
This post may contain affiliate links. Please read our disclosure policy.
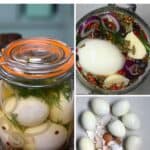
These easy pickled eggs soaked in vinegar-brine take just minutes to prep with 3 variations to choose from. They are a sweet, savory, tangy, mouth-watering snack, appetizer, or condiment!
Want to save this recipe?
What are pickled eggs?
Here in the UK, pickled eggs are a fish & chip shop staple and are at home in many British refrigerators, but what exactly are they?
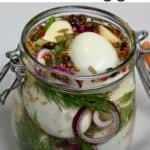
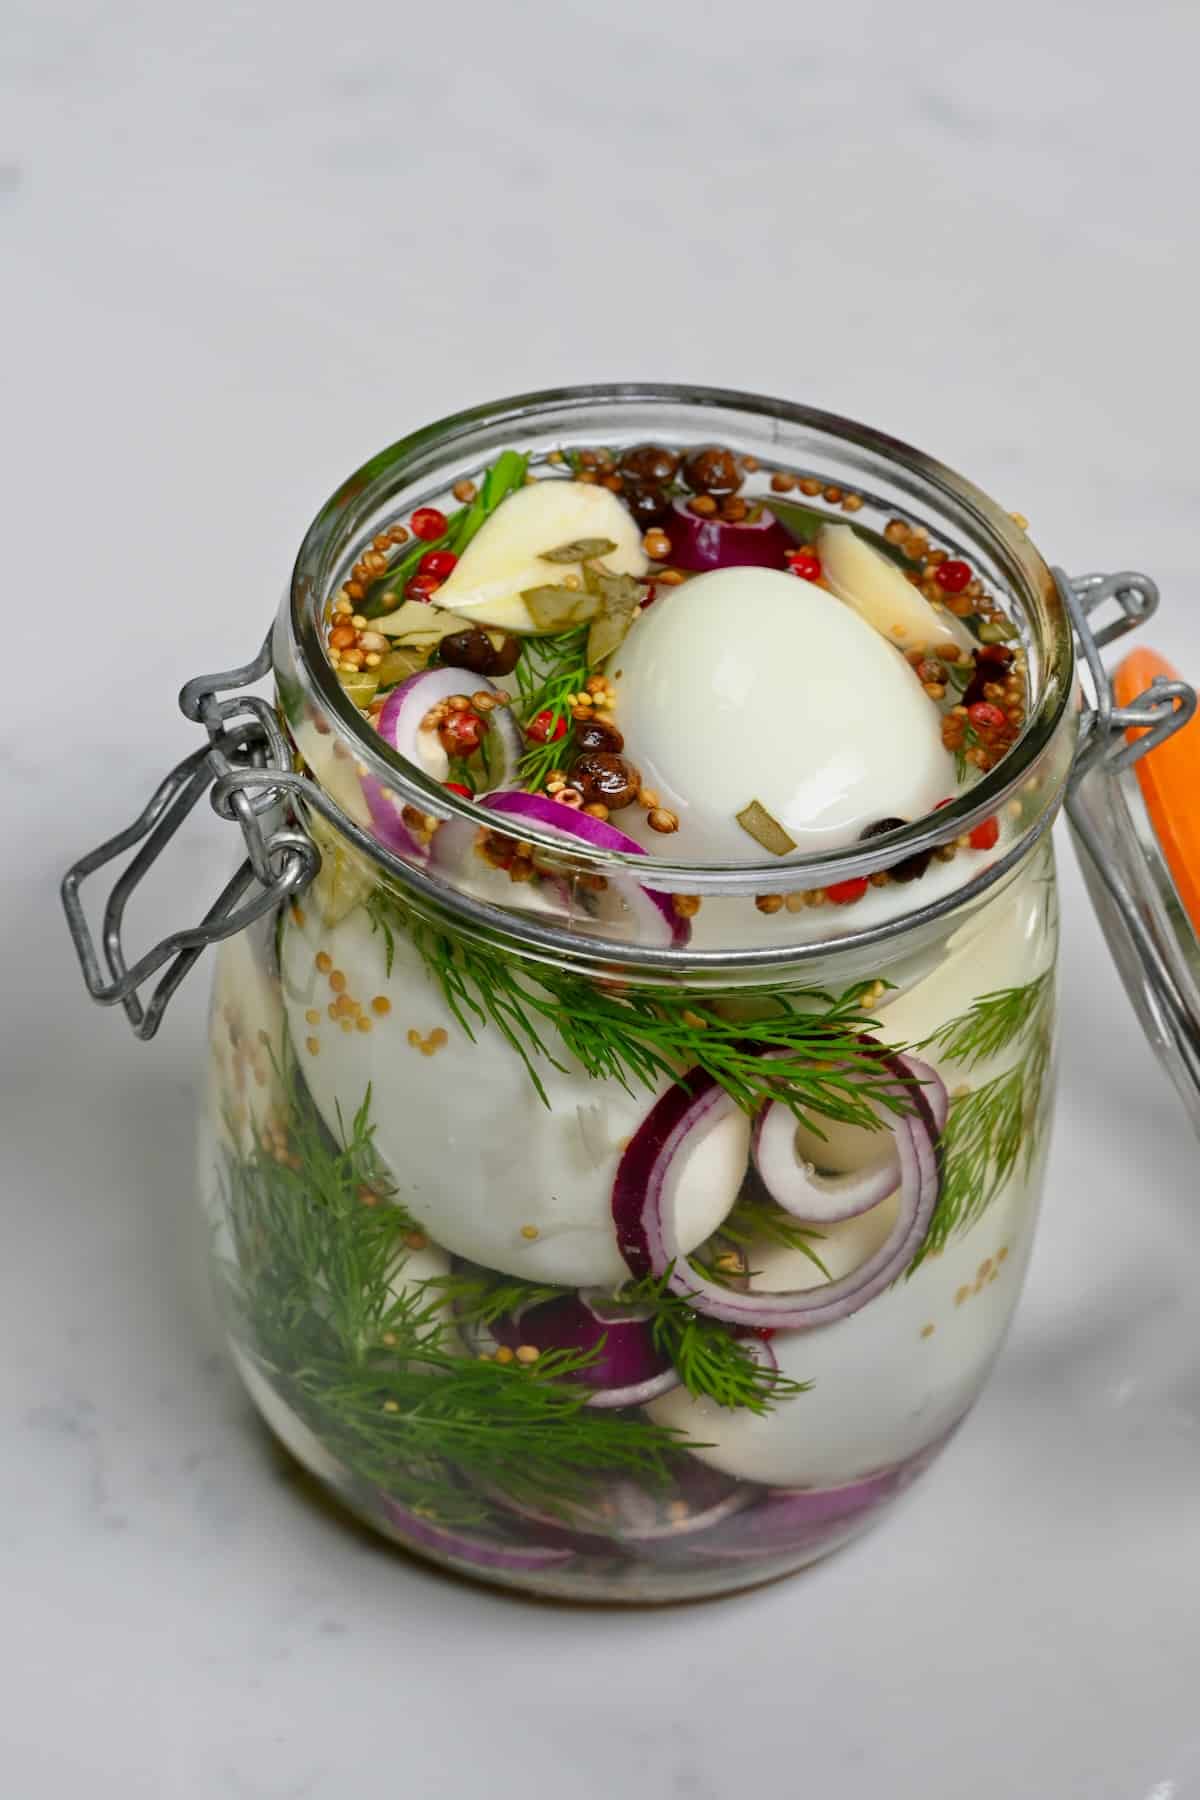
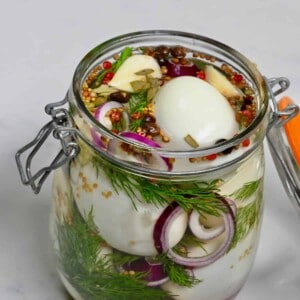
Combining hard-boiled eggs in a sweet, tangy, aromatic pickling liquid, the eggs soak up the brine and become a delectable appetizer, snack, or side!
I’m actually sharing three of my favorite pickled eggs recipes, including an aromatic brine (with mixed pickling spices, garlic, and onion), spicy pickled eggs (with jalapeño or red pepper flakes), and even naturally dyed pink pickled eggs (with, you guessed it, beets) – along with a bonus list of ingredients to naturally dye eggs various colors.
No matter which version you choose, the prep is quick and minimal before you can pop the eggs in the fridge to pickle.
The longer they sit in the brine, the more robust their flavor (and color if using beets) becomes, perfect for adding to sandwiches, making deviled eggs, and eating as a snack.
The ingredients
The ingredients for pickled eggs are simple and common pantry staples.
- Eggs: You need hard-boiled eggs. I’ve used really fresh hen’s eggs, though it’s possible to use other eggs of other sizes, like quail’s eggs.
- Vinegar: I used distilled white vinegar this time. However, apple cider vinegar or rice wine vinegar also works for the brine for pickled eggs.
- Sugar: I use regular granulated white sugar, though brown sugar or honey also work. Adjust the amount if preferred.
- Pickling salt: This helps achieve a clear brine, though kosher salt will work too.
- Water: To help dissolve the sugar and salt.
- Aromatics: I use both garlic and onions (red onion).
- Dill: Fresh dill sprigs are a simple but flavorful addition to the brine.
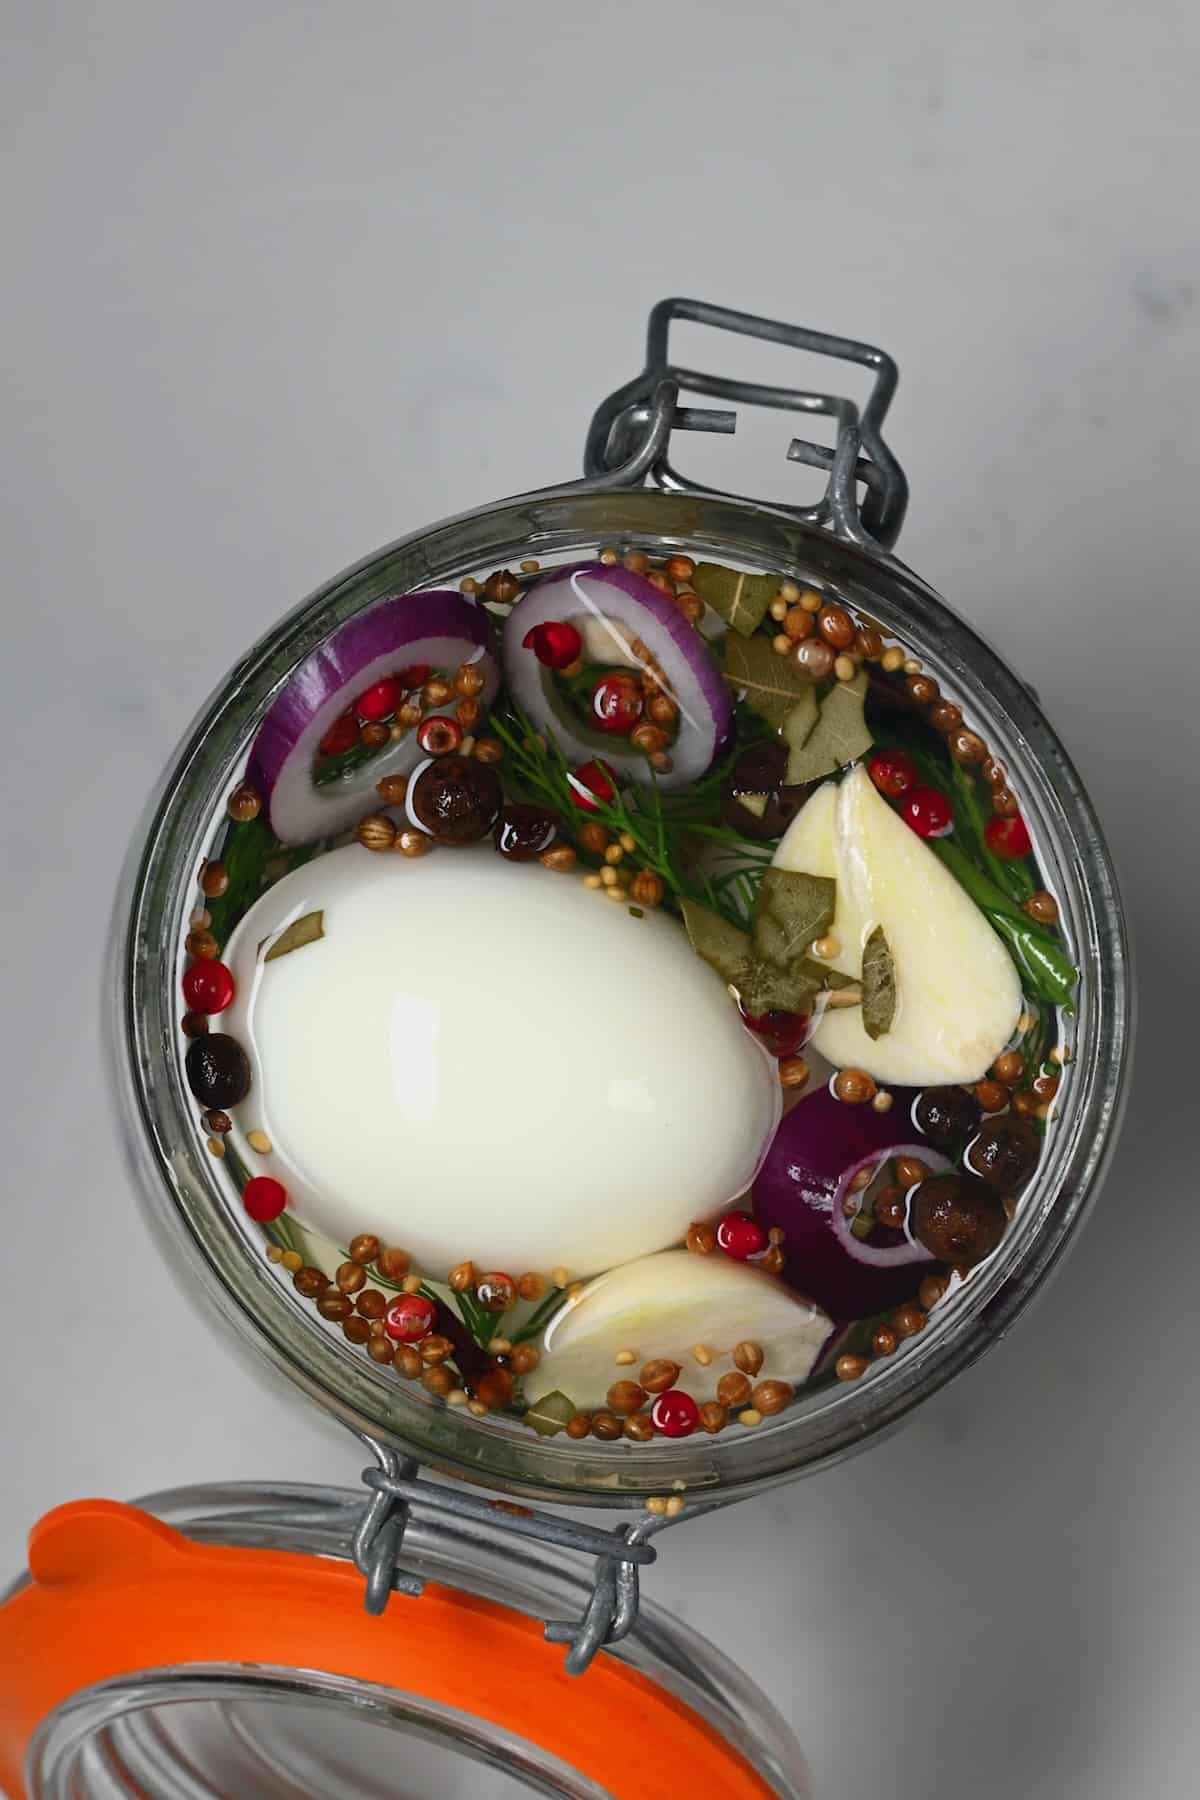
- Pickling spice blend: I used a combination of whole spices like mustard seeds, allspice, coriander seeds, red peppercorns, cloves (these have a very robust flavor, so can be removed if preferred), ¼ cinnamon stick (if you add too much it can become overpowering), and a bay leaf.
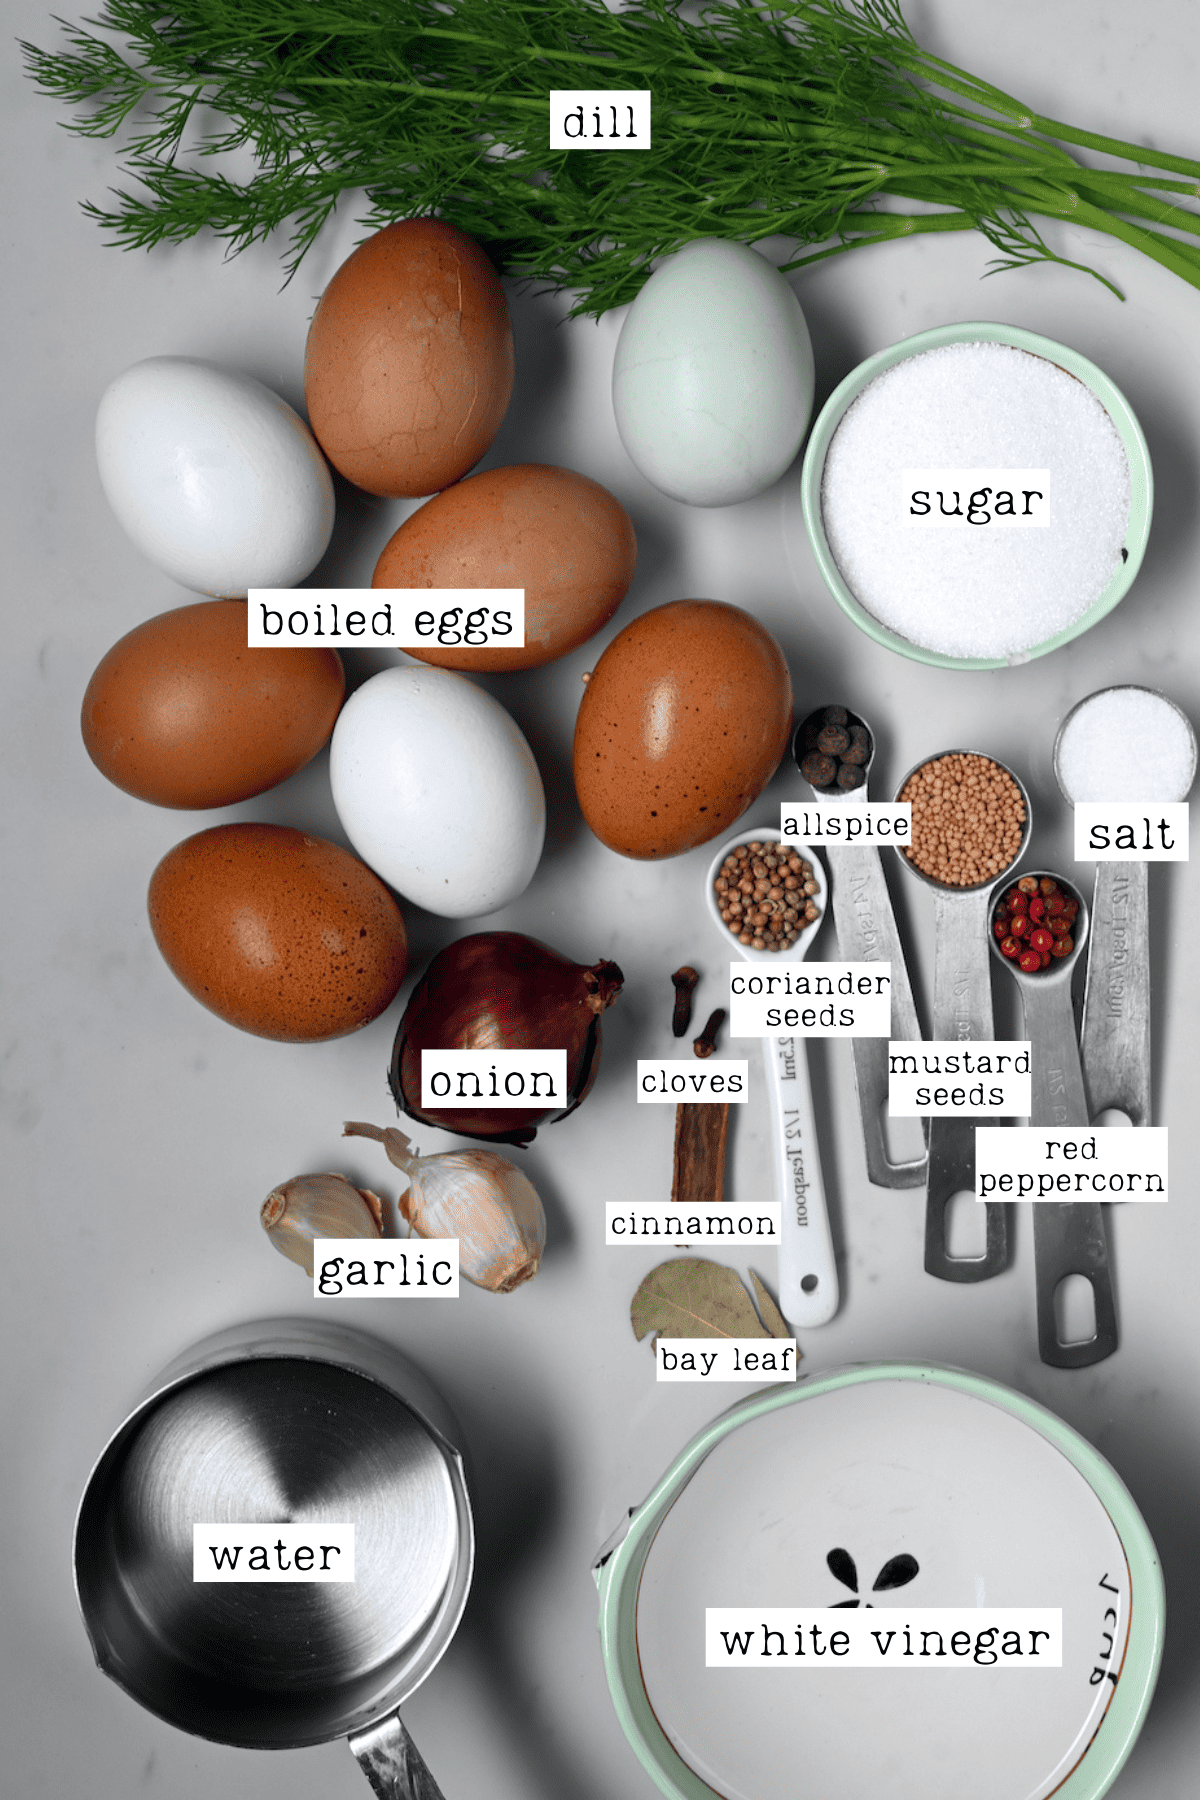
You could also use a pre-mixed pickling spice blend if preferred, or use just one or two of the spices listed (I always love adding the mustard seeds and pink peppercorns, at least).
I’ve also included versions below for pink beet pickled eggs and spicy pickled eggs. For those, you’ll also need, respectively, cooked or pickled beetroot chunks/slices, jalapeño, and/or red pepper flakes.
How to make pickled eggs
Learn how to pickle eggs in just four simple, low-fuss steps.
Hard Boil the Eggs
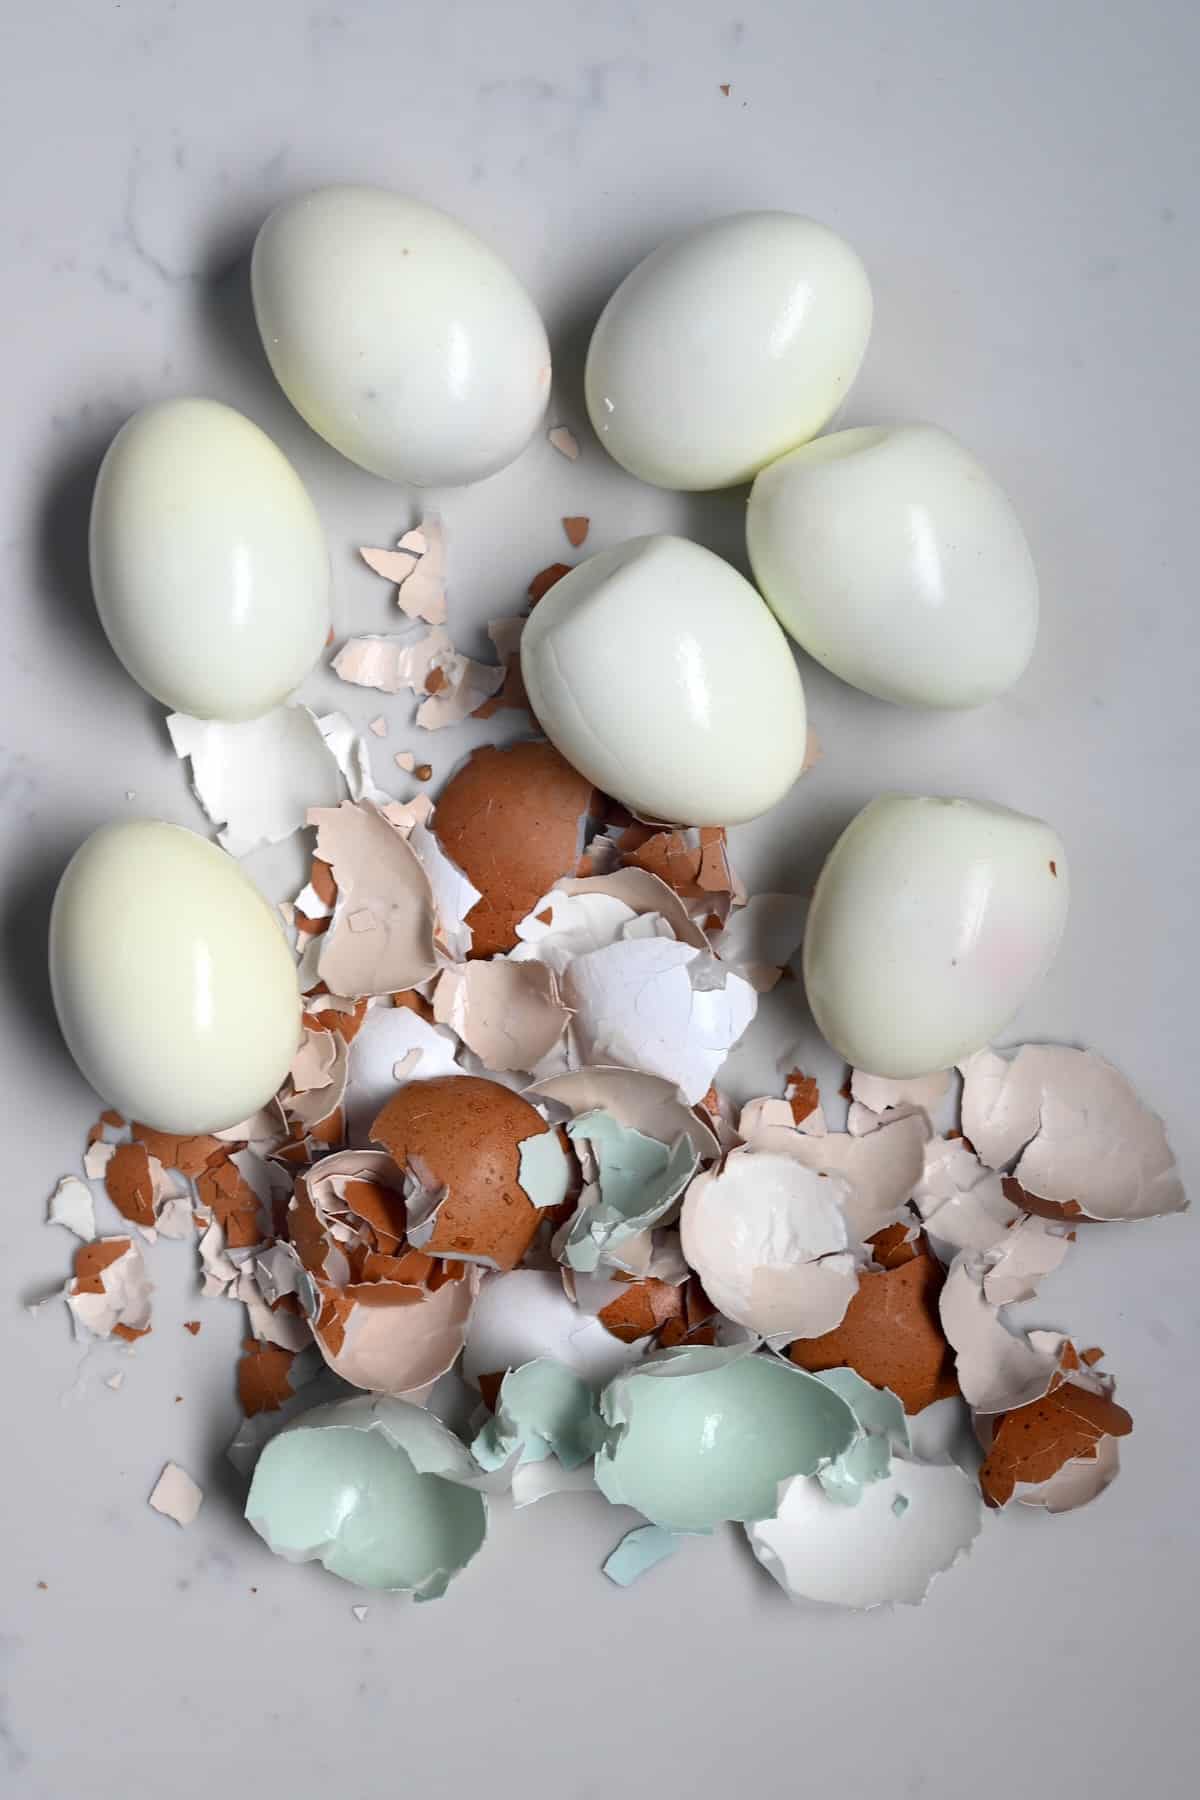
The first step is to hard-boil the eggs. You can do this on the stovetop, in an air fryer, or in an Instant Pot.
Once they’re cooked, immediately transfer them to a bowl of ice water to cool. Once cool, peel them.
Also, peel and slice the garlic and thinly slice the onion.
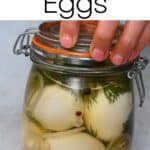
Sterilize the Jars
Wash the glass jar/s and lid/s thoroughly in hot soapy water and then leave to sit in boiling water for 10 minutes. Finally, leave them to air dry on a clean surface until completely dry.
Make the Pickling Brine
Combine the vinegar, water, sugar, salt, and pickling spice in a large saucepan and bring to a boil over medium-high heat.
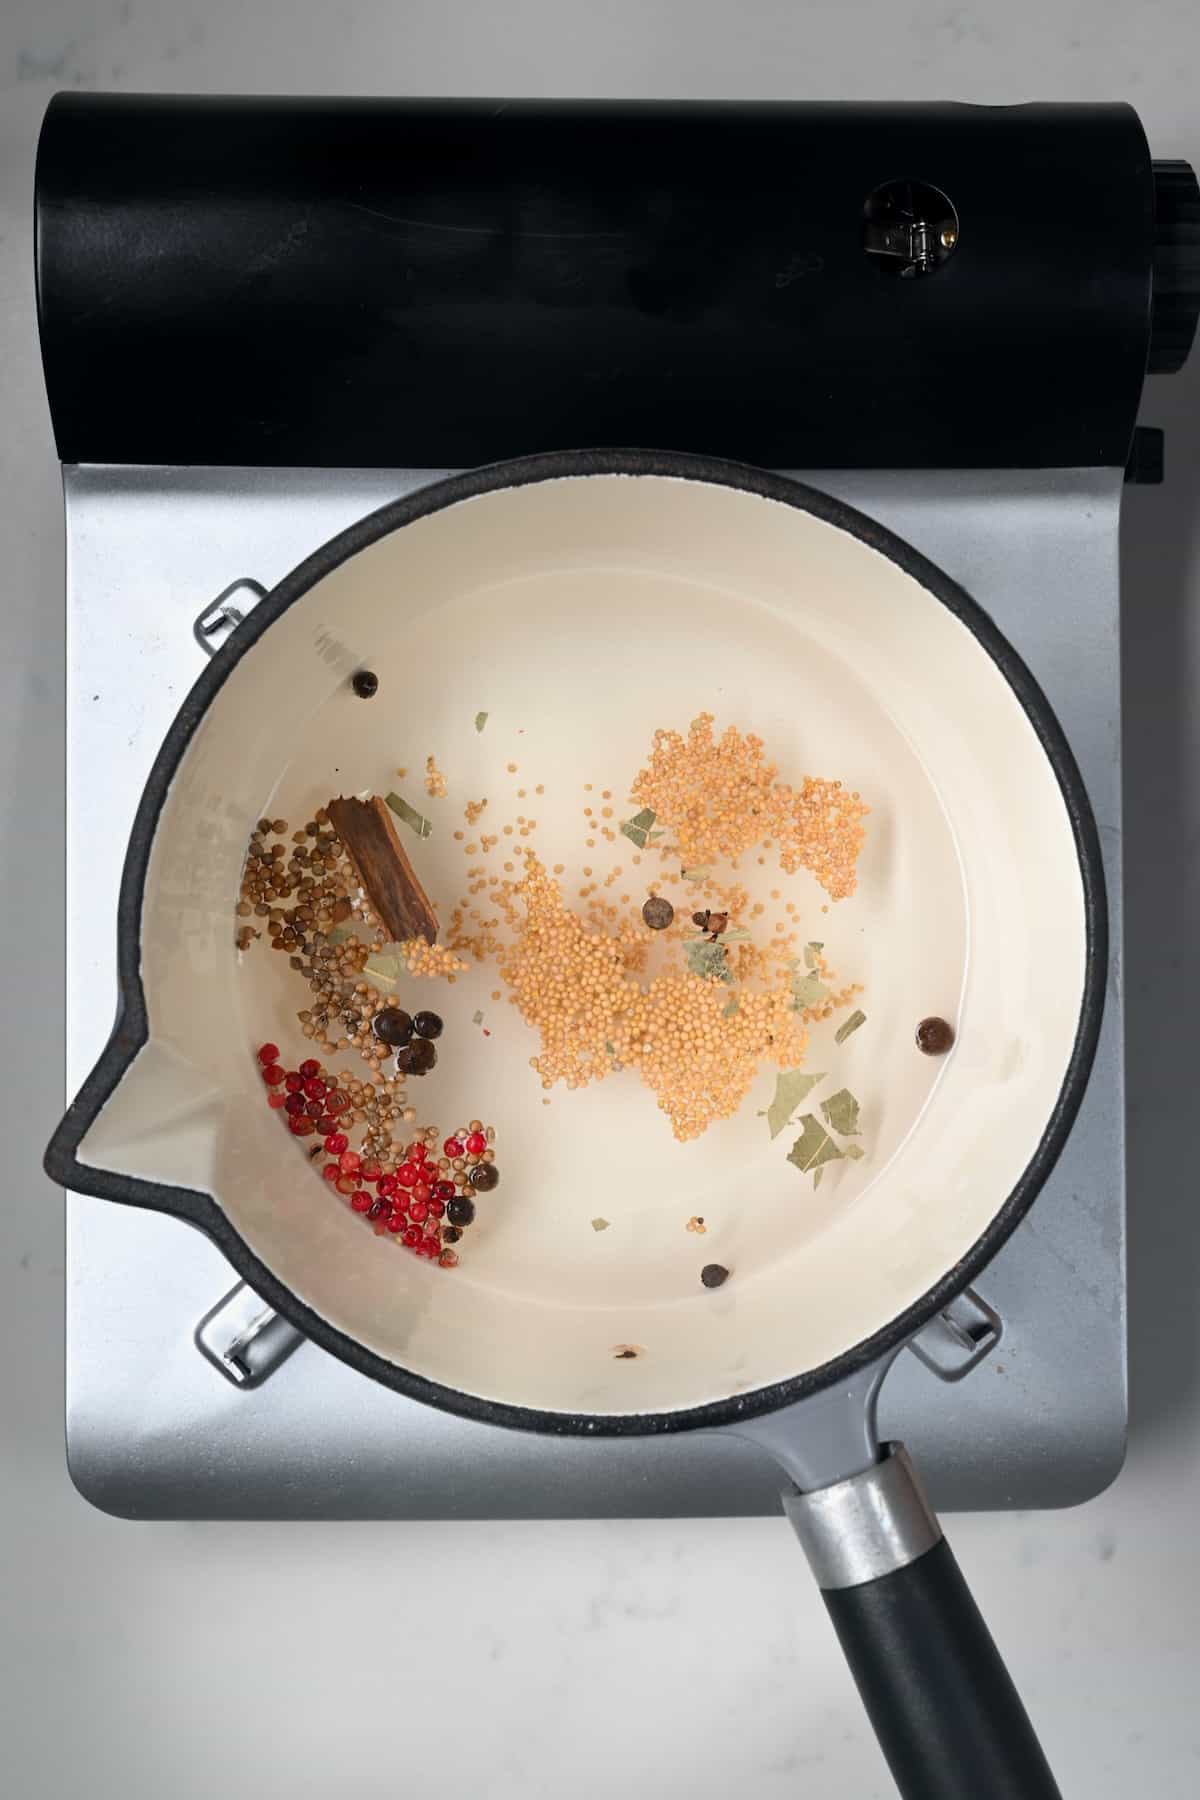
Once boiling, immediately reduce the heat to a gentle simmer and continue to heat, stirring often, until the sugar dissolves. Then remove it from the heat.
Pickle and Refrigerate
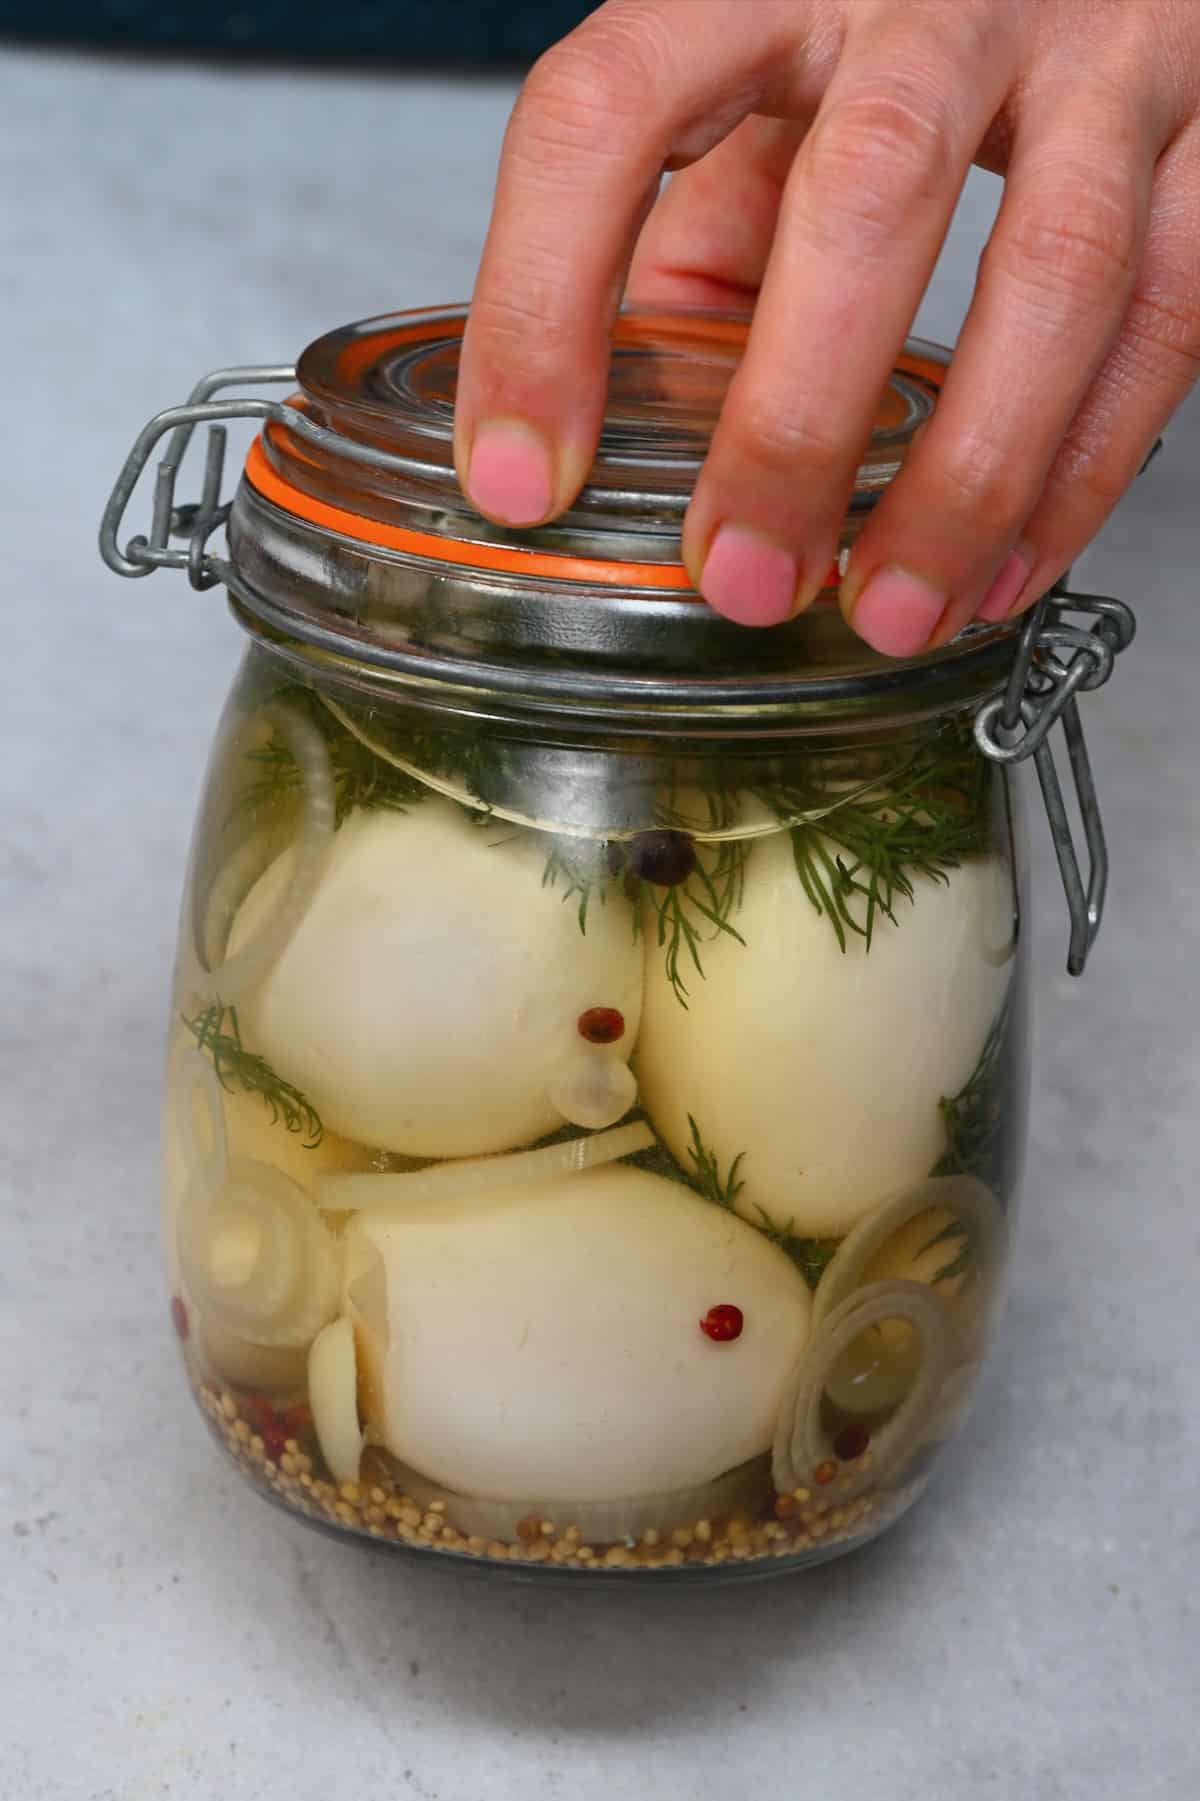
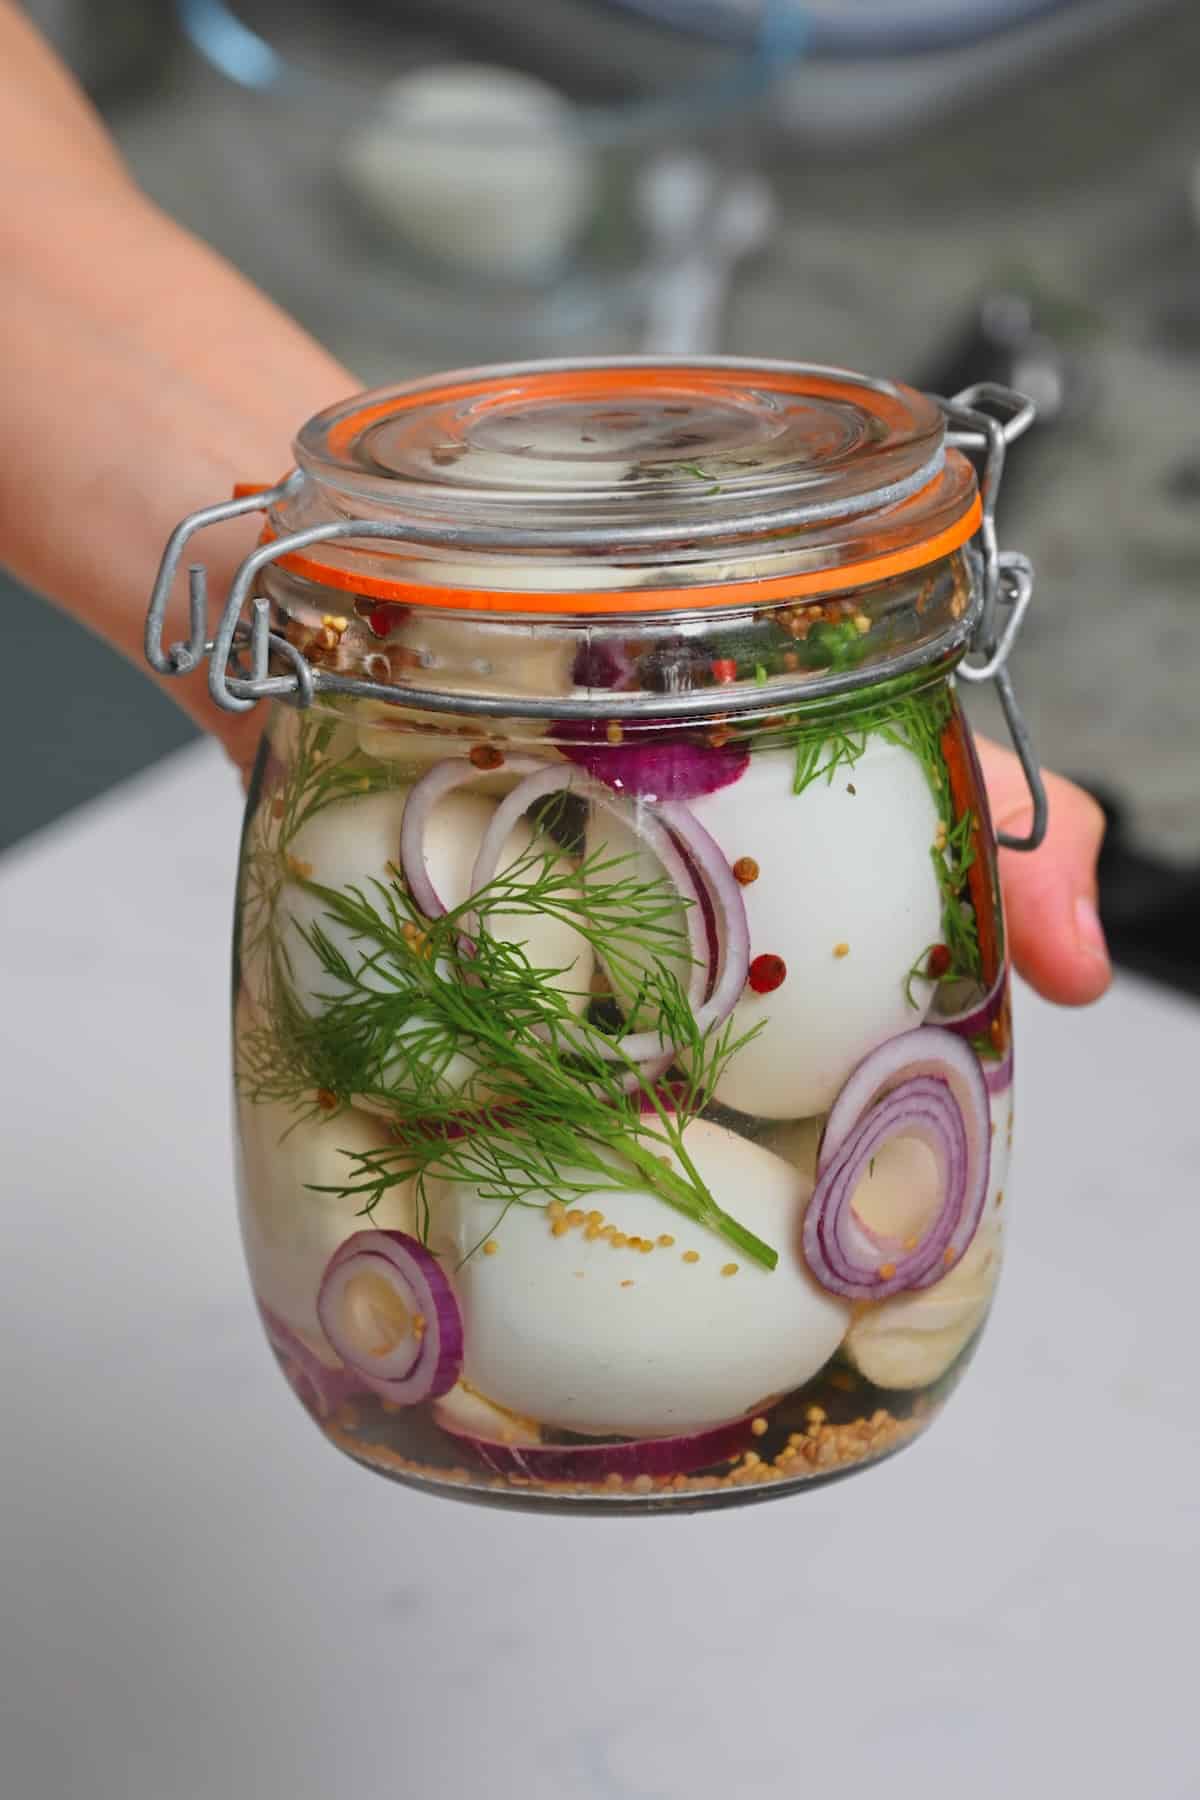
Transfer the eggs, onion, garlic, and dill to the sterilized jar/s. Then ladle or pour the pickling liquid (spices included) over them to immerse them entirely, leaving ½ inch (1cm) of headspace.
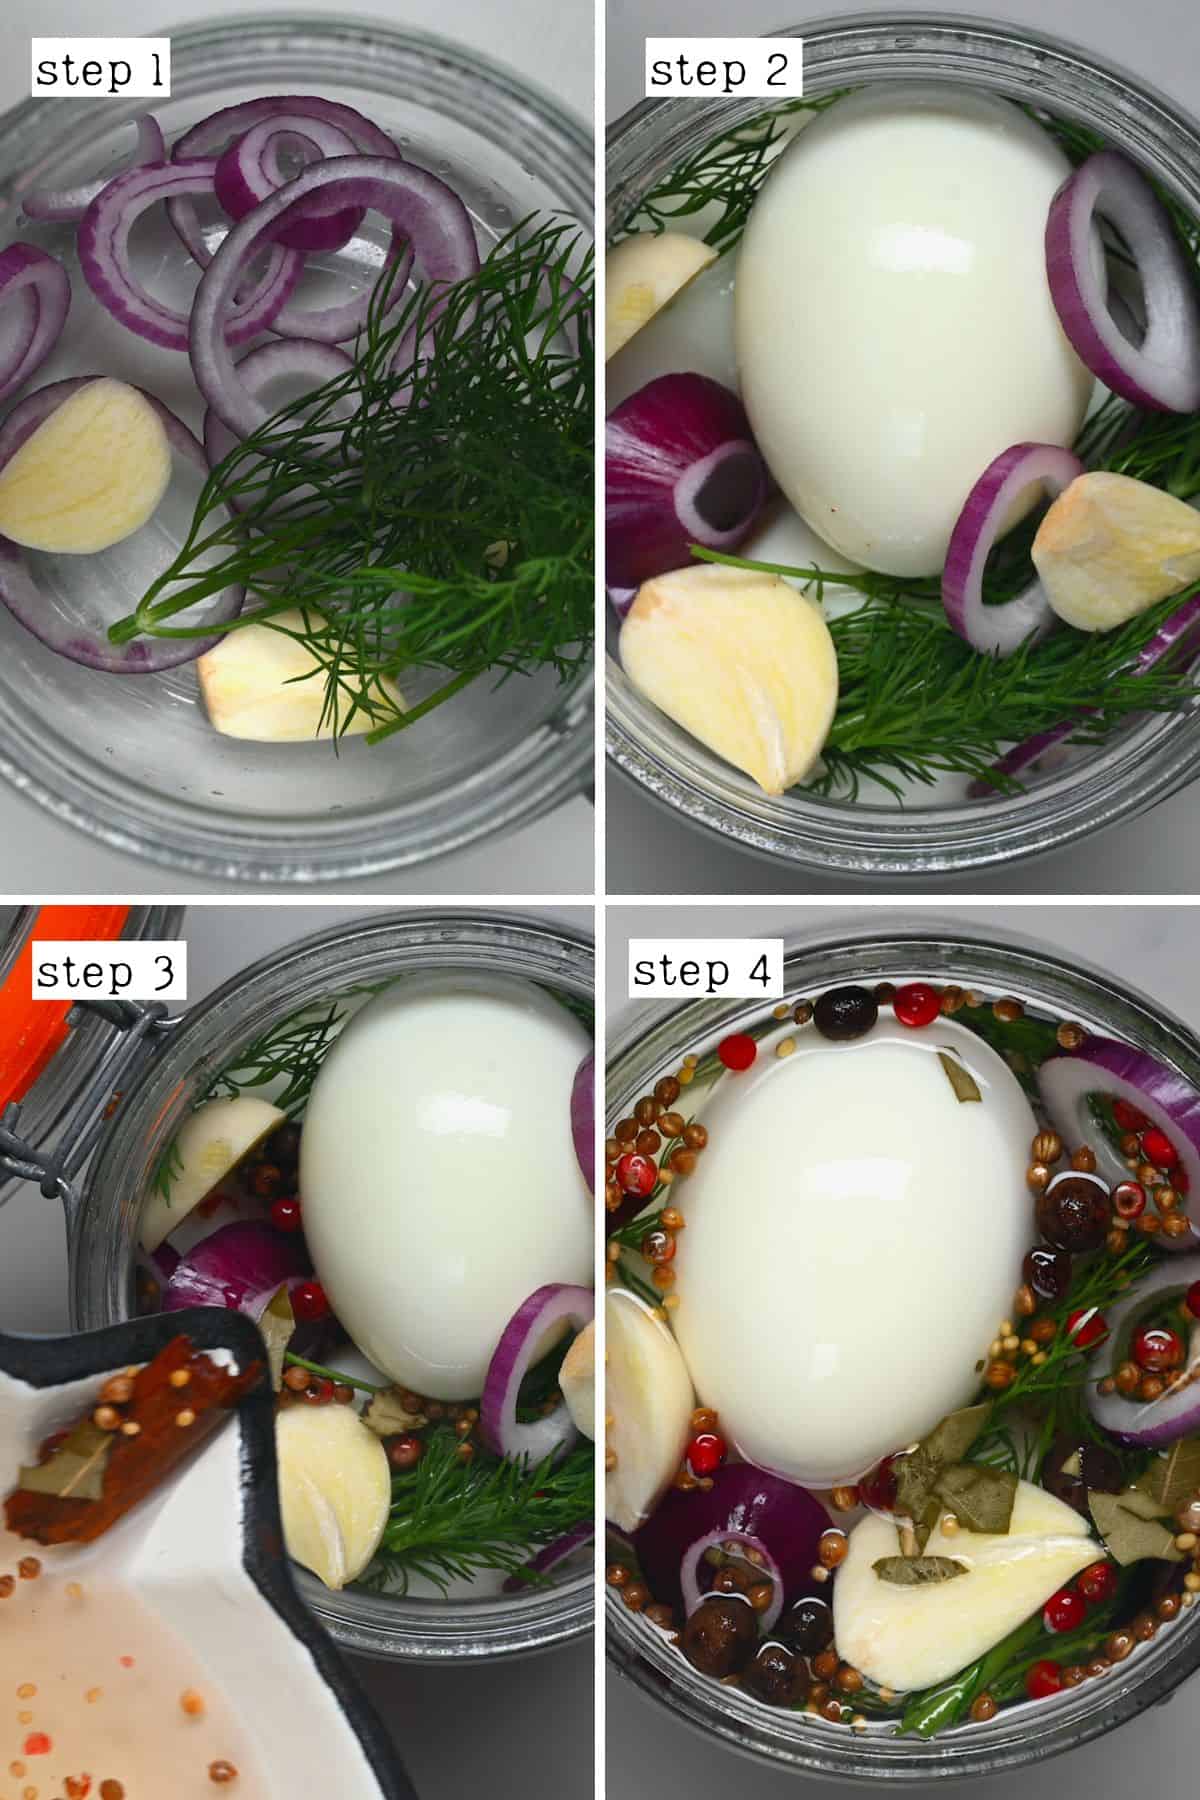
Give the jars a tap against the counter to release air bubbles. Then, wipe the jar rims with a clean cloth and secure the lids until fingertip-tight.
Finally, let the jars cool and transfer them to the fridge to pickle.
How to make pickled eggs spicy
You can make simple spicy pickled eggs with a spicy ingredient, like thickly chopped jalapeño (remove the seeds for a milder flavor) and/or red pepper flakes. Adjust the amount to preference.
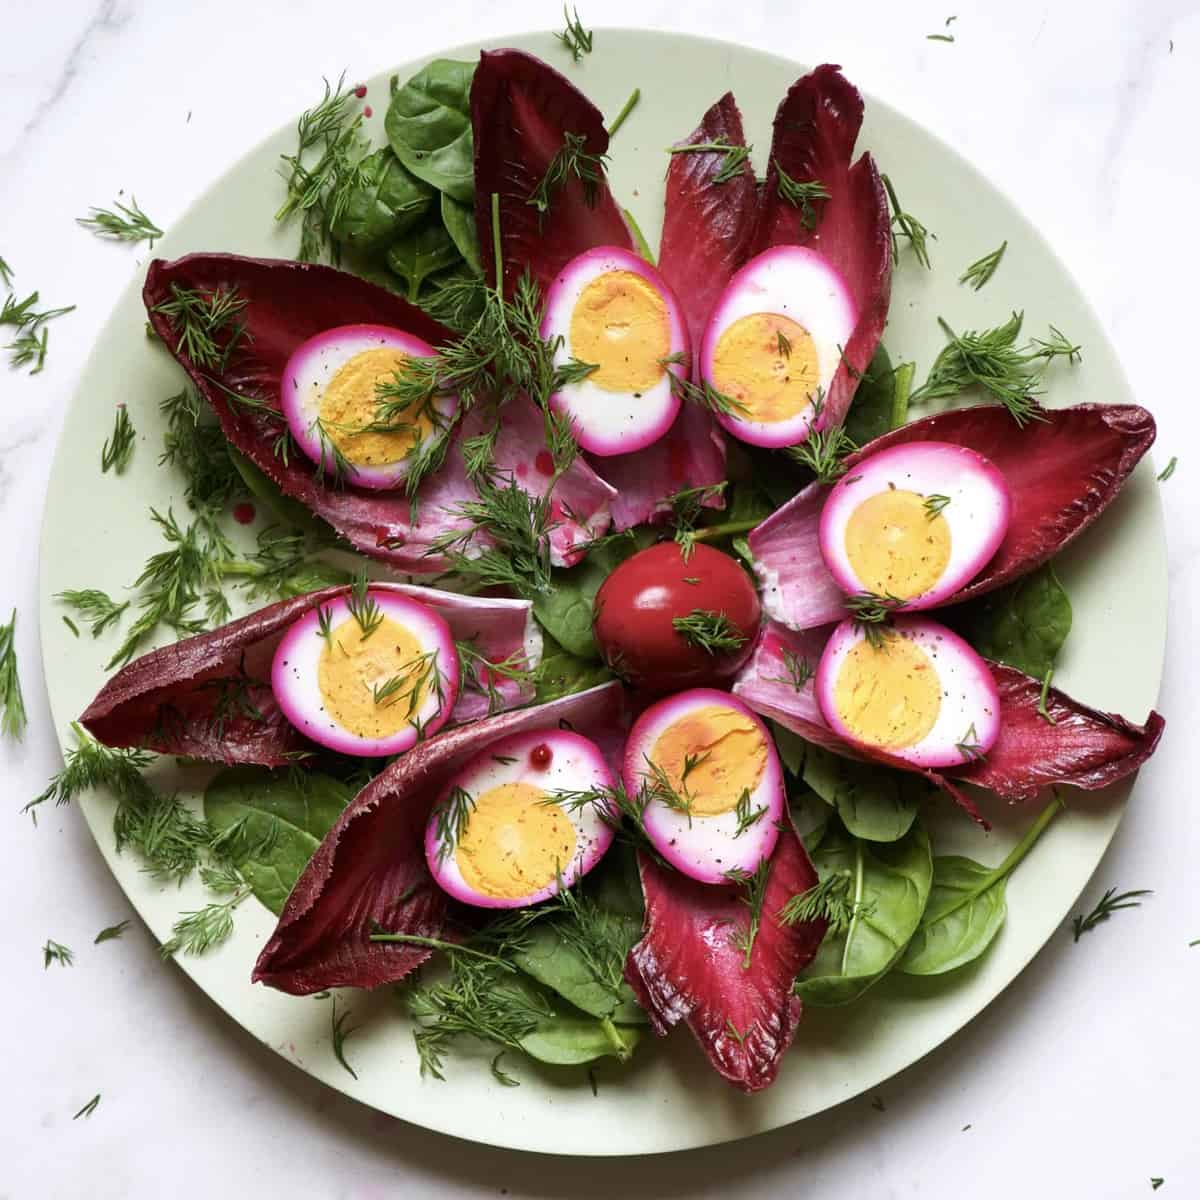
How to make pickled eggs with beets
I love making eggs with chunks of beets – this turns the eggs a beautiful pink color. To do so, add a few cooked beet chunks/slices to the pickling brine (with or without the pickling spices or extras, like onions and garlic).
Leave them to pickle to your desired color, or make them even more vibrant with extra beet juice.
How long does it take to pickle eggs
The pickling time for eggs depends primarily on their size. For example, when making pickled quail eggs, 1-2 days is more than enough for a well-developed pickle.
For medium to large hen eggs, I recommend 5-7 days to allow the salty-vinegar brine mixture to really penetrate the eggs and produce the best flavor. However, you can enjoy them in as little as a few hours.
How long do pickled eggs last
Once you’ve transferred the jar/s to the refrigerator, it’s important to keep them refrigerated at all times and only use clean utensils within the jar. That way, they should last between 3-4 months.
What to do with pickled eggs?
- Enjoy them as a snack straight from the jar!
- On a charcuterie board with cheese and crackers.
- Over sandwiches/wraps or avocado toast.
- To make egg salad or deviled eggs.
- Over ramen or a rice/ noodle bowl – like bibimbap or donburi (especially pink eggs).
- In salads.
More easy pickled recipes
If you try any of these 3 easy pickled egg recipes, let me know how it goes in the comments below. I’d appreciate a recipe card rating and would love to see your recipe recreations – tag me on Instagram @Alphafoodie!
Pickled Eggs (3 Easy Recipes)
Equipment
- 1 Canning jars (16 oz) (500 ml)
Ingredients
- 7-8 eggs hard-boiled, fresh; use hen’s egg or even quail eggs
- 1 cup white vinegar or apple cider vinegar
- 1 cup water
- 1.9 oz sugar 1/4 cup; white, brown, or honey
- 1.3 oz red onion 1 small
- 0.5 oz garlic 2 cloves
- 1 Tbsp pickling spice see below
- 1/2 Tbsp salt
- dill or thyme – few sprigs, optional
For the Pickling Spice
- 1/2 Tbsp whole mustard seeds
- 2 cloves whole; omit if preferred as it has a very robust flavor
- 1 bay leaf crumbled
- 1/4 stick cinnamon only small amount since this could be overpowering
- 1/2 tsp whole red peppercorn
- 1/2 tsp whole coriander seeds
- 1/4 tsp whole allspice berries
Instructions
Hard Boil the Eggs
- Hard-boil the eggs on the stovetop, in an air fryer, or in an Instant Pot.
- Once they're cooked, immediately transfer them to a bowl of ice water to cool. Once cool, peel them.
- Peel and slice the garlic and thinly slice the onion.
Sterilize the Jars
- Wash the jars and lids thoroughly in hot soapy water and then leave to sit in boiling water for 10 minutes. Finally, leave them to air dry on a clean surface until completely dry.
Prepare the Pickling Brine
- Combine the vinegar, water, sugar, salt, and pickling spice in a large saucepan and bring to a boil over medium-high heat.
- Once boiling, immediately reduce the heat to a gentle simmer and continue to heat, stirring often, until the sugar dissolves. Then remove it from the heat.
Pickle and Refrigerate
- Transfer the eggs, onion, garlic, and dill to the sterilized jar/s, ladling the pickling liquid (spices included) over them to immerse them entirely, leaving ½ inch (1cm) of headspace.For a spicy version: Add thickly chopped jalapeño (remove the seeds for a milder flavor) and/or red pepper flakes. Adjust the amount to preference.For pink eggs with beet: Add a few cooked beet chunks/slices to the pickling brine (with or without the pickling spices or extras, like onions and garlic).
- Give the jars a tap against the counter to release air bubbles. Wipe the jar rims with a clean cloth and secure the lids until fingertip-tight.
- Let the jars cool and transfer them to the fridge to pickle. The pickling time for eggs depends primarily on their size. For medium to large hen eggs, I recommend 5-7 days to allow the salty-vinegar brine to really penetrate the eggs and produce the best flavor. However, you can enjoy them in as little as a few hours. When making pickled quail eggs, 1-2 days is more than enough for a well-developed pickle.
Notes
- Adjust the flavors: You can tweak the amount of sugar, salt, and pickling spices (including experimenting with other variations) to find your preferred flavor profile. You can also slightly adjust how much the vinegar is diluted if you want a milder/more acidic flavor.
- Ensure the eggs are fully submerged: This is important to avoid premature spoiling.
- To avoid sticking: It’s best to stir the eggs daily for the first 5 days of pickling.
- The size of the jar: Note that a 16 oz/500 ml jar will hold approximately 6-7 medium-large hard-boiled eggs.
- For dyed eggs: You can use natural ingredients to dye your eggs other colors, too, including:
- Yellow = turmeric/yellow beets (or a combination of the two),
- Dark yellow/orange = carrot,
- Violet = red cabbage,
- Purple/Blue = Red cabbage with a pinch of baking soda.
Nutrition
Nutrition information is automatically calculated, so should only be used as an approximation.


What do you do with the left over juices ? In France the vinegars are 8-10% the ratio needs to be adjusted ?
Hi Andrew,
I don’t recommend reusing the brine (leftover juices). It’s best to just discard it. I hope this helps.
Couple of tips for cooking quail eggs.
To get the yolk to sit in the middle, stir gently with a wooden spoon for the first two minutes of boil. The spinning sets the yolk to the centre.
The shell and caul of quail eggs is really hard to get off without mashing the egg. Sit the eggs in a bowl of white vinegar for an our or two – and it all just crumbles away. (Kids love to watch this, it’s like a magic trick!)
Thank you so much for your tips, Ann!
Is it possible to do it without the vinegar?
Hi Laia,
The vinegar is needed to pickle the eggs. This gives them a nice flavor.
You can substitute vinegar with lemon or lime juice.
Thank you for your comment, Kat. Indeed you can substitute vinegar with lemon or lime juice.
Can you hot water bath canning these eggs?
Hi Laura,
I haven’t tried hot water bath canning eggs but I see some other people have done it successfully :).
Yes. You need to use bilingual temperature brine. Sterilised jars. After your eggs were covered with a brine, tight cover and put for 30 minutes in steam bath. Than you need to cover each jar with insulation material (newspapers) and place it under the blanket. After 24 hours you can store your jars in a dark cool space for about 12 months
Thanks for the tips, Kat!