
This post may contain affiliate links. Please read our disclosure policy.
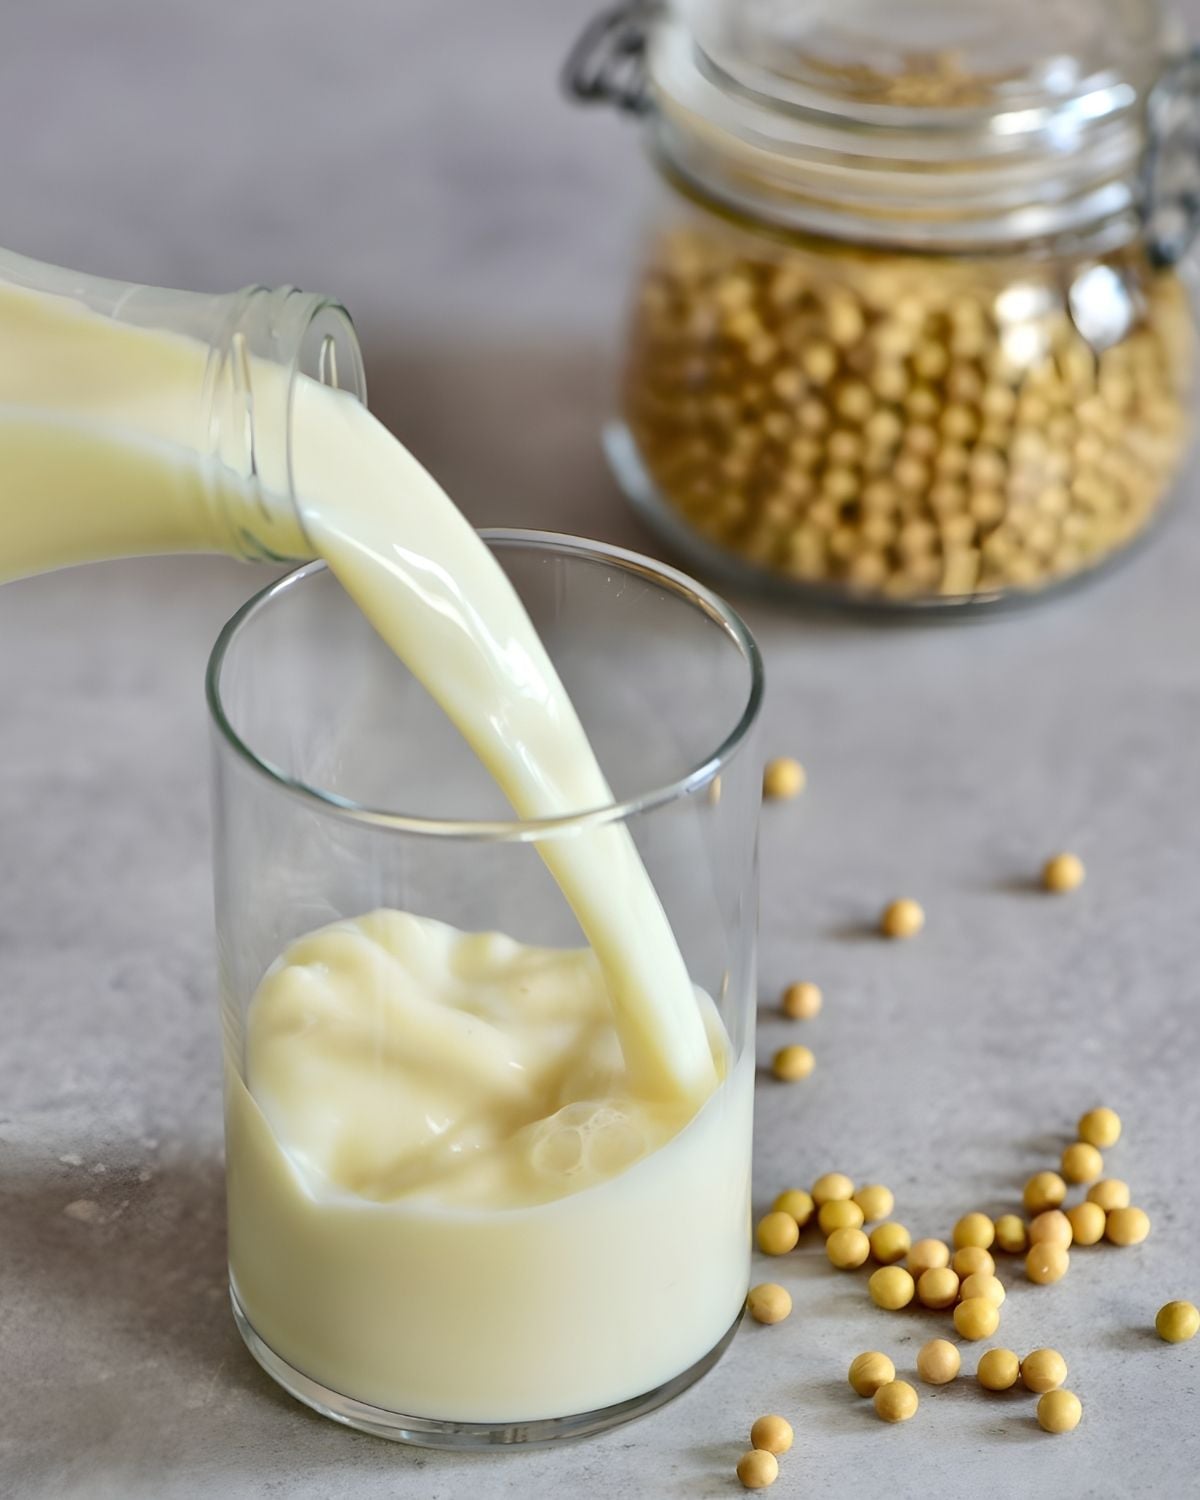
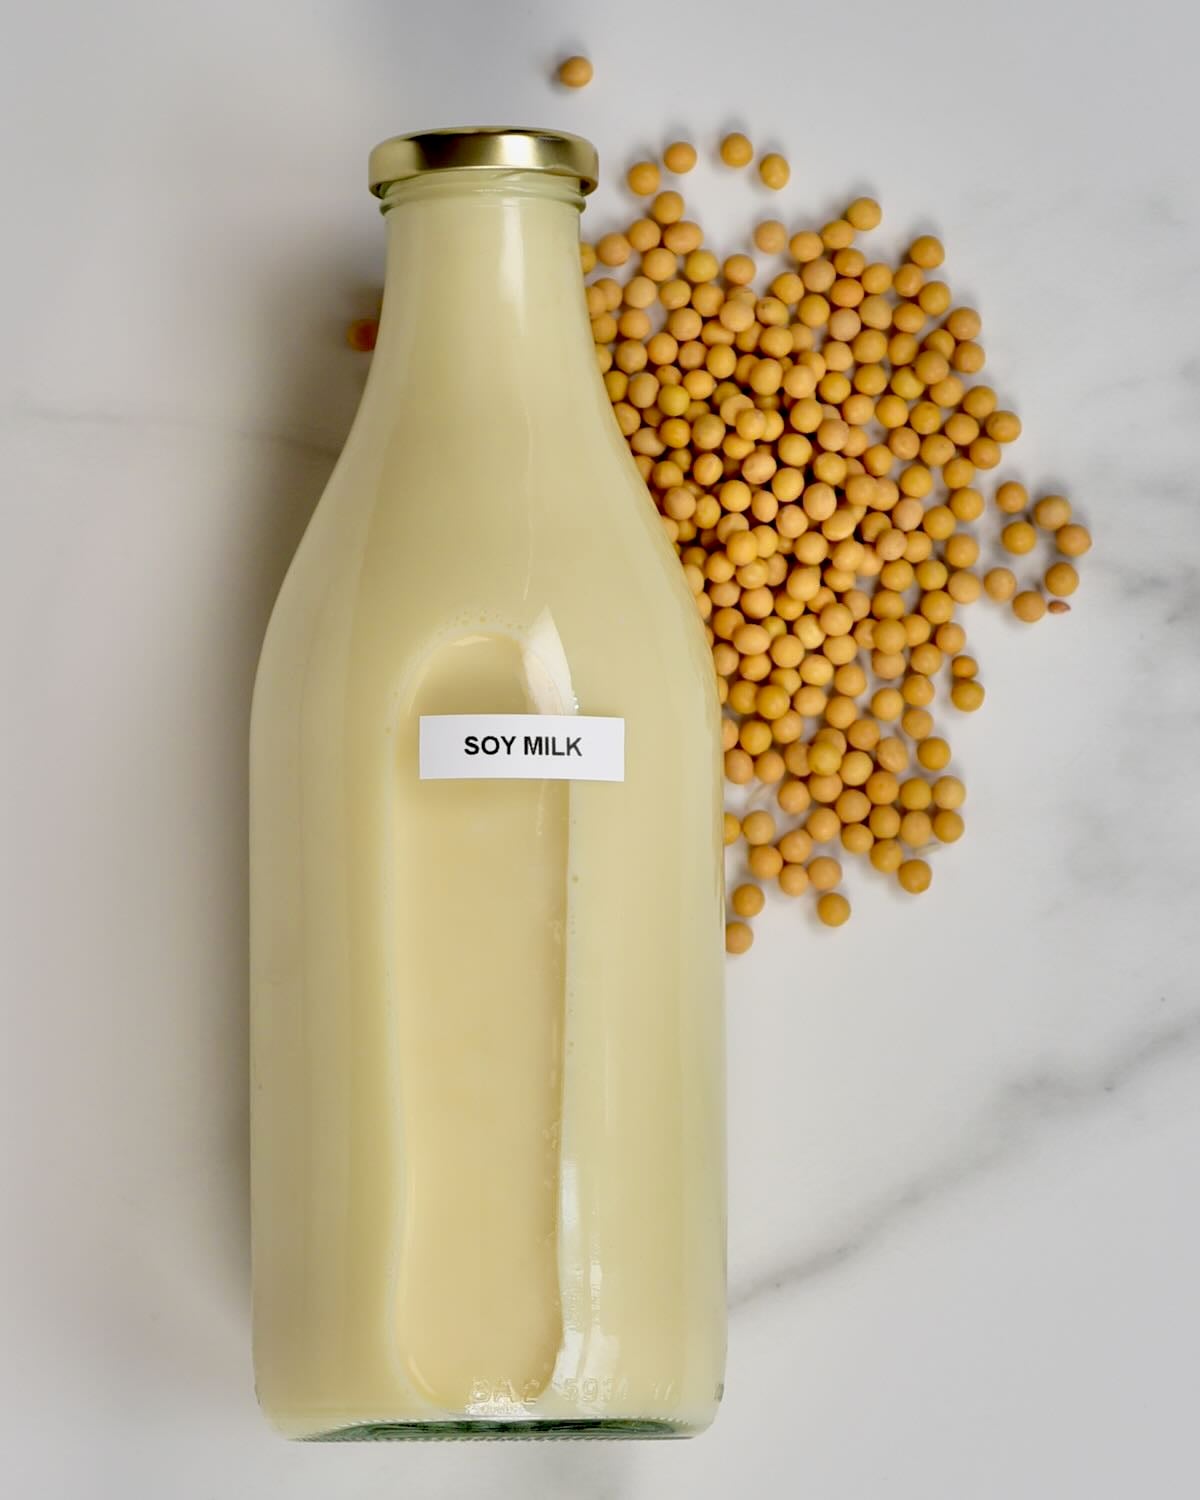
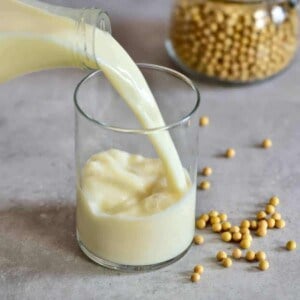
If you’ve been wondering how to make soy milk, you’re in the right place. It is fresher, creamier, and more affordable than buying cartons, and you only need two ingredients: soybeans and water.
In this guide, I’ll walk you through the full method, from soaking and blending to cooking and straining. I’ll also share the small details that make a big difference, including how to reduce the beany taste, how to prevent scorching, and what to do with the foam or soy skin that forms on top.
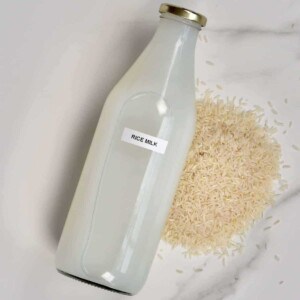
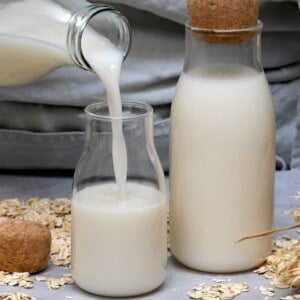
If you want more dairy-free options, I have plenty to choose from, including homemade almond milk, homemade oat milk, homemade coconut milk, and this simple homemade rice milk.
What you’ll need
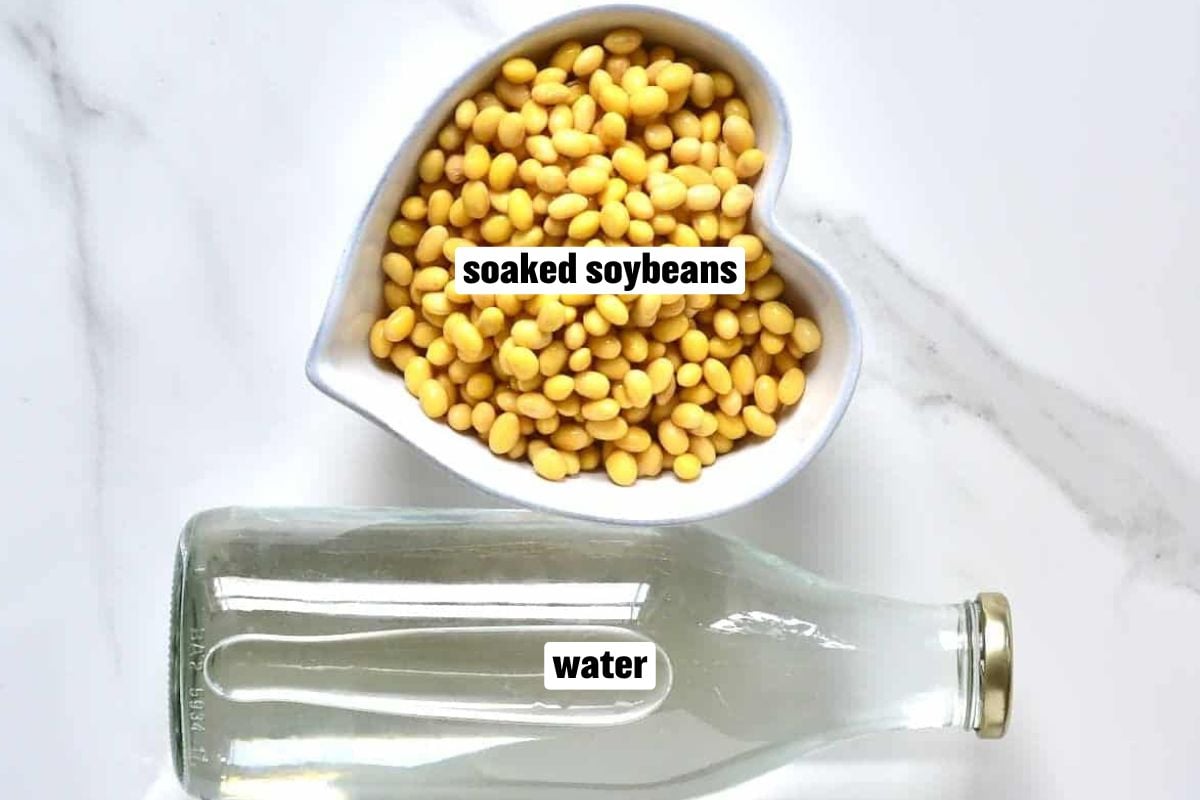
- Dried soybeans: Use beans that smell fresh and mild. Older beans can taste more “beany.”
- Water: Filtered water gives the cleanest flavor.
Optional (for serving):
- Fine sea salt: A tiny pinch can round out the flavor.
- Vanilla extract: Add after the soy milk cools for a vanilla version.
- Sweetener: Sweeten to taste. Maple syrup works well.
Equipment: A blender and a large, heavy-bottom pot. For straining, a nut milk bag is easiest. Cheesecloth or a clean kitchen towel over a fine-mesh strainer also works.
See printable recipe card below for the full ingredients list and quantities.
How to make soy milk
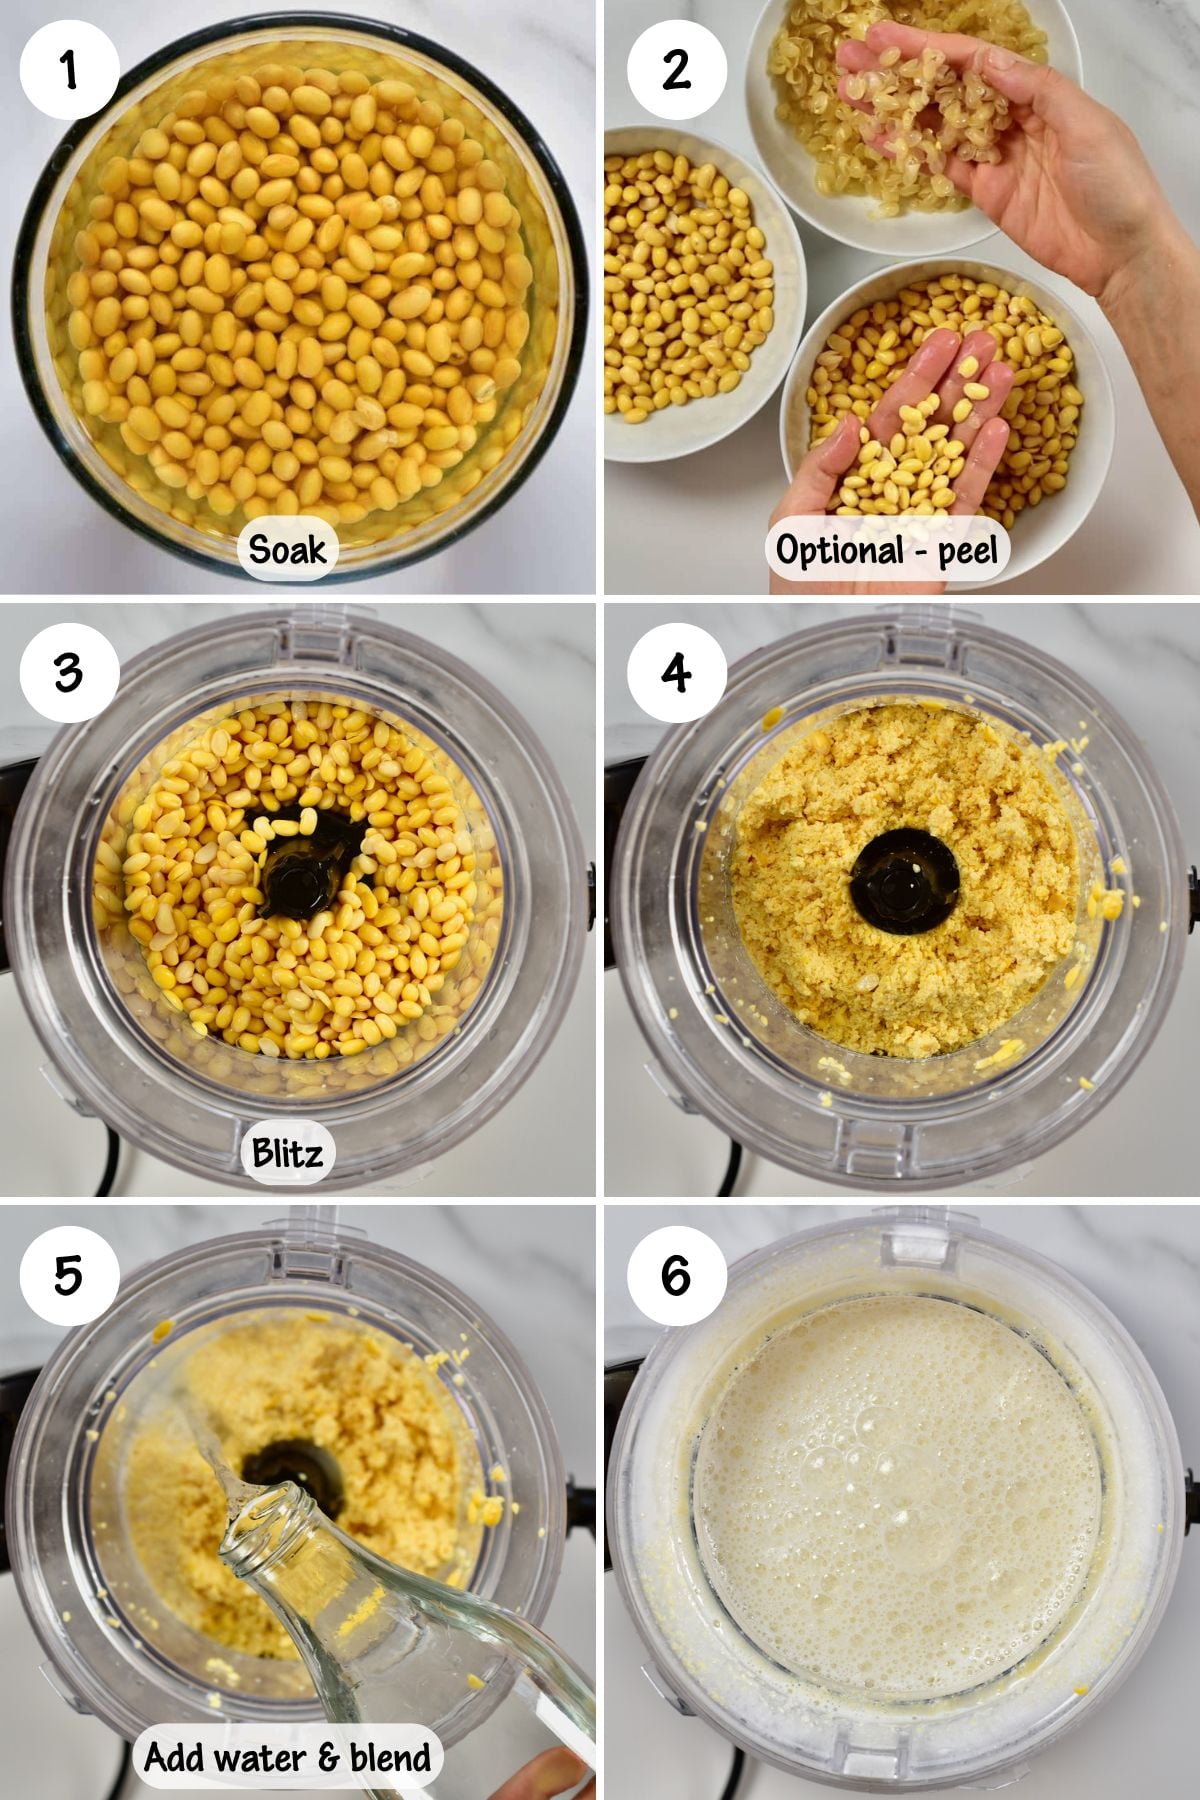
Soak the soybeans: Soak the dried soybeans in plenty of water until fully plumped, either for several hours or overnight. Drain and rinse well.
Optional: remove the skins. For a smoother result and a milder flavor, rub the soaked beans between your hands while rinsing. The skins loosen easily and can be rinsed away. This step is optional and only takes a couple of extra minutes.
Blend until very smooth: Add the soaked soybeans to a high-speed blender and briefly pulse to break them up. Add fresh water and blend until the mixture looks completely smooth and creamy with no visible grit.
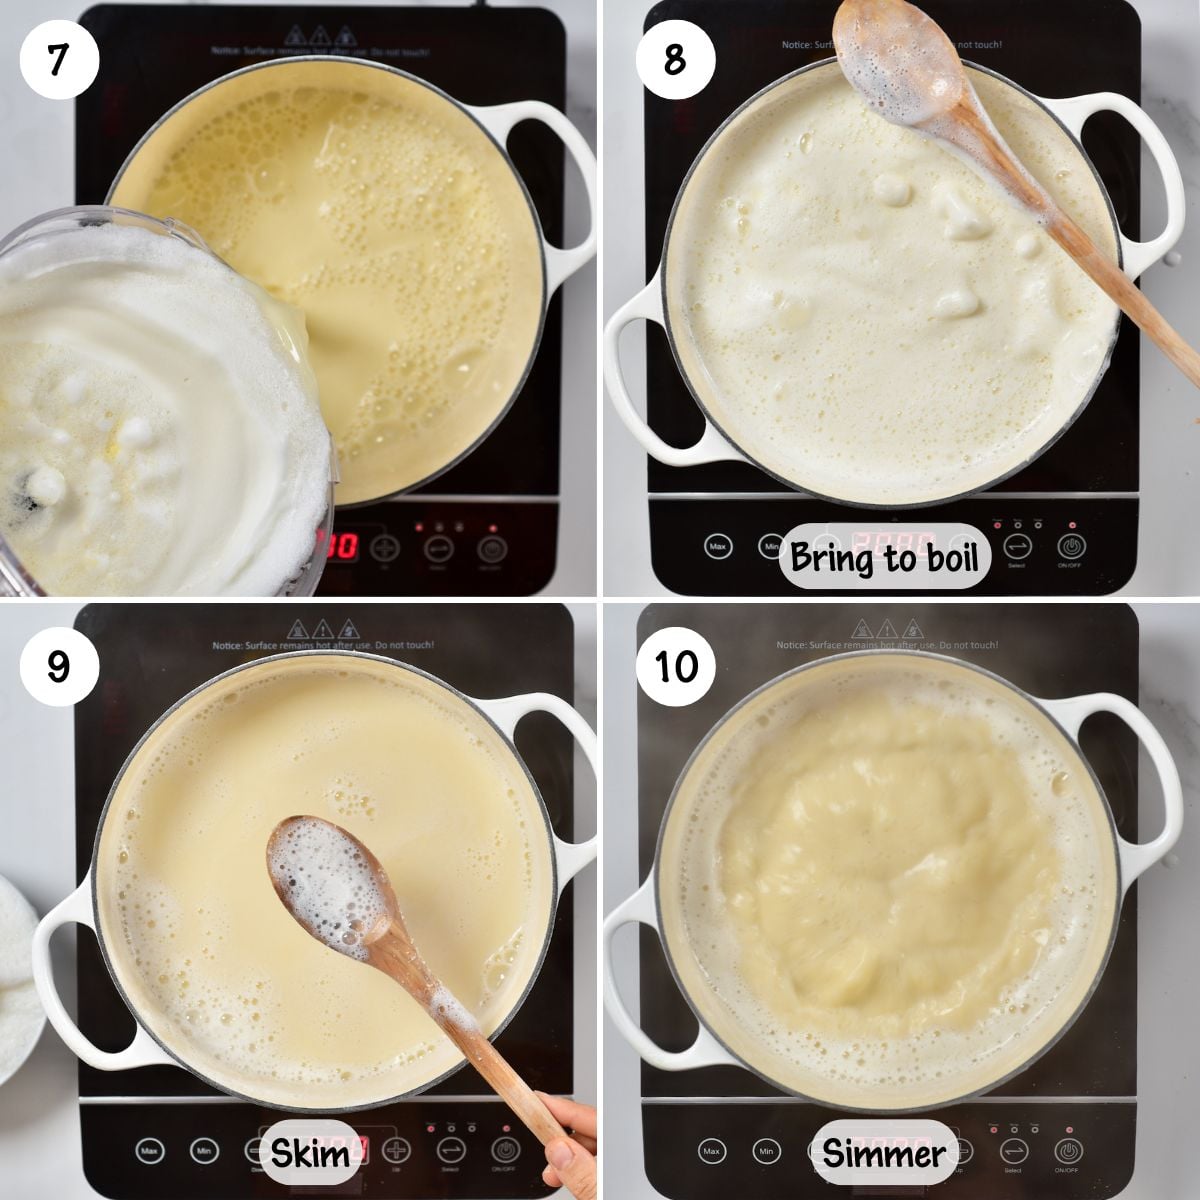
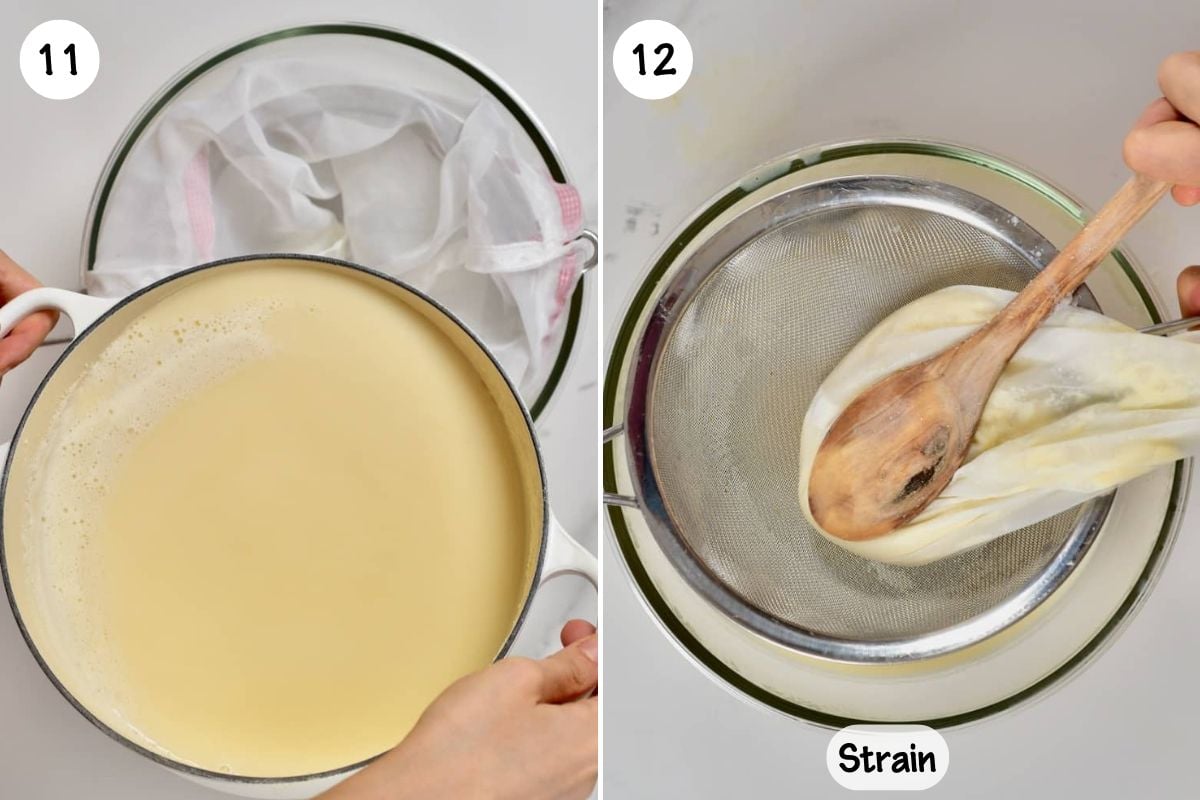
Cook the blended mixture: Pour the blended mixture into a large pot and heat over medium heat, stirring often so nothing sticks to the bottom. Soy milk can foam up quickly as it heats, so stay nearby and keep stirring.
Once it reaches a boil, continue cooking for a few minutes, then skim off the foam that collects on top.
Reduce the heat to a steady simmer and cook until the soy milk tastes fully cooked, stirring occasionally and scraping the bottom of the pot to prevent scorching.
Cool briefly, then strain: Turn off the heat and let the mixture cool for a few minutes. Pour it through a nut milk bag set over a large bowl, then squeeze well to extract as much milk as possible.
Bottle and chill: Transfer the soy milk to a clean bottle or jar and refrigerate.
My tips

Use a big pot. Soy milk foams up quickly, so extra headspace helps prevent boil-overs.
Stir and scrape the bottom. Stir often as it heats and scrape the bottom and corners to prevent scorching.
Skim foam as it cooks. Skimming keeps the simmer calmer and helps the soy milk taste cleaner.
Let it cool a few minutes before straining. It’s easier (and safer) to squeeze the bag once it’s not boiling hot. For extra-smooth soy milk, strain twice.
Flavor after cooling. Add vanilla and sweetener once the soy milk is cool so it tastes fresh.
Adjust richness to your taste. Prefer it lighter? Dilute with a little cold water after chilling. Want it richer for coffee? Use slightly less water next time.
How to use homemade soy milk
Warm it gently and use it in coffee drinks, like an iced latte or matcha latte. If you want step-by-step ideas, try my homemade iced latte, matcha green tea latte, or iced matcha green tea latte.
Pour it over cereal or granola, or blend it into smoothies for an easy dairy-free base. Use it anywhere you’d use store-bought soy milk, including overnight oats, baking, soups, and sauces. Keep it unsweetened if you want to use it for savory cooking.
You can also use it to make homemade soy yogurt.
FAQs
Do not shorten the simmer time, and skim the foam as it cooks. Using fresh soybeans and filtered water also helps keep the flavor clean.
That’s normal for homemade soy milk. Since this version doesn’t include stabilizers or emulsifiers, separation is expected. Just shake the bottle or whisk before using.
Soy milk foams up quickly as it heats. Use a large pot, stay close, and lower the heat as soon as it starts climbing. If needed, remove the pot from the burner briefly to calm it down.
Okara is the leftover soy pulp from straining. It’s edible and works well mixed into soups, stews, veggie burgers, and baking.
Yes, as long as you keep it unsweetened and unflavored. Follow my detailed guide for homemade tofu.
More homemade plant milk recipes

If you made this recipe, please leave a rating and a quick comment. Your feedback supports the blog and helps other readers.
How to make soy milk
Equipment
Ingredients
- 1 cup dried soybeans
- 8 cups filtered water + more for soaking the beans
- Pinch fine sea salt optional, to taste
- ½-1 teaspoon vanilla extract optional, add after cooling
- 1-2 Tablespoons maple syrup or sweetener of choice (optional, add after cooling)
Instructions
- Soak the soybeans in plenty of water for 6 hours or overnight. Drain and rinse well.
- Add the soaked soybeans to a high-speed blender and pulse briefly to break them up.
- Add the 8 cups of water and blend until completely smooth.
- Pour into a large, heavy-bottom pot. Bring to a boil over medium heat, stirring often so nothing sticks.
- Once boiling, cook for 3 to 4 minutes, skimming off foam as it rises.
- Reduce the heat and simmer for 15 to 20 minutes, stirring occasionally and scraping the bottom of the pot.
- Turn off the heat and let cool for a few minutes. Strain through a nut milk bag into a large bowl and squeeze well.
- Let the soy milk cool completely, then stir in vanilla and sweetener if using. Transfer to a clean bottle or jar and refrigerate.
Video
Notes
Nutrition
Nutrition information is automatically calculated, so should only be used as an approximation.


A little runny!
Hi Jen,
Was it runny or watery?
Sorry for all the comments, but do you blend the soybeans with the same water they were soaked in or use fresh water? Thank you.
Hi Margaret.
You need to use fresh water for blending the soybeans.
Thank you so much for this recipe, I’m excited to use it. Why do you skim off the foam from the milk?
Hi Paige,
In this case, it was just a wooden spoon. You can also use a slotted spoon or a more specialized skimmer one.
Hi and thanks for the recipe.
I’m in the process of making it now.
I don’t as yet have a nut milk bag or any muslin. However, the following alternative worked for me:
After I soaked o’night, I rinsed and removed the skins but as you say, it’s not necessary.
Then, I used a fine mesh strainer strainer BEFORE I cooked the beans, pressing the last of the milk from the mush.
Perfect!
I will skim and cool and bottle as advised!
Next project will be tofu! 🙂 x
Thank you for your comment, Jani. Great tips!
Hey thanks for posting this useful information about simple homemade soy milk recipe here, I really hope it will be helpful to many.
Thank you very much Jack, glad you liked this 🙂
I just bought a mixer to do soy milk for my babies (15 months). I usually buy to the grocery fortified soy milk for them to have more vitamins in it. I am wondering if you know how to fortify the soy milk with all those vitamins like b12? Does it have it naturally? What can I add to fortify it like the one in the grocery? Thank you for your help!
Hi Stephanie,
I would not recommend fortifying the soymilk yourself if you want to give it to your babies. It would be safer to buy fortified milk.
Thank you for this! What can i do with the left over beans?
Hi Mel,
The soy pulp can be added into soups and stews while cooking the other ingredients. Keep in mind that soybean pulp needs to be cooked before ingesting (just as we boil the soy milk). I hope this helps.
How beany smell of can removed from soya millk
Hi,
As long as the soybeans are soaked before making the milk, there shouldn’t be any disagreeable soy-odors.
I hope this helps.
When would they dates be added as they need to be blended up?
Hi Debby, I would add them towards the end after filtering so you don’t loose any of the date fibre.
One correction, which I’m aware of because I too prefer homemade soymilk: Soy does NOT provide vitamin B12, except to the extent commercial soymilks are often fortified with it. B12 is not available to humans except in animal products, or in fortified products or supplements. It is very important for vegans to take a vitamin B12 supplement, as long-term vitamin B12 deficiency is dangerous. (Elderly non-vegans are also susceptible to B12 deficiency because absorption is poor as we age.)
Thank you so much for your comment and all the information, Susan.
You are right.
Thank you for these instructions.
I have two questions: 1) I use a Soyajoy appliance to make soymilk. Their recipe is 1/2 cup beans, 1.7 liters water (about 7 cups). You’re using a full cup of beans, 8 cups water. Have you tried different quantities and this is the best?
2) I’d like to fortify my soymilk with calcium. Do you know — what kind of calcium supplement should I add, how much, and when (in the process)?
Thank you!
Thank you so much for your comment, Karen.
Regarding the beans to water ratio – I haven’t tried different ratios but I think the difference is in how “intense” the soy flavour is vs the milk being more “watered down”. And it’s up to personal taste at the end 🙂
I am sorry but I can’t recommend a calcium supplement at the moment since I haven’t tried any.
Hope you’re having a great day!
Tofu is made by adding calcium chloride or traditionally magnesium chloride (Nigari) in hot soy milk. Latter one is significantly less harsh for kidneys. If you wish to achieve creaminess of soy milk by adding calcium or magnesium do it, but only in small quantities (1/4 of a teaspoon per 1 Liter of a soy milk) and only in cold milk.
First dissolve magnesium or calcium chloride in 1/4 cup of a cold water and pour in a cold milk. Stir it or gently shake a soy milk container (bottle or jug or whatever milk is kept in). Leave it 1-2 hours in the fridge to settle. It is stable for 2-3 days, after that tofu will separate on a top of a container.
Thank you for the tip, Milorad.
Muchas gracias por tu increible receta e información.
Tú crees que con esta leche se puede hacer helado vegano?
Muchas gracias!
Saludos desde México <3
Hi Ramón,
You’re very welcome. For the vegan nice cream, I have a recipe on my blog. I have used bananas and almond milk but soy milk will also work. I have a non vegan traditional ice cream recipe coming soon to the blog 🙂 x.
Thanks for sharing, my question is if it’s healthy to add dates to homemade soy milk and at what point can I add it? Can the dates be grounded too?
Hi Maria,
You can add dates. You can add it right before blending the soy and water so you can strain everything together.
Hi Samira,
I’ve been making these soya milk. But I keep finding that my milk sort of curdles after two three days in the fridge. What could possibly be causing this? 🙁 I did boil quite long usually like 30-45mins in medium to low heat. I also usually remove the soybean skins(after soak). Could this be the cause?
Hi Crystal,
Homemade soy milk usually keeps for 3-5 days in the fridge. Make sure to keep it in an air-tight bottle. I’ve heard that you can re-boils it after 2 days to prolong its shelflife but I’ve never tried it myself.
I hope this helps.
Hi
At what point in the recipe can i add the flavour to the Soy Milk?
I wanted to add vanilla and chocolate powder.
And how long does it stay in the fridge after that?
I would add the flavorings once I’ve turned off the heat to the milk and am leaving it to cool down 🙂 This milk can then be stored in the fridge for 3-5 days or can be frozen for at least 3 months 🙂
I just found your post on soy milk. I’m going to try your recipe. Thank you.
I have used soy milk instead of animal milk for over 35 years. I was given many warnings about how it would mess me up physically, hormonally. I didn’t buy it then, or now. In fact, my experience was the best I think. After 25 years of drinking soy milk and eating tofu, I went through menopause. The only symptom I had was…my periods stopped. No mood swings, no hot flashes. Nothing. My mother and friends kept say “wait until it kicks in, then you’ll see”…”you haven’t actually started yet”…10 years later I’m still waiting. My husband laughs that when I went through “the change” I went to the room, changed, came out. He feels very lucky.
So my personal experience on the effects of soy…awesome!
I’m glad to hear! there is a lot of conflicting information out there – some good, some bad. I always think, as long as we consume things in moderation then that is my aim 🙂
That is great to hear, and I totally agree.
Thank you so much for your comment, Margaret.