
This post may contain affiliate links. Please read our disclosure policy.
Want to know how to make cream cheese at home with ingredients you probably already have? Business Insider tested homemade cream cheese methods and named my 3-ingredient version their top pick for flavor and texture.
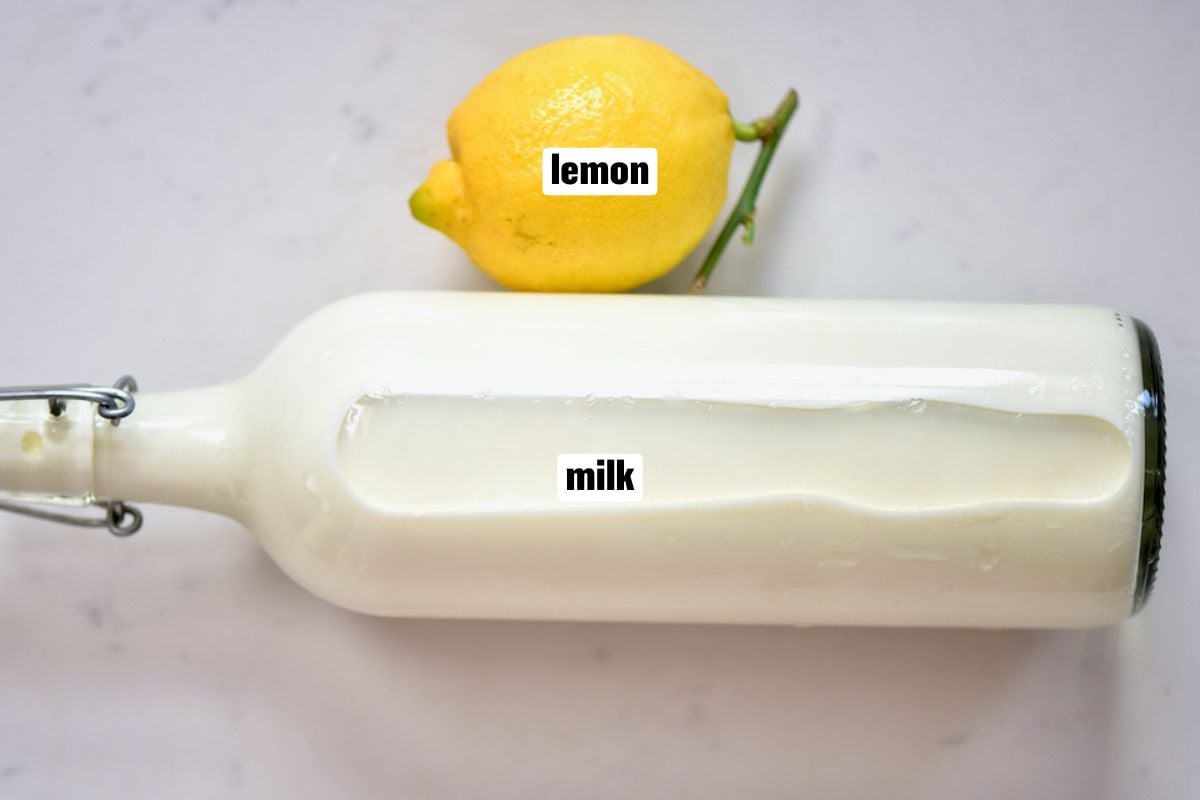
This easy method uses just 3 ingredients (milk + lemon juice or vinegar + salt) and makes a soft, tangy, spreadable homemade cream cheese you can use like store-bought, on bagels, in frosting, and even in cheesecake-style desserts.
All you do is gently heat the milk, add acid to form curds, strain, then blend until smooth and fluffy. No special cultures, no fancy equipment, and no waiting around for hours.
If you like making dairy basics at home, you might also enjoy my homemade mozzarella, goat cheese, cottage cheese, and 3-ingredient ricotta.
Updated: March 2026 (added clearer step cues, troubleshooting, and storage tips for consistently smooth results).
Table of Contents
- Why you’ll love this recipe
- What is cream cheese?
- Tools and ingredients
- How to make homemade cream cheese
- My tips for smooth, spreadable cream cheese
- How to store homemade cream cheese
- Homemade vs store-bought cream cheese
- How to use homemade cream cheese
- FAQs and troubleshooting
- More cheese recipes you might like
- How to Make Cream Cheese (Quick & Easy) Recipe
Why you’ll love this recipe
- 3 simple ingredients and one pot
- No cultures, no rennet, no special equipment
- Smooth, fluffy, and spreadable with easy ways to adjust thickness
- Works in sweet or savory recipes, including frosting and cheesecake-style desserts
What is cream cheese?
Cream cheese is a fresh (unaged), soft cheese with a mild tang and a smooth, spreadable texture.
In store-bought cream cheese, milk (and sometimes cream) is acidified, often with cultures, so it separates into curds and whey, then the curds are processed until silky. Many commercial versions also include stabilizers or thickeners to keep the texture extra uniform.
This homemade version follows the same basic idea (curds + whey), but uses the quick, no-fuss approach: milk + lemon juice or white vinegar + salt. After straining, the key step is blending, which transforms the curds from ricotta-style into a light, fluffy cream cheese-style spread.
Tools and ingredients
Ingredients
- Whole milk (full-fat): Best for richness and the smoothest texture.
- Low-fat milk can work, but the result is usually less rich and may yield smaller curds.
- Lactose-free milk can work too, but curds may be smaller, so line your strainer well (or use a nut milk bag) so you don’t lose any.
- If possible, avoid UHT/ultra-high-temperature milk, which can be more stubborn about curdling.
- Lemon juice OR distilled white vinegar: Either works to separate the milk into curds and whey (use whichever you have).
- Salt (optional): Add at the end so you can taste and adjust.
Easy variations:
- Extra-rich option: Replace a little of the milk with heavy cream for a richer result.
- Flavor add-ins: After blending, mix in dried herbs, garlic powder, or dried chili flakes (add-ins can shorten shelf life).
Tools you’ll need:
- Heavy-bottomed saucepan: milk can scorch, so a thicker pot helps
- Wooden spoon or silicone spatula: for stirring
- Fine-mesh strainer/sieve + a large bowl: to catch the whey
- Cheesecloth/muslin cloth (or a nut milk bag) for easy draining and squeezing
- Food processor or blender to blend the curds into a smooth, spreadable texture
Optional but helpful:
- Slotted spoon: handy for scooping curds out of the pot
- Thermometer: extra confidence hitting a gentle simmer without boiling
See the printable recipe card below for the full ingredients list and quantities.
How to make homemade cream cheese
This is the quick method: heat → curdle → strain → blend.
1) Set up the strainer first.
Place a fine-mesh strainer over a large bowl and line it with cheesecloth/muslin (or use a nut milk bag).
2) Heat the milk to a gentle simmer.
Warm the milk over medium-high heat, stirring occasionally to prevent scorching. You want steam and small bubbles around the edges, not a rolling boil.
 Heat the milk
3) Add the acid.
Stir in the lemon juice (or vinegar), stirring gently, until curds start forming.
4) Let the curds form.
Once the curds form and the whey begins to separate, turn off the heat and let it sit for 2-3 minutes to fully separate.
If it’s not separating, the milk may not be hot enough (or it may be UHT). Briefly return it to gentle heat and add a little more acid as needed.
 Add the acid
 Let the curds form

5) Strain.
Pour the curds and whey into the lined strainer. (Or scoop curds out with a slotted spoon.) Save some whey in case you want to loosen the texture later.
6) Optional rinse (for a milder flavor).
Rinse the curds with cold water to mellow sharpness, then let them drain again.
7) Squeeze to control thickness.
Gather the cloth and squeeze firmly to remove whey. More squeezing equals thicker cream cheese.

") Rinse (optional)
Rinse (optional) Strain
 Squeeze
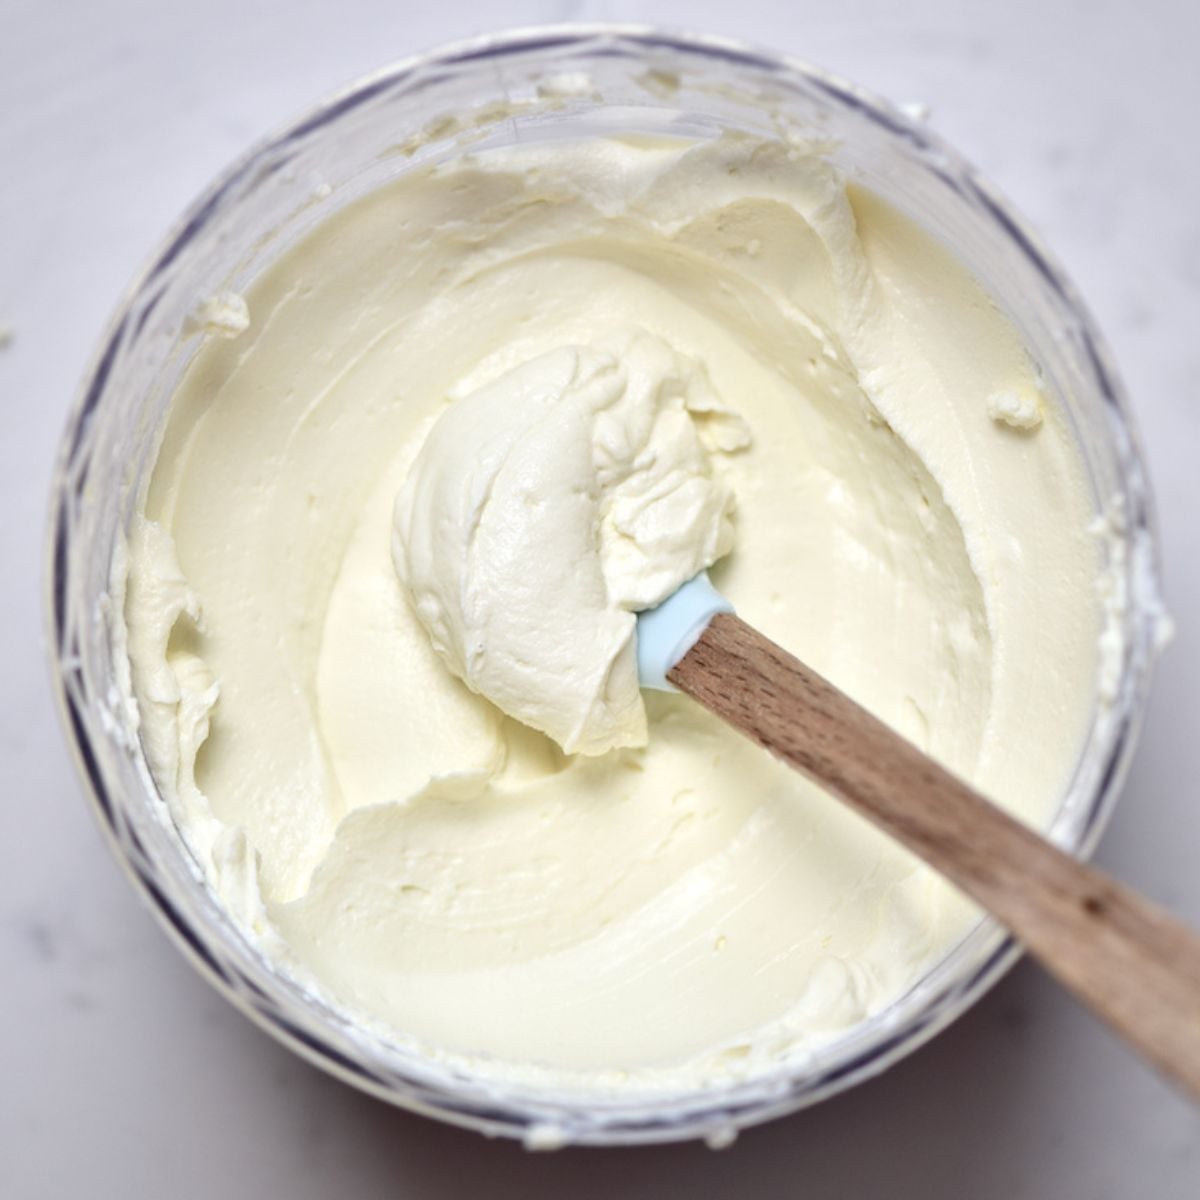
8) Blend until fluffy.
Blend the curds with salt until smooth and creamy. If it looks stiff or grainy, blend longer and add 1-2 Tablespoons reserved whey gradually until spreadable.
9) Taste and season.
Adjust salt and add any flavorings you like. Use right away or chill for a slightly firmer texture.

 Blend
Blend
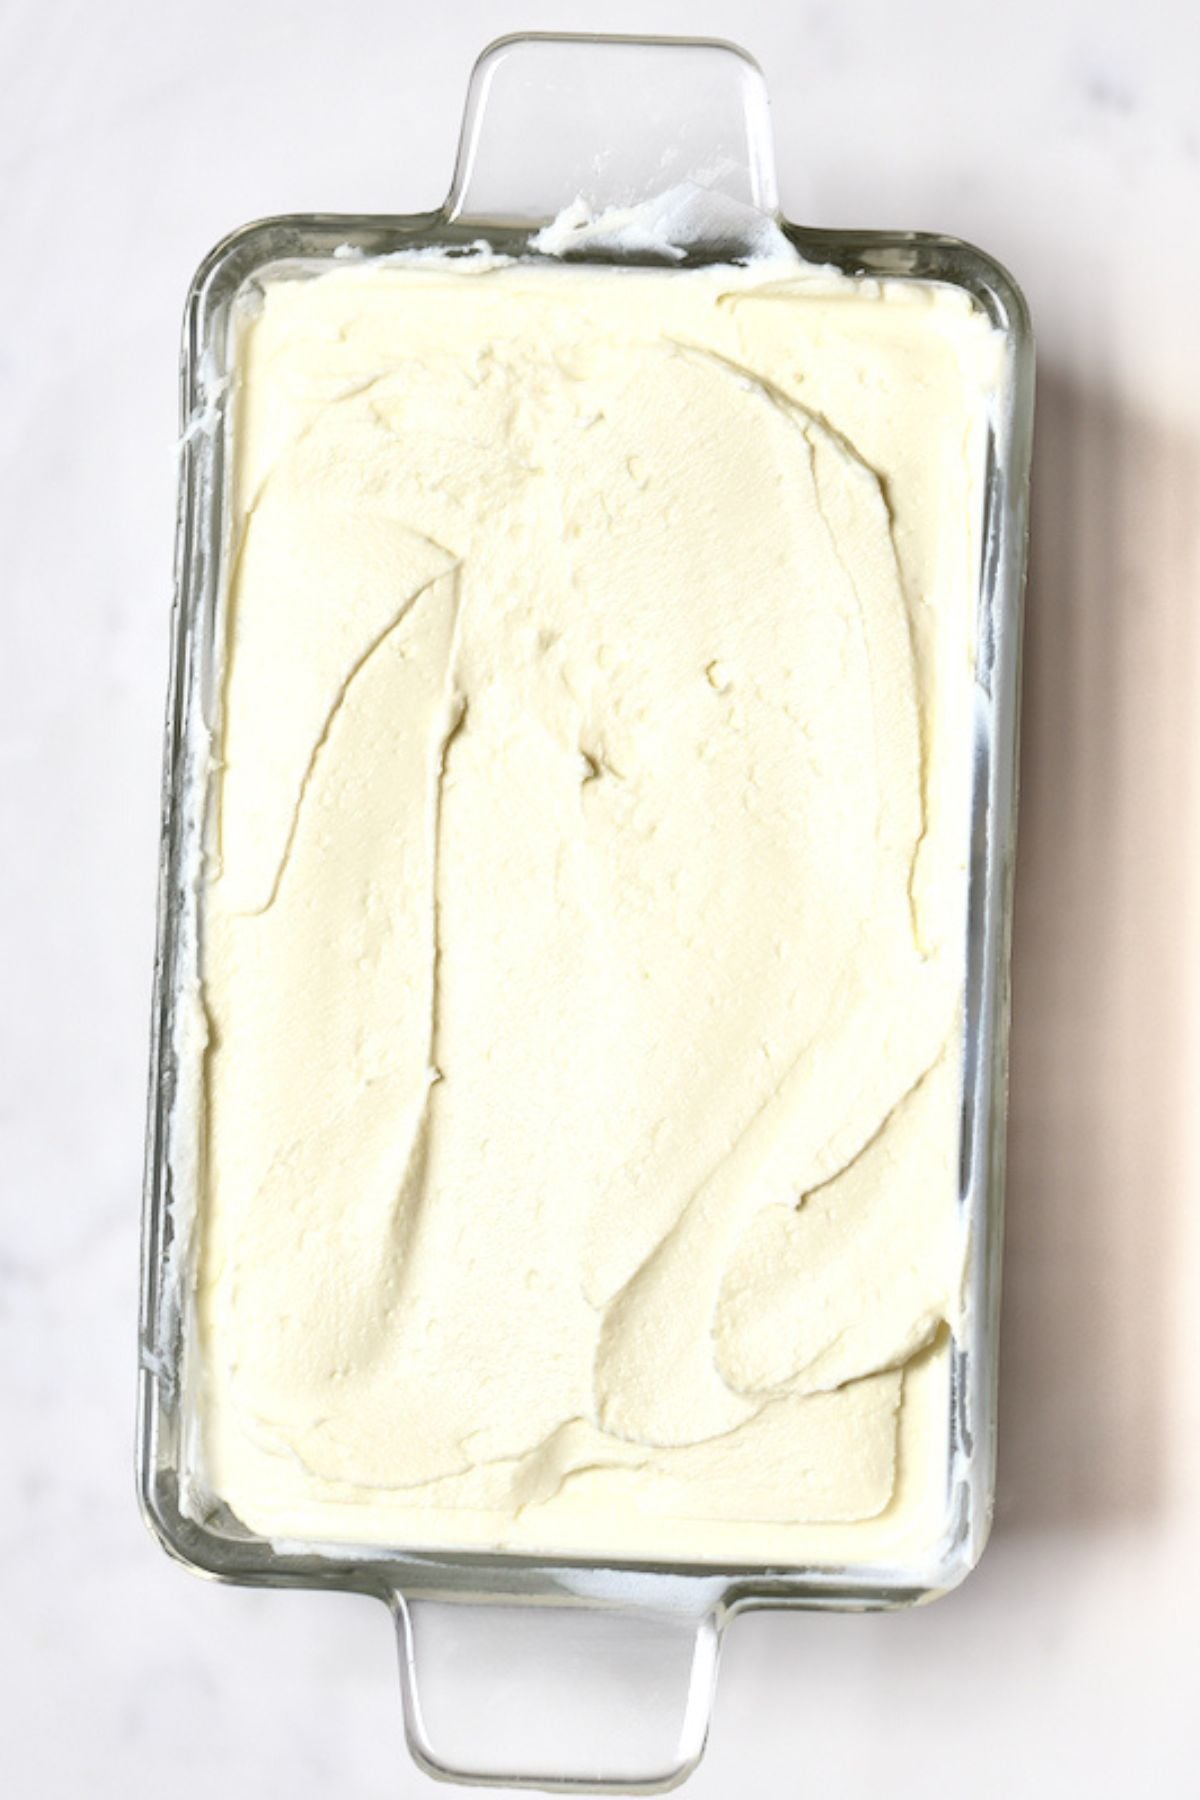
 Store
StoreMy tips for smooth, spreadable cream cheese

- Keep the heat gentle. Aim for a gentle simmer (steam + small bubbles around the edge). Boiling can make tougher curds.
- Let the curds fully form before draining. Give it a few minutes after adding the acid so separation is clear.
- Thickness is controlled at the draining step. Squeeze out more whey for thicker cream cheese.
- Grainy is usually under-blended. Blend longer, and if needed, add 1-2 Tablespoons of reserved whey gradually while blending.
- Save the whey. It’s useful for loosening texture and for cooking (ideas below).
How to store homemade cream cheese
Because this is a fresh, homemade cream cheese (no preservatives), store it cold and use it fairly quickly.
- Fridge: Store in an airtight container and use within 7 days. Always use a clean spoon/knife so it stays fresh longer.
- Freezer (optional): Freeze in a freezer-safe container for up to 2 months. After thawing, the texture can be more crumbly, so it’s best used in dips, sauces, soups, and baking.
- How to thaw: Thaw overnight in the fridge, then stir well (or briefly re-blend). Add a tiny splash of whey or milk if it needs loosening.
Homemade vs store-bought cream cheese
Homemade cream cheese is a fresh, blended curd spread, so it’s naturally a little different from supermarket blocks and tubs.
- Texture: Smooth and spreadable, but without stabilizers it can be slightly less uniform than some brands. Drain longer for thicker results.
- Flavor: Clean and tangy.
- Best uses: Great as a spread, blended into frosting, stirred into sauces, and used in cheesecake-style desserts.
How to use homemade cream cheese
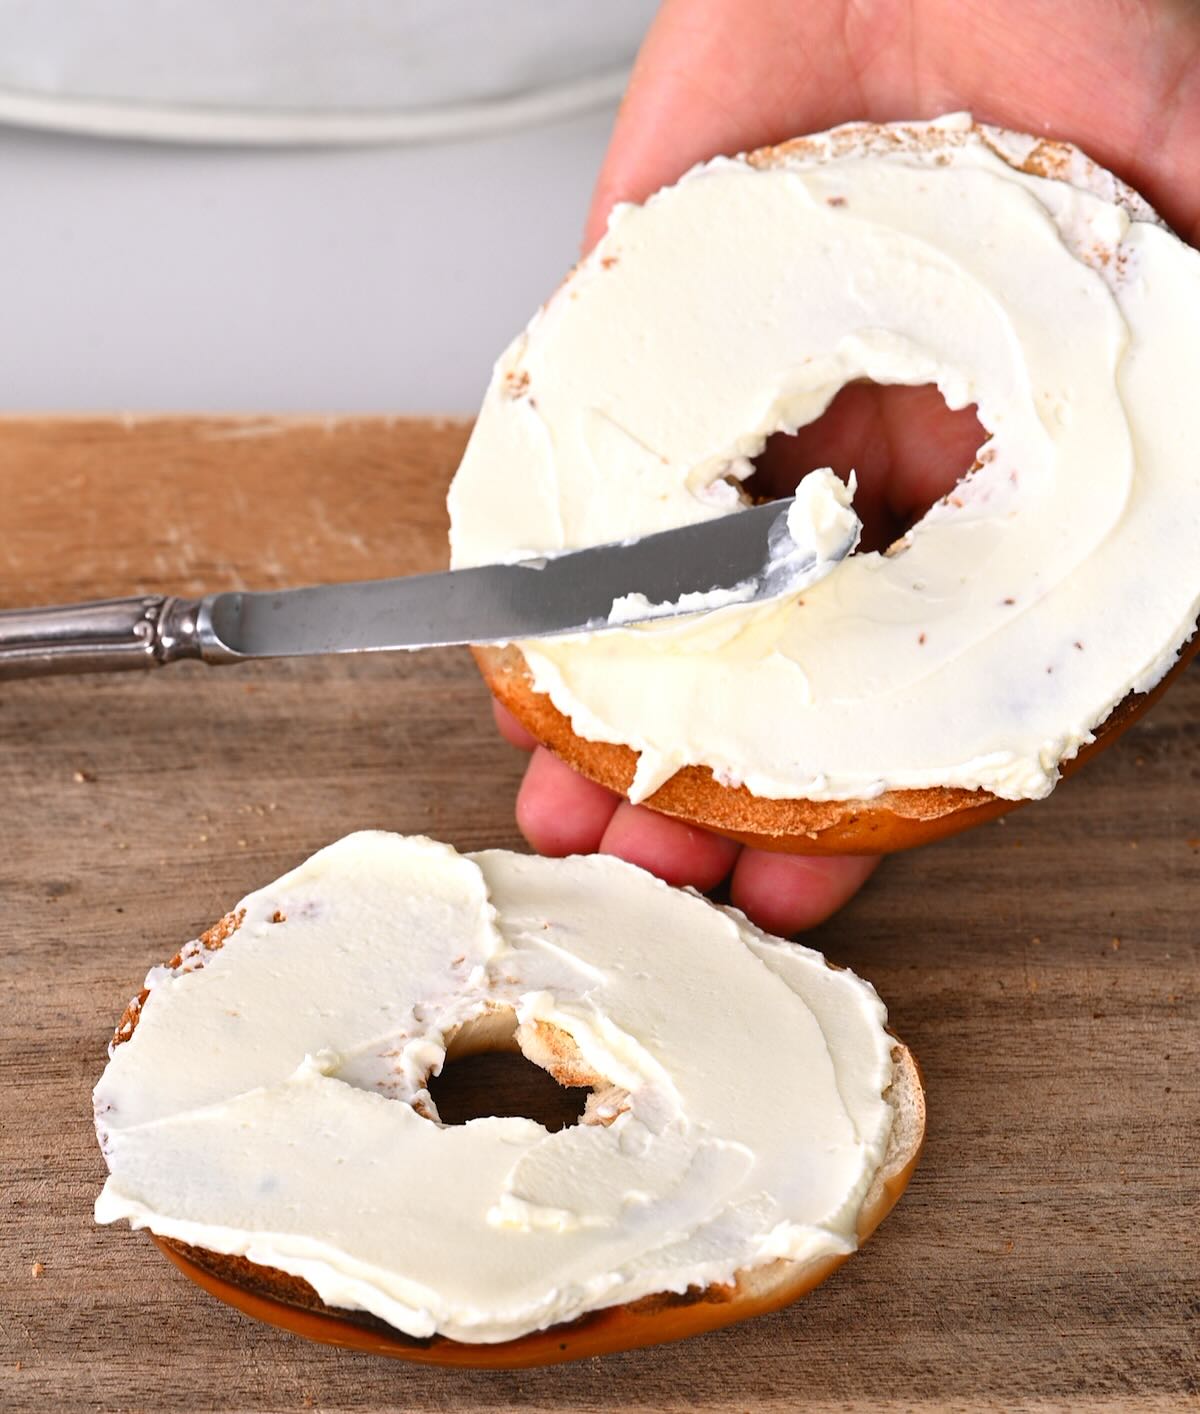
Use this the same way you would use store-bought cream cheese, sweet or savory.
- Spread it: It’s perfect for homemade New York-style bagels, a cucumber sandwich, or a lox bagel.
- Bake with it: Make carrot cake with cream cheese frosting or cheesecake-style desserts (blend until extra smooth, then chill to firm up).
- Savory snacks and appetizers: It goes great with stuffed mini peppers, or you can stir it into warm sauces or soups for extra creaminess.
- Quick flavor ideas:
- Garlic and herb: dried herbs + garlic powder + pinch of salt
- Scallion: finely chopped scallions + black pepper
- Sweet: honey + vanilla + pinch of salt
FAQs and troubleshooting
Most often:
– The milk wasn’t hot enough (you need a gentle simmer).
– The milk was UHT/ultra-high temperature.
– It needs a touch more acid.
Return it to gentle heat briefly and add a little more lemon/vinegar as needed. You should see white curds and pale yellow whey.
This is usually from overheating or under-blending. Keep the milk at a gentle simmer, then blend longer. If needed, add 1-2 Tablespoons reserved whey gradually while blending.
Drain longer and squeeze the cloth more firmly. Chilling also helps it feel firmer.
Blend again and add reserved whey (or a tiny splash of milk) a little at a time.
Yes, optional. Rinsing can mellow sharpness. Skip it if you prefer a stronger tang.
Yes. Use it the same way you would store-bought cream cheese.
Use it in soups, stews, marinades, breads, pancakes, muffins, or smoothies.
More cheese recipes you might like


If you try this cream cheese recipe, let me know how it goes in the comments below. Please leave a rating and a comment below, it really helps!

How to Make Cream Cheese (Quick & Easy)
Equipment
- Cheesecloth (Muslin cloth) or nut milk bag
Ingredients
- 8 cups whole milk full-fat preferred; lactose-free can work; avoid UHT if possible
- 5 Tablespoons lemon juice (about 1 large lemon) OR 5 Tablespoons distilled white vinegar
- 1/2 teaspoon salt or more to taste (optional)
- 1-2 Tablespoons reserved whey optional, to loosen while blending
Yield: about 1 cup.
Instructions
- Line a fine-mesh strainer with cheesecloth (or a nut milk bag) and set it over a bowl.
- Heat the milk in a heavy-bottomed saucepan over medium-high heat until steaming with small bubbles at the edges (gentle simmer). Do not boil.
- Stir in the lemon juice or vinegar until curds form, and the whey begins to separate. Turn off the heat and rest 2–3 minutes
- Pour into the lined strainer and drain until the curds are cool enough to handle. Optional: rinse with cold water for a milder flavor, then drain again.
- Gather the cloth and squeeze firmly to remove excess whey.
- Blend the curds with salt until completely smooth and fluffy. If it seems dry or slightly grainy, keep blending and drizzle in reserved whey a little at a time until creamy.
- Taste and adjust salt, then transfer to an airtight container and chill.
Video
Notes
Check the blog post for more tips and troubleshooting!
Nutrition
Nutrition information is automatically calculated, so should only be used as an approximation.


How much cream cheese will 2L or milk yield?
Hi Tanvi,
This should yield around 250 grams.
How do I make sure this cream cheese doesn’t make my frosting runny?
Hi Tash,
what I would do for that is when I drain the liquid out using the nut milk bag, I squeeze as much whey as possible at that stage. That should make it thicker. Hope this helps!
Hello!
I’m in Vancouver Canada.
I never realized how simple this coud be!
I have yet to try to make it,and will do so after your reply.
When you say whole milk ,do you mean 3.25 mf homoginized?
thank you.
Tom
Yes, I think so. It’s referred to differently in different regions, but I mean the full-fat milk variety available, so yes 3.25 MF homogenized should work well. Enjoy your cream cheese! 🙂
Hi, the recipe looks very easy to make. Are you able to tell me the nutritional values, please? Thank you.
Hi Ricko,
The recipe yields 1 cup of cream cheese. That’s 16 tablespoons, so a serving of 1 Tbsp is estimated to have 78kcal. I hope this helps.
Can I half the recipe? I don’t need this much cream cheese
Yes, of course – I hope you enjoy your cream cheese! 🙂
Hi.
Did everything and will not curdle. Milk is fresh. Put it back on stove
What next?
Thank you
Anne
Oh no! what type of milk did you use? Usually, I’d suggest adding a little more coagulant, to see if that encourages the curds to form. However, if may be down to milk choice.
How well would 2% work
Hi Jordan,
If you use fat-free or low-fat milk, the milk might not curdle at all and you won’t obtain cream cheese.
Hi! i just made my homemade creamcheese but it turned out very rubbery after blending in a food processor. May I know how to make it smooth? I threw away the liquid whey already 🙁
Thanks
Hi Camila,
Sorry to hear that. Adding a splash of milk or cream when blending should help soften the texture. Add first a bit, 1-2 tablespoons, and increase if needed. I hope this helps.
LOVED IT!
Cost me about 4$ to make 500gms cream cheese here in India, where cream cheese is not only hard to find (near impossible in a small town like mine), but is available at 3x-5x this price for processed stuff.
Was familiar with the process since we sometimes make paneer at home (as y’all know, paneer is waaaaaaaay more common here in India), but I liked the detail provided via pictures and text which can offer crucial insight to beginners.
I used 4l of milk (raw, water buffalo milk to be precise – perks of being in a smallish city/town in the “developing world”) and 150ml lemon juice to get 536 grams of paneer which I churned with ⅛ tsp salt to get my 500gms of cream cheese (the rest is stuck to my grinder vessel). I did a pretty thorough job draining and straining to remove whey. That, coupled with the fact that Buffalo milk has more fat than most other varieties, and that I used it raw (didn’t even do the self-pasturisation we normally do before consumption at home), I got some REALLY THICK cream cheese without having substituted part of the milk with heavy cream or “half-in-half” (or whatever other nonsense you yanks use ).
Planning to use it for a cheesecake which I’ve longed to make, but I was foiled by the lack of availability of a springform pan and ingredients like cream cheese and sour cream.
So, thanks again. I really appreciate this.
Cheers!
Thank you so much for your comment! Glad you are happy with the recipe.
I actually just did this recipe with 2% pasteurized milk and it worked great! I love the taste and texture but just missing that slight tang of cream cheese. Is it the milk I’m using? Does whole milk provide that tang?
Hi Van,
For more of a tang, you could try using vinegar. I hope this helps.
My milk gets delivered fresh from the farm each week. I love that the milk man still delivers in 2021! Farm fresh, grass fed, half the price of the stuff in the grocery store.
*when you say “for more tang try using some vinegar” are you referring to coagulation (instead of lemon) or after it’s creamed?
Hi Dave,
It’s amazing that you get your milk delivered 🙂
I was referring to coagulation (instead of lemon). I hope this helps.
Hi! How many grams of cream cheese does this recipe yield?
Hi Kulsoom, This yields about 250 grams.
Never mind!! It worked!
Glad to hear it worked :). Hope you liked it :)!
My milk does not curdle and I followed every step.. what could be wrong?
Hi Olive, it could be maybe because the milk could be a bit old? or the temperature? when it doesn’t curdle with me, I bring it back to heat for a bit and that does the trick!
i did this as well as all the other troubleshooting. BRAND NEW milk and cream, organic with no additives. not the high temperature pasteurized stuff, i am using fresh organic normal ingredients. first go round as per instructions, nothing. ok. took it back up to a simmer, stirring constantly. repeat repeat. let it sit for a bit to cool down. nothing. brought back up to a simmer. NOTHING. did it again. NOTHING. put it in the fridge overnight. STILL. NOTHING. in the end, i used double the lemon in an attempt to make it curdle. nothing. i’m so frustrated and p/od that i wasted all that pricy milk and cream.
So sorry to hear that it didn’t work. Just to make sure – what milk did you use? If you use fat-free or low-fat milk, the milk might not curdle at all and you won’t obtain cream cheese. Just using full-fat milk works great to make the cheese cream, you don’t necessarily need to add cream.
I hope this helps and you give the recipe another try.
Hi
I do a lot of baking for my daughter’s coffee shop in Lancaster and have BIG problems with cream cheese frosting. Every time I add the icing sugar the frosting goes runny or the frosting curdles. Reading about cream cheese, I think that the varieties we buy in England are too soft with too much liquid. So thought I might make my own as I need a firm cream cheese for frosting. Would you suggest using only double cream and squeezing out as much liquid as possible? Please help as I am at my wits end with this frosting.
Thanks and hope to hear from you soon.
the only thing you have to worry about when straining the cheese/ leaving it to press is that you don’t do it for too long that you end up with paneer instead of fluffy cream cheese- but otherwise, yes, the more you strain it, the thicker it should become and hopefully then hold up. For the frosting I would try to have it be a consistency that is slightly harder than Philadelphia spreadable cheese 🙂 Let me know how it works out for you 🙂
Wow. Perfect cream cheese and so fast and easy. Thank you!
I am glad you liked the recipe, AnnMarie. Thank you for your comment 🙂
I saw recipes for cream cheese using yogurt. I plan to try both. Cream cheese can be frozen and to return it to creaminess, let it drain, squeeze the liquid out using a cheesecloth or tea towel, then whip it up, good as new.
Thank you for your comment, Bambi.
I have the same problem. Did you try it in the end?
I would be interested if you have found a solution to the problem. I was brought up with the bricks of Philly, and since moving to England and only having access to the soft cream cheese, have had to quit making certain recipes. Cheesecake I can just about squeak, but they are not the same consistency. Cream cheese icing needs far too much icing sugar in it to keep it stiff which destroys the taste.
I am wanting to make Kolacky to a family recipe and I need the firm cream cheese to make the tender, flaky dough..
After trying a double cream, whole milk, and mesophilic aroma B starter culture in one batch, in order to achieve that firmness that wasn’t achieved with the 24+ draining, there needs to be additional steps.
Upon further reading, it looks as if, calcium chloride and and rennet are going to have to be used. The calcium chloride will produce a much firmer curd, and the rennet to help separate the curds from the whey.
While soft cream cheese has its uses – as spreads, I find they don’t work well in icings – as you have found out – in dips, or in pastry dough.
This recipe seems as if it will produce a very creamy, soft spread, but not the firm brick consistency we both need.
Hi Marri,
Thank you so much for your comment. Indeed, this yields a softer, creamy spread.
Up until step 7, I could have sworn I was making Paneer (Indian cheese ) And then i tried the food processor and got some lovely smooth whipped cream cheese to asked over hot fresh bagels.
Great easy recipe for cream cheese in no time at all. I live in the rural part of my state and am able to obtain fresh raw cow and goat milk, and that gives such a fantastic taste to cheese, cream cheese, ricotta, etc. My neighbor one ranchette over from me has a small dairy operation for cows and goats, so i just get over there early in the morning to get the milk before he processes it. If you can obtain raw milk for this and other cheeses, I credibly recommend it.
Thanks again!
It’s quite funny how similar lots of the cheese-making processes are apart from one or two steps. That sounds lovely – I’ve actually never tried it with raw dairy as it’s quite hard to source where I am but thanks for the tip! 🙂
I did it right away its was so simple n easy perfect kept it in d fridge now will see tomoro morning how it looks
Hi Radha, Great to hear :-). I hope you enjoyed it!
Can I use it for making cheese cake?
Hi Bame,
Yes, you can use this cream cheese when making a cheesecake. Maybe don’t put too much salt when making the cream cheese so it’s easier to adjust the flavours for the cheesecake.
How much cream cheese does this recipe make in grams,
I read you have written 1 cup but little more specific would help
Hi Leena,
The recipe makes about 225 grams of cream cheese. I hope this helps.
Hi
Can I use the homemade cheese for pizza
Hi Priscilla,
You should be able to use the homemade cheese for pizza. You can strain the cheese as much as possible to get all the liquid out.