
This post may contain affiliate links. Please read our disclosure policy.
Combine five ingredients to make easy homemade pita bread, a recipe so easy to put together that you’ll never go back to store-bought pita again!
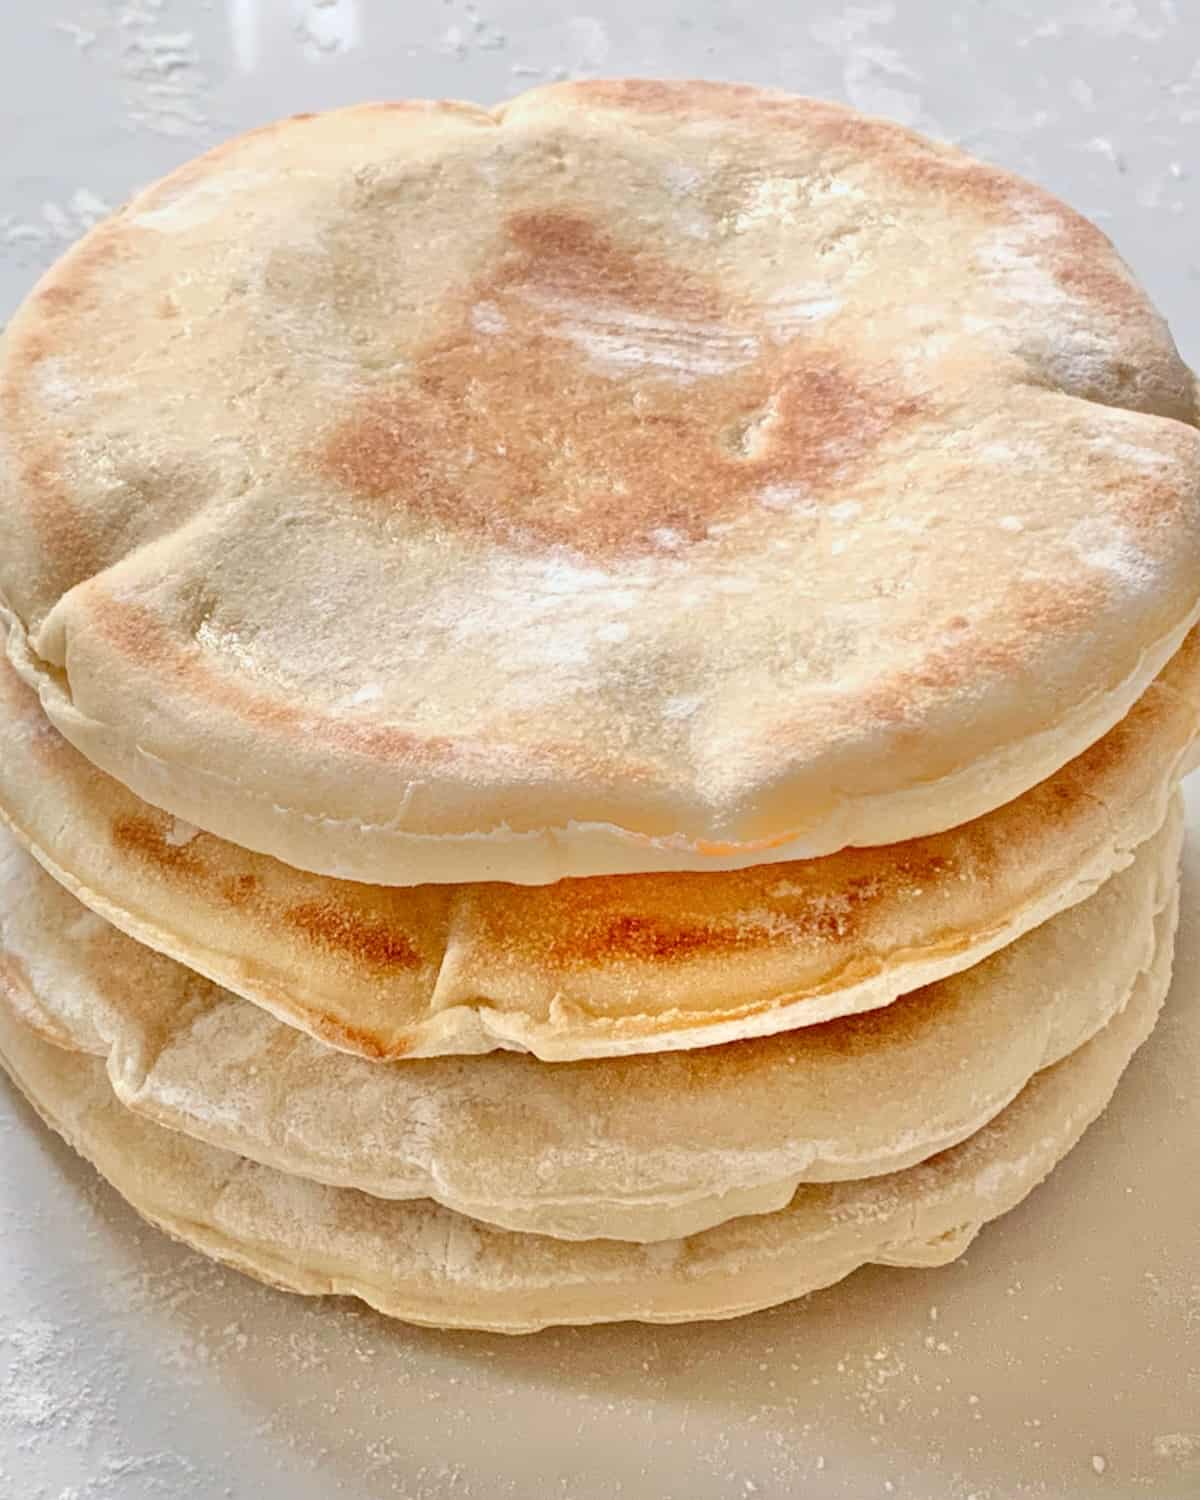
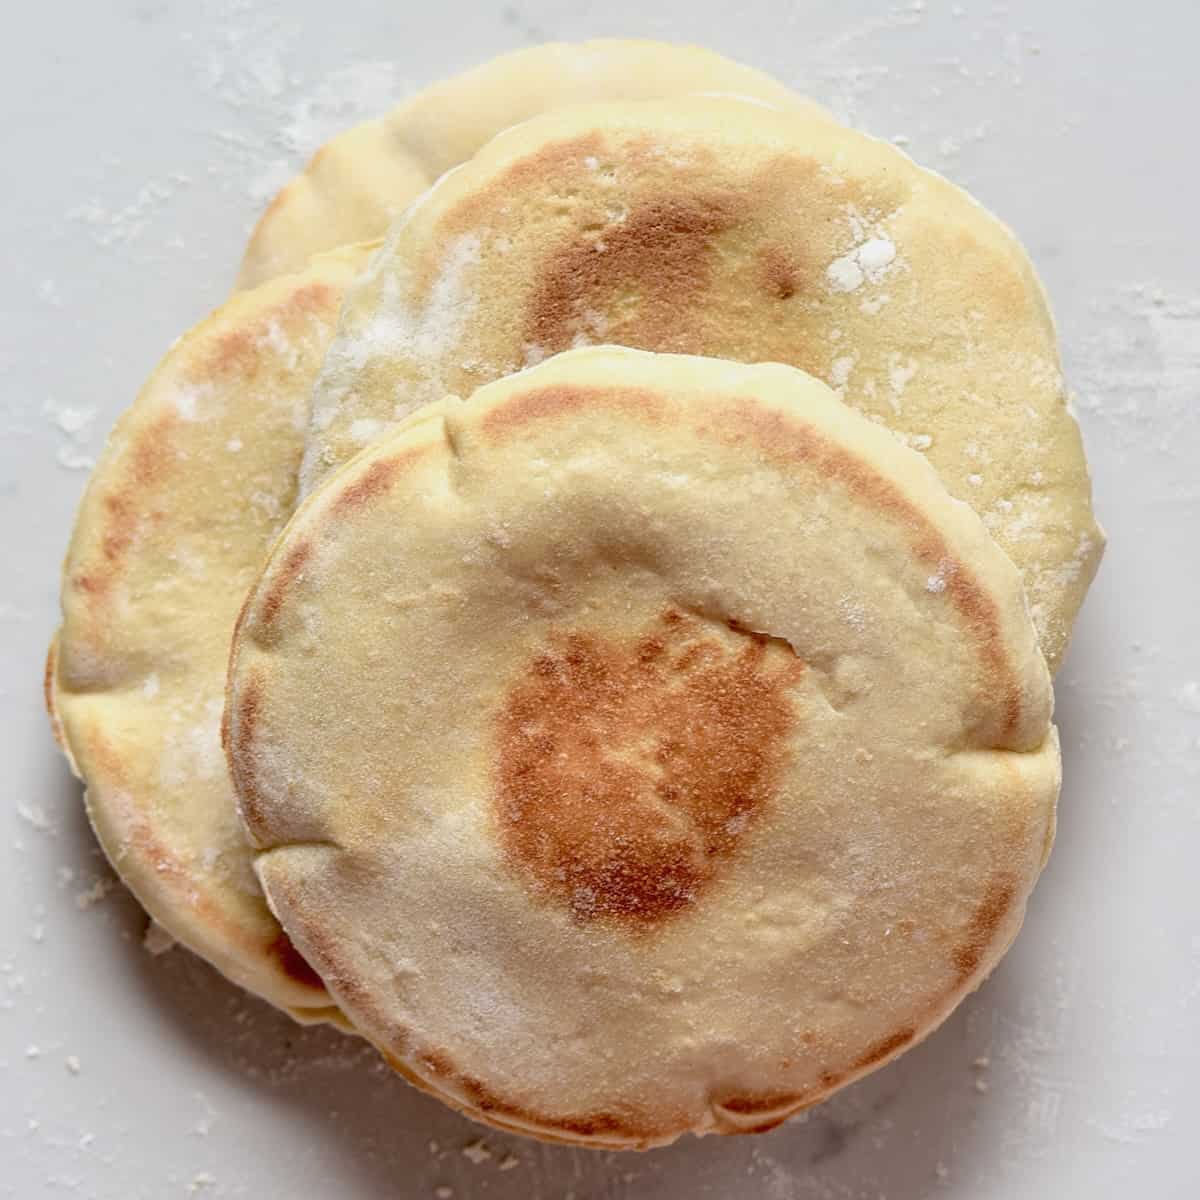
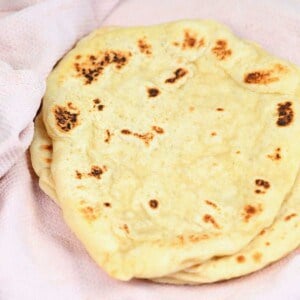
Homemade pita bread is a staple flatbread for me. This versatile, pillowy-soft bread has so many uses and is so easy to bake. With just a handful of ingredients and a little bit of oven magic, you’ll get chewy, simple-to-make pita bread better than anything you might buy. It’s also the perfect recipe for beginners to try out their bread skills.
Want to save this recipe?
Watch the pita bread tutorial video
Ingredients
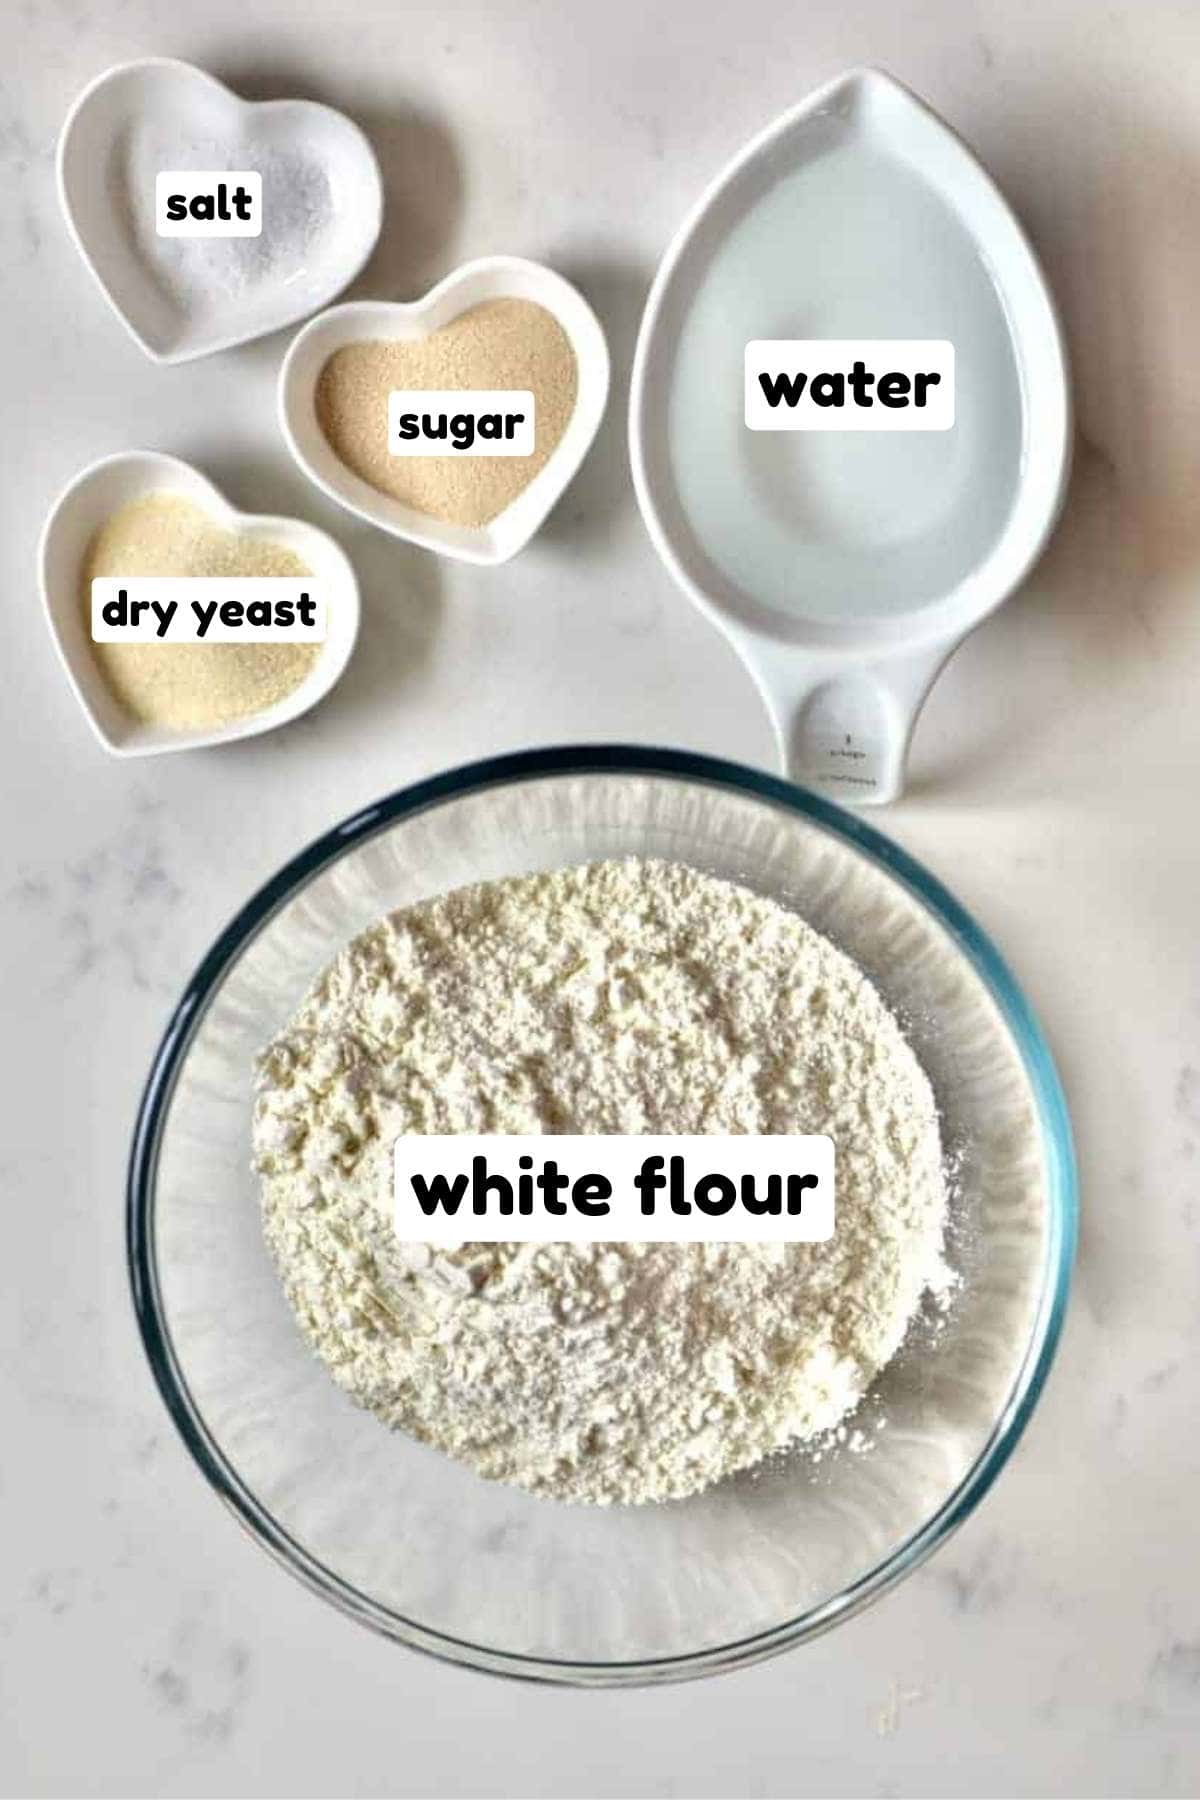
- White Flour: All-purpose flour works best for soft, chewy pita bread.
- Dry Yeast: You can also use dry instant yeast; just skip the activation step before making your dough.
- Salt
- Warm Water: Aim for a temperature between 105°-115°F/40°-45°C – too hot and the water will kill the yeast; too cool and it won’t activate properly.
- Sugar (Optional)
How to make easy homemade pita bread
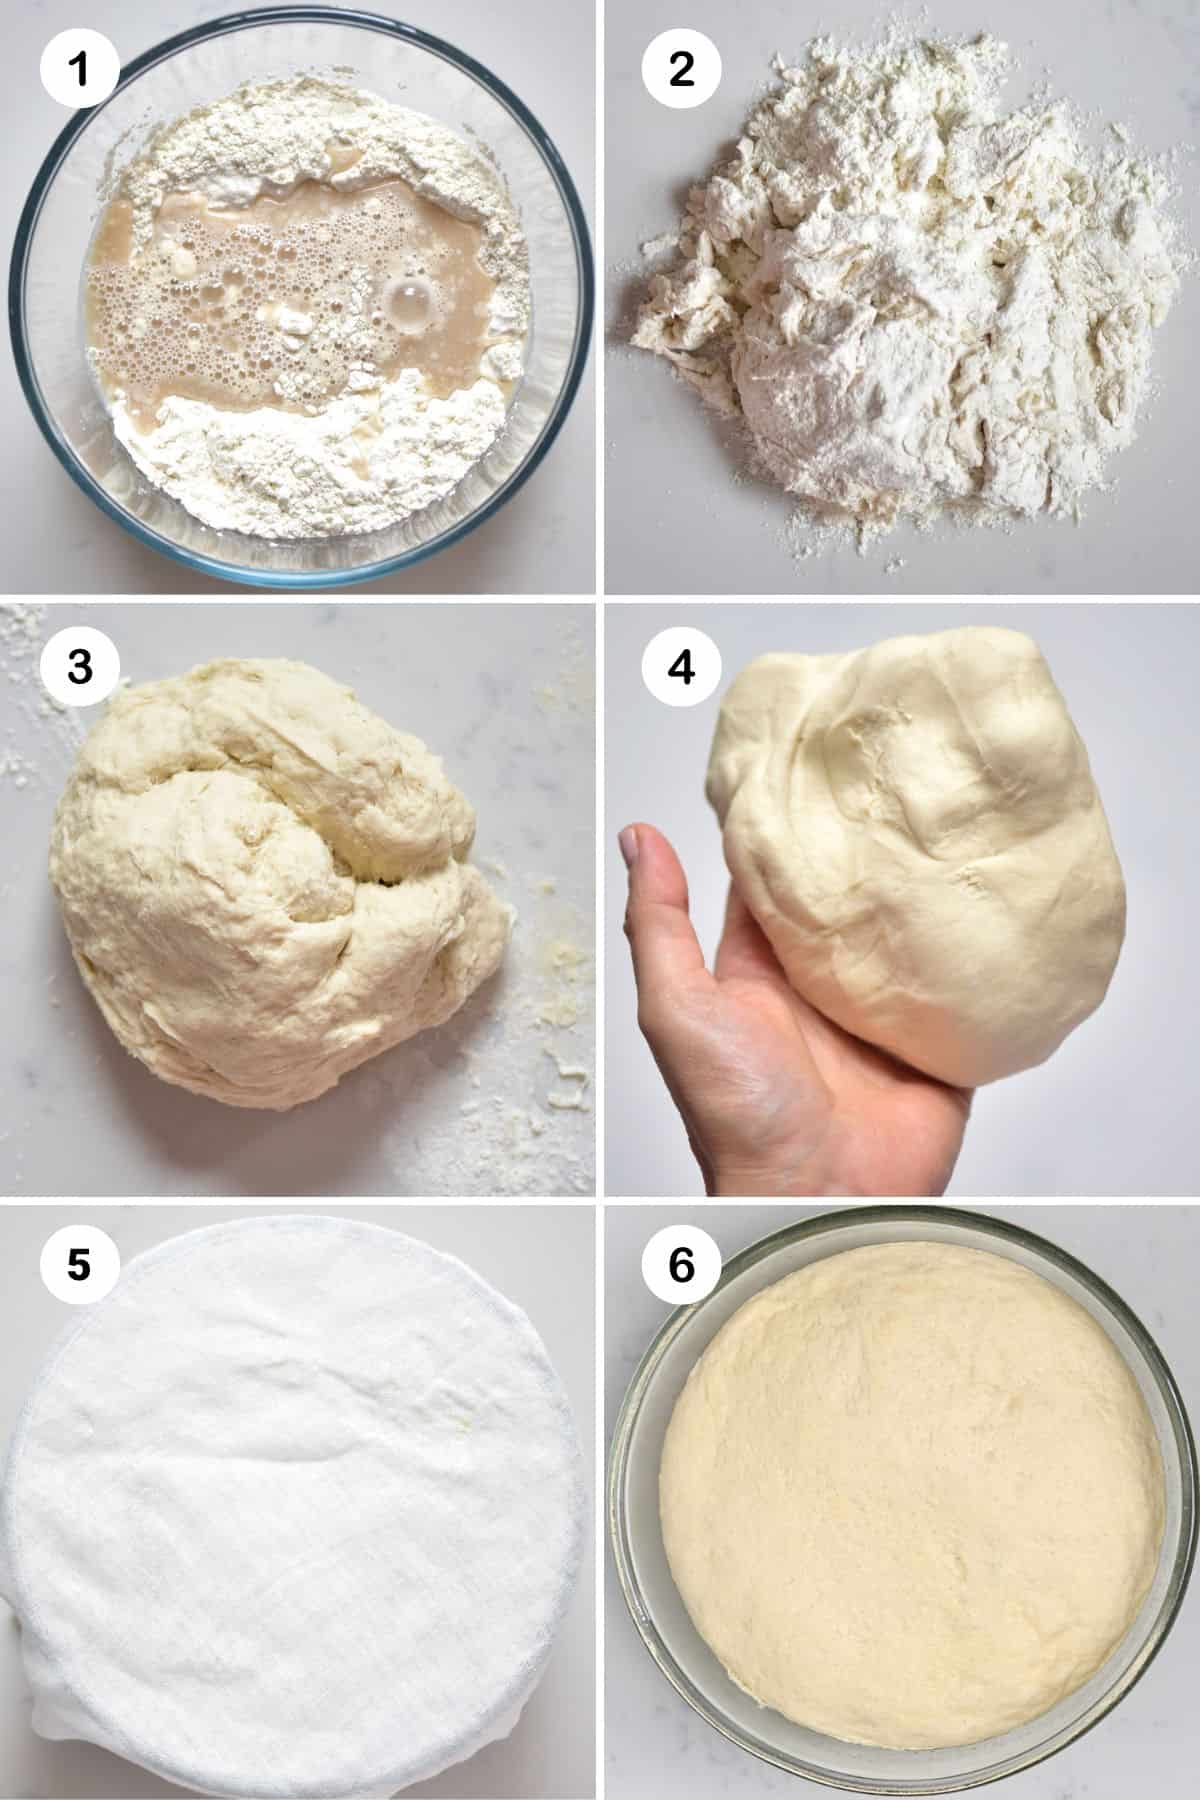
Prepare the Yeast Mixture: In a small bowl, add the yeast, sugar, and warm water, then let it rest for a few minutes. The mixture should form a foamy top with bubbles. Depending on the temperature of the water and the room, activation will take 10-15 minutes.
Make The Pita Dough: Meanwhile, mix the flour and salt in a large mixing bowl. Add the activated yeast and stir with a wooden spoon until a sticky dough begins to form.
Knead The Dough: Tip the dough onto a lightly floured work surface and knead until it becomes smooth and elastic. You can also use a dough hook attachment in the bowl of a stand mixer.
Allow The Dough To Rise: Place the dough in a large bowl. With wet hands, moisten the top of the dough with a little water or olive oil, then cover with a kitchen towel and allow to rise in a warm place for an hour or until doubled in size.
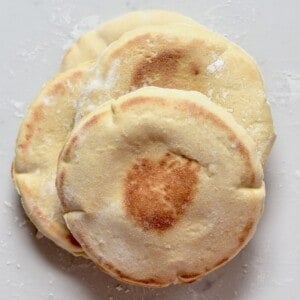
Divide The Dough: Cut the dough into four equal parts for large homemade pita bread or eight parts for smaller-sized ones. Then, shape the sections into balls.
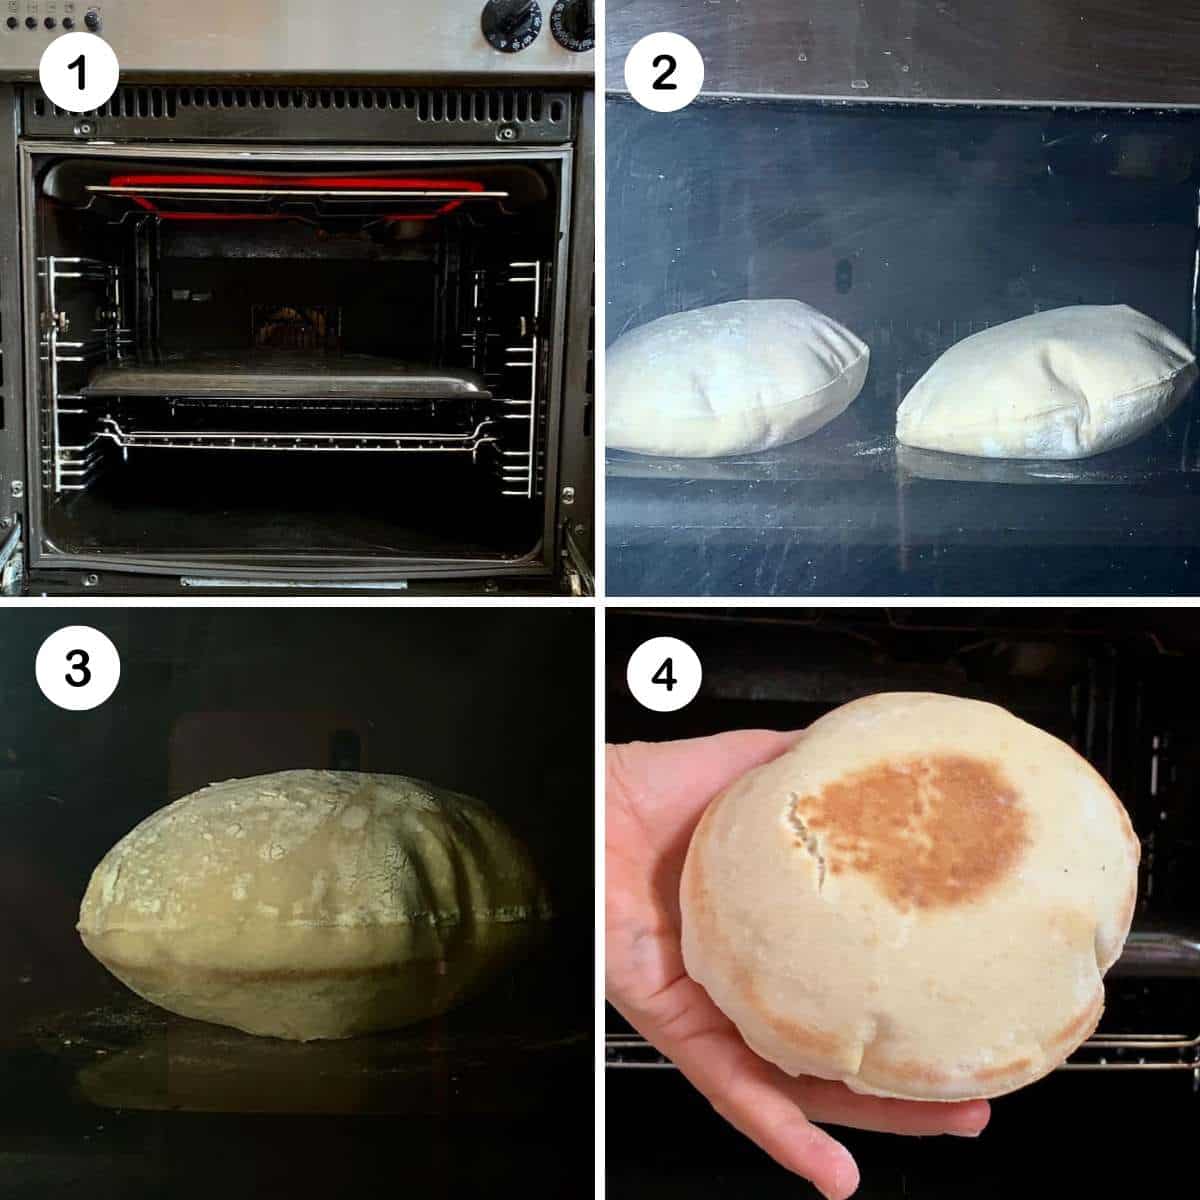
Shape The Pita Bread: On a floured surface, use a rolling pin to roll out the pita bread to ¼ inch thickness. To make a perfect circle, you can use a bowl/plate to cut out the dough. Or leave it as is if you don’t mind a more “rustic” look. Place the rolled-out bread on a floured baking sheet, cover it with a slightly damp cloth, and allow it to rest for 30 minutes.

Bake The Pitas: Place a clean baking tray upside down in the middle of the oven and preheat to 480°F/250ºC so the tray heats up. Then, carefully place each raw pita on the inverted pan and cook for 3-4 minutes. If you have larger pita bread, do this in batches. Your pita should puff up quickly and develop a brownish color when cooked through.
Cool The Pitas: Remove the homemade pita bread from the oven and cover immediately with a dry cloth. This will keep the pita soft and prevent it from crisping up. Enjoy!
Ways to use it
- Replace wraps with these homemade pita bread to enjoy delicious authentic falafel, chicken shawarma, shish tawook, or homemade hummus for an authentic taste of Middle Eastern cuisine.
- Slice your fresh pita bread into pieces and air fry to make your own easy pita chips.
- These are also perfect for dipping and scooping up delicious soups and stews such as red lentil soup and fasolia butter bean stew, as well as enjoying as part of a mezze with tzatziki sauce or tahini.
- Pita bread forms a pocket when opened, and making your own pita pockets is so easy—just fill them with za’atar spice and extra virgin olive oil or stuff them with your favorite proteins and veggies for a delicious lunch option. You can also make Lebanese meat-stuffed pitas.
Pita bread FAQs
Yes! Once your dough has risen, transfer it to the fridge and keep it until you’re ready to cook your pita bread. It should keep for up to a week, but it’s best used within a few days of making.
It’s likely that your oven wasn’t hot enough. A hot oven is the key to getting a perfectly puffy pita, so make sure you preheat properly with the baking tray inside as the oven heats up.
Simply replace the standard white flour with a gluten-free all-purpose flour to make a delicious gluten-free pita bread.
Storage instructions
To store: Allow the pita bread to cool completely before storing. Keep them in an airtight bag or container at room temperature for 2-3 days and warm in the oven or the microwave for a few minutes to enjoy.
To freeze: You can also freeze your pita bread. Once cooled, place it in Ziplock bags, pushing all of the air out before transferring it to the freezer, where it’ll keep for up to three months. If you’re storing multiple pitas in one bag, use a layer of parchment paper or wax paper between each one. Then, warm it in the oven from frozen to enjoy.
More Bread Recipes
If you try this homemade pita bread recipe, let me know how it goes in the comments below. I’d appreciate a recipe card rating and would love to see your recreations – tag me on Instagram @Alphafoodie!
Easy Homemade Pita Bread Recipe
Ingredients
- 2 cups white flour 250 grams
- 2 tsp dry yeast 7 grams
- 1/2 tsp salt
- 3/4 cup warm water
- 1 tBsp sugar optional
Instructions
Make The Dough
- In a small bowl, combine the yeast and water. Leave to activate for 10-15 minutes. It should have a foamy top and bubbles.
- In a large mixing bowl, combine the flour and salt, then add the yeast mix and mix until it starts to form a dough.
- Tip the dough onto a floured work surface and knead until smooth and soft. You can also use the dough hook on a stand mixer.
- Once the dough is soft and elastic, transfer it to a bowl and wet the top with olive oil or water. Cover and leave to proof for 1 hour or until doubled in size.
Shape
- Cut the dough into equal portions—four parts for a large pita or eight for a smaller ones.
- Shape into balls, then roll out to 1/4 inch thickness. Optionally, use a bowl or plate to cut out the dough. Or leave it as is for a more “rustic” look.
- Put the rolled-out pita on a floured baking tray, cover, and prove for a further 30 minutes.
Bake
- Put a baking tray upside down in the center of the oven, then preheat to 480°F/250ºC.
- Place the pita onto the hot tray—do this in batches. Bake for 3-4 minutes. The pita bread will puff up and start to gently brown.
- Remove from the oven and cover immediately with a kitchen towel to prevent them from crisping up.
Video
Notes
Nutrition
Nutrition information is automatically calculated, so should only be used as an approximation.


This looks so good! Is it the same recipe you use for the wrap in your falafel recipe? Is it the same method but you don’t cut open the pocket or do I have to do something different if I want to use it as a wrap?
Love your blog btw!
Thanks so much for your comment, Jasmin.
Yes, those are the pita breads I use for my falafel wraps. I sometimes open the pita, then place all the veggies and falafel patties over the pita, and then wrap them. But it’s not necessary to open/cut the pita, you can use it whole for the wraps. I hope this helps. 🙂
This recipe was super easy to follow and my
Pita pockets came out perfect & delicious!! 🙂
I have made pita in the past, but I’ve never gotten it to puff up properly and create that “pocket”! Make sure your baking sheet is getting nice and hot while pre-heating the oven! I forgot to do this and my first pita was flat and hard haha. Oops.
Great recipe, thanks alpha foodie! <3
Thank you so much Gigi. So kind of you to leave feedback and I am so glad you like it :-). Thanks so much for the tip!
Samira x
Hi, Instead of the inverted tray could you use a pizza stone instead?
Hi,
Yes of course 100%! I thought everyone would have a tray that’s why I used it. Sometimes I feel if I say pizza stone, some who don’t have pizza stone might be reluctant to try the recipe but of course it’s a great option if you have a pizza stone!
Best wishes,
Samira
I made this and so far it’s one of my favorite breads ^^
Thanks for the great recipe!
Awww thank you so much Elham, so so so kind of you to leave feedback so glad you liked it :)) x
I’m wondering if I can make this on a pan? I don’t have an oven and want to try these !!!
Hi Beu,
Yes you can, if you have something like a pancake pan (flat surface not curved it would be ideal). Cast iron would be perfect too. Make sure it’s very very hot and keep an eye on it (couple minutes on each side). I have an illustration on my instagram highlights but will add more info on here.
Hope you’ll like it.
Best wishes,
Samira
Hi! Love your recipes and ideas. I have attempted making pita over and over but with little or no success. Any tips for making pita on the stove top and also with qhole wheat flour?
Hi Fatima,
You can cook the pita on a large pan on the stove but then the pita might be thicker with a more chewy texture.
Also, you can use whole wheat flour.
Hi! How much is 3/4 cup of water in ml? 750 ml? Thaaanks
Hi, it’s 177ml 🙂
Unfortunately mine came out really crispy instead (still yum but was looking for that soft pita). Do you think my dough was too thin?
Hi Tamara,
Did you cover them with a dry cloth as soon as it came out of the oven? This will keep them soft and prevent them from becoming crispy.
If you’re keen on trying a different pita version, you can give this Greek pita recipe a go: https://www.alphafoodie.com/?s=how+to+make+greek+pita
Hi! I really want to make this but the only flour that i was able to find in grocery store is: “white bread flour 100% hard white whole wheat flour ” do you think it will work?
Thank you so much!!!!
I would think so. Pitta generally uses hard flour anyway- I haven’t tried with whole wheat before but I know that it’s possible and will just have a stronger flavour. Let me know how it goes!
Thank you for your recipes. I just made the pita bread but it became very hard .. why?
Hi Fatma, If you want the pita to be super soft, as soon as it comes out of the oven you have to immediately wrap it using a cloth or bag. If you want it hard and crispy, you leave it uncovered! Hope that helps. The main trick is to cover as soon as you take of the oven, it will remain soft!!!
Absolutely love your website my friend it’s awesome. Have tried some of your milks and love them. Some much better than shop bought. Give the sourdough a try it will become a massive passion I promise. I have not bought a loaf for around three years and love the smell of fresh bread. Just wanted to let you know. Stay safe!!
Thank you so much for your kind words 🙂 And yes, I’m loving baking my own bread products right now- the smell is amazing throughout the apartment and the taste is wonderful! I hope you’re keeping safe too! 🙂