
This post may contain affiliate links. Please read our disclosure policy.


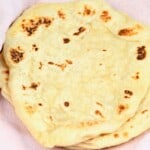

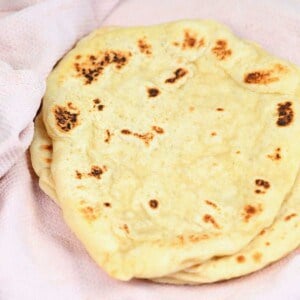
How to make Greek pita (aka gyro bread) at home with just 4 ingredients and a super simple process. This Greek flatbread recipe is perfect for serving as a wrap, with gyro, and alongside appetizers – plus, it’s dairy-free and naturally vegan! I’ve included a recipe for eggplant gyro, too – a delicious meat-free use for this gyro pita!
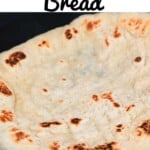
This post might feel slightly like déjà vu since I’ve already posted a recipe for authentic Pita bread. However, did you know that Greek pita and Middle Eastern pita are completely different? This Greek pita recipe is completely pocketless, for one thing. Instead, it’s more like naan since it is a thicker, pocketless flatbread.
It seems like I’m on a bit of a bread-making journey this past year, having shared Indian naan, Turkish pide bread, American pretzels, etc. Now it’s the turn of this Greek flatbread recipe. Using just 4 ingredients and a straightforward method, this is a flatbread anyone can make – though let’s be honest, you can never have enough flatbread recipes!
Once prepared, create a Greek pita sandwich with your filling of choice, or check out my options below, including homemade tzatziki, baked eggplant, and a selection of veggies! Save any leftover bread for the following day or freeze it for months!
Want to save this recipe?
The Ingredients

- Flour: I use white bread flour (aka bread flour). This is high in gluten and will yield a well risen Greek pita.
- Olive oil: will improve the dough’s tenderness and inhibit moisture from penetrating the dough; great for homemade gyros.
- Salt: this not only improves flavor but also has an effect on the way the yeast works to ferment the dough.
- For the yeast: yeast and lukewarm water. You can use fresh or dry yeast (check FAQs).
Gyro Pita Filling Ideas
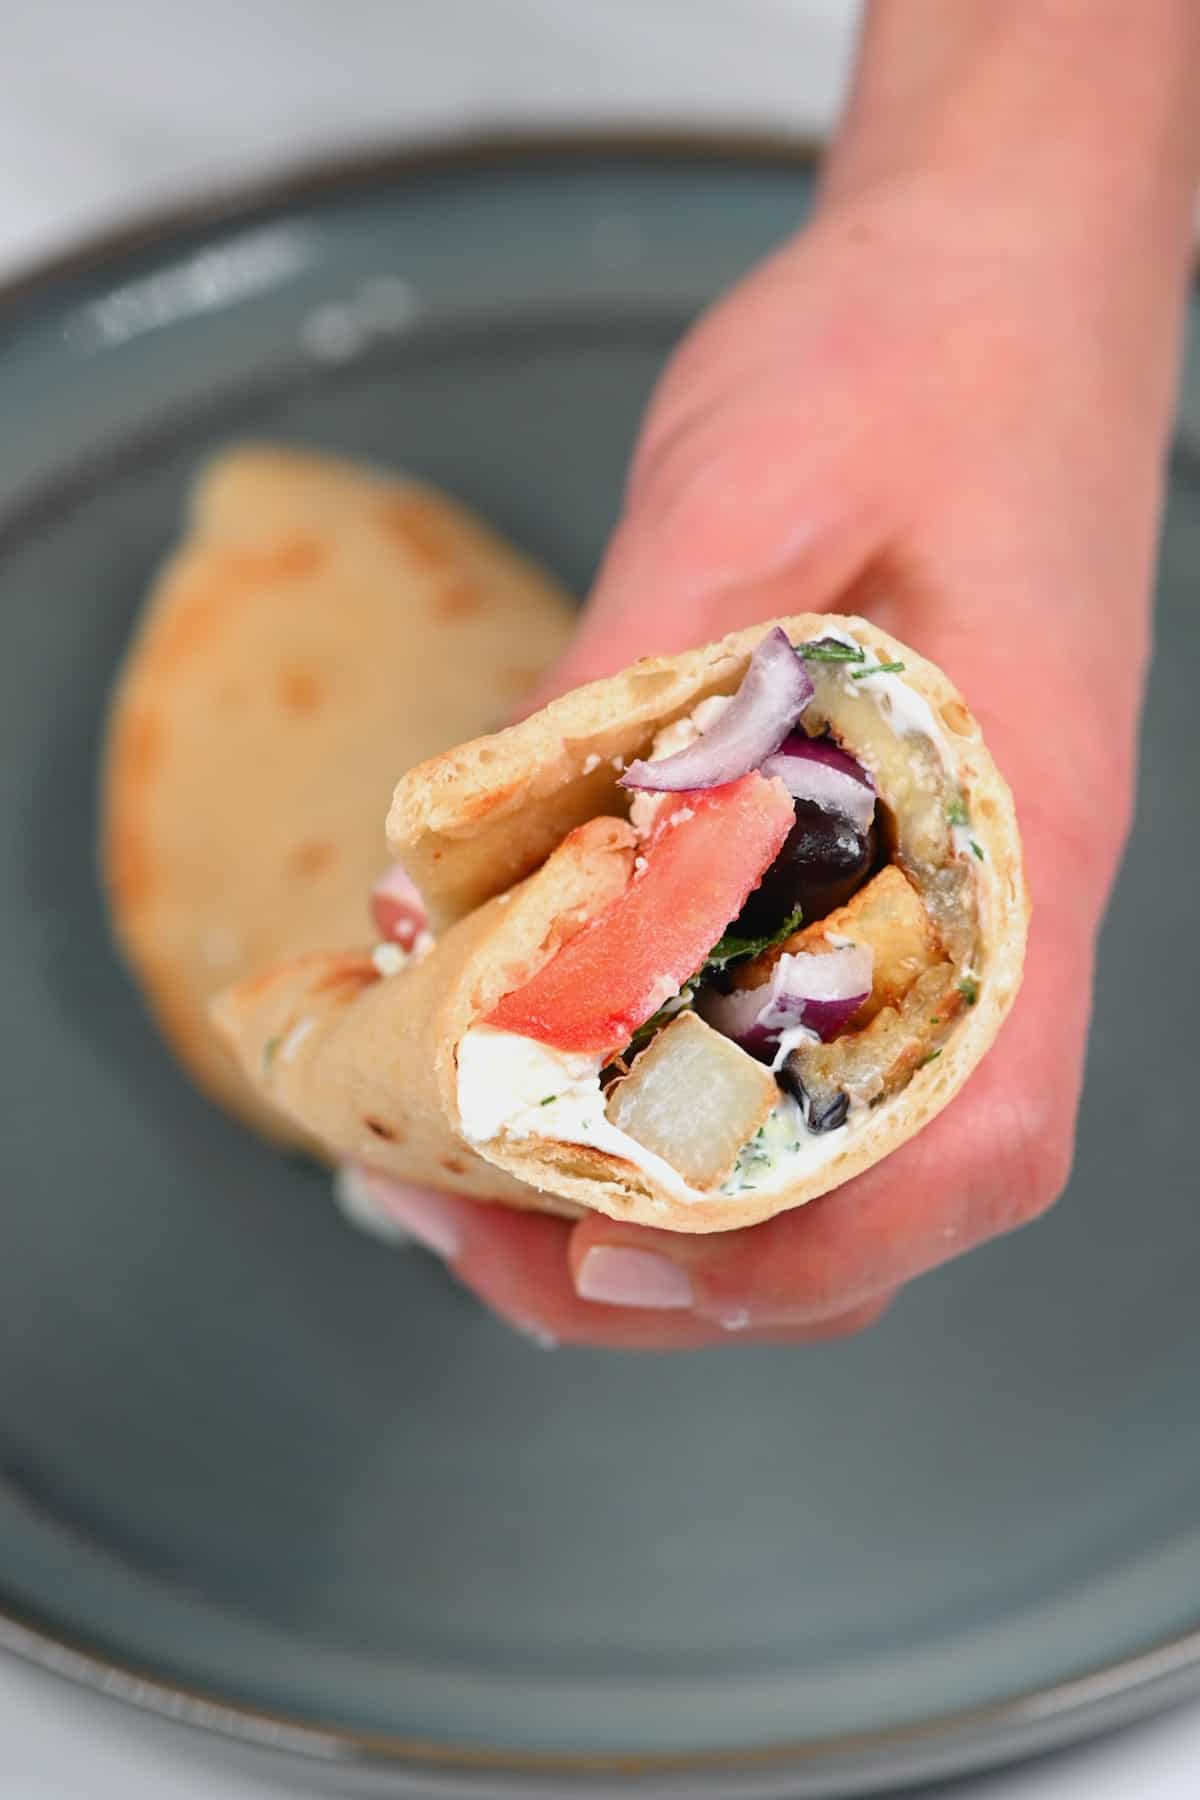
For this post, I used a combination of homemade tzatziki, roasted eggplant, baked potato wedges, olive, red onion, tomato, mint leaves, and feta. Other options include:
- Vegetables: potato – like this roasted cubed potato, leafy greens, cucumber, cabbage, oven baked fries, artichoke, sun-dried tomatoes, sauteed mushrooms, veggie patties, baked falafel, jackfruit, etc.
- Protein: chicken cubes (souvlaki), calamari, kebabs (on skewer and gyro), keftedes (meatballs), or even tofu.
- Cheese: feta (or vegan feta) or halloumi are the best options.
- Other: lentils (mujadara), fresh basil, oregano, paprika, pickled onions – like these pink pickled turnips, etc.
Best of all, you can prep most Greek Gyros components separately and store them in the refrigerator for several days, ready for gyros all week!
How to Make Greek Pita (Gyro bread)
Step 1: Activate the yeast
Mix lukewarm water (99-104ºF/37-40ºC) and yeast in a small container, then set it aside for several minutes to activate.

Step 2: Mix the dough
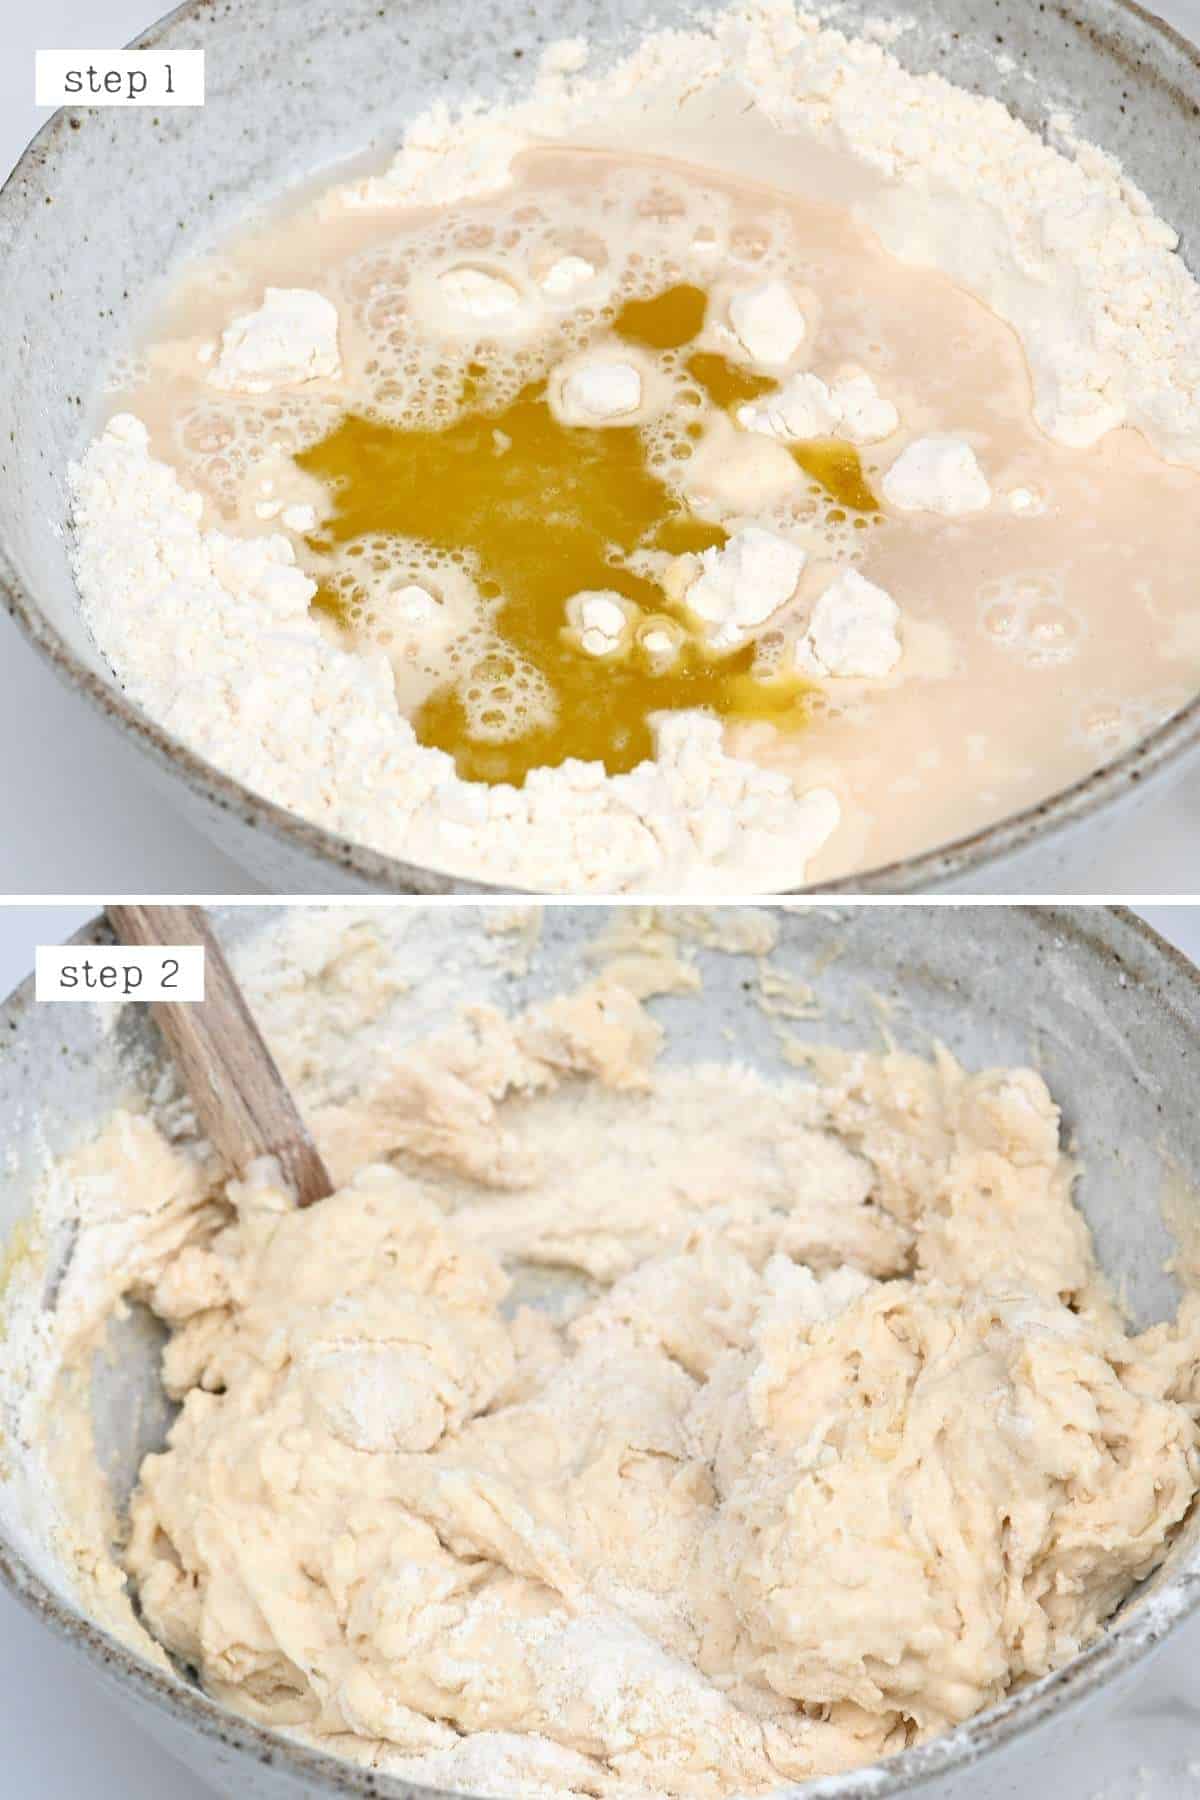
In a large bowl, combine the flour and salt. When the yeast is ready, add it to the bowl along with the oil and mix well with a spoon until it forms a rough dough.
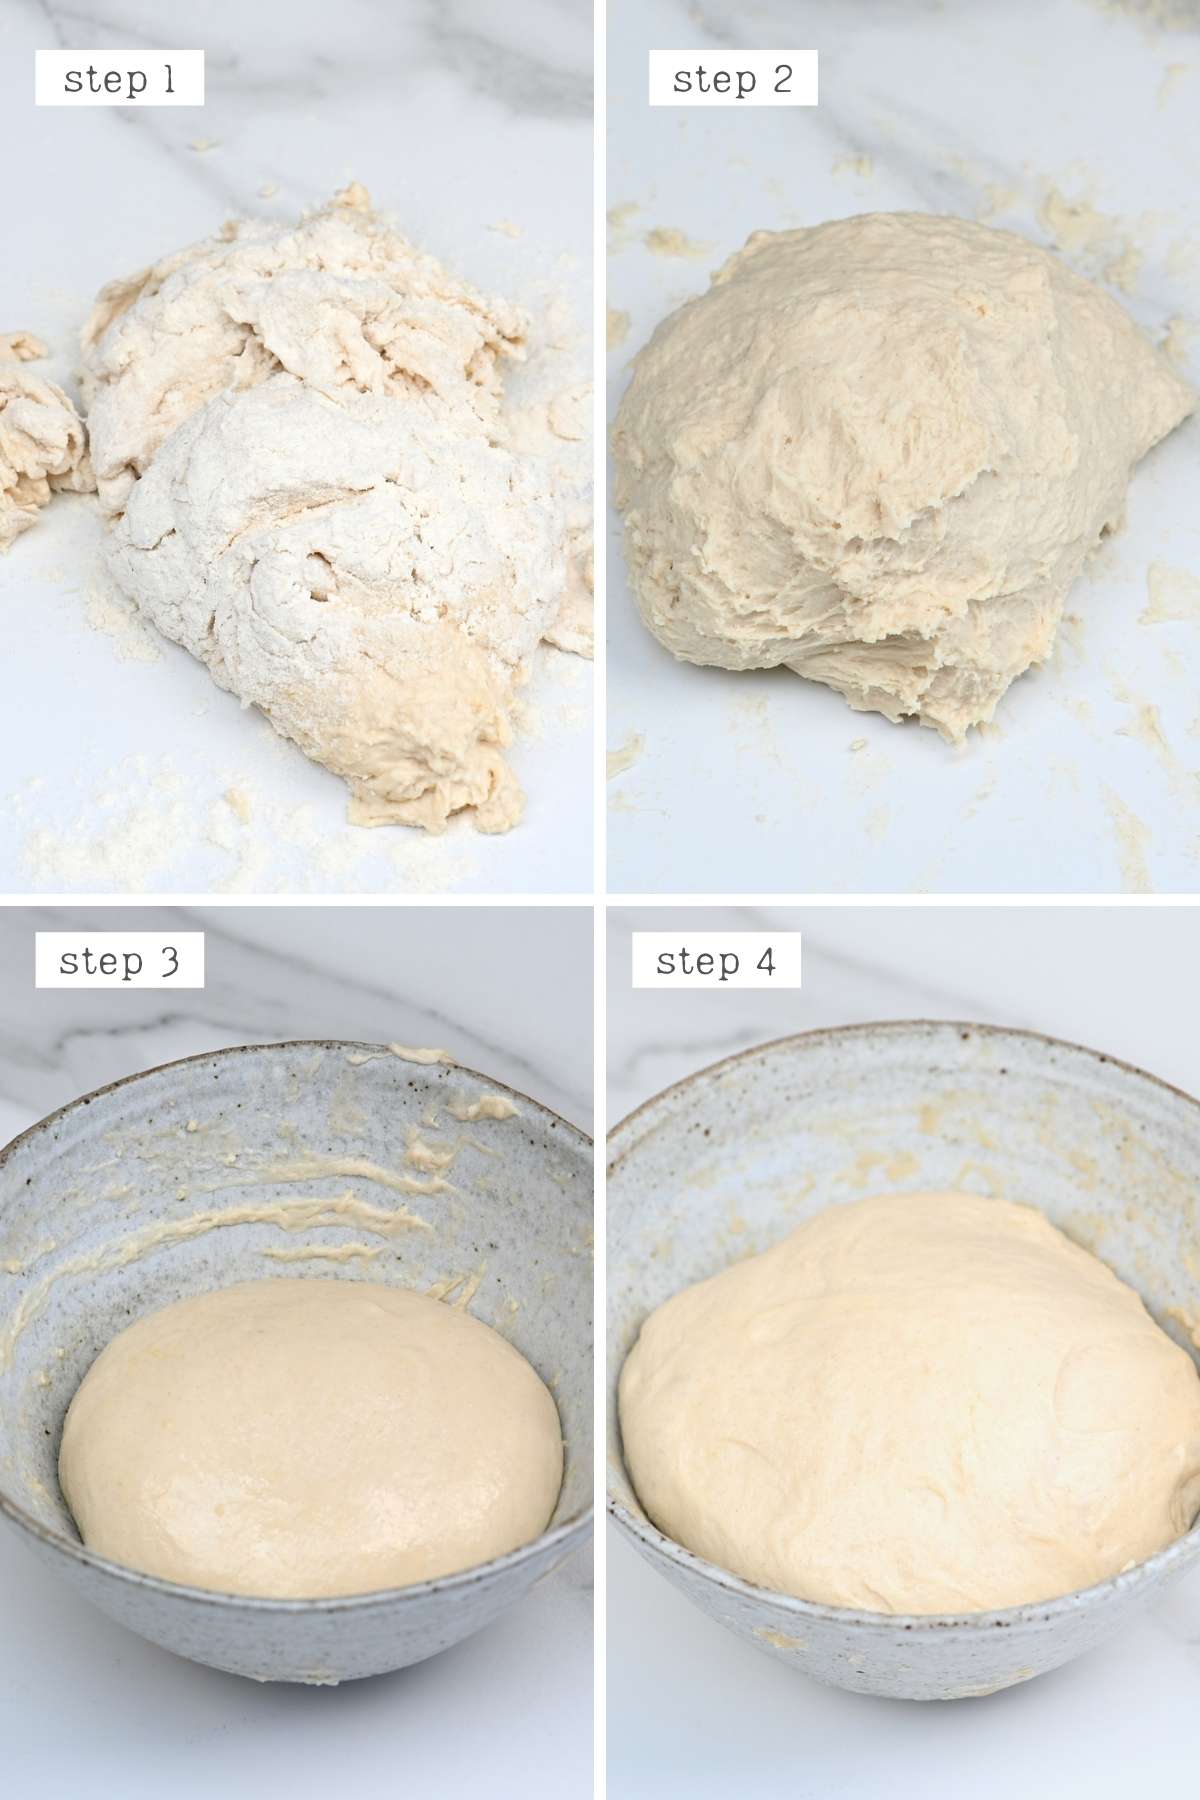
Turn the dough out onto a clean kitchen counter and knead it lightly for a few minutes until you have a soft, elastic dough.
Step 3: Stretch and fold the dough
Place the dough back in the bowl and cover with a kitchen towel to rest for 15 minutes.
After 15 minutes, we need to stretch and fold the dough within the bowl. To do this, imagine that the dough is like a clock face. Pull up the dough at 12 o’clock and then fold it over onto the top of the dough. Repeat this at 3 o’clock, 6 o’clock, and 9 o’clock.
Allow it to rest again for 15 minutes, then repeat the stretch and fold technique, rest again, and repeat the stretch and fold two more times. You need to have stretched and folded the dough a total of 4 times with 15 min breaks in between. Then allow it to rest for one last 15 minutes.
By doing this step, you’re strengthening the dough. The stretch and fold motion helps develop the dough gluten network for stronger dough strength. By the end, the dough should have stiffened somewhat and will have risen during the resting time. If the dough is very sticky, dip your hands in water before stretching and folding.
Step 4: Shape the Greek pita
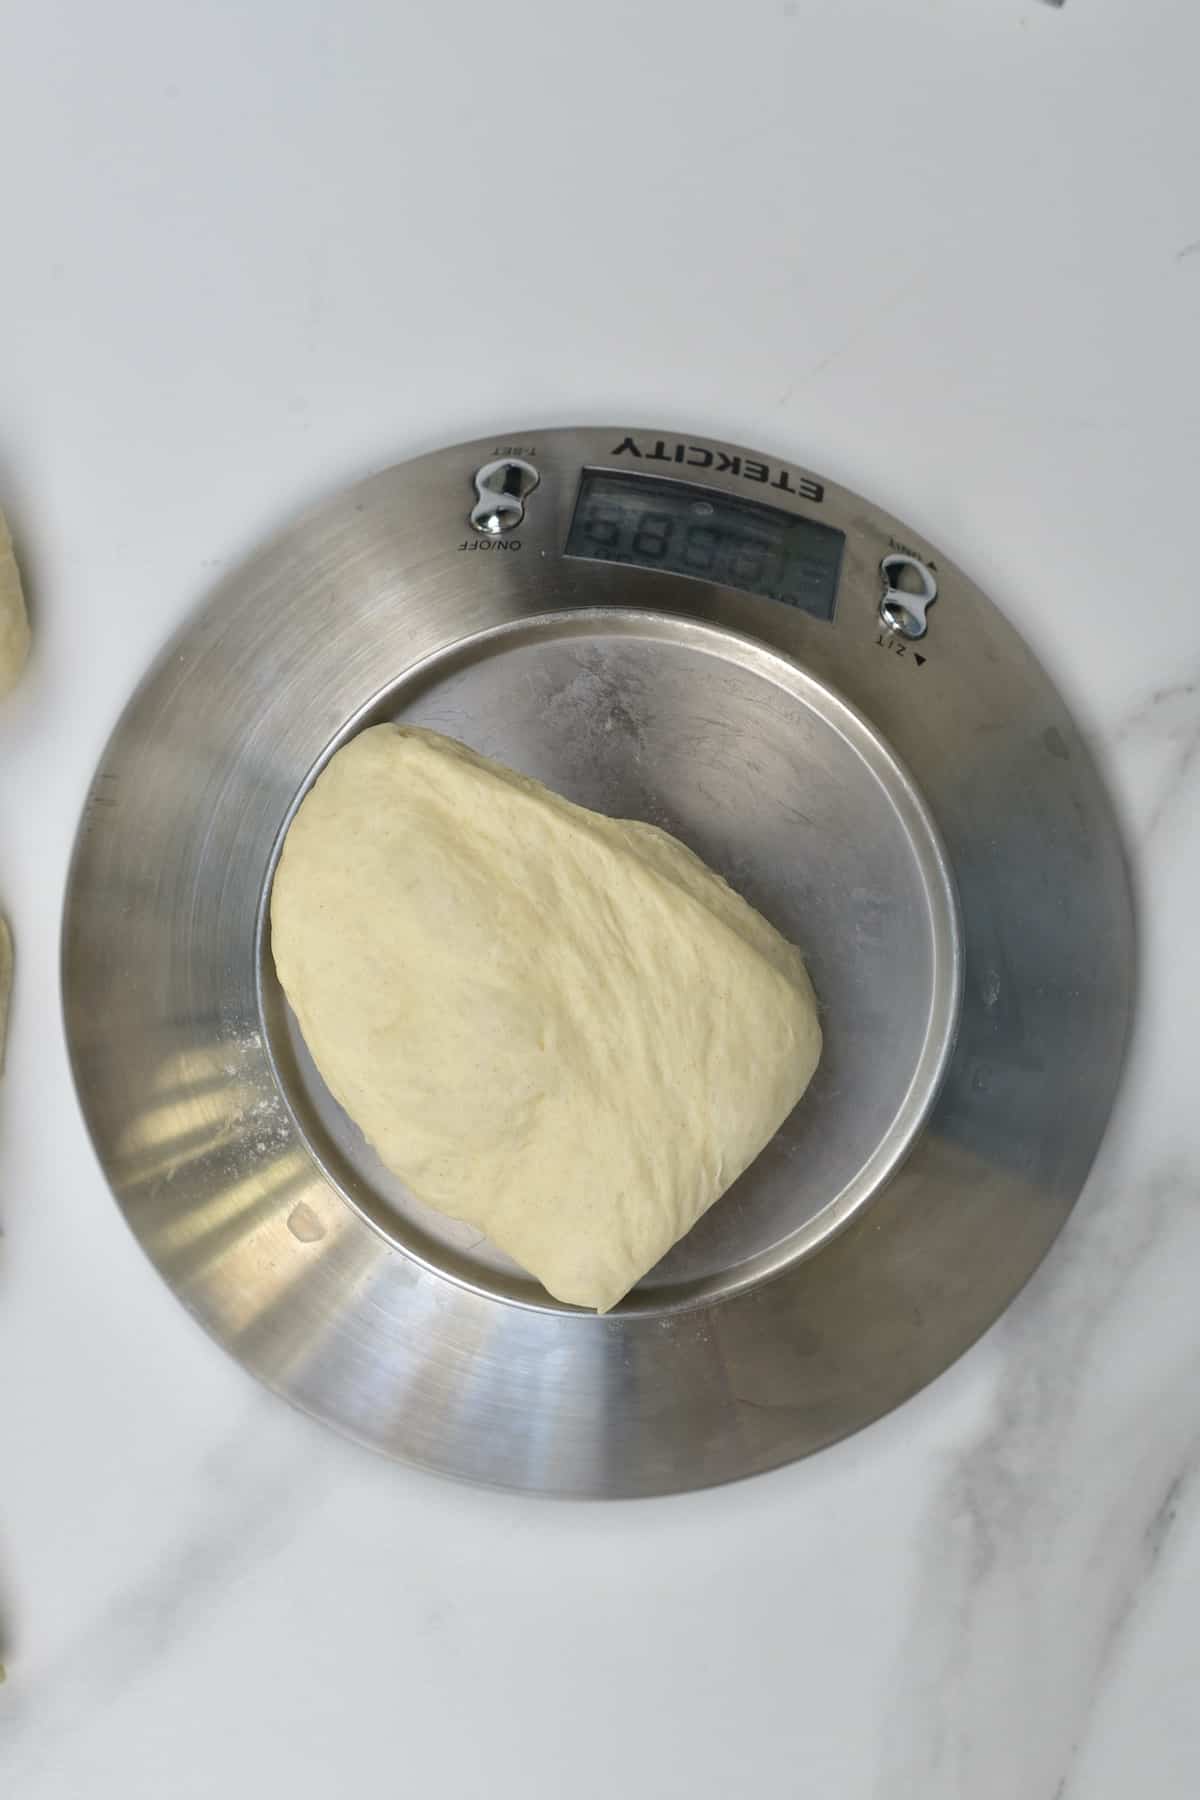
Weigh the prepared dough and divide it into four pieces. Mine were 90g each.
You can also do this by eye if you’re not bothered about completely even Greek pita bread.
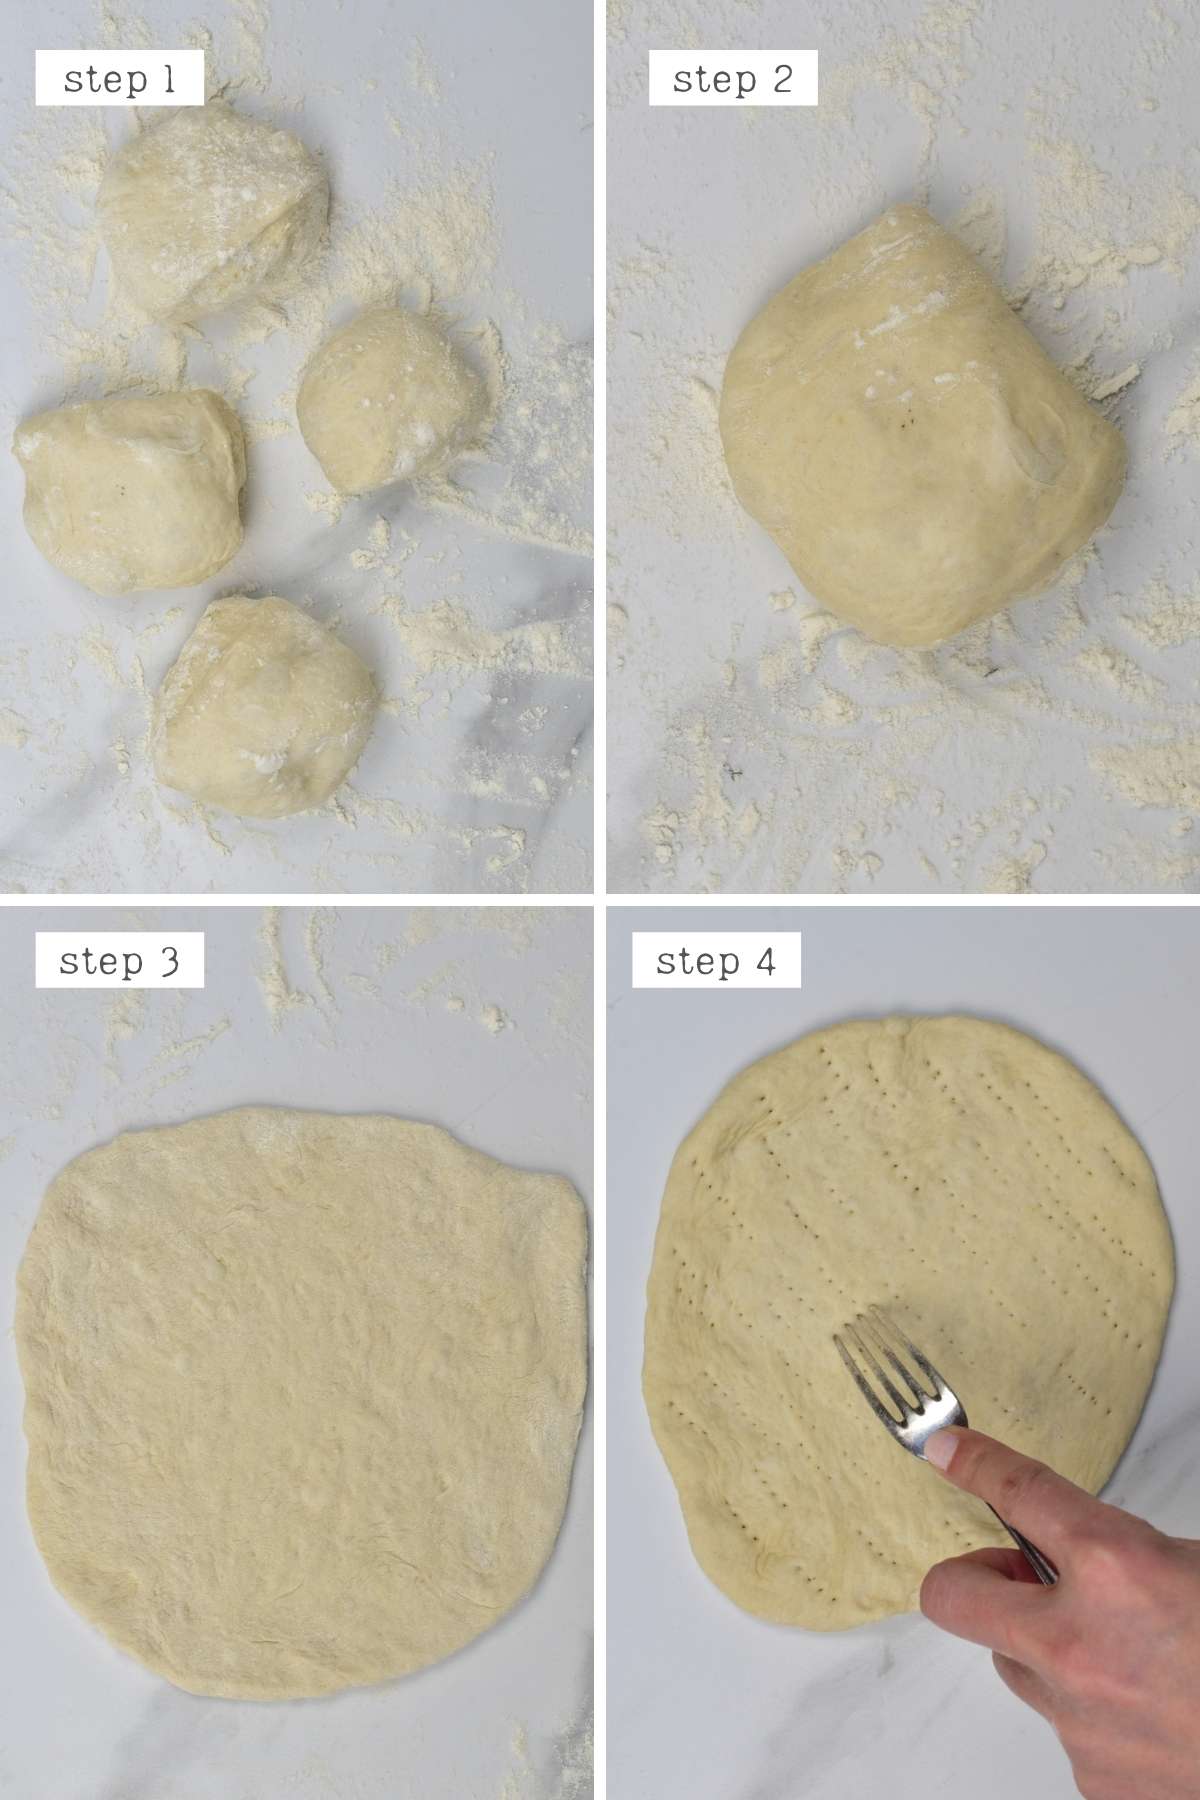
Transfer the dough to a floured surface and work on just one piece while the others rest under a clean kitchen towel.
Roll out the first dough section until it’s around 7 inches (18cm) in a circular or oblong shape. Then prick the dough all over with a fork – this will stop it from puffing up and forming a pocket the same way Middle Eastern pita does.
Meanwhile, heat up a large pan with a bit of oil.
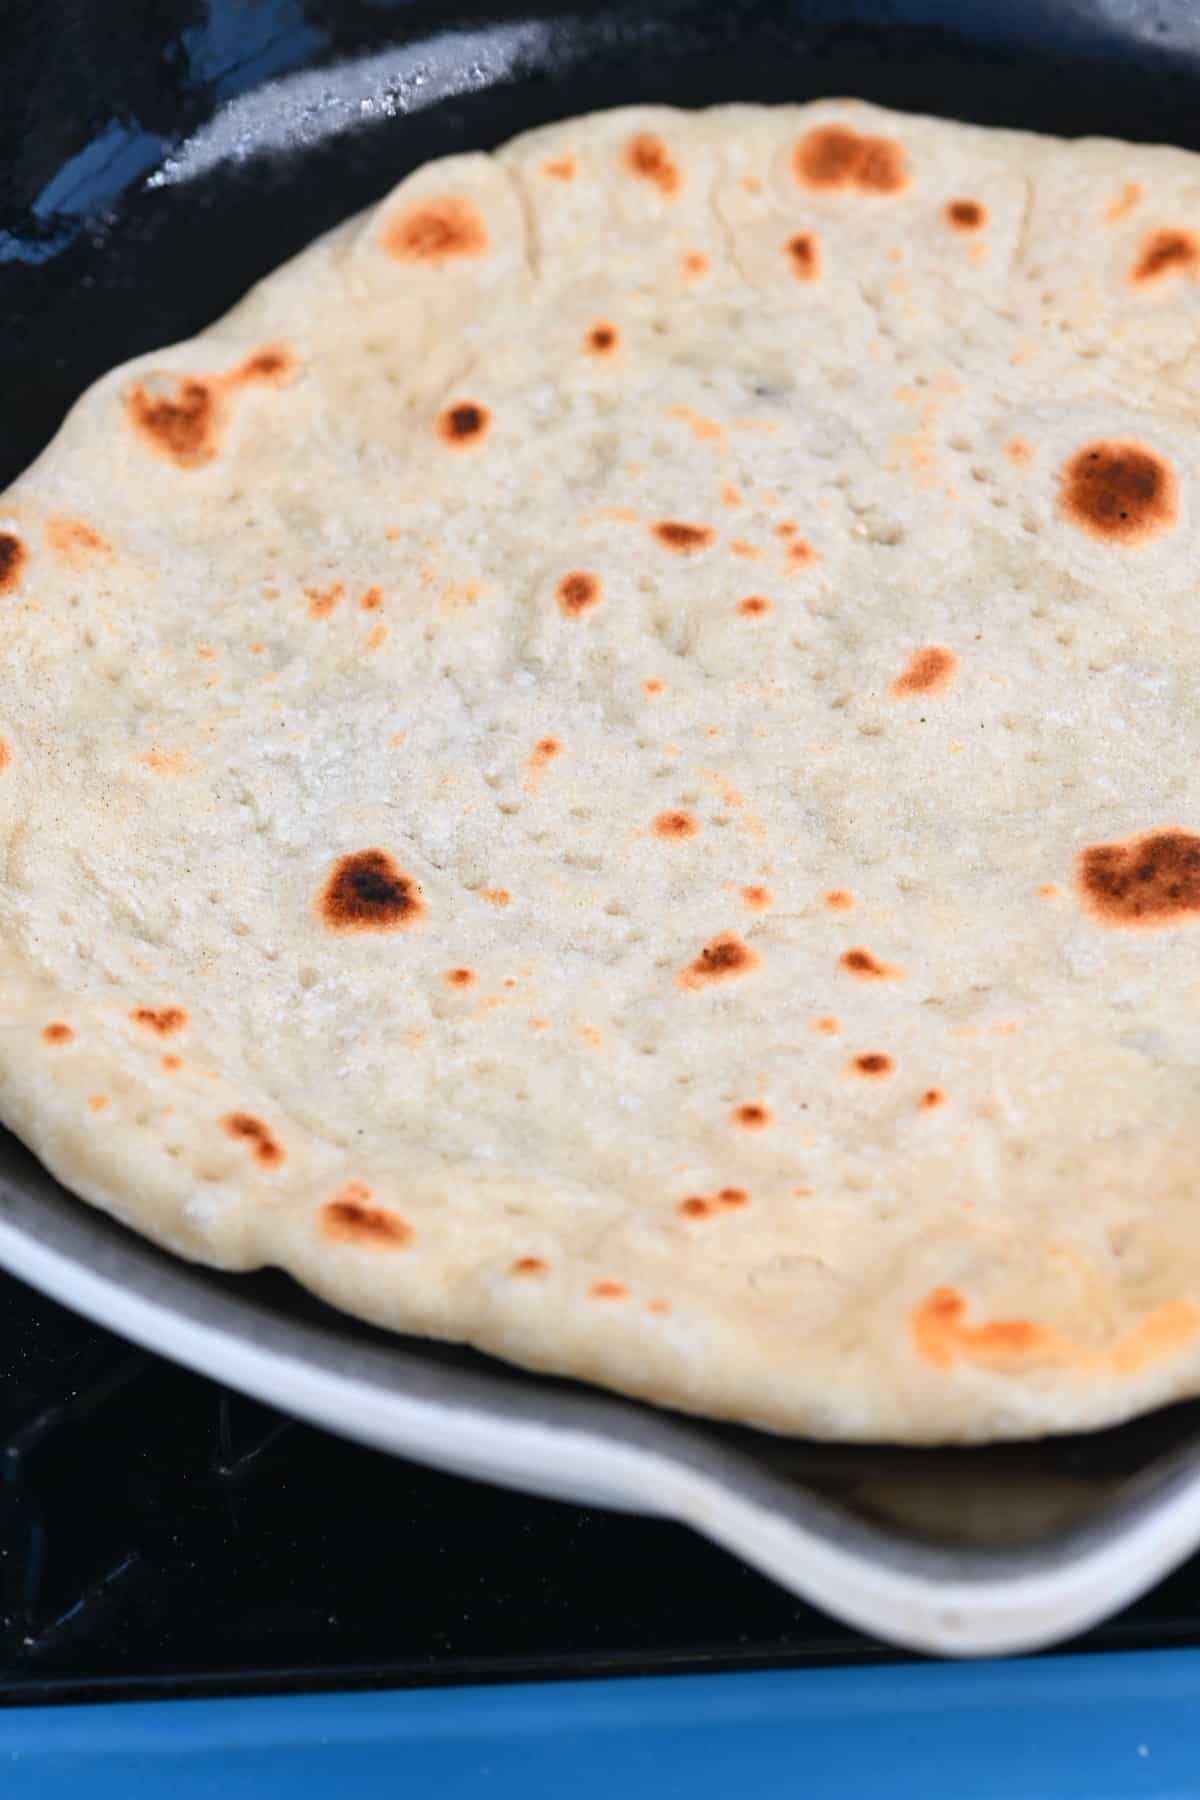
Step 5: Cook the Pita bread
Once the oiled pan is hot, transfer the first Greek pita bread to it and cook it for around 3 minutes per side, until it slightly bubbles up and starts to get brown spotting on the dough.
If needed, adjust the heat and cooking time – just make sure to flip it when it starts to form bubbles on top and is beginning to brown underneath.
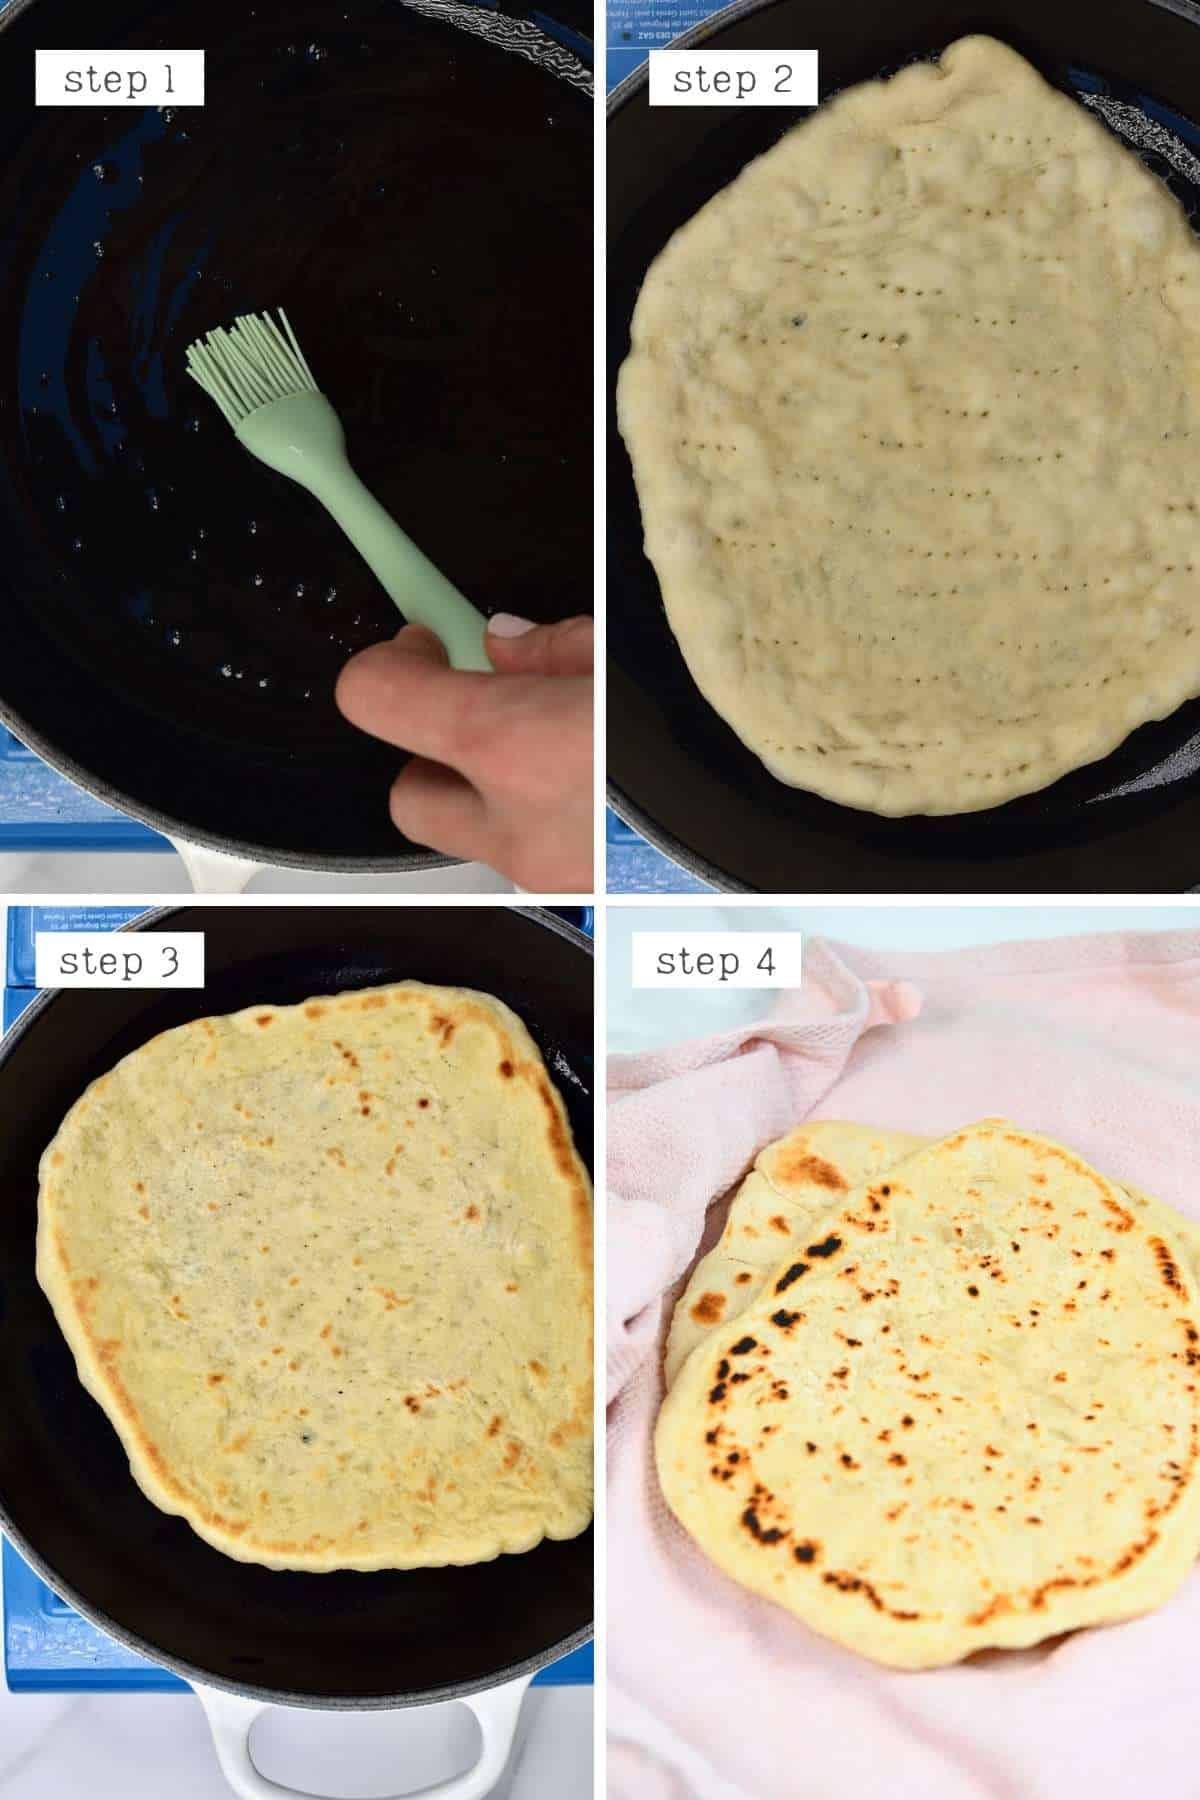
While one pita cooks, you can roll out and prick the next one with a fork until all four pieces are ready.
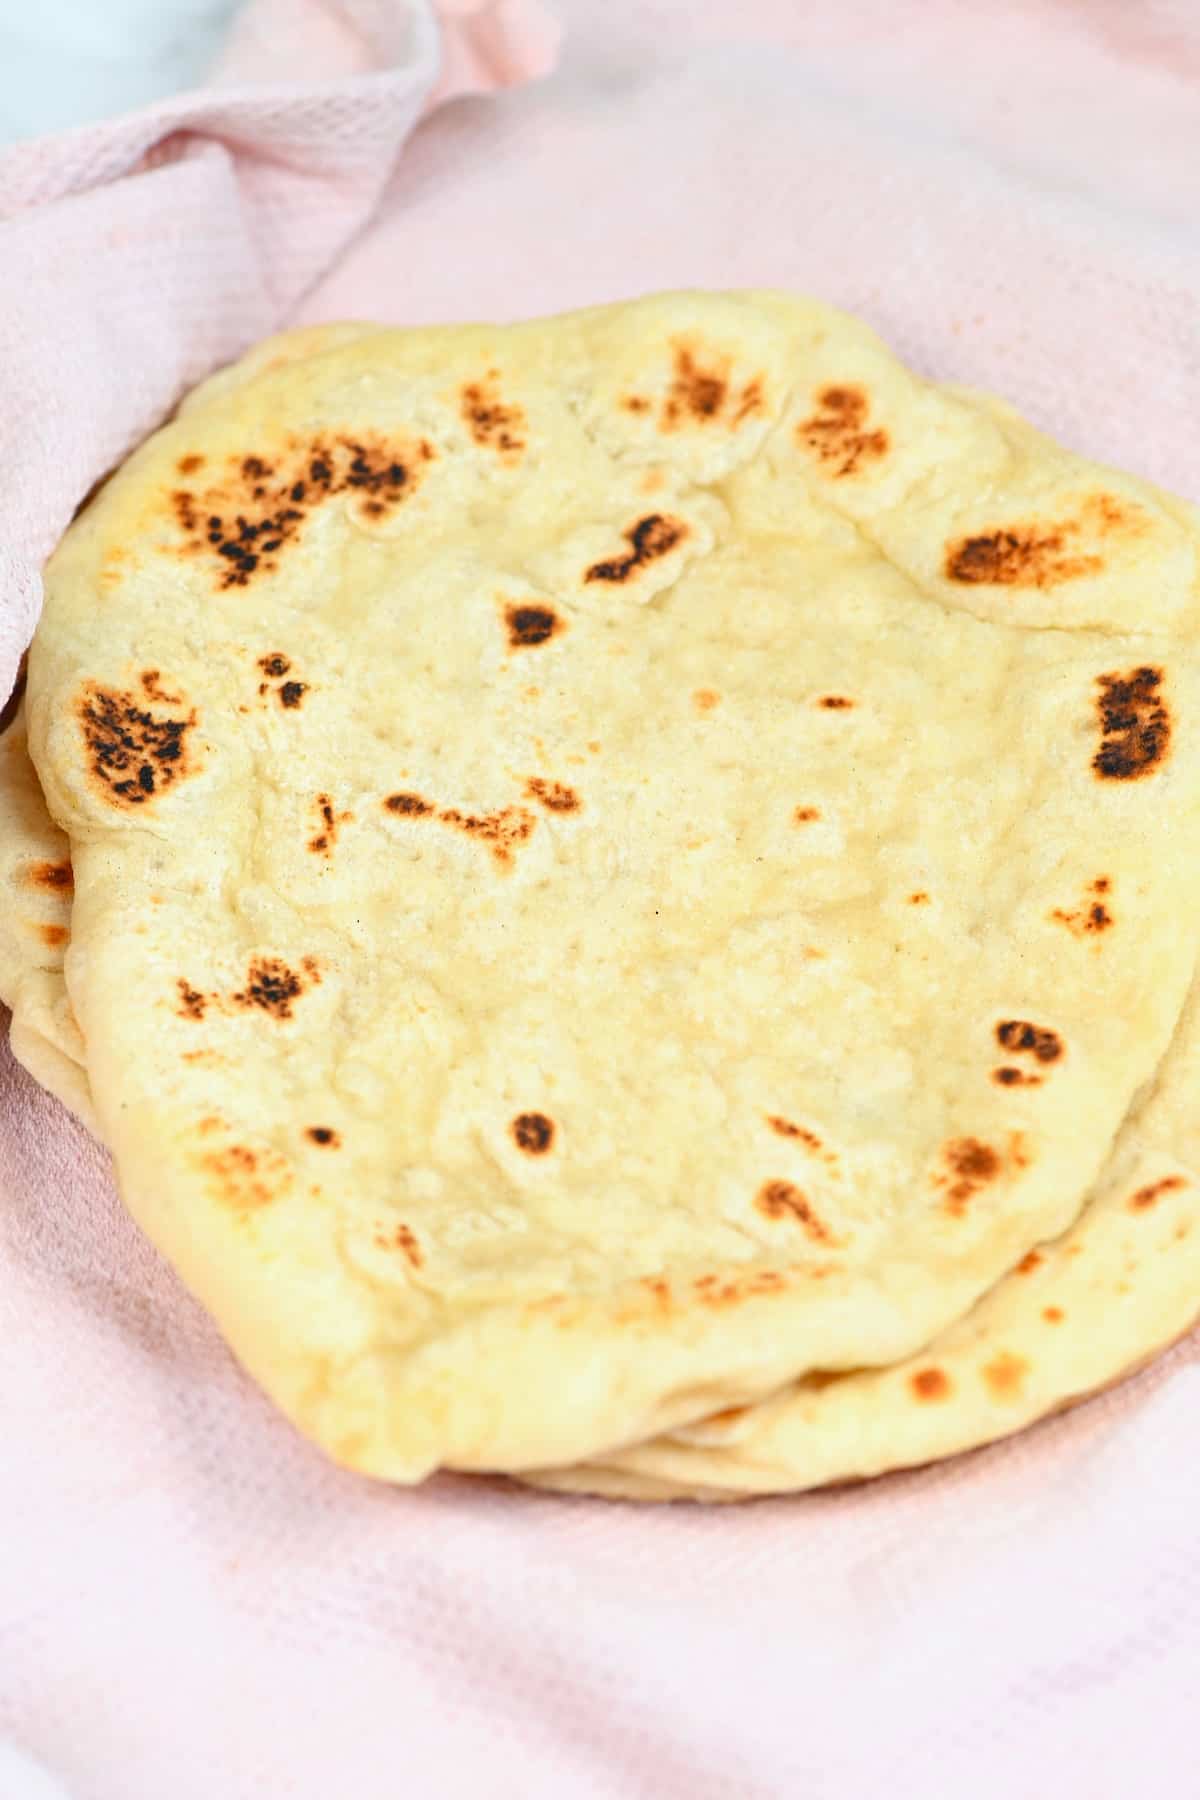
As soon as each pita bread is cooked, transfer it to a clean kitchen towel, wrapped well, to keep it warm and supple.
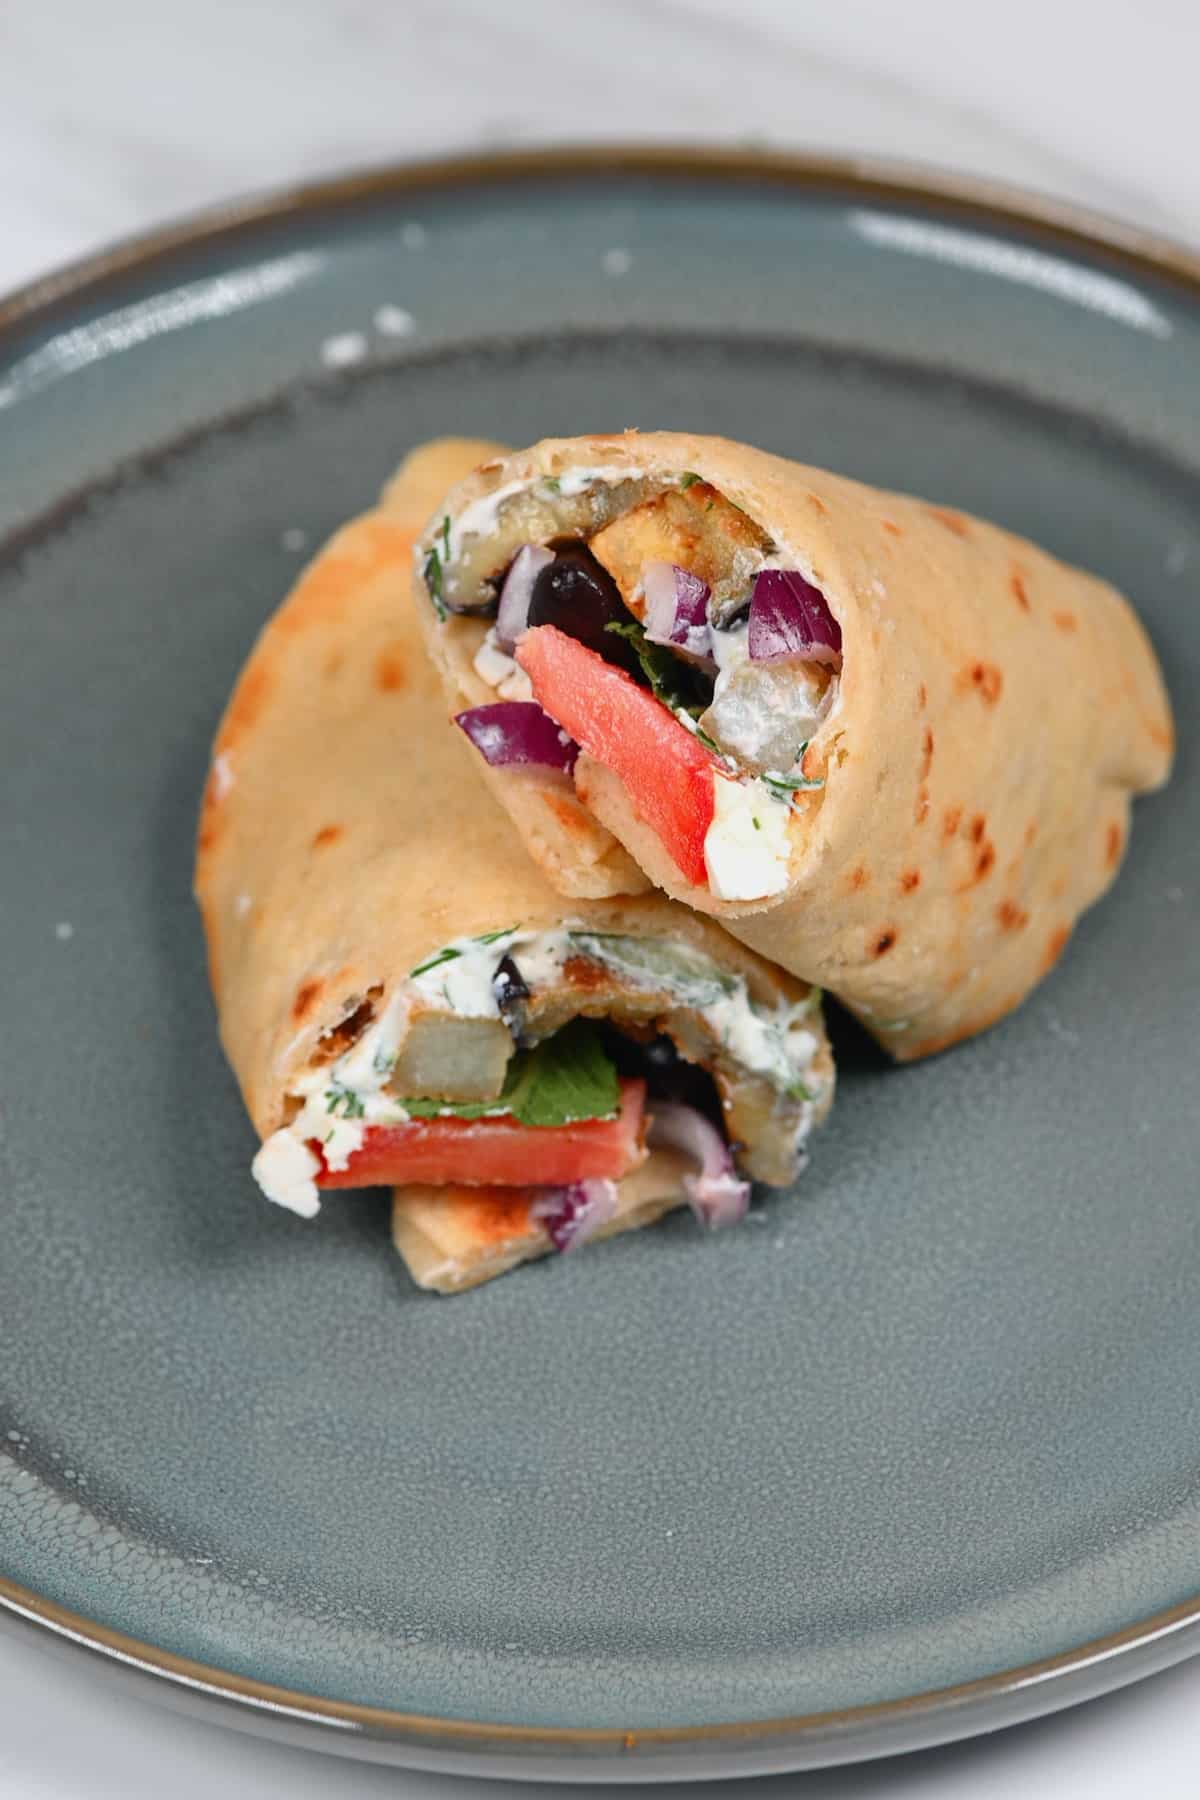
To make a Greek Gyro wrap (eggplant gyro)
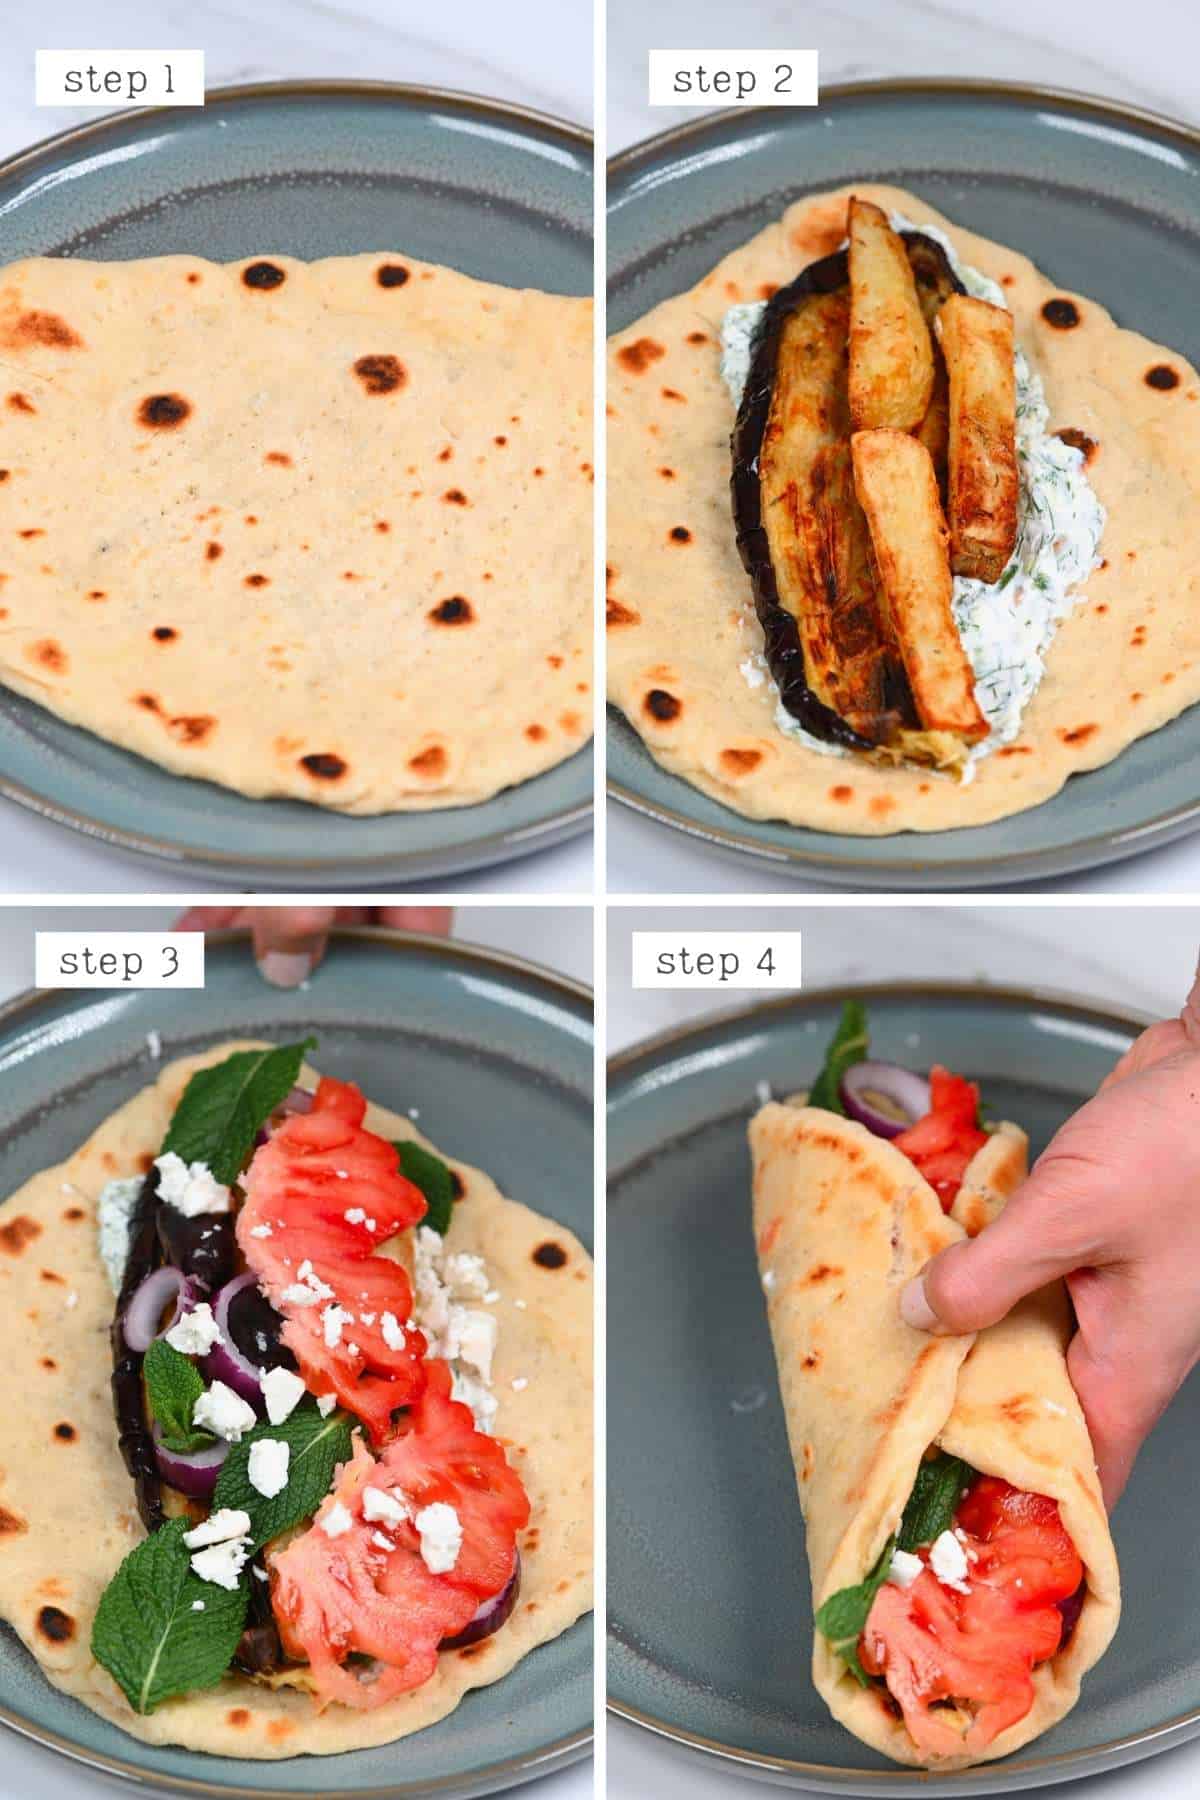
First, spread some tzatziki in the center of the gyro bread, and then add your filling of choice. I used a slice of roasted eggplant with a few potato wedges, black olives, red onion (or pickled red onion), tomato, and a little feta and mint leaves.
Then, fold it into a wrap and enjoy!
How to Store
Store: Greek pita bread is best enjoyed on the same day it’s prepared. However, Store any unused Greek pita bread in an airtight container in the refrigerator for 2 days.
Freeze: alternatively, you can freeze the Greek pita for up to 3 months, wrapped tightly. Reheat it in the oven from frozen to use.
Reheat: sprinkle the gyro bread with a bit of water (or cover with a damp paper towel) and reheat it in the microwave in 15-second spurts until warmed through. Alternatively, if you want to reheat a lot in one go, sprinkle them with a bit of water, stack them up, wrap them in foil, and then reheat in the oven on low heat for 10-15 minutes.
How to use Greek pita bread?
Besides making gyros and other Greek pita sandwich wraps, this gyro bread is also wonderful for serving alongside kebab or appetizers like Greek salad, tzatziki, and dips like creamy hummus and baba ganoush.
- You could also use it in place of naan to mop up chickpea curry, musakhan chicken, or eggplant stew.
- Use instead of toast at breakfast with eggs or mopping up this shakshuka.
- Served it alongside Greek Stuffed Vegetables with Rice (Gemista/Yemista) or Vegetarian Greek Stuffed Tomatoes and Authentic Greek Tzatziki.
- As an “untraditional” use, you can also use the Greek pita as a ‘quick pizza’ base. Top with a little tomato puree or marinara and a sprinkle of mozzarella cheese, then broil it until melted.
FAQs
You could also use wholewheat, though I’d suggest a 50/50 combination of all-purpose and whole wheat, so the gyro bread isn’t too dense/chewy.
This isn’t something I’ve experimented with yet as it will require a blend of flour and potentially starch or xanthan gum to be as flexible and soft.
You may be able to bake Greek pita in the oven in a similar way to how Middle Eastern pita is made. Preheat your oven to 500ºF/260ºC and then place an inverted oven tray or a pizza stone into the oven to heat up.
Once the dough is rolled, carefully transfer it to the preheated tray and bake for between 3-4 minutes. During this time, it should puff up slightly and become slightly brown.
Other Recipe Notes
- Thinner Greek Pita: Feel free to roll out the dough thinner for a slightly thinner pita which is even easier to wrap.
- The flour amount: Similarly to lots of bread recipes, the flour amount isn’t set in stone. The temperature, humidity, specific flour, etc., can all impact how much flour the dough needs.
- To make ahead: I haven’t done much experimenting with this gyro bread recipe (yet). However, since I use the stretch and fold method, I’d be tempted to suggest placing the dough in the refrigerator before the first rest. You can then continue with the stretch and fold method the following day. Once again, I haven’t yet tried this, so I can’t guarantee results.
- You can season the dough, though it’s not necessary. I suggest adding a little Greek seasoning for extra flavor.
- Using a hand mixer: You can do the first part of the recipe (mixing and kneading the dough) in a stand mixer. Use a dough hook and mix on low to begin until a rough dough has formed, increasing the speed to medium-low to mix and knead until smooth.
- The yeast: you can use fresh, dry, or instant yeast (I used fresh). If you use active dry yeast, there’s no need to activate the yeast. Just make sure that if you’re using anything other than fresh yeast, to convert it to the correct amount.
Other Bread Recipes
- Homemade New York-Style Bagels (NY Bagel Recipe)
- How To Make Soft Pretzels
- How To Make Simit (Turkish Bagel)
- Easy No-Knead Turkish Bread (Ramadan Pide Bread)
- Easy Cheese Flatbread (Cheese Manakish)
- Zaatar Bread (Manakish Za’atar)
- The Best Authentic Homemade Pita Bread
- Homemade Garlic Naan Bread (Indian Flatbread)
- Authentic Corn Tortilla Recipe (Gluten-Free Tortillas)
If you try this recipe, then let me know your thoughts and questions in the comments. I’d also really appreciate a recipe rating and would love to see your recreations – just tag @AlphaFoodie.
How to Make Greek Pita (Gyro Bread)
Ingredients
- 1⅓ cups strong white bread flour
- 1/2 tsp salt
- 5 floz lukewarm water
- 0.18 oz fresh yeast 0.11 oz/3 g dry
- 1 Tbsp olive oil
Instructions
Step 1: Activate the yeast
- Mix lukewarm water (99-104ºF/37-40ºC) and yeast in a small container, then set it aside for several minutes to activate.
Step 2: Mix the dough
- In a large bowl, combine the flour and salt. When the yeast is ready, add it to the bowl along with the oil and mix well with a spoon until it forms a rough dough.
- Turn the dough out onto a clean kitchen counter and knead it lightly for a few minutes until you have a soft, elastic dough.
Step 3: Stretch and fold the dough
- Place the dough back in the bowl and cover with a kitchen towel to rest for 15 minutes.
- After 15 minutes, we need to stretch and fold the dough within the bowl. To do this, imagine that the dough is like a clock face. Pull up the dough at 12 o'clock and then fold it over onto the top of the dough. Repeat this at 3 o'clock, 6 o'clock, and 9 o'clock.
- Allow it to rest again for 15 minutes, then repeat the stretch and fold technique, rest again, and repeat the stretch and fold two more times. You need to have stretched and folded the dough a total of 4 times with 15 min breaks in between. Then allow it to rest for one last 15 minutes.By doing this step, you're strengthening the dough. The stretch and fold motion helps develop the dough gluten network for stronger dough strength. By the end, the dough should have stiffened somewhat and will have risen during the resting time. If the dough is very sticky, dip your hands in water before stretching and folding.
Step 4: Shape the Greek pita
- Weigh the prepared dough and divide it into four pieces. Mine were 90g each.You can also do this by-eye if you're not bothered about completely even Greek pita bread.
- Transfer the dough to a floured surface and work on just one while the others rest under a clean kitchen towel.
- Roll out the first dough section until it's around 7 inches (18cm) in a circular or oblong shape. Then prick the dough all over with a fork – this will stop it from puffing up and forming a pocket the same way Middle Eastern pita does.
- Meanwhile, heat up a large pan with a bit of oil.
Step 5: Cook the Pita bread
- Once the oiled pan is hot, transfer the first Greek pita bread to it and cook it for around 3 minutes per side, until it slightly bubbles up and starts to get brown spotting on the dough.If needed, adjust the heat and cooking time – just make sure to flip it when it starts to form bubbles on top and is beginning to brown underneath.
- While one pita cooks, you can roll out and prick the next one with a fork until all four pieces are ready.
- As soon as each pita bread is cooked, transfer it to a clean kitchen towel, wrapped well, to keep it warm and supple.
To make a Greek Gyro wrap (eggplant gyro)
- First, spread some tzatziki in the center of the gyro bread, and then add your filling of choice. I used a slice of roasted eggplant with a few potato wedges, black olives, red onion, tomato, and a little feta and mint leaves.Then, fold it into a wrap and enjoy!
Notes
- Thinner Greek Pita: Feel free to roll out the dough thinner for a slightly thinner pita which is even easier to wrap.
- The flour amount: Similarly to lots of bread recipes, the flour amount isn’t set in stone. The temperature, humidity, specific flour, etc., can all impact how much flour the dough needs.
- To make ahead: I haven’t done much experimenting with this recipe (yet). However, since I use the stretch and fold method, I’d be tempted to suggest placing the dough in the refrigerator before the first rest. You can then continue with the stretch and fold method the following day. Once again, I haven’t yet tried this, so I can’t guarantee results.
- You can season the dough, though it’s not necessary. I suggest adding a little Greek seasoning for extra flavor.
- Using a hand mixer: You can do the first part of the recipe (mixing and kneading the dough) in a stand mixer. Use a dough hook and mix on low to begin until a rough dough has formed, increasing the speed to medium-low to mix and knead until smooth.
- The yeast: you can use fresh, dry, or instant yeast (I used fresh). If you use active dry yeast, there’s no need to activate the yeast. Just make sure that if you’re using anything other than fresh yeast, to convert it to the correct amount.
Nutrition
Nutrition information is automatically calculated, so should only be used as an approximation.


Well, I have discovered the recipe doesn’t work with Italian bread flour. I’ll give it another shot with regular flour next time!
Hi Mikael,
Thanks for sharing your experience! Indeed, Italian bread flour can behave differently. It’s often higher protein and a bit more elastic, which can affect the softness. Regular all-purpose flour tends to work better for that classic soft, fluffy pita texture. Hope the next round turns out just right!
Made this today – excellent recipe. Thank you
Hey! I’m so glad you enjoyed the recipe! Thanks for trying it out and for your kind words!
Hello 🙂 am I able to prep this dough earlier in the day and cook later? Or is it best to cook right away? And do they stay okay if I make them earlier and eat later? Thanks! I’m excited to try
Hey Islah!
Yes, you can absolutely prep the dough ahead of time and cook it later! After the dough has risen, you can store it in the fridge for up to 24 hours before rolling and cooking. Just let it come to room temperature for about 30 minutes before shaping and cooking to ensure the best texture.
If you make the pitas earlier in the day, they will stay soft if stored in an airtight container or wrapped in a clean kitchen towel. If they become a little dry, you can reheat them quickly in a hot pan or wrap them in foil and warm them in the oven.
Hope that helps,
I come back to this recipe again and again! It always turns out and they are so fluffy and soft. No matter how low my groceries are running I always have the ingredients on hand. I made them for the baby I nanny and he kept coming back for more. Thanks very much!
Thank you for your comment, Anna! So happy to hear this! 🙂
In the recipe down the bottom on step 2 you have put water instead of salt
Hi Jack,
So sorry about this and thank you so much for pointing it out, I am fixing it right away!
This was my first time making flat bread and it was delicious. I will never buy it again – this was quick, easy and so much better than any I’ve had before. Thank you for this recipe 🙂
Thank you for your comment, Denise. So happy you enjoyed this recipe 🙂
this recipe is super easy and produces excellent results! im not kidding when i say i make a batch every week. i found cooking them on my pancake griddle works very well
Thank you so much for your comment, Cindy! Glad you are enjoying the recipe!
Holy cow!! This was my first time making pita bread, and it turned out absolutely fabulous!! I think salt may be missing in the first ingredient steps, but I just added it to the flour beforehand. And I put it on medium heat, or a touch below. My boyfriend loved it too!! Thank you!!
Glad you guys liked it, Shelby! 🙂