
This post may contain affiliate links. Please read our disclosure policy.
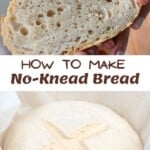


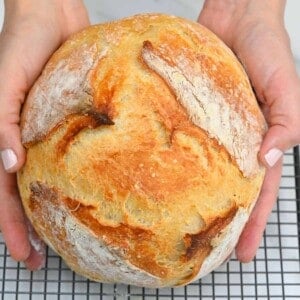
This easy no-knead Dutch oven bread is the ultimate beginner loaf. It requires just 4 ingredients, no kneading, under 10 minutes of hands-on prep(!!), and a Dutch oven! In no time at all, you’ll be impressing family and friends with a perfect Dutch oven crusty bread!
Okay, I may be doing this whole baking thing a little backward. After posting recipes for New York-style bagels, Greek pita, American soft pretzels, and Turkish simit (bagels), here is the ultimate beginner’s easy no-knead bread recipe! This easy Dutch oven bread is a must-try for everyone who’s been wanting to take the bread-baking plunge!
I’ve been experimenting a lot more with no-knead options recently. Just last month, I shared a recipe for no-knead rosemary focaccia. This easy no-knead bread recipe follows a similar method. The dough takes just minutes to come together and is left for a single long rise (so plan ahead!) before shaping and baking. 95% of the recipe is hands-off, and there are no complicated-sounding methods or baking “terms” (like with the “poolish” used for this pizza dough).
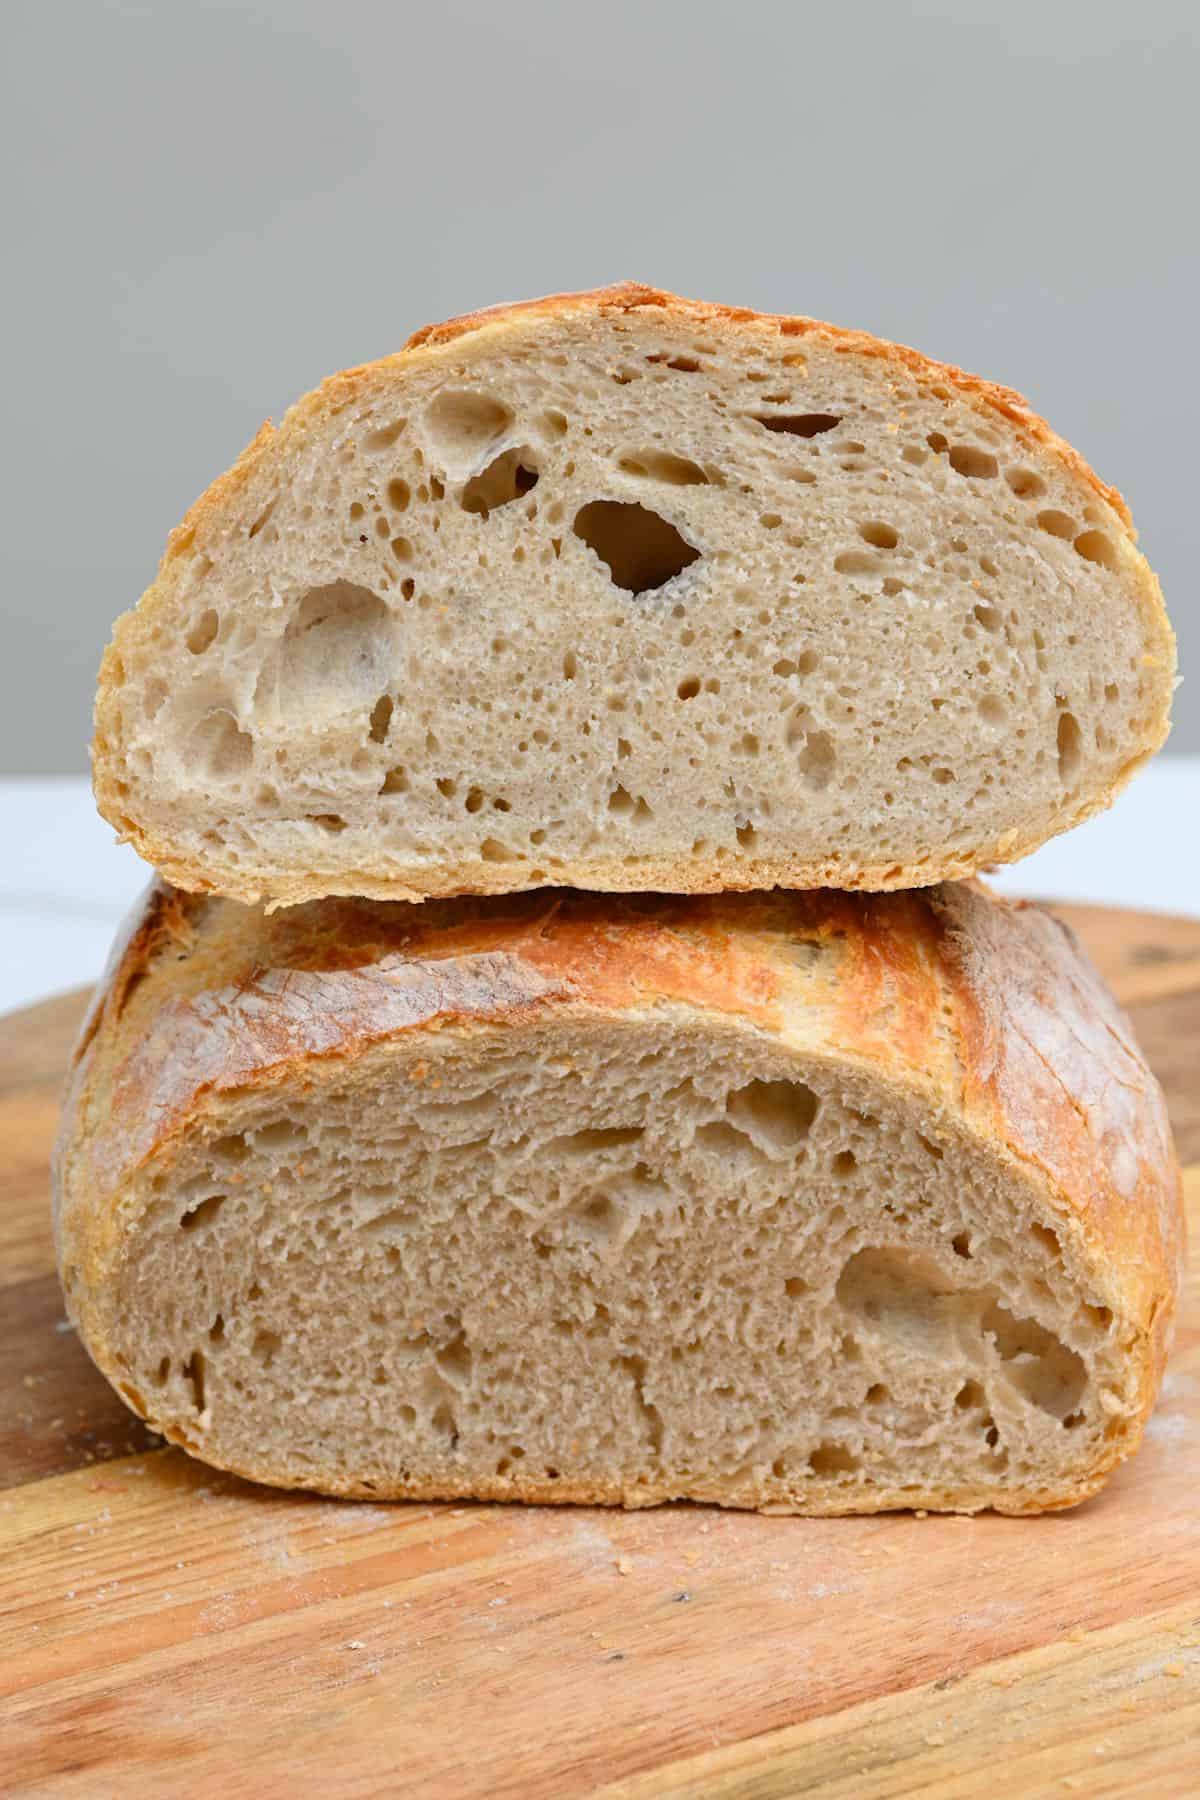
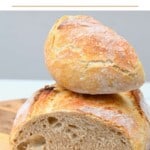
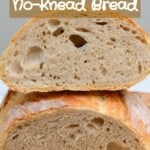
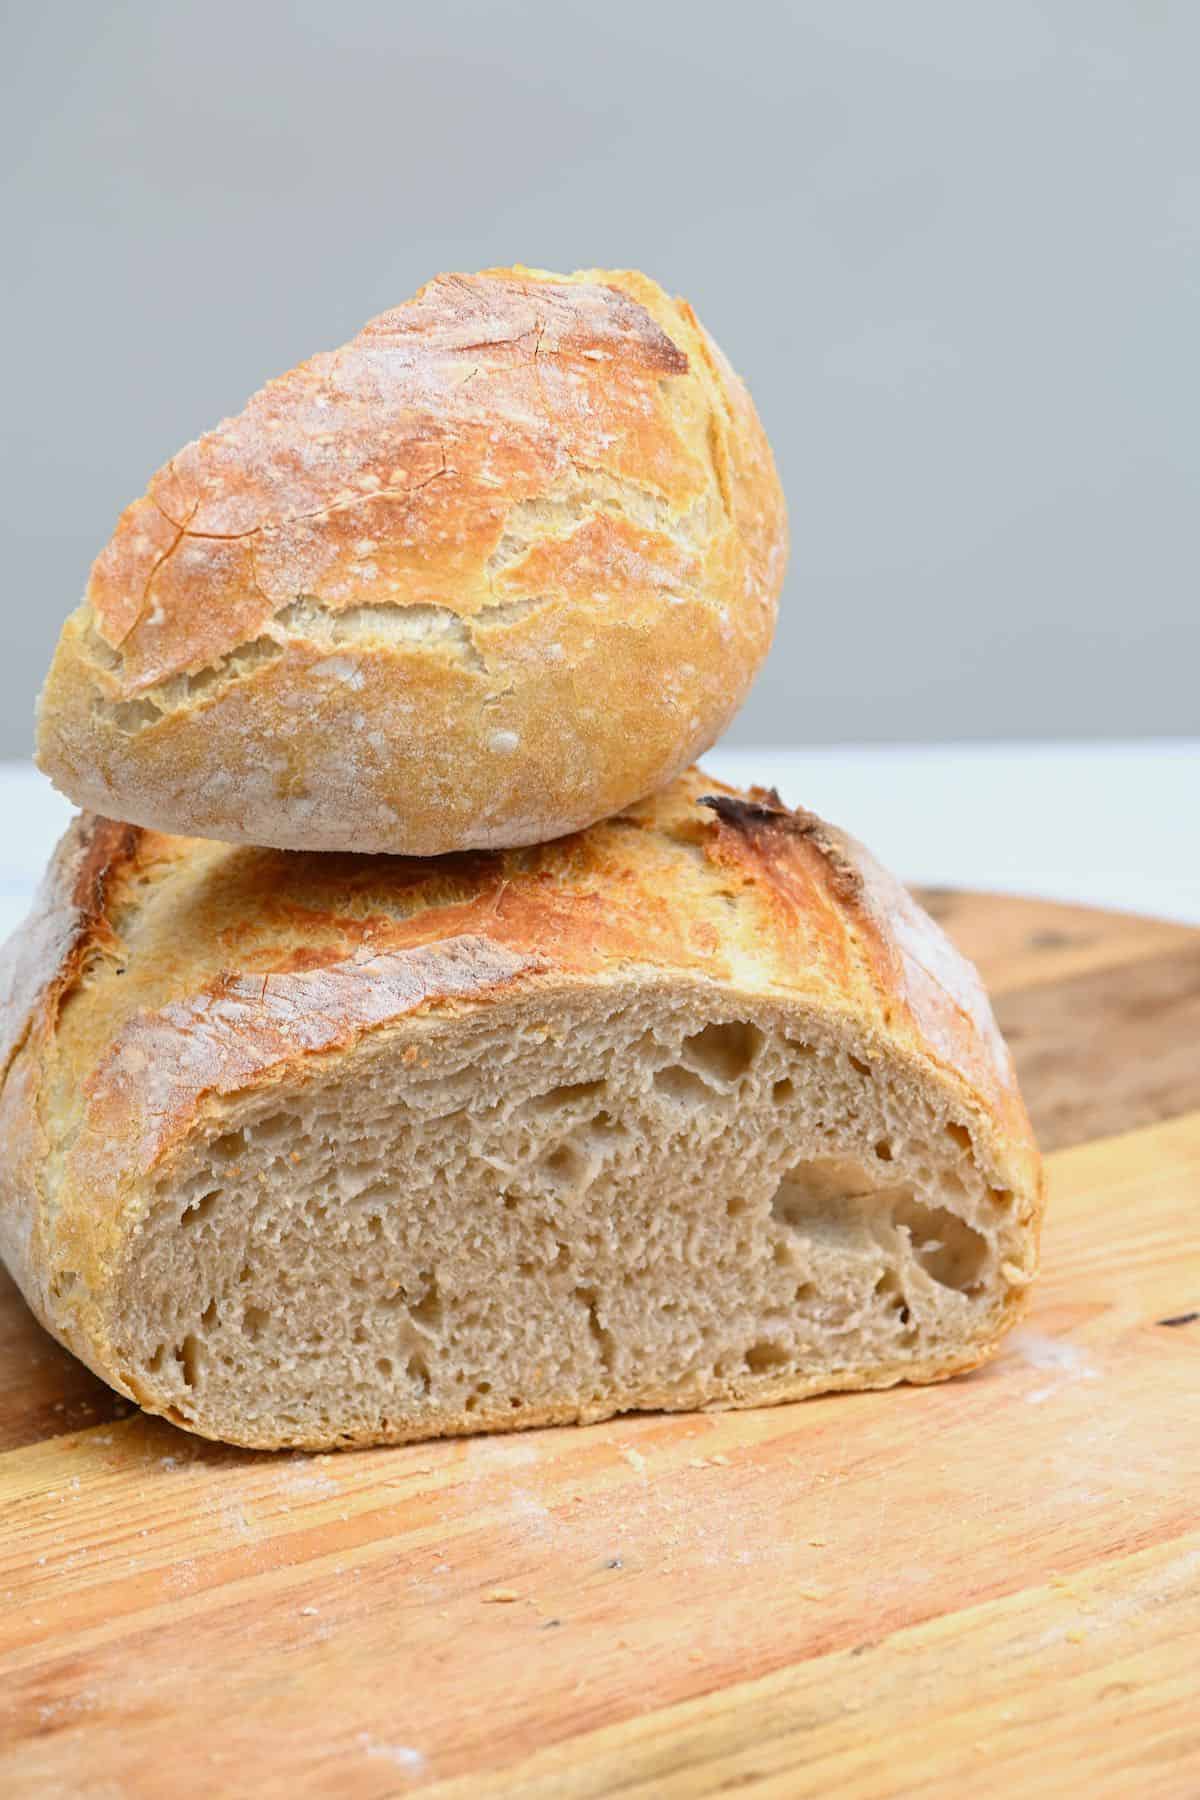
Baking bread in a Dutch oven helps to create the perfect environment for this super crusty easy no-knead bread. Thanks to the steam that builds up inside the pot and evenly distributed heat, the bread develops a fantastic crust while remaining super moist and fluffy on the inside. Even better, the Dutch oven crusty bread can be on your table in a day (after the long rise) or resting in the fridge for up to 3 days before baking!
Everyone will think the loaf has come straight from an artisanal bakery – but don’t take my word for it; try it out for yourself! I can barely contain myself before slicing it up, slathering in a bit of butter or cream cheese or even a spoonful of orange marmalade, and and serving with a big bowl of soup (like this potato leek soup, creamy tomato soup, cream of asparagus soup, etc.), stew (eggplant stew or Lebanese Green Beans), a saucy pasta dish (like vegetable lasagna, or vegan mac n’ cheese) or even turning it into a delicious grilled cheese!
And if you’re in the mood for more super simple bakes, why not try out one of my mug cakes, like this blueberry mug cake or chocolate mug cake!
Want to save this recipe?
The ingredients
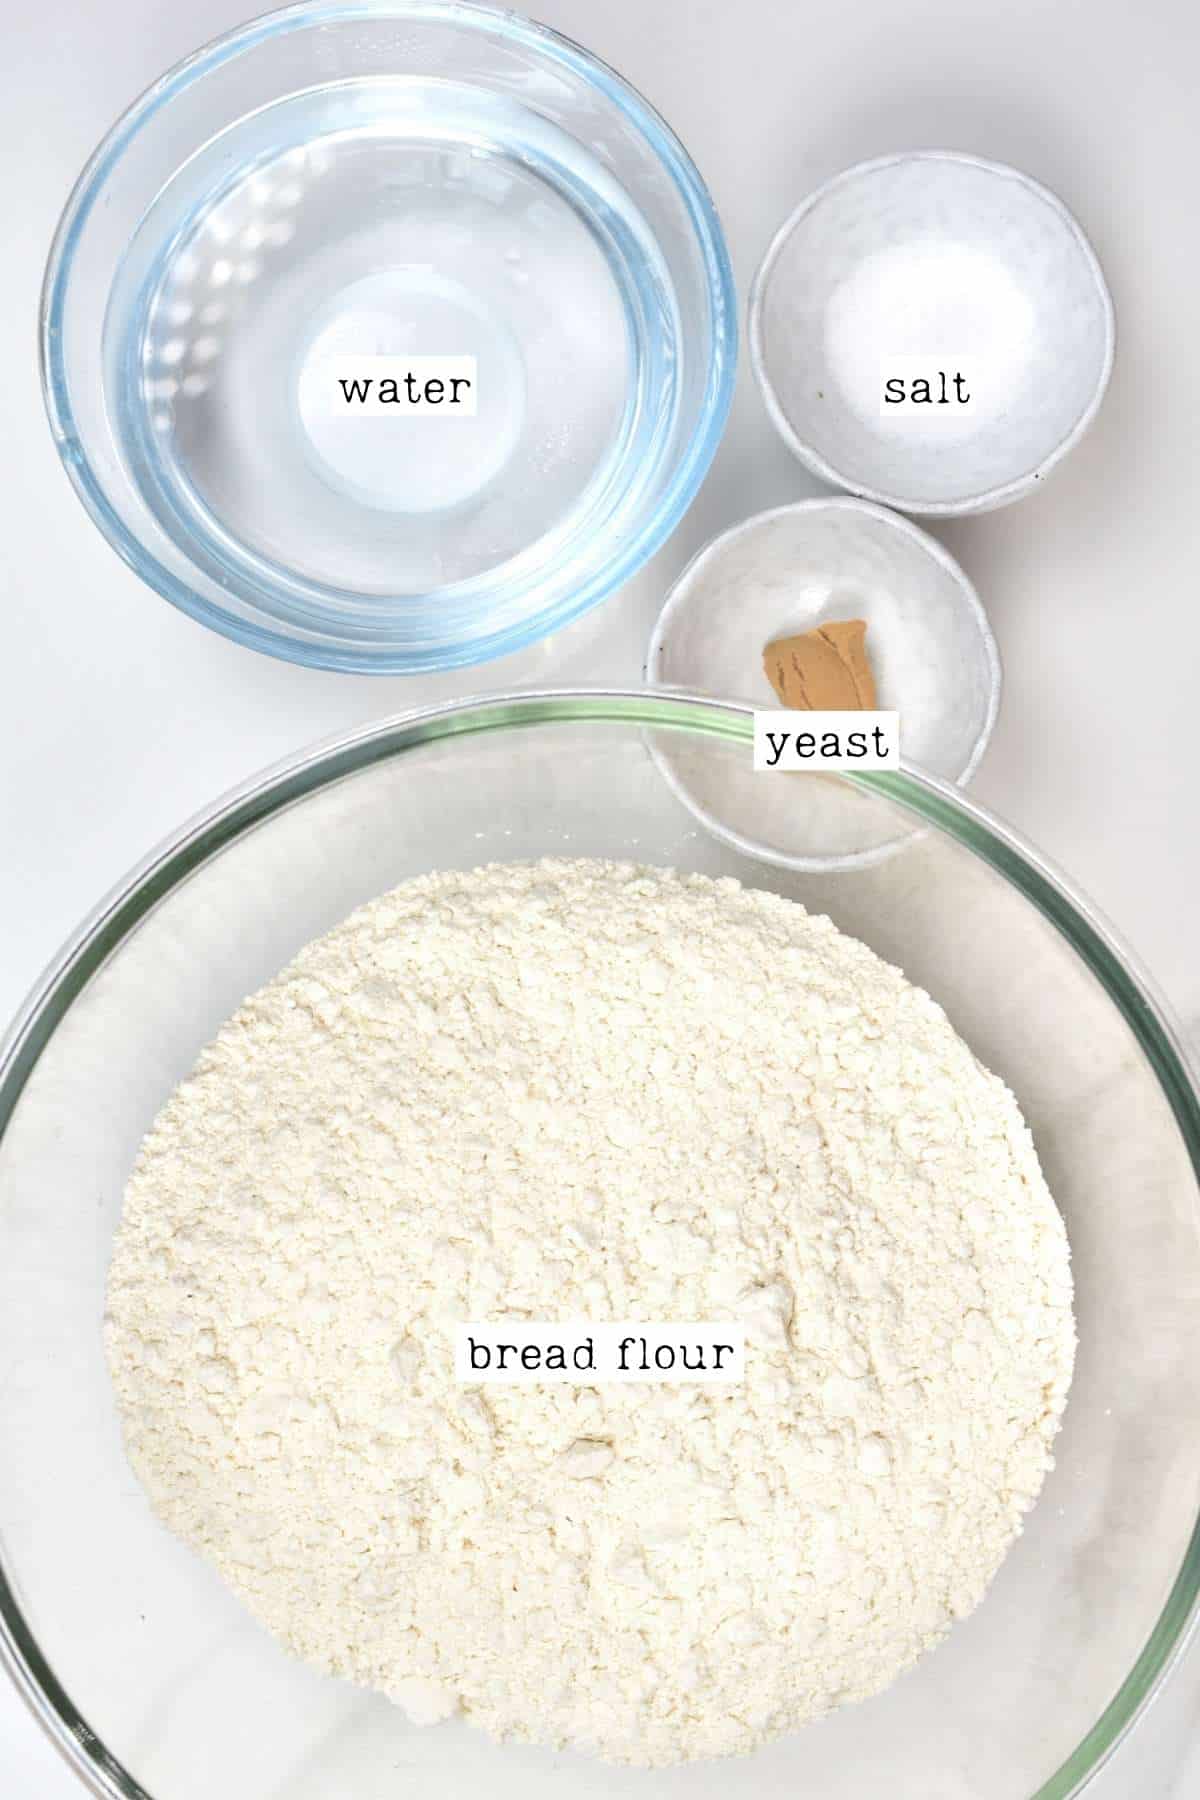
- Bread flour: I used white bread flour, which has a higher protein amount than regular all-purpose and yields a chewier bread. Check the FAQs for other flour options.
- Yeast: there are three types of yeast to choose from: fresh, active dry, and instant. I usually use dry years. Check the recipe card for conversions for each type.
- Water: you’ll need lukewarm water (about 110-115°F/43-46ºC) for the yeast. If the water is too hot, it will kill the yeast, too cold, and it won’t activate.
- Salt: to enhance the flavor of the bread.
Optional add-ins
- Garlic: you can mince fresh garlic directly into the loaf. I like to use 2 cloves, but you can adjust the amount to taste.
- Dried spices/herbs: add extra flavor to the Dutch oven bread with herbs/spices like garlic powder, Italian herbs, rosemary, dill, onion powder, sage, Herbs de Provence, etc.
- Cheese: I particularly like parmesan, but even a strong cheddar will work well. I recommend adding between 1/4-1/2 cup to the dough.
- Nuts/seeds: you can mix chopped nuts (like walnuts, pecans, pistachios) or seeds – like the blend I used for this seeded loaf, directly into the dough for extra crunch and protein. You could even use everything bagel seasoning. I usually add between 1-3 tablespoons depending on how packed I want them in the loaf. I recommend lightly toasting the nuts/seeds to add even more flavor to the crusty Dutch oven bread.
- Jalapeño: finely sliced pieces of jalapeno or another chili help to add little pockets of spice to the crusty loaf. Combine jalapeno and cheese for a delicious loaf!
- Olives: use a combination of green and black olives to add little pockets of salty, tangy flavor.
How to make no-knead Dutch oven bread
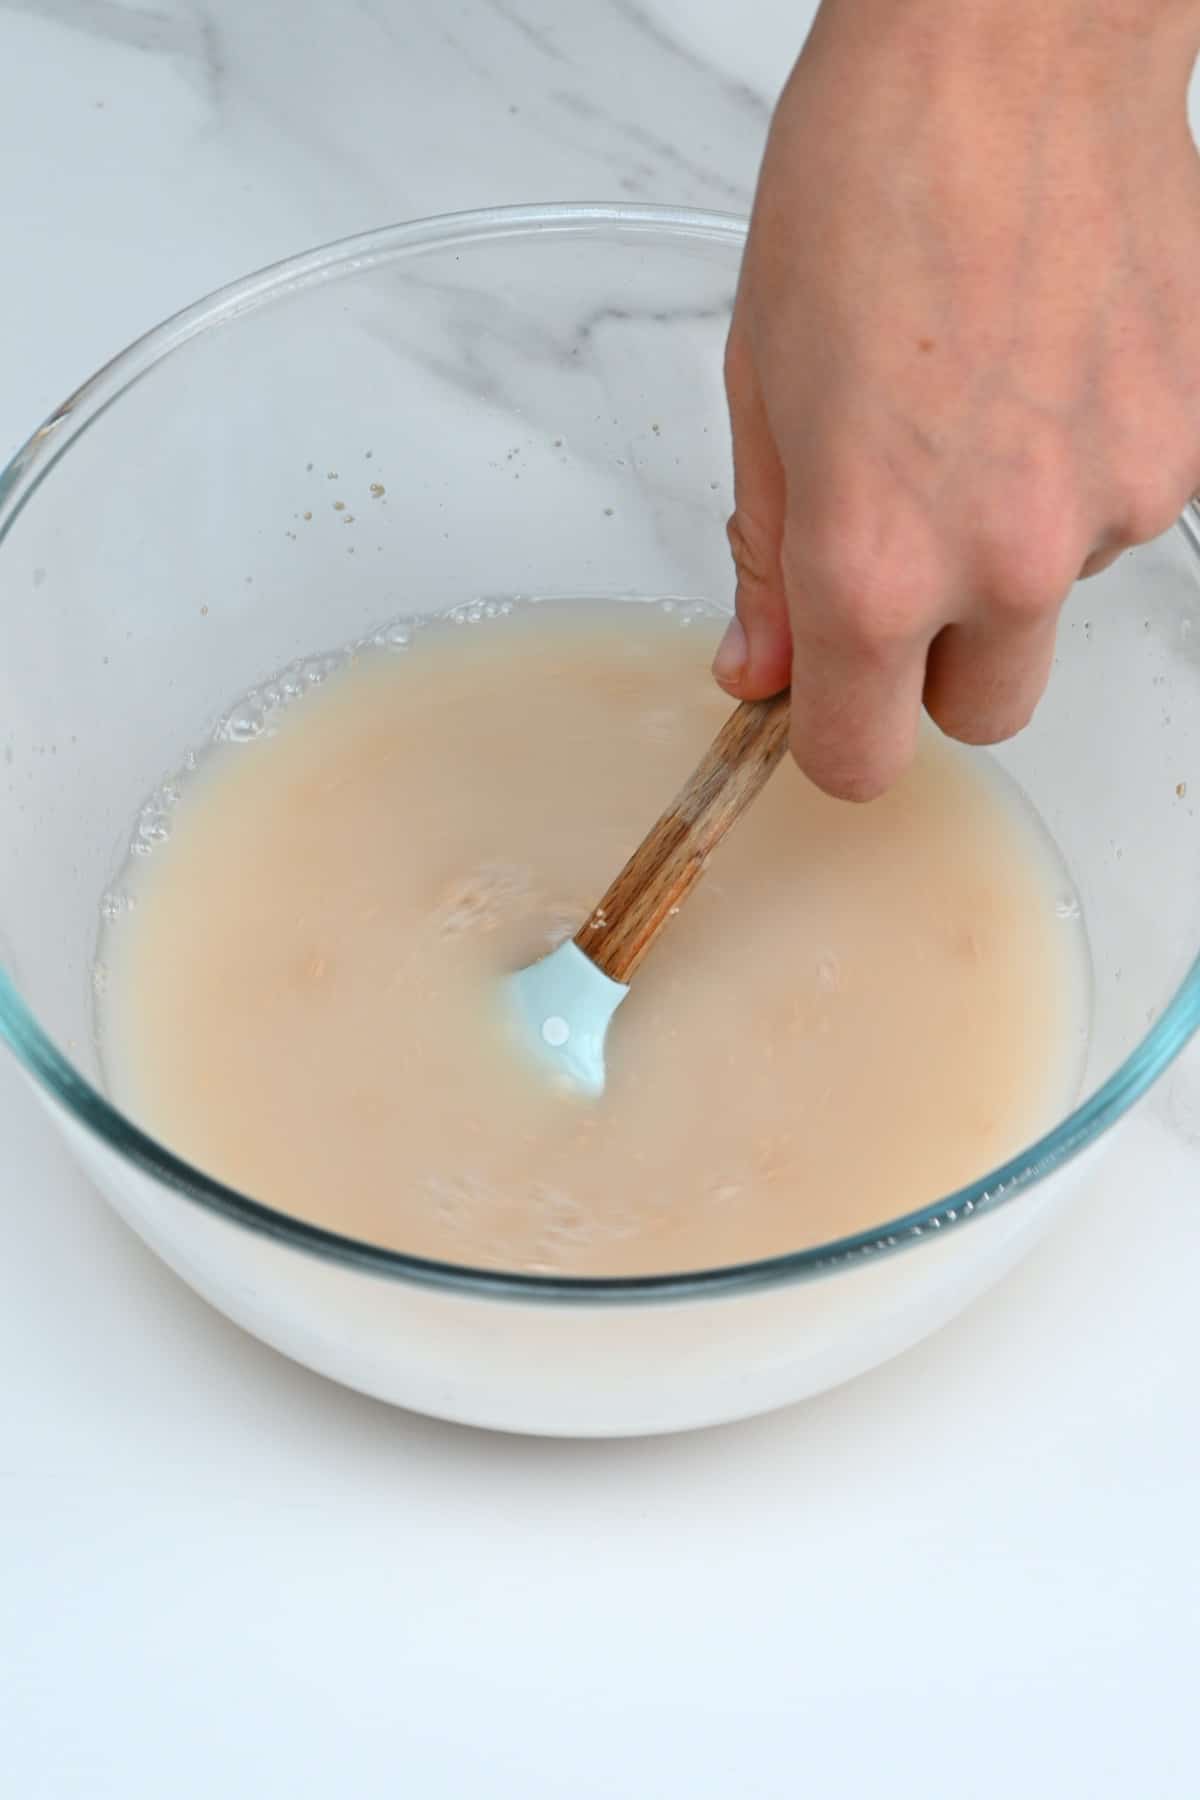
Step 1: Activate the yeast
First, mix the yeast with the lukewarm water and set it aside for several minutes to activate. You won’t need to do this if you’re using instant yeast.
A little bit of sugar or sweetener (honey/maple) can be added to help activate the yeast. But if your yeast is fresh and the water is at the right temperature, I haven’t found this necessary. Just make sure never to add the salt to the yeast mixture, as it can kill the yeast.
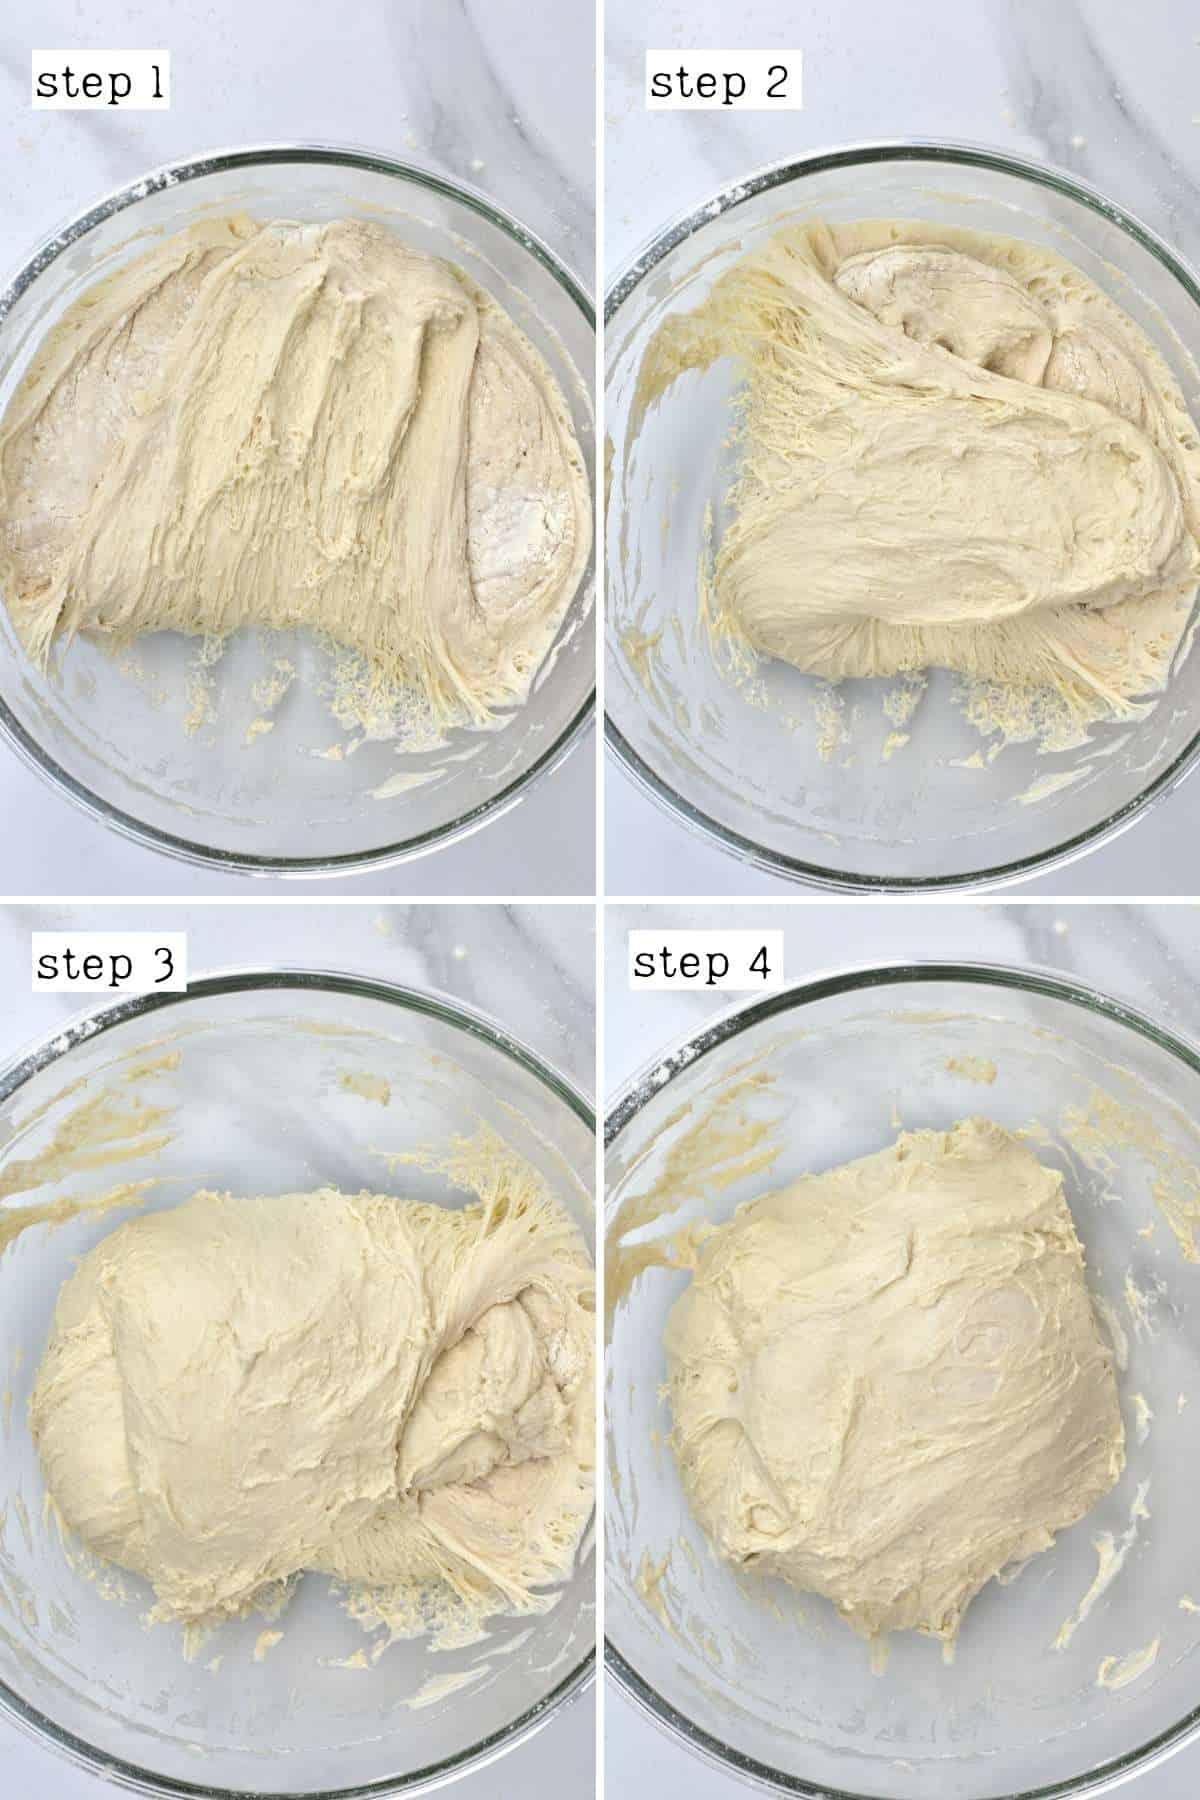
Step 2: Mix the dough
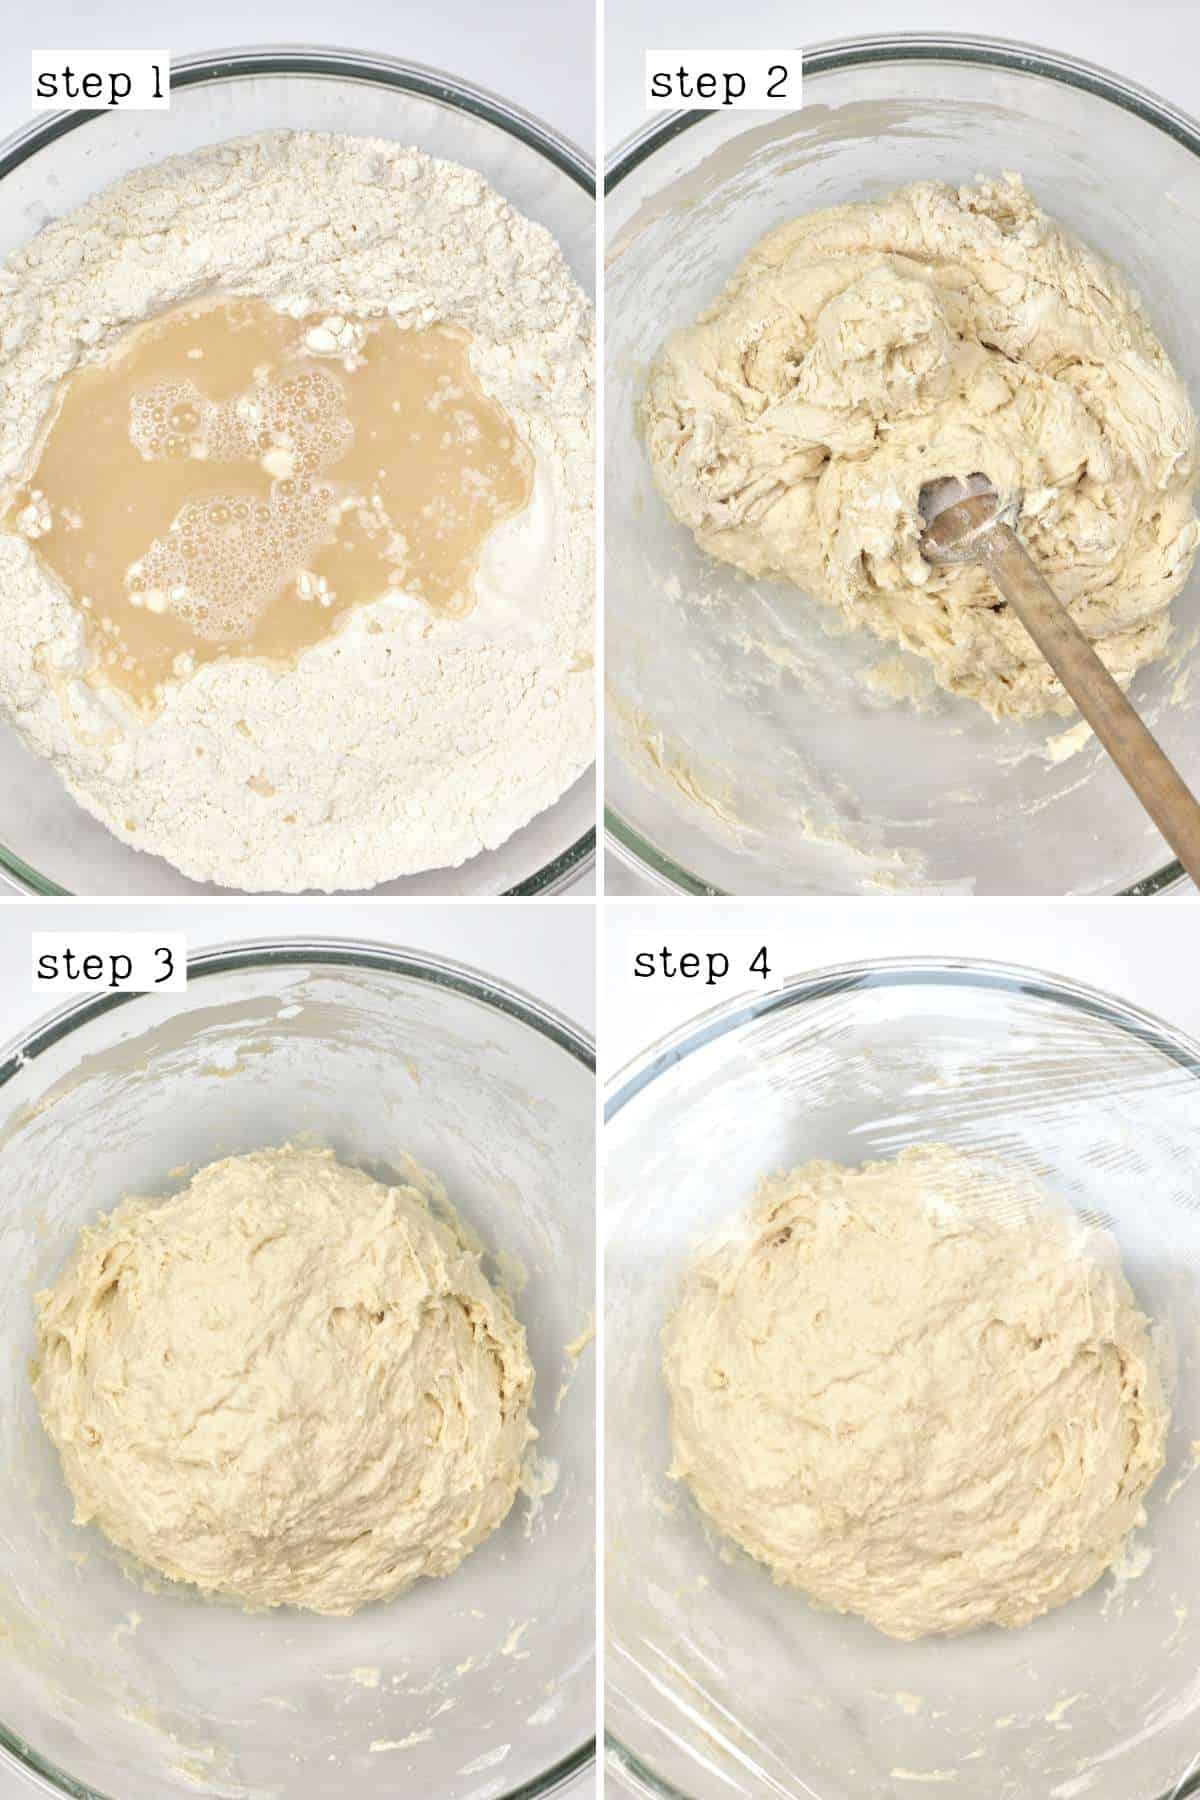
Meanwhile, in a large bowl, sift in the flour and salt. Then, when the yeast is activated, add it to the mixture. Then mix until there is no dry flour left and you have a sticky, shaggy dough.
For this easy, no-knead bread, soft and slightly sticky dough is preferred. A wetter dough usually means bigger air pockets and fluffier bread! So, avoid adding extra flour unless it’s necessary – i.e. if it’s still un-shapable in step 4).
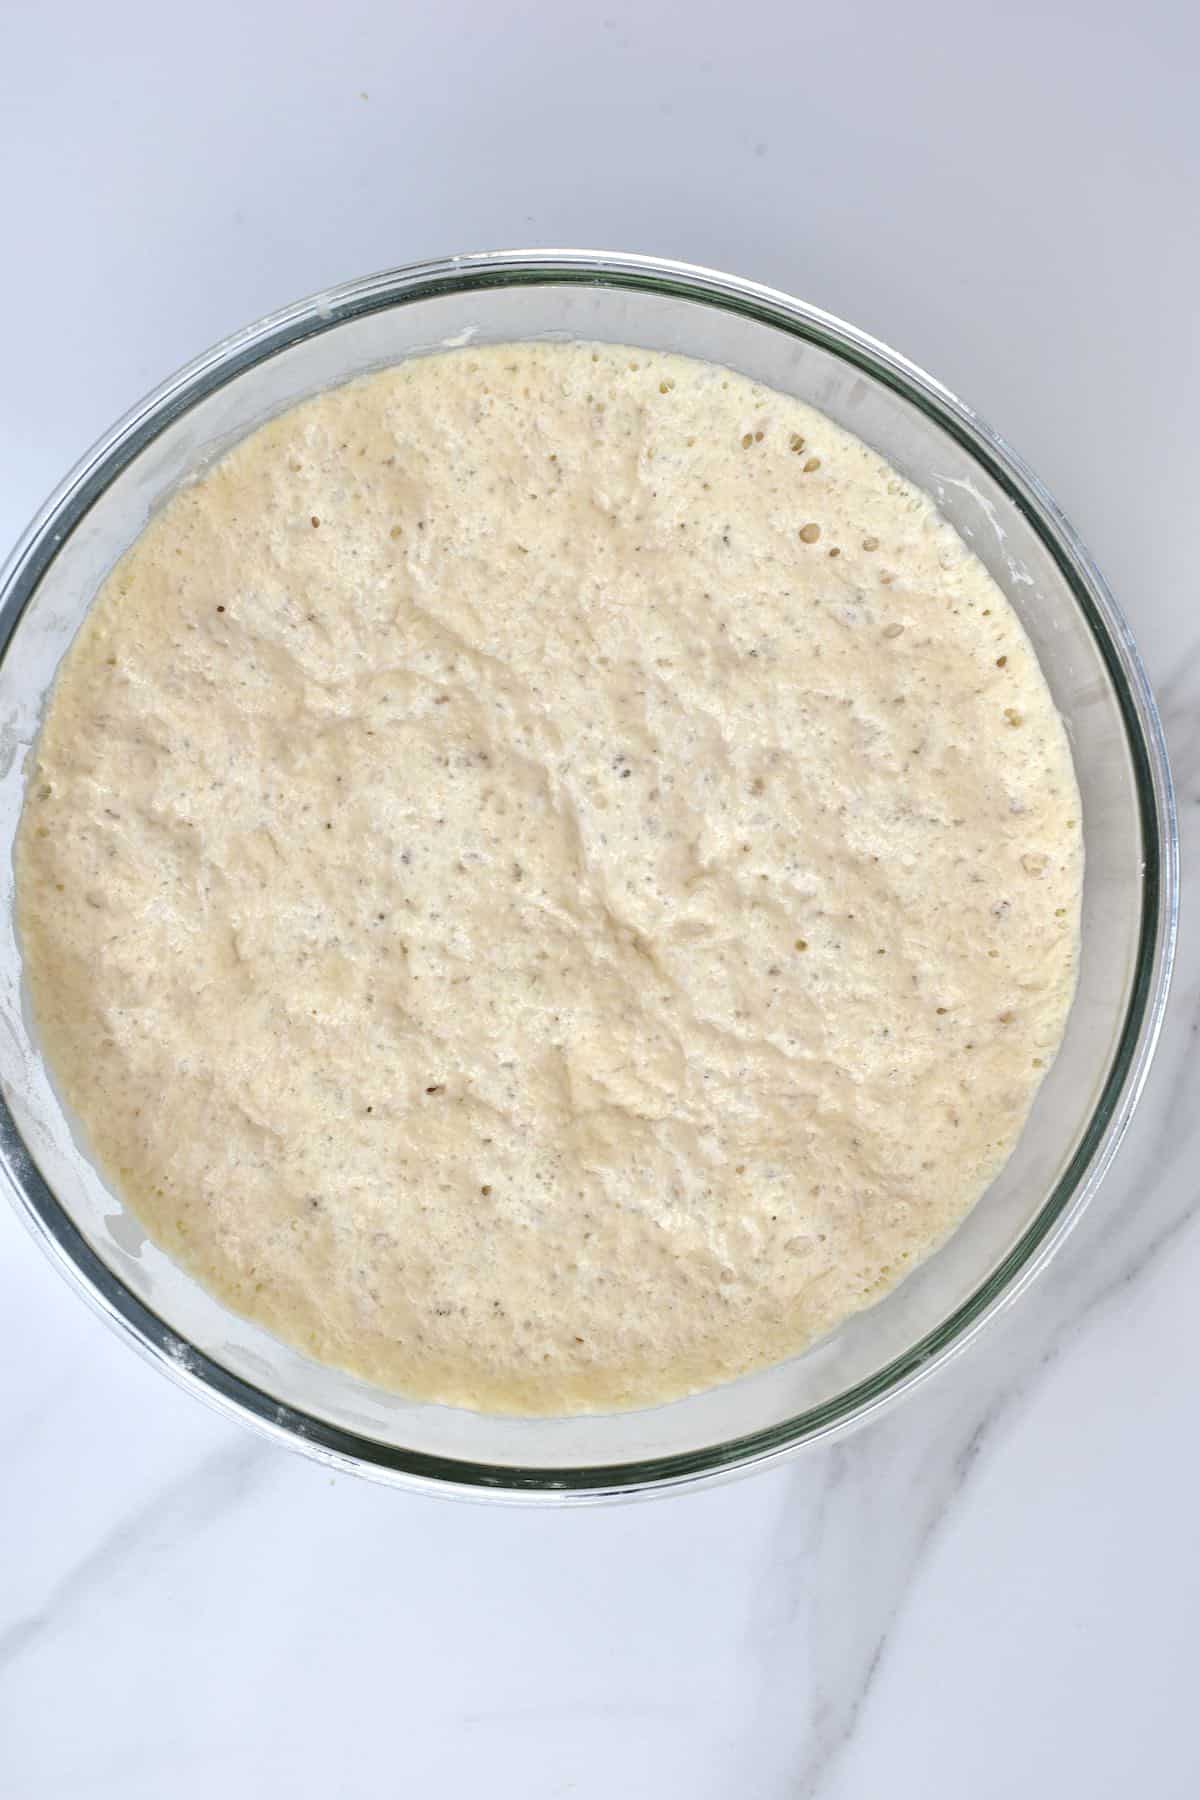
Step 3: Leave to rise
Cover the bowl with plastic wrap and leave it on your countertop for between 12-24 hours to rise.
If you live in a cold area or your house is particularly cold, it’s best to leave it to rise in a switched-off oven. However, you can speed up the process a little by turning on your oven for just 30-60 seconds beforehand.
During this time, the dough can triple in size (but should at least double), so use a large enough bowl.
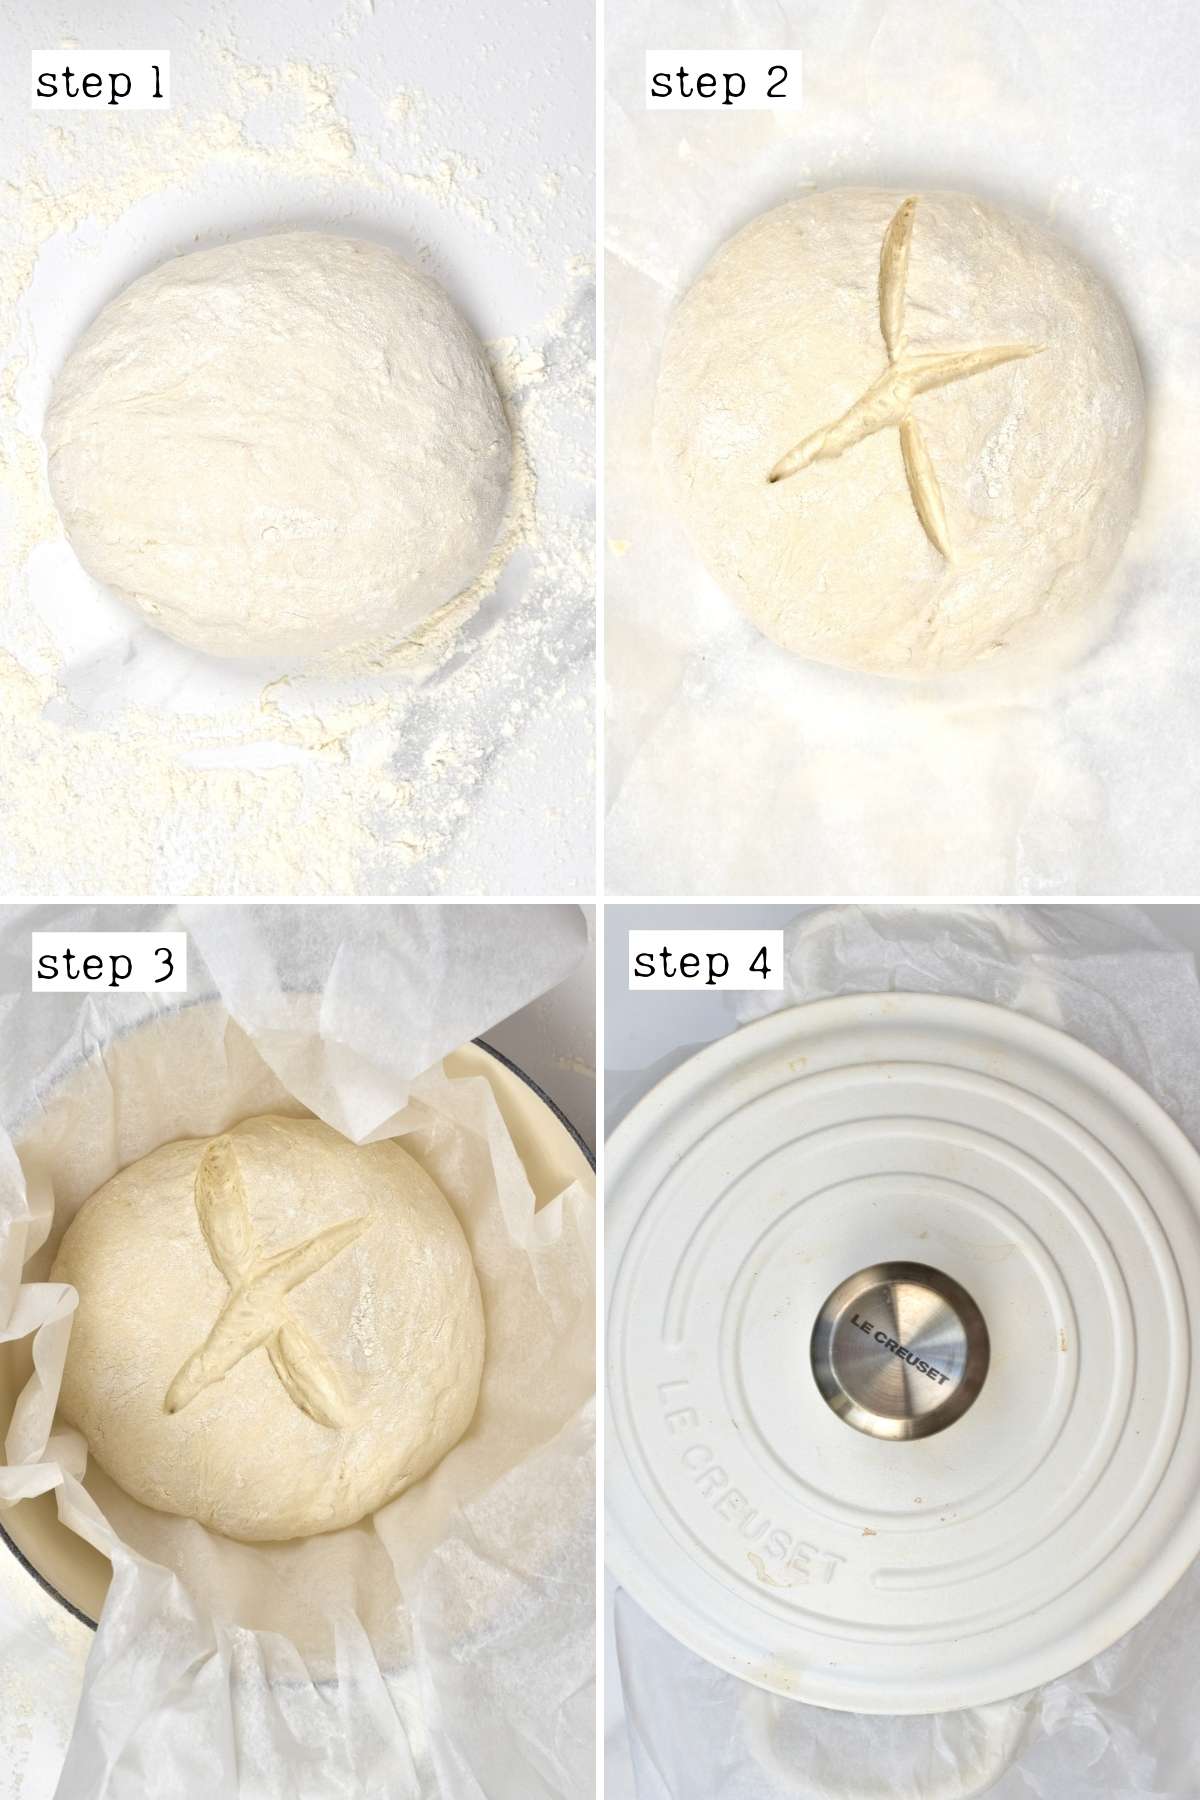
Step 4: Shape the loaf
At this point, pre-heat the oven to 450ºF/230ºC.
Once the dough has risen, it’s time to shape the loaf. The easiest way to do this is with the stretch and pull method. To do this, lightly pull each side of the dough away from the bowl (imagine the bowl is a square – this will be done with all four “sides”). Stretch then fold the first side over the top, turn the bowl 90-degrees and repeat for the remaining 3 sides.
You can do this with your hands or a spatula, but I find it easiest with my hands.
This stretch and fold only needs to be done once with each side, to remove the dough from the sides of the bowl. Then you can turn the bowl over and deposit the dough onto a piece of flour-dusted parchment paper. It should be in a nice round loaf shape. If it isn’t, lightly shape it until it is, pinching together the seams at the bottom of the loaf.
Step 5: Bake the loaf
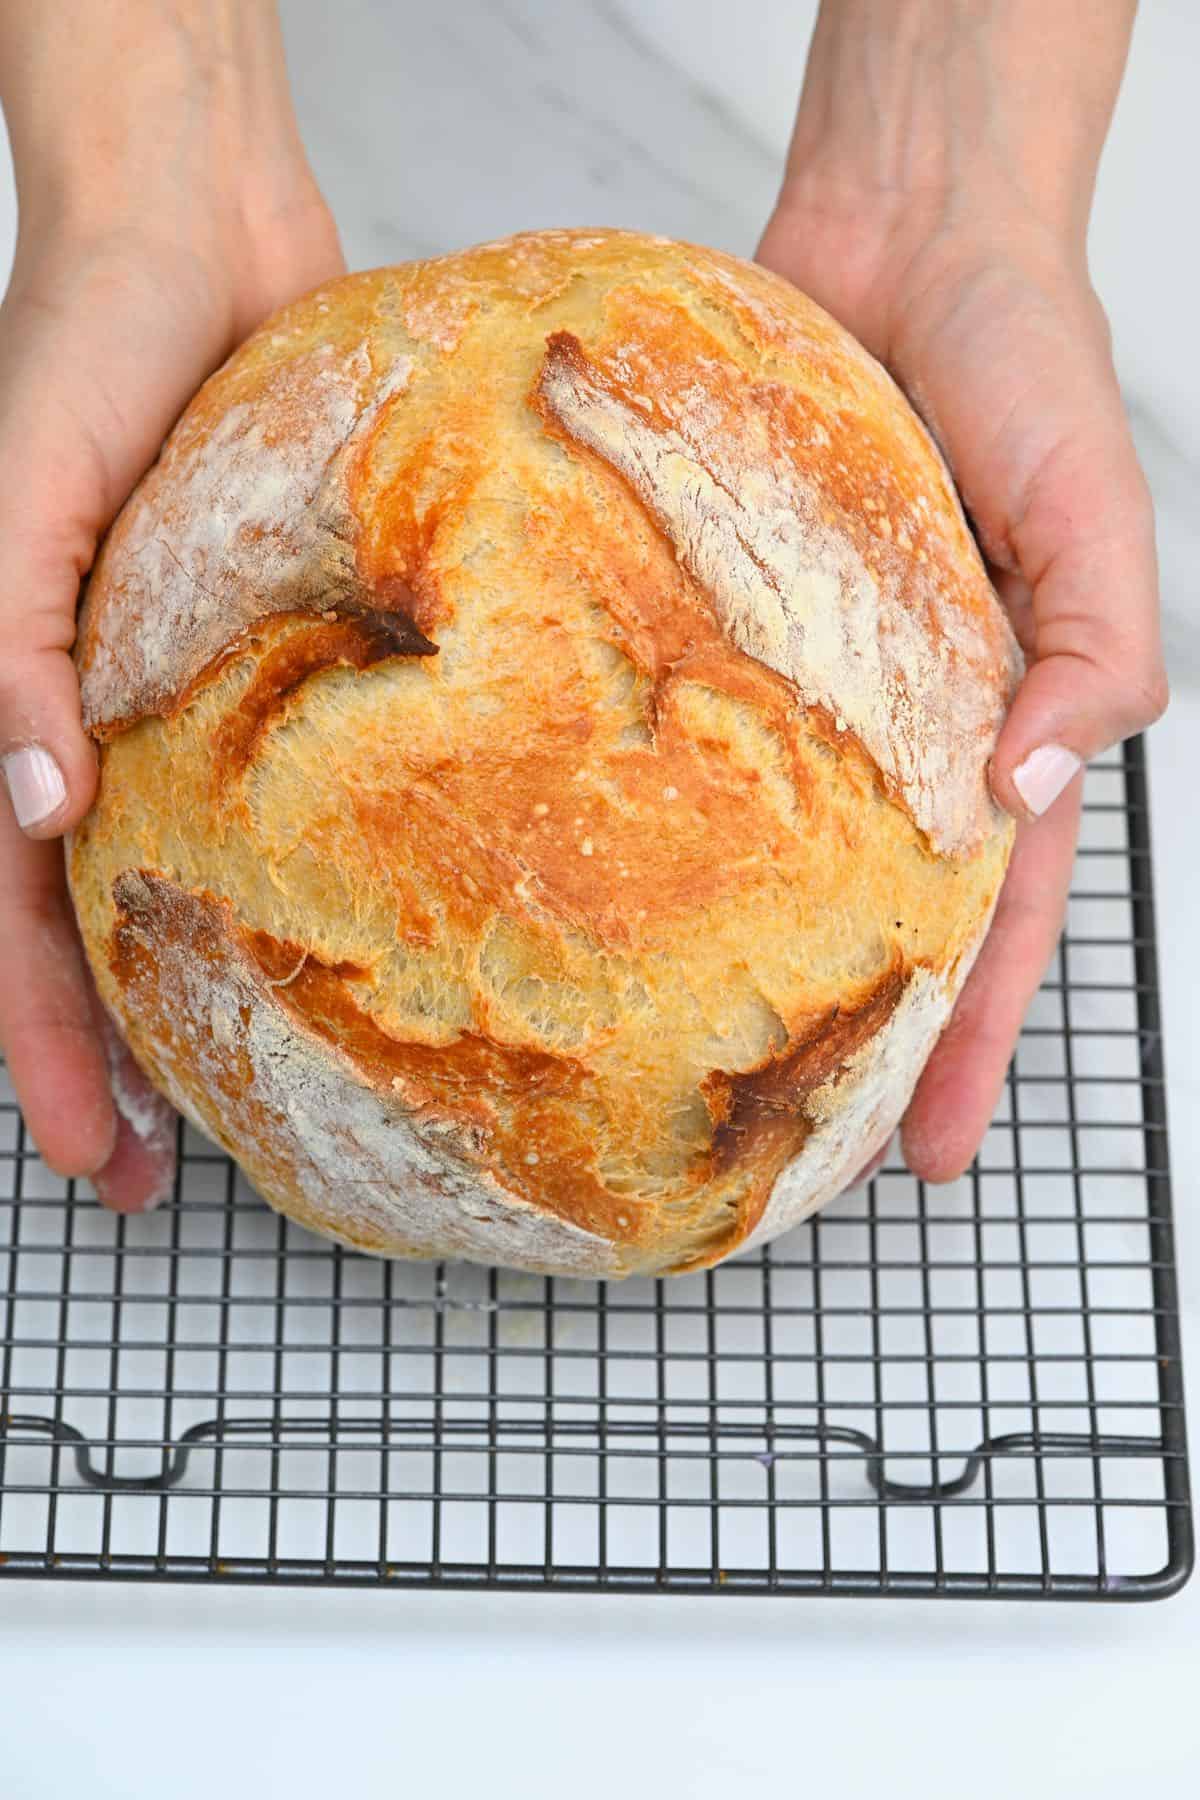
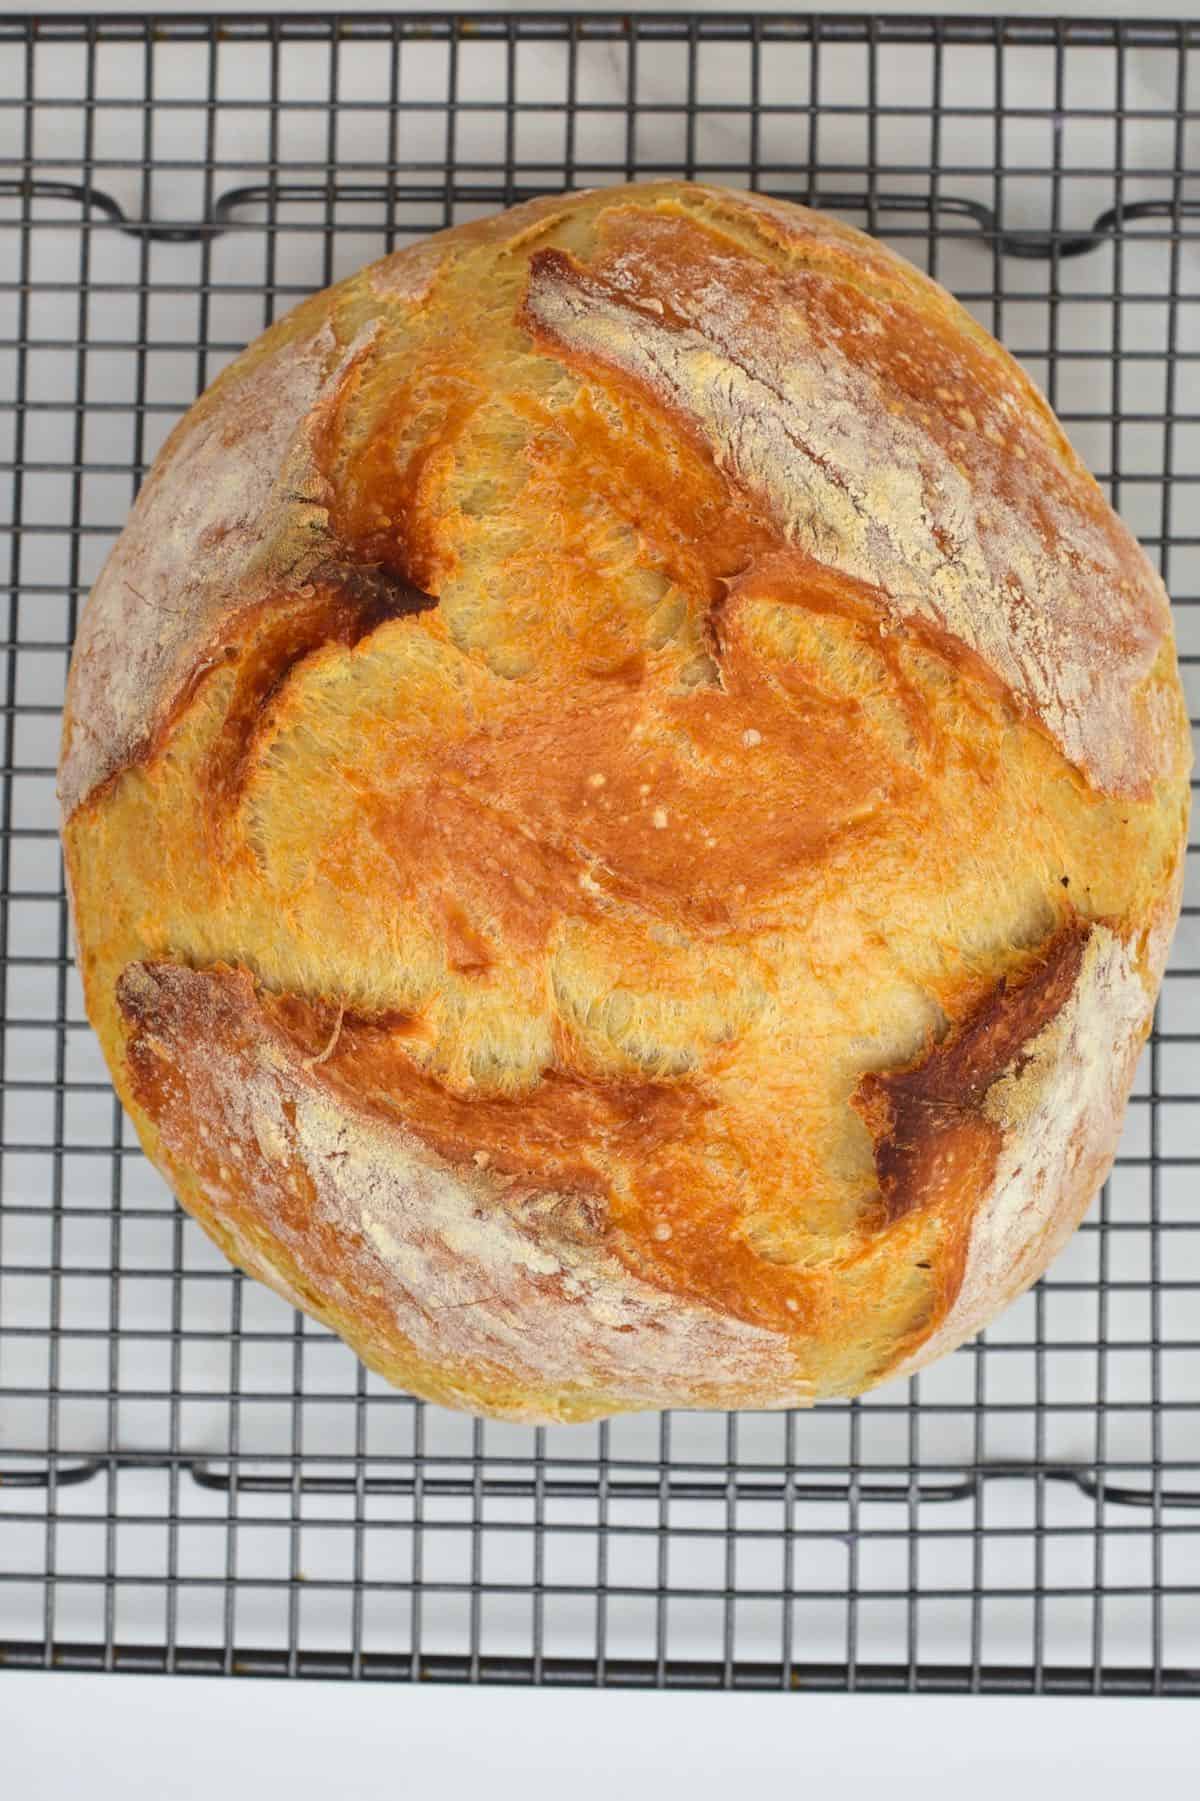
Score the top of the loaf with a large X using a sharp blade (or lame). Then place it into a large casserole dish.
Make sure to trim any extra parchment paper so it doesn’t overhang too much or it can burn. If you’re not using parchment paper, you’ll need to oil the Dutch oven and sprinkle it with a bit of cornmeal to stop it from sticking.
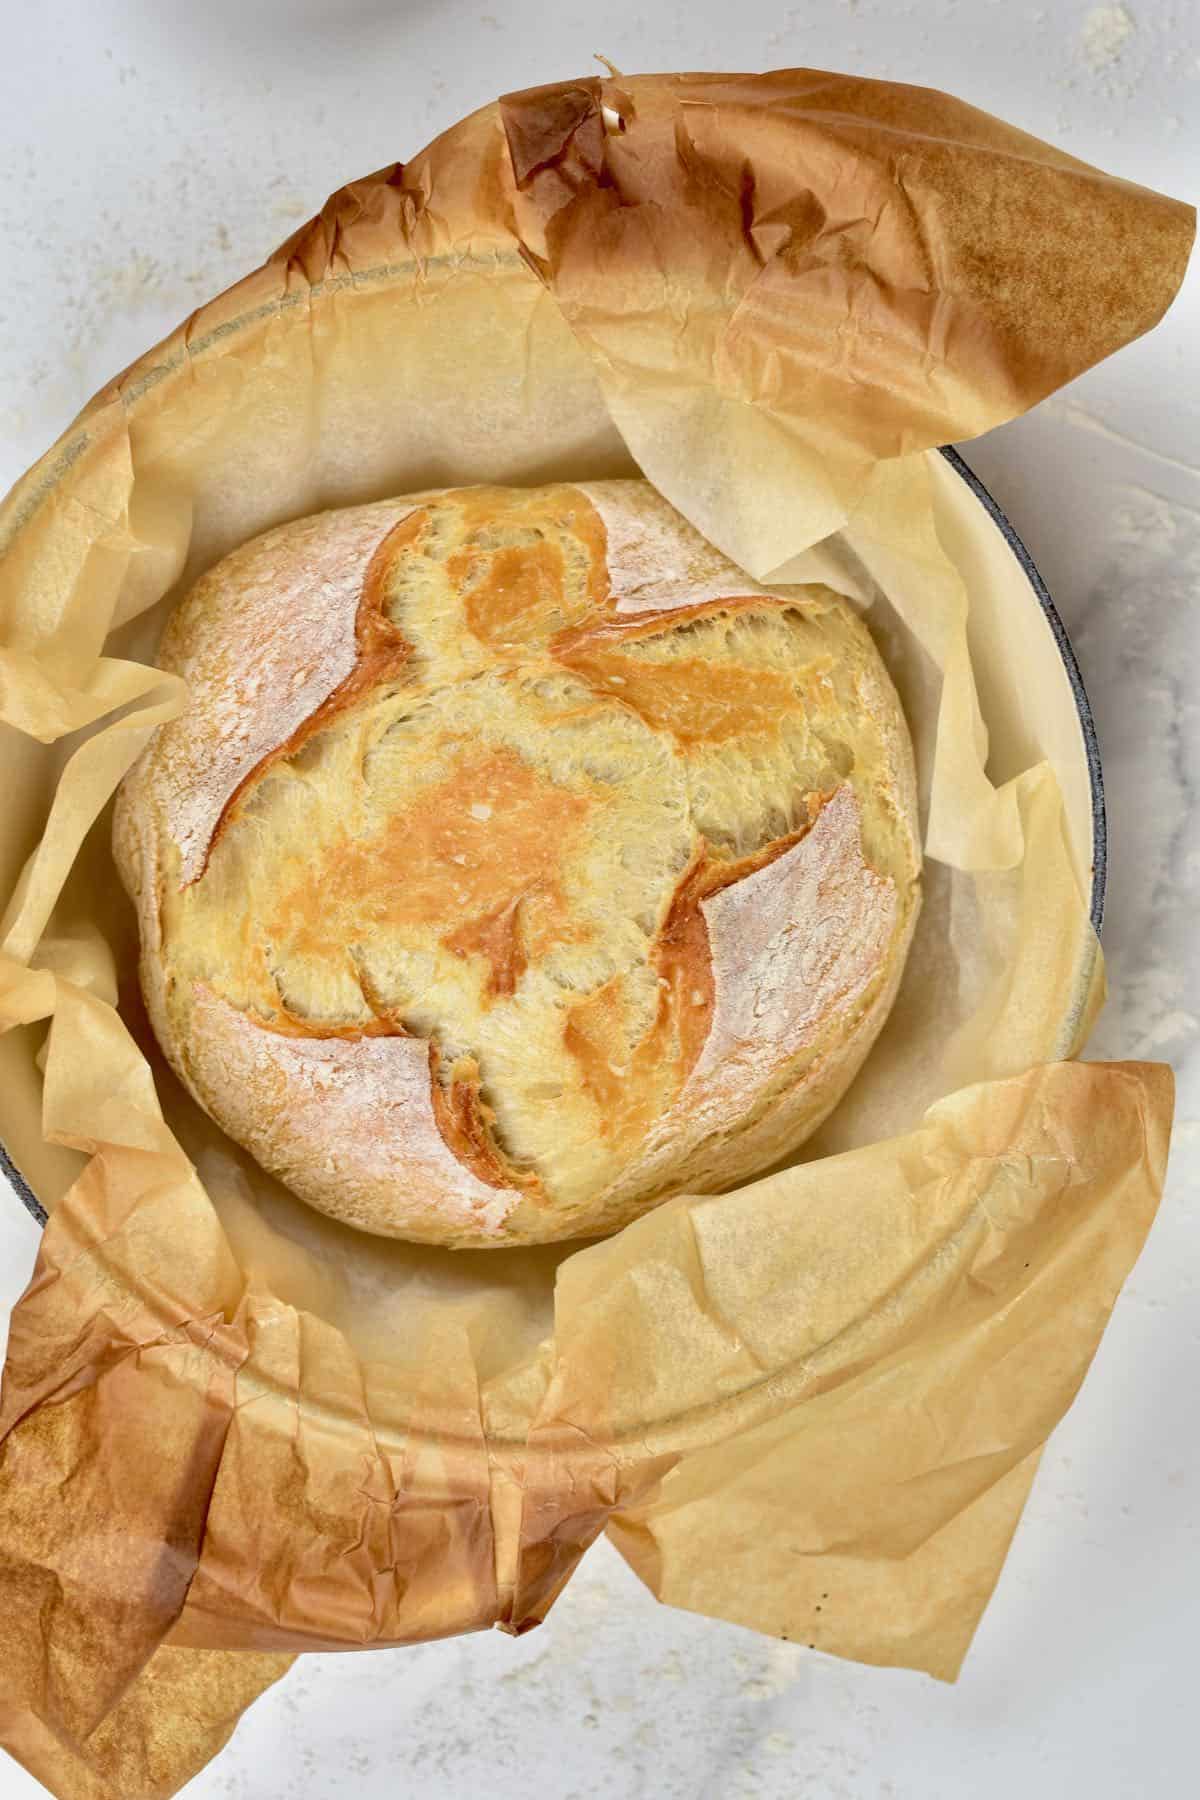
Place in the pre-heated oven and bake for 40 minutes, covered, on the middle rack. Then remove the lid and bake for a further 10 minutes (or slightly longer) for a nice crusty golden-brown loaf.
I’ve found that if I place the casserole dish too low in the oven, it tends not to crust up as much. However, this may vary from oven to oven. If you notice a piece at the top starting to burn, place a little piece of foil on that area.
When you remove the Dutch oven bread from the oven, allow it to cool for about one hour on a wire rack before slicing and enjoy!
Make sure to allow it to cool – this will allow the residual heat to continue cooking the center, so it’s not too doughy.
How to make ahead and store
Make ahead: you can prepare the dough up to three days in advance and store it, covered, in the refrigerator.
Store: store the bread in an airtight container/bag at room temperature for 2-3 days for optimal freshness and flavor. Any longer, and it’s best to freeze.
Freeze: you can freeze the Dutch oven bread whole or sliced (with parchment paper between each slice if you want to defrost pieces individually). Place in an airtight bag (optionally wrapped in a layer of plastic wrap to avoid freezer burn) and freeze for up to three months. After that, you can allow the loaf to thaw in the refrigerator/at room temp or defrost individual pieces in the microwave/toaster oven.
FAQs
If you don’t have a Dutch oven (casserole dish with lid), then you can use any deep roasting pan, casserole dish, or oven-safe stockpot and cover tightly with a thick layer (or two) of foil.
Just note that you won’t get results that are as impressively crusty. However, you can increase this slightly by placing a dish on the bottom rack of your oven. Once the oven is heated, add some cold water to the dish – the steam will help to create more of a crust.
Yes. I’ve tried this recipe with all-purpose and white bread flour with great results. Bread flour is higher in protein and so slightly chewier, but all-purpose works too.
If you want to use whole wheat flour, I recommend a 3:2 ratio. I.e., 3 parts strong white flour and 2 parts whole wheat (e.g., 300 g white, 200 g whole wheat).
I haven’t tried this recipe with all-purpose gluten-free flour, so I can’t guarantee any results.
I love leaving this easy no-knead bread to rise for such a long time as it allows the dough to “ferment” slightly and increases the flavor tenfold over doing shorter 1-2 hour rises multiple times (plus it’s less effort!).
Plus, you can further this extra fermented flavor by retarding the dough – leaving it to rise in the fridge for up to three days (this will slow the rising time but still allow it to ferment for longer).
Recipe notes
- For more crust: I’ve found that I get amazingly crusty results. However, a friend let me know that she always pre-heats her Dutch oven along with the oven (heating for at least 30 minutes) and places the dough into the hot Dutch oven to bake. This will cause a burst of steam to build up inside the pot, yielding a super crusty loaf.
- Don’t forget the lid: this easy no-knead bread must be baked partially covered, and partially uncovered, so a lid is essential. If you don’t have one, use two layers of heavy-duty foil, and make sure to wrap tightly!
- Make sure to test the yeast: if your yeast doesn’t activate during the first step, then it may be out of date or no longer active. I don’t recommend continuing with the recipe then until you have new yeast! Just remember that Instant yeast doesn’t need activating but still needs to be fresh!
- Dutch Oven size: if it comfortably fits the loaf, then the actual size doesn’t matter. It’s not actually used to “shape” the loaf, but just create the correct “environment” for it to bake to perfection.
Other bread recipes
- Easy No-Knead Turkish Bread (Ramadan Pide Bread)
- Homemade Garlic Naan Bread (Indian Flatbread)
- Easy Cheese Flatbread (Cheese Manakish)
- Zaatar Bread (Manakish Za’atar)
- The Best Authentic Homemade Pita Bread
- Authentic Corn Tortilla Recipe (Gluten-Free Tortillas)
- Quick Cheesy Garlic Bread Recipe (Vegan Garlic Bread Optional)
If you try this easy no-knead bread recipe, I’d love to hear your thoughts/questions below. Also, I’d appreciate a recipe card rating below, and feel free to tag me in your recipe recreations on Instagram @Alphafoodie!
Easy No-Knead Dutch Oven Bread (Crusty Bread)
Equipment
Ingredients
- 21 oz white bread flour or 3:2 ratio of white bread flour plus whole wheat flour
- 2 tsp salt adjust amount based on what salt is used (flaky vs. granulated)
- 14 floz lukewarm water at around 110-115°F/43-46ºC
- 0.10 oz dry yeast 0.2oz/6 g fresh
Instructions
Step 1: Activate the yeast
- Mix the yeast with the lukewarm water and set it aside for several minutes (I leave it for between 5-7 minutes) to activate. You won't need to do this if you"re using instant yeast.A little bit of sugar or sweetener (honey/maple) can be added to help activate the yeast. But if your yeast is fresh and the water is at the right temperature, I haven't found this necessary. Just make sure never to add the salt to the yeast mixture, as it can kill the yeast.
Step 2: Mix the dough
- Meanwhile, in a large bowl, sift in the flour and salt. Then, when the yeast is activated, add it to the mixture. Mix until there is no dry flour left and you have a sticky, shaggy dough.For this easy no-knead bread, soft and slightly sticky dough is preferred. A wetter dough usually means bigger air pockets and fluffier bread! So, avoid adding extra flour unless it's necessary – i.e. if it's still un-shapable in step 4).
Step 3: Leave to rise
- Cover the bowl with plastic wrap and leave it on your countertop for between 12-24 hours to rise.If you live in a cold area or your house is particularly cold, it's best to leave it to rise in a switched-off oven. However, you can speed up the process a little by turning on your oven for just 30-60 seconds beforehand.During this time, the dough can triple in size (but should at least double), so make sure to use a large enough bowl.
Step 4: Shape the loaf
- Preheat the oven to 450ºF/230ºC.
- Once the dough has risen, it's time to shape the loaf. The easiest way to do this is with the stretch and pull method. To do this, lightly pull each side of the dough away from the bowl (imagine the bowl is a square – this will be done with all four "sides"). Stretch then fold the first side over the top, turn the bowl 90-degrees and repeat for the remaining 3 sides. You can do this with your hands or a spatula, but I find it easiest with my hands.
- This stretch and fold only needs to be done once with each side to remove the dough from the sides of the bowl. Then you can turn the bowl over and deposit the dough onto a piece of flour-dusted parchment paper and it should be in a nice round loaf shape. If it isn't, lightly shape it until it is, pinching together the seams at the bottom of the loaf.
Step 5: Bake the loaf
- Score the top of the loaf with a large X using a sharp blade (or lame) and then place it into a large enough casserole dish.Make sure to trim any extra parchment paper so it doesn't overhang too much from the sides of the casserole dish or it can burn. If you're not using parchment paper, you'll need to oil the Dutch oven and sprinkle it with a bit of cornmeal to stop it from sticking.
- Place in the preheated oven and bake for 40 minutes, covered, on the middle rack. Then remove the lid and bake for a further 10 minutes (or slightly longer) for a nice crusty golden-brown loaf.I've found that if I place the casserole dish too low in the oven, it tends not to crust up as much. However, this may vary from oven to oven. If you notice a piece at the top starting to burn, you can place a little piece of foil over that area.
- When you remove the Dutch oven bread from the oven, allow it to cool for about one hour on a wire rack before slicing and enjoy!Make sure to allow it to cool– this will allow the residual heat to continue cooking the center, so it's not too doughy.
How to Make Ahead and Store
- Make ahead: you can prepare the dough up to three days in advance and store it, covered, in the refrigerator.Store: store the bread in an airtight container/bag at room temperature for 2-3 days- for optimal freshness and flavor. Any longer, and it's best to freeze.Freeze: you can freeze the Dutch oven bread whole or sliced (with parchment paper between each slice if you want to defrost pieces individually). Place in an airtight bag (optionally wrapped in a layer of plastic wrap to avoid freezer burn) and freeze for up to three months. After that, you can allow the loaf to thaw in the refrigerator/at room temp or defrost individual pieces in the microwave/toaster oven.
Notes
Nutrition
Nutrition information is automatically calculated, so should only be used as an approximation.


I’m finding it difficult to convert the measurement to that of the standard measuring cups because that’s what I have. Is there a way you can help me out?
Hi there,
It’s best to use a balance but if measuring cups is all you have, I hope this helps:
600 grams of flour is 4 ¾ cups.
400ml of water is about 1 ⅔ cups
3g of yeast is about 1 tsp.