
This post may contain affiliate links. Please read our disclosure policy.
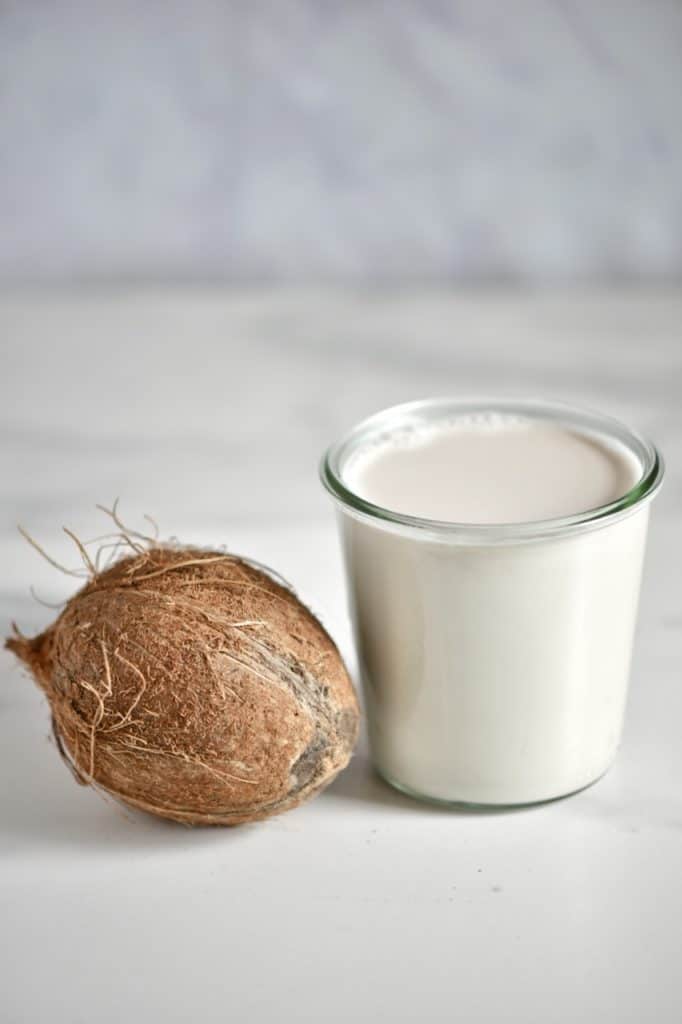
Two simple DIY’s for fresh homemade coconut cream – a creamy, thick, dairy-free, gluten-free cream alternative with tonnes of uses.
Of all the coconut products that you can make from a single coconut, coconut cream is the one that I always thought would be the hardest. Because of this, I put it off and put it off. Then I realised just how simple the process is, kicked myself and haven’t looked back since.
Coconut cream is such a simple coconut DIY that I’ve even included two methods. The first is more of a traditional method and is already super simple. However, the second method is even simpler – so simple in fact I’d call it a coconut cream ‘cheat’ (and all you need is a juicer).

This recipe is gluten-free and great for those who are lactose intolerant or dairy-free as it can be used as a dairy replacement in so many recipes. Making it homemade also tastes so much better than canned (if I do say so myself) versions from grocery stores.
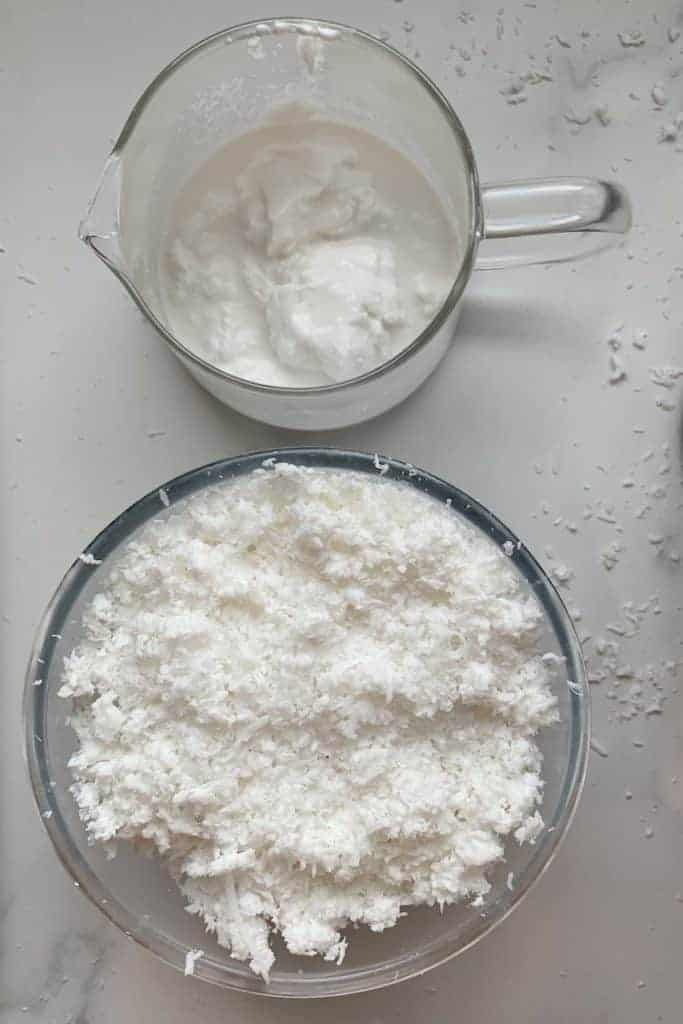
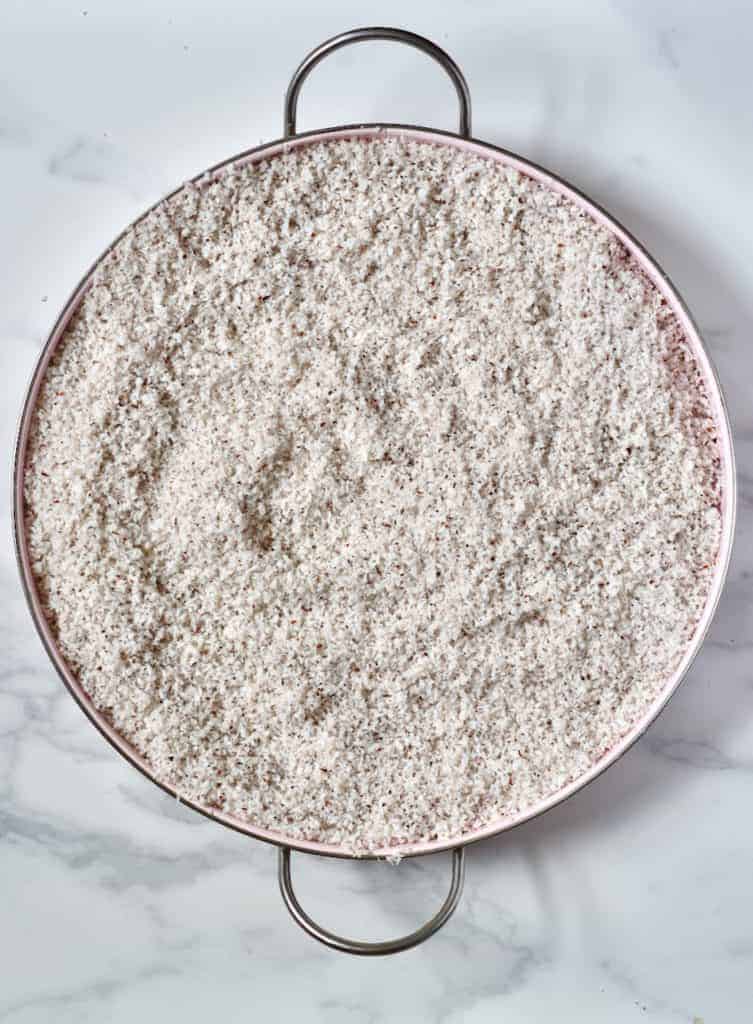
Plus, regardless of which method you decide to use – when making this cream, you’ll get the delicious by-product of desiccated coconut that you can then dry out and use for a variety of recipes.
Want to save this recipe?
What is coconut cream?
I suppose the first question to answer would be, what exactly is coconut cream? I know there can be a lot of confusion surrounding this and what supermarkets label products. Particularly with confusion between coconut milk and coconut cream (and sometimes even cream of coconut).
Coconut milk and coconut cream are of course both made using the same ingredients (coconut meat and water) – but with slightly different processes. Coconut cream basically has a higher fat content and thicker, creamier texture like heavy cream – similar to dairy milk vs cream change in texture.
Plus, coconut milk is usually made using less coconut, combined with water. The cream, however, uses more coconut and requires the mix to separate (as you’ll see in the DIY below).
Note* Unless you’re using a juicer, as you’ll see in my second method!
How to use coconut cream
So once you have your fresh coconut cream, it’s time to use it – of course. So, here are a few options for you:
- Probably one of the more traditional uses is within curries. Coconut cream adds a creamy element to a curry (like this Creamy Vegan Thai Green Curry), without watering it down as coconut milk does.
- The same can be said for soups. For example, adding some into this Creamy Butternut Squash Soup or Green Pea Soup.
- One of my favorite ways to use this is to make it into coconut whipped cream. You can then use this as a dairy-free ‘frosting’/cream for cakes.
- Likewise, it’s great to serve in place of dairy cream when served alongside pie or tart, warm puddings and more.
- Coconut cream is delicious when added to a variety of drinks – smoothies, milkshakes and even your favourite cocktail (piña colada anyone?)
- This isn’t something I’ve tried yet – but coconut cream would be an amazing part of a dairy-free ice-cream recipe.
- A whole variety of desserts could benefit from this dairy-free cream from mousses to pies, to tarts – like this Vegan Pumpkin Pie Recipe.
How to make coconut cream
Here I’m sharing the two methods to make coconut cream using matured coconut.
When making coconut cream, it’s worth noting that it has a short shelf life (just a few days) so is worth making in smaller batches. It’s hard to give you an exact amount of cream you’ll get out of each coconut, as this really depends on the size of the fruit and amount of meat inside.
When beginning to make coconut cream, start by experimenting with a couple of similar sized coconuts and you’ll quickly start to realise how many you need to make your perfect portion.
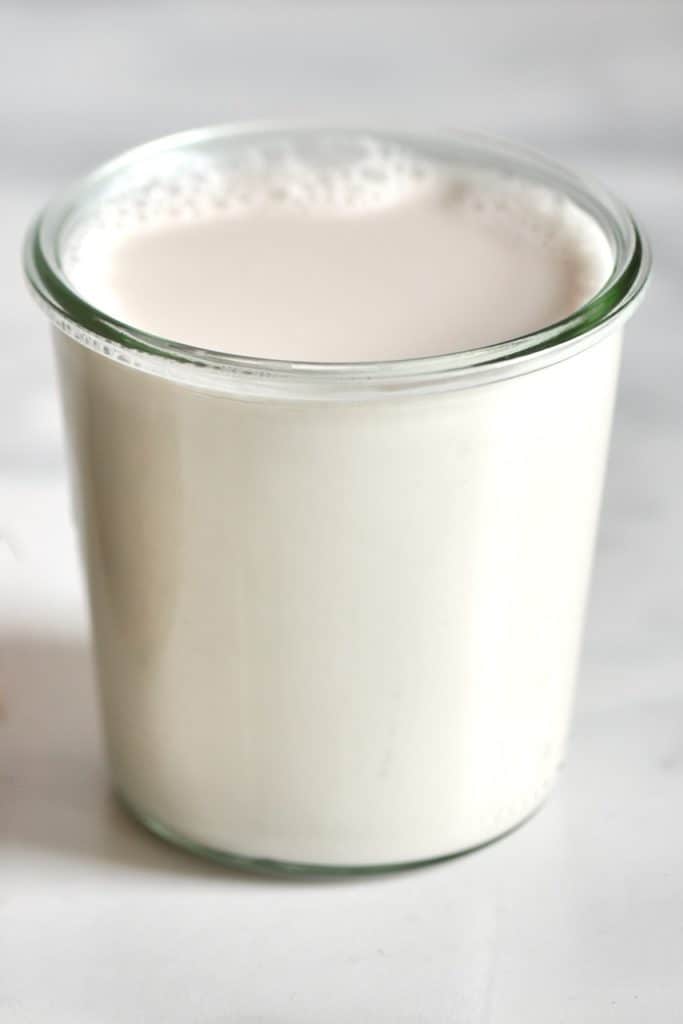
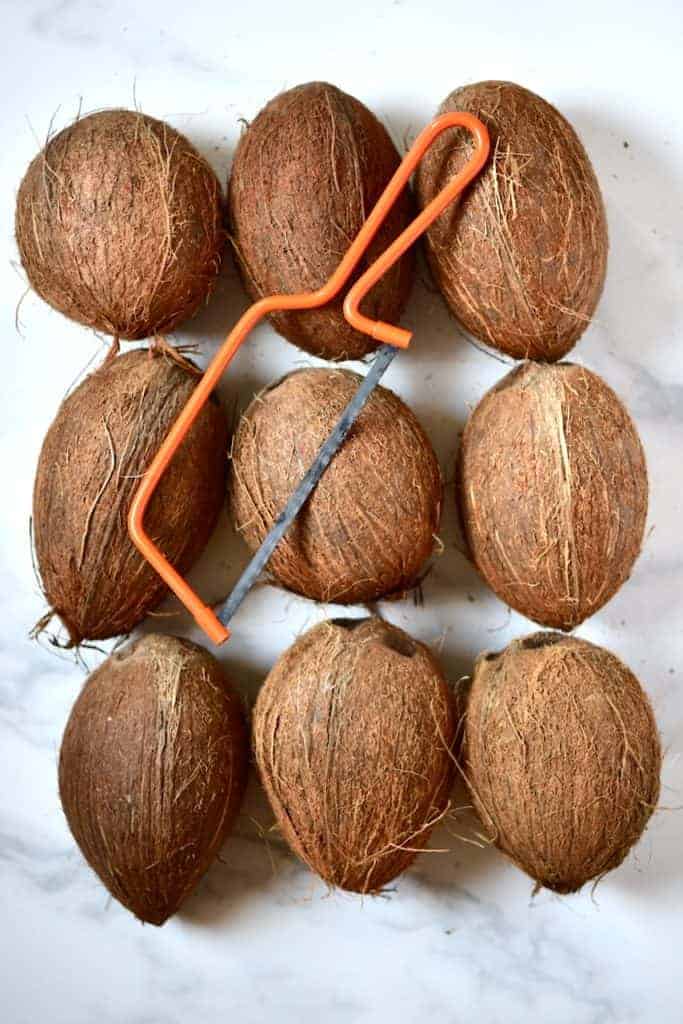
I used 9 coconuts to make a big jar of coconut cream which I quickly used to make whipped cream and decorate a cake.
Method 1: Using a blender
Other tools needed: nut milk bag
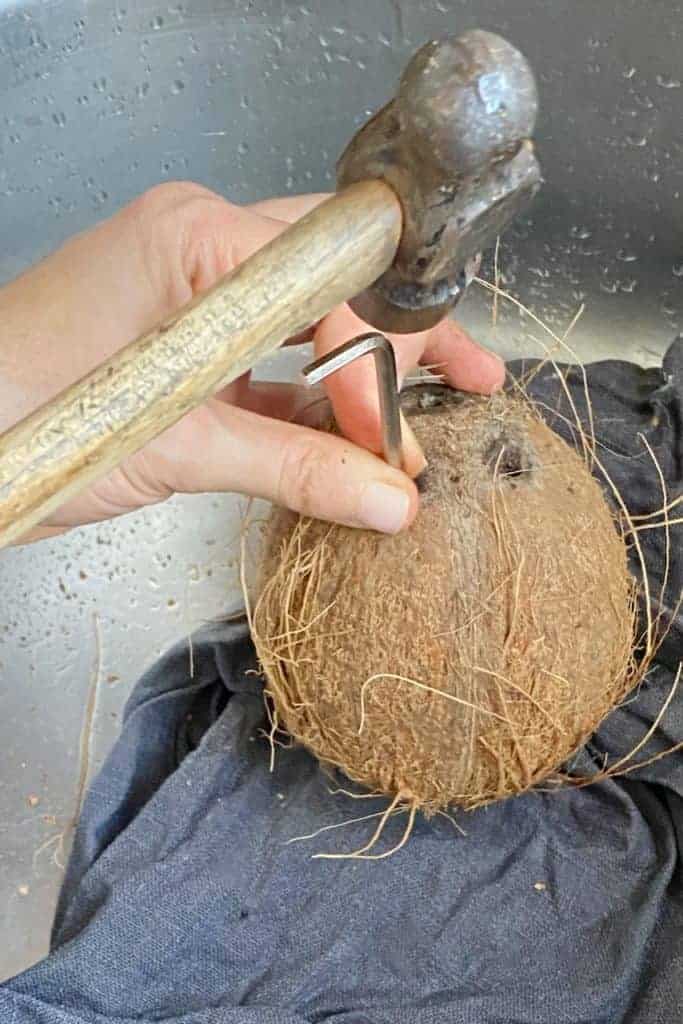
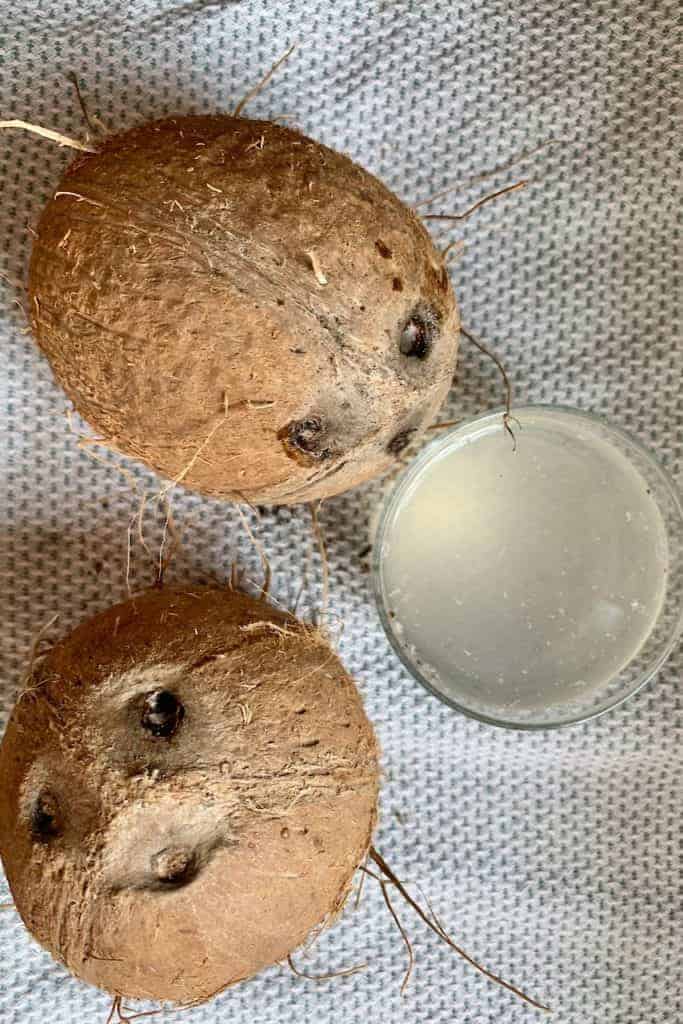
Begin by extracting the coconut water from the coconuts. You can do this by using a screwdriver, nail or similarly sharp tool and create holes in the coconut eyes, to drain the water (which you can drink straight or add to smoothies).
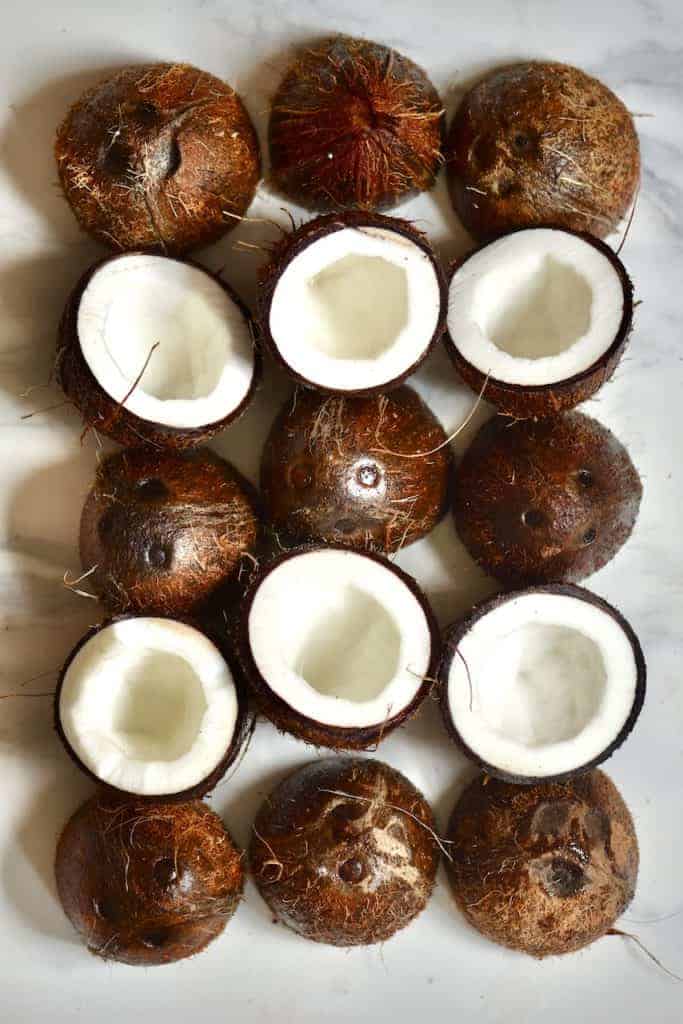
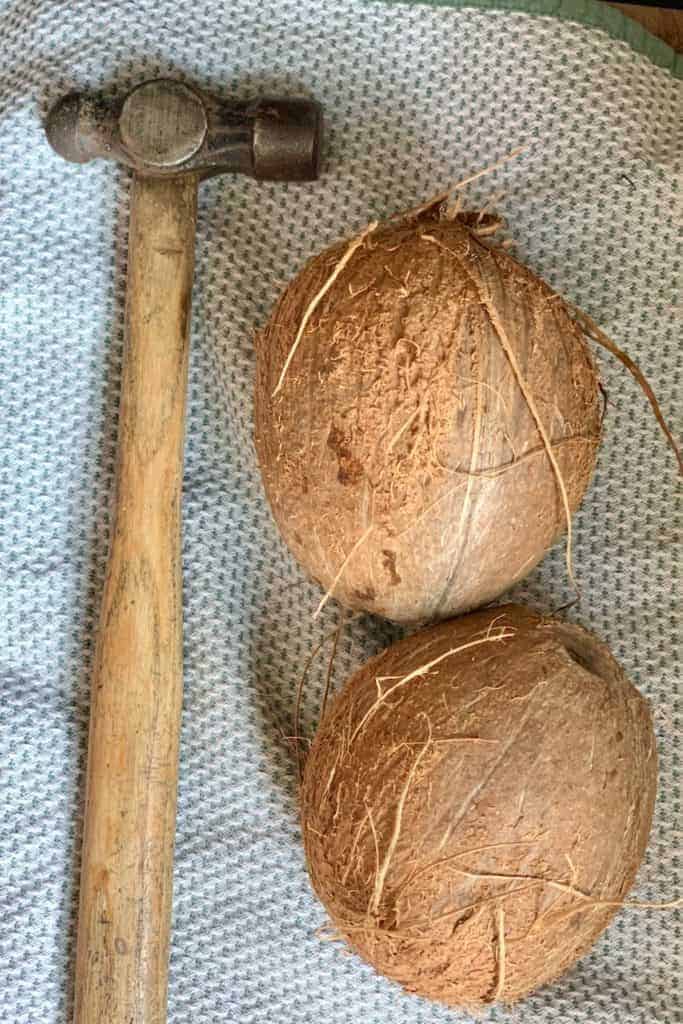
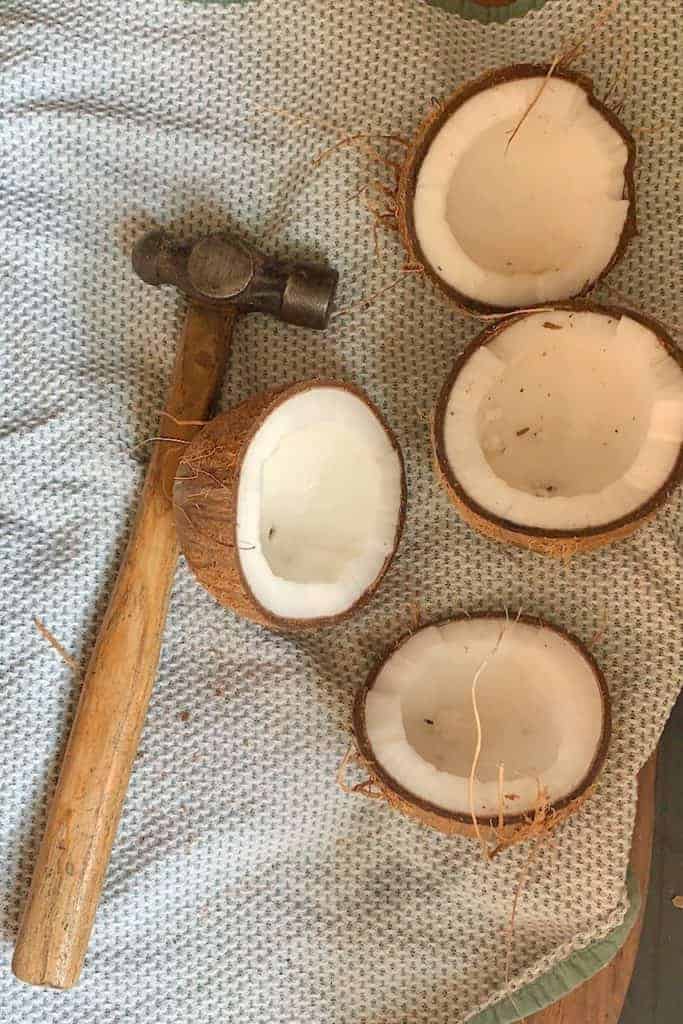
Next, break the coconut shells and extract the coconut flesh. You can do this with a hammer, by banging it against a sharp/hard edge, with a small hand saw or any other favourite method of yours.
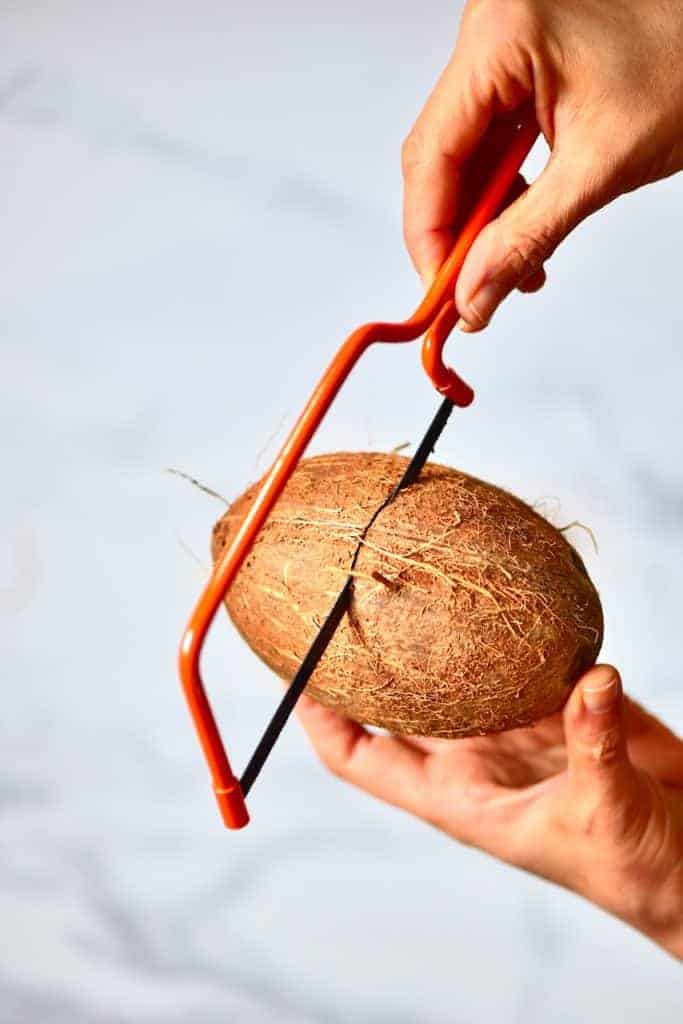
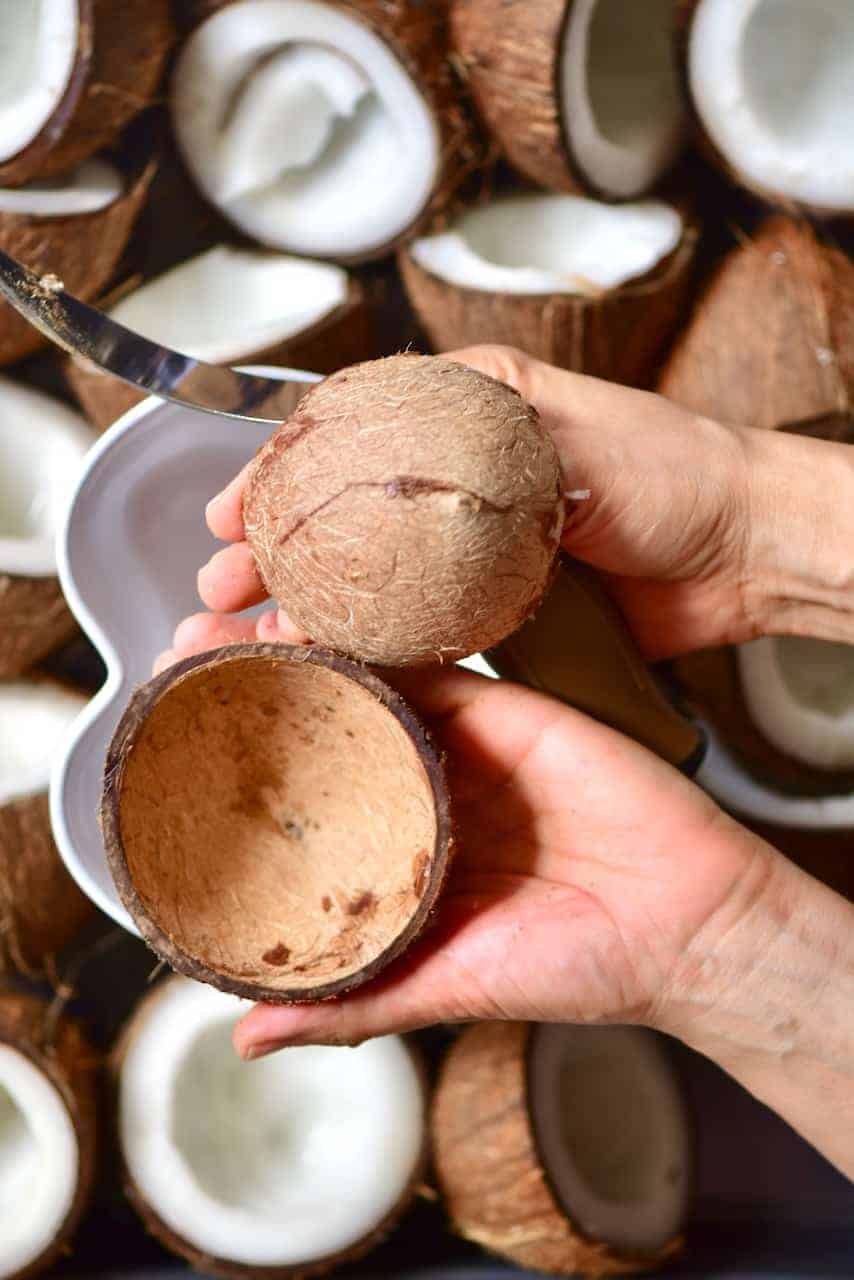
Note* you can then use the coconut shell to make DIY coconut bowls. However, if you want to do this – it’s best to use the saw method and cut them open through the middle. You might also want to skip the step of making the holes, but in this case, you might lose the coconut water unless you open it over a bowl and then strain the liquid.
Pro tip: If you want to keep the coconut shells completely intact, after sawing them in half, put the coconut halves in the oven for 20 minutes at 170ºC. This will allow the coconut flesh to come out very easily.


Next, add the coconut flesh to a high-speed blender/food processor and blitz to shred it. Add 4 cups of water and blend again to obtain coconut milk.
Note* for a creamier version, that uses dairy, you could swap out the water for semi-skimmed milk instead.
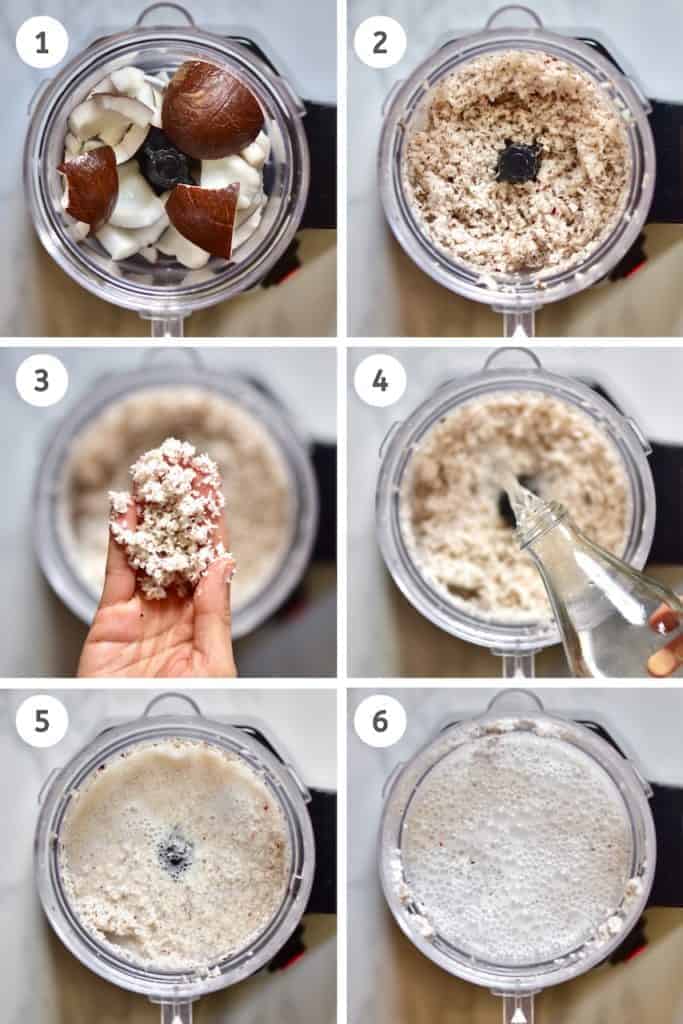
Note: depending on how many coconuts you are blending, you might have to do this multiple times. Not all the coconut flesh will fit in the blender if you’re making a massive batch. Also, it will be harder for the machine to blend very big amounts at once.
Next, pass the blended coconut milk through a nut milk bag and squeeze out all the liquid.
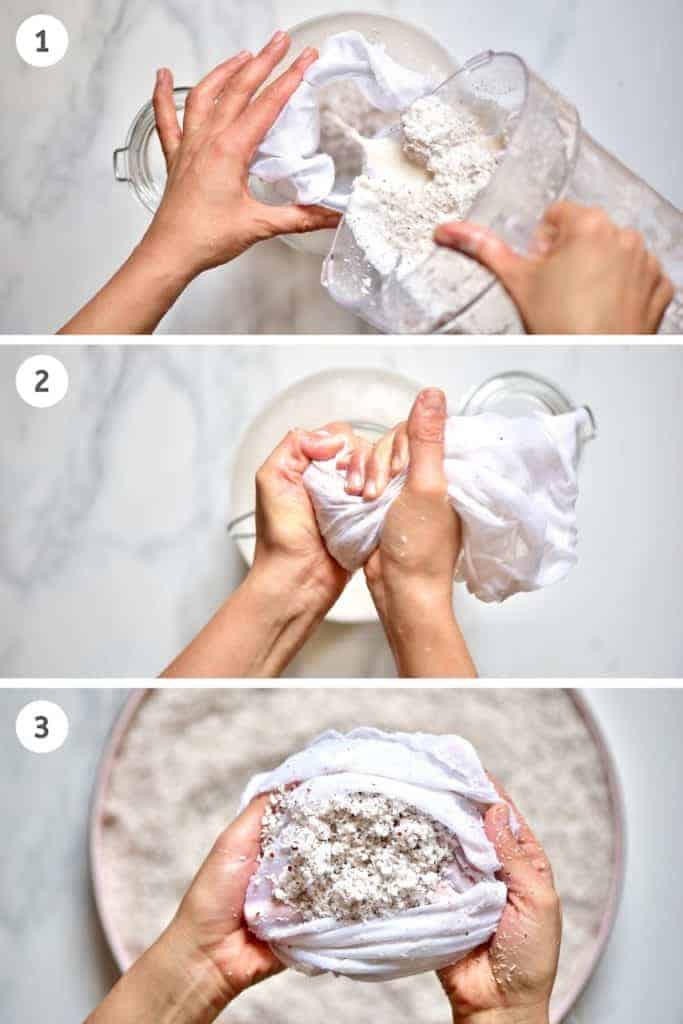
You can keep the remaining shredded coconut and dry it either in low temperature in the oven or out in sunny well-aired corner/window sill.
Next, pour the coconut milk into a big jar and set aside so that the creamy part separates from the watery liquid part. Using a dispenser tap jar works great as you can then easily remove the liquid part.
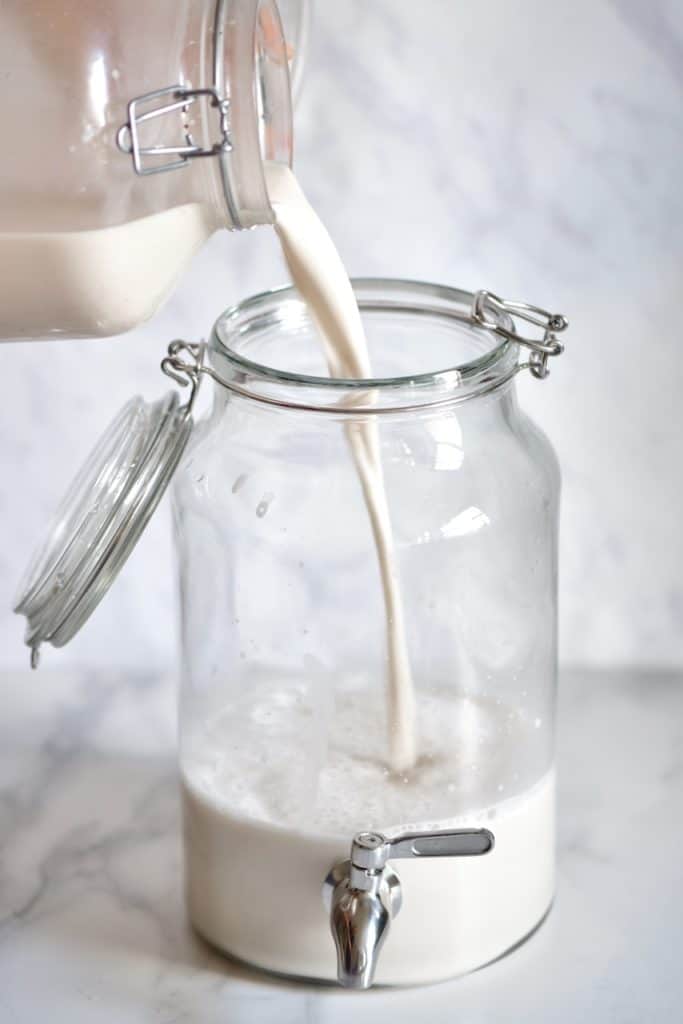
If using a regular container, you can scoop out the creamier part after the separation.
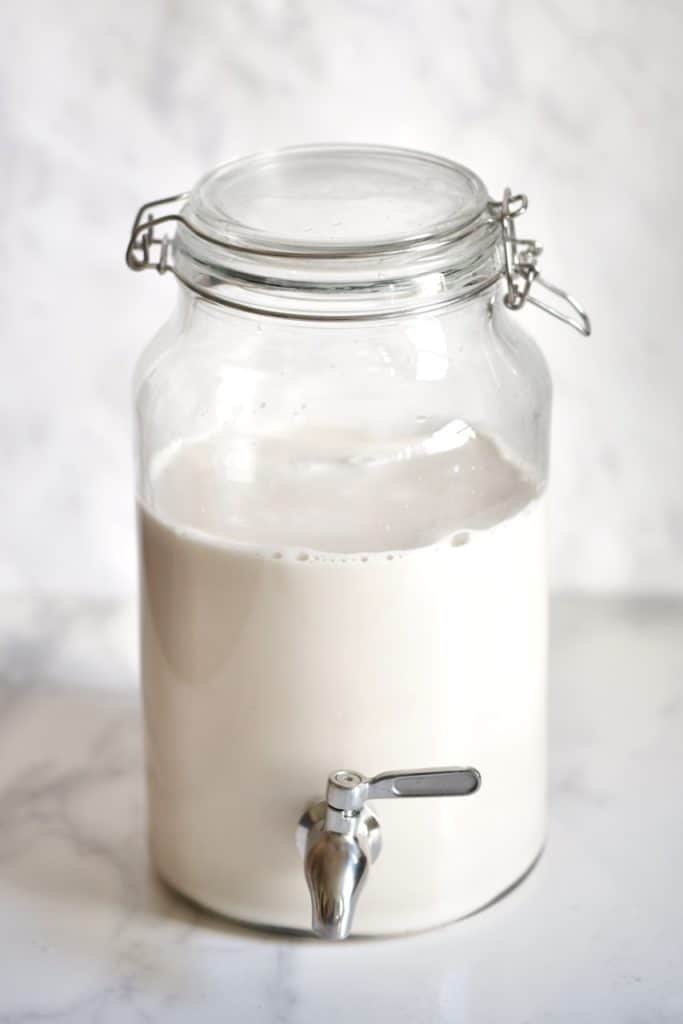
After some time, the cream will separate and rise to the top.
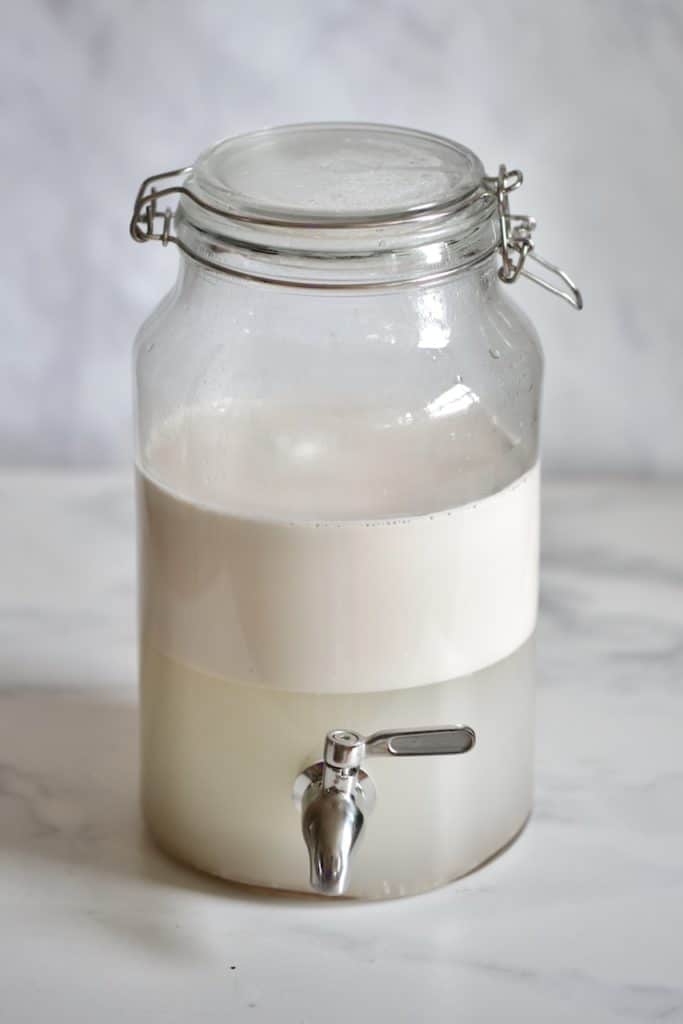
Remove the watery liquid through the tap. (Or carefully scoop out the cream from the top)
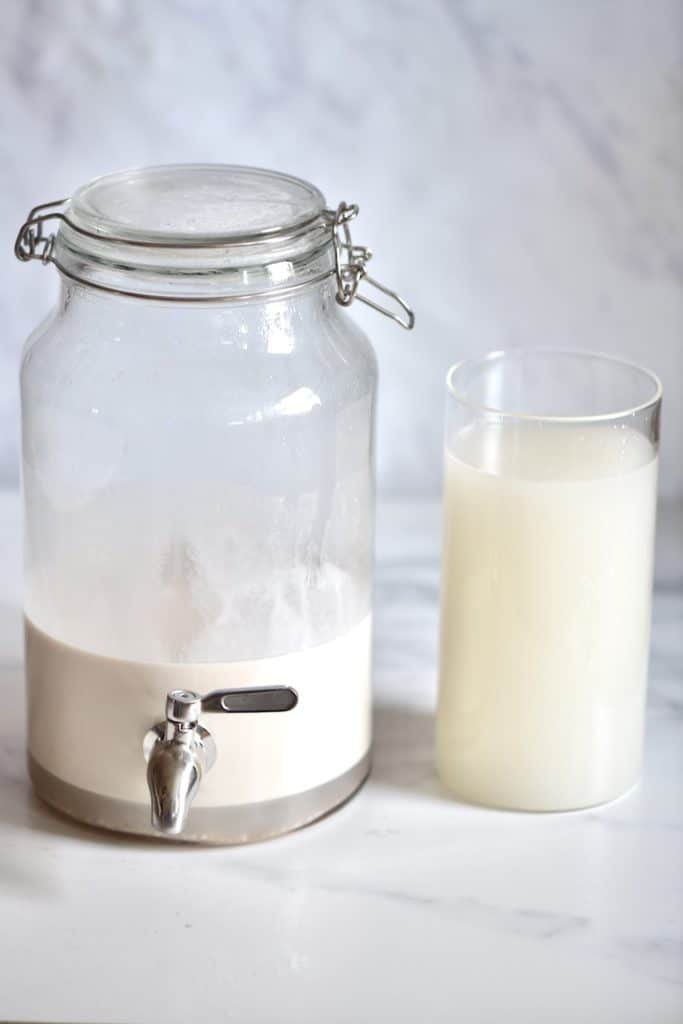
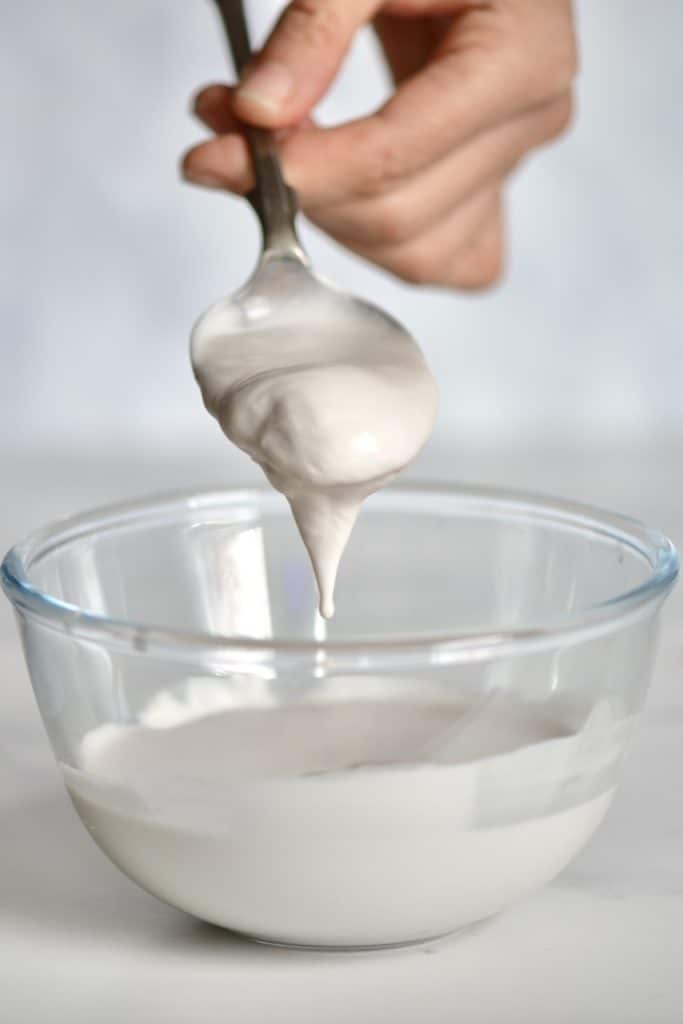
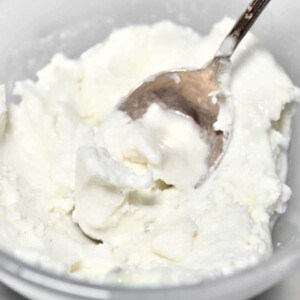
What’s left is the coconut cream.
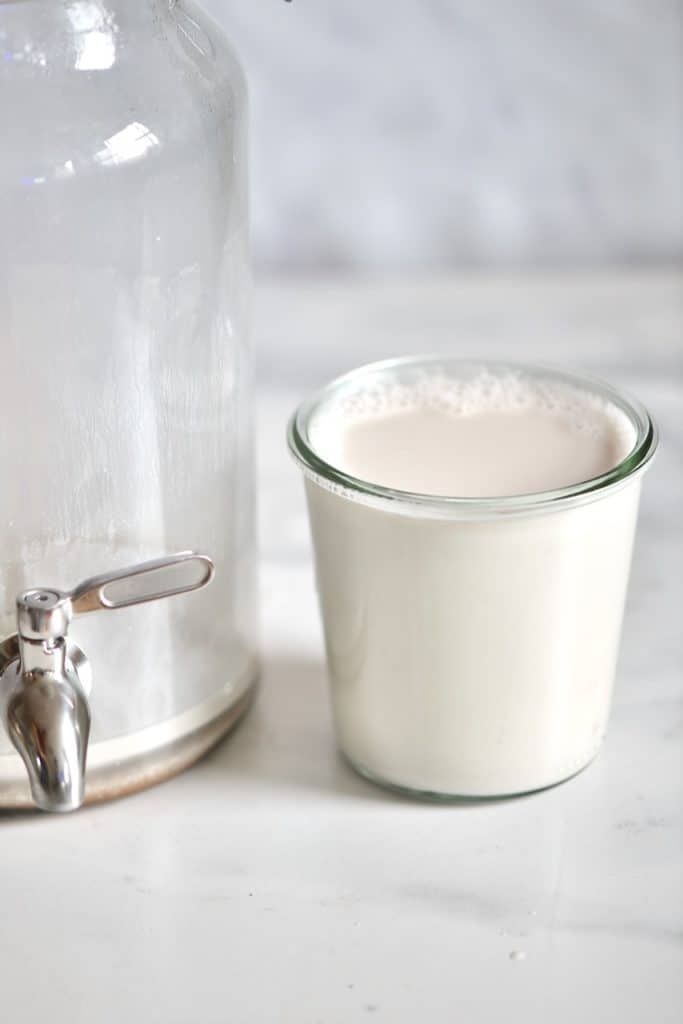
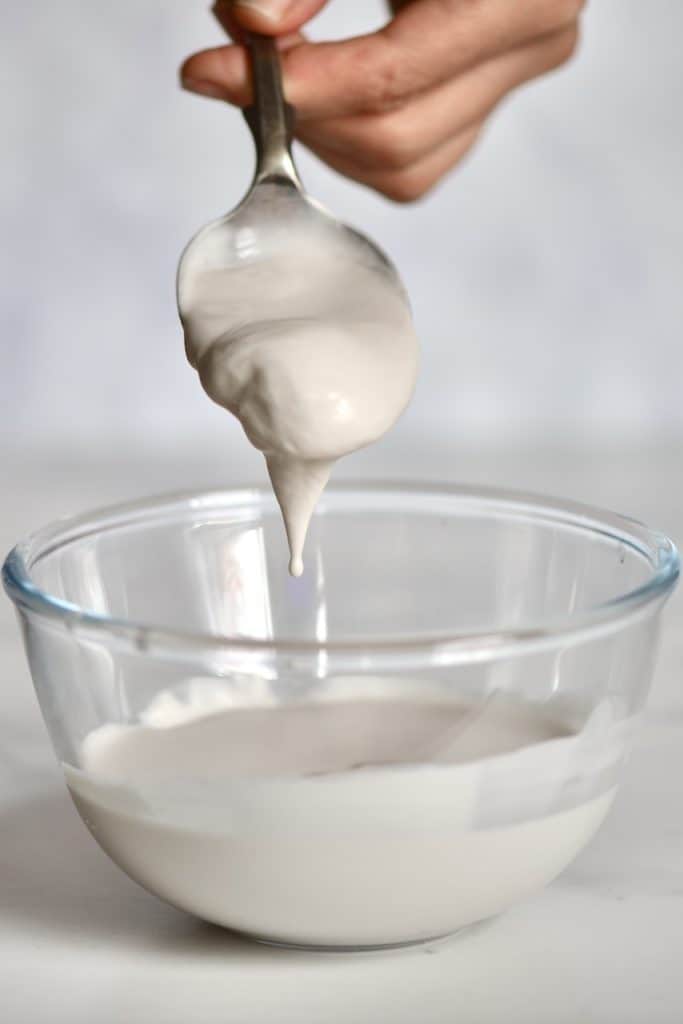
To make it even thicker, you can refrigerate and chill overnight. There will be even more water that separates in the jar.


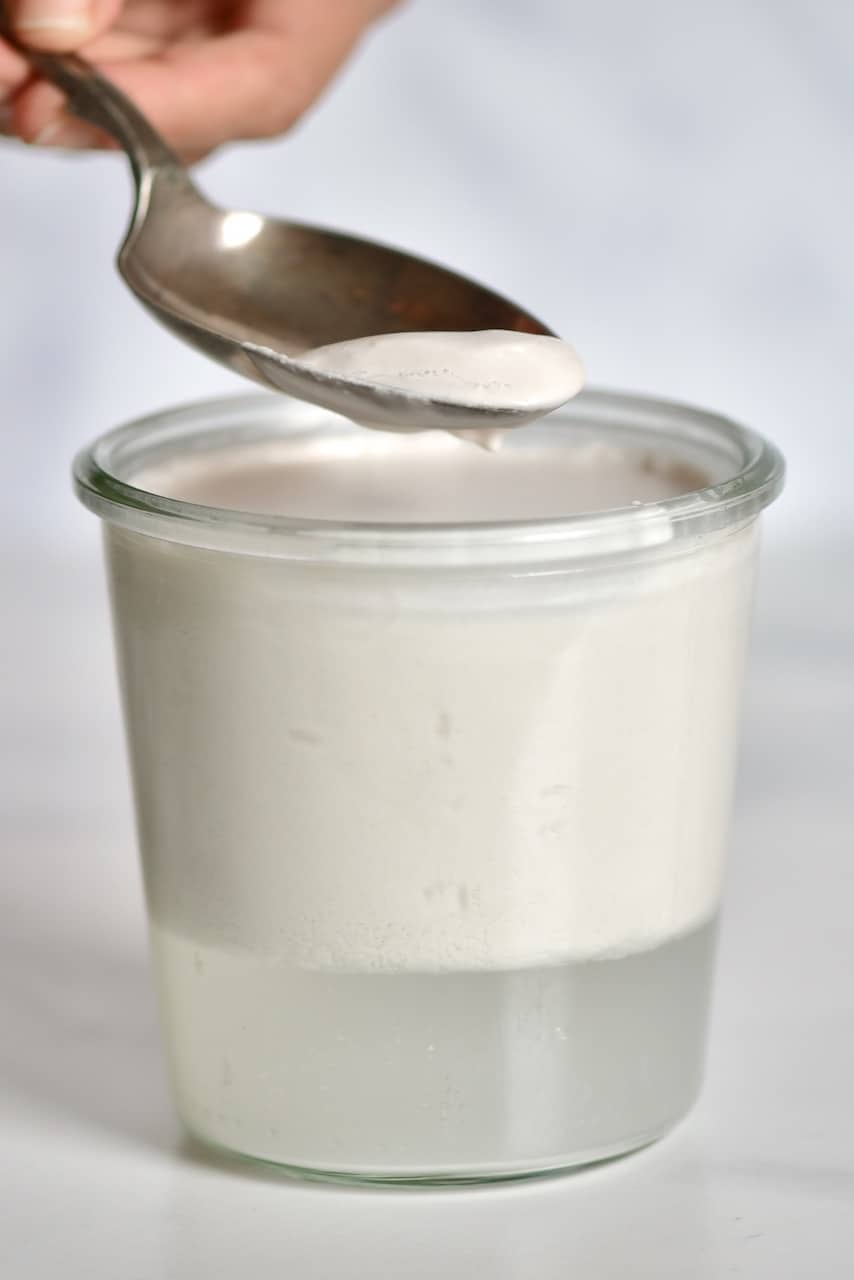
You can then scoop out the cream.
Method 2: Using a juicer
Once again, begin by draining your coconut water.
Break open the coconuts with a hammer or a hacksaw if you want to keep the shells.
Remove the coconut flesh from the shells and peel the brown skin off.
Note* this brown part can be eaten as a snack, added to smoothies etc.
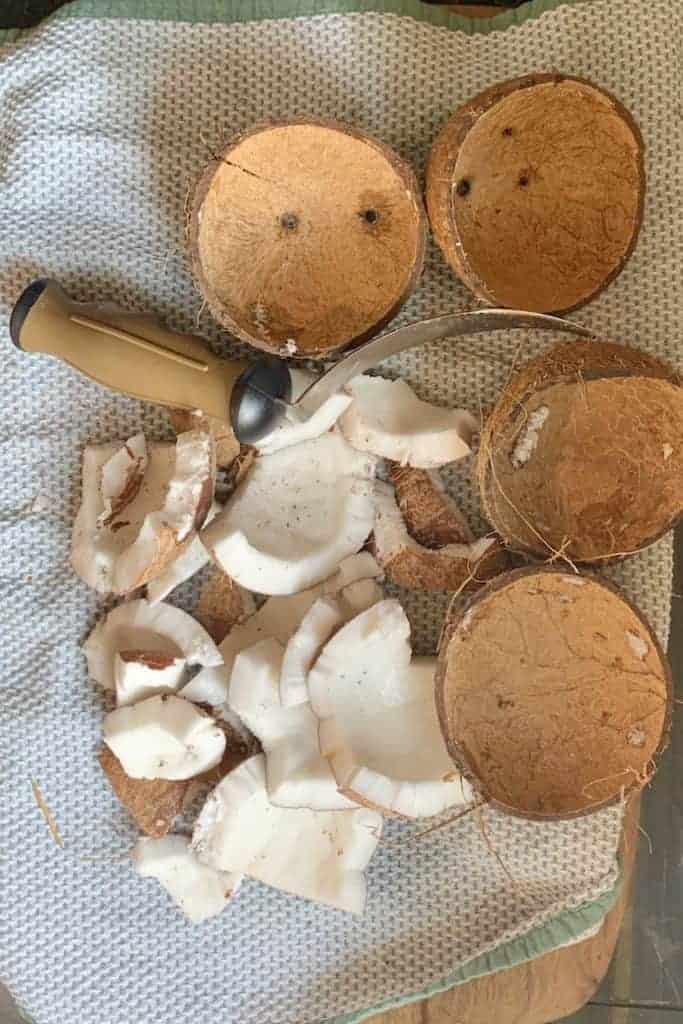
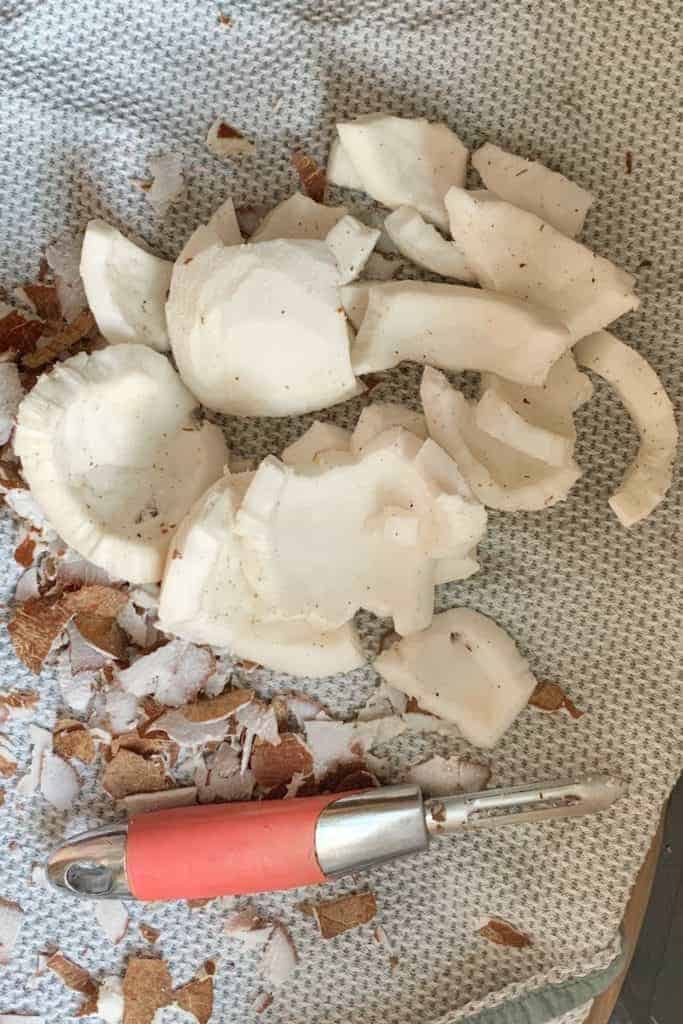
Tip: you can also leave the skin on but it would affect the colour of the cream and it will not be pure white; but the taste won’t change.
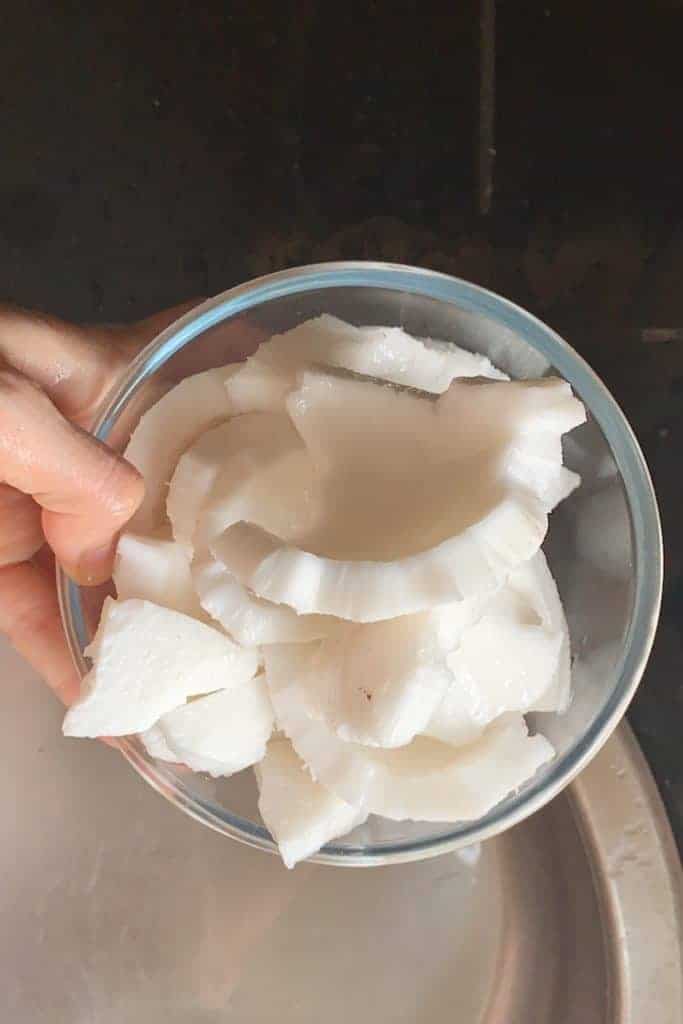
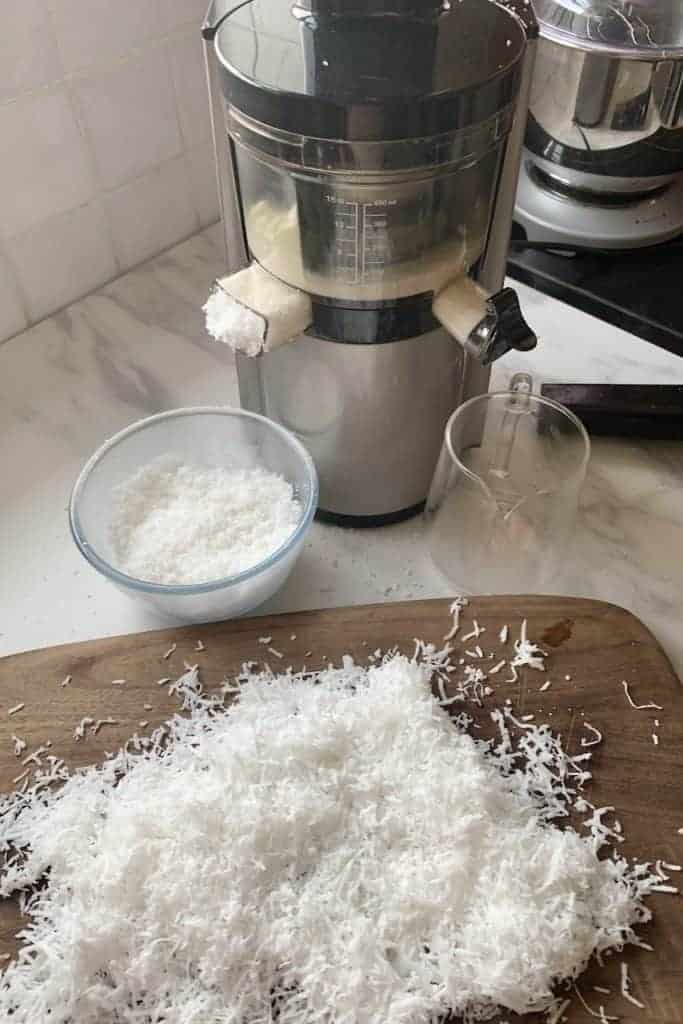
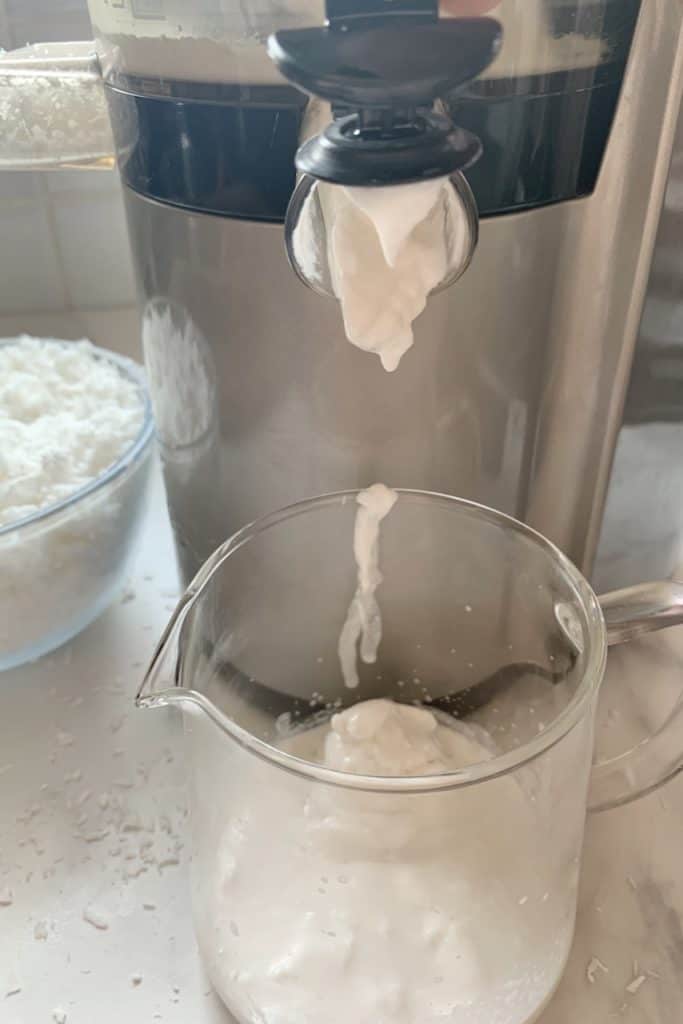
Pass pieces of the coconut flesh through your juicer (as you can see I sometimes use with the skin and sometimes without – depending on what I’m using the cream for).
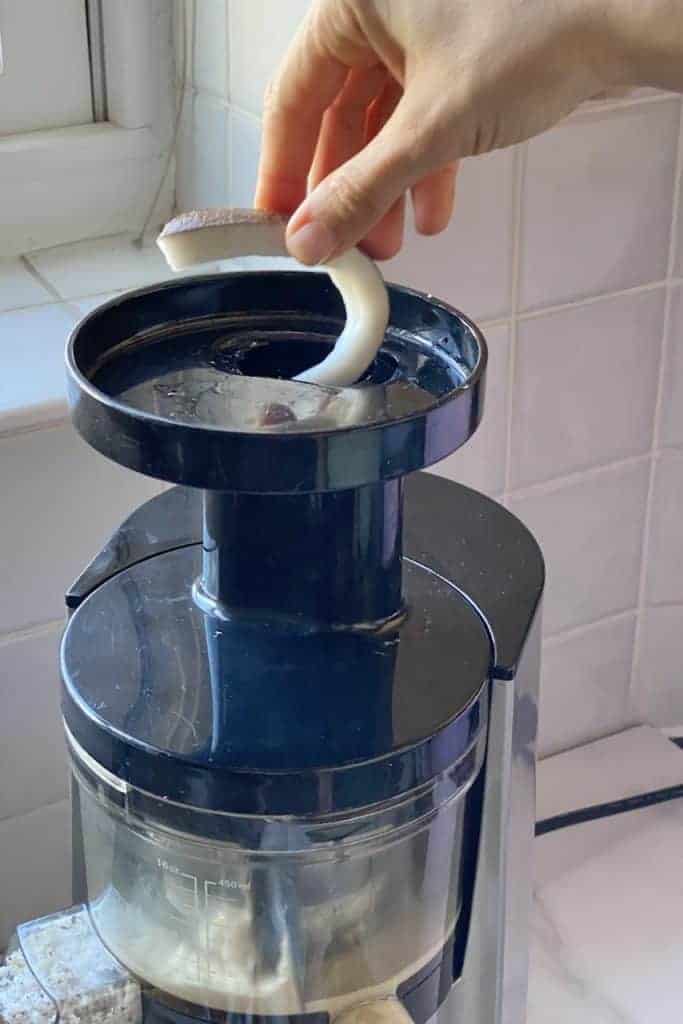
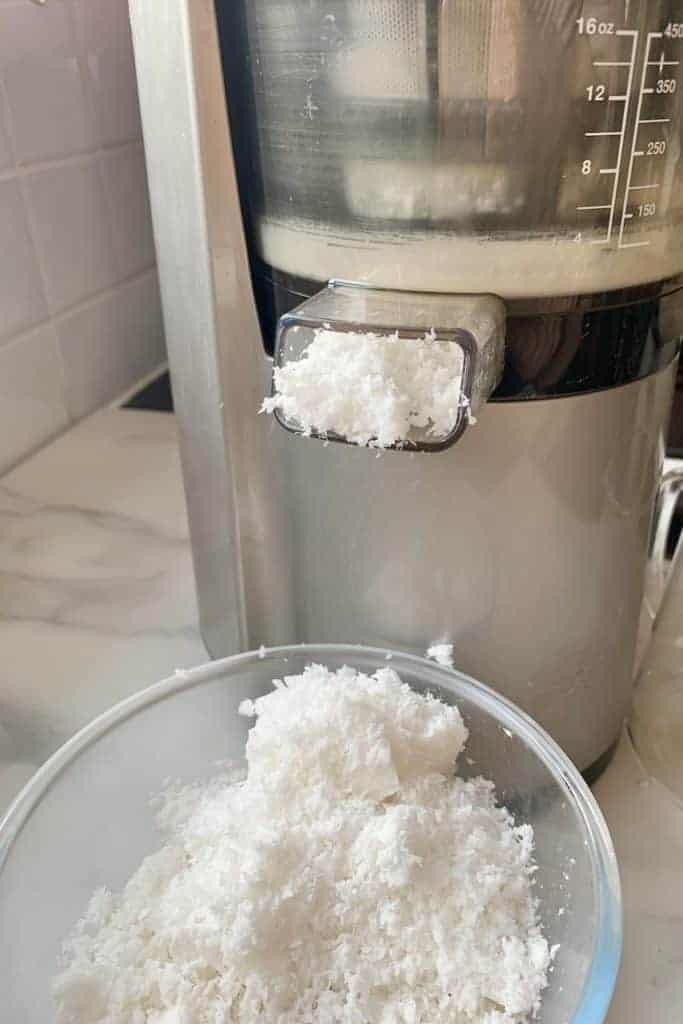
Voila! You get shredded coconut come out one shute and coconut cream from the dispenser- like magic.
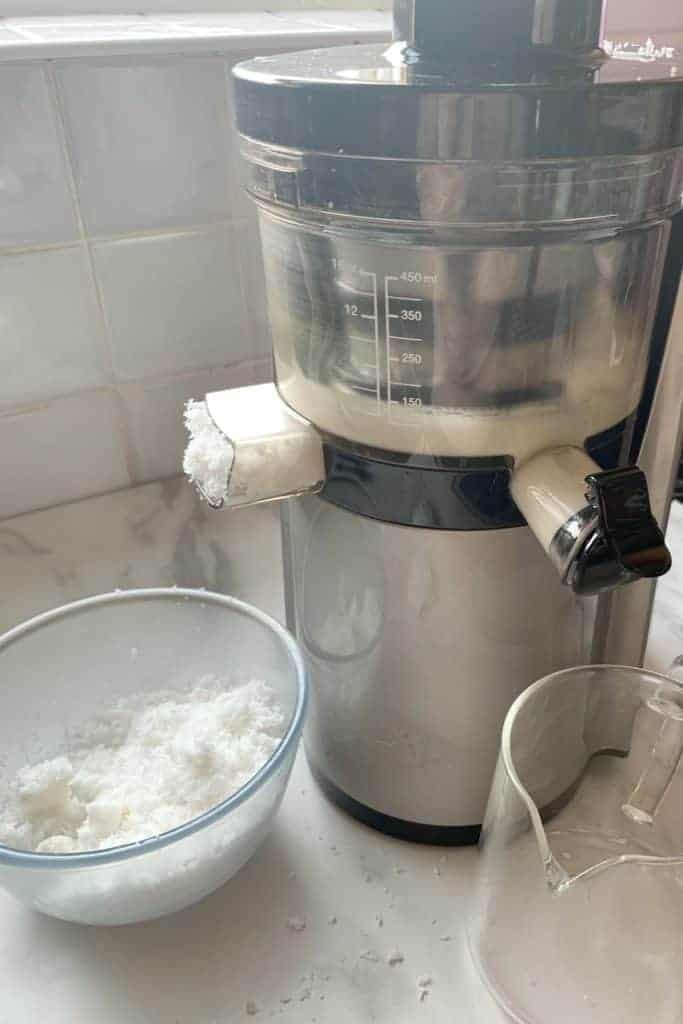
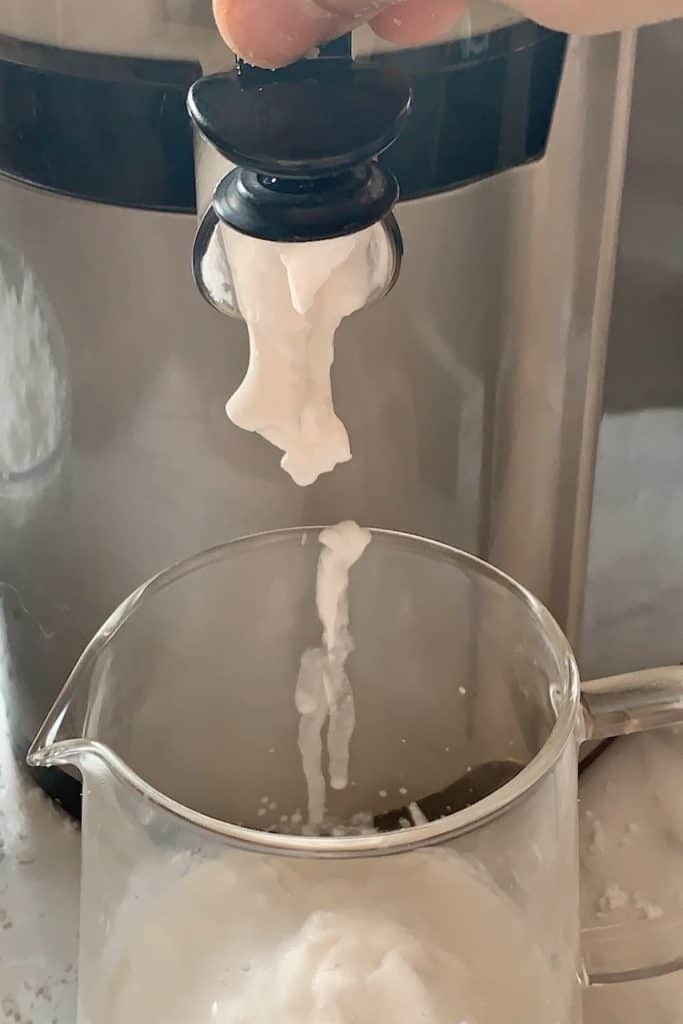
The shredded coconut coming out of the pulp dispenser (into the pulp container) is actually lower in fat too.
Your coconut cream is ready to use immediately or can be stored in the refrigerator in an airtight container for 3-4 days.
Other coconut DIYs you may like
If you’re not familiar with my coconut DIY obsession then you may not have seen that I’ve been working my way through pretty much everything you could possibly make with coconut. This includes Homemade Dairy-free Coconut Yogurt, How to make Coconut Butter, and even coconut sweetened condensed milk ( yes you read that right!).
If you give this DIY a try, I’d love to know your thoughts in the comments. Also, feel free to tag me in your recreations and how you use your homemade coconut cream @AlphaFoodie.
Easy Homemade Coconut Cream 2 ways
Equipment
- Hammer or a small hand saw
- Vegetable peeler (potato peeler) or a sharp knife (optional)
Ingredients
- Mature coconuts the amount is up to you. I used 9 to make a large jar of coconut cream
Instructions
The first step for either method: Opening the coconuts
- To keep the coconut shells 100% intact (to make coconut bowls), use a small handheld saw and cut them open through the middle. Do this over a bowl, to collect the coconut water. Otherwise, Begin by extracting the coconut water from the coconuts. You can do this by using a screwdriver, nail, or similarly sharp tool and create holes in the coconut eyes, to drain the water (which you can drink straight or add to smoothies).
- You can then put the coconut shells with the flesh in the oven for 20 minutes at 170ºC/325ºF. This is optional but it makes it easier for the flesh to come out of the shells. Alternatively use a knife, spoon, or coconut tool.
- You can peel the brown skin off the coconut flesh to get a pure white coconut cream when using a juicer (not required for the blender at all). This is an optional step. *
Method 1: Using a blender
- Add the coconut flesh to a high speed blender/food processor and blitz to shred it. Add 4 cups of water and blend again to obtain coconut milk. ** / ***
- Pass the blended coconut milk through a nut milk bag and squeeze out all the liquid. ****
- Pour the coconut milk into a big jar and set aside so that the creamy part separates from the watery liquid part and rises to the top. Using a dispenser tap jar works great as you can then easily remove the liquid part.
- Scoop out the coconut cream. Or, if using a dispenser tap jar, pour out the watery part and place in a smaller jar/container.
- Optional step: to make thicker cream, refrigerate overnight. It will separate further, to make even creamier cream on top. Scoop out the cream and it’s ready to use.
Method 2: Using a juicer
- Pass pieces of coconut fresh through a juicer. For a pure white cream, peel off the brown skin in advance.
- The coconut cream comes out in the juice container, low-fat shredded coconut comes out in the pulp container.
- Your coconut cream is ready to use immediately or can be stored in the refrigerator in an airtight container for 3-4 days.


I’d like to try this, thanks.
Where do you recommend buying coconuts in N America?
Also, can you freeze coconut milk or cream?
Hi there,
You should be able to find coconuts at your local East Asian, Mexican/Central American, or Indian store. Mainstream grocery chains can have them too.
You can freeze coconut milk and coconut cream. I hope this helps.
Can you use a cheese cloth if you don’t have a nut milk bag?
Hi Dana,
Yes, you can use a cheese cloth. Layer it 2-3 times if necessary.
When making the coconut creame using method two, what type of juicer are you using? I’m using the kruvigs cs700 and the coconut came out like a milk rather than creamy.
Are you soaking the coconut before hand or using any water with it in method 2?
Hi Jeet! Great question 😊 The juicer/masticating type can make a big difference, a slow masticating juicer tends to extract a thicker, creamier coconut, while some models push more liquid through. For method two, I don’t soak the coconut beforehand and I don’t add water (adding water will thin it out toward a milk rather than a cream). If yours came out milky, try running the pulp through a second time and pressing firmly, and avoid adding any liquid. You can also chill the result and skim the thicker cream off the top.
SUPER ! SUPER! SUPER INFORMATION! THANK YOU!
Thank you, Mary!
Great recipe! First time knowing about coconut cream. I’ve known coconut milk and how to make it since childhood, but not coconut cream. Coconut milk in my country (called as santan) usually used for cooking and drinking it is virtually unheard of. There’s even public debate when a foreign athlete visited my country when he caught on camera drinking coconut milk which usually used for cooking only. There’s debate about whether coconut milk and santan is the same thing. Some company representative even came out and stated coconut milk & santan is a different thing. What’s the difference? He said that coconut milk is more watery and santan is very thick in texture.
After going through many websites on how to make coconut milk and santan, the method to make the two are literally the same. There’s no difference at all. If there’s anything different, store bought coconut milk used more water and diluted even further, hence why the company representative said it has more watery texture compared to santan used for cooking that uses less water because it will get diluted when used for cooking (usually for curry and soup). To think something silly like this would become a public debate…
This is so interesting. Thanks for sharing, Uraura!
I very much enjoy and appreciate your site, especially for trying to make vegan deserts for gatherings, but do have a request: Could you please be more precise with measurements, even if they’re only estimates? 9 coconuts made a big jar means a 16 oz jar? Or 8, or 32? Coconuts vary but not so radically and every foodie has a scale. It would be helpful when shopping to have some sort of gauge and then people wouldn’t have to hunt down other sites to figure it out. Thanks!
Hi Kathryn! 😊 Thank you so much for the kind words and for the helpful feedback, you’re absolutely right that more precise estimates make shopping and prepping easier. Coconut yield does vary, but as a rough guide a mature coconut yields roughly 1-1.5 cups of cream/milk depending on size and how much water you add, so a batch from several coconuts could fill a large jar (think 16-32 oz). I’ll work on adding clearer estimated measurements to the recipe. Thanks again for taking the time to share this!
Your site is very good, I liked the information. Grateful. 52417176
Thank you!
This recipe looks good! I have a question, how long would the separation process take (from the 1st method)?
Hi Ron,
I’d say at least 24 hours in the fridge. I hope you enjoy it!
My husband is from Fiji and the islands do this process all the time just to make daily meals. Tools are the back of a machete to crack open the coconut with one hit, a scrapper attached to a piece of wood that they sit on and scrape the flesh into a bowl. they rinse the shredded flesh with the coconut water. My husband says separating the cream from the liquid is also how they make virgin coconut oil.
Thank you so much for your comment, Dauny!
Olá ! Gostaria de saber como desidratar ou secar o creme de coco e como fazer o leite de coco em pó caseiro? É possível?
Hi Eliane,
To dry coconut cream, you can follow the steps from this post – https://www.alphafoodie.com/how-to-make-powdered-milk-at-home/
Make sure to use low temperature – 50-60ºC/ 122-140ºF – and the coconut cream needs to become completely dry for this to work.
I’m trying to make coconut oil and coconut cream using your technique. I love how easy the technique is. Though, Im not sure how to recognize when I’m done cooking the mix for the heat method for oil.
I figure I’ll know it when I see it. But I’m not seeing it. Probably just impatient.
Thanks so much for the fun with coconuts ideas, recipes, and photos.
Hi Deb,
Thank you for your comment! Did you watch the video on the blog regarding how to make coconut oil? It will give you a better idea on what to look out for.