
This post may contain affiliate links. Please read our disclosure policy.


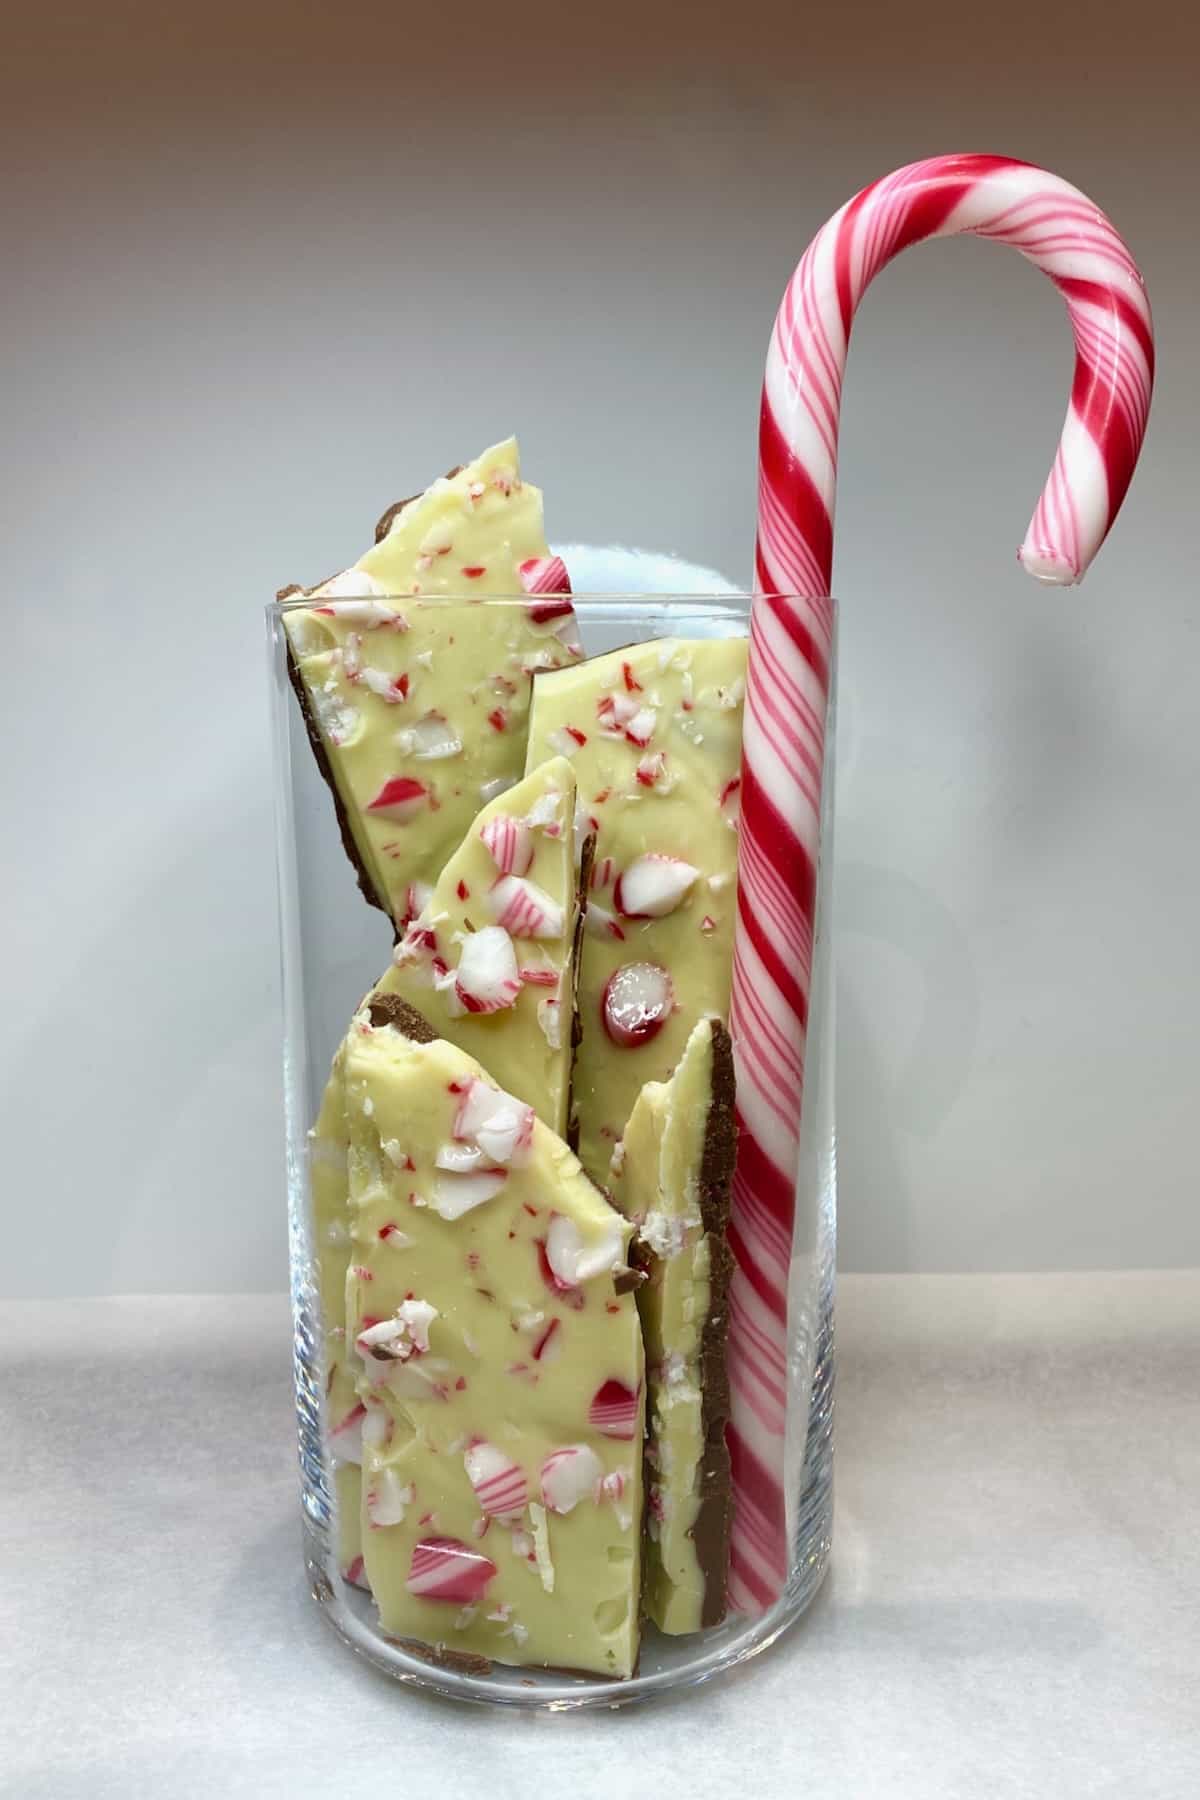
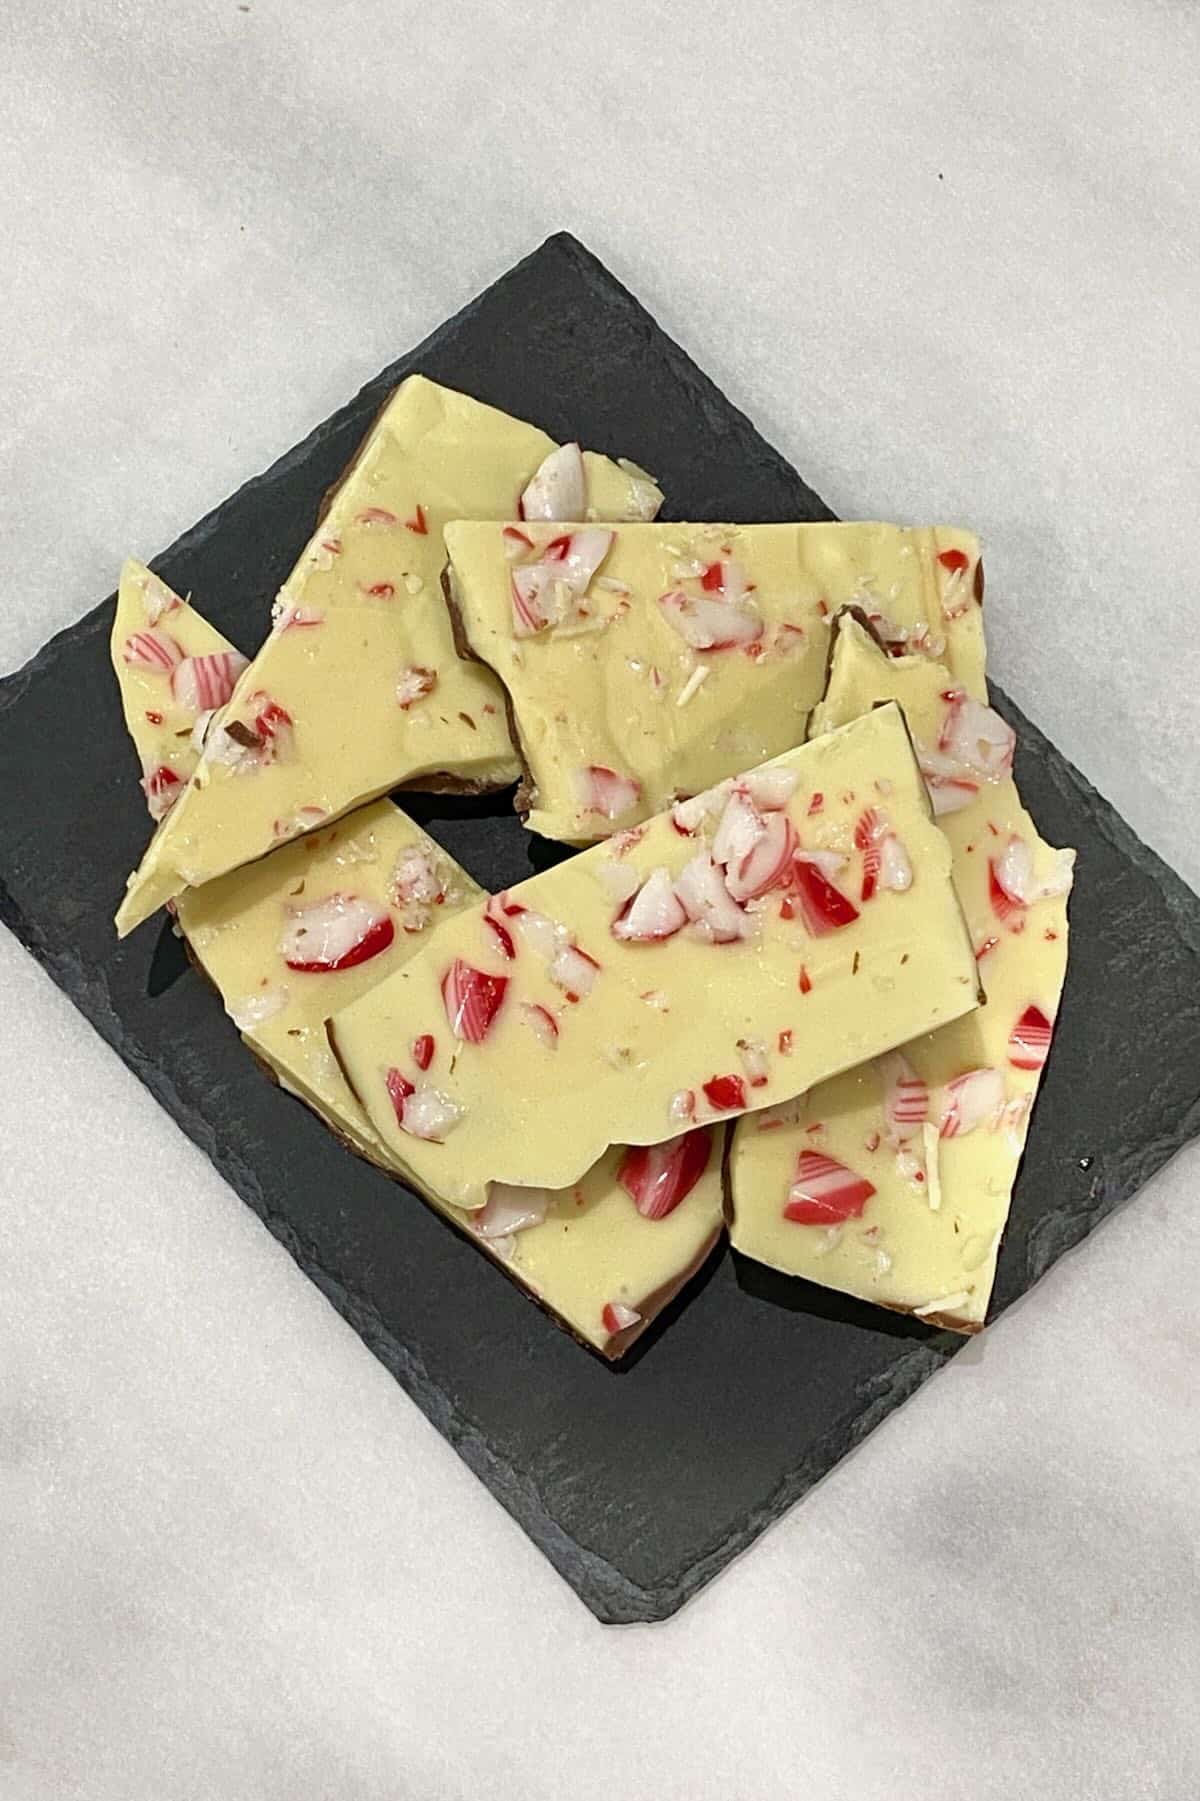
This 4-ingredient white chocolate peppermint bark layers milk/dark chocolate with white chocolate and a peppermint candy topping. It’s a super simple holiday snack, dessert, or edible gift, perfect for making with kids and customizing to your taste/dietary requirements (including vegan/Keto)!
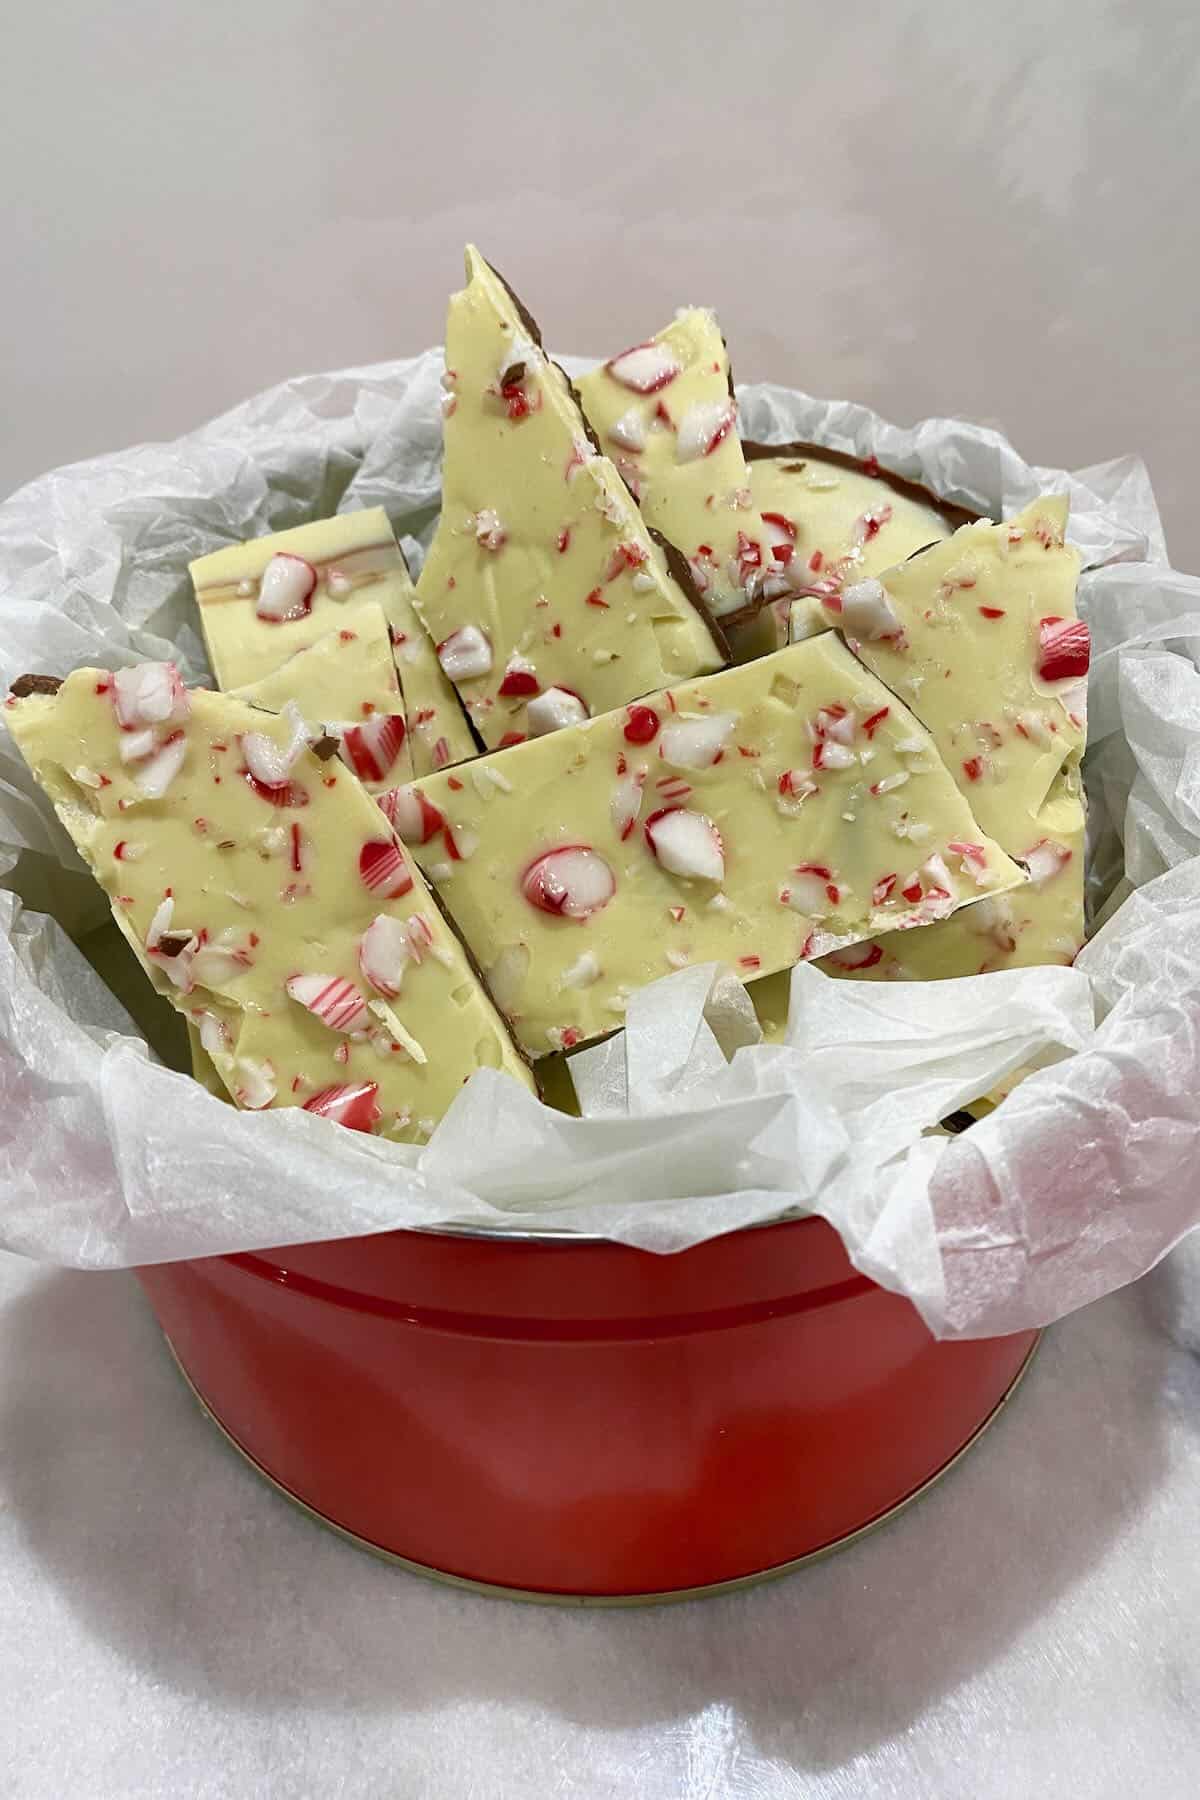
This white chocolate peppermint bark is possibly the ultimate low-effort holiday snack. It requires just 3 ingredients (4 if you want to infuse the white chocolate with extra peppermint) and the simplest process. All you do is melt the chocolate, pour it into the pan of your choice, and top it off with peppermint candy (even the kids will be helping you in the kitchen)! And yet, as simple as it sounds, this white chocolate Christmas bark disappears in practically minutes when left out at a holiday gathering or on Christmas Day.
I’ve also included several variations of this recipe for peppermint bark. Keto peppermint bark, vegan peppermint bark, and several other optional addons and recipe variations for you to choose from. With how quickly this disappears from the bowl, you’ll be making multiple batches this Christmas anyway!
In fact, this white chocolate Christmas bar makes for a simple but well-loved edible Christmas gift too. Pack a few pieces in a cute cellophane candy bag tied with a ribbon, and your family and friends will adore it either as a stocking stuffer or part of a larger gift. Thanks to the shelf stability, you can even post it to family and friends.
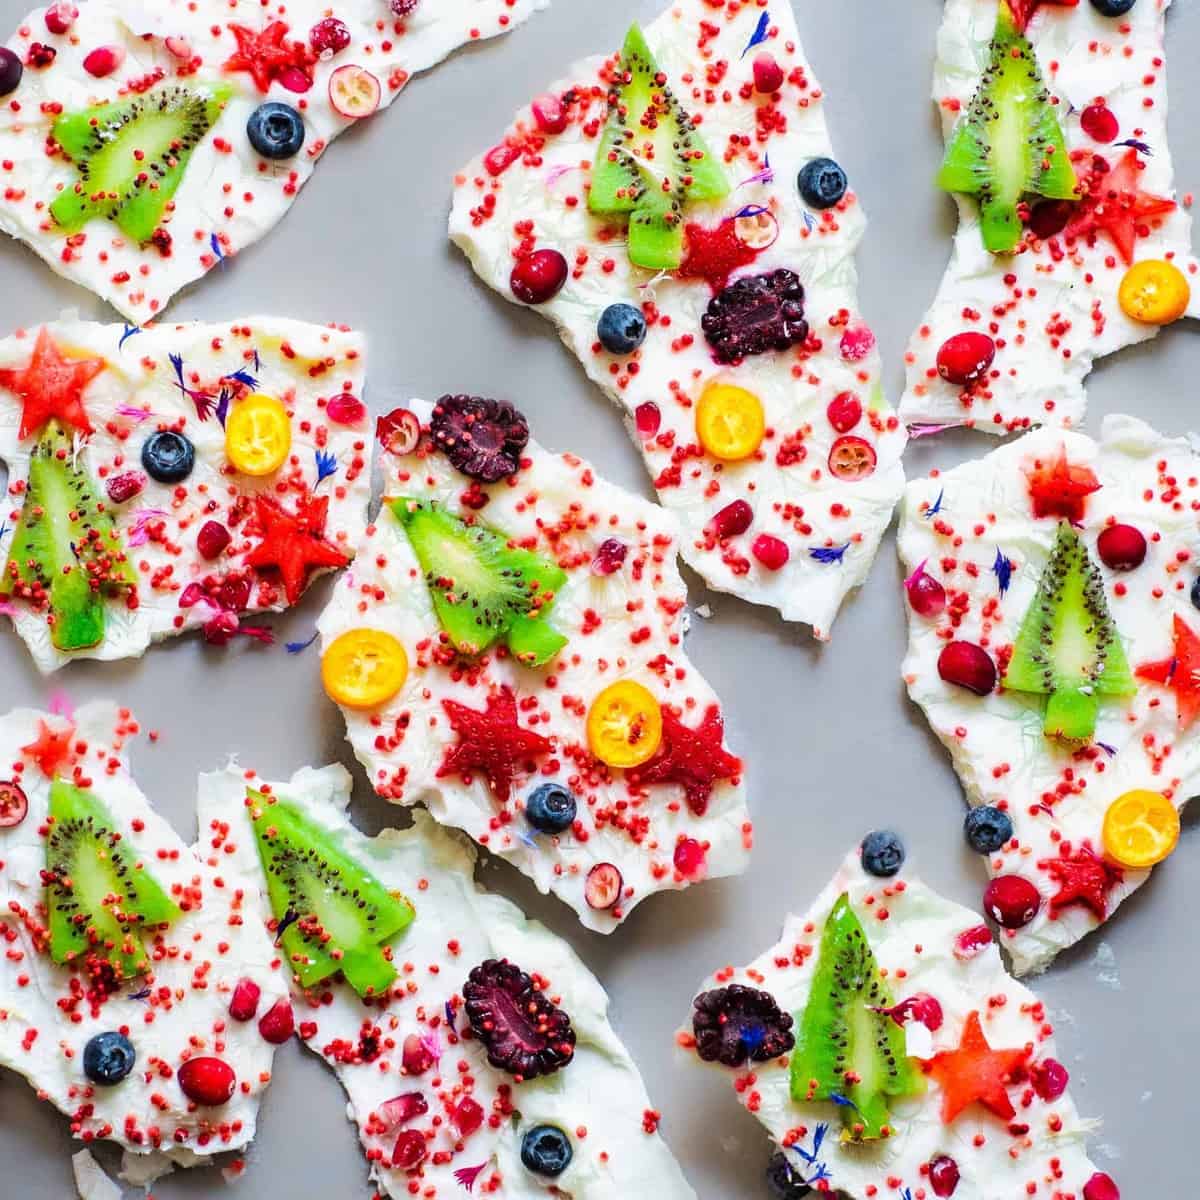
And if you’re looking for more fun Christmas bakes, you might enjoy learning how to make a fantastic gingerbread house, delicious candied pecans, orange sugar cookies, or even fluffy thick gingerbread pancakes!
Want to save this recipe?
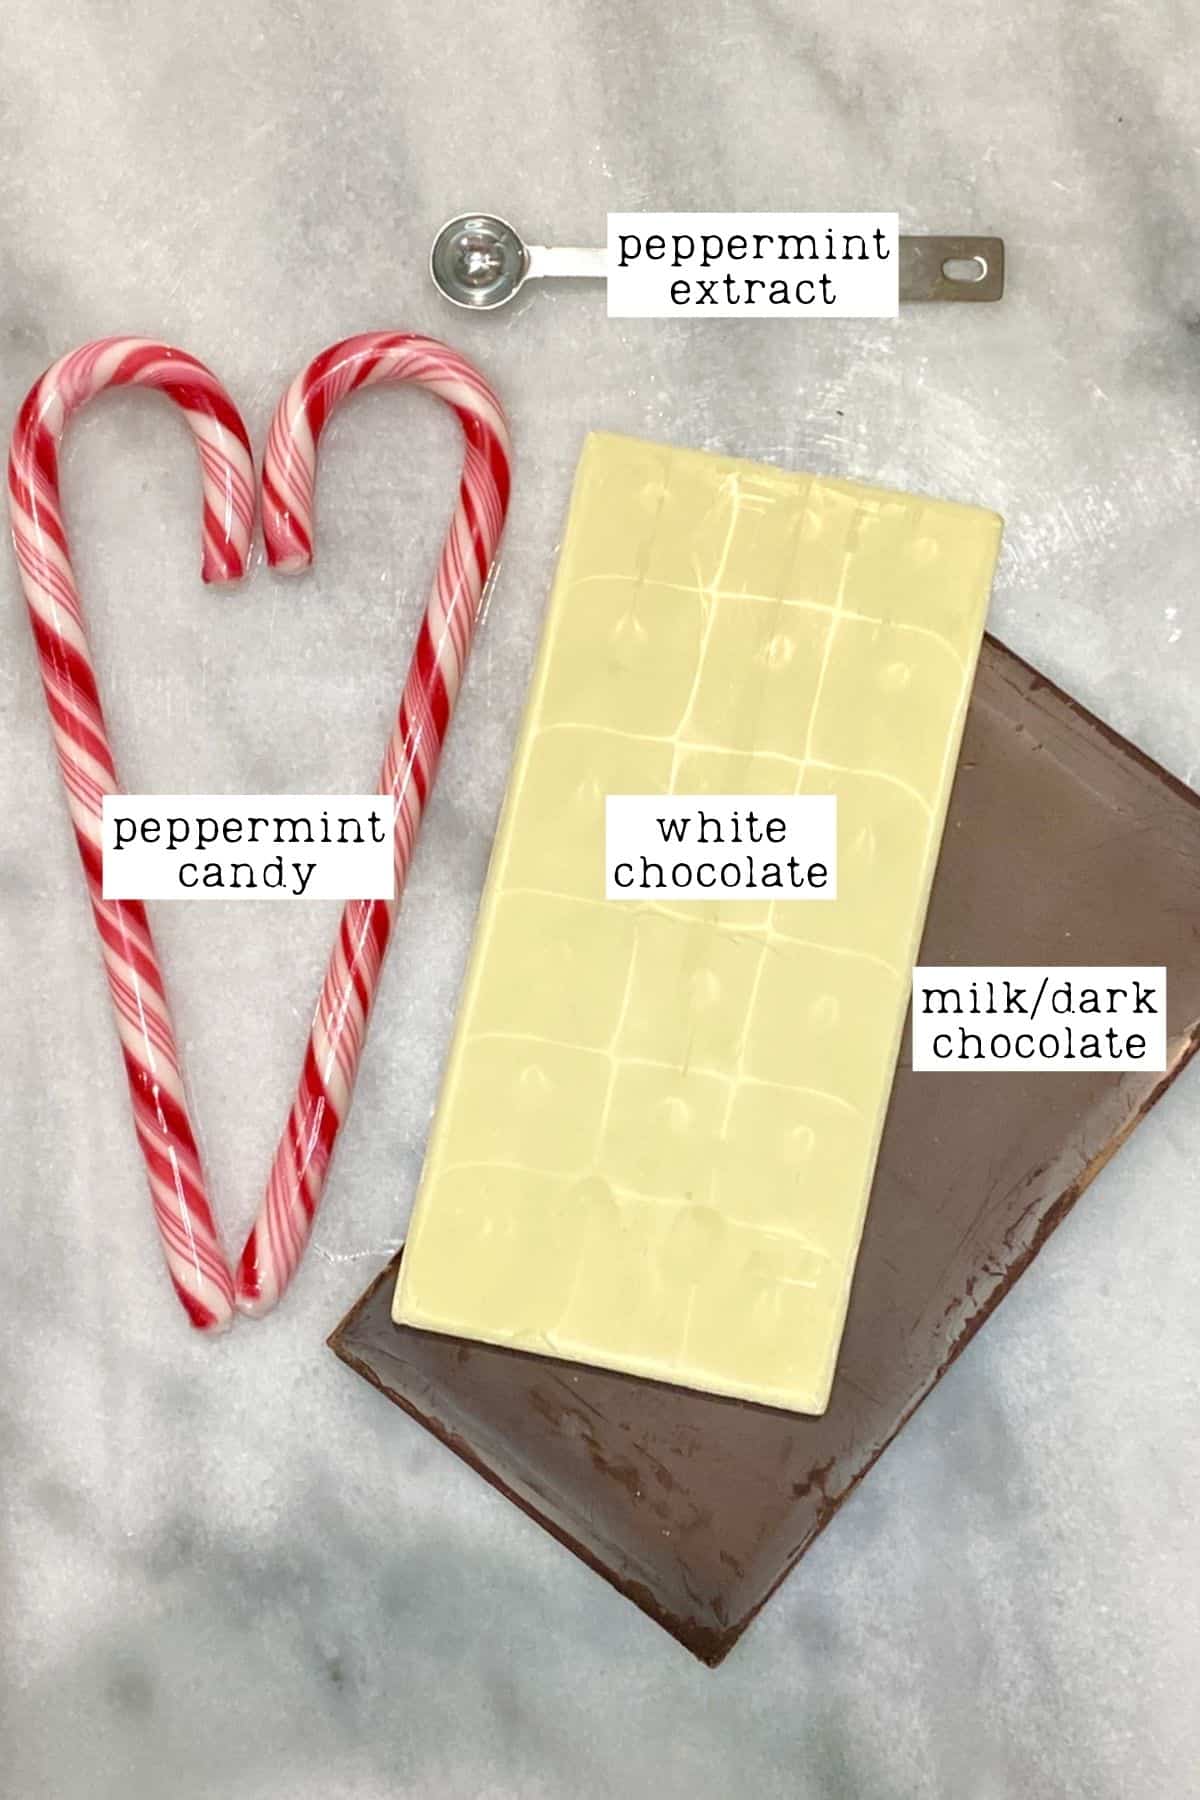
The White Chocolate Peppermint Bark Ingredients
- White chocolate: you can use homemade or store-bought white chocolate. Use high-quality chocolate containing cocoa butter (not palm oil/coconut oil) to get a smooth melt that adheres to the other chocolate.
- Milk/Dark chocolate: use high-quality milk or dark (semi-sweet or bitter-sweet) chocolate chips/bar for this homemade peppermint bark.
This is technically optional, but I always add it. I prefer to use bitter-sweet/dark chocolate over 70% to balance with the sweetness of the white chocolate.
- Peppermint candy: I used candy canes, as I had some lying around. But any crushed peppermint candy will work.
- Peppermint extract: (optional, but I always add it) use an oil-based, not water-based, candy extract that won’t cause your chocolate to seize.
Optional Add-ins and Alternative White Chocolate Bar Ideas
- Dried fruit: a sprinkle of chopped dried cranberries and/or apricot would work well.
- Cookies: you could crumble some cookies (digestives/rich tea work well) into the dark chocolate layer or even some pretzel pieces in this white chocolate candy cane bark.
- Nuts: I recommend using lightly toasted crushed nuts for the best flavor. My favorites are white chocolate almond bark and pistachio bark (either over the top or mixed into the white chocolate) but experiment with other nuts/seeds like pecans, walnuts, etc.
- Coconut: use shredded coconut or coconut flakes (raw or lightly toasted) to make a delicious coconut chocolate bark. Optionally pair with nuts or dry fruit.
- Keto peppermint bark: if you’re making your own chocolate, make sure to use keto-friendly sugar (not water-based). Otherwise, use keto-friendly chocolate and peppermint candies.
- Vegan chocolate bark: use vegan chocolate (many dark chocolates are naturally vegan). Most candy canes are vegan, but double-check your candy.
- Pistachio cranberry bark: with either white, dark, or the combination of the two chocolates. Optionally add a pinch of flakey sea salt to balance the sweetness of the white chocolate.
- White chocolate Oreo bark: chop/crush Oreos and mix them with white chocolate mint bark.
You can also create peppermint bark with just one type of chocolate, rather than the white and dark chocolate peppermint bark that we’ve made here.
How to Make Peppermint Bark?
Step 1: Prepare a Tray
First, prepare your tray/shallow box of choice (I used a 9×9 inch/23×23 cm baking sheet). To double the recipe, I recommend 9×13 inch/23×33 cm. Line the tray with aluminum foil (shiny side up, with slightly overhang) or parchment paper, smoothing away any bumps.
Alternatively, you can use a large silicone square/rectangle cake mold, and no foil is required.
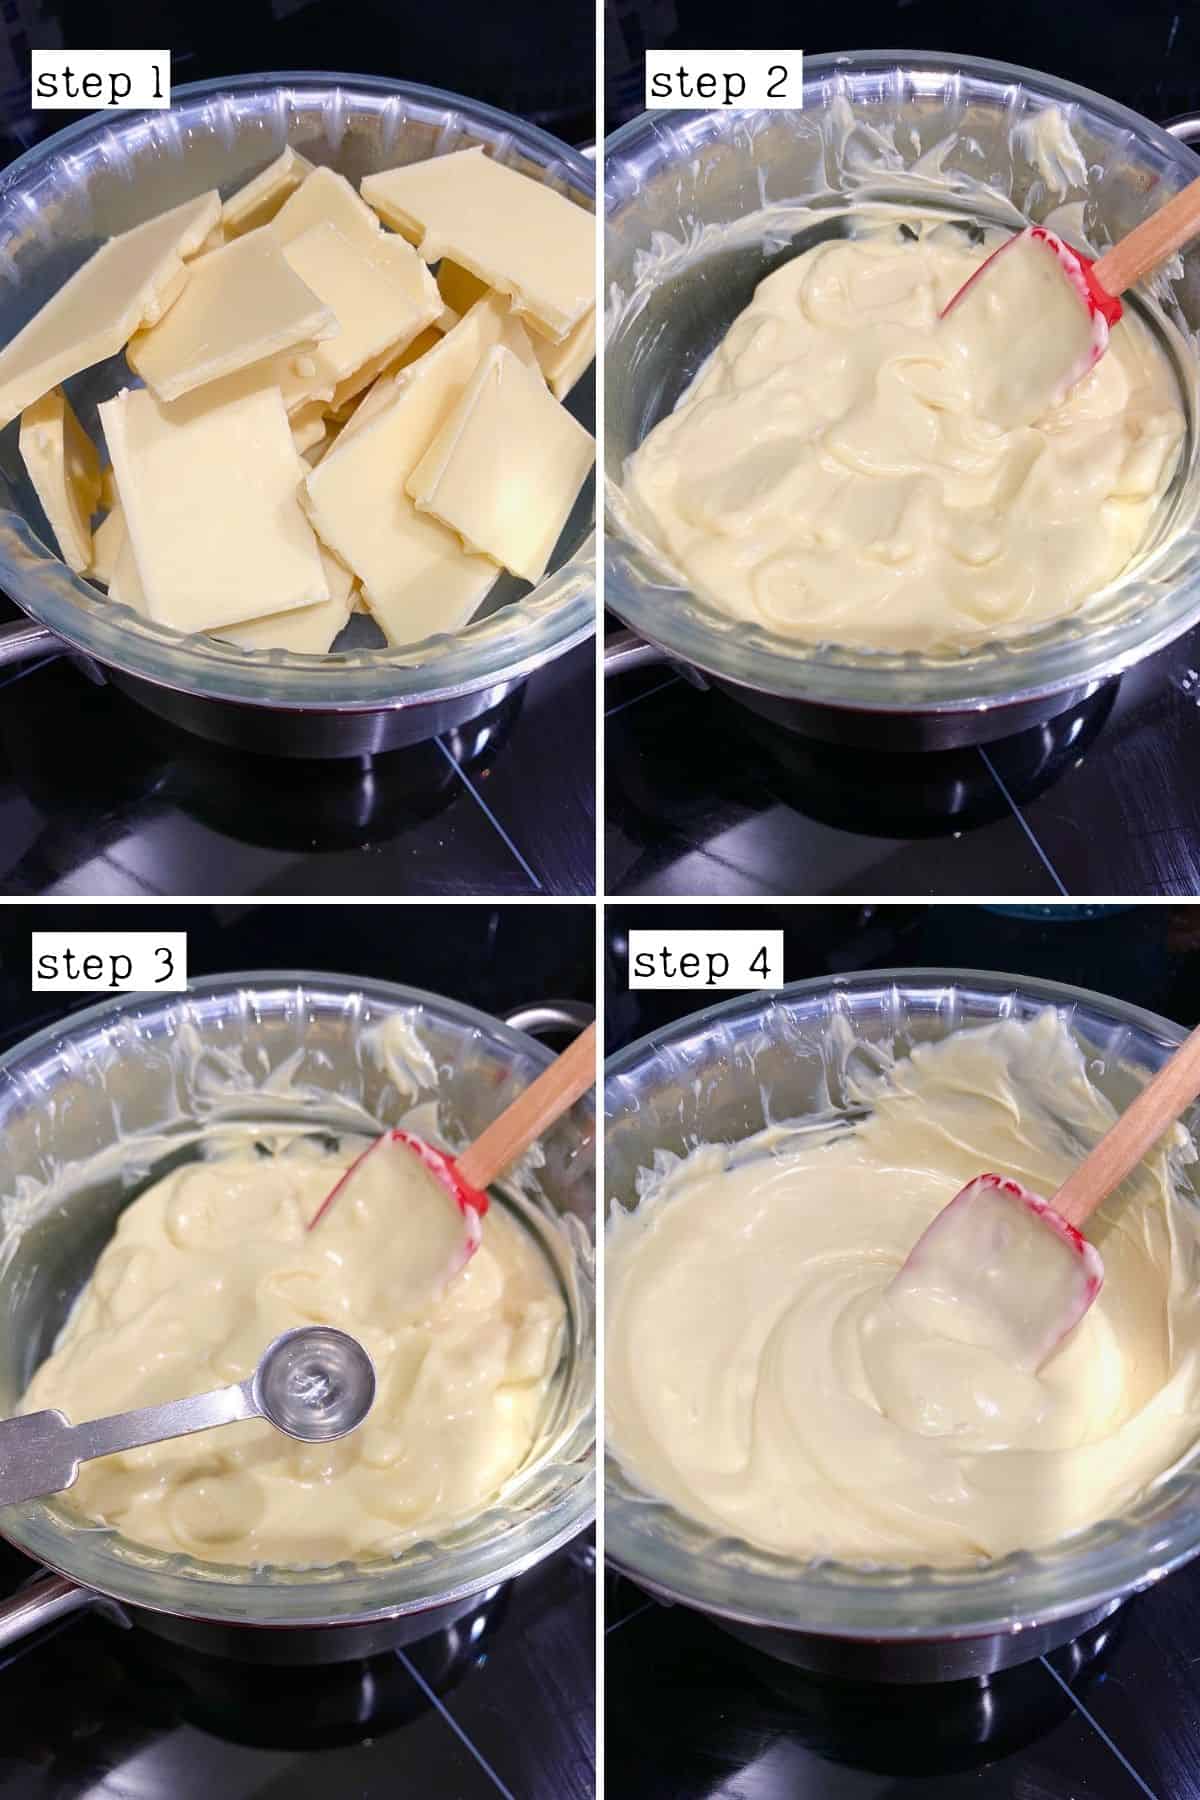
Step 2: Melt the Chocolate
Melt the milk/dark chocolate until smooth and fully melted using a double boiler method.
What is a double boiler? Place a heatproof bowl over a small saucepan filled with an inch or two of simmering water (the water shouldn’t touch the bottom of your bowl). Chop the chocolate into smaller pieces and place in the bowl, stirring often until melted.
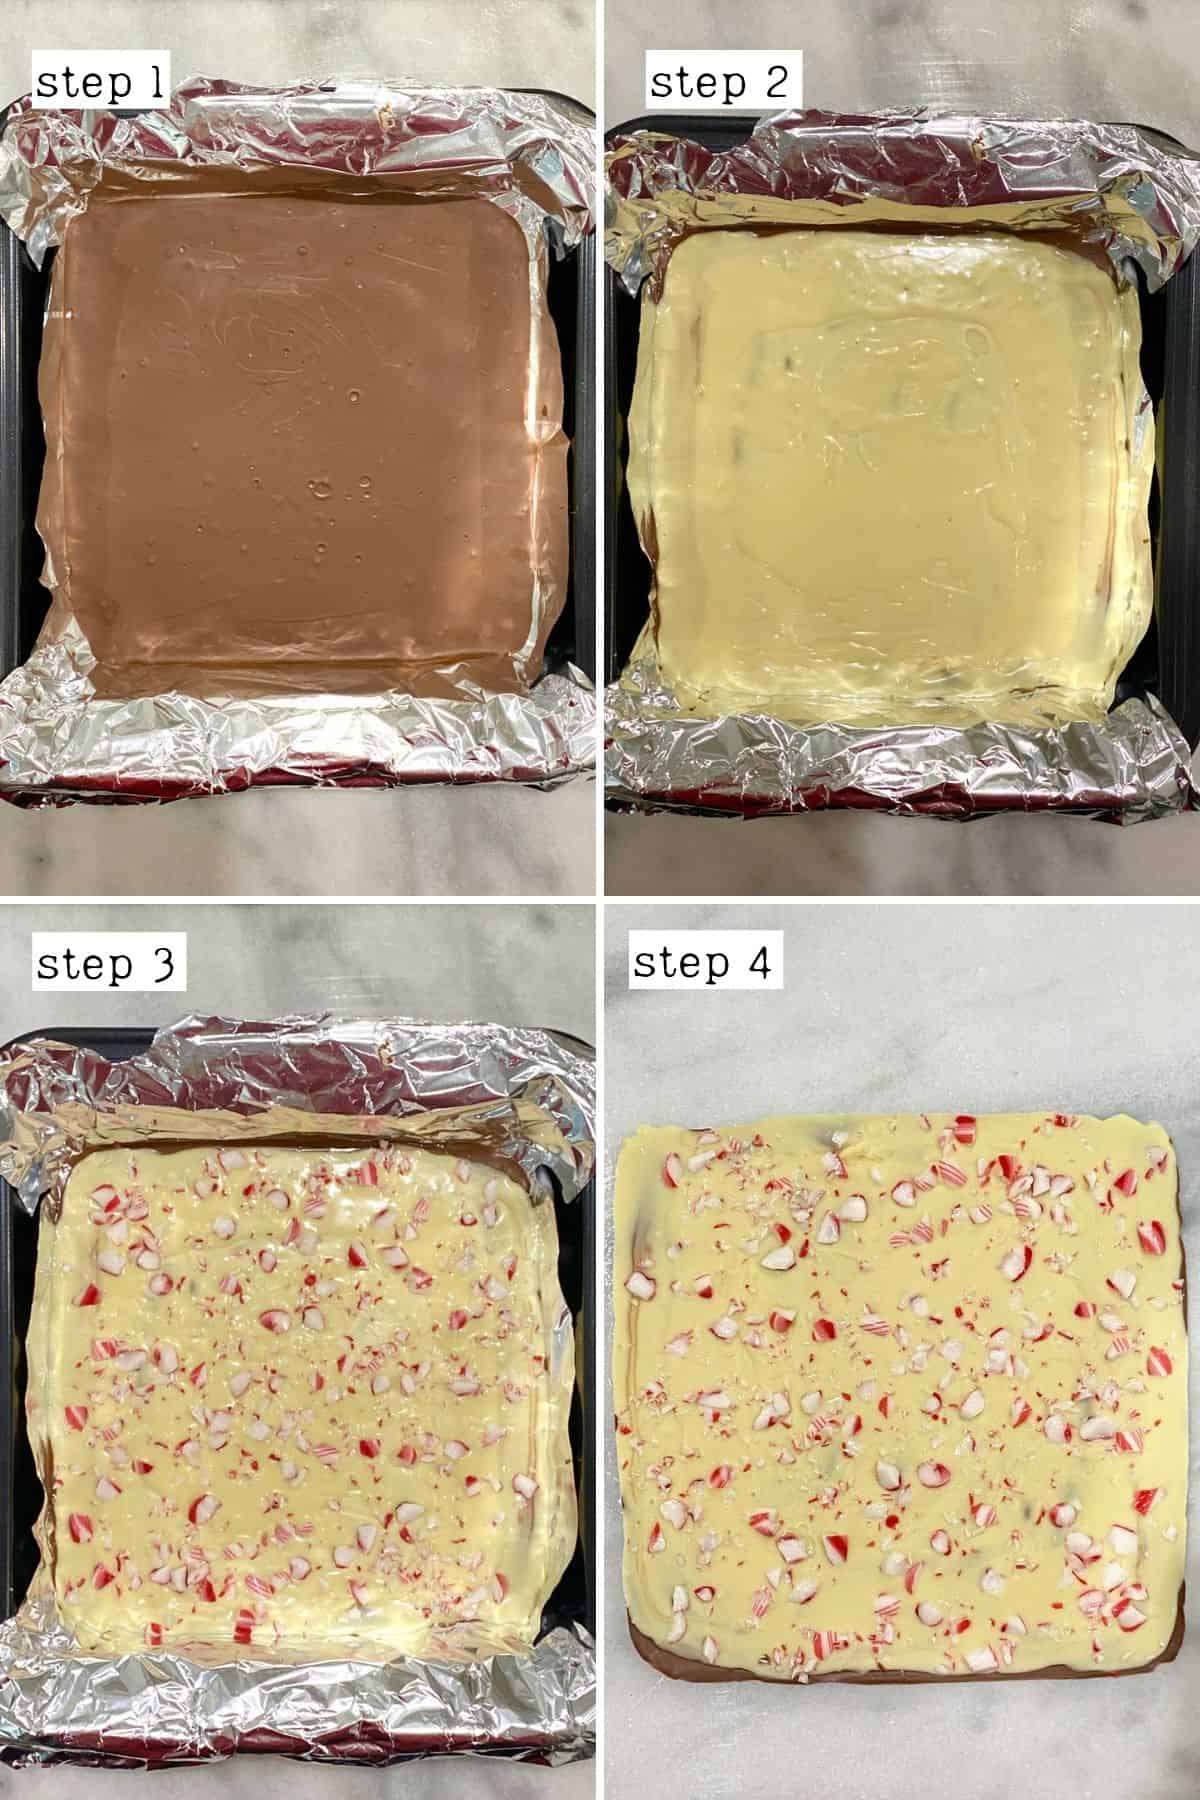
Then, pour the melted chocolate into your prepared tin, using a silicone spatula to get as much of the chocolate from the bowl as possible. Then tap it gently on the countertop to release any air bubbles.

Make sure to use a tea towel or something heatproof to hold the bowl, as it will be hot!
Then, transfer the tray to the refrigerator to set for around 10-15 minutes. It shouldn’t be fully set, but mostly set, if you want the two layers to adhere well.
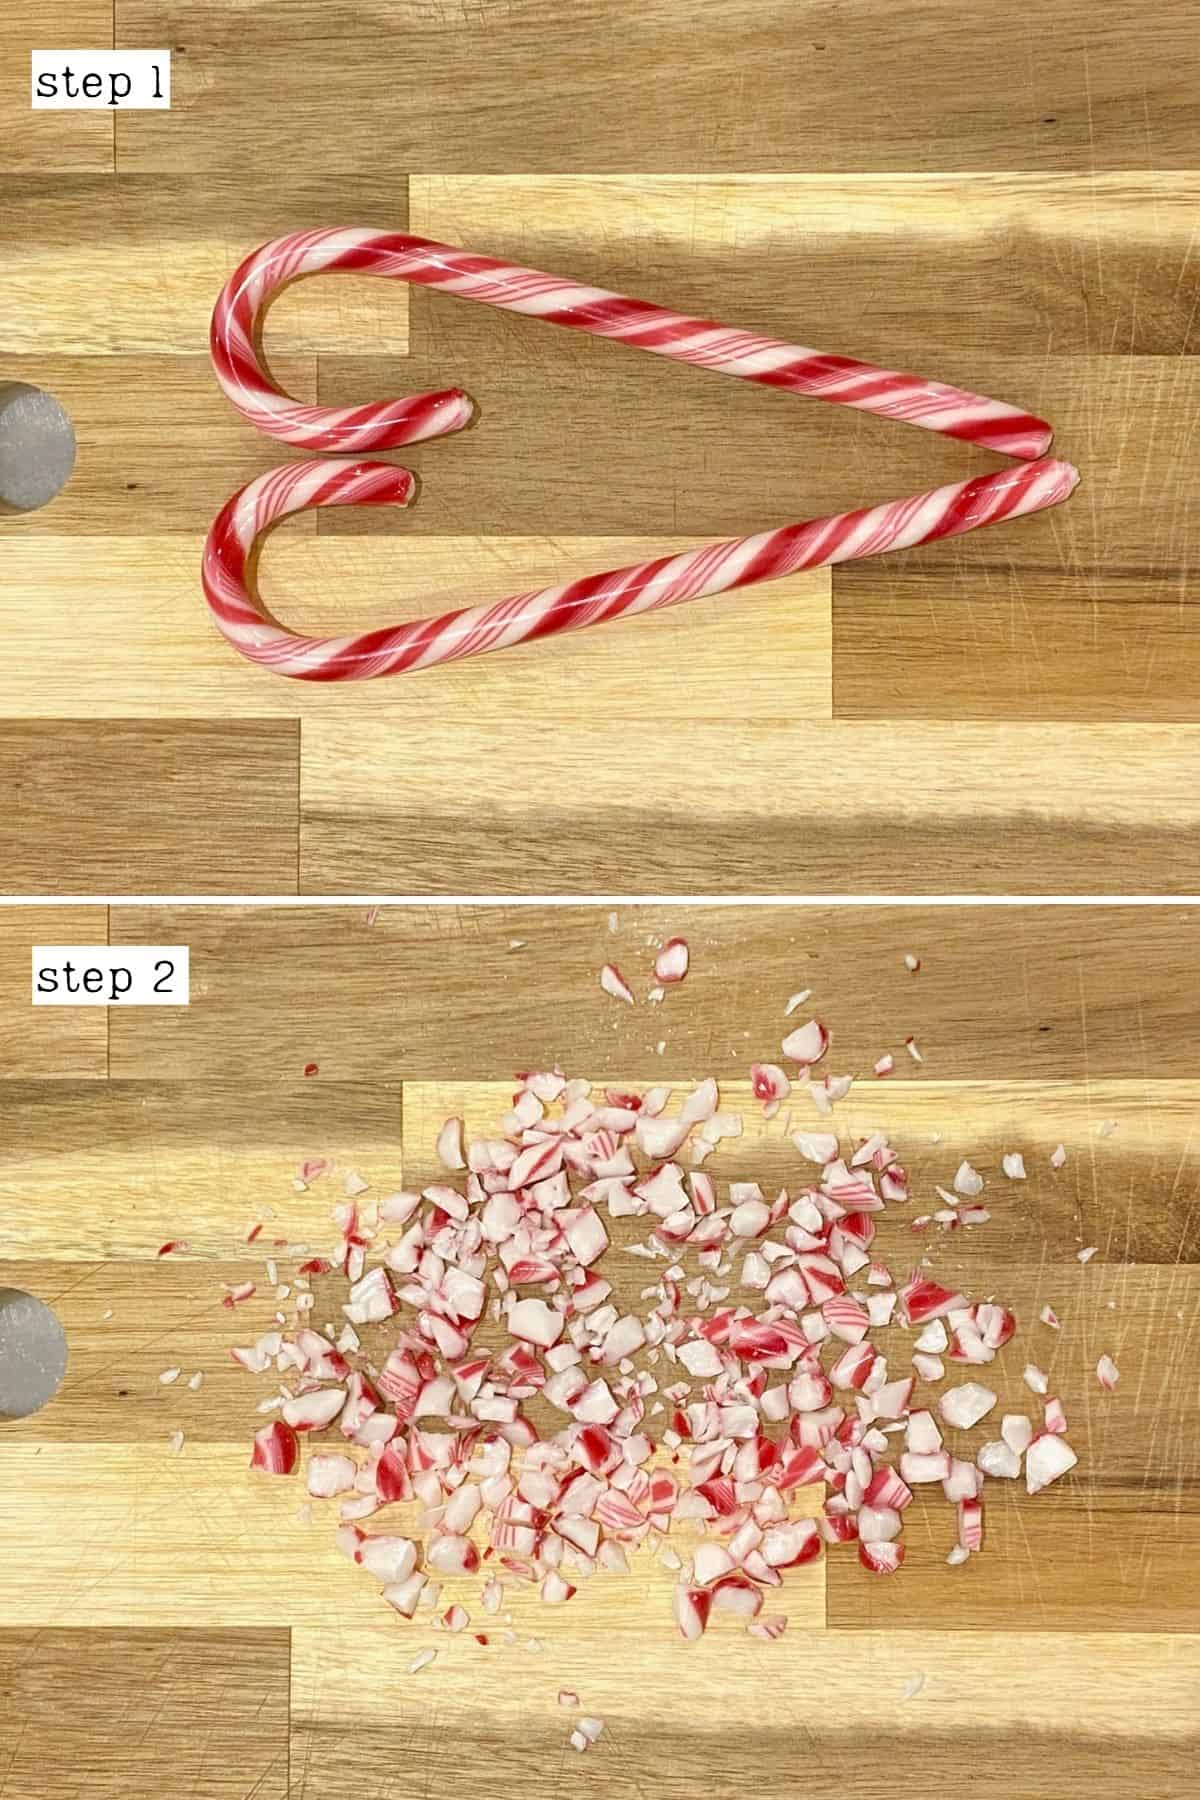
Step 3: Prepare the peppermint candy
As the first layer chills, it’s time to crush the peppermint candy either using a knife, pulsing in a food processor for a few seconds, or crushing inside a bag with a heavy item (like a rolling pin/mallet).
I prefer to use a knife as it gives me more control over the size of the pieces. Crushing the pieces in a bag tends to yield a lot of “candy dust.” You can strain them out with a strainer and mix them into the white chocolate or save them for something else or add to your hot chocolate.
Step 4: Prepare the White Chocolate Layer
After the first layer has chilled, melt the white chocolate using the double boiler method until JUST melted. Then remove it from the heat, add the peppermint extract, and stir to thoroughly distribute it.
Pour the melted white chocolate over the first layer, spreading it with a spatula (an offset spatula is best) and tapping it against the counter to smooth/release air bubbles.
Be careful as the hot chocolate may have caused the lower level to melt slightly, so you could end up mixing them if not careful.
Then, sprinkle the crushed candy canes over the white chocolate bark (as much or as little as you’d like). Optionally, gently press the candy into the chocolate slightly so it’s less likely to fall off.
Place the tray back in the fridge to fully set (for around 30 minutes or 15 minutes in the freezer).
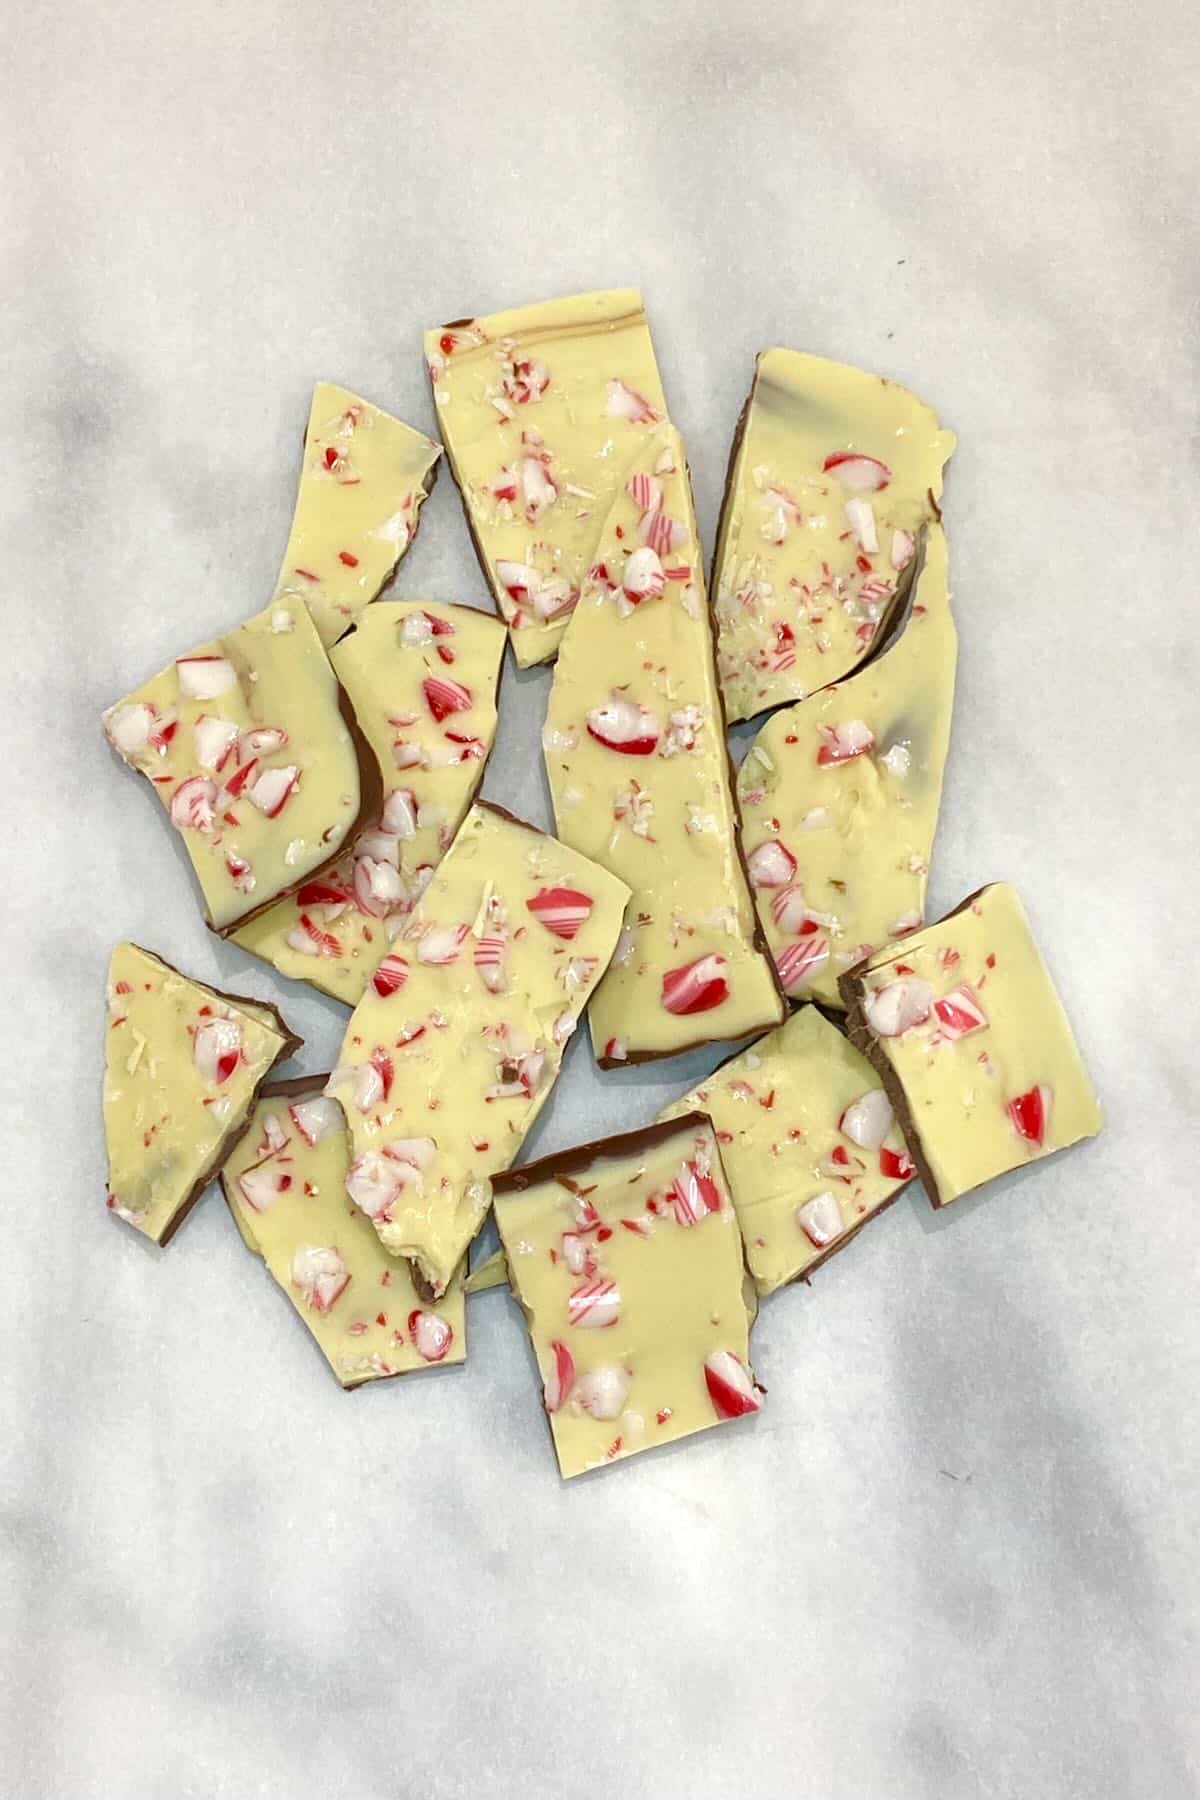
Step 5: Break the Chocolate Mint Bark
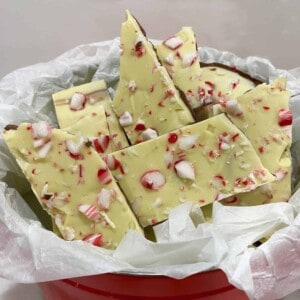
Once set, remove the white and dark chocolate peppermint bark from the fridge, use the tin foil overhang to remove it from your pan, and peel away the foil. Finally, allow it to rest for a few minutes before you cut or break it into irregular bark pieces, and enjoy!
How to Store?
Store: store the white chocolate peppermint bark in an airtight container at room temperature for about 10 days. While the chocolate will be fine after that, the peppermint candies begin to soften and become chewy and unpleasant to eat.
Freeze: while it’s possible to freeze chocolate peppermint bark, you must keep moisture away from the chocolate. To do so, I like to wrap the chocolate in two layers of plastic wrap before then placing it in an airtight Ziplock bag or container. You can store it for several months in the freezer this way.
FAQs
Use good-quality chocolate with cocoa butter and leave it adequate time to chill and set before slicing. It’s also a good idea to pour the white chocolate over the first chocolate layer when it hasn’t been fully set yet.
Absolutely! In fact, tempering the chocolate is best if you plan to ship this white chocolate peppermint bark. Follow this guide for tempering your chocolate. Then allow the layer to cool on the countertop rather than in the refrigerator.
Yes, just be careful not to scorch it. I recommend using a heatproof bowl and microwaving on low power in 30-second increments, stirring in-between each.
This dark and white chocolate peppermint bark recipe is simply two types of chocolate combined with optional peppermint extract and topped with peppermint candies. It may sound super simple, but this Christmas treat tastes delicious!
Well, chocolate itself is shelf-stable and will last months and months. The peppermint candy on top softens within 10 to 14 days and will become unpleasantly chewy. I recommend enjoying the candy cane chocolate bark within 10 days (although it rarely lasts 2 when sharing it with guests).
Recipe Notes and Top Tips
- To create a chocolate swirl: instead of two layers, you can swirl the chocolate. Pour the melted milk/dark chocolate into your pan as usual then, without chilling, drizzle the white chocolate over that and use a little spatula to gently swirl it to create a swirl pattern. You’ll only need half the amount of the white chocolate.
- The best chocolate for peppermint bark: make sure the chocolate contains cocoa butter; otherwise, you can have issues with the two layers adhering correctly. I recommend using brands like Ghirardelli, Callebaut, and Lindt.
- When pouring the white chocolate: it’s best if the first layer of chocolate isn’t completely set. That way, they’ll adhere better.
- For clean cuts: use a sharp knife dipped in hot water and then wiped off. Re-dip it as needed while you chop your white chocolate peppermint bark pieces.
- To make peppermint bark hearts: use mini candy canes to shape into a heart and pour your chocolate within.
More Sweet Holiday Treats
- Healthy Candy Cane Jars (Yogurt and Jelly)
- Mini raw vegan chocolate peppermint cheesecakes
- Festive Frozen Yogurt Bark Recipe
- Gluten Free Brownie in a Jar (Edible Christmas Gift)
- Cranberry Juice (Stovetop | Sugar Free Optional)
- Chocolate Vanilla Pinwheel Cookies (Slice-and-Bake Swirl Cookies)
- White Hot Chocolate (+ Flavors| Toppings| Crockpot Option)


If you try this simple white chocolate peppermint bark recipe, I’d love to hear your thoughts/questions below. Also, I’d appreciate a recipe card rating below, and tag me in your recipe recreations on Instagram @Alphafoodie!
White Chocolate Peppermint Bark (+ Multiple Variations | Keto, Vegan Optional)
Ingredients
- 7 oz chocolate dark or milk high-quality or homemade (using cocoa butter)
- 7 oz white chocolate make sure it contains cocoa butter (not palm oil/coconut oil)
- 1.8 oz peppermint candy less or more to preference, I used about 2 candy canes
- 1/4 tsp Peppermint extract less or more to taste (optional)
Check the Recipe Notes below for optional add-ins and variatons!
Instructions
Step 1: Prepare a Tray
- Prepare your tray/shallow box of choice (I used a 9×9 inch/23×23 cm baking tin). To double the recipe, I recommend 9×13 inch/23×33 cm. Line the tray with aluminum foil (shiny side up, with slightly overhang) or lightly greased parchment paper, smoothing away any bumps.Alternatively, you can use a large silicone square/rectangle cake mold, and no foil is required.
Step 2: Melt the Chocolate
- Melt the milk/dark chocolate until smooth and fully melted using a double boiler method (see the Notes below for how to do this exactly).
- Pour the melted chocolate into your prepared tin, using a silicone spatula to get as much of the chocolate from the bowl as possible. Then tap it gently on the countertop to release any air bubbles.Make sure to use a tea towel or something heatproof to hold the bowl as it will be hot!
- Transfer the tray to the refrigerator to set for around 10-15 minutes. It shouldn't be fully set, but mostly set, if you want the two layers to adhere well.
Step 3: Prepare the Peppermint Candy
- As the first layer chills, it's time to crush the peppermint candy either using a knife, pulsing in a food processor for a few seconds, or crushing inside a bag with a heavy item (like a rolling pin/mallet).I prefer to use a knife as it gives me more control over the size of the pieces. Crushing the pieces in a bag tends to yield a lot of "candy dust." You can strain them out with a strainer and mix them into the white chocolate or save them for something else or add to your hot chocolate.
Step 4: Prepare the White Chocolate Layer
- After the first layer has chilled, melt the white chocolate using the double boiler method until JUST melted. Then remove it from the heat, add the peppermint extract, and stir to thoroughly distribute it.
- Pour the melted white chocolate over the first layer, spreading it with a spatula (an offset spatula is best) and tapping it against the counter to smooth/release air bubbles.Be careful as the hot chocolate may have caused the lower level to melt slightly, so you could end up mixing them if not careful.
- Sprinkle the crushed candy canes over the white chocolate bark (as much or as little as you’d like). Optionally, gently press the candy into the chocolate slightly so it’s less likely to fall off.
- Pace the tray back in the fridge to fully set (for at least 30 minutes, or until set).
Step 5: Break the Chocolate Mint Bark
- Once set, remove the chocolate peppermint bark from the fridge, use the tin foil overhang to remove it from your pan, and peel away the foil. Finally, allow it to rest for a few minutes before you cut or break it into irregular bark pieces, and enjoy!
How to Store?
- Store: store the white chocolate peppermint bark in an airtight container at room temperature for about 10 days. While the chocolate will be fine after that, the peppermint candies begin to soften and become chewy and unpleasant to eat.Freeze: while it’s possible to freeze chocolate peppermint bark, you must keep moisture away from the chocolate. To do so, I like to wrap the chocolate in two layers of plastic wrap before then placing it in an airtight Ziplock bag or container. You can store it for several months in the freezer this way.
Notes
- To create a chocolate swirl: Instead of two layers, you can swirl the chocolate. Pour the melted milk/dark chocolate into your pan as usual then, without chilling, drizzle the white chocolate over that and use a little spatula to gently swirl it to create a swirl pattern. You’ll only need half the amount of the white chocolate.
- The best chocolate for peppermint bark: make sure the chocolate contains cocoa butter; otherwise, you can have issues with the two layers adhering correctly. I recommend using brands like Ghirardelli, Callebaut, and Lindt.
- When pouring the white chocolate: it’s best if the first layer of chocolate isn’t completely set. That way, they’ll adhere better.
- For clean cuts: use a sharp knife dipped in hot water and then wiped off. Re-dip it as needed while you chop your white chocolate peppermint bark pieces.
- To make peppermint bark hearts: use mini candy canes to shape into a heart and pour your chocolate within.
- Dried fruit: a sprinkle of chopped dried cranberries and/or apricot would work well.
- Cookies: you could crumble some cookies (digestives/rich tea work well) into the dark chocolate layer or even some pretzel pieces in this white chocolate candy cane bark.
- Nuts: I recommend using lightly toasted crushed nuts for the best flavor. My favorites are white chocolate almond bark and pistachio bark (either over the top or mixed into the white chocolate) but experiment with other nuts/seeds like pecans, walnuts, etc.
- Coconut: use shredded coconut or coconut flakes (raw or lightly toasted) to make a delicious coconut chocolate bark. Optionally pair with nuts or dry fruit.
- Keto peppermint bark: if you’re making your own chocolate, make sure to use keto-friendly sugar (not water-based). Otherwise, use keto-friendly chocolate and peppermint candies.
- Vegan chocolate bark: use vegan chocolate (many dark chocolates are naturally vegan). Most candy canes are vegan but double-check your candy.
- Pistachio cranberry bark: with either white, dark, or the combination of the two chocolates. Optionally add a pinch of flakey sea salt to balance the sweetness of the white chocolate.
- White chocolate Oreo bark: chop/ crush Oreos and mix them with white chocolate mint bark.
Nutrition
Nutrition information is automatically calculated, so should only be used as an approximation.


