
This post may contain affiliate links. Please read our disclosure policy.


A simple DIY for homemade coconut bowls that can be made for decorative purposes or even made food-safe for smoothie bowls and other food dishes! All you need is a mature coconut and a few simple tools, to make your own natural coconut bowls!
Coconuts are one of my most well-praised, versatile fruits. Not only are there tons of ingredients and uses that you can get from a single coconut, but we can even utilize the shell for gorgeous homemade coconut bowls. These eco-friendly bowls are made using just a few easy-to-source ‘tools,’ are far more cost-effective than buying them elsewhere, and are a great way to reduce waste for the coconuts.
Note This post was originally written to contain the DIYs for coconut bowls, shredded coconut, and coconut flakes. However, due to all the information I had on each DIY, I decided they all deserve their own post. Here are the new posts for Desiccated Coconut and Coconut flakes.
I buy lots of coconuts – you would do too if you were making homemade coconut oil, coconut cream, coconut butter, coconut milk, coconut yogurt regularly (and you should, they’re fantastic!). That means a lot of shells that I don’t want to throw away. Instead, you can make coconut shell bowls. Whether you want them to store things, to turn into a coconut candle, or for food purposes, the process is super simple.
Plus, I love gifting these ‘handcrafted’ natural organic coconut bowls to friends and family, too. They are surprisingly simple and cost-effective to make and yet make for an impressive gift. Plus, these coconut bowls are 100% natural and free of BPA, toxins, synthetic materials, plastics, etc.
You don’t need any specialized equipment for any of these DIYs, either. Although, I did use a small saw to cut the coconut in half so that I’d get a perfectly even cut for my bowls. You can pick up a little hand saw from any hardware store, and the entire cost of making this DIY is still cheaper than buying coconut bowls elsewhere (most of the time, anyway).
Want to save this recipe?
How to make coconut bowls at home
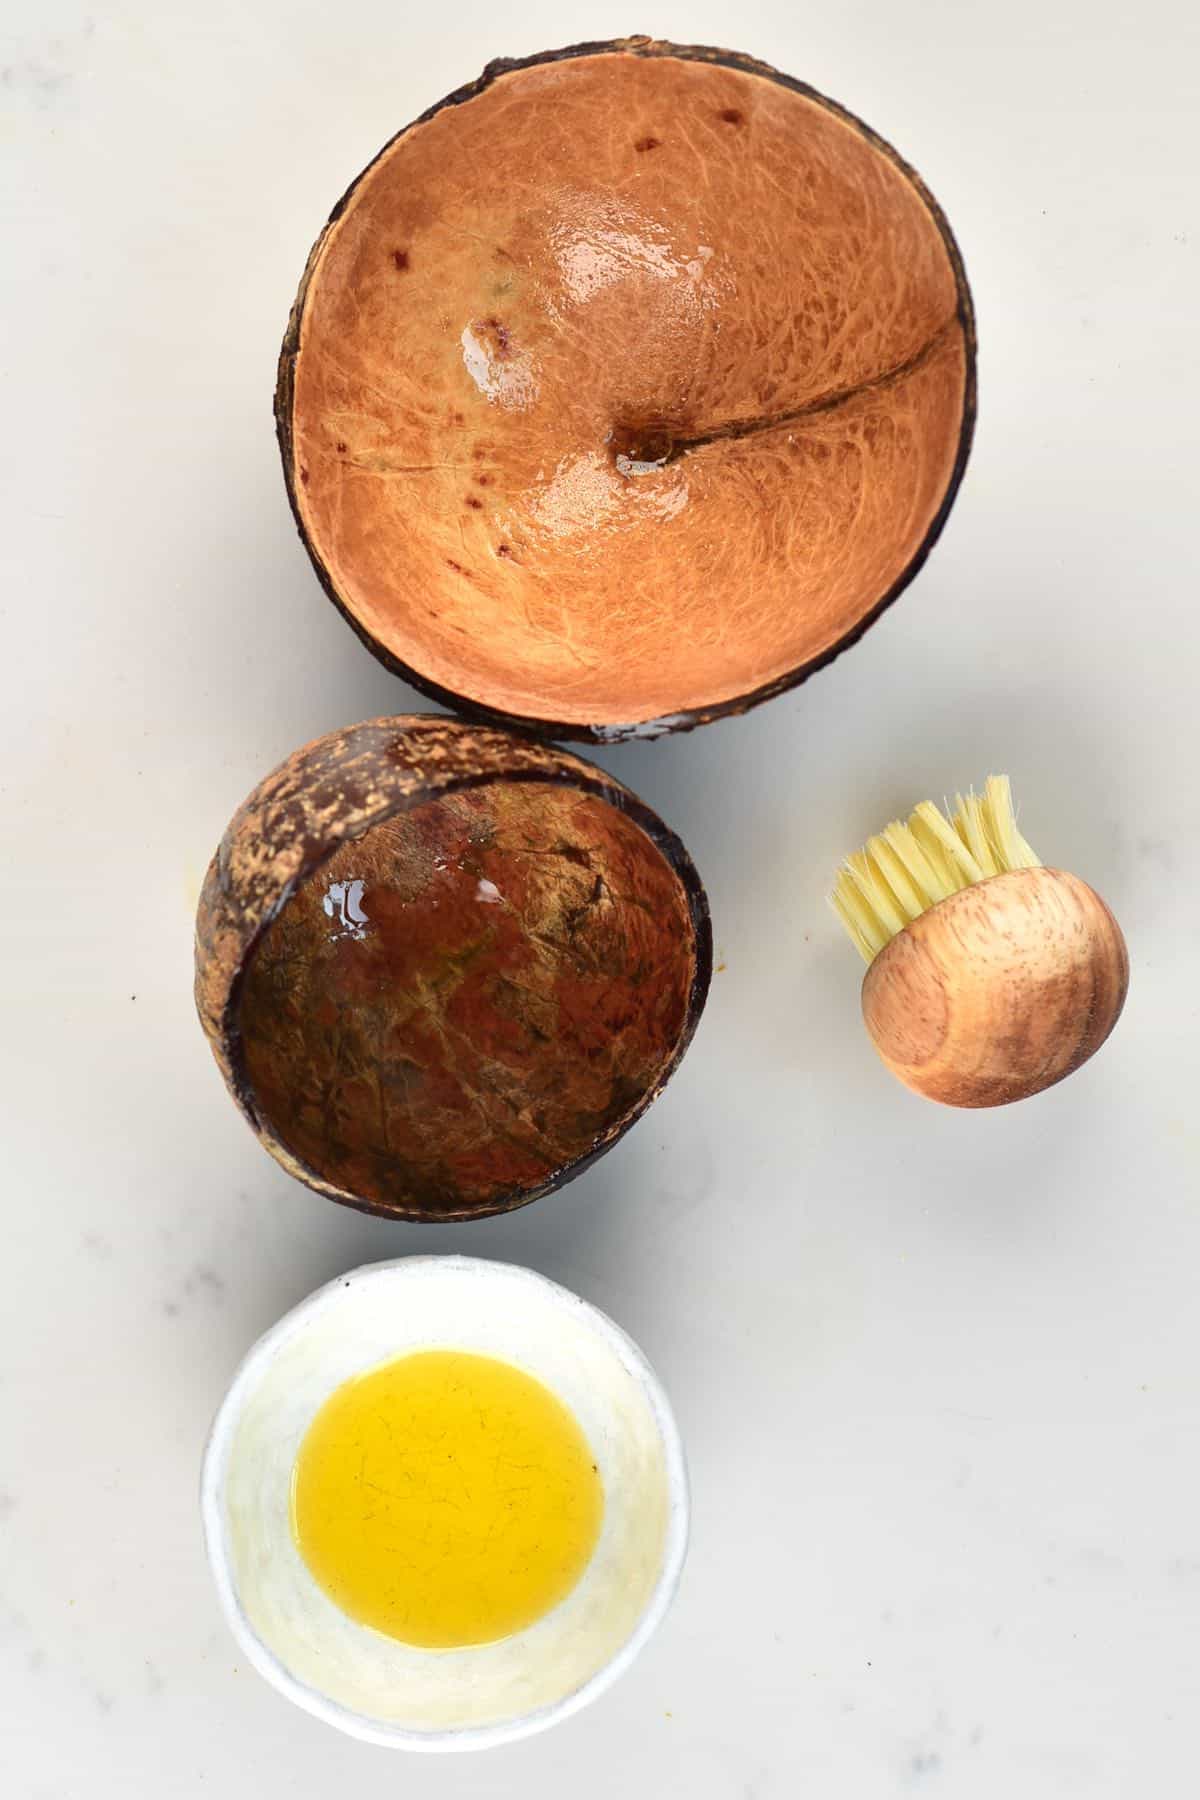
What’s needed
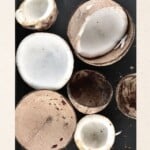
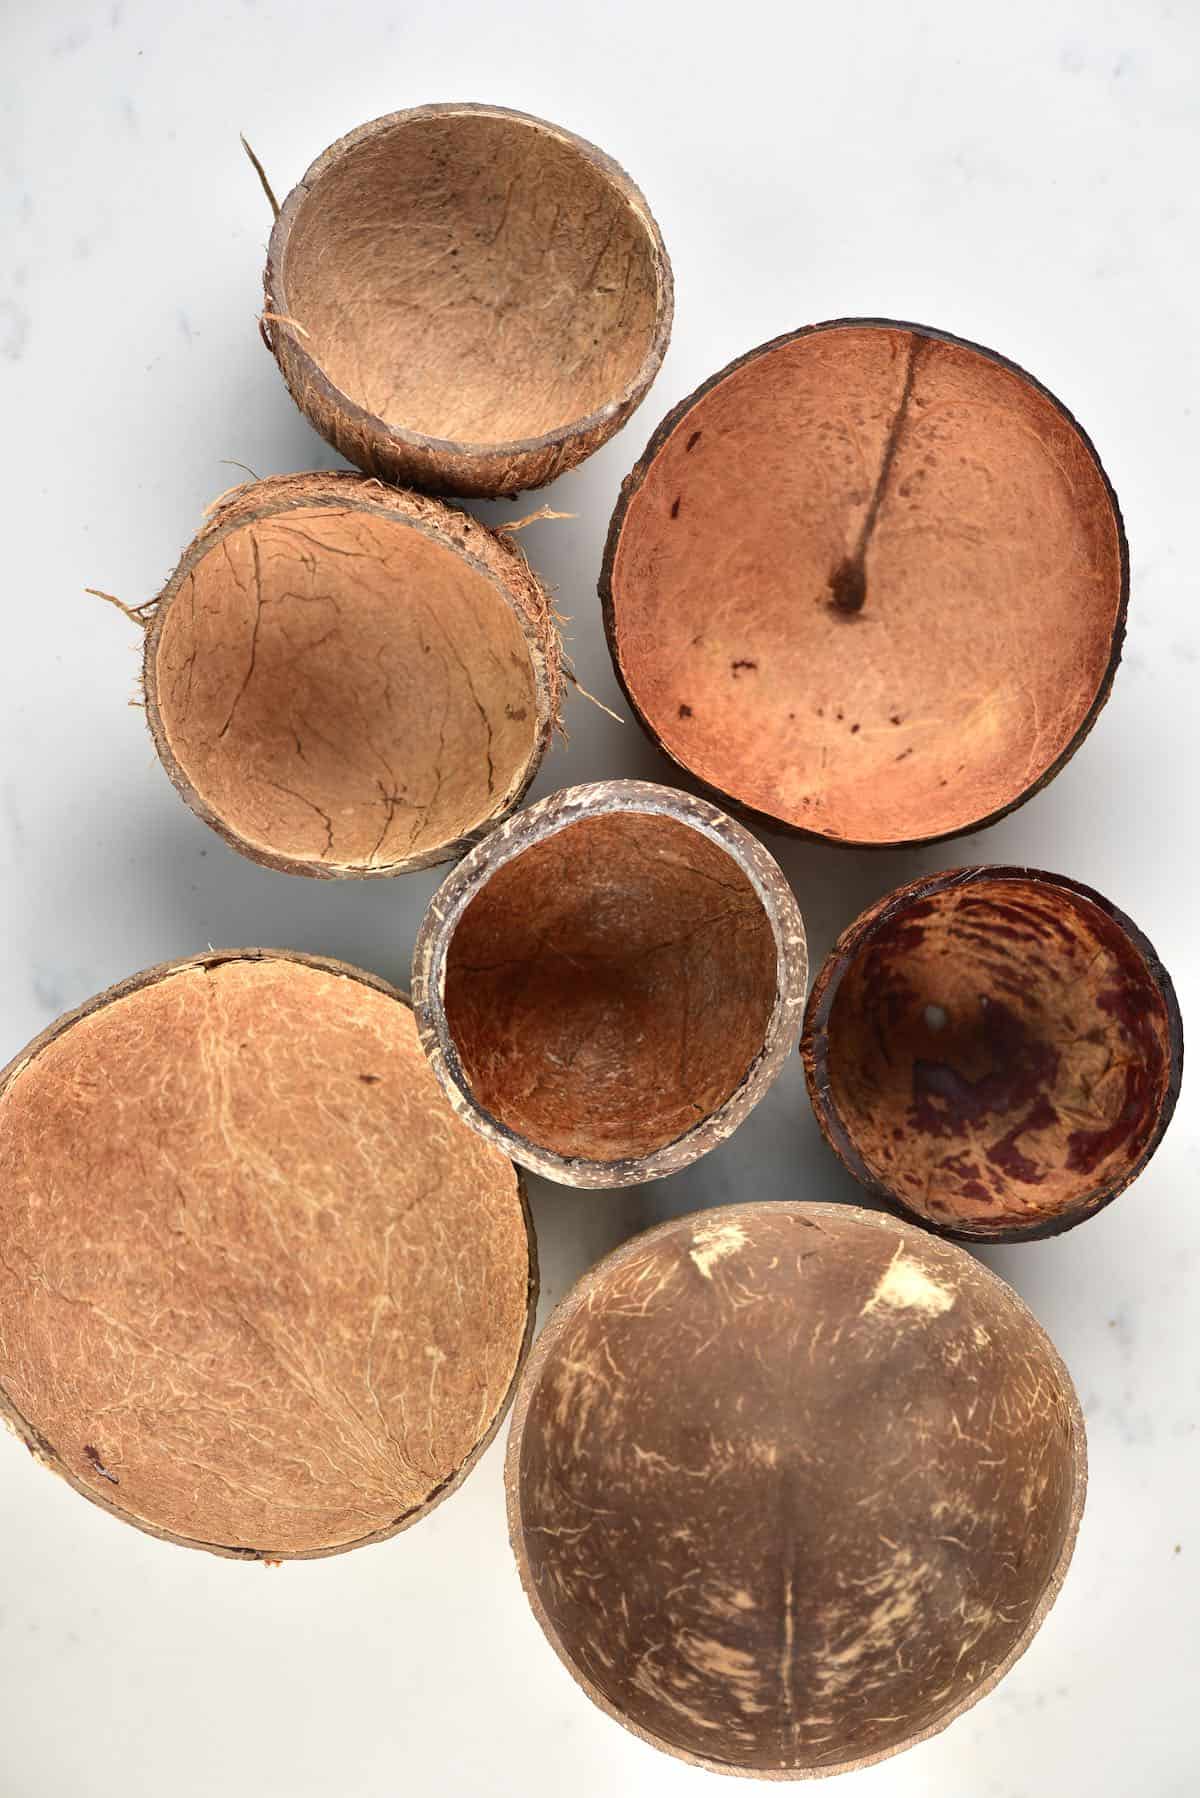
- Mature Coconut/s – It’s best to choose ones that have slightly flatter ends, to balance easier and nicely round-shaped. Plus, ones that don’t have too much of the outer fibrous husk.
- Small handsaw – can be bought very cheaply online or from local DIY stores.
- Sandpaper – coarse and medium grit works best.
- A brush
- Linseed Oil – or any food-safe medium that will lacquer/waterproof the coconut bowls. Other options include generic vegetable oil, walnut oil, or even Extra Virgin coconut oil. Food-grade mineral oil mixed with beeswax is suitable for items you plan to wash a lot. You can also use any DIY store lacquer for bowls that won’t be used for food purposes.
The step by step
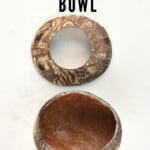
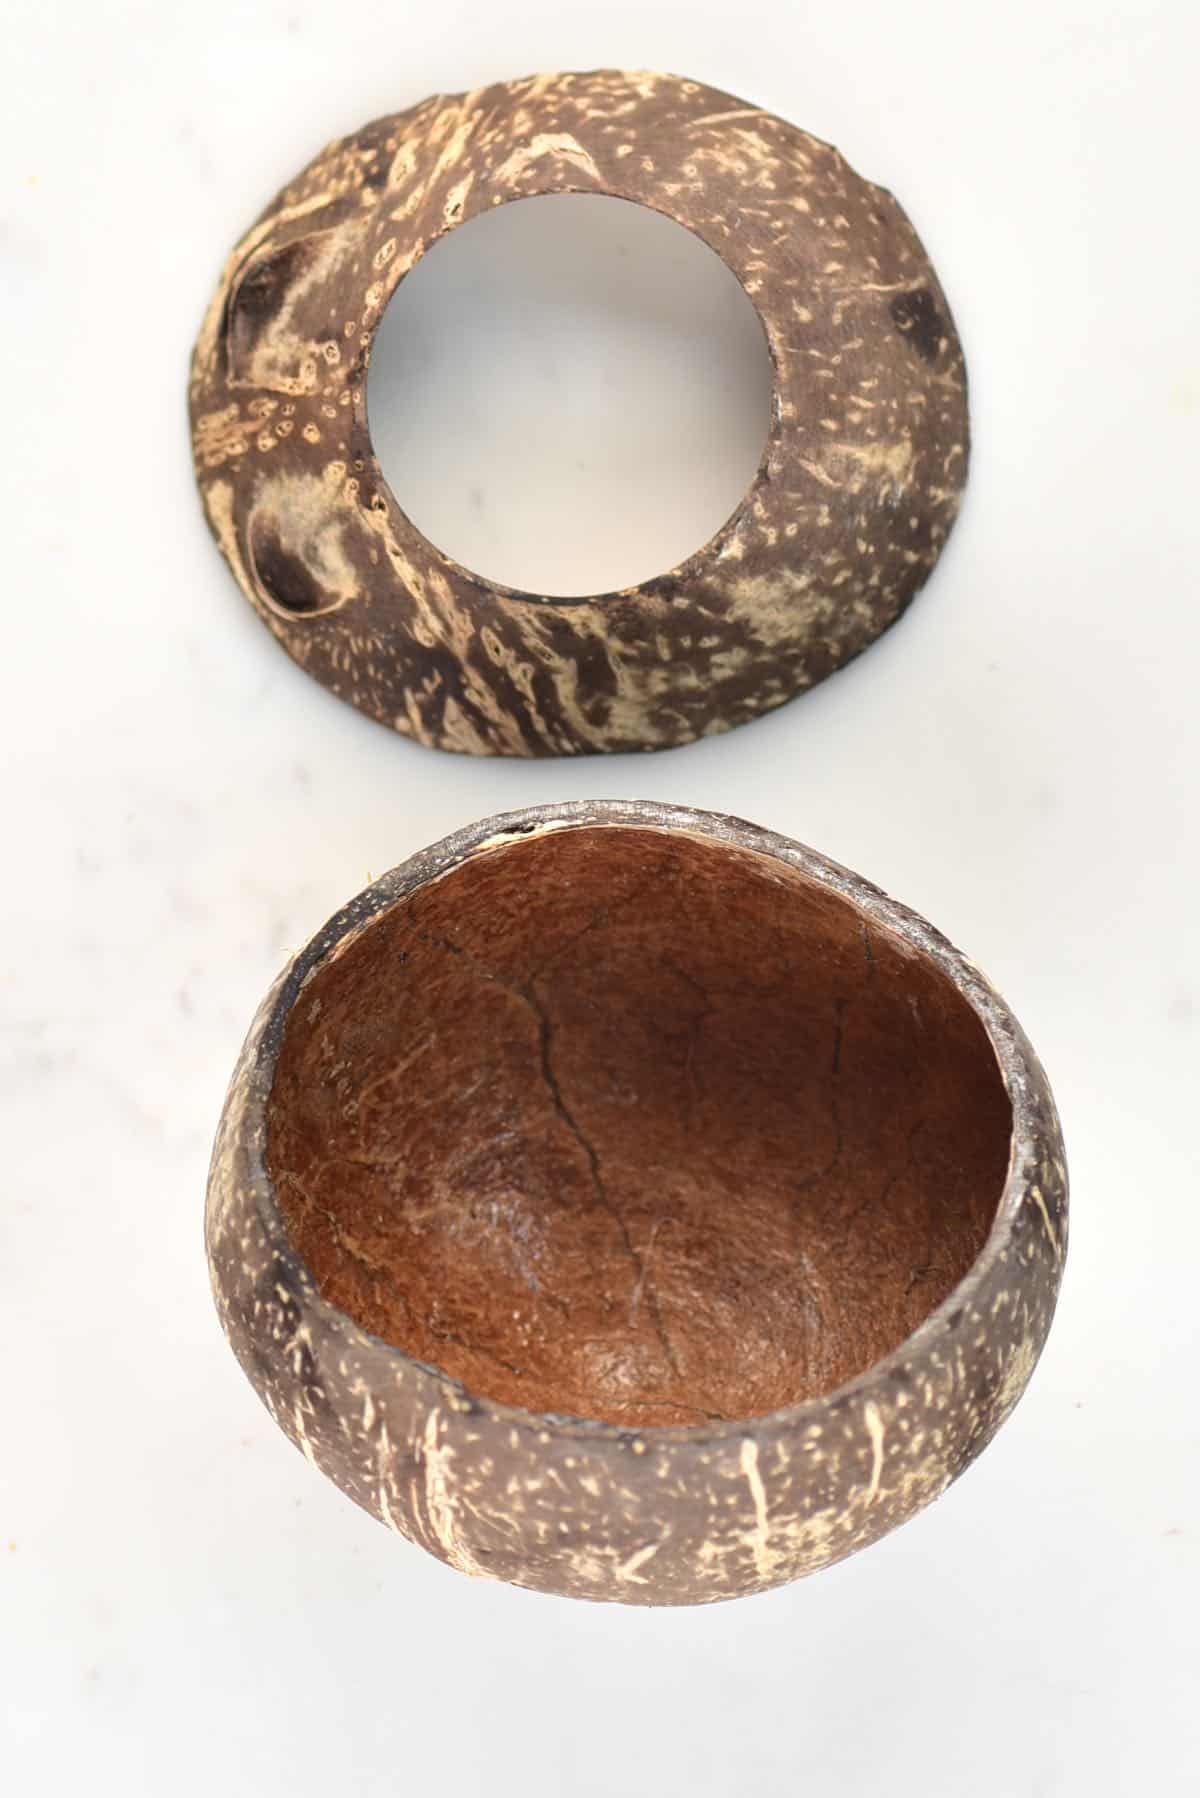
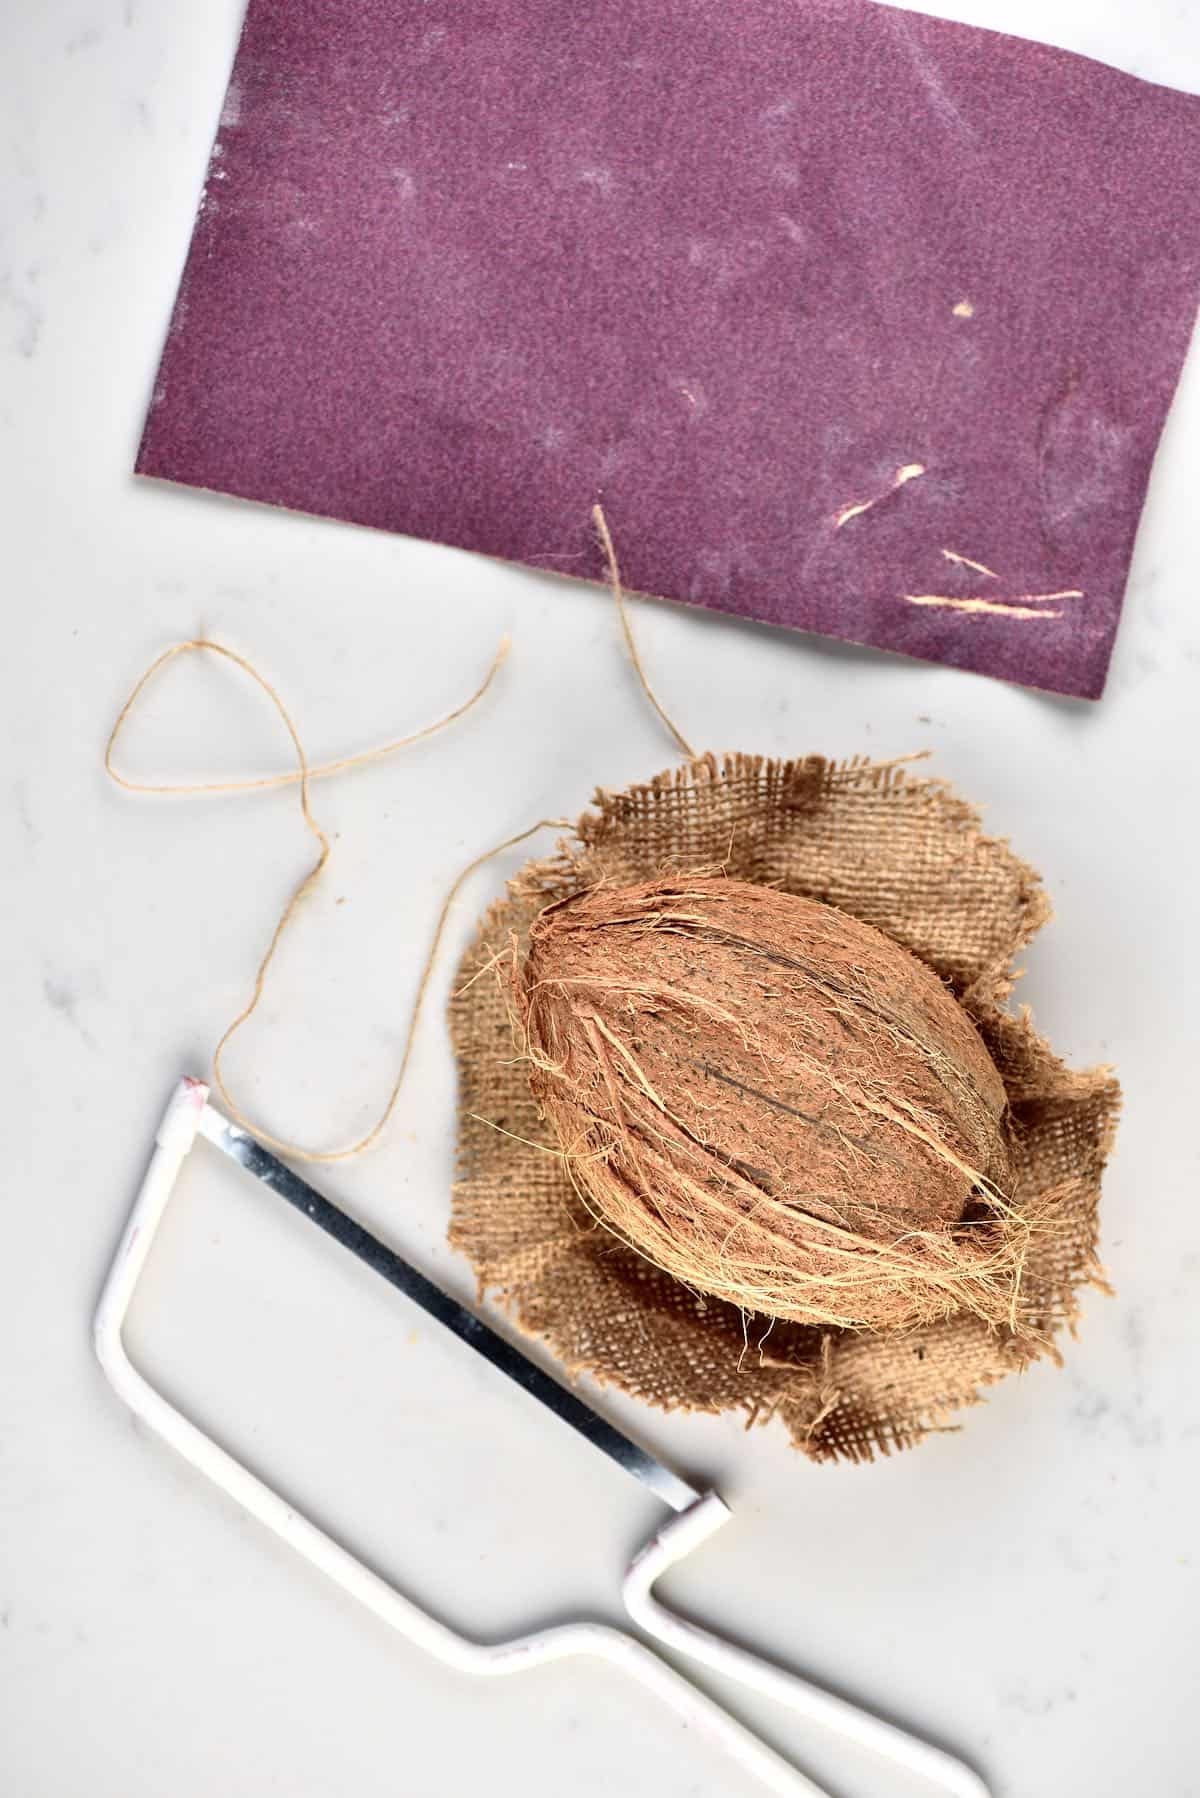
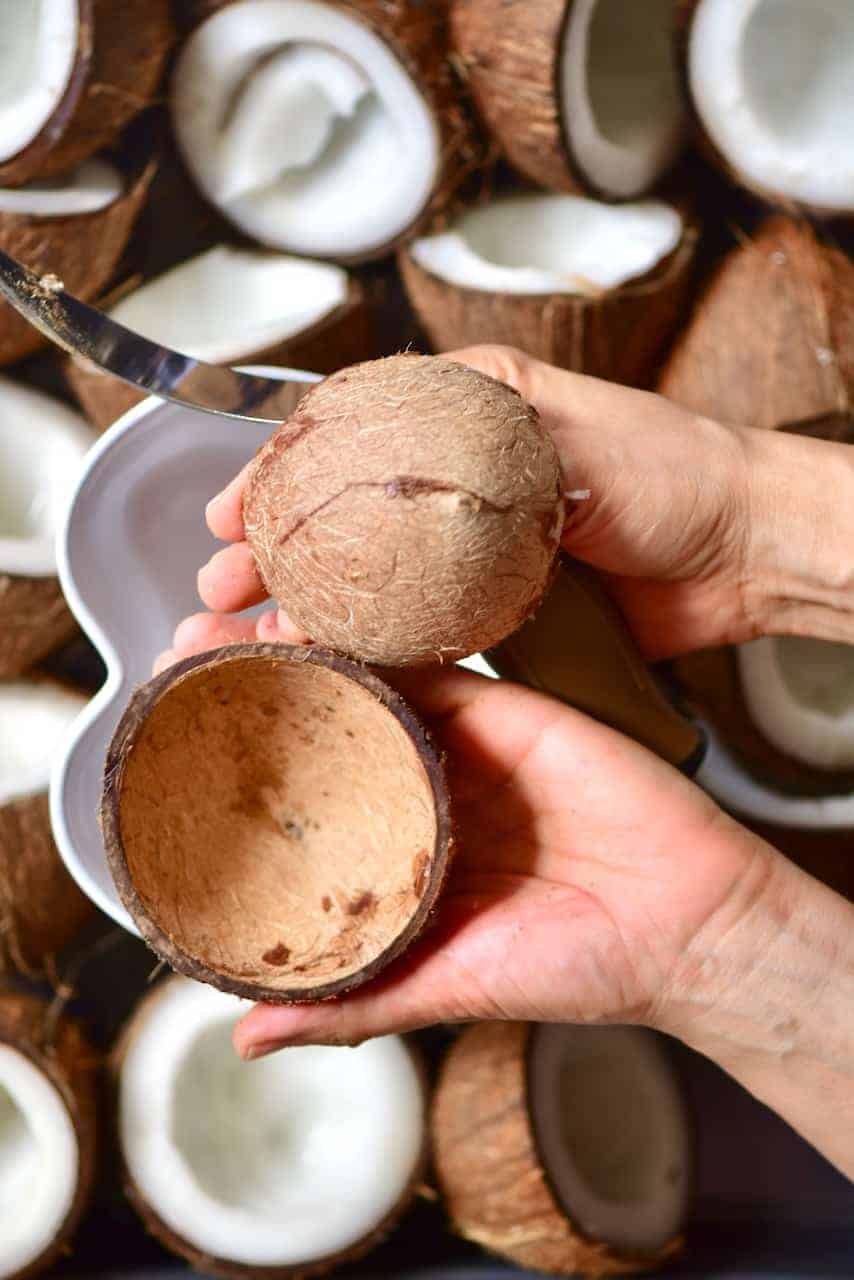
First, open the coconut: When making bowls, it’s best to use a small handsaw to cut the coconut precisely in the middle. Many other methods of opening the coconut may end up in uneven sides. However, if that’s not a worry for you, then use whatever process you prefer.
If using a handsaw, place the coconut on a kitchen towel or softer surface to stop it from rolling away. Hold one end of the coconut (not near the saw!) and then begin to push the handsaw back and forth slowly.
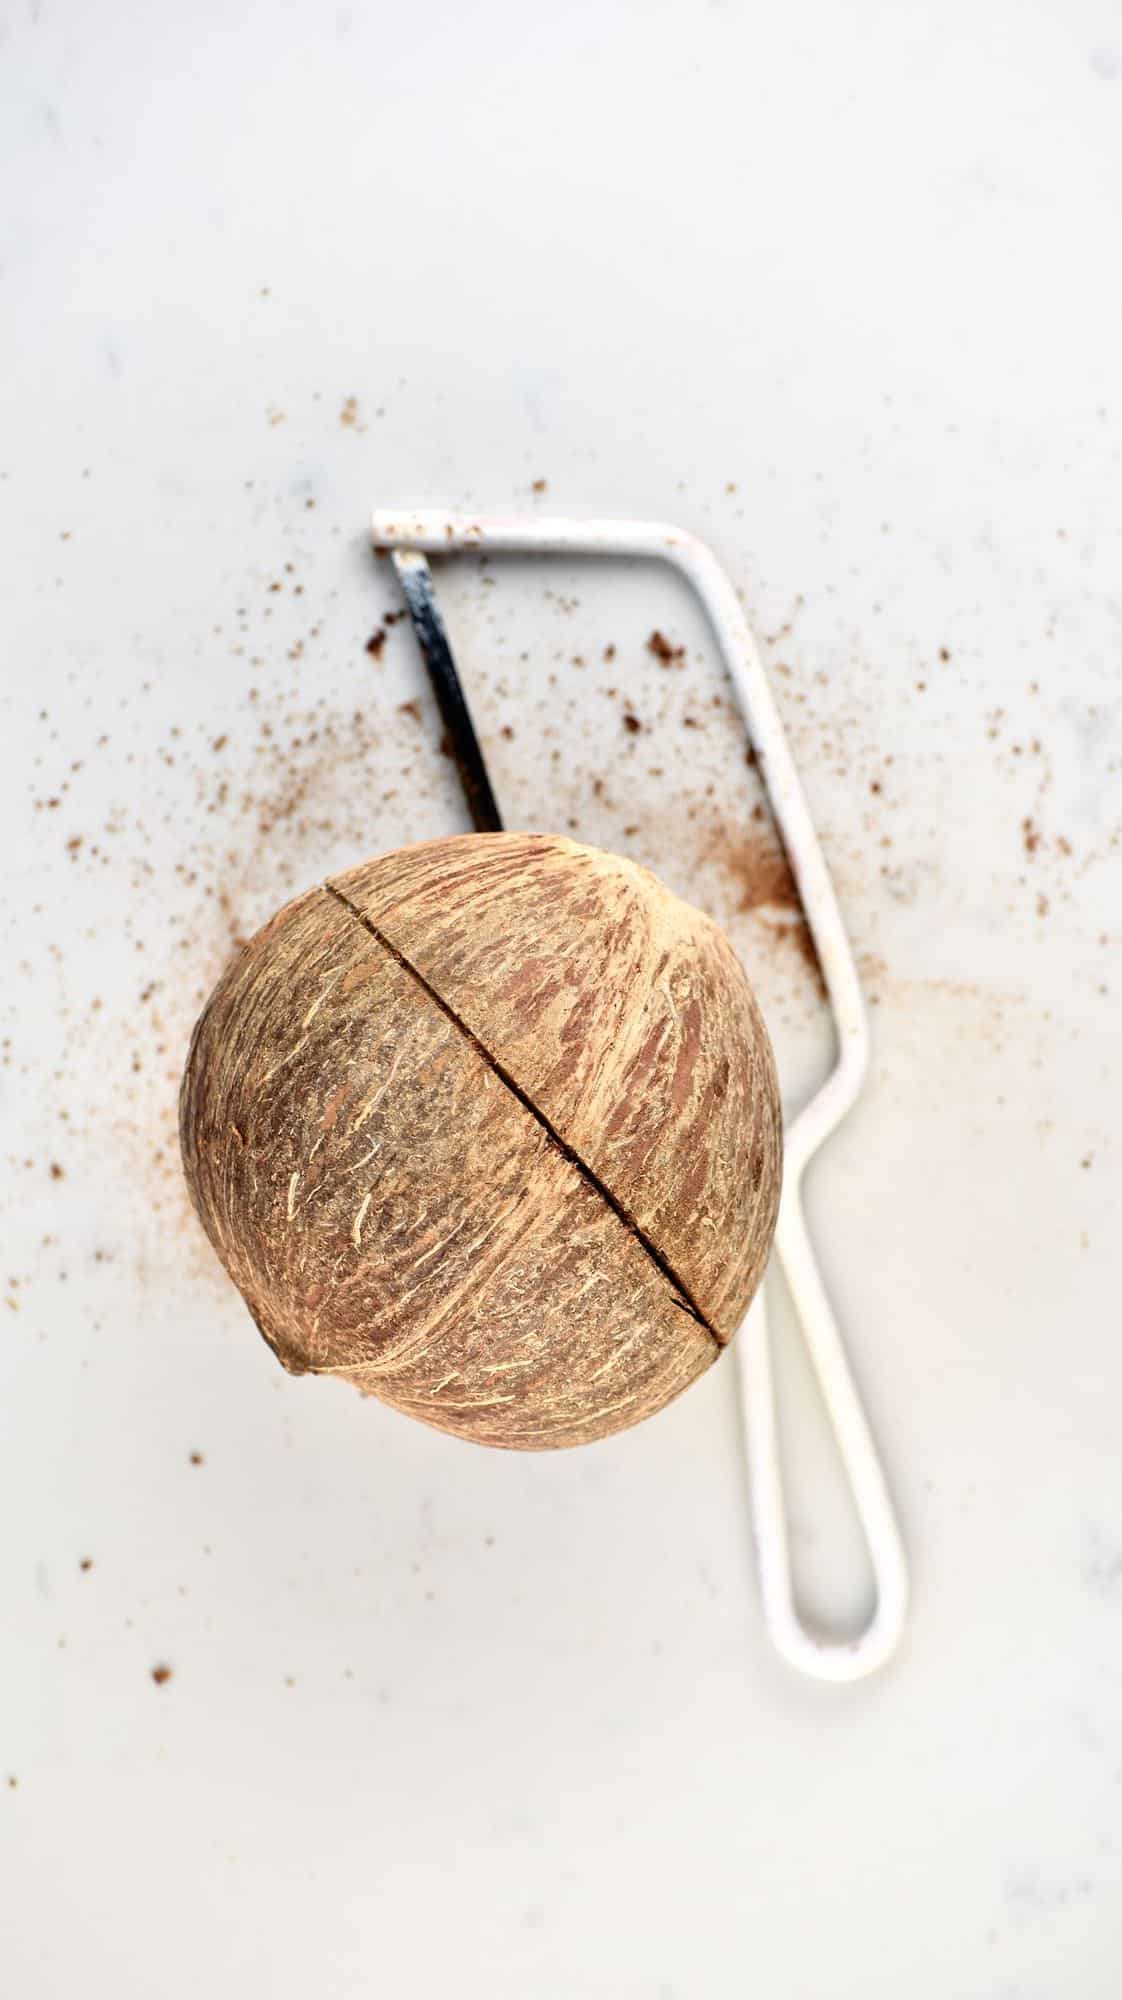
When you’ve managed to saw an inch or two into the coconut, turn it over and lightly pull at the cut to drain the coconut water into a bowl (save this to drink!). Continue to saw the coconut all the way through.
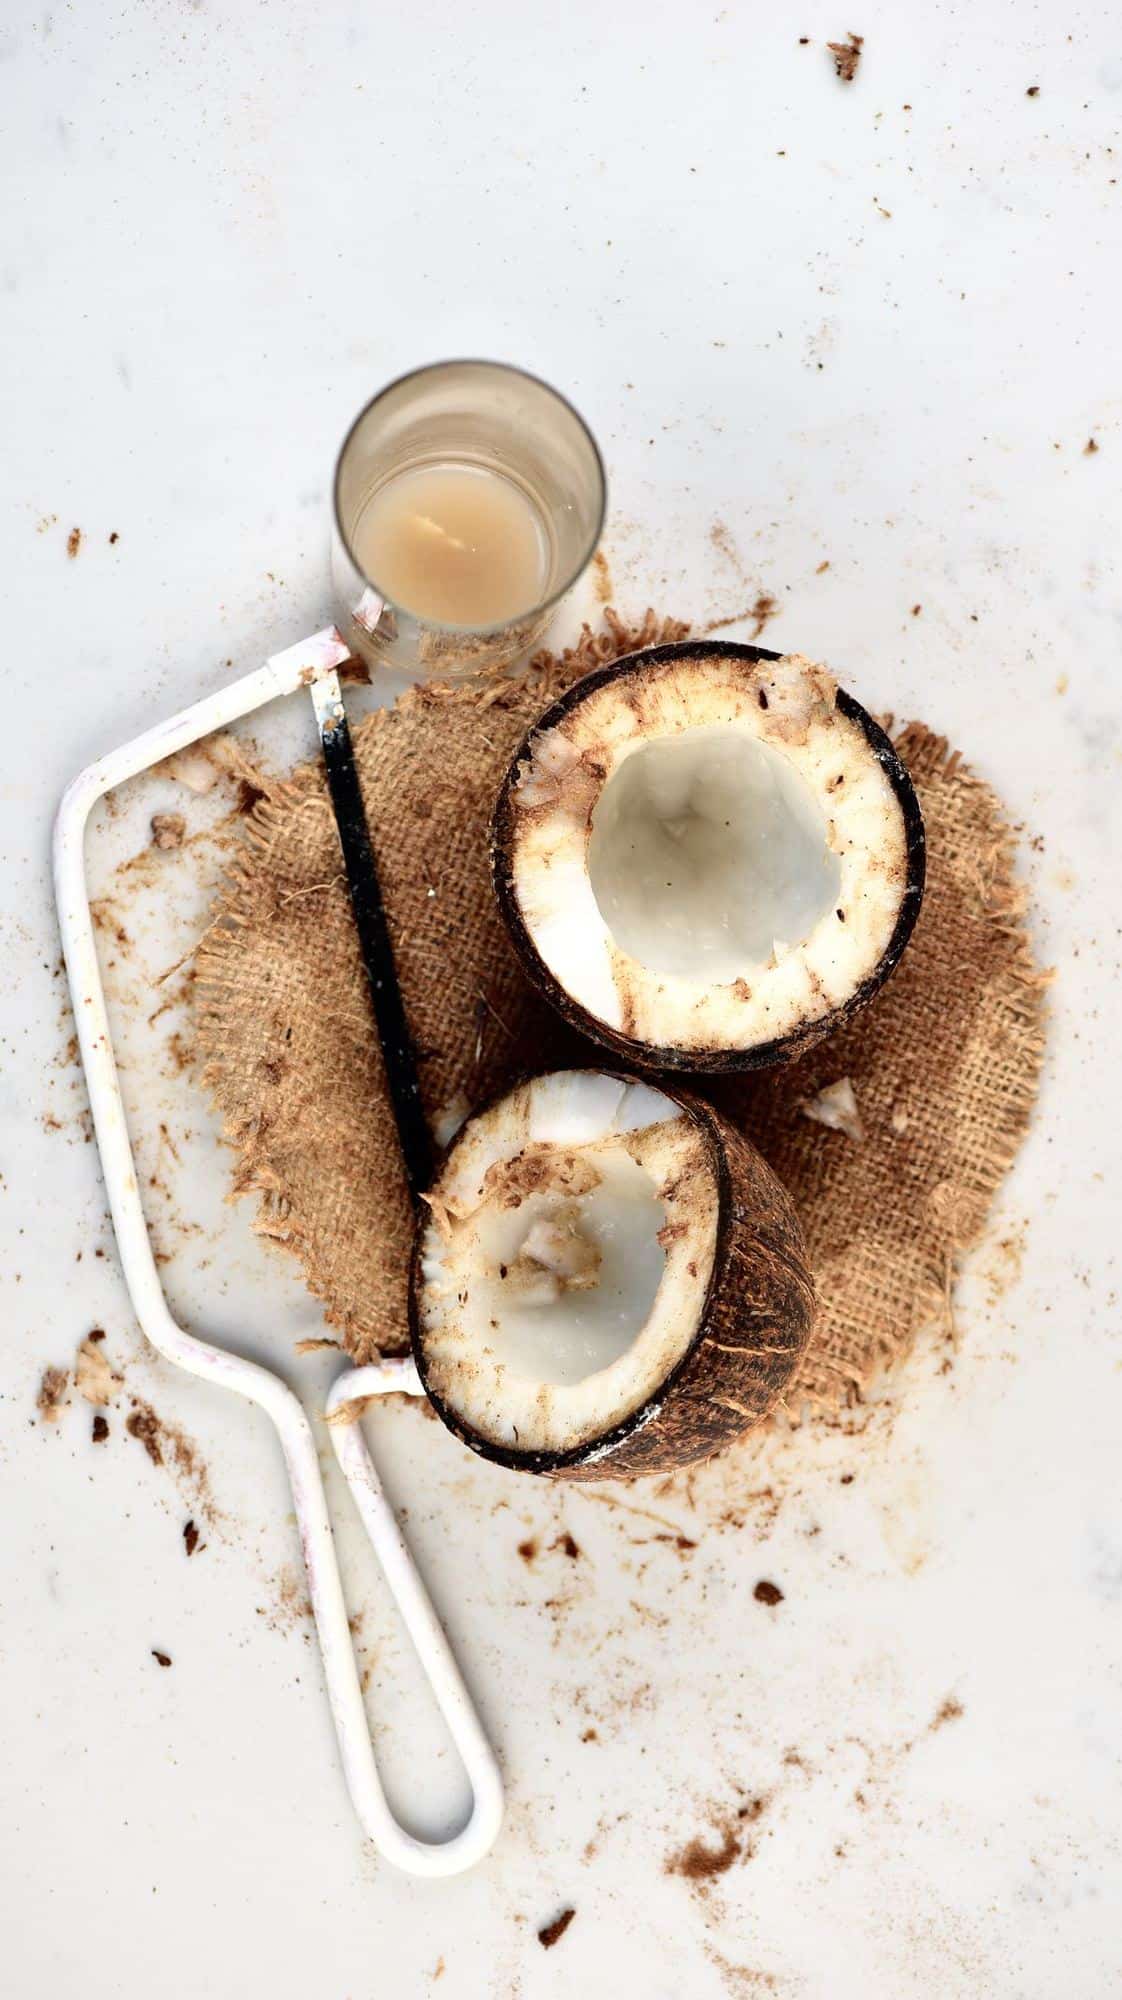
Next, remove the coconut meat: You can use a butter knife or other ‘blunt’ ended knife to slot between the coconut meat and shell. Work your way around the coconut, prying the meat away from the shell, and eventually, it will come loose.
Alternatively, you can get specific ‘coconut tools’ to remove the coconut meat. But that’s only really worth it if this is an ingredient you work with often.
Once the meat is free, then you can use this to make shredded coconut, coconut flakes, or pretty much any of the other coconut DIYs mentioned above.
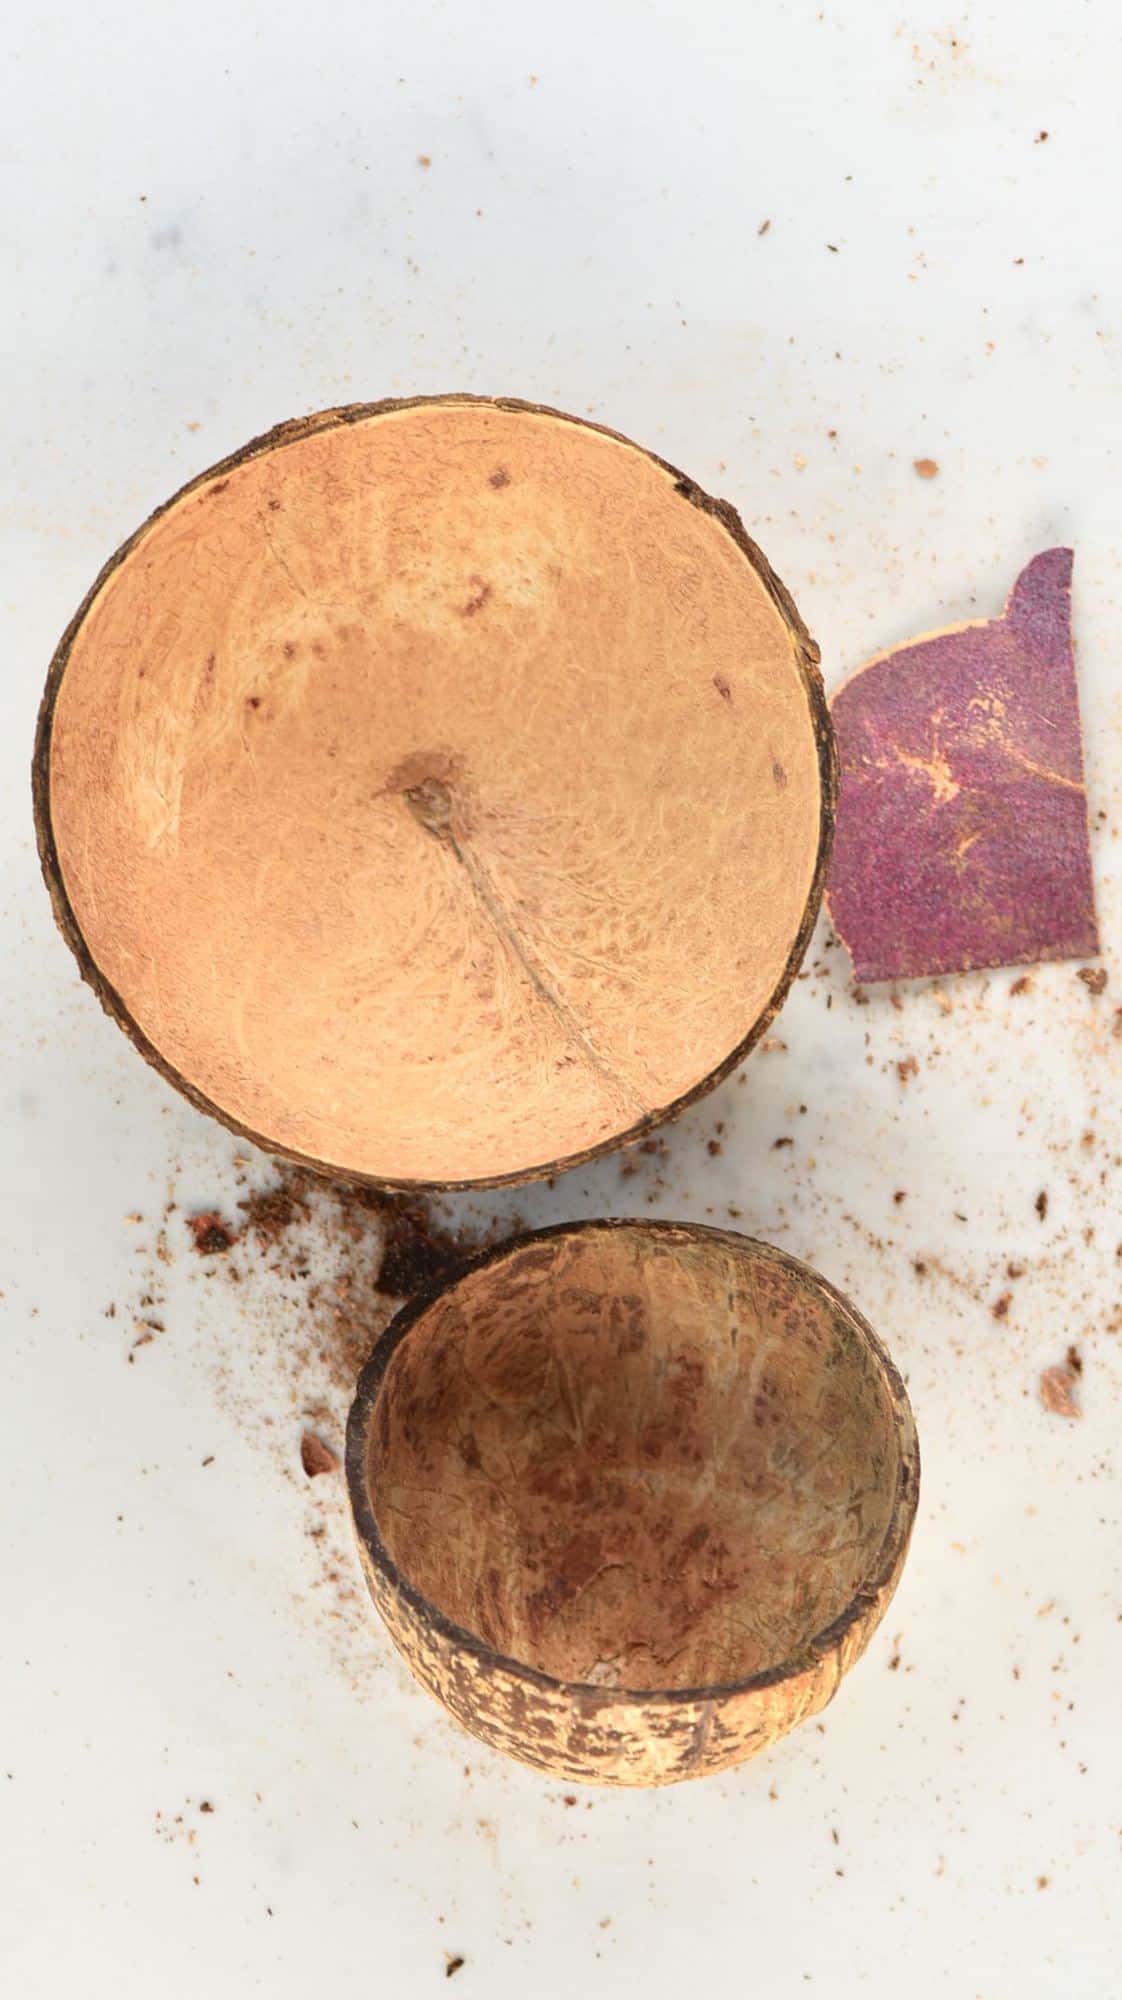
Now, it’s time to sand the coconut bowls: Use sandpaper to sand the entire surface of the shell halves, until smooth. This includes the ‘rim’ of the bowl. You can use medium-grit sandpaper for the outside of the bowl and work very lightly if you don’t want to ruin too much of the natural pattern.
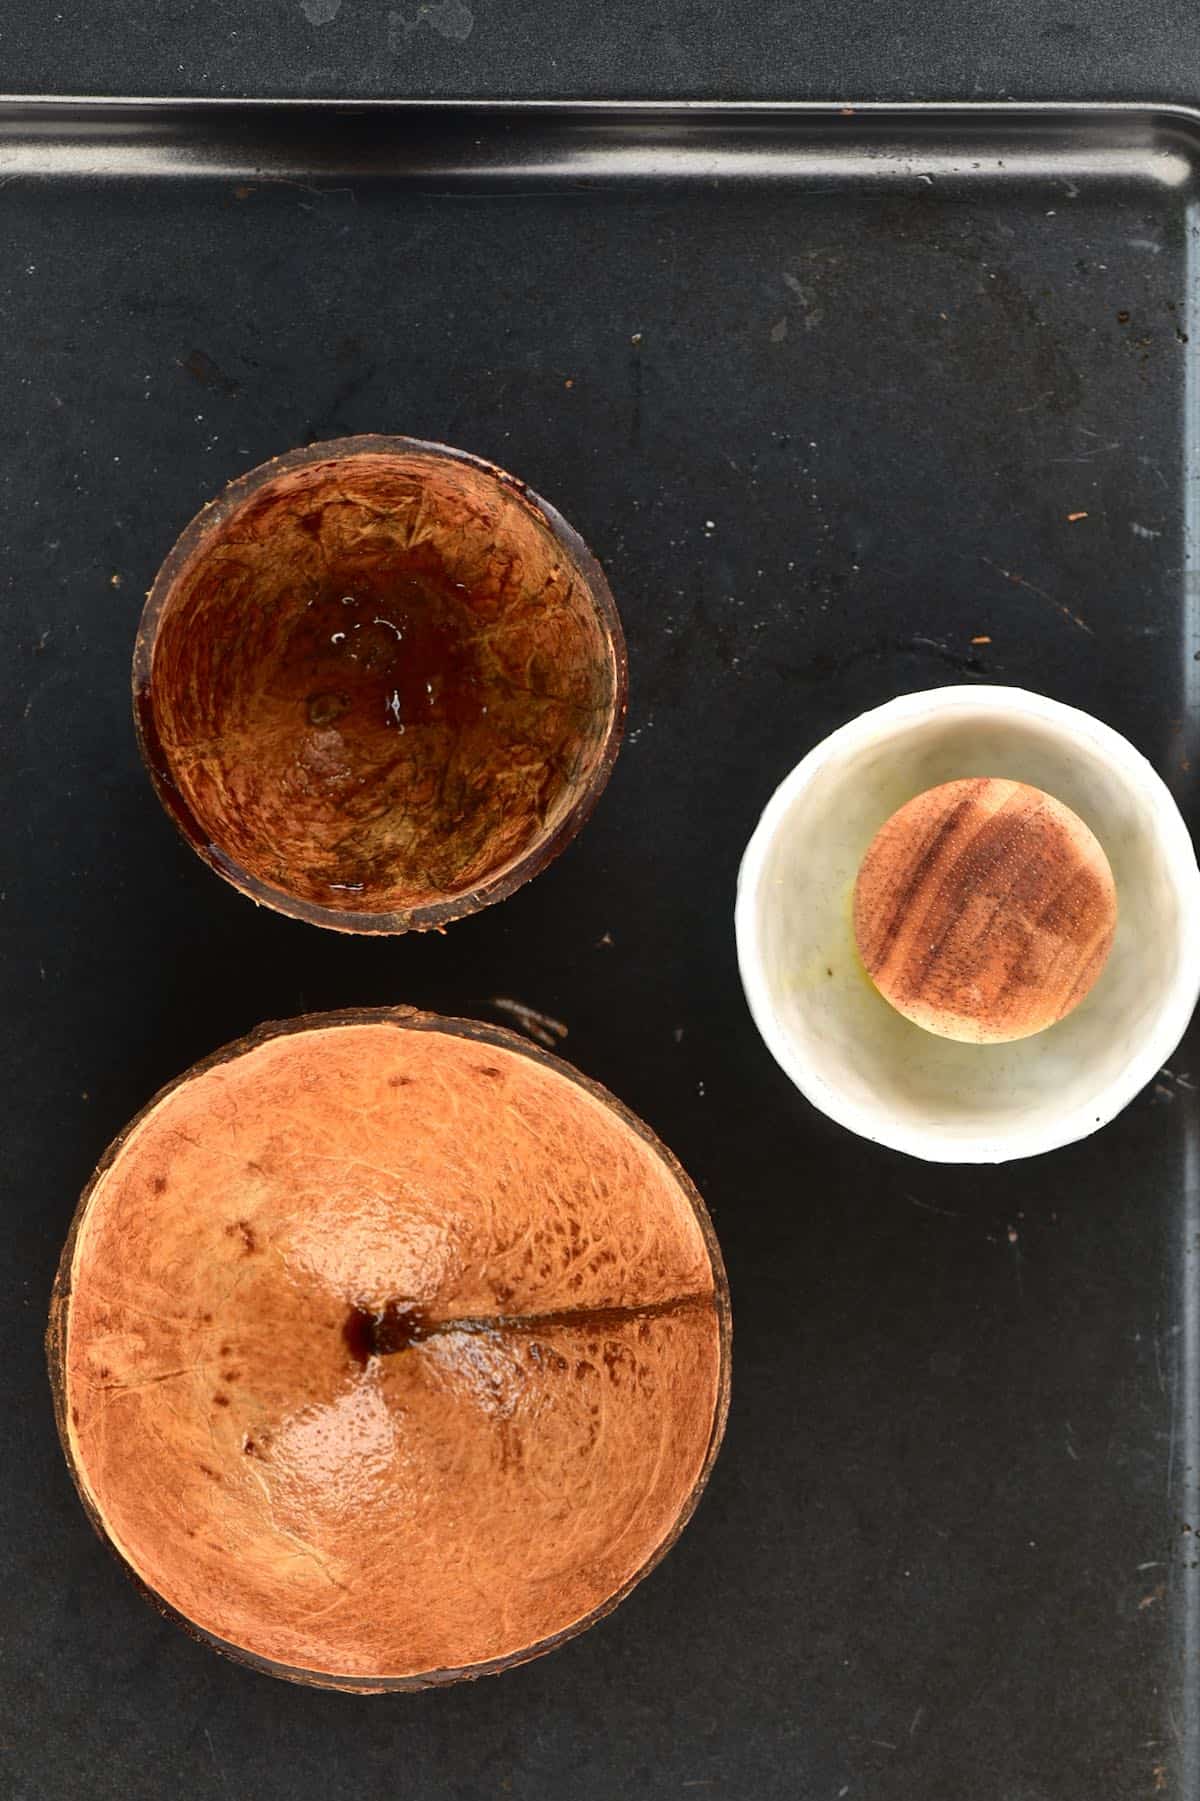
Finally, lacquer the bowl to make it food-safe: Brush some linseed oil (or your lacquer of choice) on both the inside and the outside of the bowls. You will need to repeat this step 4-5 times, drying in between, to seal it and make the bowl food safe completely.
Note* For a more natural finish, you can just polish the inside of the bowl.
After each layer of linseed oil, you can leave it to dry out at room temperature or accelerate the process in the oven.
Caring for the coconut bowls
- Wash the bowl in lukewarm soapy water only. They aren’t dishwasher safe and shouldn’t be ‘soaked’ in hot water for long periods.
- Never place in the oven, microwave, or fridge. ‘Extreme’ temperatures can cause it to crack/damage.
- You can use the bowls with hot and cold foods.
- Over time the bowl will lose its sheen and oil coating. Simply, use another tablespoon of oil and polish the bowl, allow it to dry, and repeat once more. Voila!
More fun DIY handmade gifts
- Beginners guide to making soap at home
- Homemade all-natural skin balm
- Non-toxic natural all-purpose citrus cleaner
- DIY coconut oil sugar scrub
- Candle Making for Beginners
If you give this DIY a try, then I’d love to know your thoughts in the comments below! Also, I love seeing your recreations, so feel free to tag me @AlphaFoodie.

How To Make Coconut Bowls At Home (Food-safe)
Ingredients
- mature coconuts It's best to choose one's that have slightly flatter ends to balance easier and nicely round-shaped. Plus, ones that don't have too much of the outer fibrous husk.
- Small handsaw can be bought very cheaply online or from local DIY stores.
- Sandpaper coarse and medium grit works best.
- A brush
- Linseed Oil – or any food-safe medium that will lacquer/waterproof the coconut bowls. Other options include generic vegetable oil, walnut oil, or even Extra Virgin coconut oil. Food-grade mineral oil mixed with beeswax is suitable for items you plan to wash a lot. You can also use any DIY store lacquer for bowls that won't be used for food purposes.
Instructions
- First, open the coconut. When making bowls, it's best to use a small handsaw to cut the coconut precisely in the middle. Many other methods of opening the coconut, may end up in uneven sides. However, if that's not a worry for you, then use whatever process you prefer.
- If using a handsaw, place the coconut on a kitchen towel or softer surface to stop it from rolling away. Hold one end of the coconut (not near the saw!) and then begin to push the handsaw back and forth slowly.
- When you've managed to saw an inch or two into the coconut, turn it over and lightly pull at the cut to drain the coconut water into a bowl (save this to drink!). Continue to saw the coconut all the way through.
- Next, remove the coconut meat. You can use a butter knife or other 'blunt' ended knife to slot between the coconut meat and shell. Work your way around the coconut, prying the meat away from the shell, and eventually, it will come loose.
- Alternatively, you can get specific ‘coconut tools’ to remove the coconut meat. But that’s only really worth it if this is an ingredient you work with often.
- Once the meat is free, then you can use this to make shredded coconut, coconut flakes, or pretty much any of the other coconut DIYs mentioned above.
- Now, it's time to sand the coconut bowls. Use sandpaper to sand the entire surface of the shell halves, until smooth. This includes the 'rim' of the bowl. You can use medium-grit sandpaper for the outside of the bowl and work very lightly if you don't want to ruin too much of the natural pattern.
- Finally, lacquer the bowl to make it food-safe. Brush some linseed oil (or your lacquer of choice) on both the inside and the outside of the bowls*. You will need to repeat this step 4-5 times, drying in between, to seal it and make the bowl food safe completely.After each layer of linseed oil, you can leave it to dry out at room temperature or accelerate the process in the oven. Your bowls are now ready to use!
Video
Notes
- Wash the bowl in lukewarm soapy water only. They aren’t dishwasher safe and shouldn’t be ‘soaked’ in hot water for long periods.
- Never place in the oven, microwave, or fridge. ‘extreme’ temperatures can cause it to crack/damage.
- The bowls can be used with hot and cold foods.
- Over time the bowl will lose its sheen and oil coating. Simply, use another tablespoon of oil and polish the bowl, allow it to dry, and repeat once more. Voila!


Hi, I’m looking to apply this to cacao pods like in your other post, I’d there a special way to dry out the insides before sanding? Dehydrator?
Hey Katie!
To dry out the insides of cacao pods before sanding, you can use a dehydrator if you have one. Simply remove the seeds from the pods and place them in the dehydrator at a low temperature for several hours. This will help remove any moisture and make the pods easier to sand.
Hope that helps! Let me know if you have any more questions.
Cheers,
Samira
Lindas úteis maravilhosas adorei
Thank you for your comment, Eliane!
Great information. Where I live (Minnesota) the coconuts are old by the time they get to the store. I wanted it just for the shell anyway. When I cracked it open, it was moldy inside, so I had to wash it and put it in the oven to kill any bacteria in the shell. Yeah, it reeked when opened, but the smell went away after being heated a time.
So sorry to hear this, Nina. It’s sad they don’t get them fresh.
Hi ! Can I coat it with food safe grapeseed oil? And if I dry it in the oven, what should be the temp/time? Thank you !
You can use grapeseed oil or you can use generic vegetable oil, walnut oil, extra virgin coconut oil, or food-grade mineral oil.
Hi ! Will beeswax alone be enough to seal the bowls effectively? And how will I know if there’s enough coating?
Hi Julia,
I recommend first using another oil to seal the bowls. Then you can use beeswax on top.
How long do we bake it and at what temperature when the coconut still has the meat in it.
Hi Brook,
While the coconut meat is still in the shells, you can bake the halves in the oven at 80ºC/175ºF for 10-15 minutes. Then the meat will begin to separate from the shell. I hope this helps.
is there anything we can substitute for the linseed oil? Or where could I buy that?
hi – any food-safe medium that will act as a lacquer/waterproofing agent will work. Walnut oil could work, or even general vegetable oil 🙂
Can another vegetable oil be used for the bowl?
Yes. The main aim is to lacquer and seal the bowl so there are a variety of oils that will work. Vegetable oil in general is a good one, also walnut oil.
Wonderfull! Could I make coconut butter from this Shredded coconut recipe? Thanks!
Hi Selene, of course you can! That’s exactly what I do for this here: https://www.alphafoodie.com/how-to-make-coconut-butter/ x