
This post may contain affiliate links. Please read our disclosure policy.
A simple DIY for how to make cornmeal at home with popcorn and options for dehydrated corn. A GF flour & polenta substitute made from dried and ground corn kernels – more cost-effective, and less processed than store-bought varieties!
Yup, you read right, this post is taking you through how to make cornmeal at home – and not just from dehydrated corn, but also popcorn kernels! By making homemade cornmeal, you avoid lots of the additional “processing” in store-bought options (or endlessly looking for cornmeal substitutes), it’s usually more cost-effective, and the nutritional quality AND taste are superior! All you need to do is dehydrate your corn (or use popcorn kernels – that are already dry), and grind this.
This post is going to take you through the types of corn you can use for cornmeal, the difference between cornmeal, cornflour, and polenta, and the simple DIY. My main focus here is on making cornflour quickly with popcorn kernels, as it’s easy for anyone and everyone to do. However, I’m also including a bonus section on dehydrating corn and using that for cornmeal.
Corn flour is not only great for cornbread, pancakes, as a coating, and more, but it is also a great gluten-free flour option, too! And, honestly, who knew it was so simple to grind your own flours. If you like this DIY, then I have a whole series of alternative and gluten-free flour options coming to the site.
Want to save this recipe?
What Is Corn meal?
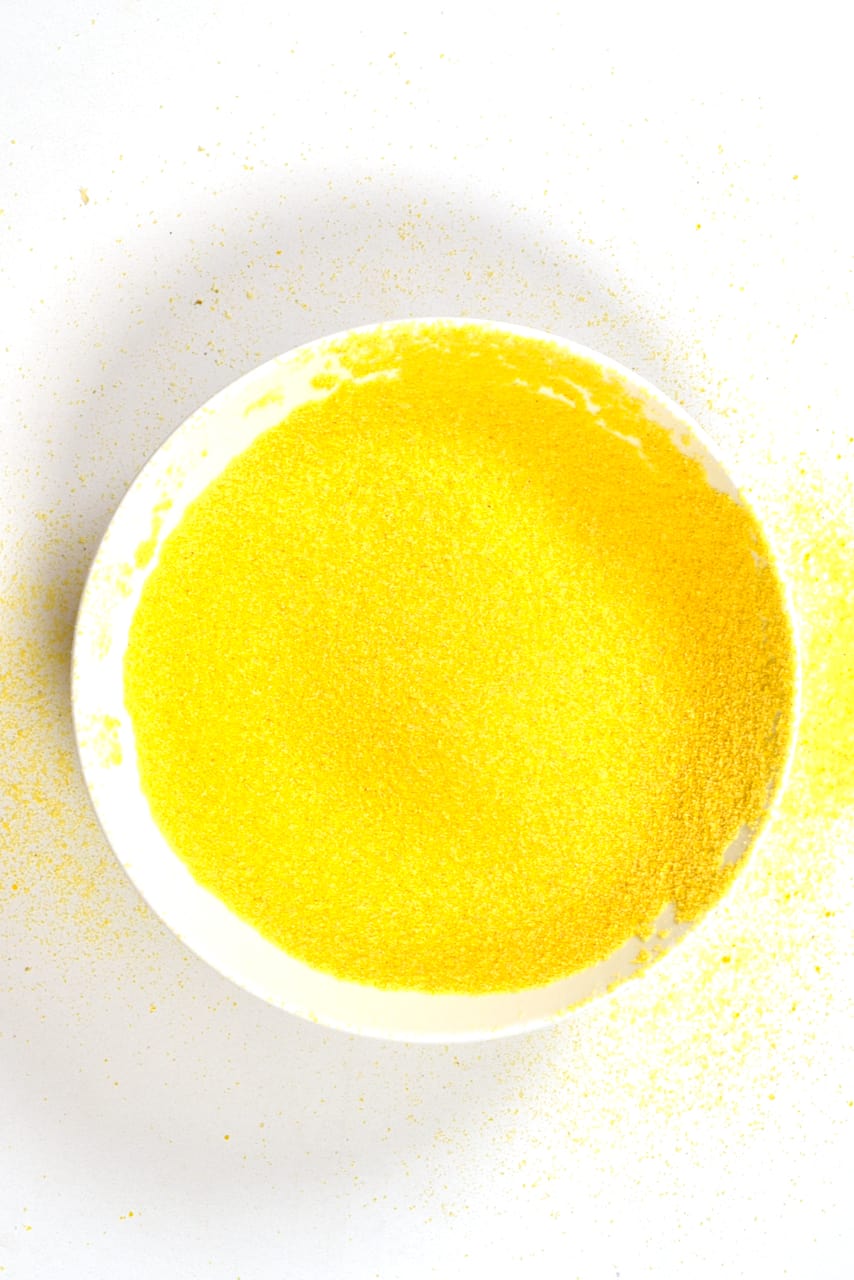
To put it simply, corn meal (cornmeal) is dried and ground corn. The typical corn used to make cornmeal is field corn, rather than our usual “sweetcorn” variety. However, this isn’t necessarily always the case. The resulting “meal” varies in texture from fine to coarse.
Cornmeal has an almost granular, coarse, but still powdery texture and is yellow/white. The type of corn you use will affect the color of the final meal. Some people refer to this product as “cornflour”, too. However, “cornflour” (otherwise called cornstarch), is an entirely different product.

Cornmeal vs. polenta vs. cornflour vs. grits
Cornflour (i.e., cornstarch) is white and a very fine powder, similar to powdered sugar. It is an extracted carb from the endosperm of corn and is used as a thickener.
In comparison, polenta is far more similar to cornmeal. Okay, technically, polenta is the name for the dish rather than the ingredient. But I’m talking about the corn-based product labeled as ‘polenta’ in grocery stores here.
Traditional “polenta” comes from a variety of Italian flint corn, which has a slightly gritty texture. In some cases, cornmeal can even be used in place of polenta, but only when it’s coarsely ground (although it will be slightly “smoother”). Otherwise, finer cornmeal is used to make “cornmeal mush” – a dish very similar to polenta but “not quite.”
Lastly, there’s “grits.” I have to admit I don’t know much about grits as it’s not really readily available in the UK (that I’ve noticed – it’s much more of a United States thing). However, a bit of research tells me that grits go through a “treatment” when the corn is treated with a lye solution to make something called “hominy.” The result is softened kernels that increase the corns’ nutrient value, increases the bioavailability of its niacin content, and results in a “creamier,” softer dish than polenta.
Cornmeal Coarseness
As stated, cornmeal can be made/bought in different coarseness levels – fine, medium, and coarse. The general rule of thumb is that, unless a recipe specifically calls for coarse cornmeal, most recipes are referring to the medium or fine variety. This is because coarse cornmeal needs a longer time to cook and can make a dish ‘gritty,’ if not cooked for long enough.
For that reason, I always aim to grind my cornmeal to a medium or fine consistency – which is usually interchangeable, and the usual option needed for recipes and all uses.
The Types Of Corn
When it comes to commercial cornmeal, the types of corn used will differ from what you are able to do at home. So let me take you through the various corn types.
Field & Dent Corn – These are the varieties most used for cornflour. This variety is actually the top grower in the US and is used to feed livestock and make corn syrup and most dry corn products. However, it isn’t eaten in the same way sweetcorn is and is starchier, with a prominent ‘corn’ flavor.
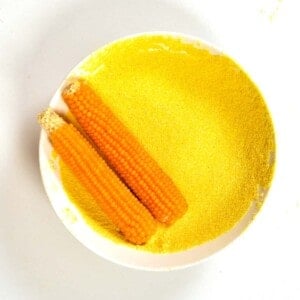
Sweetcorn – Not usually a variety of corn that is used in commercial cornmeal but something you’re able to use at home. Best for sweeter dishes, though, due to its sweet flavor.
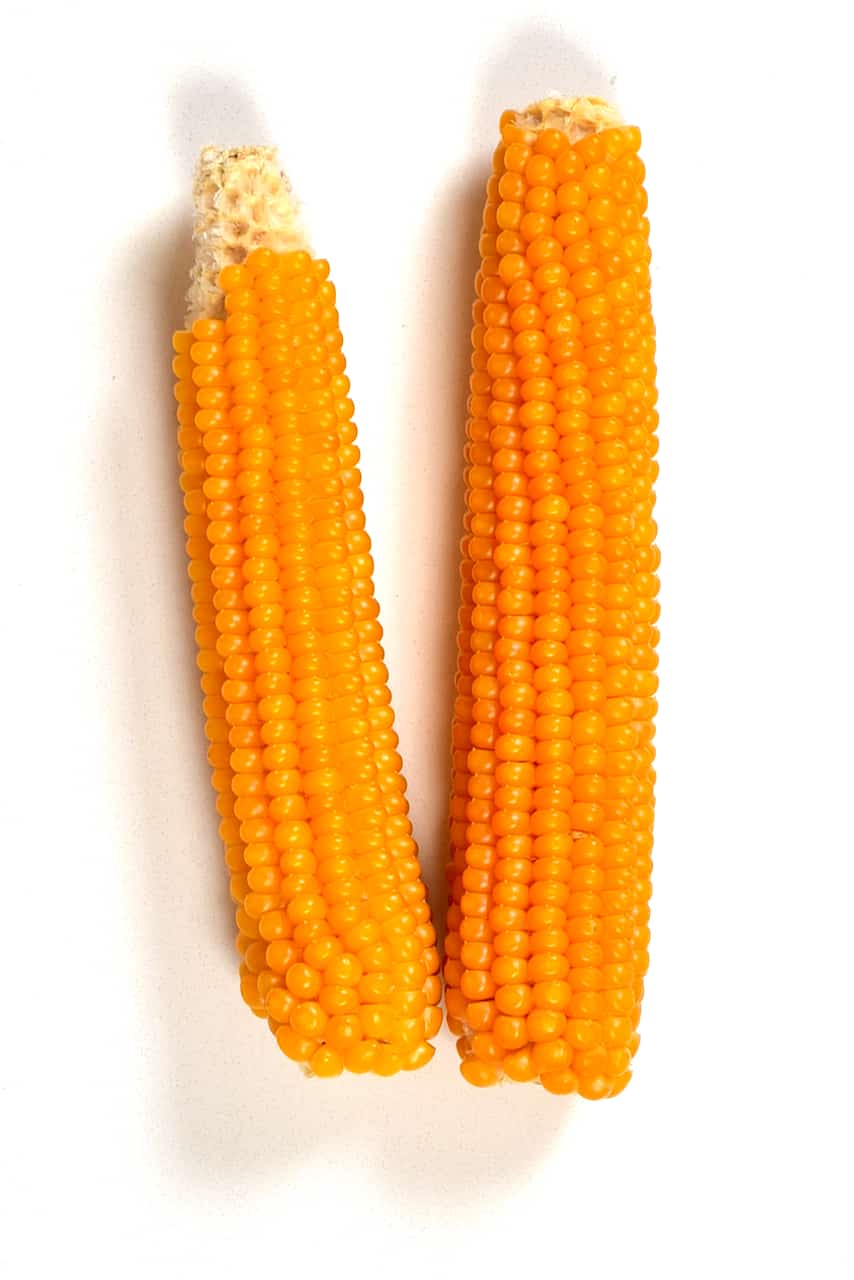
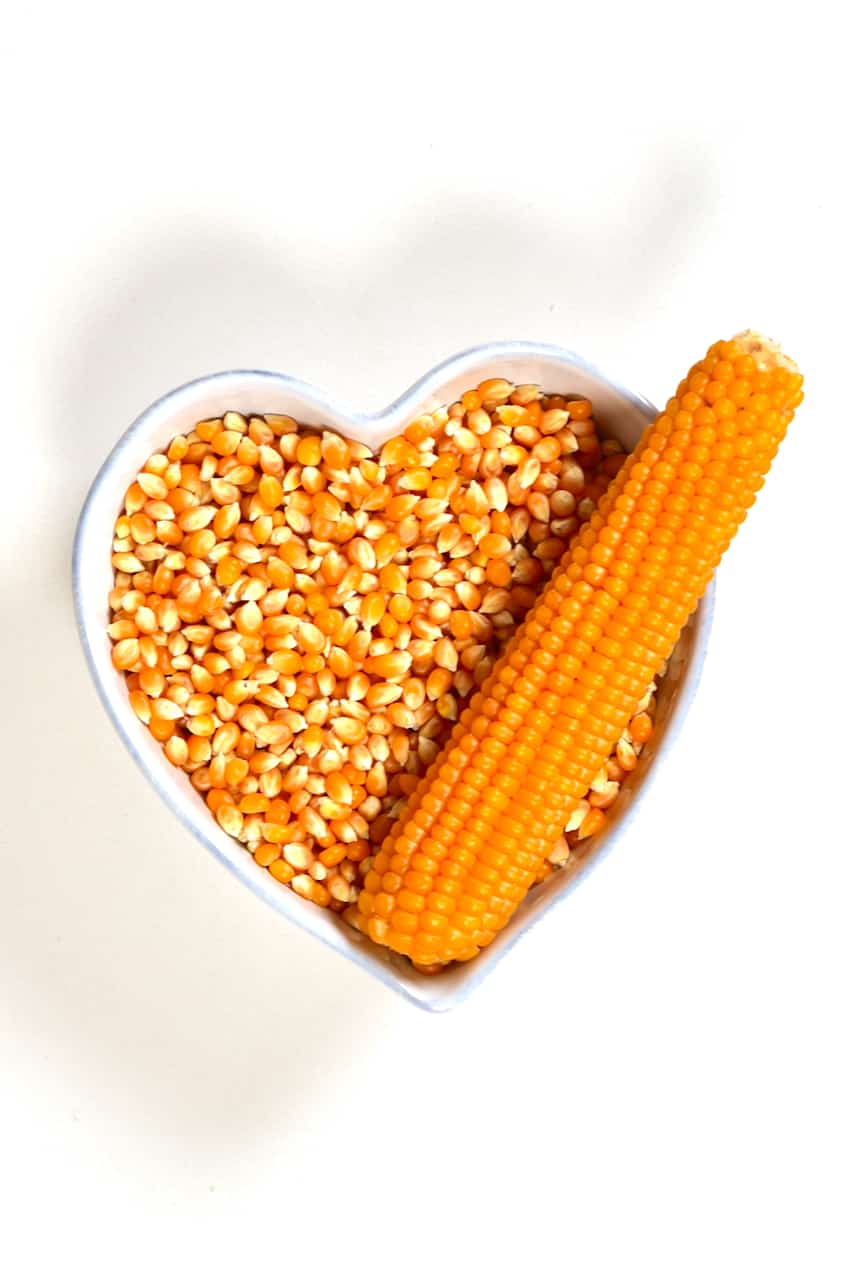
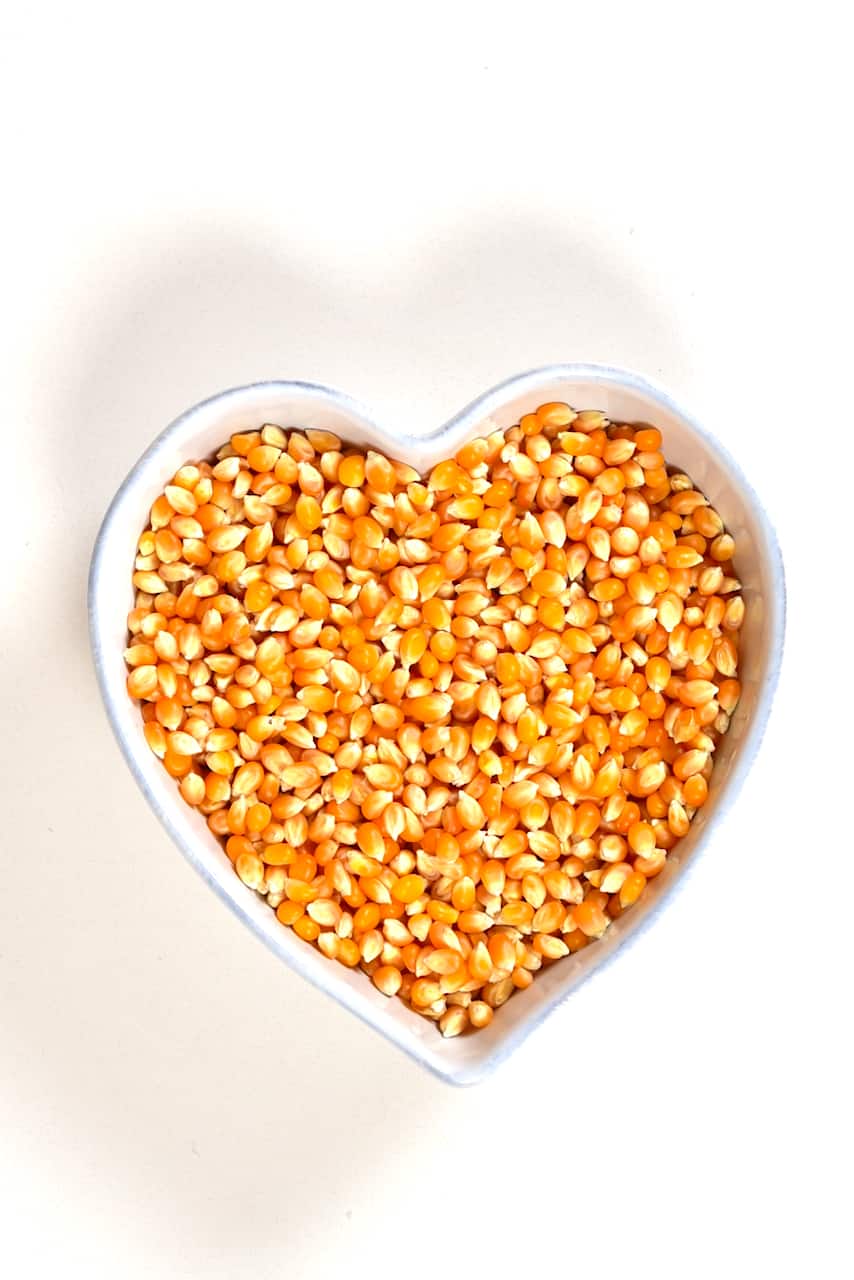
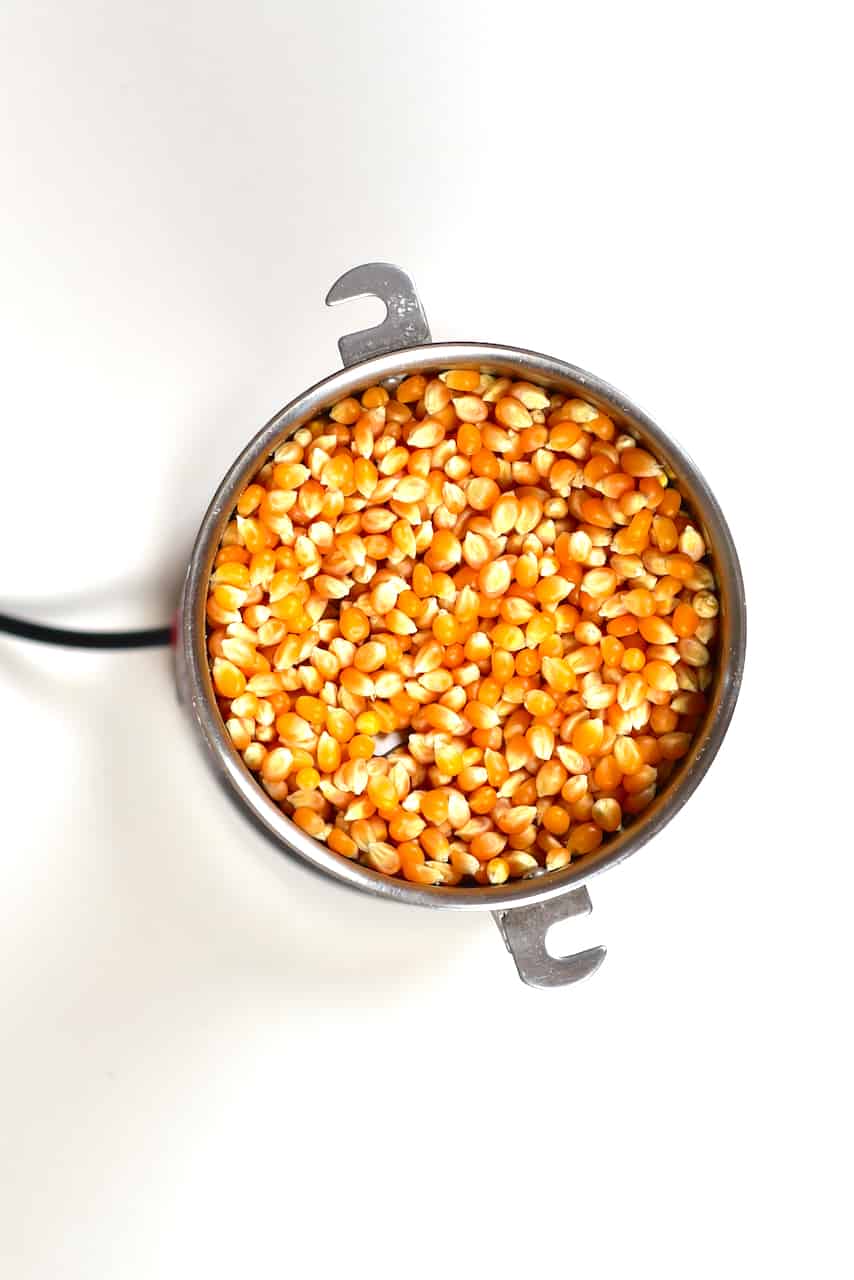
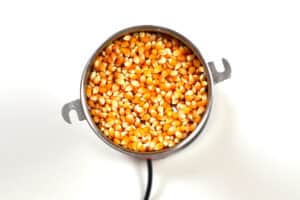
Popcorn – Once again, not often used in commercial cornmeal but one of the easiest homemade options. Popcorn kernels are already dry and are considered whole grain (for whole-grain cornmeal).
You can use most types of corn that you have (including frozen corn, off the cob) to make homemade cornmeal. As long as it is thoroughly dehydrated, then it will work. The color and flavor of your cornmeal will vary depending on which corn you use.
Fun fact – Commercial cornmeal is often “de-germinated”, which extends the shelf life of the product but also strips tons of the nutrients from the grain.
How To Make Cornmeal
The main method I will be taking you through today is making homemade cornmeal with popcorn kernels. Thus, no additional “drying” is required – so it’s just a simple grinding process.
I usually swap out my “corn base” for different batches of cornmeal, though, to take advantage of the different nutritional values of different corn. So I’ve included the method for drying corn in the recipe card.
Needed:
- Dried popcorn kernels
The Steps:
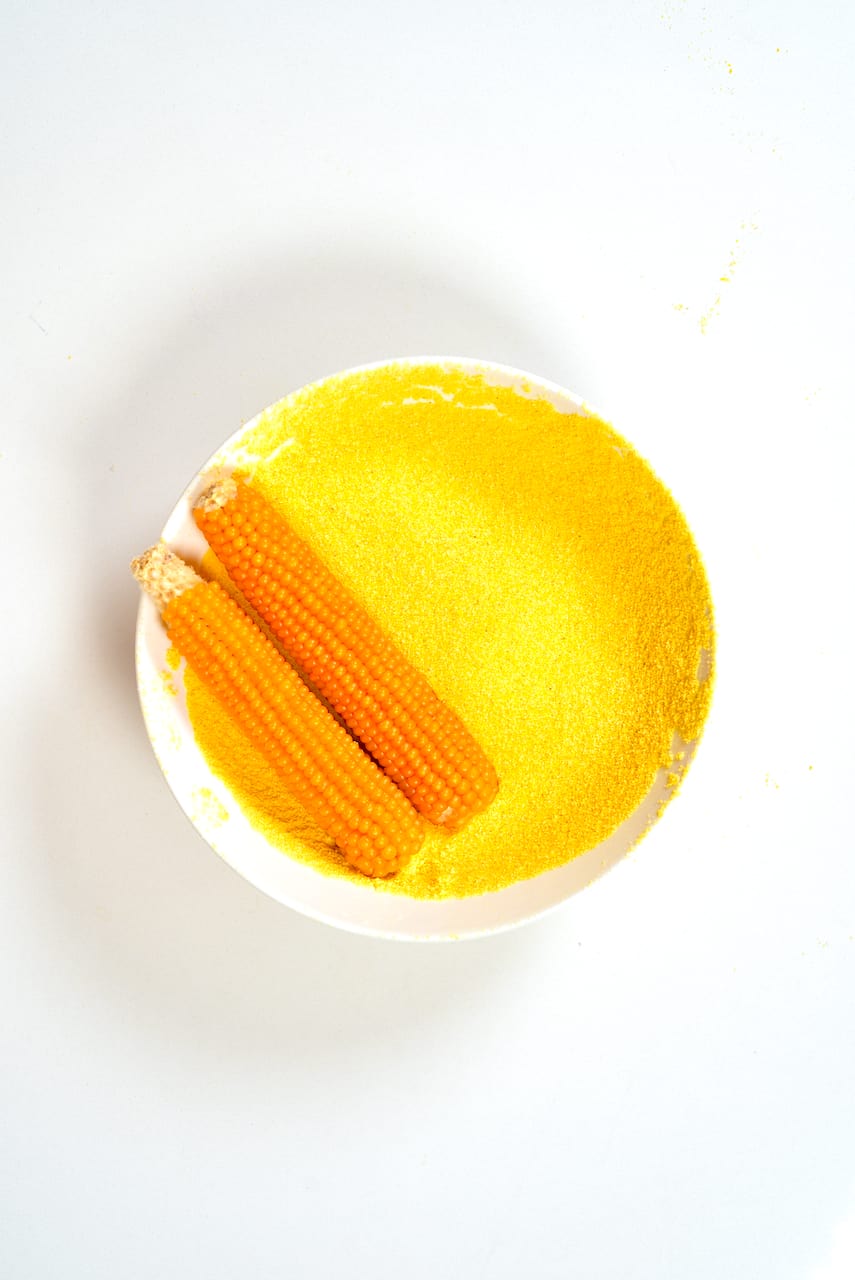
Place the corn kernels in a blender or seed grinder.
Then just grind till you obtain a powder.
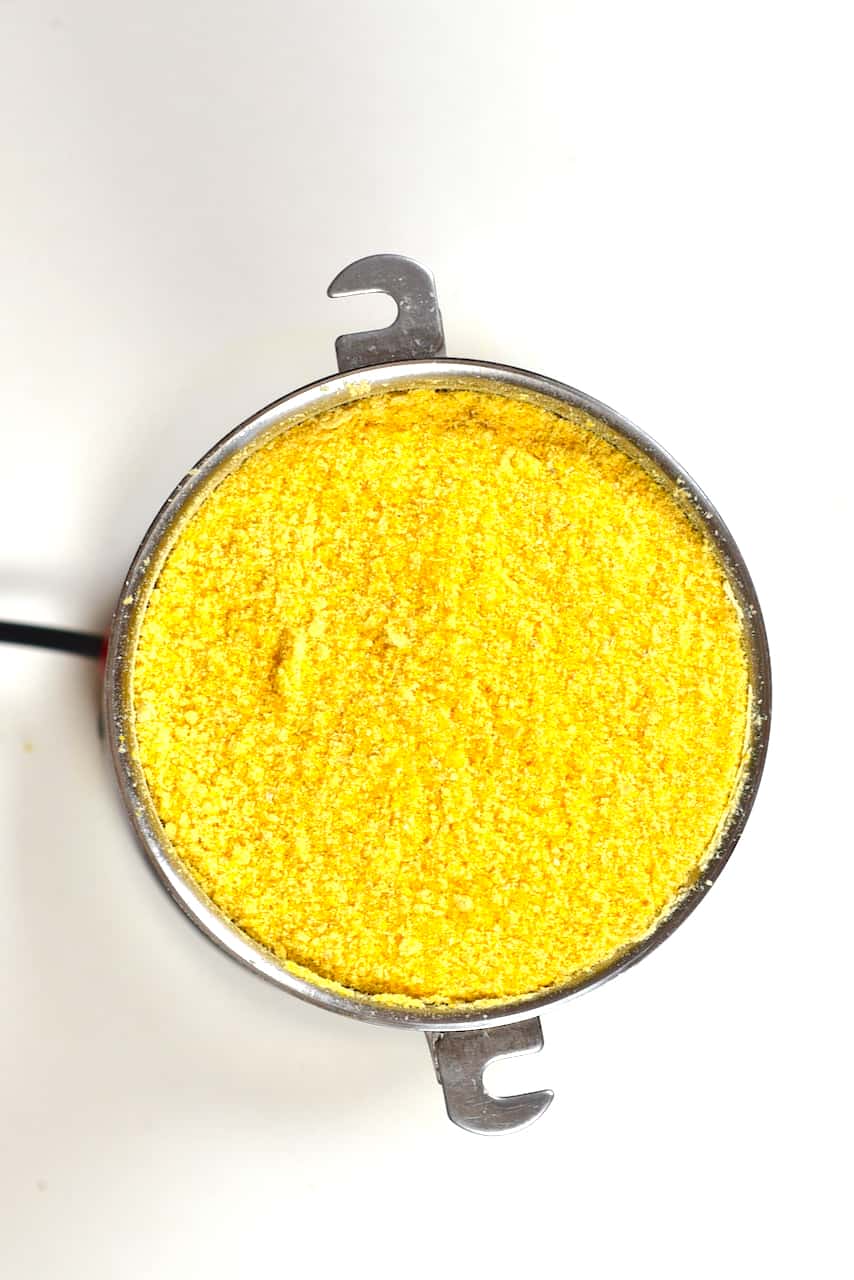
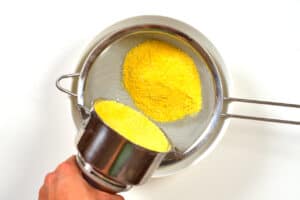
The first go-around will yield some uneven pieces, so sieve the powder into a bowl and then re-grind the larger pieces.
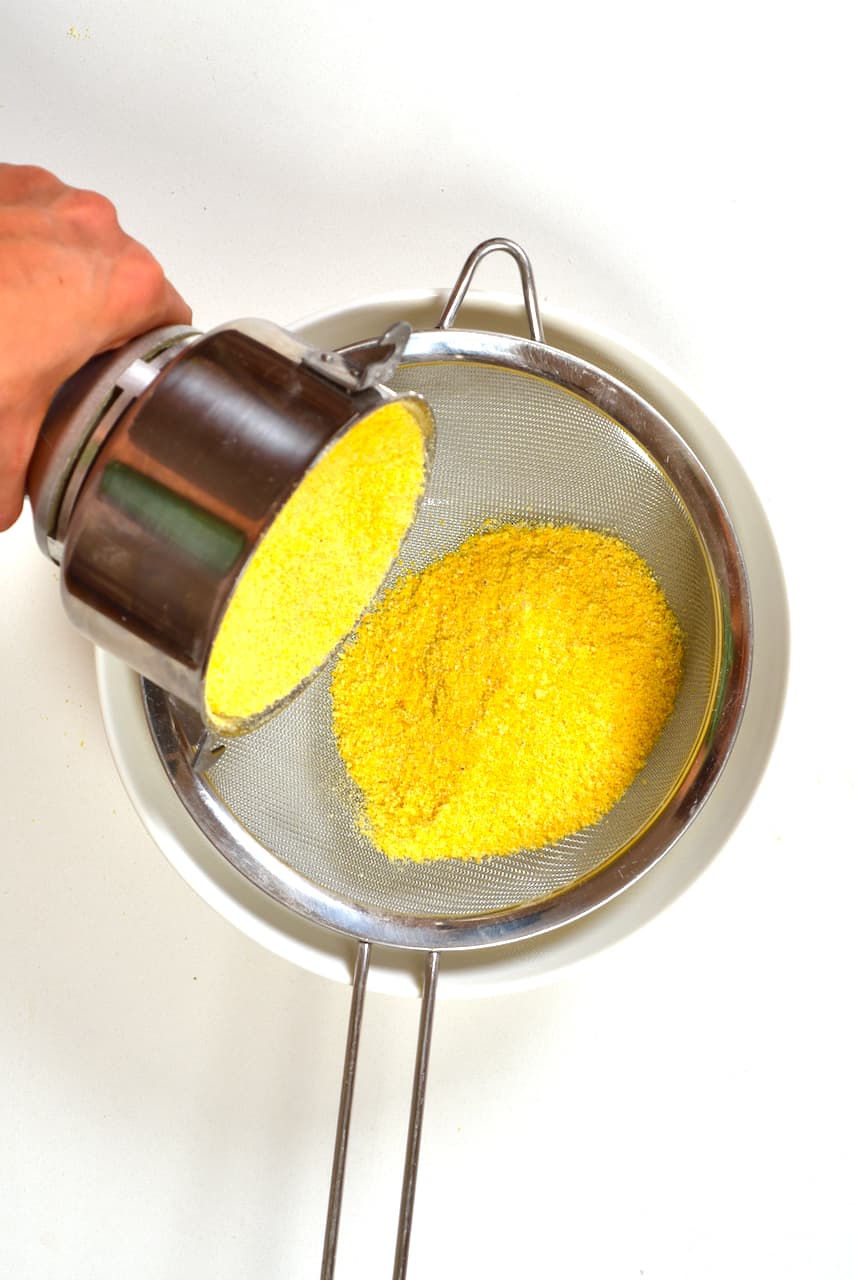
You may need to go for a third grind/ blend. However, I usually find two is sufficient.
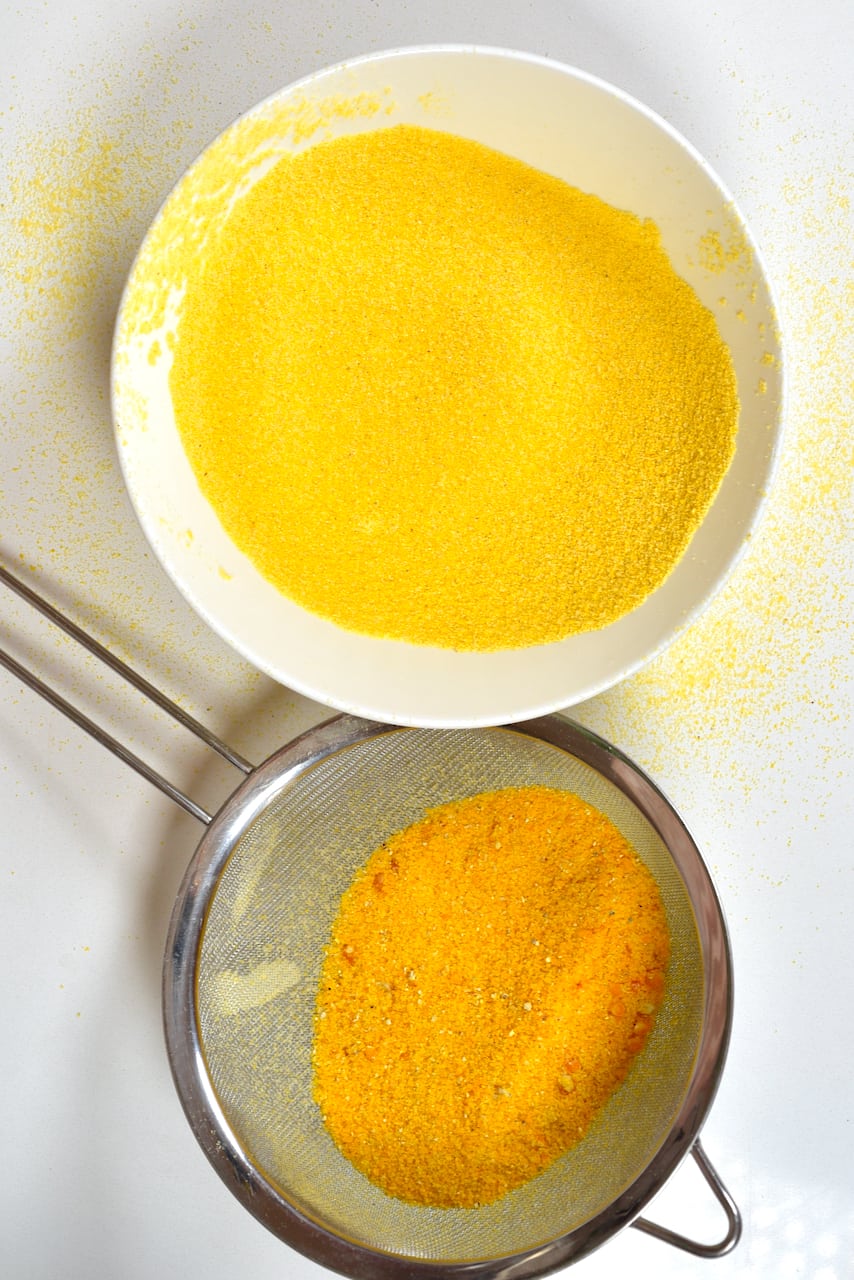
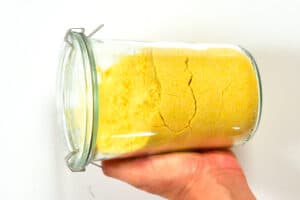
Transfer the cornmeal to an airtight container.
If Using A Blender
Instead of a grinder, you can also use a high-speed blender (must be powerful). Run at its’ top speed for 40 seconds, check what the meal looks like, and run for a further 20-30 seconds if needed. Sieve the resulting mixture into a bowl and replace the larger bits back into the blender and go for round two. You may even need around three for finely ground cornmeal.
Just make sure to use enough corn that the blades are safely covered. 2-3 cups of dried corn are usually best per batch in a blender. The longer you blend it, the more like a ‘flour’ it will become. 2-3 minutes will yield a soft, powdery flour.

Storing Instructions
Freshly milled cornmeal, within the first couple of days, will yield the best nutrients and flavor. However, it does actually have a long shelf life, too.
Keep cornmeal in airtight silicone bags or jars at room temperature. You want the container to be as air-free as possible, to reduce the chance of it going rancid too soon. This way, you can store the container in a cool, dark, dry place (like a kitchen cupboard) for up to a year.
Cornmeal is also freezer-friendly. Transfer to a freezer-safe container and keep stored for up to 2 years. You’re able to use it directly from the freezer, without a need to thaw, the majority of the time.
How To Use Cornmeal
The classic recipes include corn bread, pancakes, and corn muffins. However, you can also use it to dust bread and pizza dough – providing a non-stick coating and subtle texture. As mentioned above, cornmeal can also be used to cook polenta (but smoother).
Cornmeal is also a great gluten-free flour option and can be used as a ‘breading’/coating. It is great for Jamaican dumplings, too. Not to forget that it also makes for wonderful sweet baked goods – appearing in tons of cake recipes.
Other Simple DIY’s You May Like
- How To Make Chickpea Flour
- 5-Seed DIY Vegan Protein Powder / Blend
- How to Make Ginger Powder (Two Methods)
- How to make Turmeric powder at home
- Homemade Miso Paste (Kome Miso/Shinshu Miso)
- How to Make Unrefined Cane Sugar & Jaggery (Gur)
- How to Make Onion Powder
- Homemade Vegetable Bouillon Cubes and Powder
- How to Make Ginger Paste
- Oven-Roasted Corn with Garlic Butter (+ Other Toppings)
If you give this cornmeal DIY a go, then let me know your thoughts in the comments (and any questions). Also, feel free to tag me in your recreations @AlphaFoodie.
How to Make Cornmeal With Popcorn (and other corn)
Equipment
Ingredients
- 3 cups dried corn kernels
Instructions
The Steps For Grinding Popcorn Kernels Into Cornmeal
- Place the corn kernels in a blender or seed grinder and grind.

- The first go-around will yield some uneven pieces so sieve the powder into a bowl and then re-grind the larger pieces.
- You may need to go for a third grind/ blend. However, I usually find two is sufficient.
- Transfer the cornmeal to an airtight container.
If Using A Blender
- Instead of a grinder, you can also use a high-speed blender (must be powerful). Run at its' top speed for 40 seconds, check what the meal looks like and run for a further 20-30 seconds if needed. Sieve the resulting mixture into a bowl and replace the larger bits back into the blender and go for round two. You may even need a round three.
- Just make sure to use enough corn that the blades are safely covered. 2-3 cups of dried corn is usually best per batch in a blender. The longer you blend it, the more like a ‘flour’ it will become. 2-3 minutes will yield a soft, powdery flour.
Drying Corn At Home
- If you want to use sweetcorn or other fresh corn for your cornmeal, then you're going to first need to dry it out. You can do this either in a dehydrator or the oven.
- If using a dehydrator: Pour the corn kernels over the dehydrator trays, in a single layer. You can use frozen or fresh corn for this, just make sure none of the frozen corn is sticking together in clumps.Dehydrate at around 50ºC/125ºF for 8-10 hours. This can take up to 12 hours sometimes. I usually check after 8, then check in 30-minute intervals.
- In an oven: The process is similar, and can only be done in an oven if you're able to reach the low temperatures like 50ºC/125ºF. You want it to dry out without cooking. You can increase the temperature slightly, if your oven doesn't go as low – but then it may be best to leave the door slightly open. It could take 6 to 10 hours to dry them.
- When ready, the kernels must be hard, brittle, and not at all pliable. They should also have that familiar ‘clicky’ noise when rustling them together or dropping onto a counter.
Video
Notes
Nutrition
Nutrition information is automatically calculated, so should only be used as an approximation.


I’m kinda curious if I can use this to make corn flakes?
Hi Kate,
You sure can 🙂
Can you use the puréed popcorn as hot cereal?
I think you can. Let me know if you give it a try.
Thank you for this! We just harvested our first field corn, organic, of course, and red, blue, and orange! I’m not sure how to know if it’s dried enough, so I put some in a dehydrator for a while. It probably can’t be over-dried, since you succeeded with popcorn. I’ll let you know how our colorful polenta and rainbow cornbread turn out.
Thank you for your comment, Peri. This sounds exciting!
Where i live in the US you can buy dried sweet corn in bags or already rehydrated in cans or frozen. Would this dried corn work for your process? It’s made by a company called Cope’s and very popular in the Amish and Mennonite communities (aka Pennsylvania Dutch).
Hi Sue,
As long as the corn is completely dry, you can grind it into cornmeal. If the kernels feel a little soft, you can first dehydrate them using an oven or a dehidrator. All the steps are outlined here on the blog.
Excellent!!!!!!
Thank You!!!!!
Wow, so glad I stumbled into your recipe I ran out of cornmeal for my pizza pan. I normally put some on the bottom when making homemade pizza and thank goodness I found your technique of making cornmeal! I used the popcorn kernels and they work! Thanks so much!!
Thank you for your comment, Nina. Glad you tried this recipe.
In the oven method under “Dry corn at home” you don’t tell us how many hours to leave it in the oven.
Hi Debbie,
Thanks for pointing this out – it takes 6 to 10 hours to dry them in the oven. The post is updated as well.
I am going to try this as I am making chili and do not have cornmeal for the cornbread I also want to make. Do you have a favorite cornbread recipe from popcorn kernel meal or would any recipe do? Thank you.
Thank you for your comment, Donna.
I don’t have a favorite cornbread recipe yet. On my list to do 🙂
Wow I never knew!
Thank you for your comment. I hope you give this recipe a try 🙂
Thank You!!!
Thank you for your comment. 🙂