
This post may contain affiliate links. Please read our disclosure policy.


How to make miso paste with just 4 ingredients, a simple process, and some patience. This miso paste recipe makes for a great all-purpose mild yellow miso using koji rice (Shinshu Miso/Kome Miso). Plus, it’s easier to make this homemade miso paste recipe than you think!
Having previously shared methods for making homemade soy milk and homemade tofu, I’m a little surprised it’s taken me this long to share a technique on how to make miso paste at home using soybeans. Luckily, a Japanese friend’s mother stepped in to my rescue, and now I’m passing along those secrets to you (with her permission, of course!).
Miso paste is complex, sweet, salty, and packed with umami flavor – making it a great addition to tons of recipes. However, as a fermented product, it may seem like a labor-intensive, complex process to replicate at home. Luckily, this couldn’t be further from the truth! While the fermented bean paste DOES take patience, it’s also incredibly forgiving, and the process itself isn’t complicated either.
The only thing you need to be prepared for is planning for the time it takes to prepare the initial ferment. You’ll need two days to prepare the paste fully (not including the 6-12 months of fermenting, of course). However, don’t worry; most of the two days are hands-off, including soaking and cooking the soybeans before mashing them into a paste, mixing with the remaining ingredients, and transferring them to a container to ferment.
This isn’t the first time I’ve shared a fermented recipe/DIY on the blog either, having previously shared napa cabbage kimchi, fermented garlic honey, apple cider vinegar, and homemade kombucha! I’ve also shared recipes for yogurt, including homemade plain yogurt, homemade coconut yogurt, homemade almond yogurt, and even homemade soy yogurt.
Want to save this recipe?
What is Miso?
Miso is a traditional Japanese “seasoning” traditionally made by fermenting soybeans with salt and koji rice (which contains the fungus aspergillus oryzae). However, several versions include other legumes and additions such as barley, millet, rye, wheat, hemp, and seaweed.
There are several traditional types of miso, including sweet white (Shiro miso), yellow (or mixed – Awase miso), and red (Aka miso). These tend to be categorized by the ingredients (and the ratio of them), color, and taste. The lighter miso is milder in flavor with the shortest fermentation period and so on.
For example, we’re using rice koji for this miso paste recipe, which makes “Kome miso” – which can be yellow or red. It will be milder at the 6-month point and stronger/darker at 12 months.
The prepared fermented bean paste is filled with vitamins, minerals, and gut-boosting probiotic healthful properties. It’s also a versatile seasoning to add to all kinds of foods, sauces, soups, and more!
The Miso Paste Ingredients
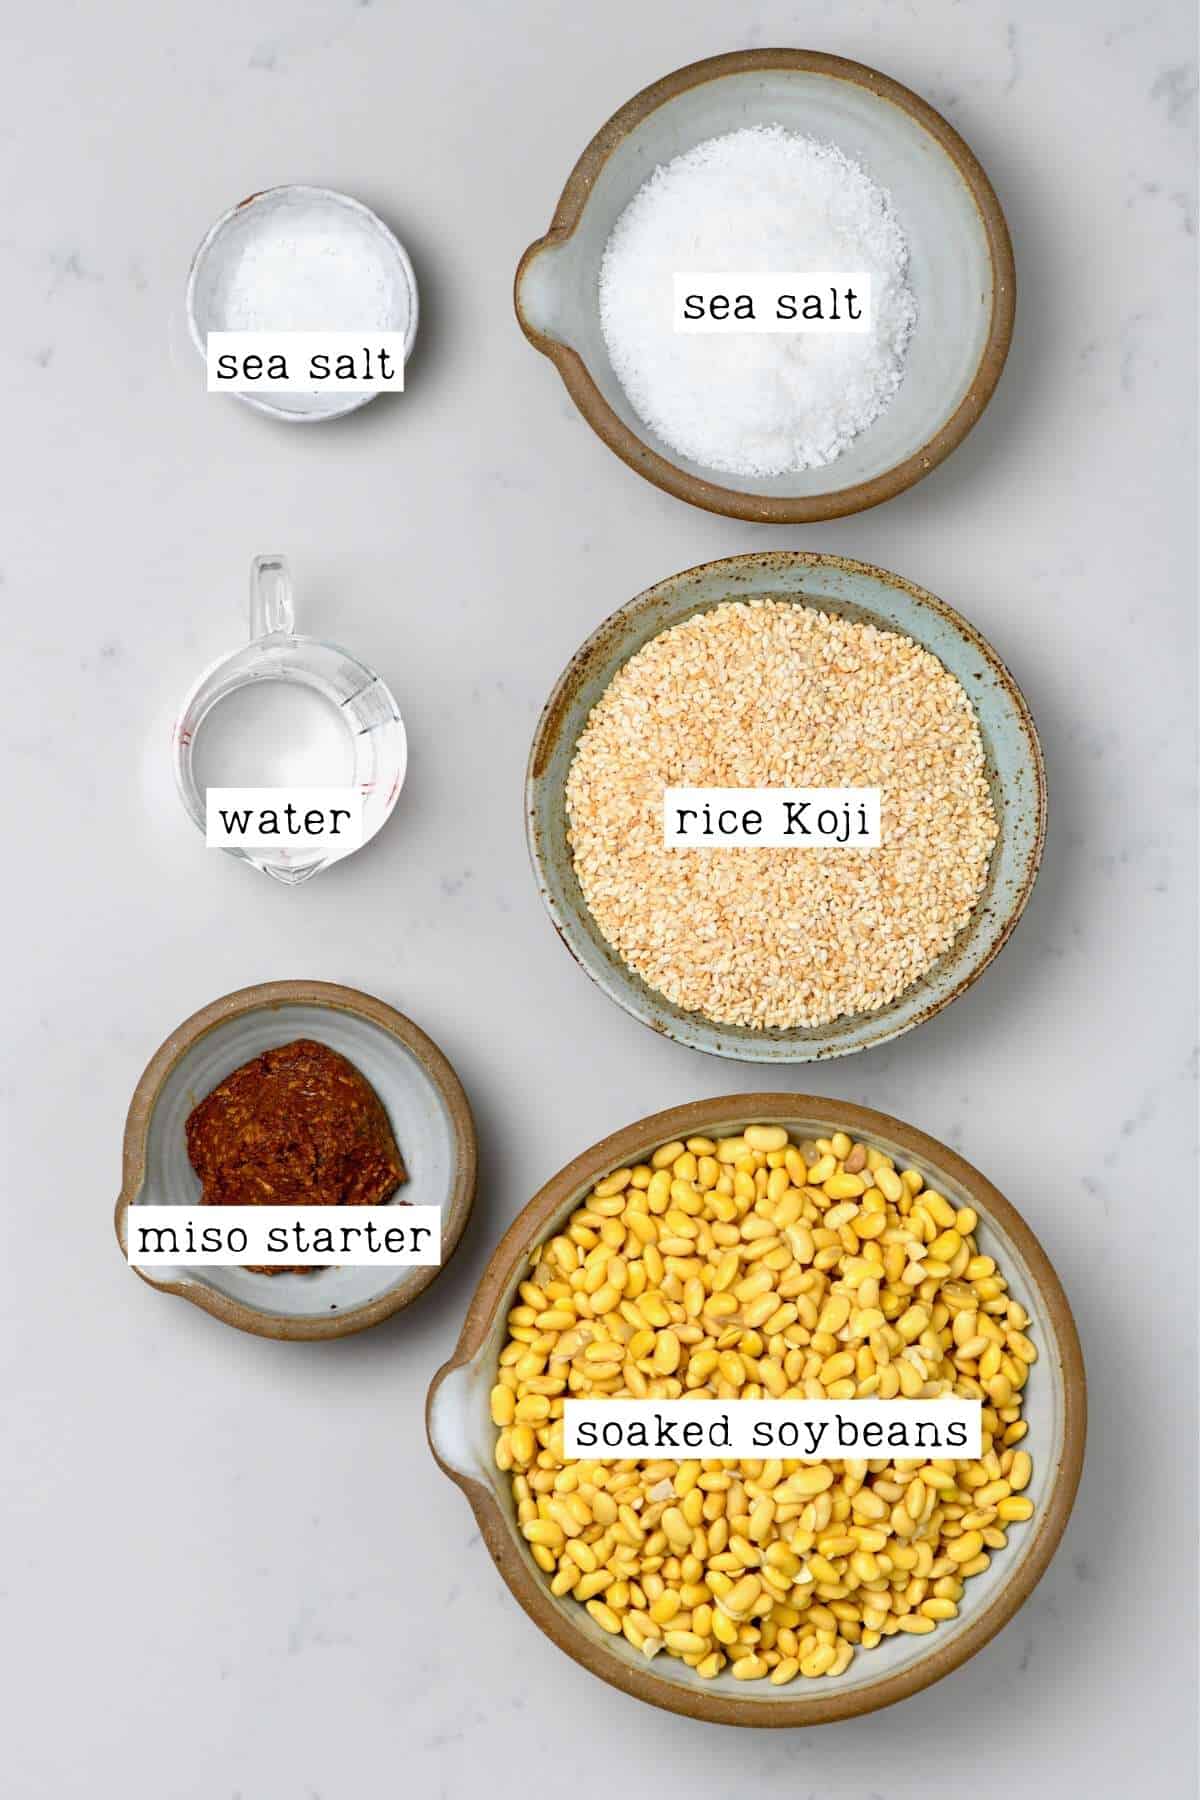
- Soybeans: I recommend using organic soybeans for this miso-paste recipe, which you can purchase from health food stores or online.
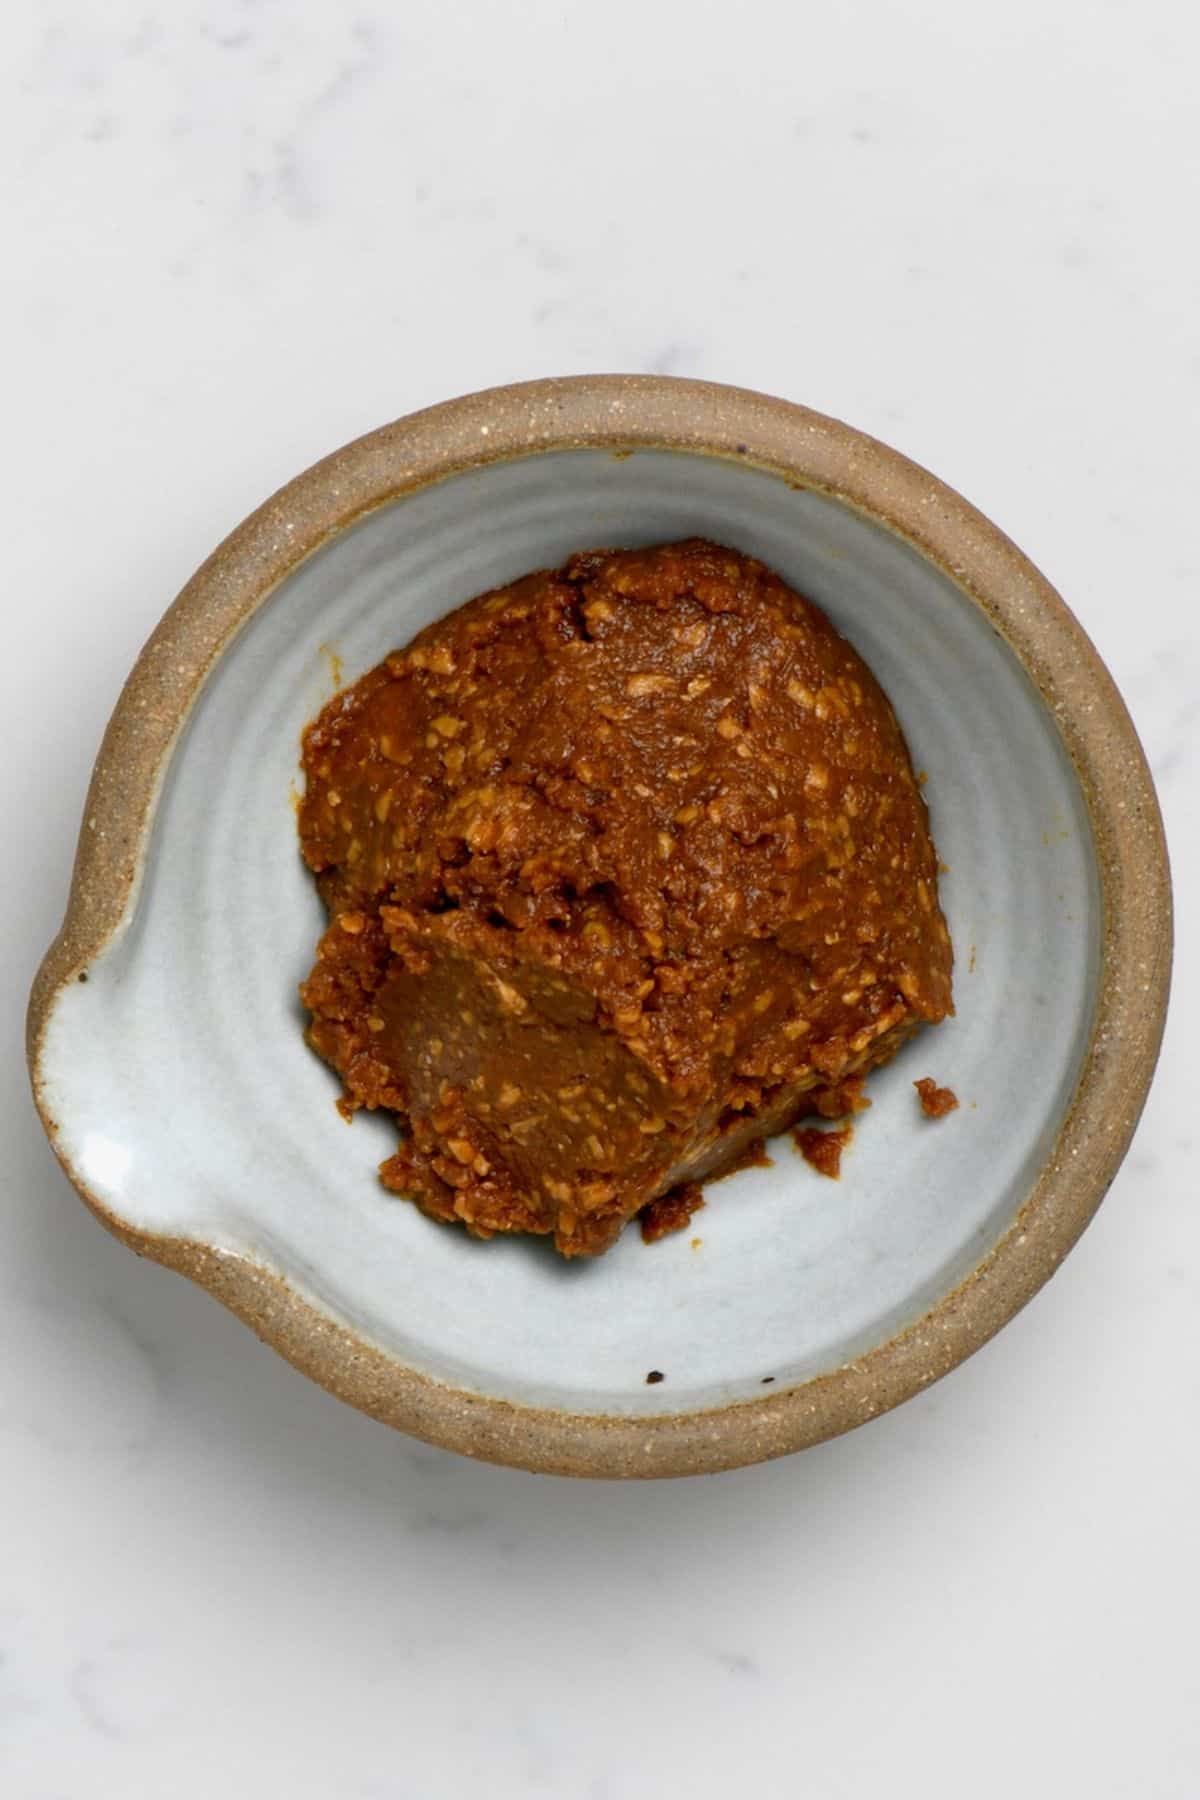
- Miso starter: technically, you may not need this; however, it’s the way a Japanese friend’s mother taught me, so, who am I to argue?! For the first batch, you can use store-bought miso. After that, you can use some of this batch as a starter for the next and so on.
- Rice koji: rice koji is a must for this homemade miso method. It’s a type of steamed rice treated with a fermentation culture, which will encourage the fermentation process of the soybean paste.
- Salt: I used sea salt for this recipe as it’s a better flavor over general salt and has the benefit of extra minerals. This salt will be separated into two different-sized portions (see the recipe card below), so make sure to do so.
- Water: I recommend using filtered water for this recipe, so you don’t have to worry about impurities (chemicals, chlorine, etc.) in the water affecting the fermentation activity of the fermented bean paste.
The equipment needed
- Jar/container: you need a container that snugly fits all the miso ingredients as well as the “weight” on top. I used an earthenware container. However, if you’re new to making miso, it may be best to use a large glass jar so you can see the miso inside as it ferments and you can look out for any mold. For this sized batch, you’ll need a container that’s around 3-4 liters in size (102-135 fl oz). Alternatively, you can use two smaller jars, if needed.
- Alcohol: I used shochu, but vodka could also work (around 35%) to sterilize your container. You’ll also need a clean cloth to use with the alcohol.
- Weight: Something needs to be placed over the soybean paste while it ferments to weigh it down. You could use a bag of salt or beans. I recommend aiming for a weight that’s around 1/3 of the weight of the soybean paste.
- Plastic wrap: to cover the top of the paste while it ferments and prevent bacteria/mold.
- Large mixing bowl: for combining the soybean paste and koji.
- Food processor/potato masher: to mash the soybeans into a paste.
How to Make Miso Paste?
Step 1: Soak and cook the soybeans
First, lightly rinse the soybeans and then leave them to soak overnight (between 12-16 hours. I recommend the full 16!) in a large bowl of water. During this time, they will double in size (2.2lb/1kg of dried beans yields 5lb/2.3kg soaked), so make sure to use plenty of water.
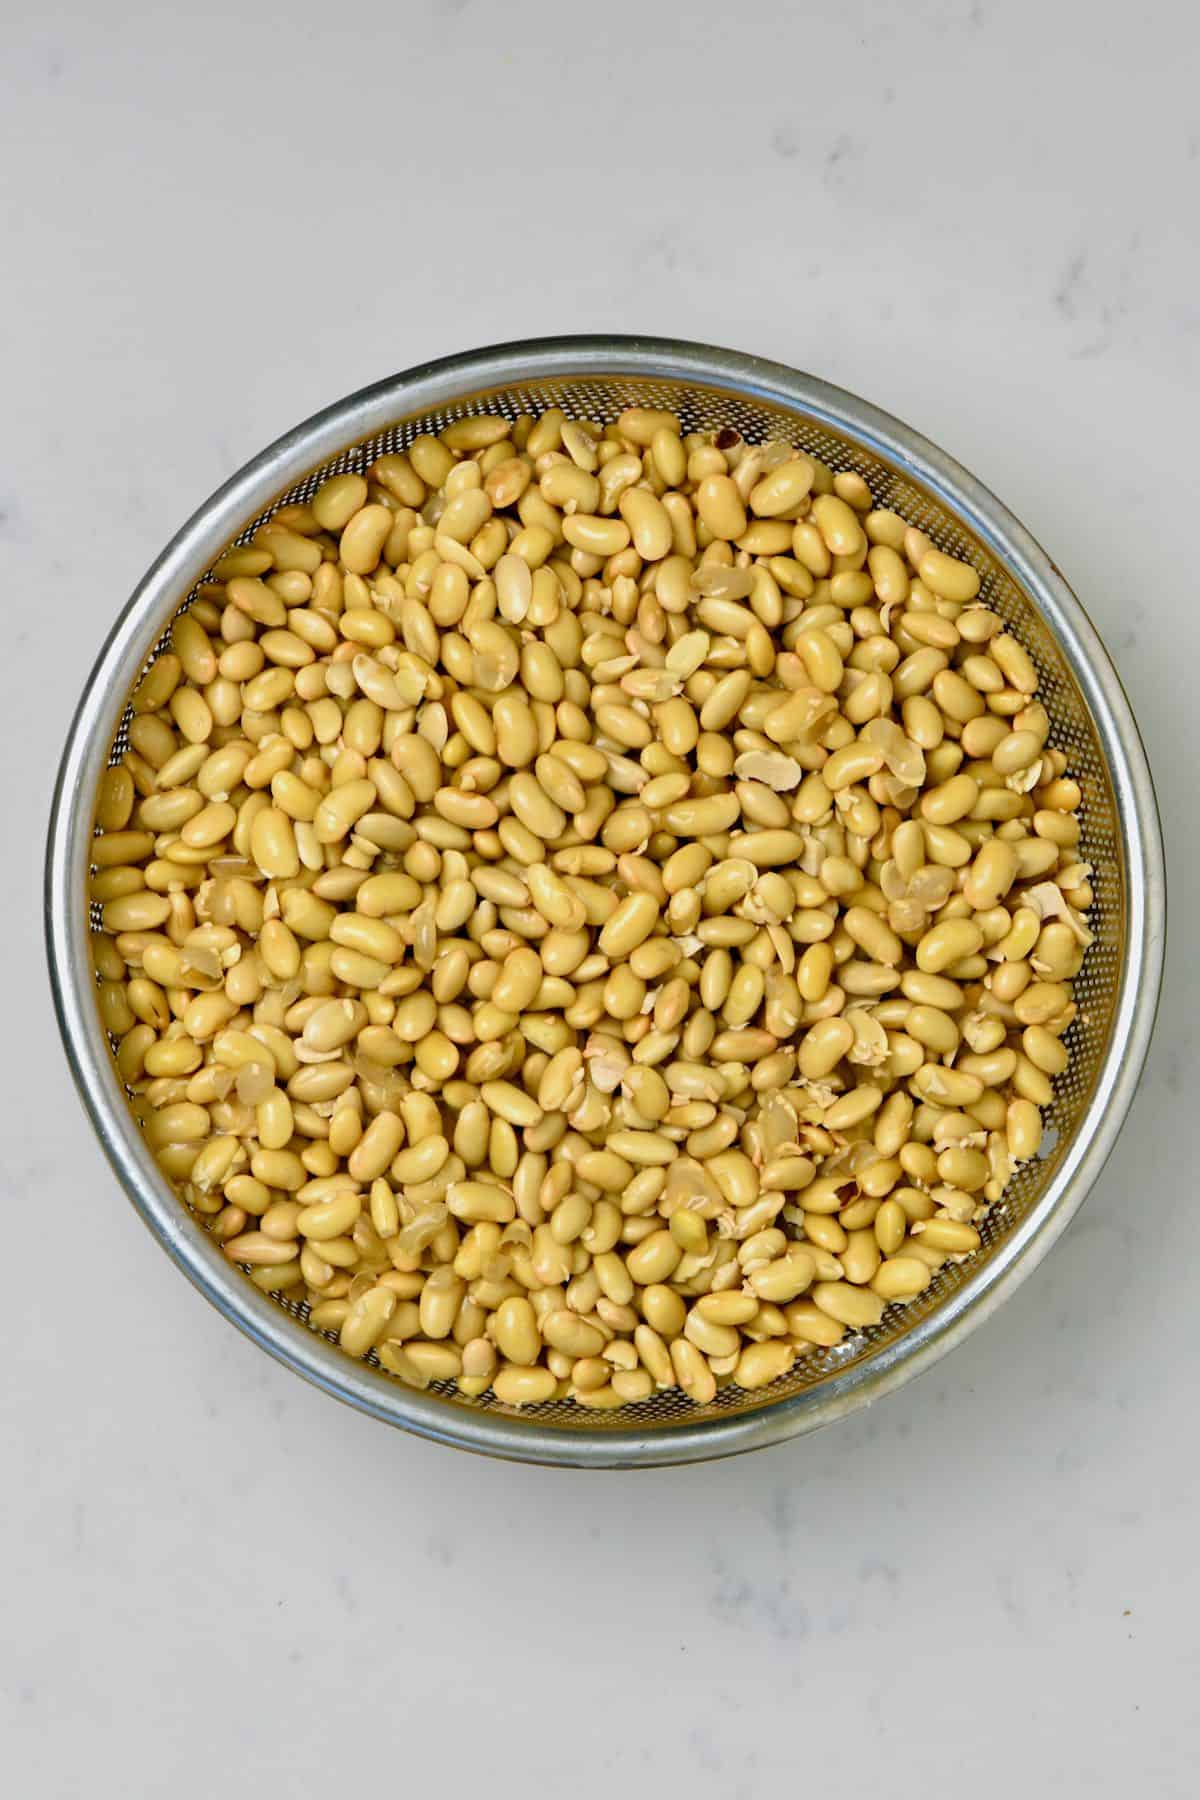
After soaking, drain and rinse them once more.
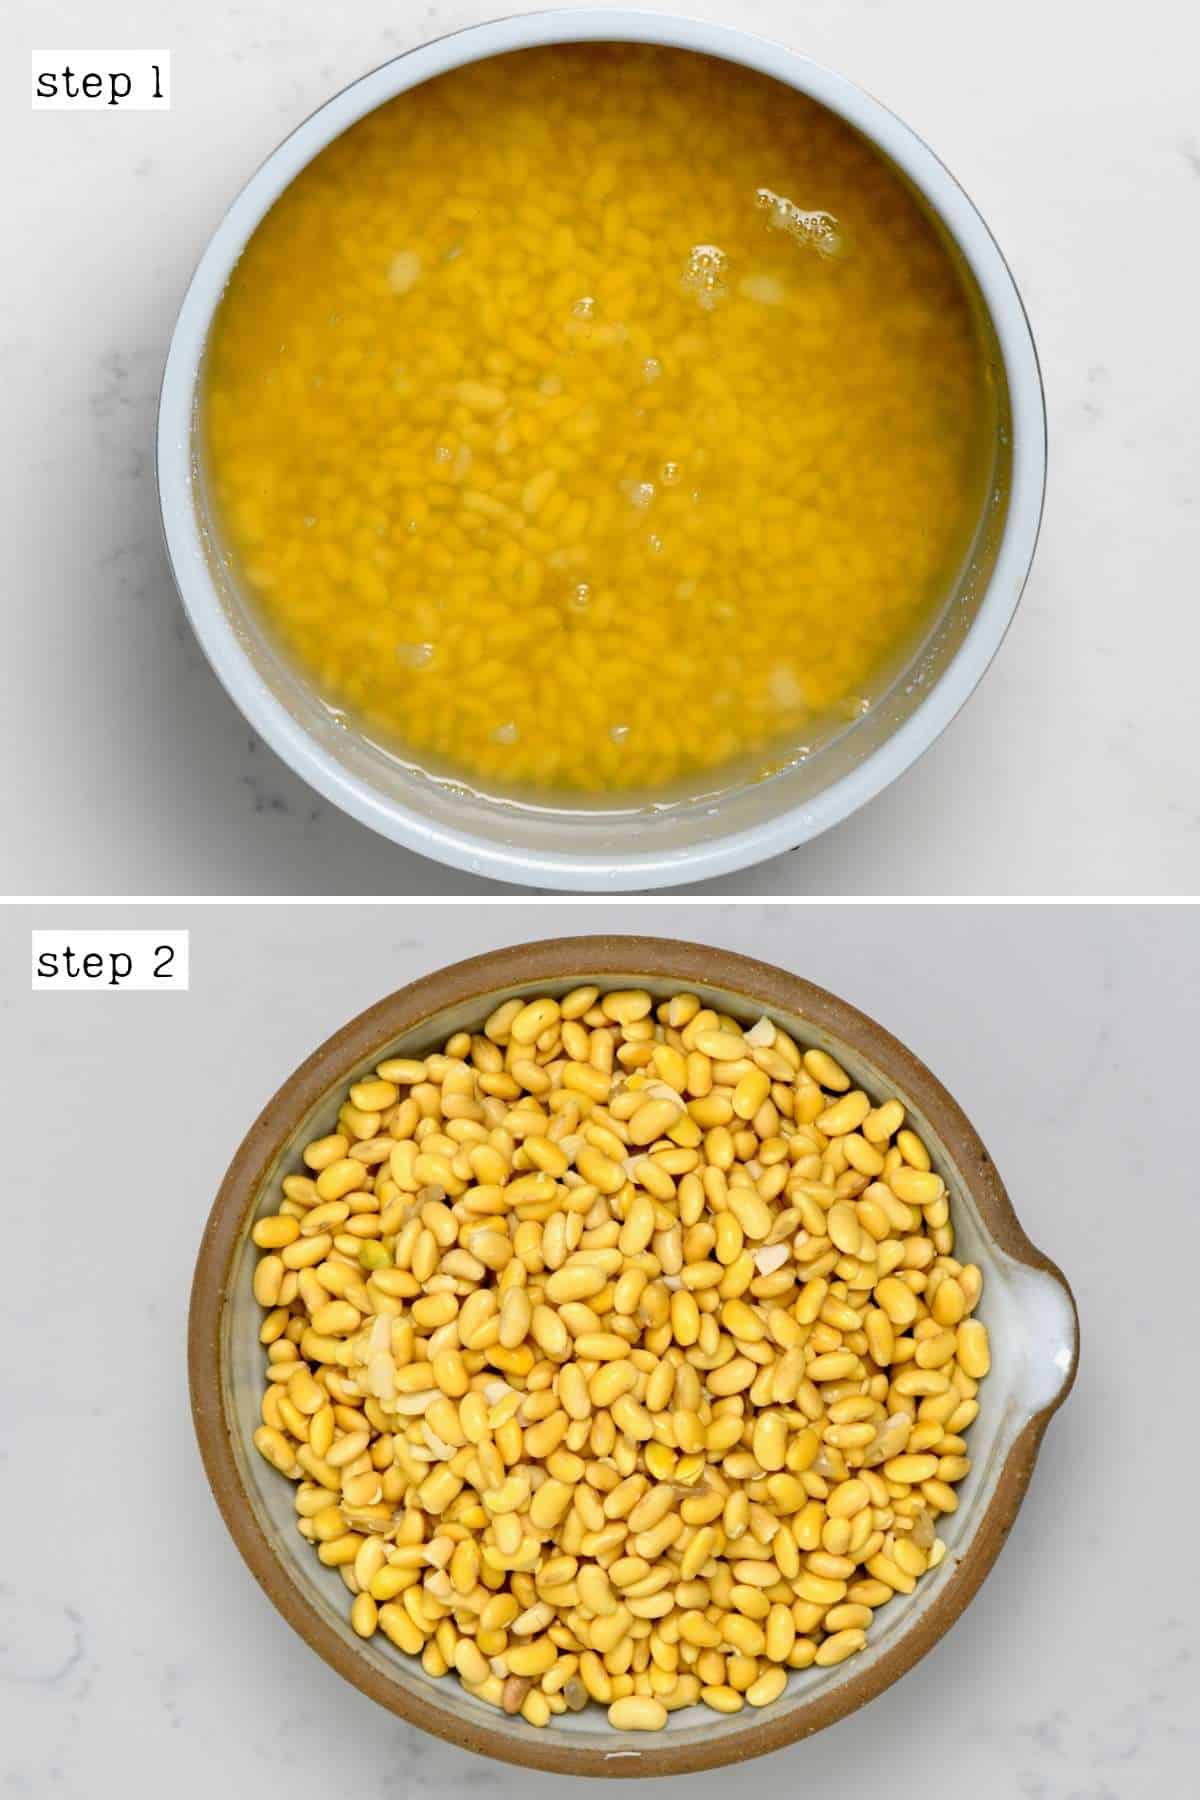
Step 2: Cook the beans
Then transfer them to a large pot with plenty of water and cook the beans. To do this, bring the water to a boil and then simmer the beans for between 2-3 hours. They need to become soft and tender during this time until a bean is easily crushed between two fingers.
Alternatively, you can use a pressure cooker for between 40-45 minutes.
During the cooking process, you’ll likely need to top up the water, as needed, to ensure the beans stay submerged during the process.
Once cooked and tender, drain the beans again, this time saving 1 ¼ cup (300ml) of the cooking liquid to use at a later stage.
During the last 10-15 minutes of cooking the soybeans, add the warm water (as listed in the recipe – make sure it’s warm) to the rice koji and set it aside to soak for 30 minutes.
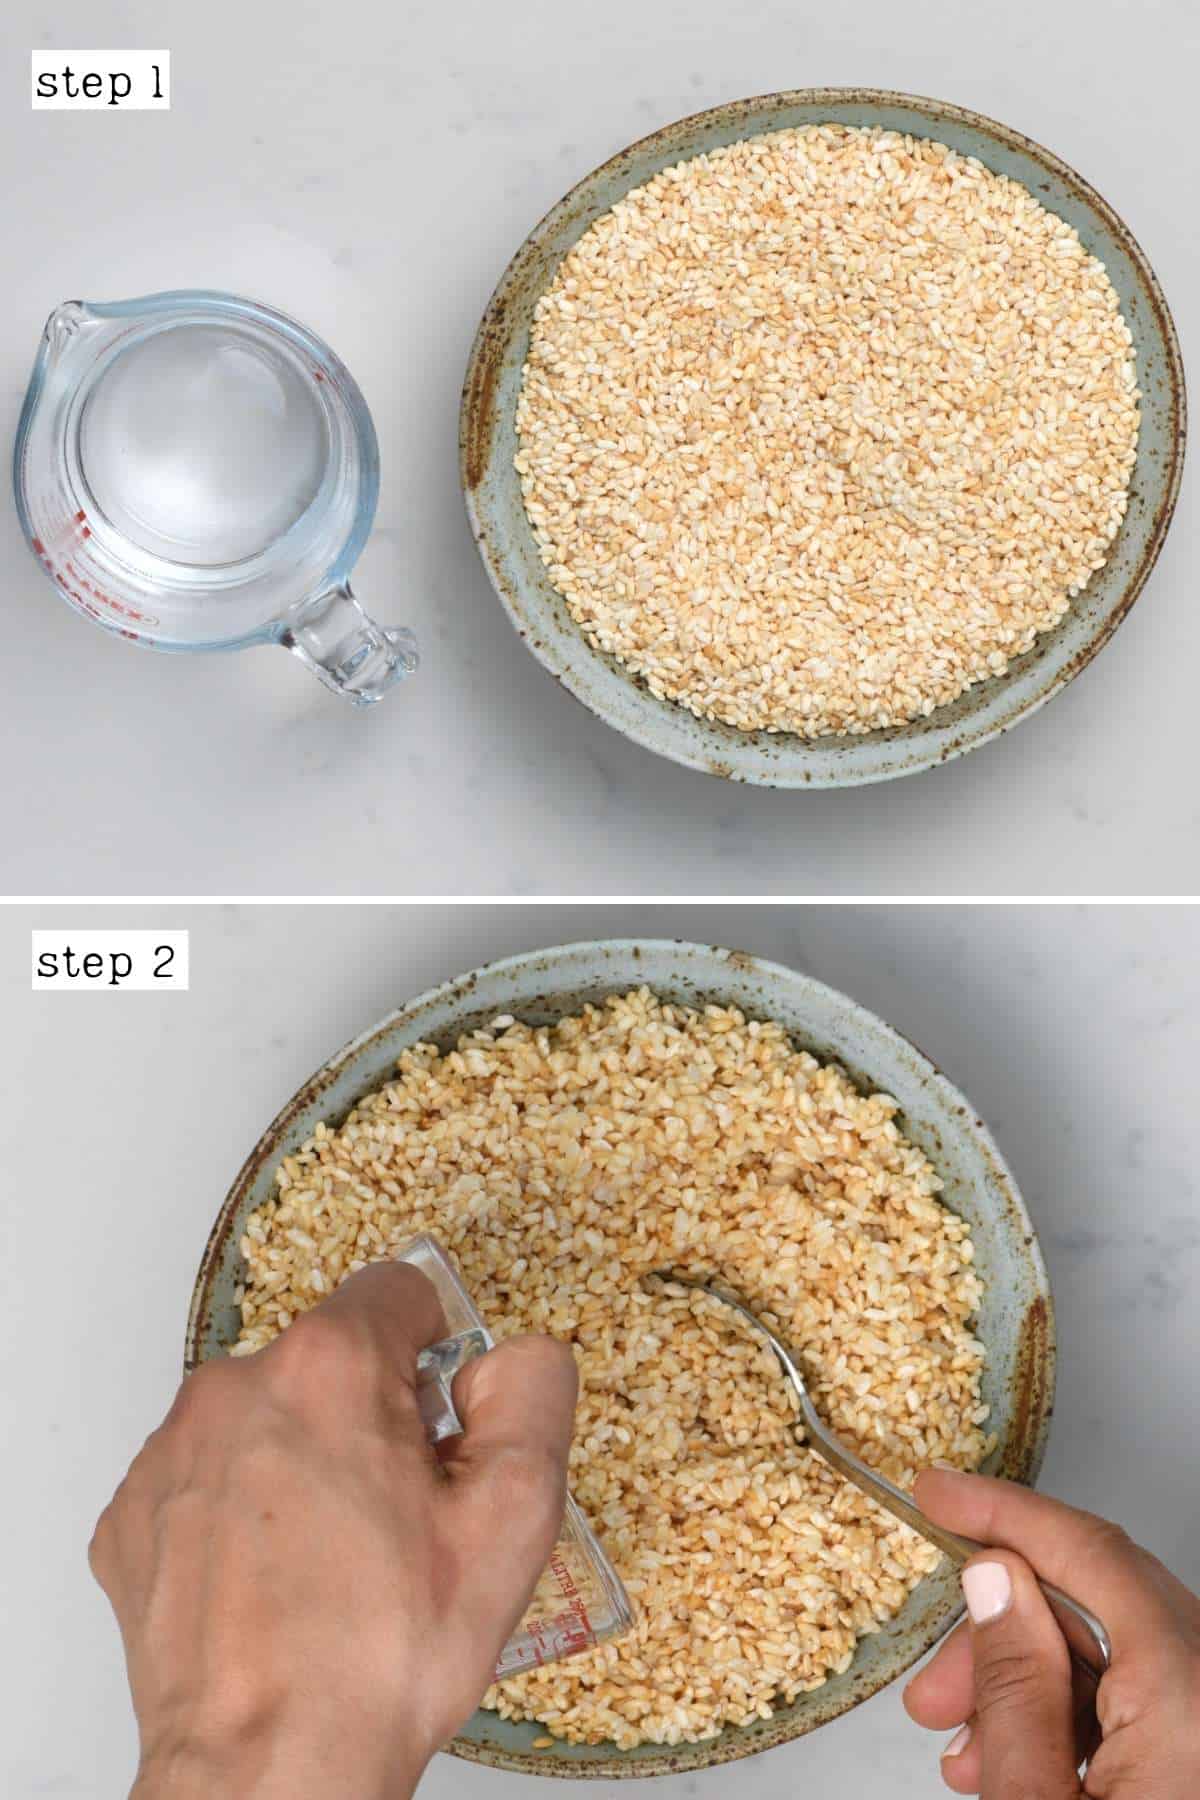
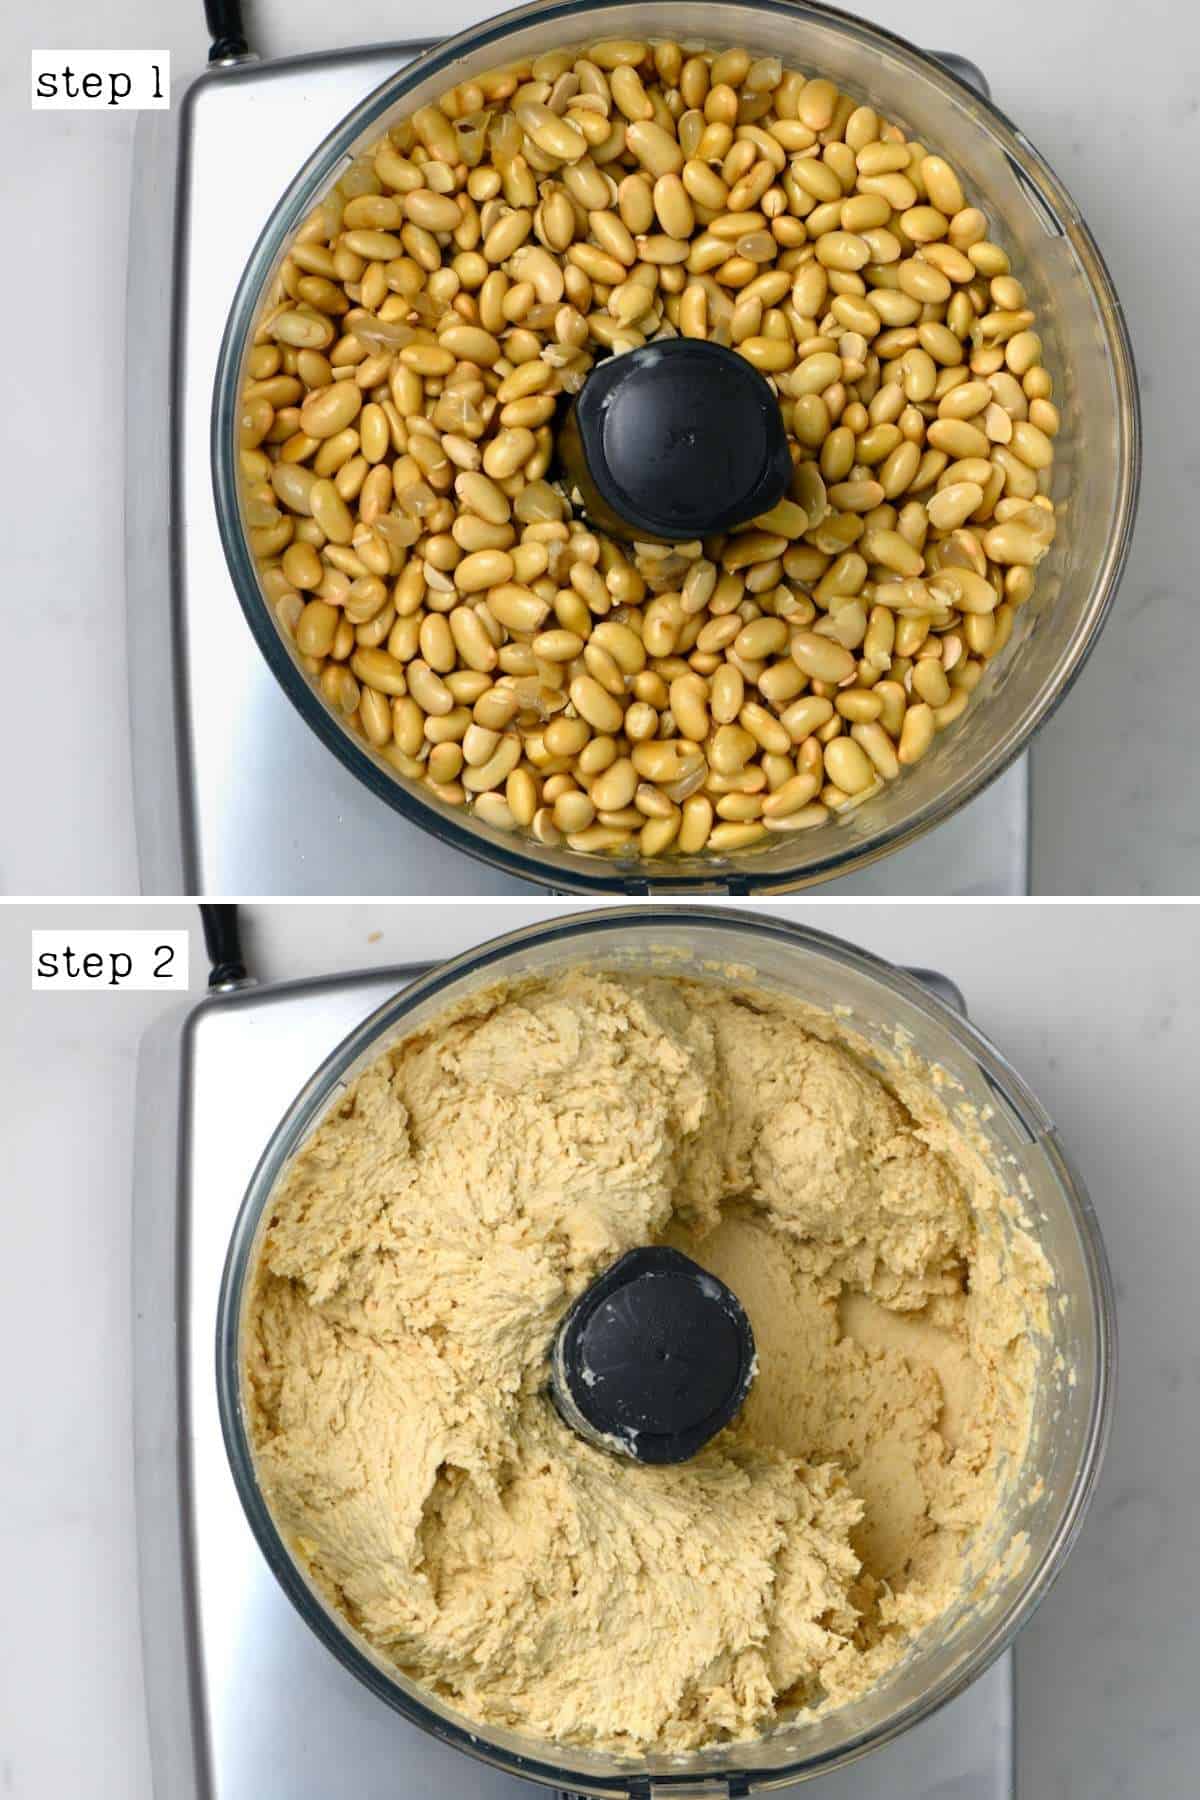
Step 3: Blend the beans
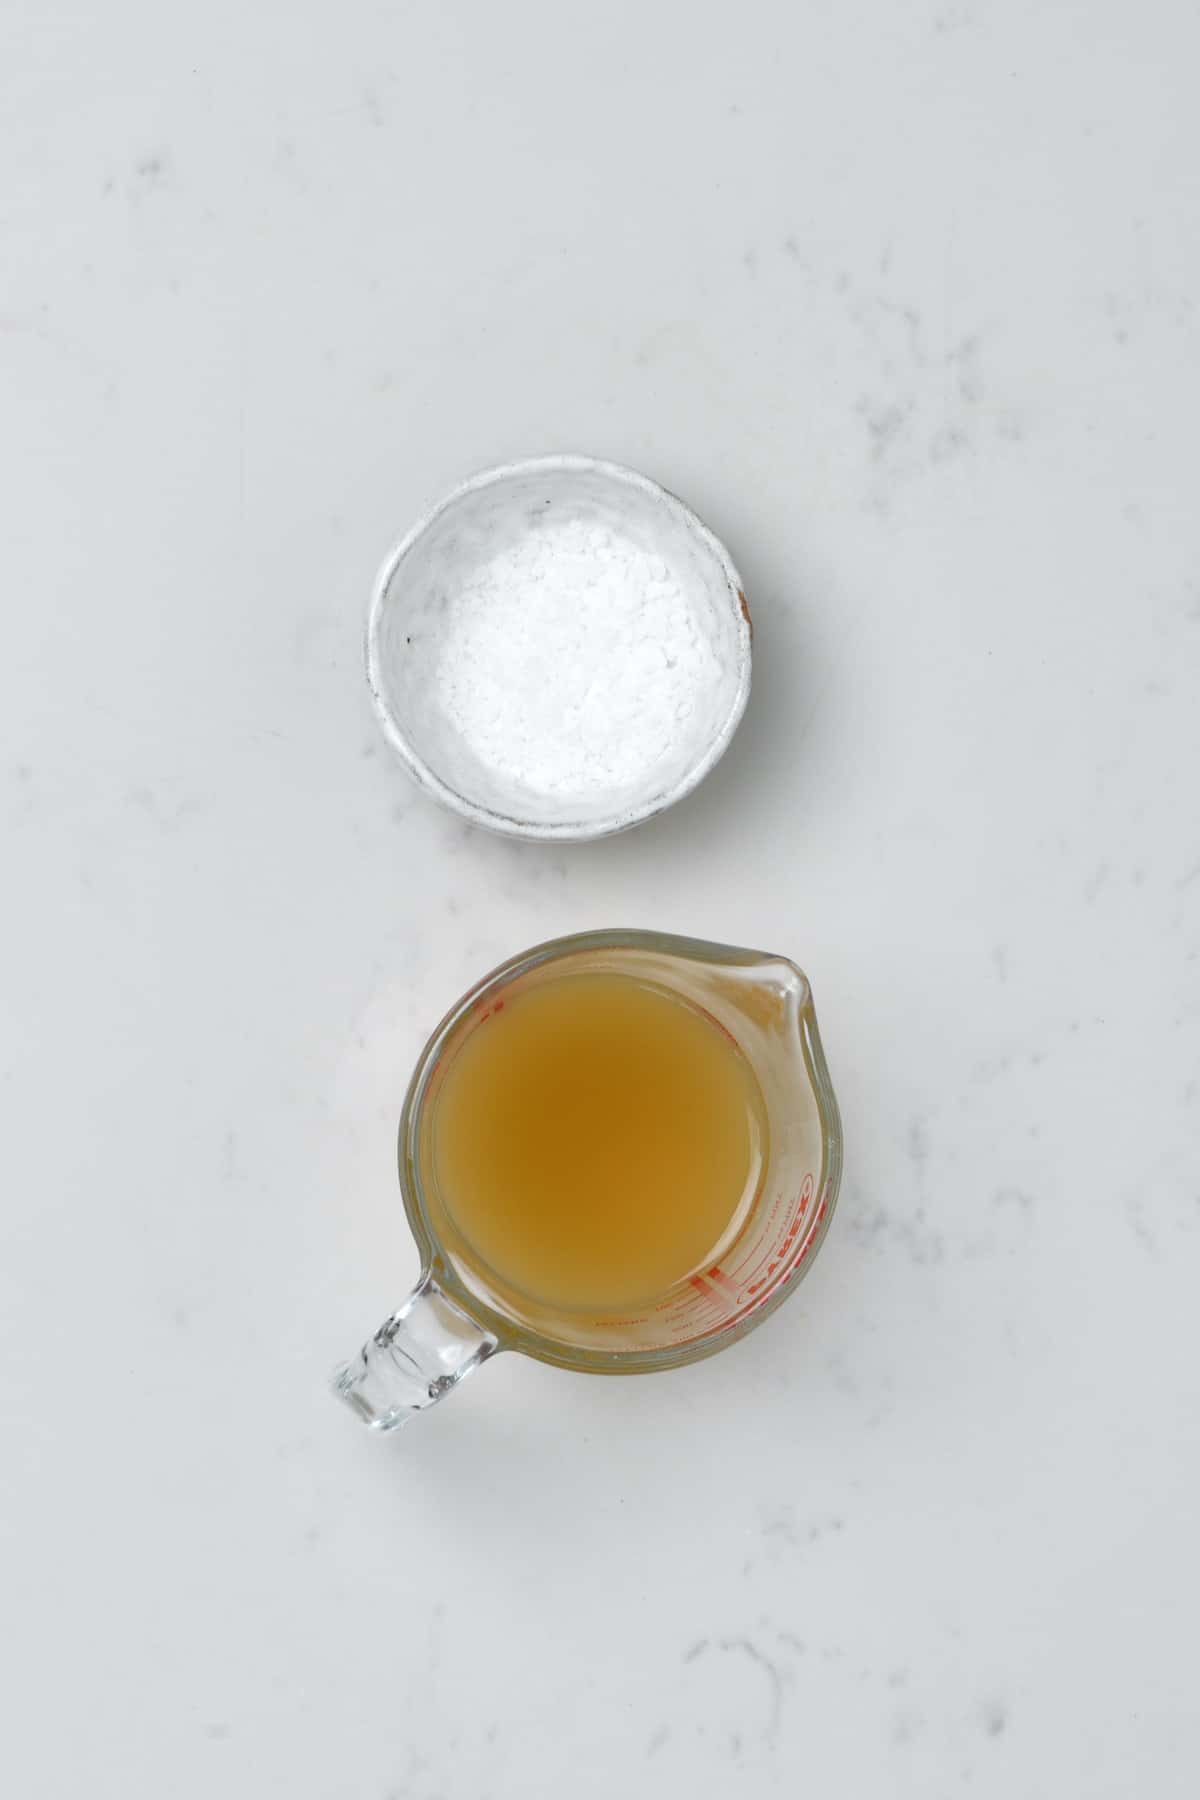
First, combine the warm soybean cooking liquid with the smaller amount of salt and mix well. Then set it aside.
Then, add the still-warm beans to a food processor or blender and blend them into a smooth paste. You could use a potato masher for a machine-free option or place them in a large bag (or just on a flat surface) and roll/smash with a rolling pin. However, the food processor method is much, much faster.
Step 4: Sterilize the container
Whatever container you plan to use when fermenting the miso paste needs to be thoroughly sterilized. First, rinse it with soapy boiling water.
Then, dip a clean cloth into the alcohol and wipe the container’s inside walls, rim, and lid. This is important to reduce the risk of contamination during the long fermentation process.
Then allow the container to dry, making sure it’s 100% dry before starting the next step.

Step 5: Mix the soybean paste
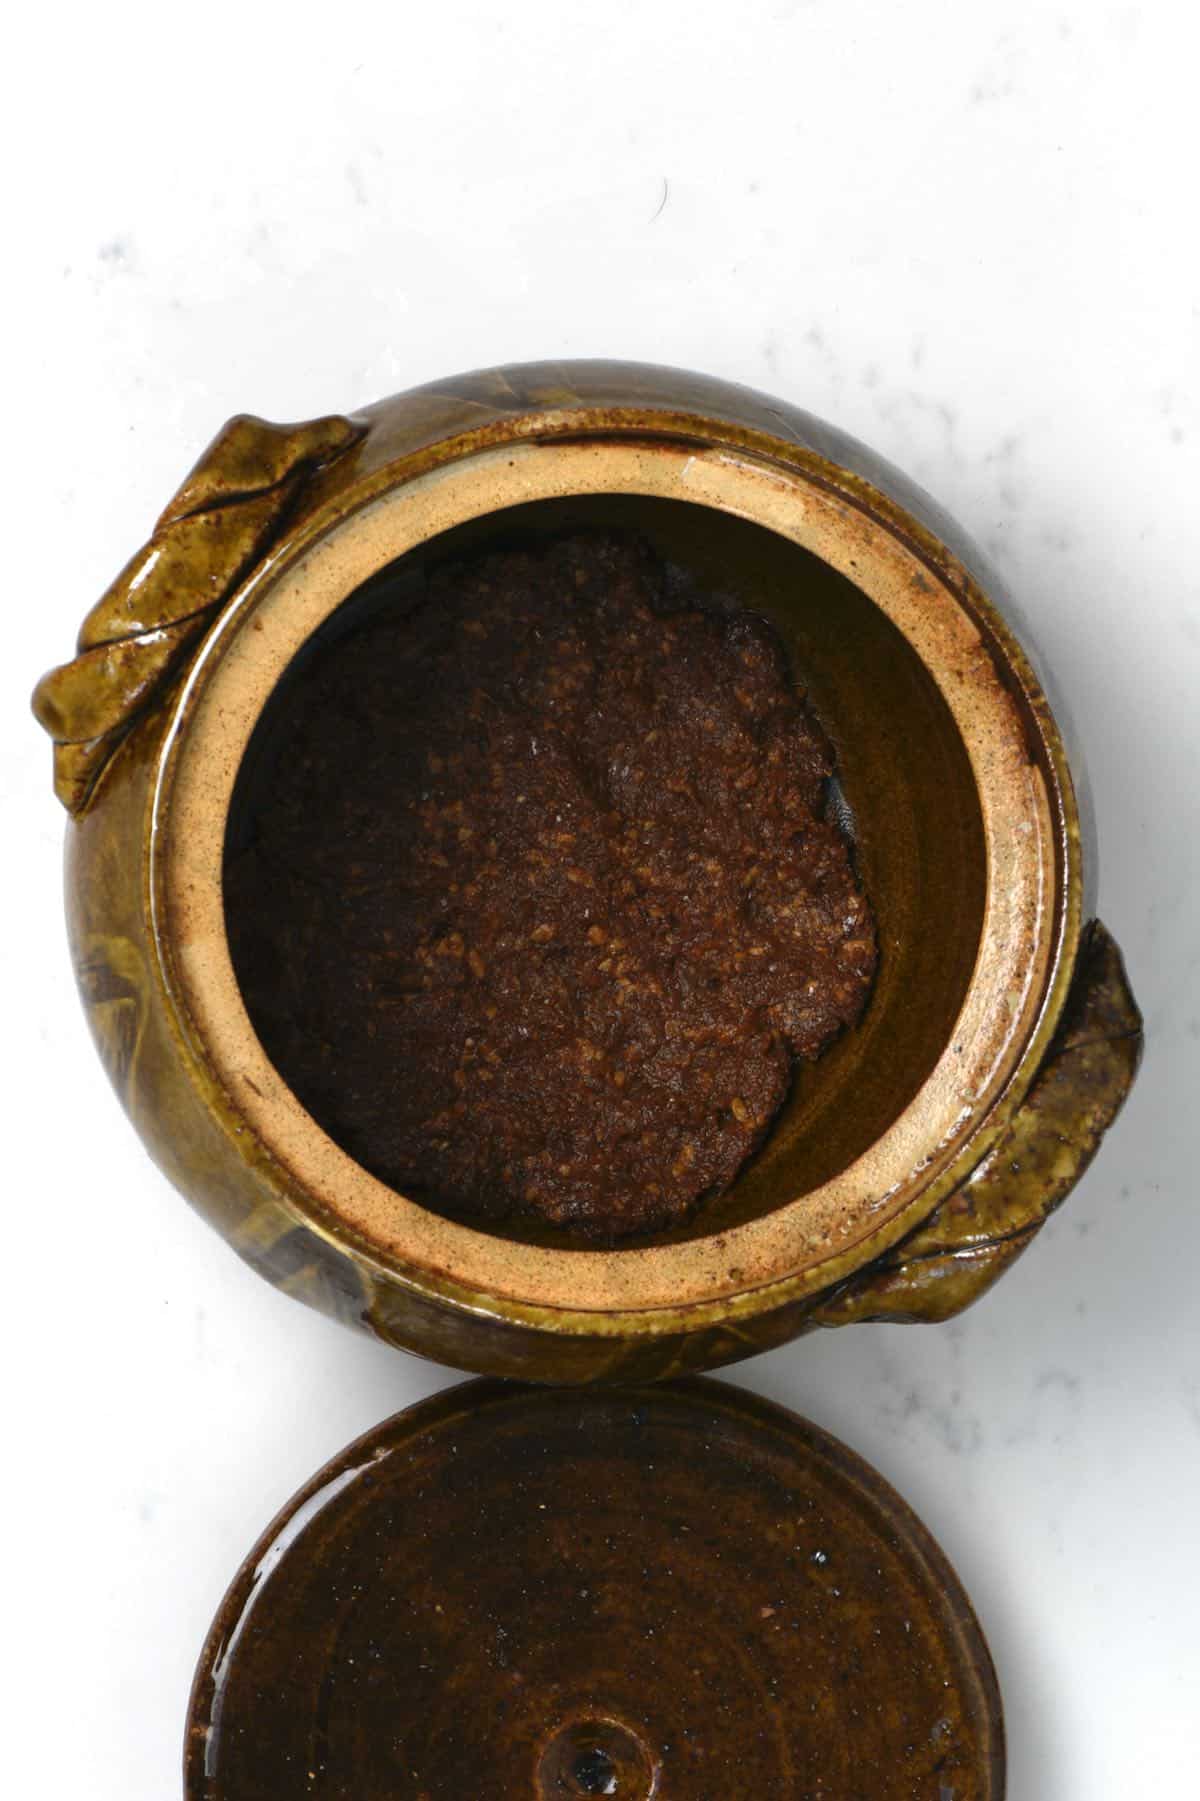
First, start by placing half of the miso starter at the bottom of your container of choice, spreading it into a thin layer across the bottom of the container.
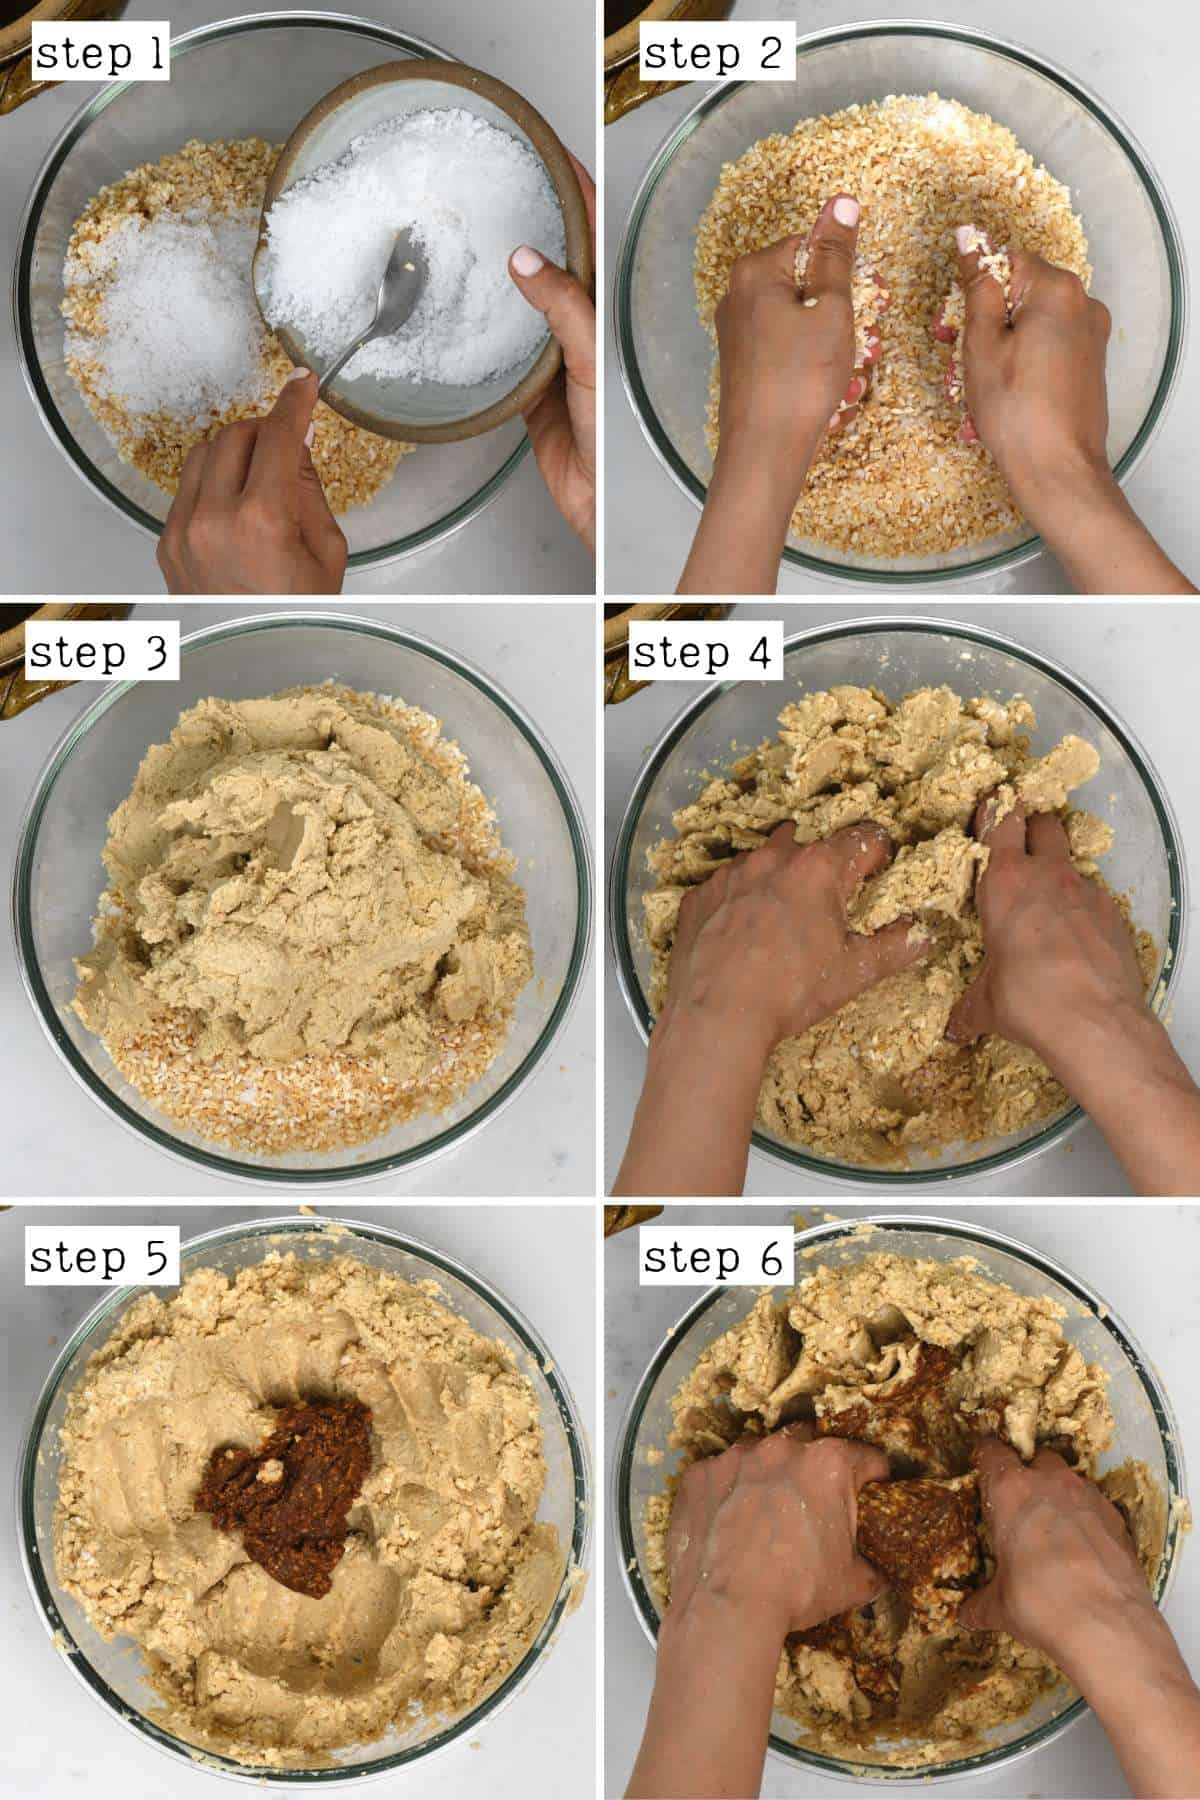
Then, in a large bowl, combine the soaked rice koji with the remaining salt and rub well with your hands to make sure it is thoroughly incorporated/mixed.
Add the mashed soybeans to the bowl and use your hands (make sure they’re clean) to mix the ingredients, kneading them along with the remaining miso starter until everything is thoroughly mixed.
It’s okay if the paste is still a little warm or at room temperature when combining it with the rice koji, but make sure it’s not hot (below 104ºF/40ºC is OK) – otherwise, it can kill the cultures in the koji.
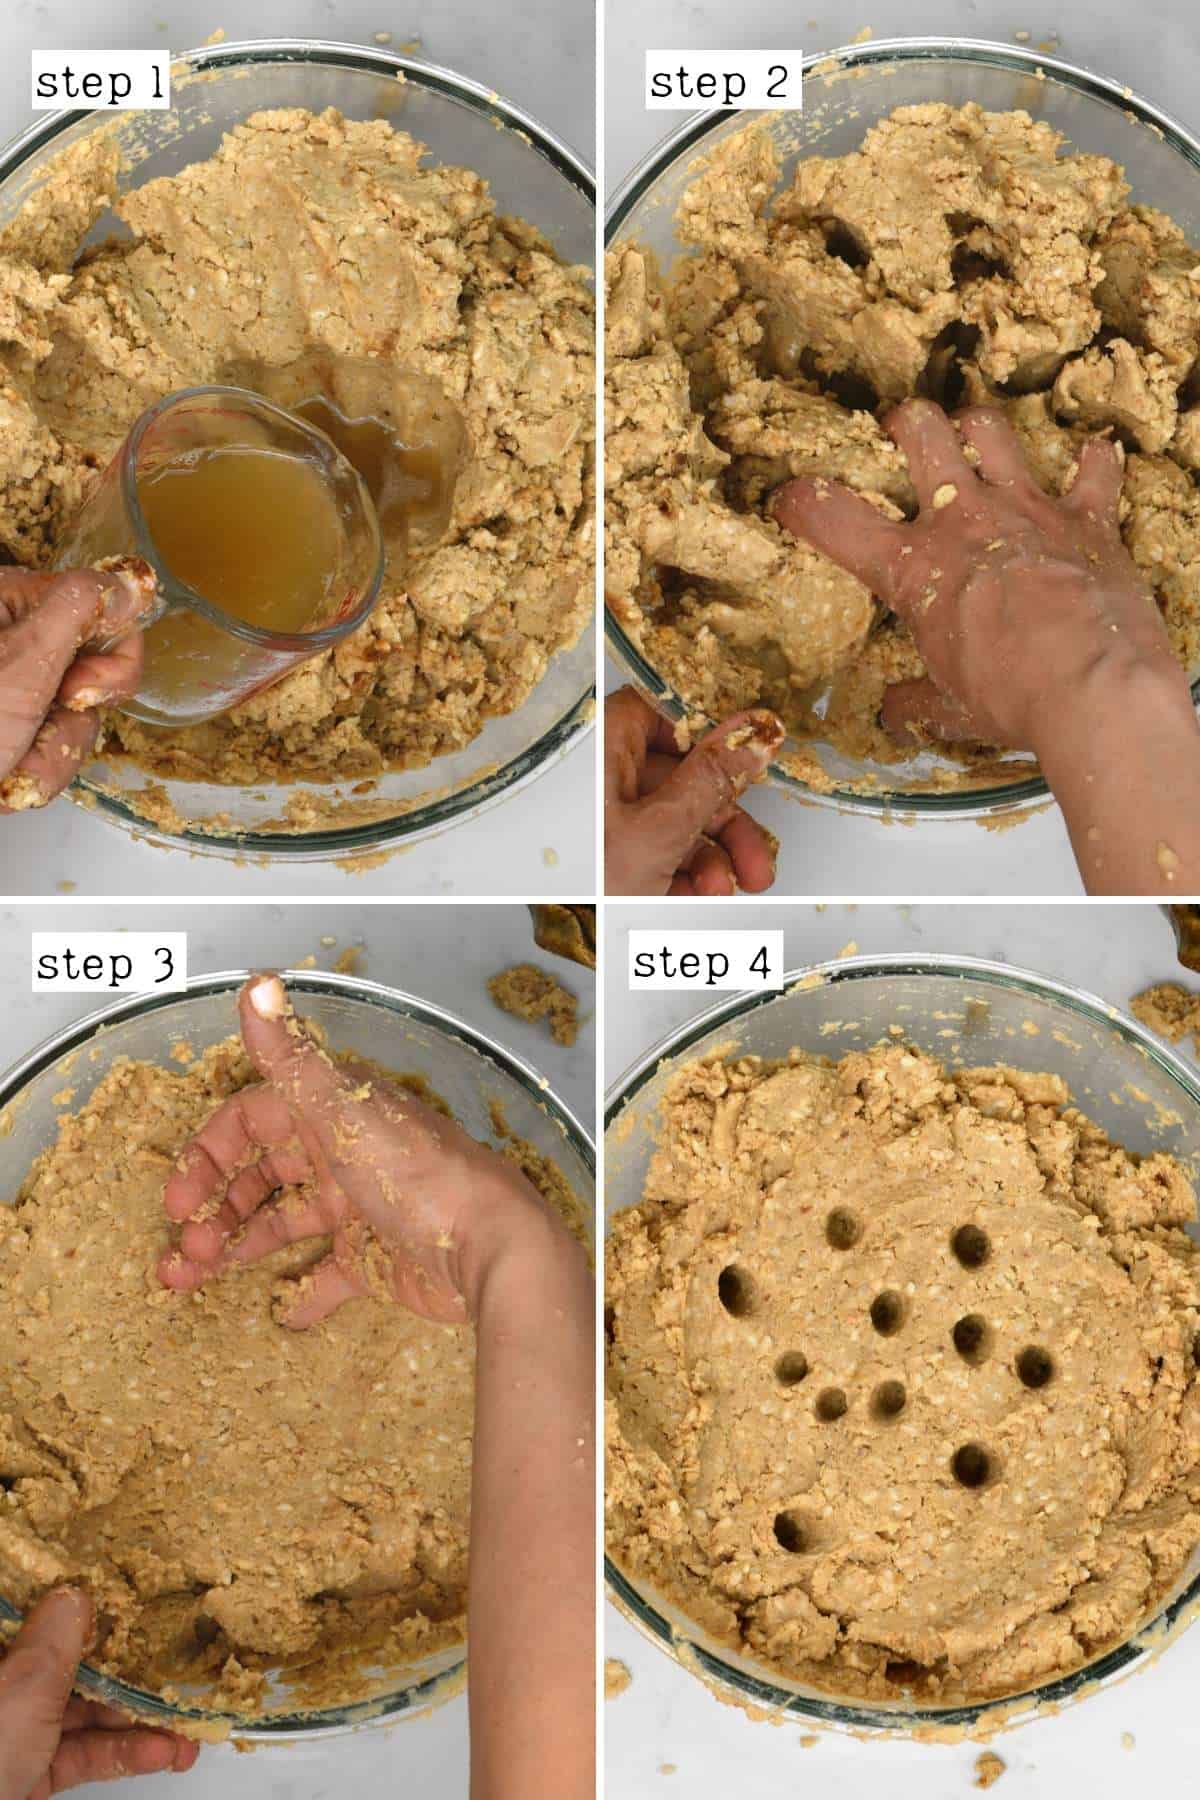
Next, add the salted cooking liquid to the paste, around 1-2tbsp at a time, incorporating it well into the paste. It’s ready when the paste is soft enough to dip a pinkie into it easily, and it retains its shape.
You may not need all the salted liquid, which is why it’s essential to do this step a little at a time (as the more liquid you add, the higher chance of mold). I used around half of the liquid this time, but it can vary based on your beans, how you mashed them, etc.
Step 6: Transfer the soybean paste to the container
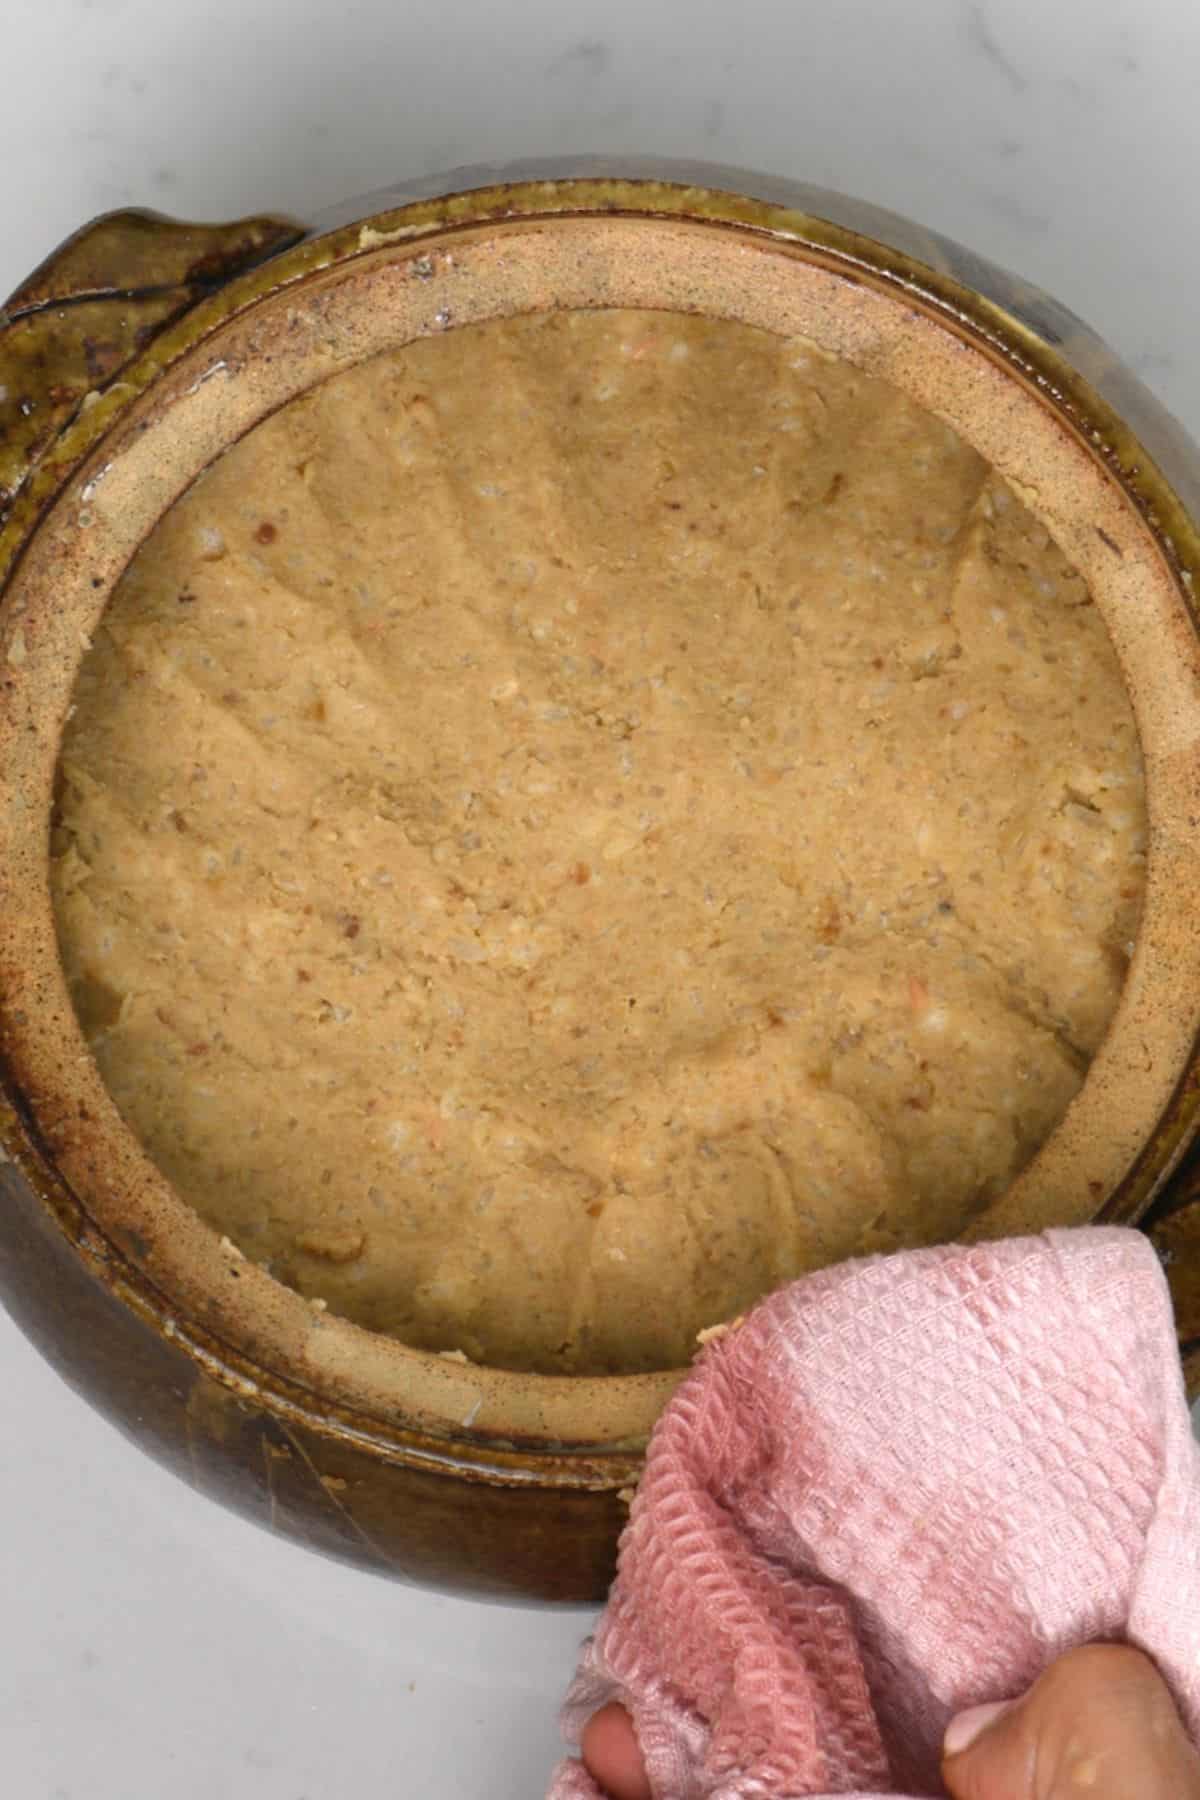
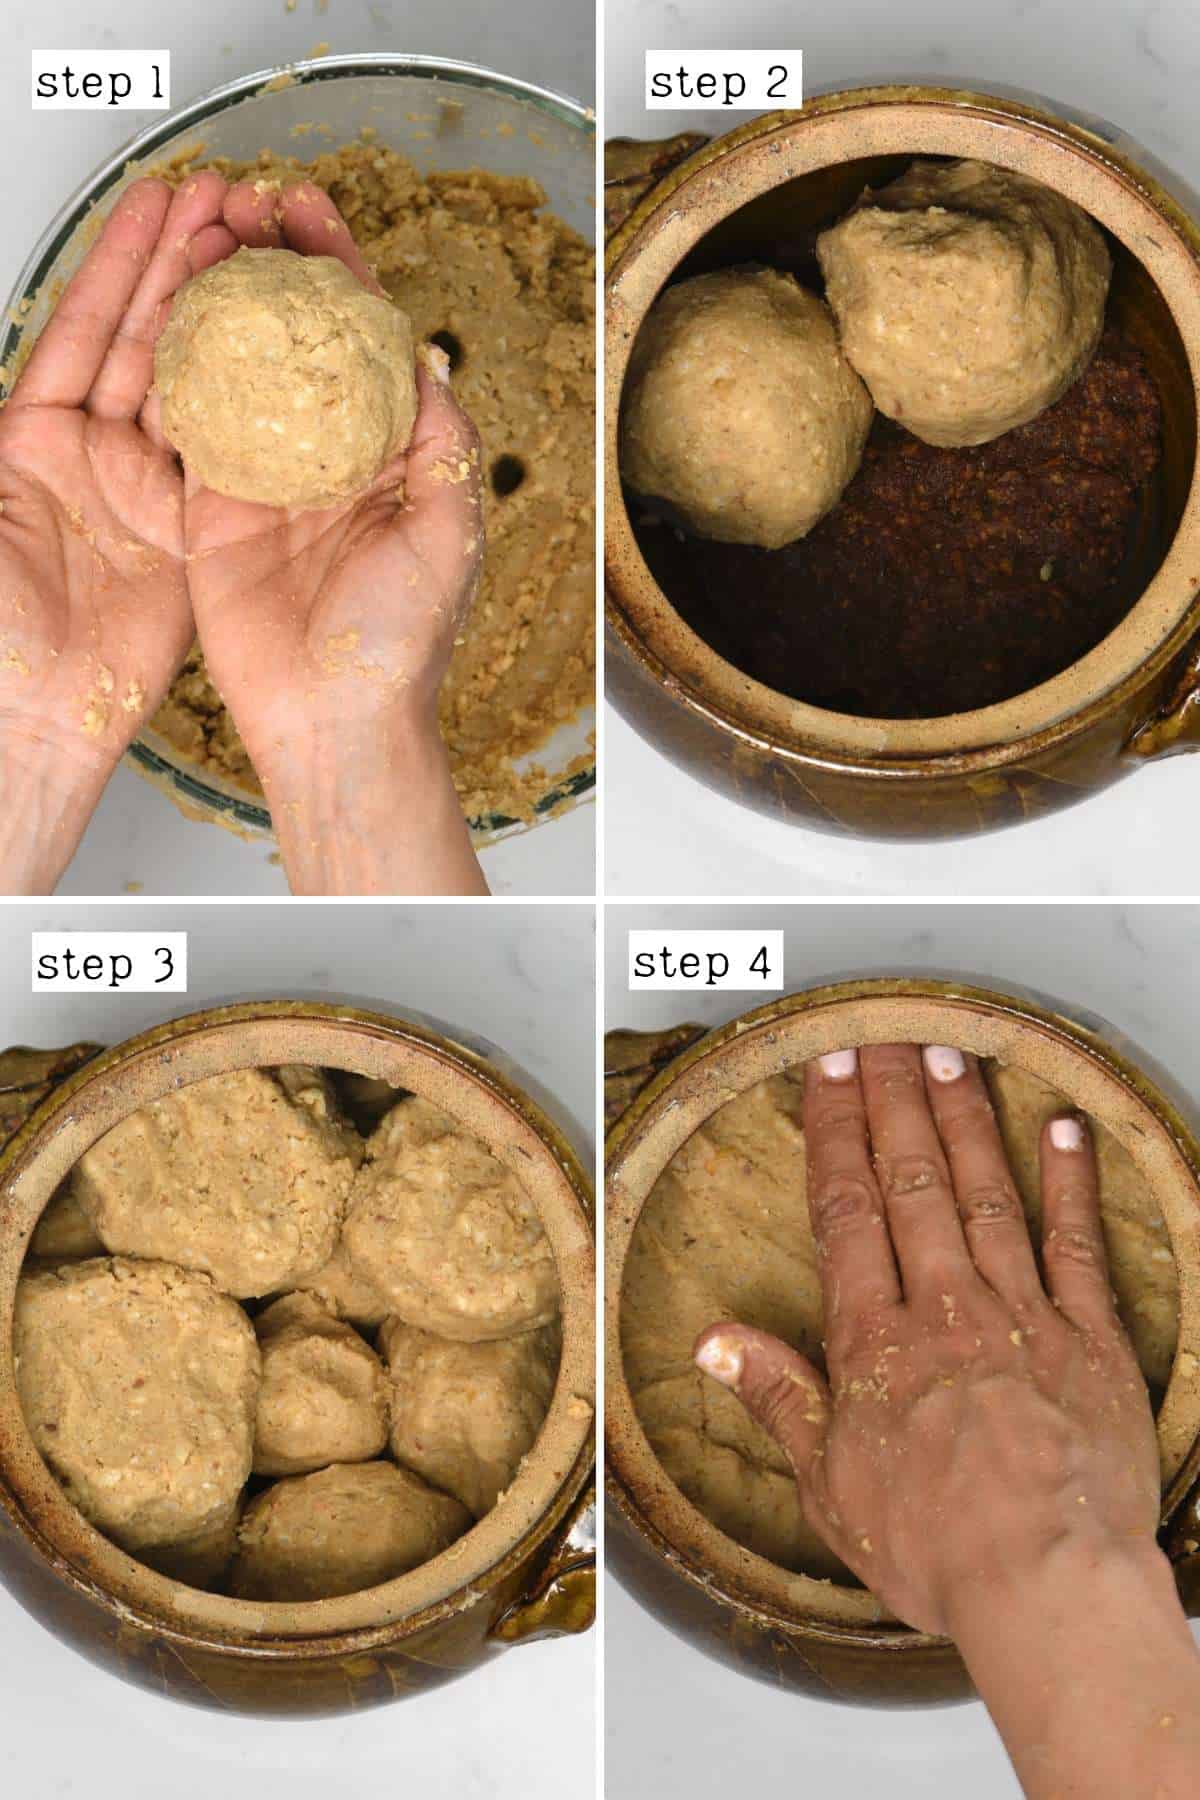
Then transfer the paste to your container. I use the tennis-ball method. First, make the paste into several tennis-ball-sized balls, squeezing them tightly so there are no air pockets in the balls. Then transfer a layer of the balls to the container and press them to flatten them, releasing any air from between the balls. Repeat with further layers until the paste is entirely in the container and pushed down, with no air bubbles.
It’s essential to get rid of the excess air to avoid mold growth during the fermentation process. You can also keep some of the salt aside (about 20% of the larger portion) to sprinkle over the top of the miso mixture, which can help avoid mold growth during the fermentation process.
Step 7: Ferment the soybean paste
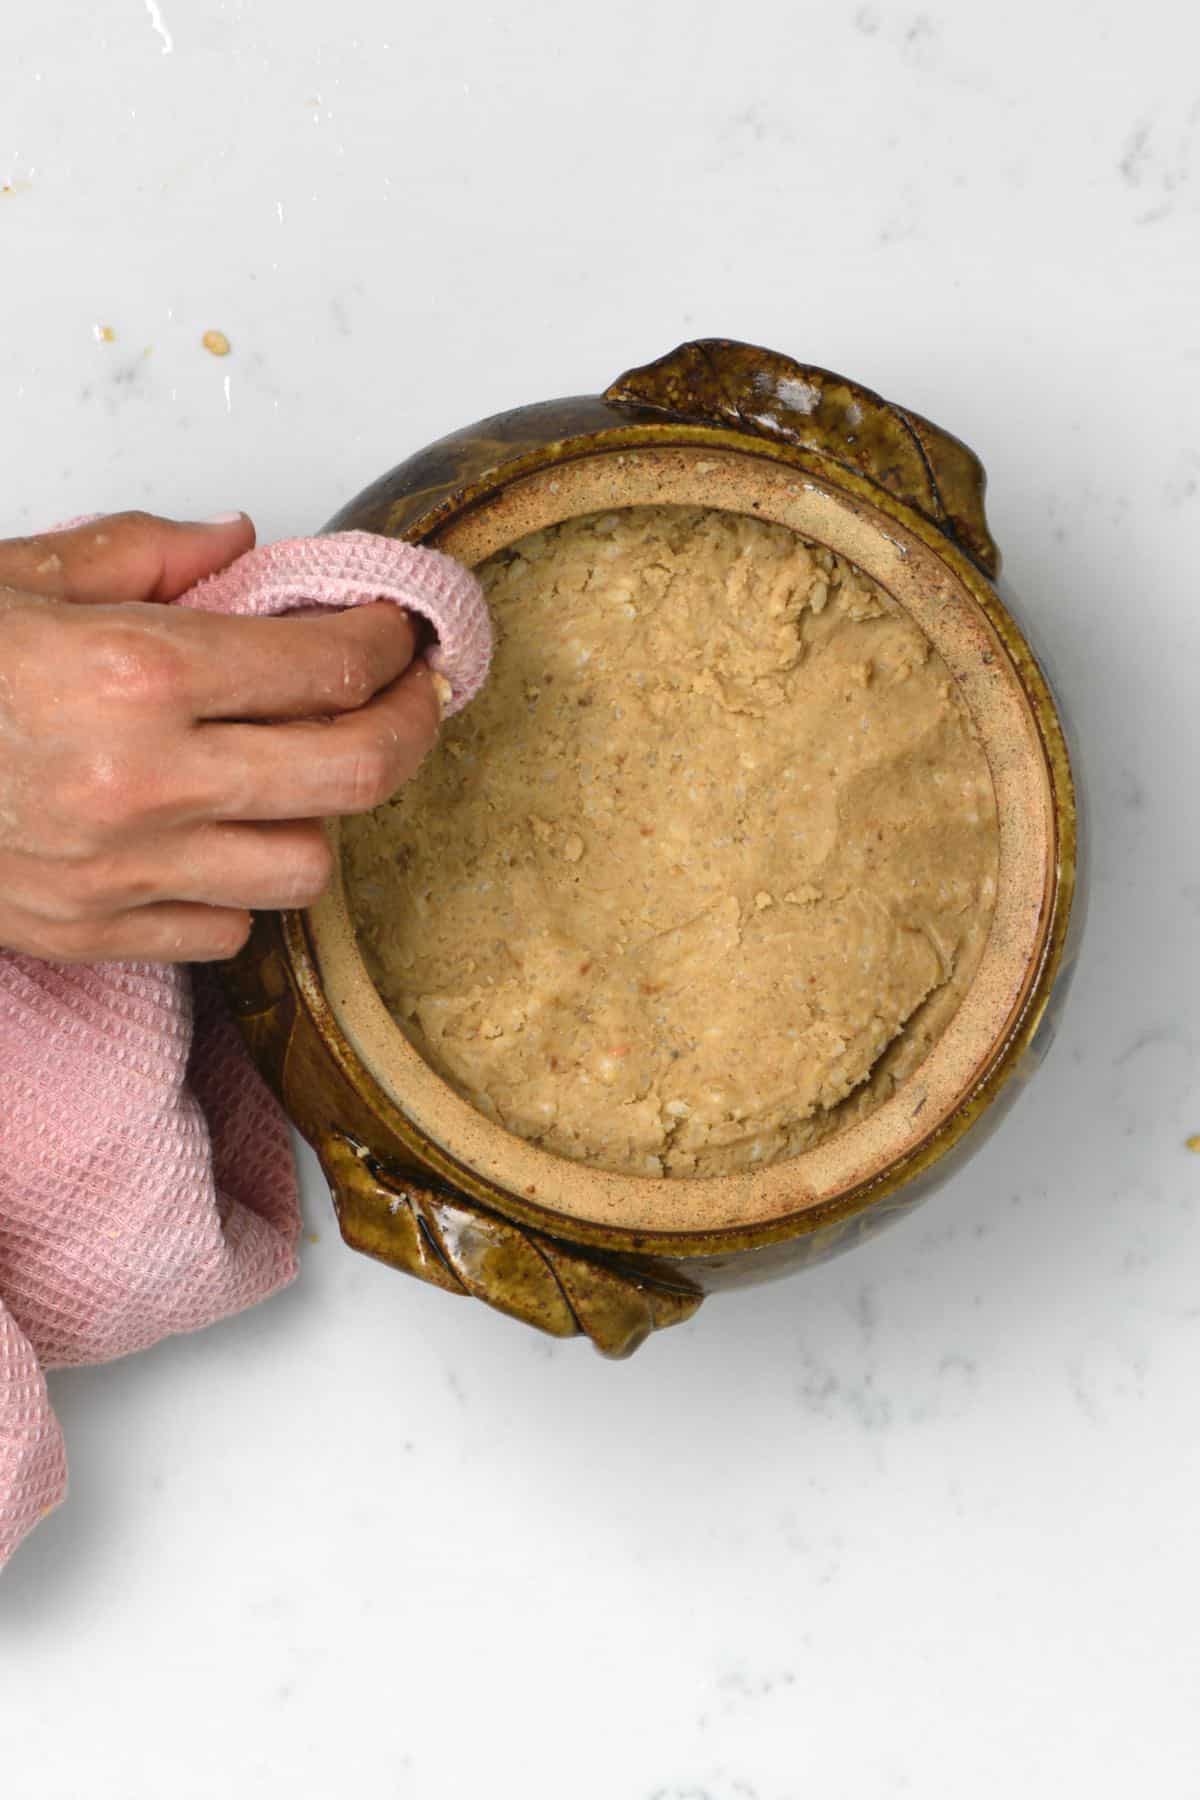
Before sealing the jar, I like to use an alcohol-dipped cloth to clean the container’s rim to make sure there is no paste smudged across it.
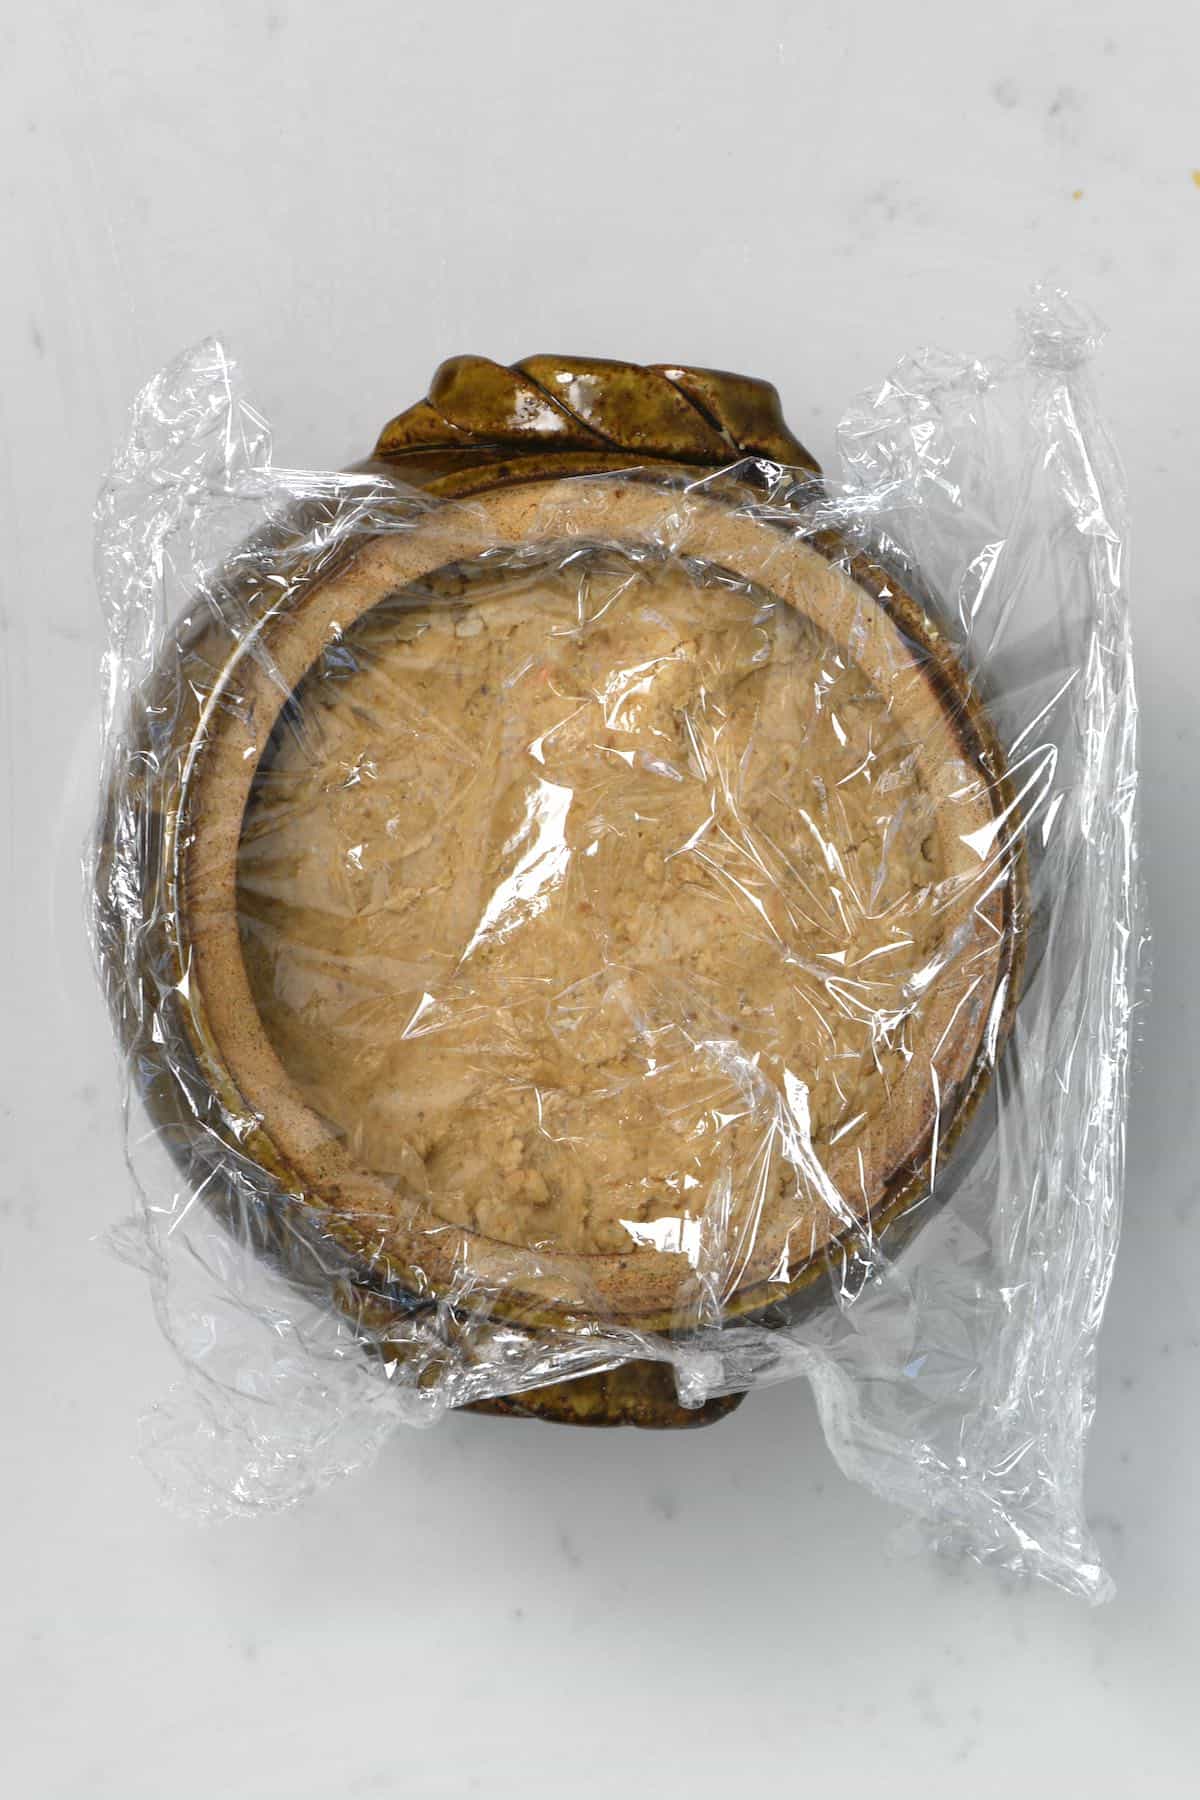
Then, add a layer of plastic wrap to the top of the paste. Ensure it’s right up against the top of the paste with no air in-between and cover the entire surface.
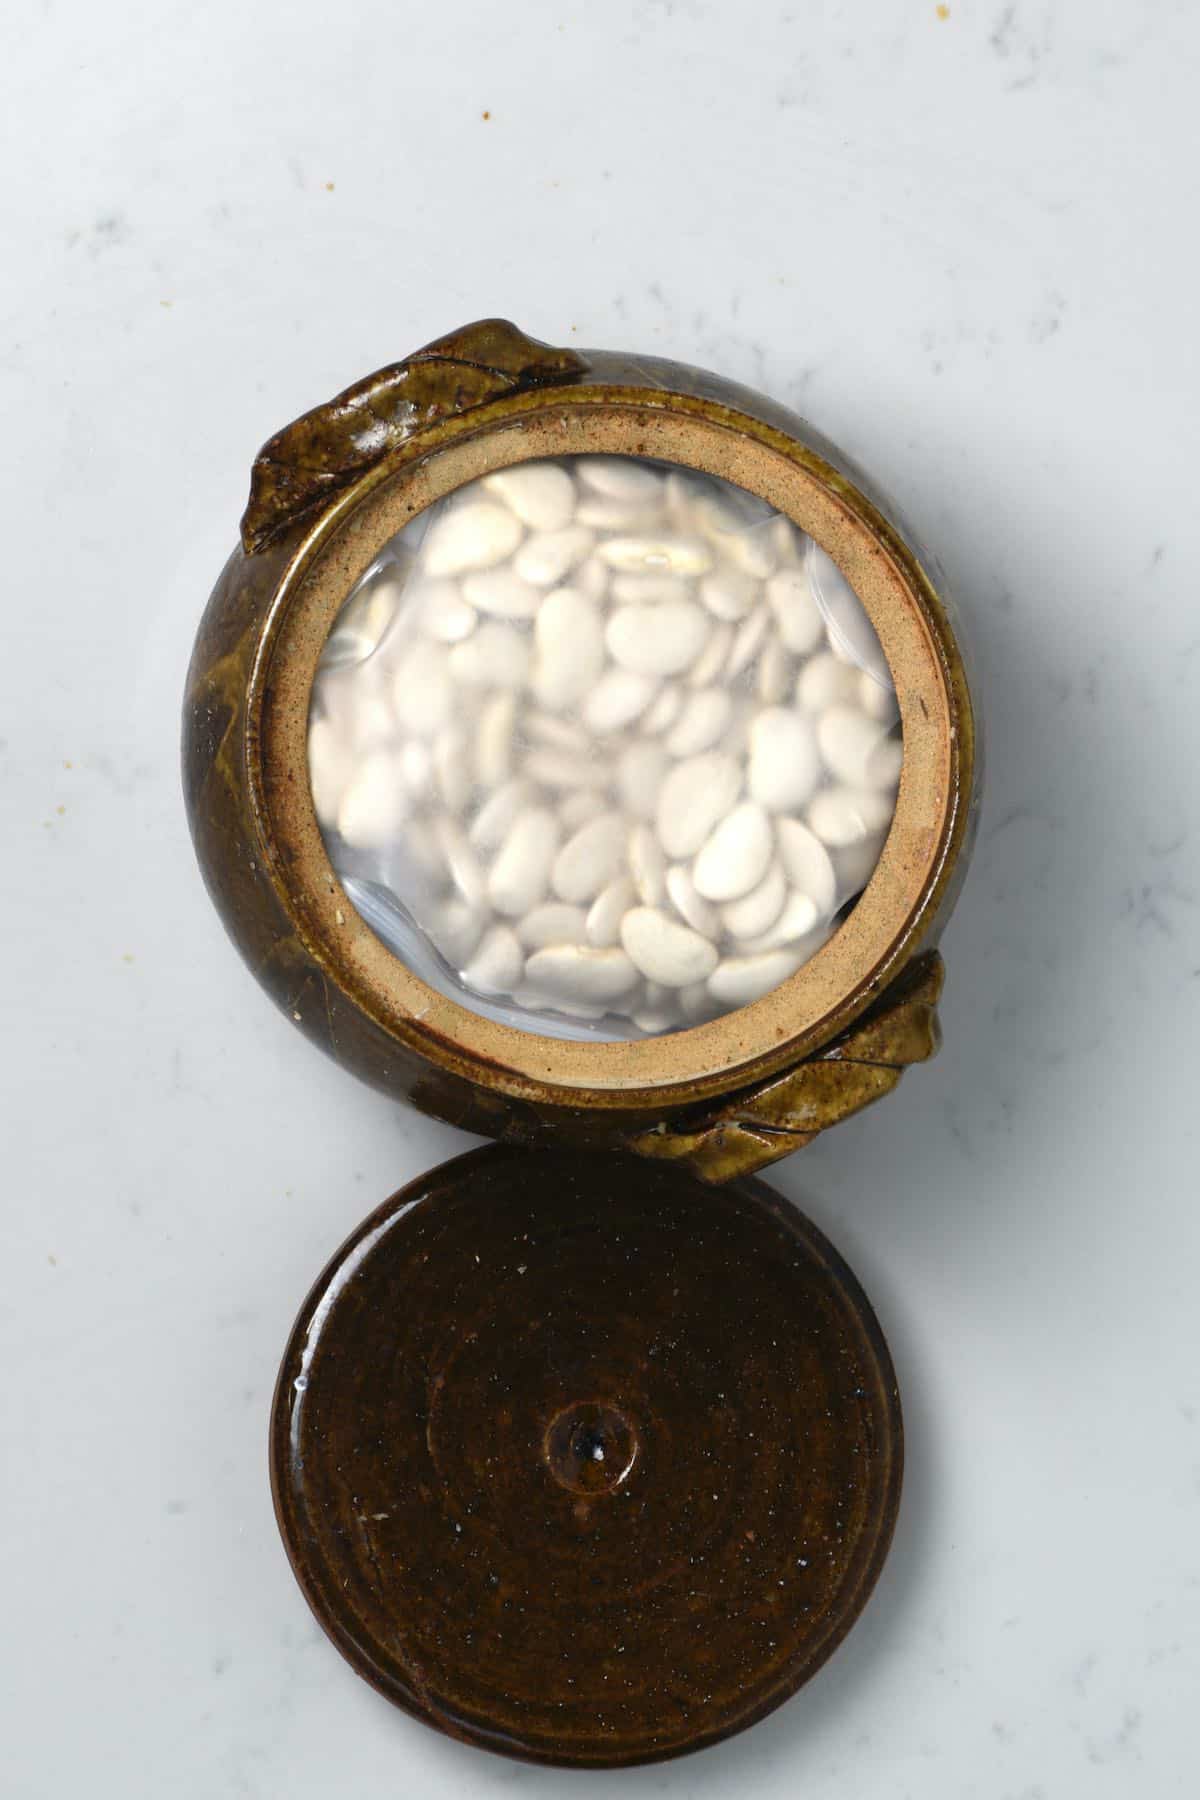
Then, place your “weight” over the plastic wrap. I used dried beans in a reusable Ziplock bag.
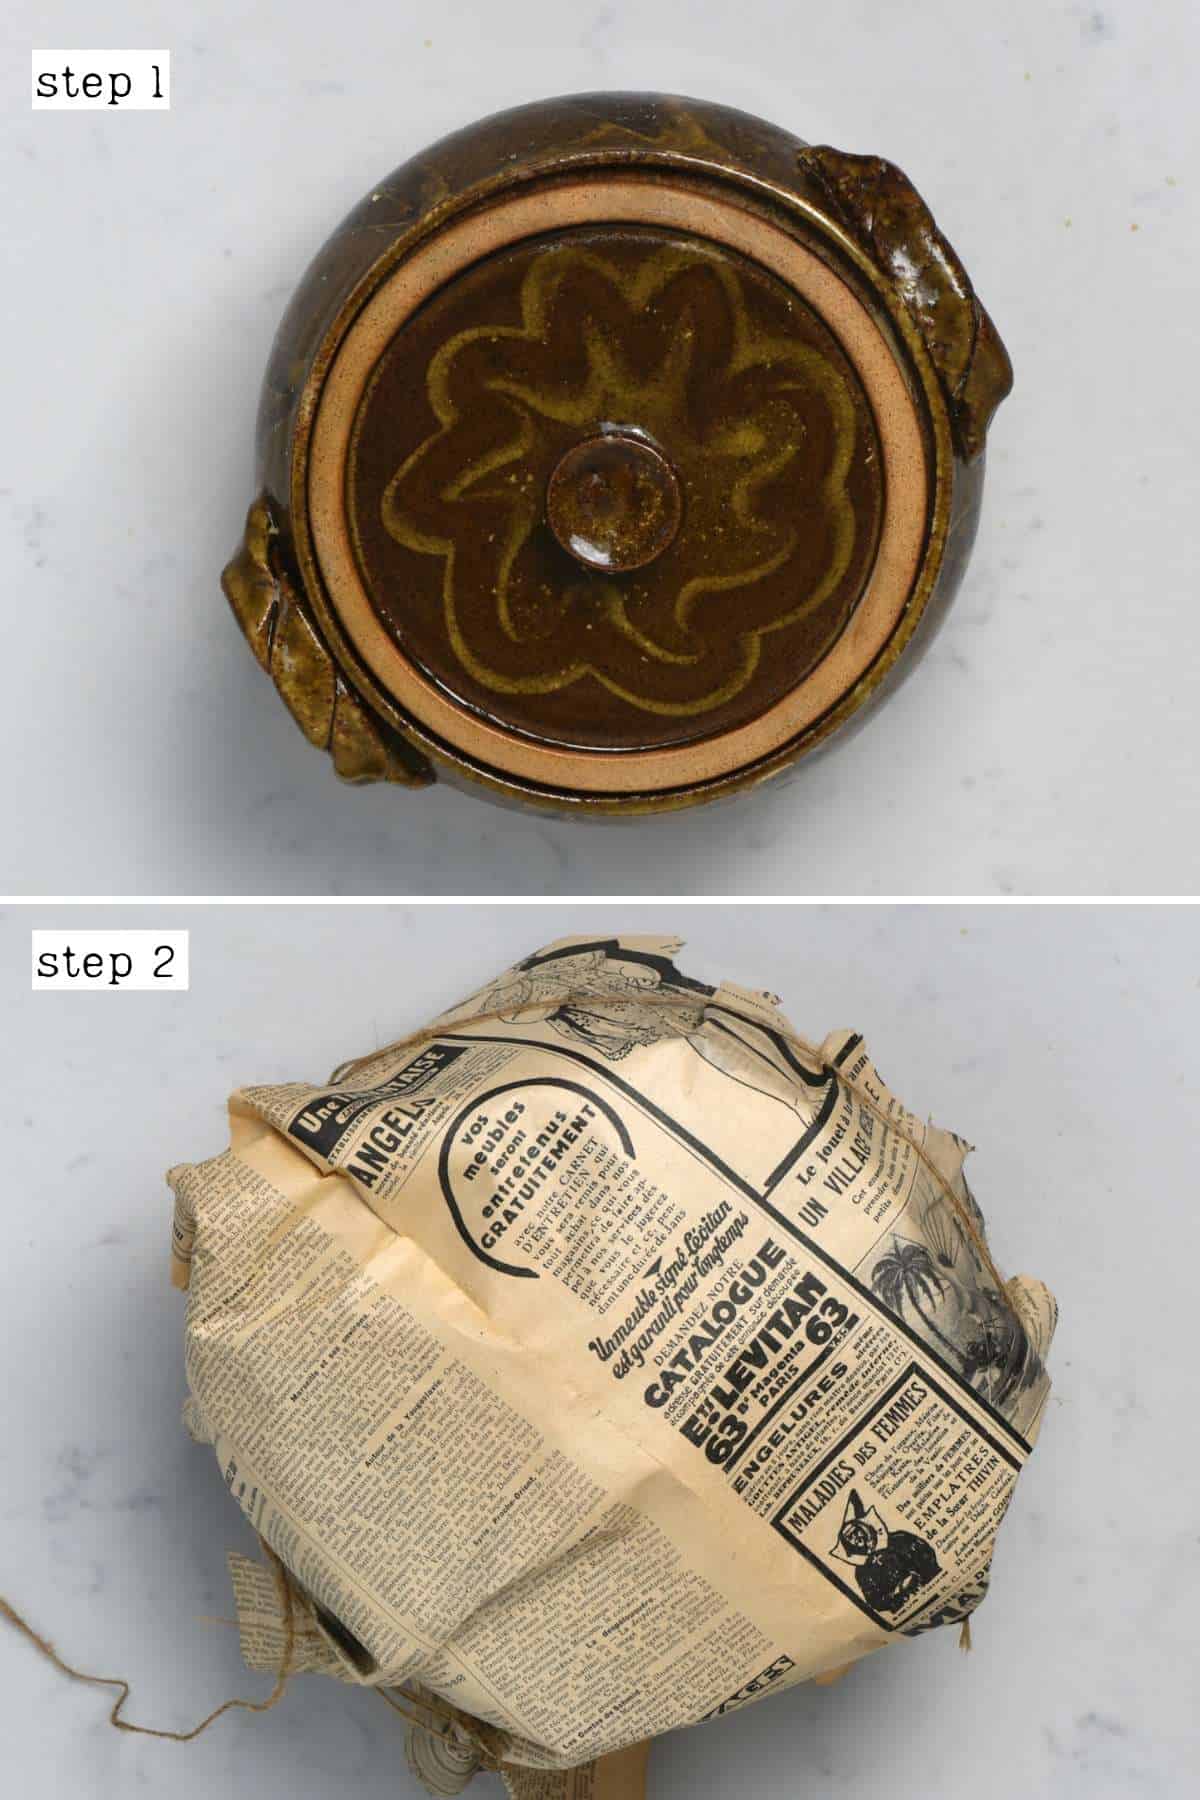
Add the lid to your container and wrap it in a newspaper or something material – like a pillowcase. This is especially important if you are using a clear glass jar.
Place the container in a cool, dark location for up to six months to allow the paste to ferment. You can leave it up to 12 months for a deeper fermented bean paste.
It’s best not to interact with the miso too much during the fermentation – although some methods recommend you “turn over” the miso every three months (which I’ve never done, so I can’t guarantee results). However, if you happen to check it and notice a little mold (gray, green, or blue mold usually) on the top of the miso paste, you can simply remove that bit, cover it well and continue the fermentation process. Using a glass jar that you can easily see into can help with this, so you don’t need to open the lid to check that it’s alright.
The longer you leave the paste to ferment, the darker and more developed the flavor will become. I recommend trying it at the 6-month mark and increasing if needed. Once the homemade miso paste has your desired flavor profile, it’s time to transfer it to the fridge (no weights necessary, you can even distribute it in smaller jars and just seal them with a lid).
How to Store Miso Paste?
Store: as soon as your miso reaches your desired flavor profile, it’s best to transfer it to a refrigerator. This will slow the fermentation (almost to a stop). Once in the fridge, the homemade miso will last up to a year! Just make sure to use clean utensils whenever removing any from the jar.
How to Use Miso Paste?
There are tons of ways to enjoy your homemade miso, including making miso soup, for marinades, sauces, glazes, etc.
I’ve shared some recipes already, including:
- Miso Glazed Sweet Potato
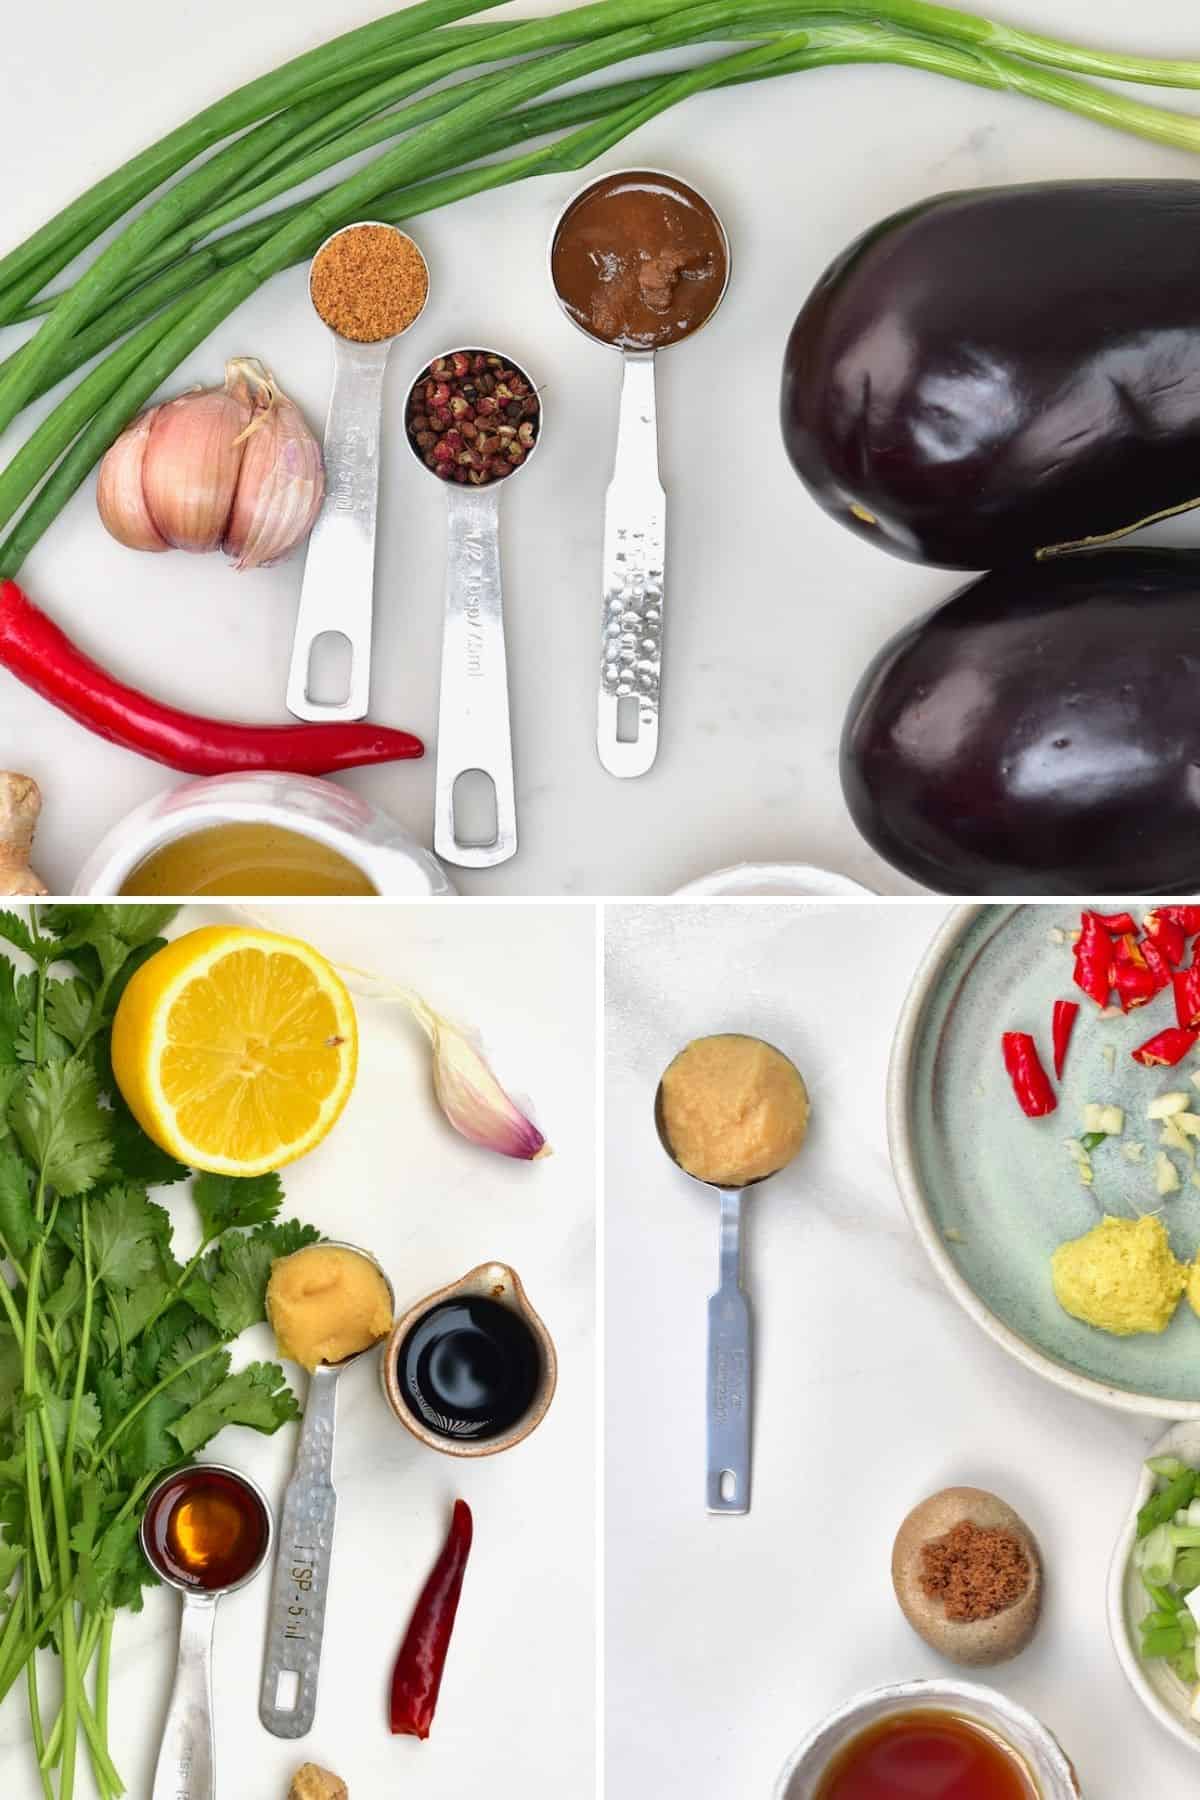
- Miso-glazed Eggplant (Nasu Dengaku)
- Chinese Eggplant with Garlic Sauce (Eggplant Stir-Fry)
You can also mix it into mashed potatoes, add it to stir-fries to enhance umami flavor, add to ramen, and more! Most recently, I made a batch of my homemade caramel with miso in (delicious!).
FAQs
This depends on where you live and the climate/temperature there. For example, in the UK, you can prep it almost any time of the year as it doesn’t often get humid OR too hot (I type in the middle of a heatwave -sigh). However, in general, I prefer making miso in the cooler months (fall/winter). The air is usually less humid and contains fewer contaminants; the colder weather also helps it ferment slower for a deeper, more developed flavor.
Just note that the temperature can impact the fermentation speed of this miso paste recipe. When prepared during warmer months, it may only take 3-4 months to reach your desired flavor. If this is your first time making homemade miso paste, I recommend testing the miso around the 3-4-month mark, continuing to ferment until it reaches your desired flavor.
The interesting thing about homemade miso paste is that the ingredients used for the various types of miso are nearly identical. The main difference is the ratio of the ingredients and their fermentation period. For example, red miso usually uses steamed rather than boiled beans and a longer 12–18-month fermentation process. Meanwhile, white miso – as far as I’m aware, uses less salt and a shorter fermentation period.
However, so far, I’ve only tried making miso with this method for mild yellow miso. The amount of time it’s left to ferment will develop the color and flavor.
No! The salt isn’t just in this miso paste recipe for flavor. It is also critical in reducing mold growth during the fermentation period.
Yes, there are several variations that people have used to make a miso paste recipe, including chickpeas, millet, azuki, black beans, etc. However, I haven’t tried anything other than soybean (for now), so I can’t guarantee results.
Recipe Notes
- Making more batches of miso: once you’ve made your first batch of homemade miso, you can then use that as a “starter” for the next batch.
- Label your jars: label the pot at the beginning of the fermentation process so you can keep track of how long it takes to reach your desired flavor, and you know exactly when the process began. If you’re experimenting with new ratios, then I recommend adding this to the label, too – so you can keep track of your favorite results.
- Remember that climate matters: warm and humid environments will speed up the fermentation process of this miso paste recipe. Likewise, colder temperatures will slow it down. It’s important to remember this as you may need to check on the homemade miso paste sooner or leave it for longer to move away from being just “salty” to having the complex slightly sweet, beany, funky flavor we want in our miso.
- Say no to air bubbles: It’s essential to ensure there are no air bubbles in your soybean paste when placing it in the fermentation jar/container. Any air can lead to rot and mold. When using a glass jar, you can see from the outside if there are any small air bubbles. Use your hands to press down firmly on the mixture to remove these before you put away the jar.
Other DIYs You’ll Love
- How to Make Tempeh
- Homemade chili oil
- How to Make Sushi Rice
- Easy no-knead Dutch oven bread
- Homemade avocado oil
- How to make Harissa sauce
- Homemade vegetable bouillon cubes or powder
- How to make mango boba (tapioca pearls)
- How to make tapioca pearls (regular boba)
If you try this homemade miso paste recipe, I’d love to hear your thoughts/questions below. Also, I’d appreciate a recipe card rating below, and feel free to tag me in your recipe recreations on Instagram @Alphafoodie!
How to Make Miso Paste (Kome Miso/ Shinshu miso)
Ingredients
These ingredients will yield about 4.4 lb/2 kg miso paste.
- 1.1 lb dried soybeans organic non GMO
- 1.1 lb rice Koji
- 3.7 floz warm water to add to the koji
- 8.6 oz sea salt to mix with the koji
- 0.6 oz sea salt to be added to soybean cooking water
- 5.3 oz miso paste used as a starter – use storebought for the first batch.
Also needed:
- 14 oz heavy object like a bag of salt or beans
- 1/2 cup strong alcohol shochu, vodka, etc (>35%)
Instructions
Step 1: Soak and cook the soybeans
- Lightly rinse the soybeans and then leave them to soak overnight (between 12-16 hours. I recommend the full 16!) in a large bowl of water. During this time, they will double in size (2.2lb/1kg of dried beans yields 5lb/2.3kg soaked), so make sure to use plenty of water.
- After soaking, drain and rinse them once more.
Step 2: Cook the beans
- Transfer the soaked beans to a large pot with plenty of water. Bring the water to a boil and then simmer the beans for between 2-3 hours. They need to become soft and tender during this time until a bean is easily crushed between two fingers.Alternatively, you can use a pressure cooker for between 40-45 minutes.
- During the cooking process, you’ll likely need to top up the water, as needed, to ensure the beans stay submerged during the process.
- Once cooked and tender, drain the beans again, this time saving 1 ¼ cup (300ml) of the cooking liquid to use at a later stage.
- During the last 10-15 minutes of cooking the soybeans, add the warm water (as listed in the recipe – make sure it’s warm) to the rice koji and set it aside to soak for 30 minutes.
Step 3: Blend the beans
- Combine the warm soybean cooking liquid with the smaller amount of salt and mix well. Then set it aside.
- Add the still-warm beans to a food processor or blender and blend them into a smooth paste. You could use a potato masher for a machine-free option or place them in a large bag (or just on a flat surface) and roll/smash with a rolling pin. However, the food processor method is much, much faster.
Step 4: Sterilize the container
- Whatever container you plan to use when fermenting the miso paste needs to be thoroughly sterilized. First, rinse it with soapy boiling water.
- Dip a clean cloth into the alcohol and wipe the container's inside walls, rim, and lid. This is important to reduce the risk of contamination during the long fermentation process.
- Allow the container to dry, making sure it's 100% dry before starting the next step.
Step 5: Mix the soybean paste
- Place half of the miso starter at the bottom of your container of choice, spreading it into a thin layer across the bottom of the container.
- In a large bowl, combine the soaked rice koji with the remaining salt and rub well with your hands to make sure it is thoroughly incorporated/mixed.
- Add the mashed soybeans to the bowl and use your hands (make sure they're clean) to mix the ingredients, kneading them along with the remaining miso starter until everything is thoroughly mixed.It's okay if the paste is still a little warm or at room temperature when combining it with the rice koji, but make sure it's not hot (below 104ºF/40ºC is OK) – otherwise, it can kill the cultures in the koji.
- Add the salted cooking liquid to the paste, around 1-2 Tbsp at a time, incorporating it well into the paste. It's ready when the paste is soft enough to dip a pinkie into it easily, and it retains its shape.You may not need all the salted liquid, which is why it's essential to do this step a little at a time (as the more liquid you add, the higher chance of mold). I used around half of the liquid this time, but it can vary based on your beans, how you mashed them, etc.
Step 6: Transfer the soybean paste to the container
- Transfer the paste to your container. I use the tennis-ball method. First, make the paste into several tennis-ball-sized balls, squeezing them tightly so there are no air pockets in the balls. Then transfer a layer of the balls to the container and press them to flatten them, releasing any air from between the balls. Repeat with further layers until the paste is entirely in the container and pushed down, with no air bubbles.It's essential to get rid of the excess air to avoid mold growth during the fermentation process. You can also keep some of the salt aside (about 20% of the larger portion) to sprinkle over the top of the miso mixture, which can help avoid mold growth during the fermentation process.
Step 7: Ferment the soybean paste
- Before sealing the jar, I like to use an alcohol-dipped cloth to clean the container's rim to make sure there is no paste smudged across it.
- Add a layer of plastic wrap to the top of the paste. Ensure it's right up against the top of the paste with no air in-between and cover the entire surface.
- Place your "weight" over the plastic wrap. I used dried beans in a reusable Ziplock bag.
- Add the lid to your container and wrap it in a newspaper or something material – like a pillowcase. This is especially important if you are using a clear glass jar.
- Place the container in a cool, dark location for up to six months to allow the paste to ferment. You can leave it up to 12 months for a deeper fermented bean paste.
- It's best not to interact with the miso too much during the fermentation – although some methods recommend you "turn over" the miso every three months (which I've never done, so I can't guarantee results). However, if you happen to check it and notice a little mold (gray, green, or blue mold usually) on the top of the miso paste, you can simply remove that bit, cover it well and continue the fermentation process. Using a glass jar that you can easily see into can help with this, so you don't need to open the lid to check that it's alright.The longer you leave the paste to ferment, the darker and more developed the flavor will become. I recommend trying it at the 6-month mark and increasing if needed. Once the homemade miso paste has your desired flavor profile, it's time to transfer it to the fridge (no weights necessary, you can even distribute it in smaller jars and just seal them with a lid).
How to Store Miso Paste?
- Store: as soon as your miso reaches your desired flavor profile, it's best to transfer it to a refrigerator. This will slow the fermentation (almost to a stop). Once in the fridge, the homemade miso will last up to a year! Just make sure to use clean utensils whenever removing any from the jar.
Notes
- Making more batches of miso: once you’ve made your first batch of homemade miso, you can then use that as a “starter” for the next batch.
- Label your jars: label the pot at the beginning of the fermentation process so you can keep track of how long it takes to reach your desired flavor, and you know exactly when the process began. If you’re experimenting with new ratios, then I recommend adding this to the label, too – so you can keep track of your favorite results.
- Remember that climate matters: warm and humid environments will speed up the fermentation process of this miso paste recipe. Likewise, colder temperatures will slow it down. It’s important to remember this as you may need to check on the homemade miso paste sooner or leave it for longer to move away from being just “salty” to having the complex slightly sweet, beany, funky flavor we want in our miso.
- Say no to air bubbles: it’s essential to ensure there are no air bubbles in your soybean paste when placing it in the fermentation jar/container. Any air can lead to rot and mold. When using a glass jar, you can see from the outside if there are any small air bubbles. Use your hands to press down firmly on the mixture to remove these.
Nutrition
Nutrition information is automatically calculated, so should only be used as an approximation.


This is my first time visiting your blog and thank God I did!
I checked a lot of amazing recipes that you’ve shared and now I’m gonna try them all!
So is there a way that I can send you photos of the results?
Thank you for your sweet comment, Jessie! Feel free to share on Instagram and tag me there @alphafoodie 🙂
Sounds intensive but really great I love Miso.. Am going to try your recipe ..
My Korean friend always made her own Miso which I dearly loved. She used a
wooden (Oak) container made specifically used for fermenting her Miso. It was yummy !
Thanks. I hope you give this recipe a try 🙂
For the ratio of koji to soy bean. Is that 1.1 pounds of dried soy bean? Or soaked?
Lots of recipes I’ve seen don’t state whether it’s soaked or not.
Hi Jordan,
That would be 1.1 pounds of dried soy bean, they will double in size and weight once soaked. I hope this helps. 🙂
I want to thank you for the great work.
Please help me out on this Koji rice part! Where can I find it? Is it sold in supermarkets?
Kampala Uganda.
Hi Darlene,
Koji rice could be found in specialized Asian stores. Or maybe you can find it online.
Could red yeast rice (red Koji rice) be used as starter to make miso?
Hi Peter,
Yes you can use yellow or red Koji rice however, you will need miso paste to use as the starter. I hope this helps.
Where do you get rice Koji?
You can get it in some Asian stores or online. I will try to make the DIY for it too, so stay tuned 🙂