
This post may contain affiliate links. Please read our disclosure policy.


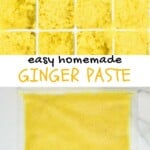
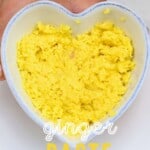
How to make ginger paste at home – a time-saving, long-term stored, meal-prepped alternative to fresh ginger for any recipe! This ginger puree takes just ONE ingredient and a few minutes for months of prepared minced ginger!
With how much time I spend in my kitchen, you better believe I love an excellent time-saving hack. I’ve already shared methods for garlic paste, turmeric paste, and recently 2-minute almond milk cubes. Now it’s the turn to share how to make ginger paste – the perfect pre-prepped replacement for freshly minced ginger in all your recipes.
Okay, yes, it’s not like preparing ginger for each recipe takes half an hour a pop – but having to peel ginger and mince this knobbly root isn’t my favorite task (especially multiple times a week!), whereas making ginger paste takes just minutes, and you can have enough for months to come.
More so, making it at home is often cheaper than buying it from stores; it’s fresher, with a better flavor (really!), and contains no preservatives or unwanted extras. There are no downsides, in my opinion!
You may even find that you waste less when preparing it this way – so many recipes call for just a little bit of ginger, and then the remaining root can get forgotten in the back of the fridge – this way, it’s sitting in the freezer for months with no risk of wastage!
Plus, I nearly always have a big supply of ginger in my pantry, ready for whipping up ginger juice, warming ginger tea, ginger chips, and homemade ginger lemonade! I recently made a large batch of ginger-turmeric shots too!
Want to save this recipe?
What you’ll need

- Ginger: it’s best to use the freshest ginger you can for the least fibrous results (though I know that’s not always possible when buying from a grocery store). I also recommend picking up ones that are not too knobbly, that will be easier to peel.
- Spoon: I use a simple spoon to help peel ginger and it makes the task SUPER quick and simple!
- Food processor: or a high-speed blender to help puree this up in minutes. You can also do this by hand with a micro-plane, but it’s more effort AND more time – the choice is up to you, though.
How to make ginger paste
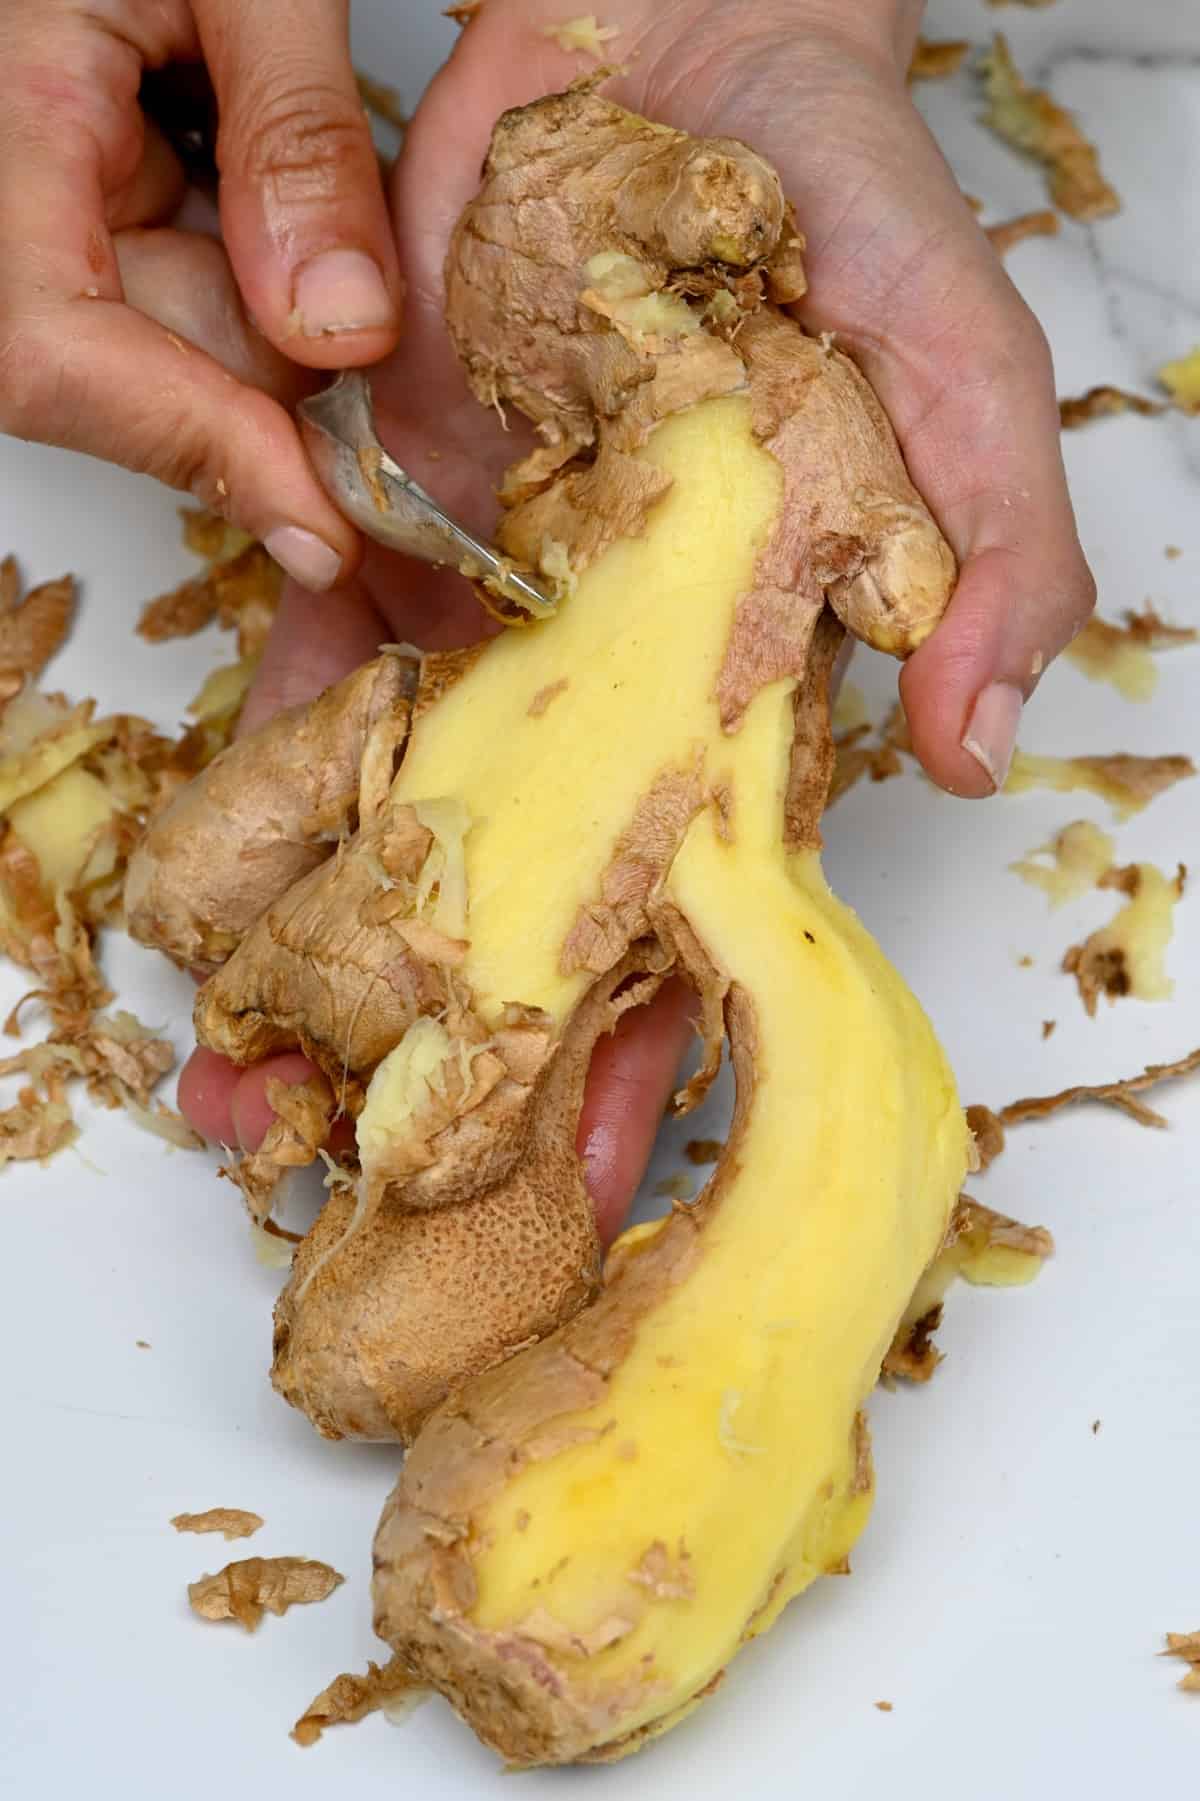
Step 1: Peel the ginger
The first step is to peel all your ginger. I like to peel ginger with a spoon for the quickest, best results.
If it’s organic ginger and you don’t mind eating the peel, then feel free to leave it on.
Step 2: Make the ginger paste
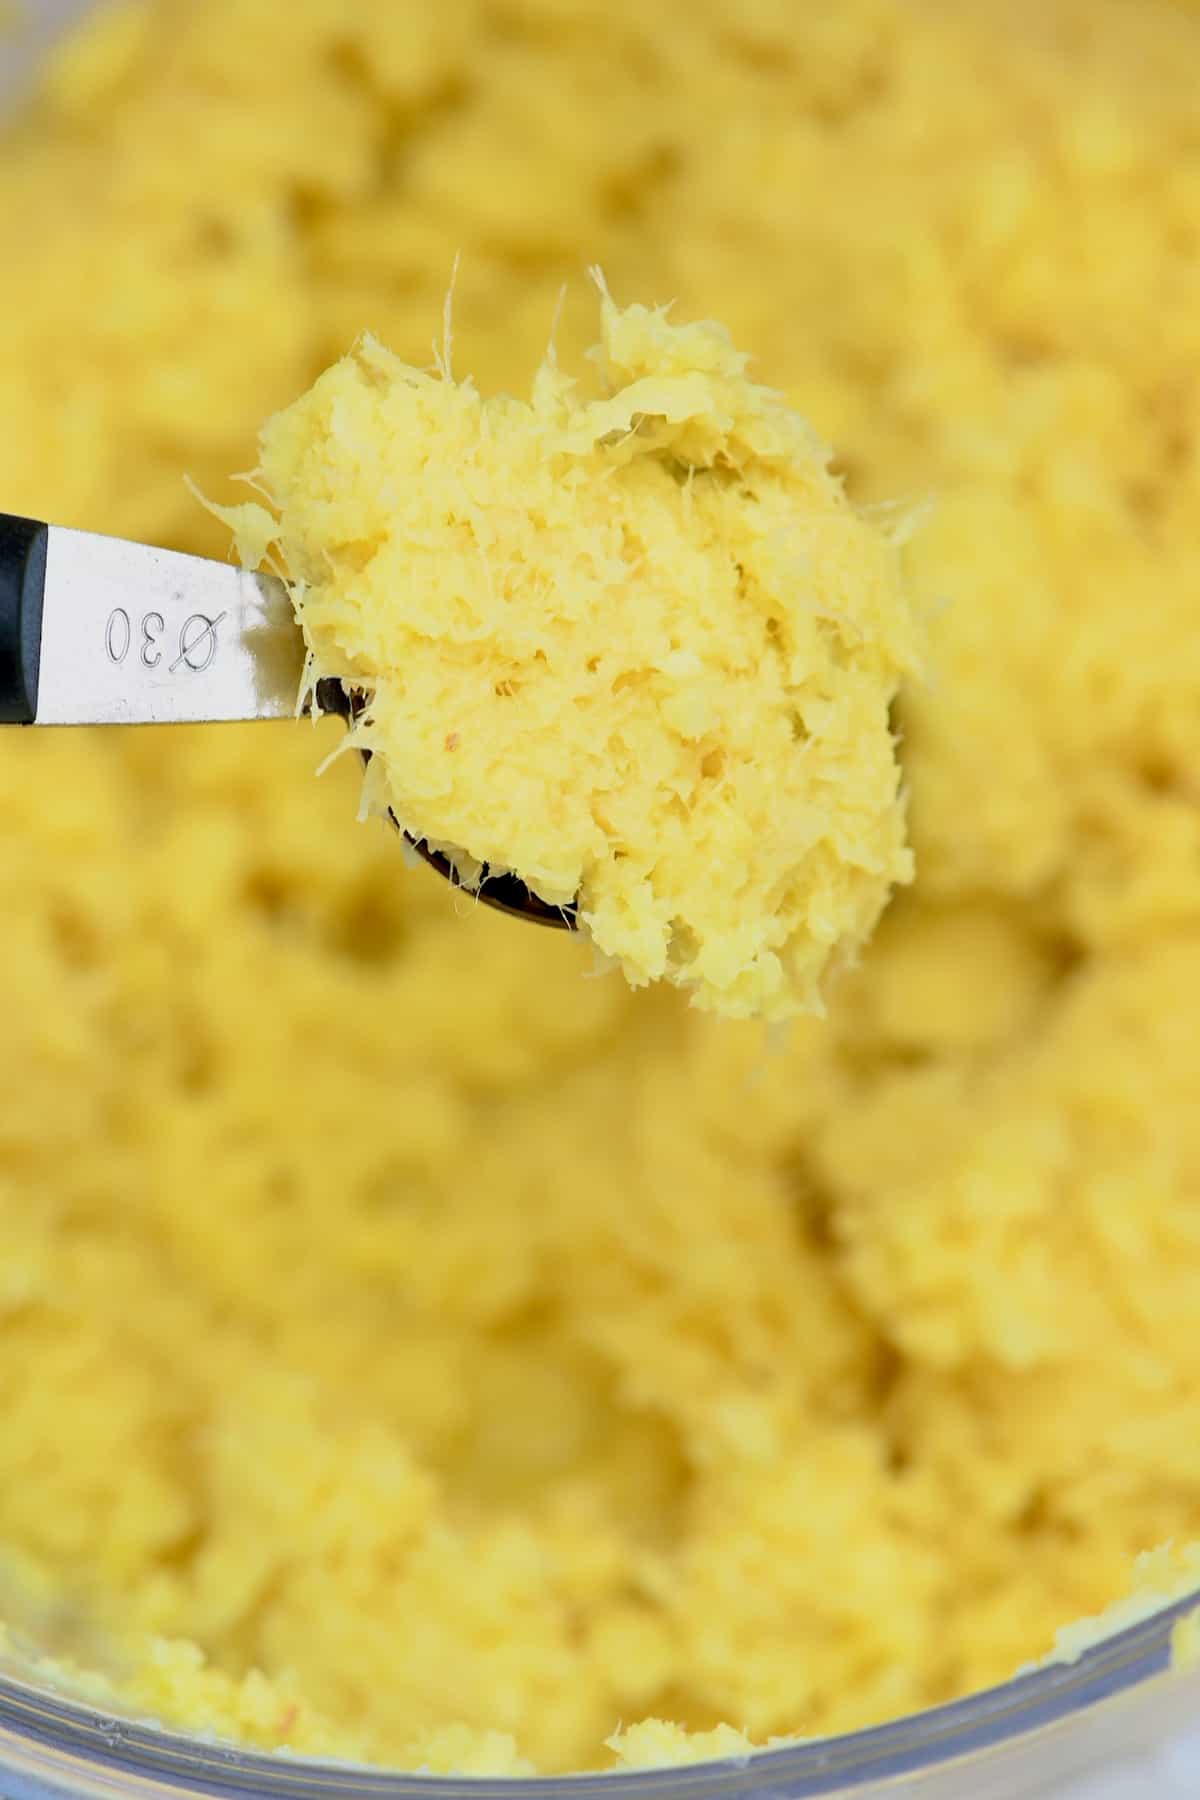
For the quickest results, use a food processor. Chop the ginger up into a few pieces and then add it to your processor (or high-speed blender) and blend into a paste.
You’ll need to stop the machine occasionally and scrape down the sides of the jug with a spatula to make sure everything is being evenly processed.
This can take up to five minutes to blend (machine resting time included) into a chunky paste. However, this will depend on the power of your machine and the size of your ginger pieces (mine were large, it may be easier to cut them into coins).
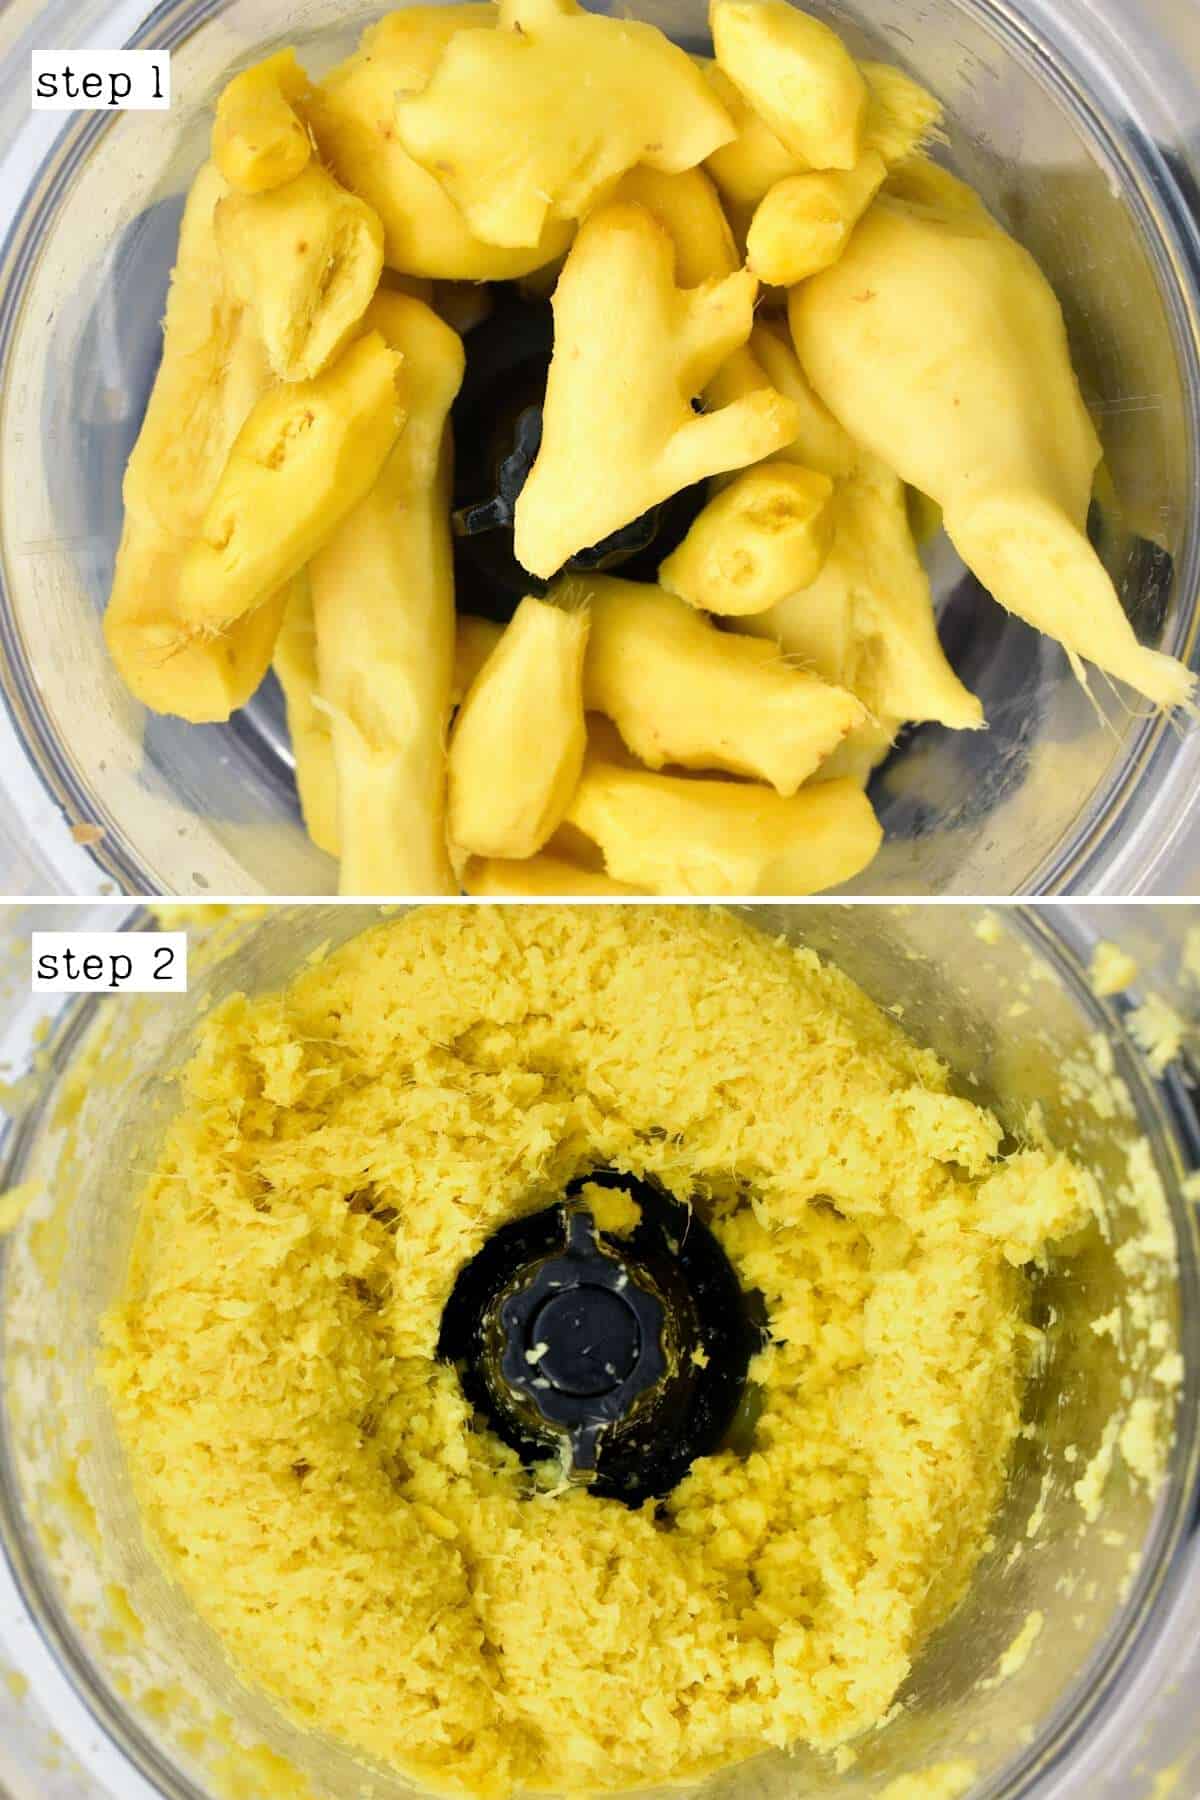
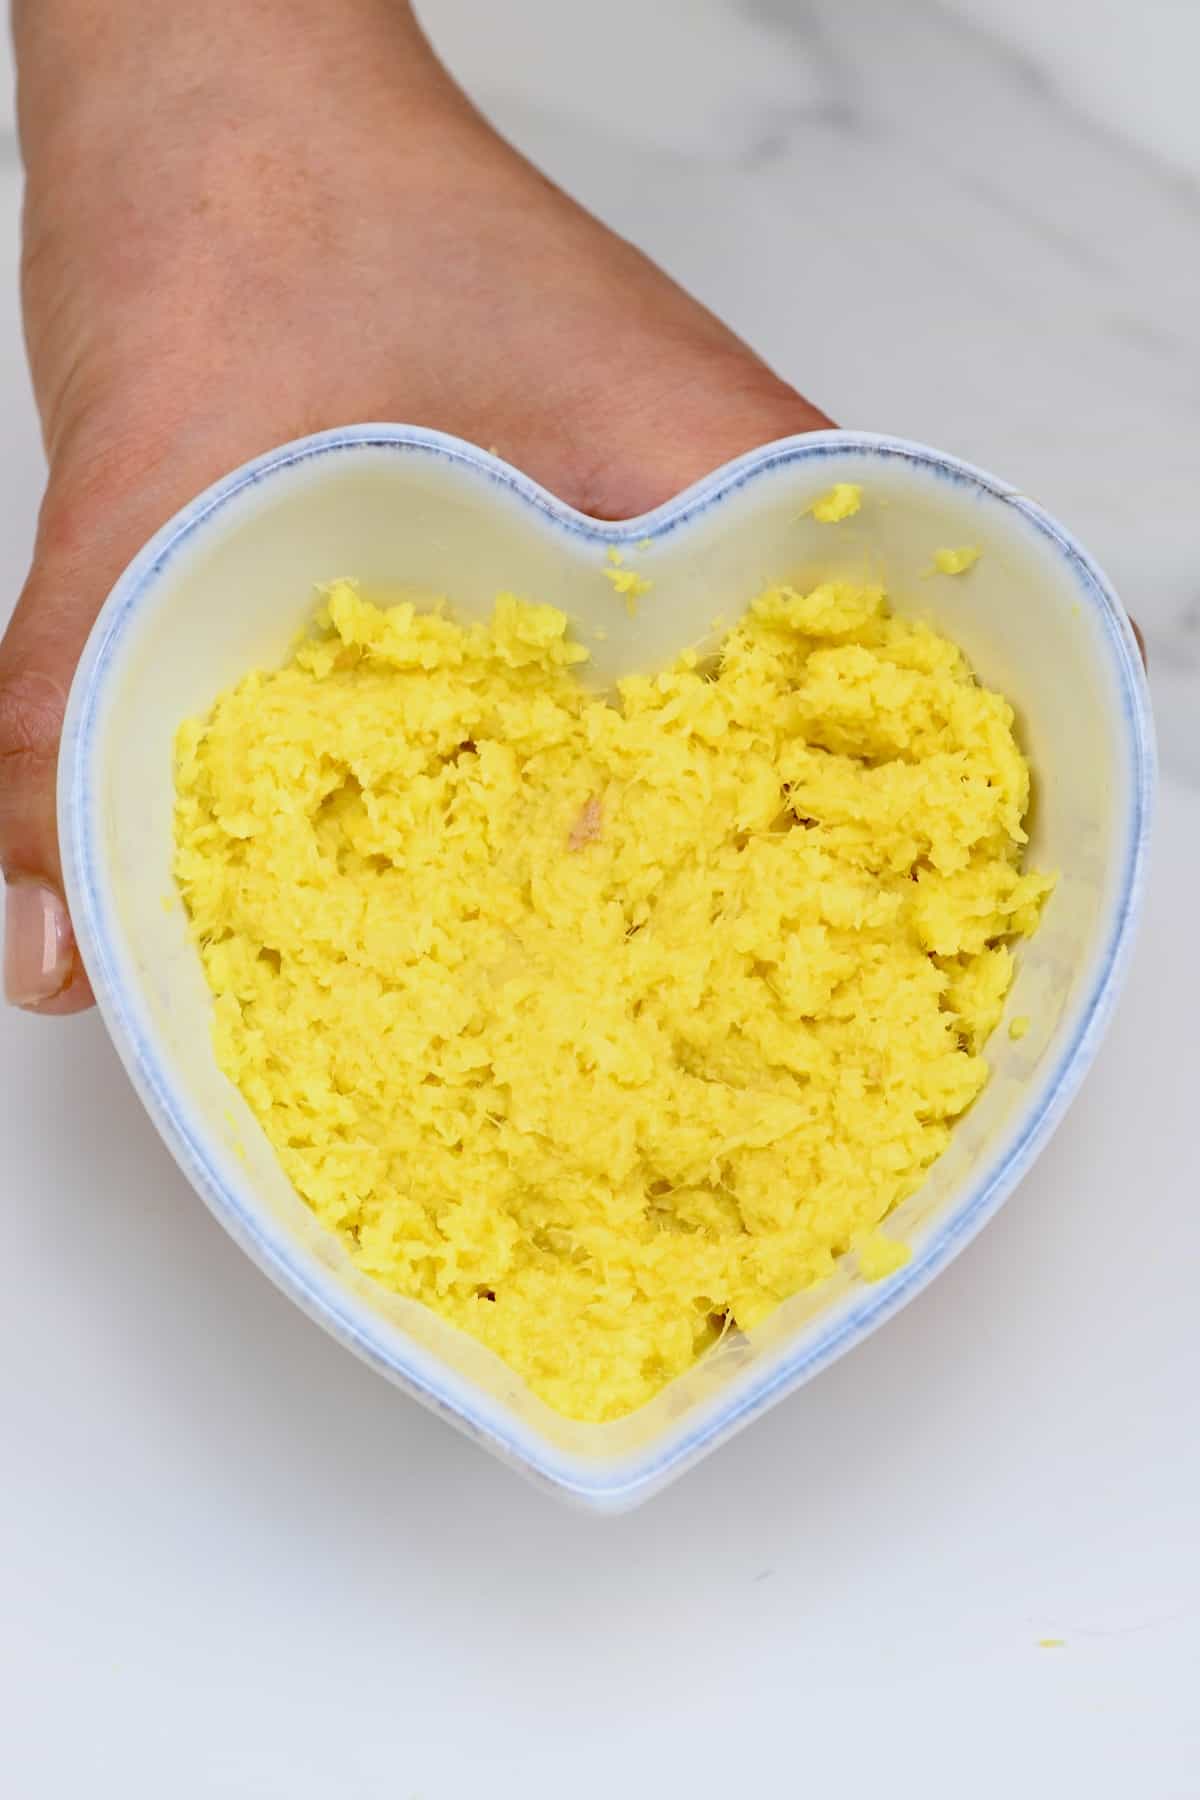
My ginger paste is slightly on the chunky side because I prefer to leave it oil- and water-free. However, if you want smoother results, then feel free to add some in to help your machine.
For a machine-free method, you could manually grate (using a micro-plane is best) or mince the ginger.
Step 3: Strain the ginger
Once blended, you can (optionally) pass the mixture through a sieve or nut milk bag, squeezing very lightly to collect some of the juice (which I use for juices and smoothies). However, you can also keep all the juice with the pulp.

Then, it’s time to use or store it!
How to store ginger paste
Fridge: Store the ginger paste in an airtight container in the refrigerator for 1 week. You could top the jar with a thin layer of oil to help preserve it for slightly longer (between 2-3 weeks).
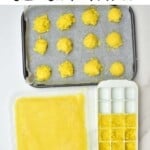
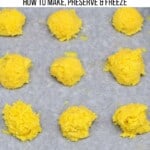
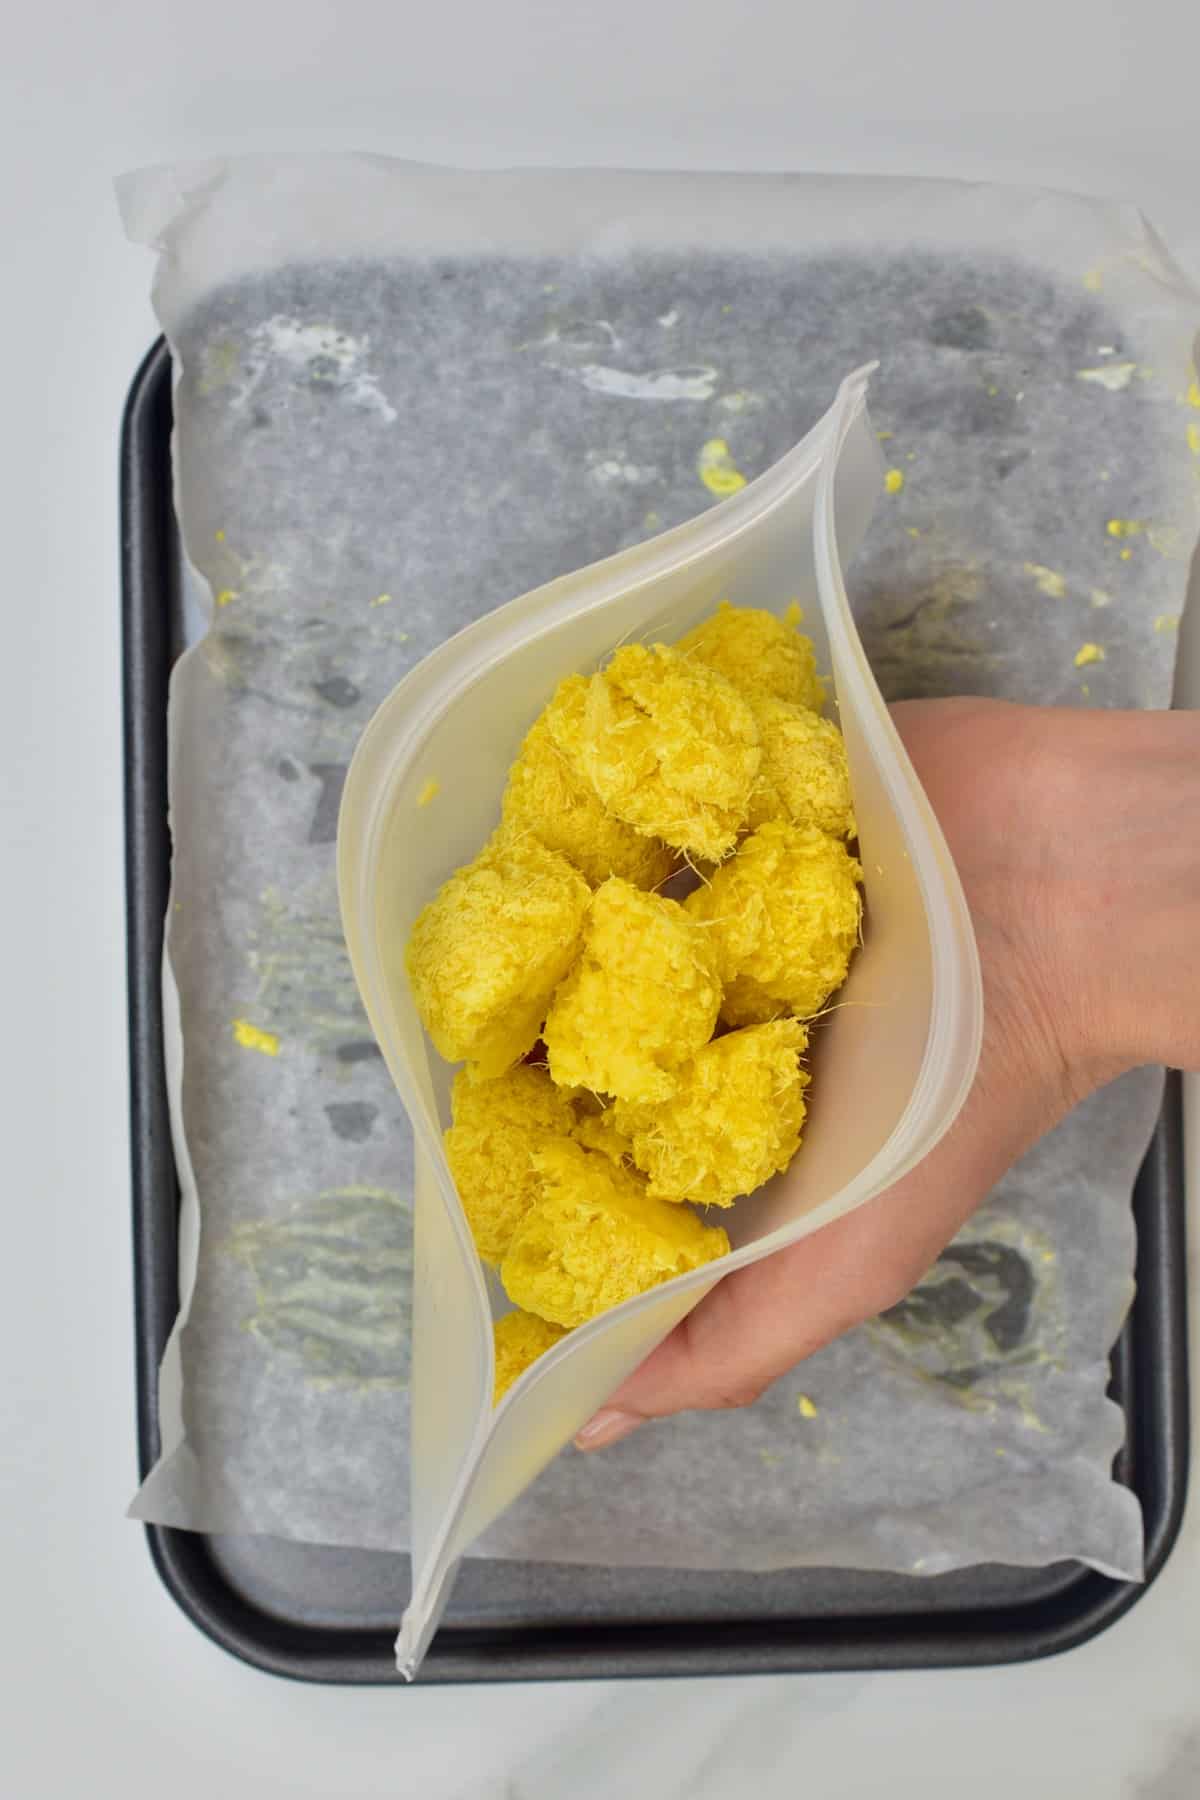
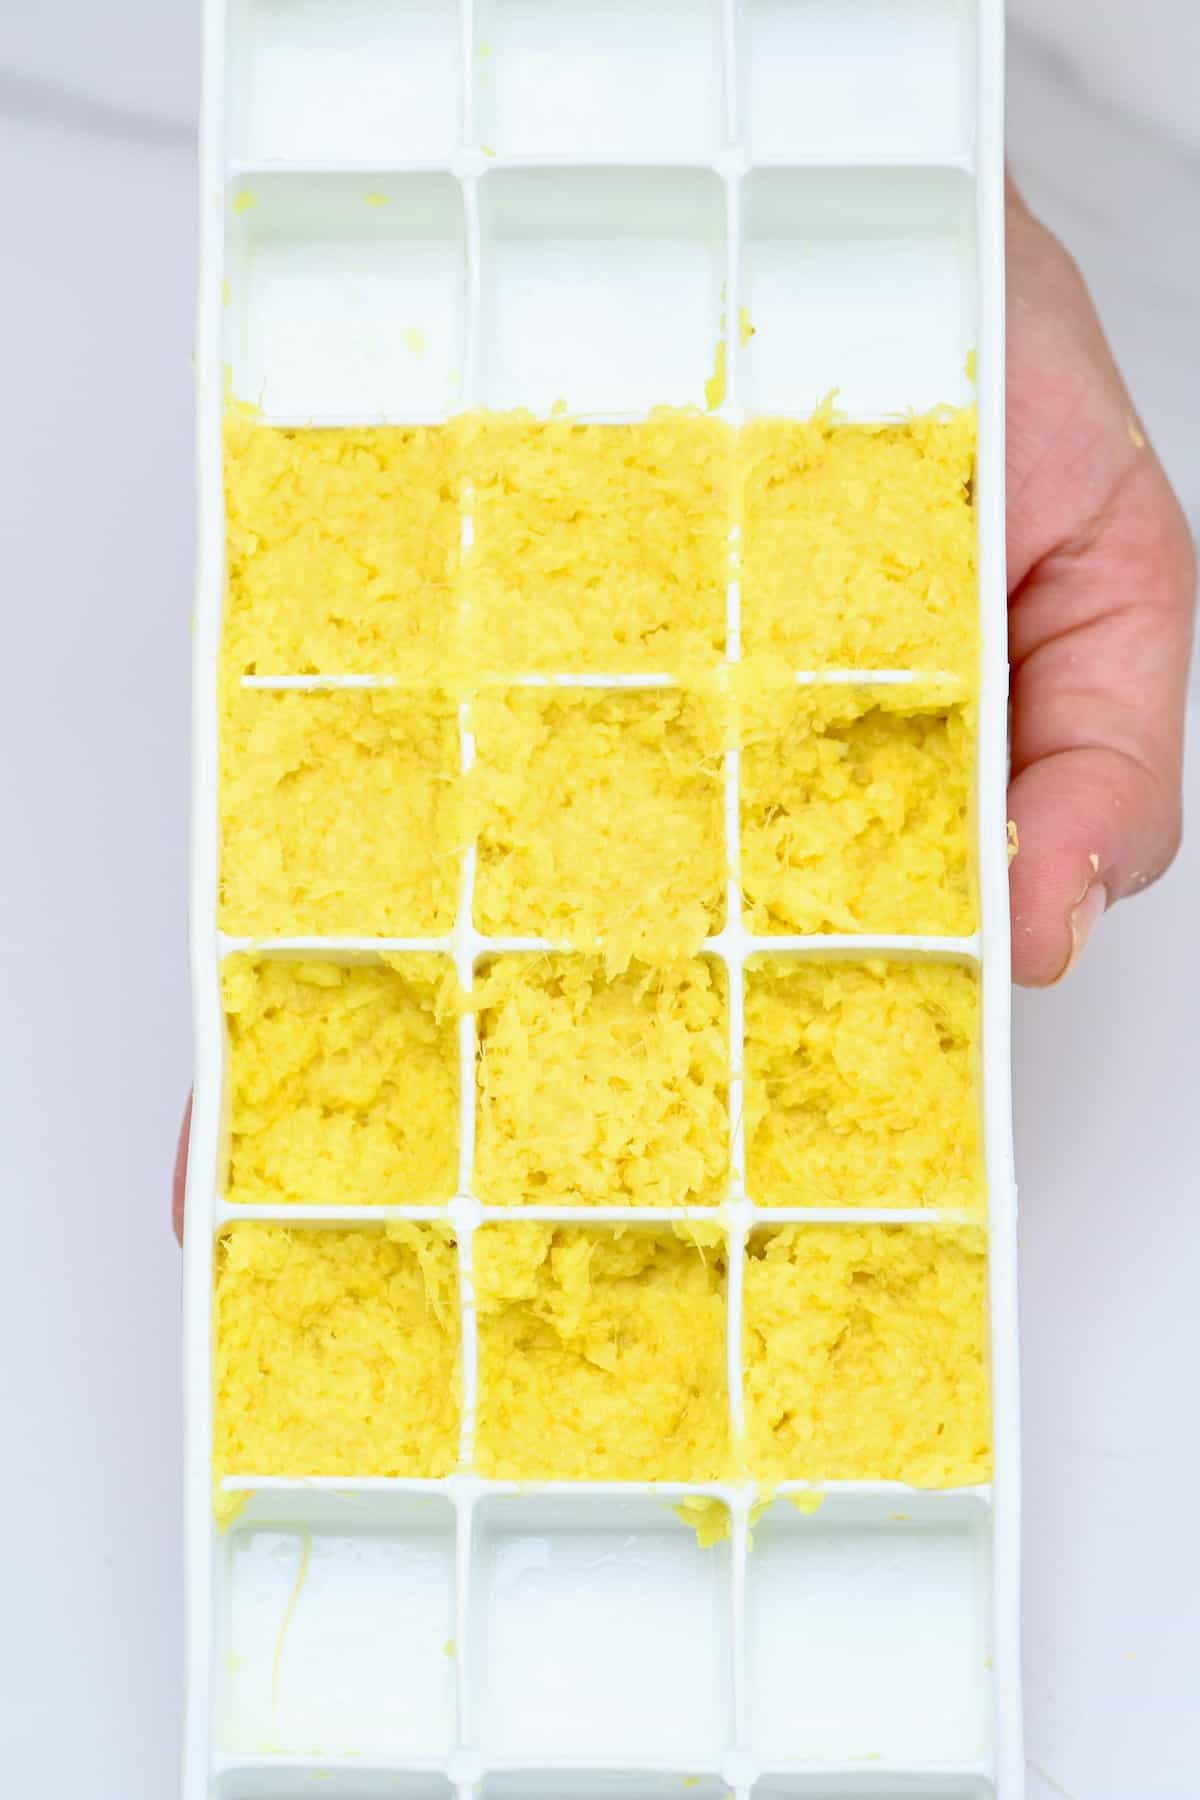
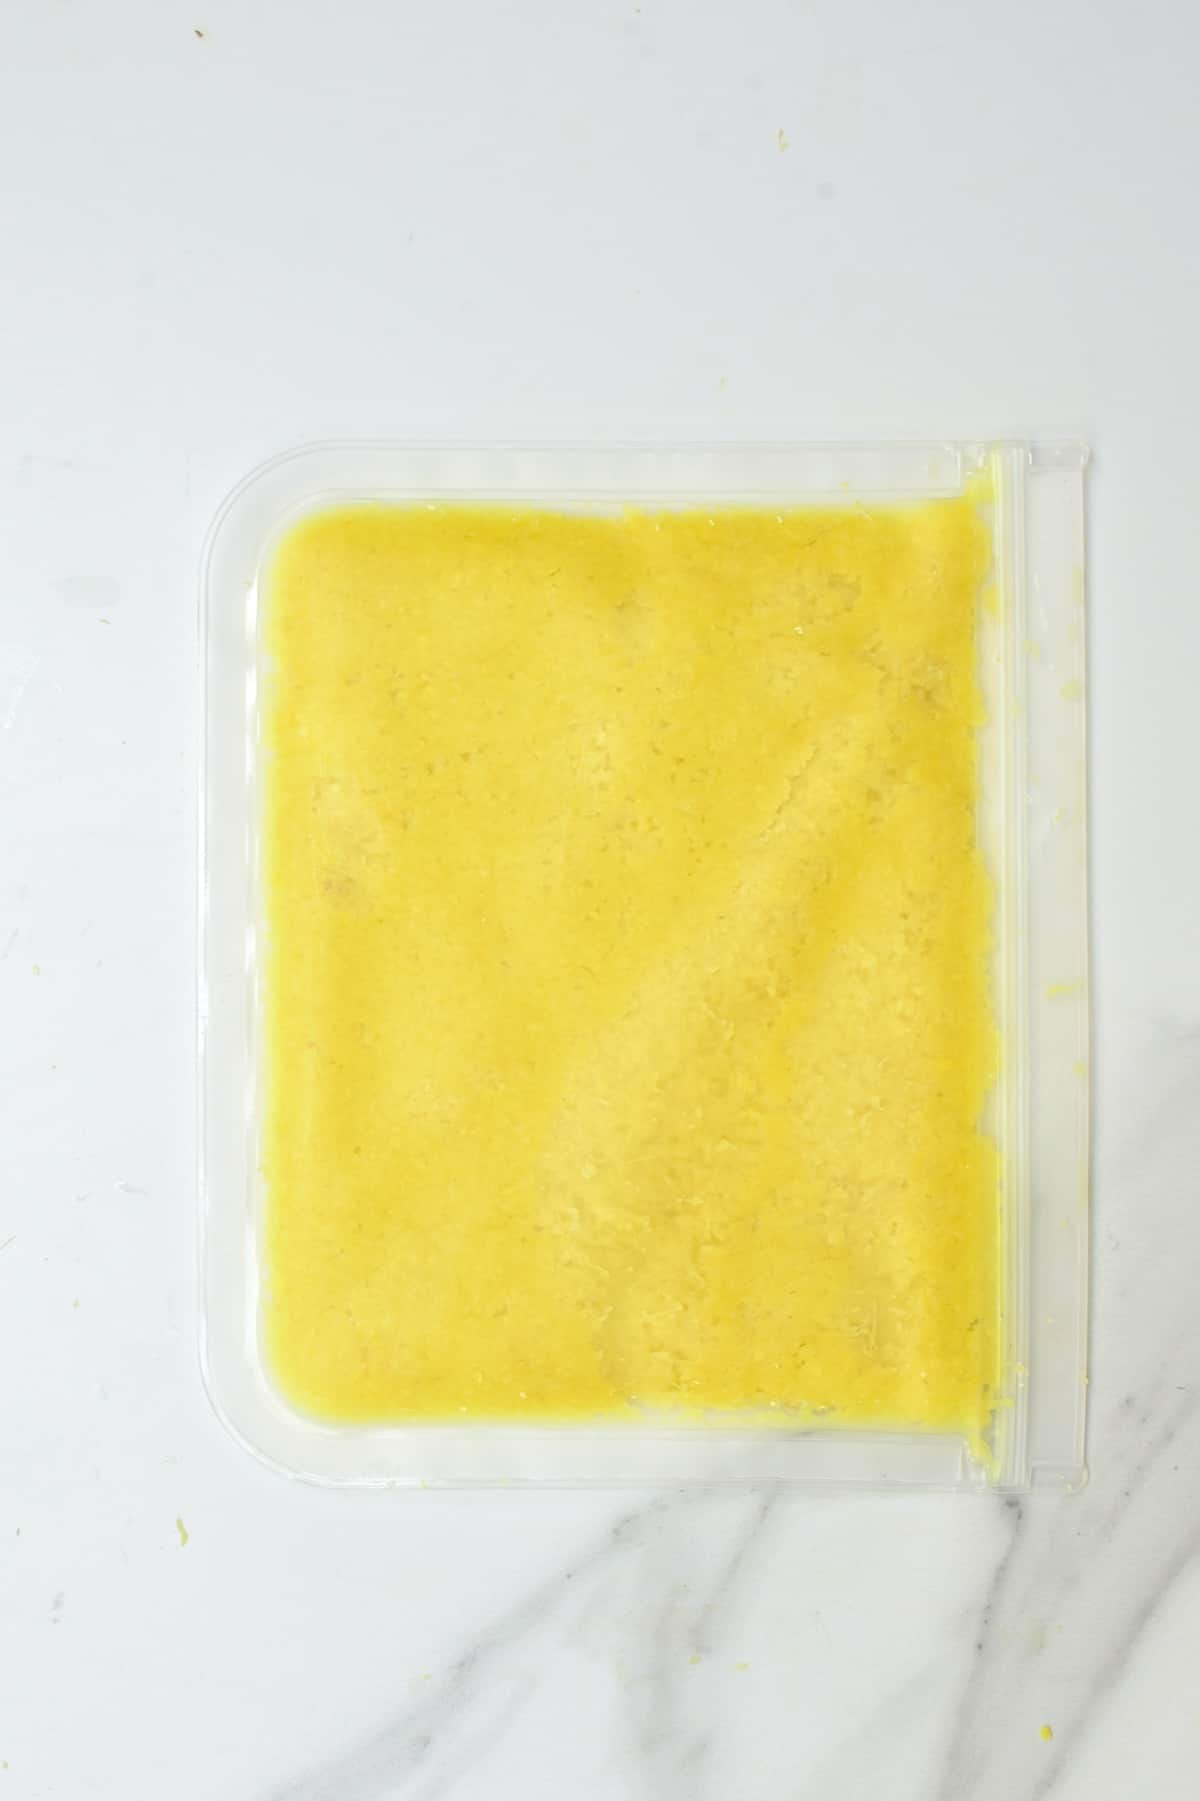
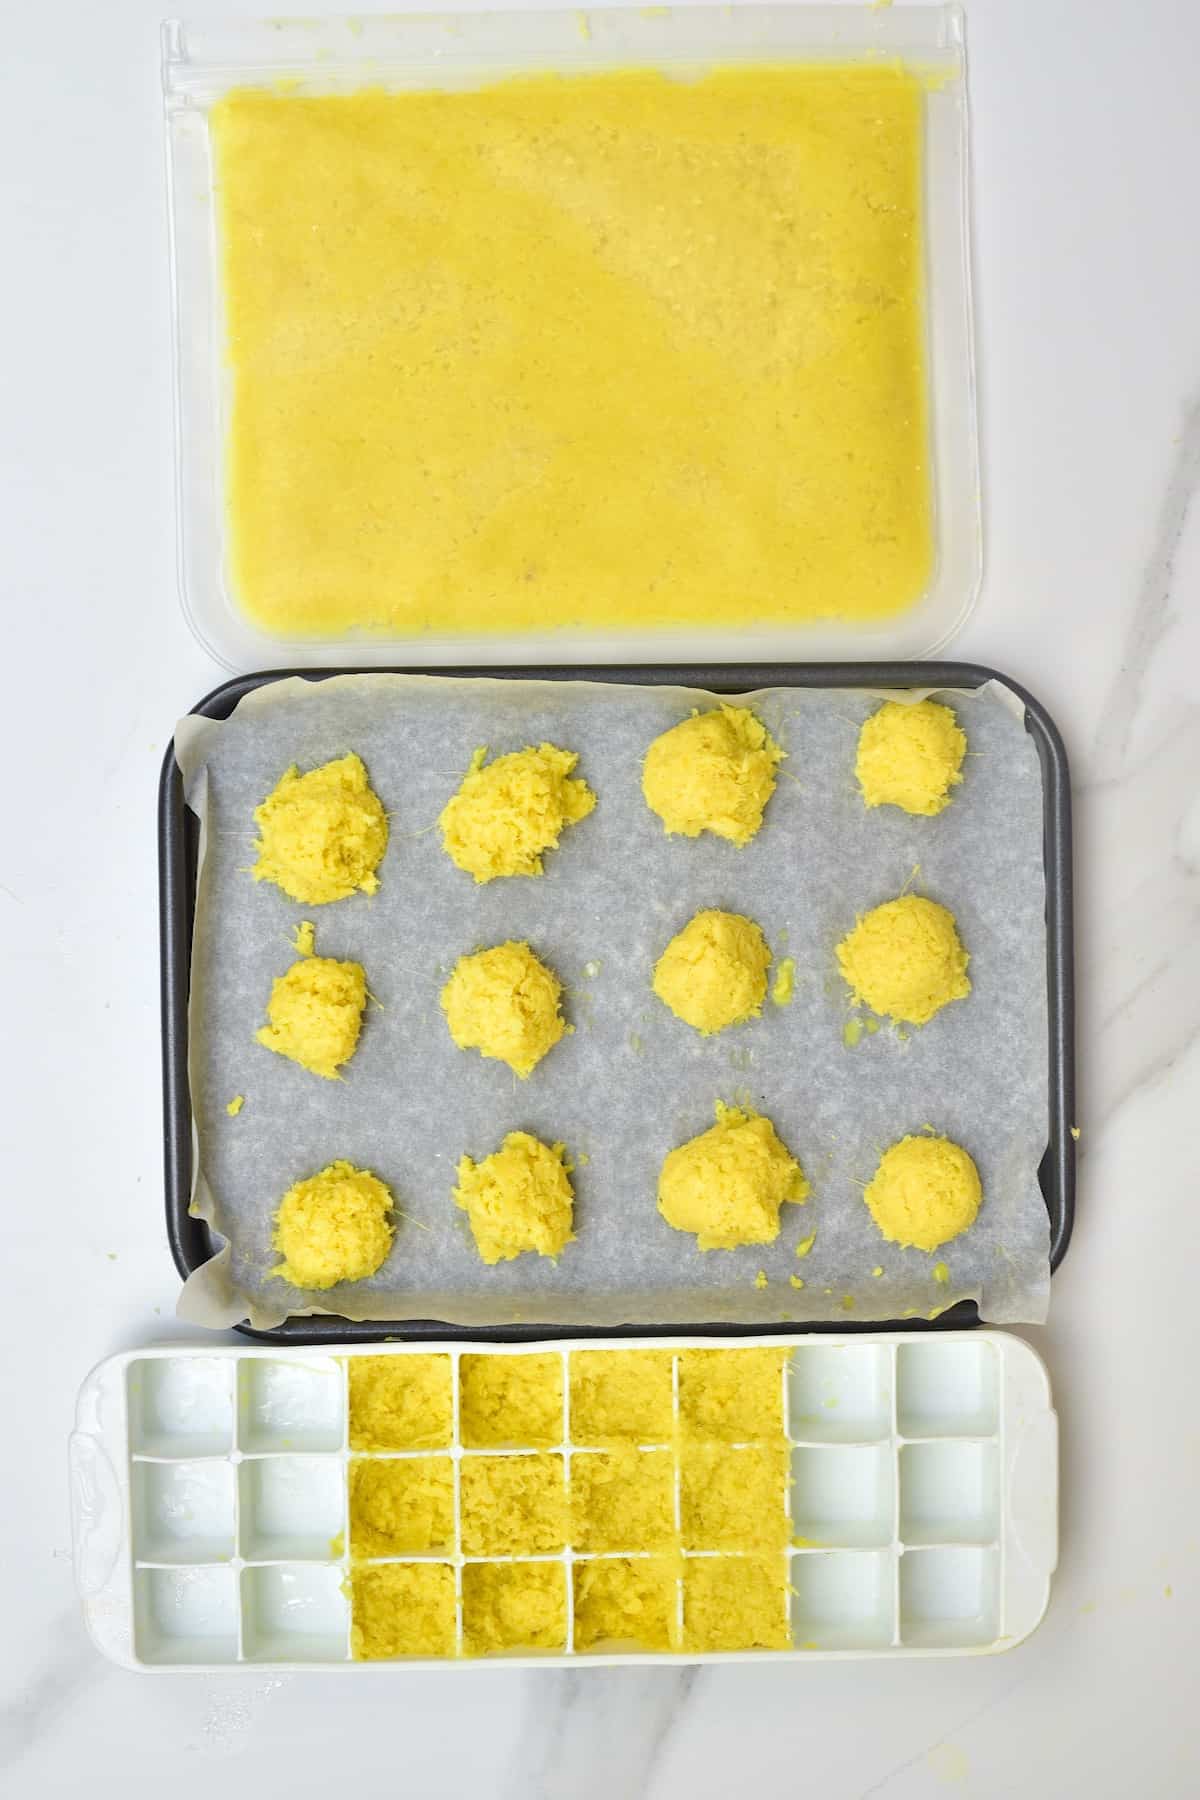
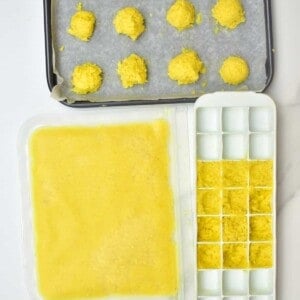
Freeze: To freeze the paste, you can transfer it to a re-usable freezer bag in a thin layer, in an ice-cube tray, or make portioned ‘scoops’ using a melon baller/scoop that’s around 1 Tbsp (or 1 tsp) in size.
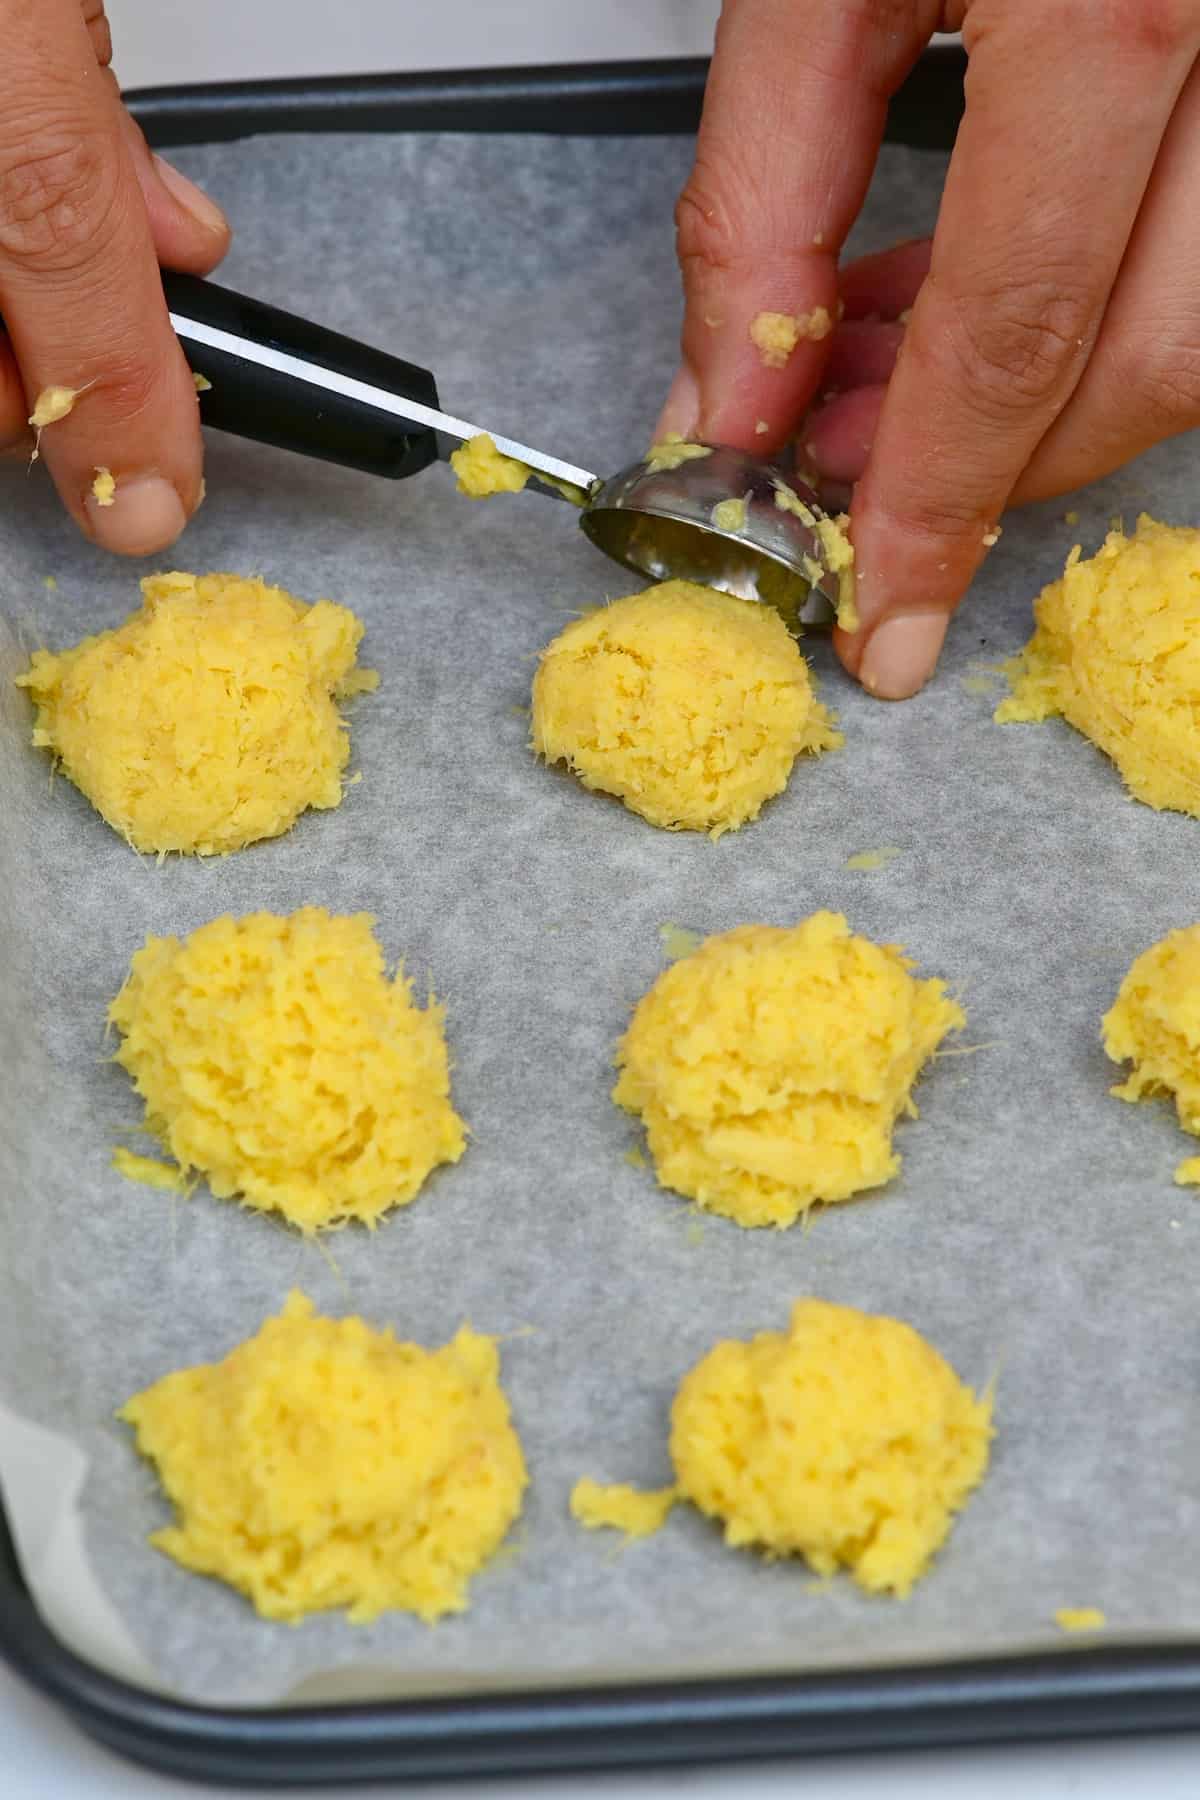
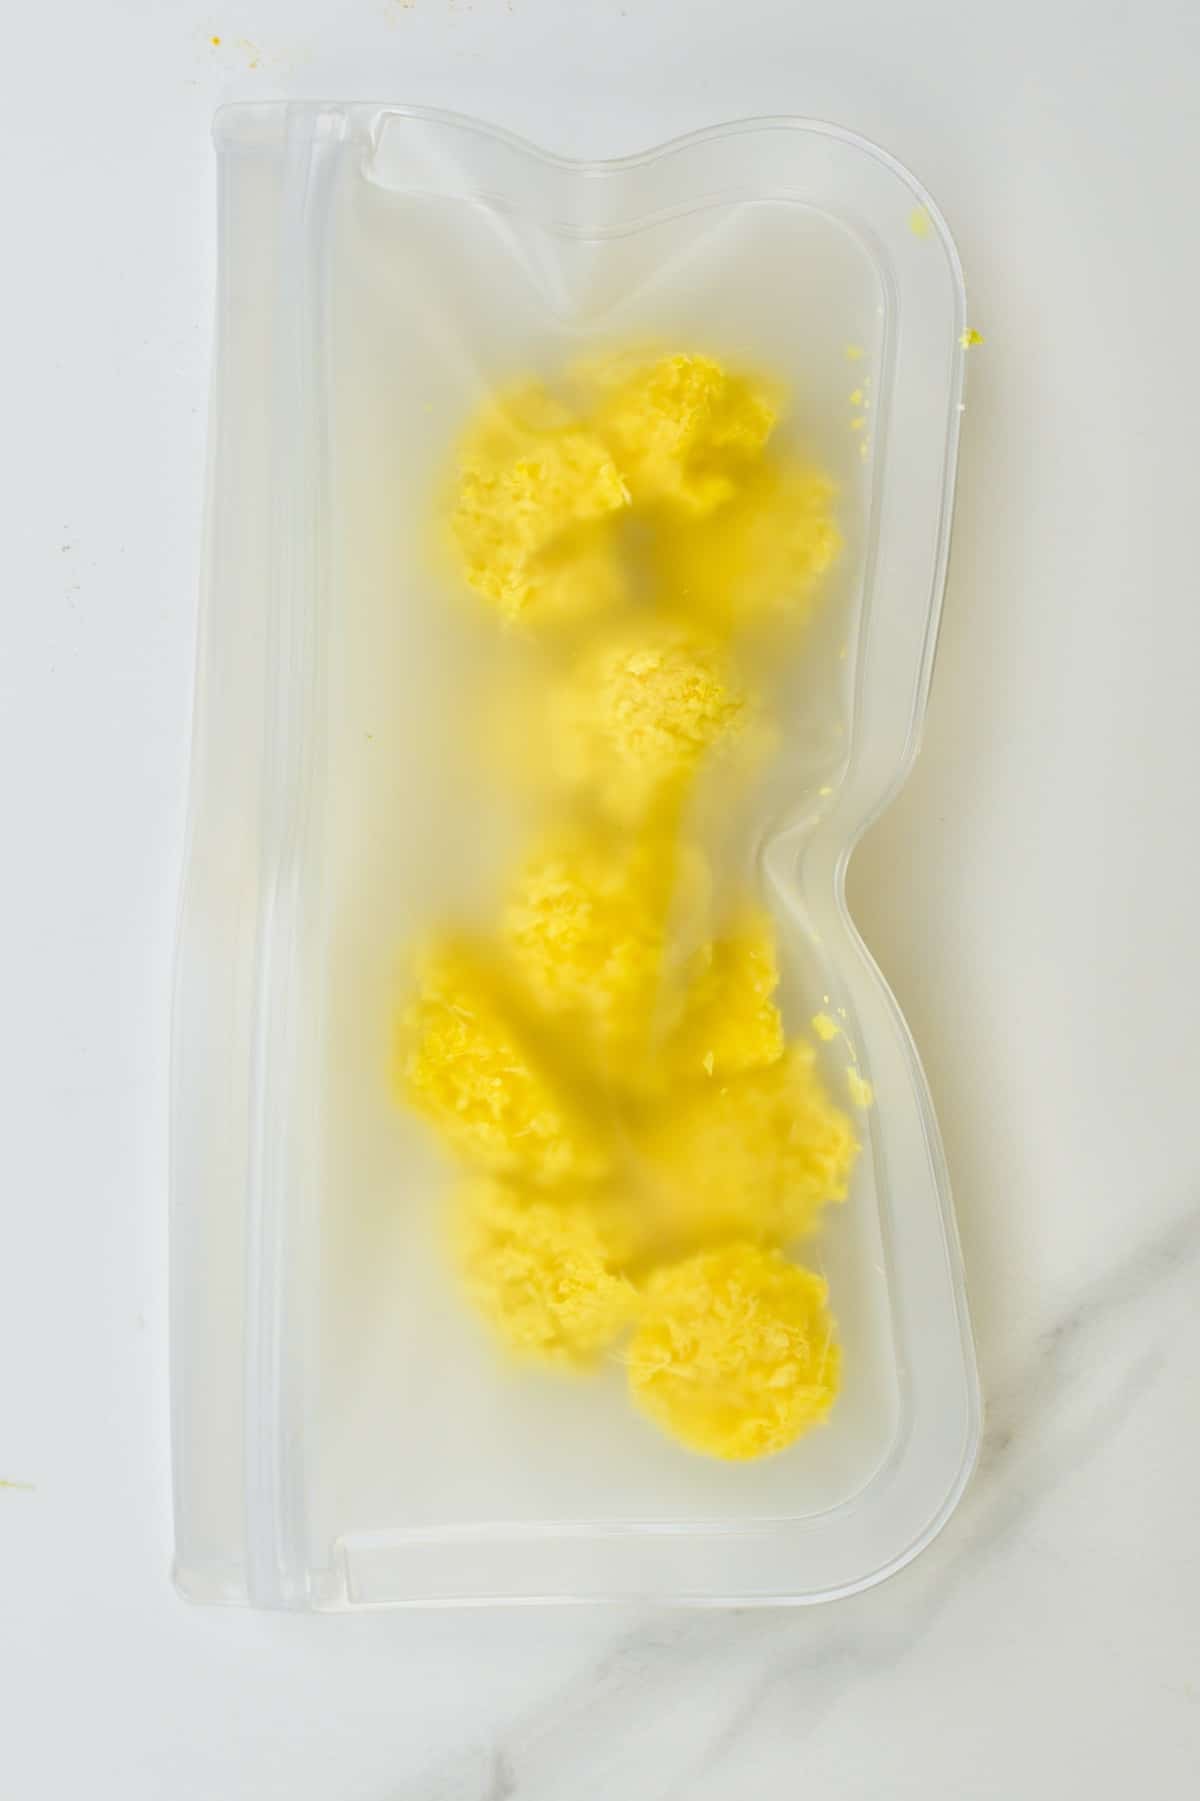
When making the scoops, lay them on a parchment-lined tray and freeze for a few hours until solid. Then transfer to a freezer-safe bag or container and store for up to 6 months!
How to use ginger puree
You can use this prepared ginger in nearly all the ways you’d use freshly minced ginger, including:
- Add it to healthy homemade smoothies and cocktails.
- To make ginger tea.
- Add to ginger pumpkin soup, stews, and vegetable stock recipes.
- Include it in curries and all kinds of Indian recipes.
- Mix into desserts like cookies and fudgy brownies.
- Add to marinades, dips, sauces, dressings, and spreads.
- Add a little to stovetop oatmeal or a yogurt bowl (though I prefer adding my ginger marmalade for some sweetness!).
- Use in place of ginger powder.
And, of course, you can add it to your pan while cooking stir-fries, Indian food, sauces, etc. No need to thaw the frozen cubes either – just chuck them straight in the pan from frozen!
You can also check these 40+ ways to use ginger – maybe you will find another recipe that you like that uses ginger!
FAQs
You can leave the skins on, though it may take slightly longer to blend and could be slightly chunkier. I tend to peel it as I always use peeled ginger in my recipes, though the skin does contain extra nutrients.
I’ve found that the ginger is less fibrous the fresh it is. If you find the mixture a little too stringy, you could add a couple of tablespoons of oil or water to help it blend into more of a paste.
For every 1-inch of fresh ginger root called for in a recipe, use 1 Tbsp of the ginger paste.
For every 1 teaspoon of ground ginger called for, use 1 Tbsp of the ginger paste.
Feel free to adjust these amounts to personal taste, though.
Recipe notes
- For ginger and garlic paste: I know ginger and garlic paste is a popular combined mixture (in a 1:1 ratio of both ingredients). However, I love to have the option of using them separately. For that reason, I usually prepare them individually and then combine them when cooking.
- To preserve the ginger paste for longer: adding a little neutral oil to the mixture can help to extend the shelf life further. Use something without a strong flavor like avocado oil or rapeseed oil. A little salt will also act as a preservative. This is only needed if you plan to store it in the fridge and can help keep it fresh for a couple of weeks. I omit it since I use the paste for tea and drinks too.
- Picking ginger: When I know I’m buying ginger specifically for this reason, I take the time to choose some slightly smoother so they will be easier to peel.
- Make a large enough batch for your machine: if you’re using a blender/food processor, it’s important to realize that there’s a minimum capacity to work properly. So, don’t try and get away with making a tiny batch unless you plan to mince it by hand. If you’re making a slightly smaller batch or have a less powerful machine, you may need a drizzle of water to help the ginger blend smoother.
More Ginger and DIY Recipes
- Silky Ginger Milk Pudding (Ginger Curd)
- Simple ginger marmalade
- Ginger lemon shots
- Orange and ginger juice
- Carrot ginger juice
- How to make ginger powder
- Zero Waste Ginger Syrup (+ Ginger Pulp Crackers)
- Homemade Vegetable Bouillon Cubes and Powder
- How to Make Crystallized Ginger (Candied Ginger)
If you try this ginger paste recipe, I’d love to hear your thoughts/questions below. Also, I’d really appreciate a recipe card rating below, and feel free to tag me in your recipe recreations on Instagram @Alphafoodie!
How to Make Ginger Paste
Equipment
Ingredients
- 1 lb ginger
This yields about 1 cup ginger paste. Use more ginger to make a bigger batch.
Instructions
Step 1: Peel the ginger
- The first step is to peel all your ginger. I like to do this with a spoon for the quickest, best results.If it’s organic ginger and you don’t mind eating the peel, feel free to leave it on.
Step 2: Make the ginger paste
- For the quickest results, use a food processor. Chop the ginger up into a few pieces and then add it to your processor (or high-speed blender) and blend into a paste.
- You’ll need to stop the machine occasionally and scrape down the sides of the jug with a spatula to make sure everything is being evenly processed.This can take up to five minutes to blend (machine resting time included) into a chunky paste. However, this will depend on the power of your machine and the size of your ginger pieces (mine were large, it may be easier to cut them into thin coins).My ginger paste is slightly on the chunky side because I prefer to leave it oil and water-free. However, if you want smoother results, then feel free to add some in to help your machine.
- For a machine-free method, you could manually grate (using a micro-plane is best) or mince the ginger.
Step 3: Strain the ginger
- Once blended, you can (optionally) pass the mixture through a sieve or nut milk bag, squeezing lightly to collect some of the juice (which I use for juices and smoothies). However, you can also keep all the juice with the pulp.Then, it’s time to use or store it!
How to store?
- Fridge: Store the ginger paste in an airtight container in the refrigerator for 1 week. You could top the jar with a thin layer of oil to help preserve it for slightly longer (between 2-3 weeks).Freeze: To freeze the paste, you can transfer it to a re-usable freezer bag in a thin layer, in an ice-cube tray, or make portioned ‘scoops’ using a melon baller/scoop that’s around 1tbsp (or 1tsp) in size. When making the scoops, lay them on a parchment-lined tray and freeze for a few hours until solid. Then transfer to a freezer-safe bag or container and store for up to 6 months!
Notes
Nutrition
Nutrition information is automatically calculated, so should only be used as an approximation.


