
This post may contain affiliate links. Please read our disclosure policy.
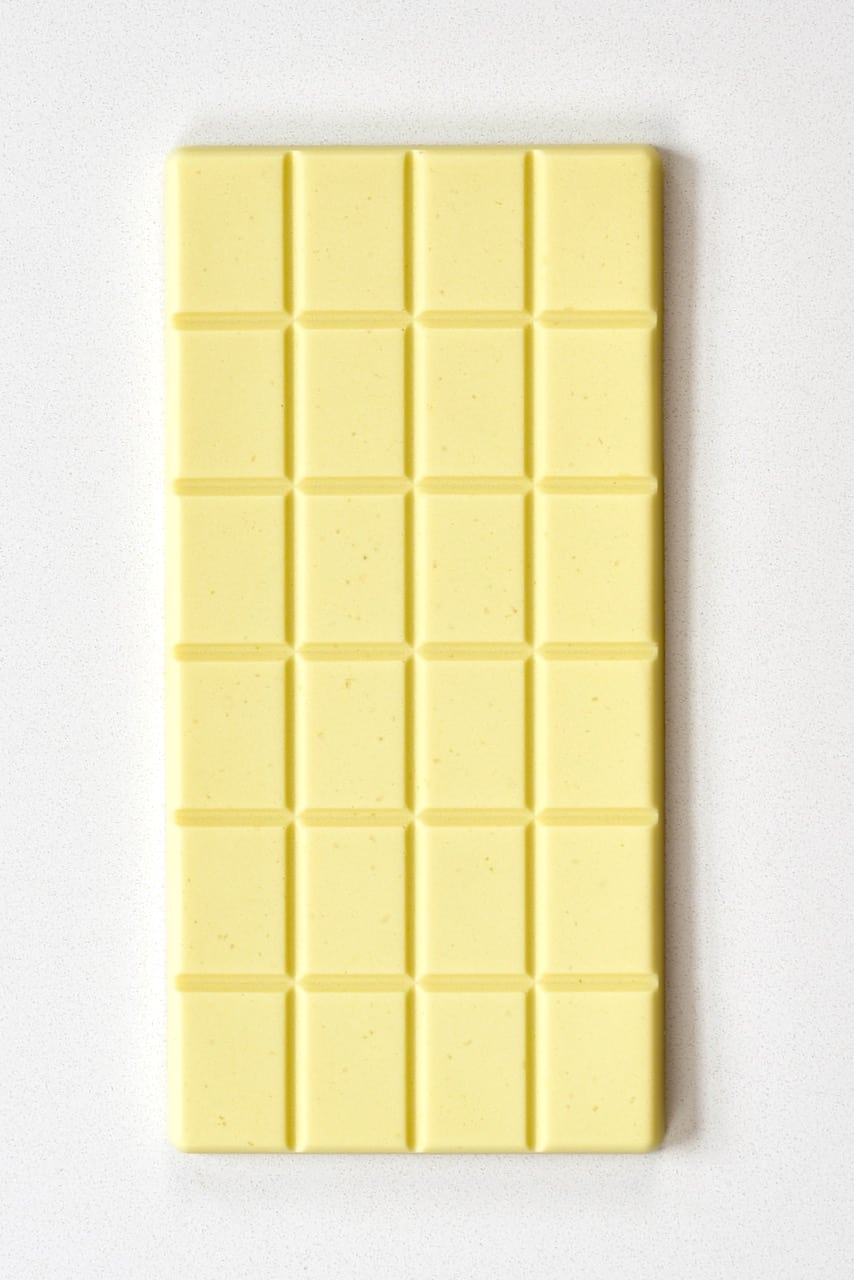
A simple DIY for how to make white chocolate at home using just three ingredients! This homemade white chocolate can be made with or without dairy too!
I’ve never been a massive fan of store-bought white chocolate, with results ranging from super sickly-sweet, to waxy. Because of that, I hadn’t put much thought into making my own – until I recently learned How To Make Powdered Milk At Home. Now, here I am with a simple, 3-ingredient, white chocolate recipe for you that I personally think is SO much better than store-bought.
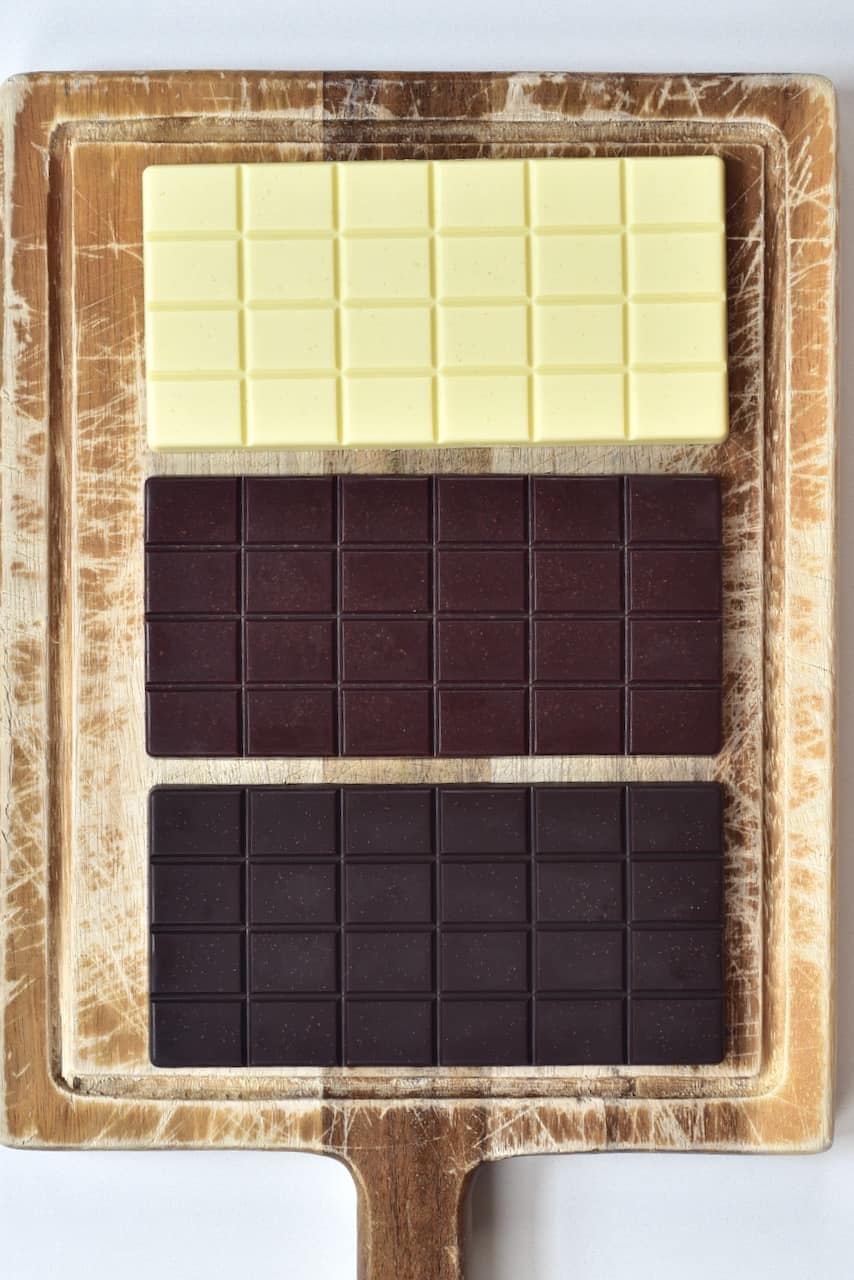
What really made me want to make white chocolate originally is because of how versatile it is. We know that dark and milk chocolate can be flavored in tons of different ways (and you can see my healthy dark chocolate & milk chocolate recipes here too). But I’ve always thought of white chocolate as the king of customization.
However, when I first started looking at making this ingredient at home, I came across recipes that were loaded with tons of sugar, and that’s not what I wanted. Indeed, I am still using powdered sugar, but it’s a small quantity. Furthermore, the type of sweetener that you use is up to you: coconut sugar, monk fruit powder, or even sugar-free options like powdered erythritol.
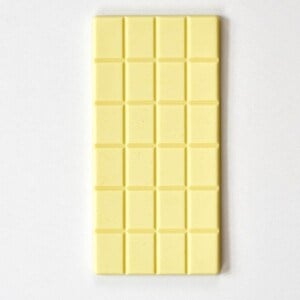
The resulting white chocolate that I’ve made is creamy and buttery. Perfect for a treat and to add to a variety of dishes! Including grating over desserts, as part of an oatmeal bowl, for a snack, melted and drizzled over dessert, etc.
Want to save this recipe?
What is white chocolate & what is white chocolate made of?
I suppose in a way these two questions are linked, so I thought I’d answer them both in a single section. It may or may not surprise you to find out that white chocolate isn’t chocolate at all. Legally, all ‘chocolate’ must contain cocoa solids – and white chocolate does not.
Instead, white chocolate is largely made up of cocoa butter, lecithin, powdered milk, sugar (and lots of it), and sometimes vanilla. Meanwhile, some brands and various vegan chocolates often swap out cocoa butter altogether with hydrogenated oils (hence the waxiness) and fats, including palm oil (eep!) as well as tons of sugar.
So, what is cocoa butter?
Well, it’s the edible fat (basically like the vegetable oil) from the cocoa bean rather than the ‘solids’, which are what is needed to define a ‘chocolate’ product. I know it’s all a bit weird – so let me break it down a bit more for you.
Chocolate all begins with a cocoa pod, which, when ripe, is harvested for its seeds. The seeds are then treated (fermented) and dried to begin roasting. When the shells are removed, that’s where we get cacao nibs. Those nibs are then broken down into ‘chocolate liquor.’
This liquor is then separated into the cocoa solids (which are turned into yummy chocolate products like cocoa powder and chocolate) and the cocoa butter (the fat). Cocoa butter itself doesn’t have much of a chocolate flavor at all – but is often added to chocolate for providing that good ‘mouth feel’ we want.
In fact, if you want to learn about how to make chocolate from bean to bar, I’ve done that recently too!
P.S. when items are named ‘cacao,’ rather than cocoa, these are more natural and less processed. So you may even be able to make raw white chocolate using cacao butter instead of cocoa butter.
How to make white chocolate
Making this homemade white chocolate is fairly easy. Best of all, it is just a few simple steps and three key white chocolate ingredients.
Check towards the bottom of the post for ways on how to flavor the white chocolate and several flavor variations.

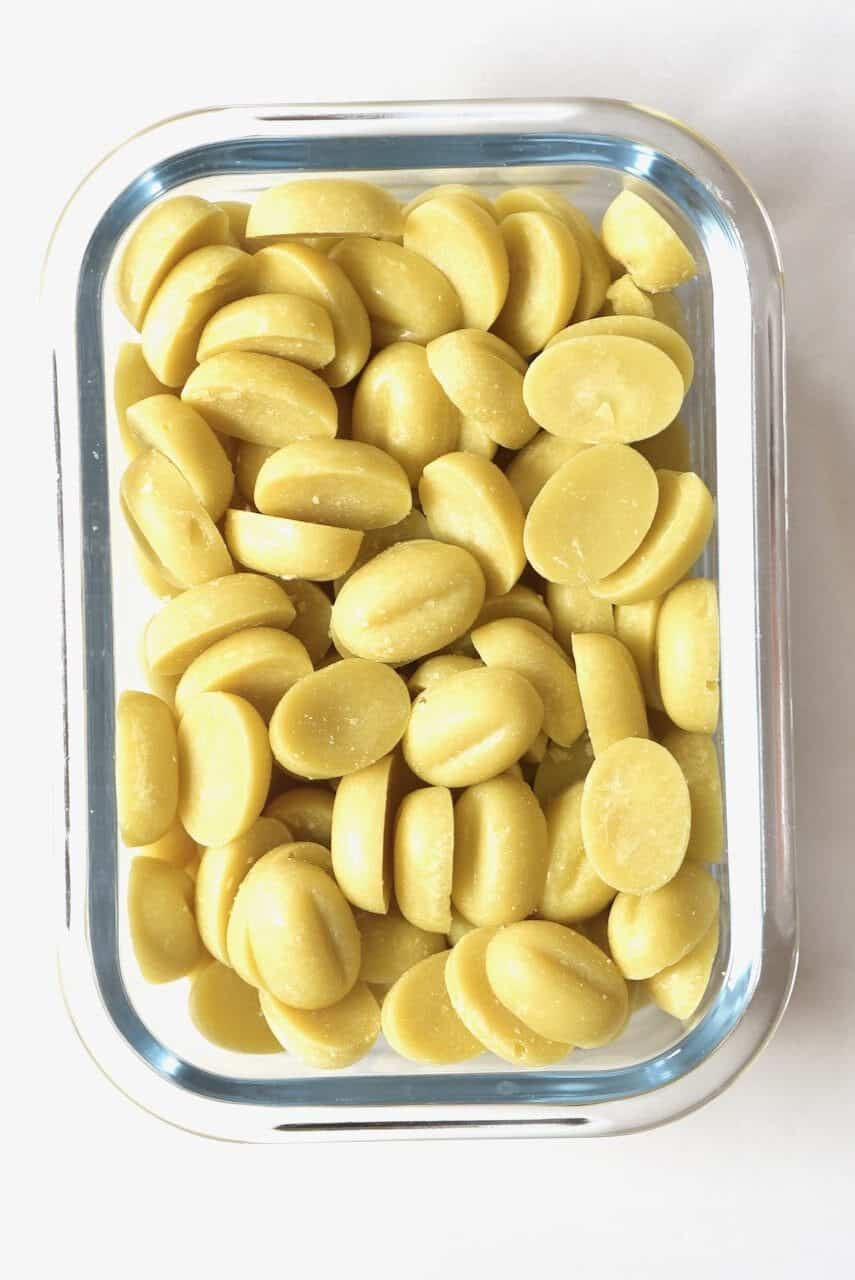
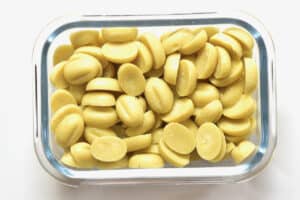
- Cacao butter (or cocoa butter) Make sure to use food-grade cacao butter.
- Dry milk powder – I use homemade milk powder. For vegan white chocolate, you can use coconut milk powder or soy milk powder. I have also seen methods using cashew butter in place of dry powder, though this isn’t something that I’ve tried. DON’T use liquid ‘milk’ for this recipe or the chocolate will likely seize and/or won’t chill solid.
- Sweetener – use your favorite powdered sugar: coconut sugar, cane sugar, monk fruit powder, etc. If you only have granulated sugar, you can make your own powdered sugar. You can also use a sugar-free alternative such as powdered erythritol. AVOID liquid sweetener though, like maple, which can cause the chocolate to seize.
- (Optional) Vanilla – I often like to add vanilla to my bade white chocolate recipe. You can use vanilla straight from the pod, vanilla powder (or even vanilla extract – though there is a small risk of the chocolate seizing. It’s best to use an oil-based flavoring if possible.)
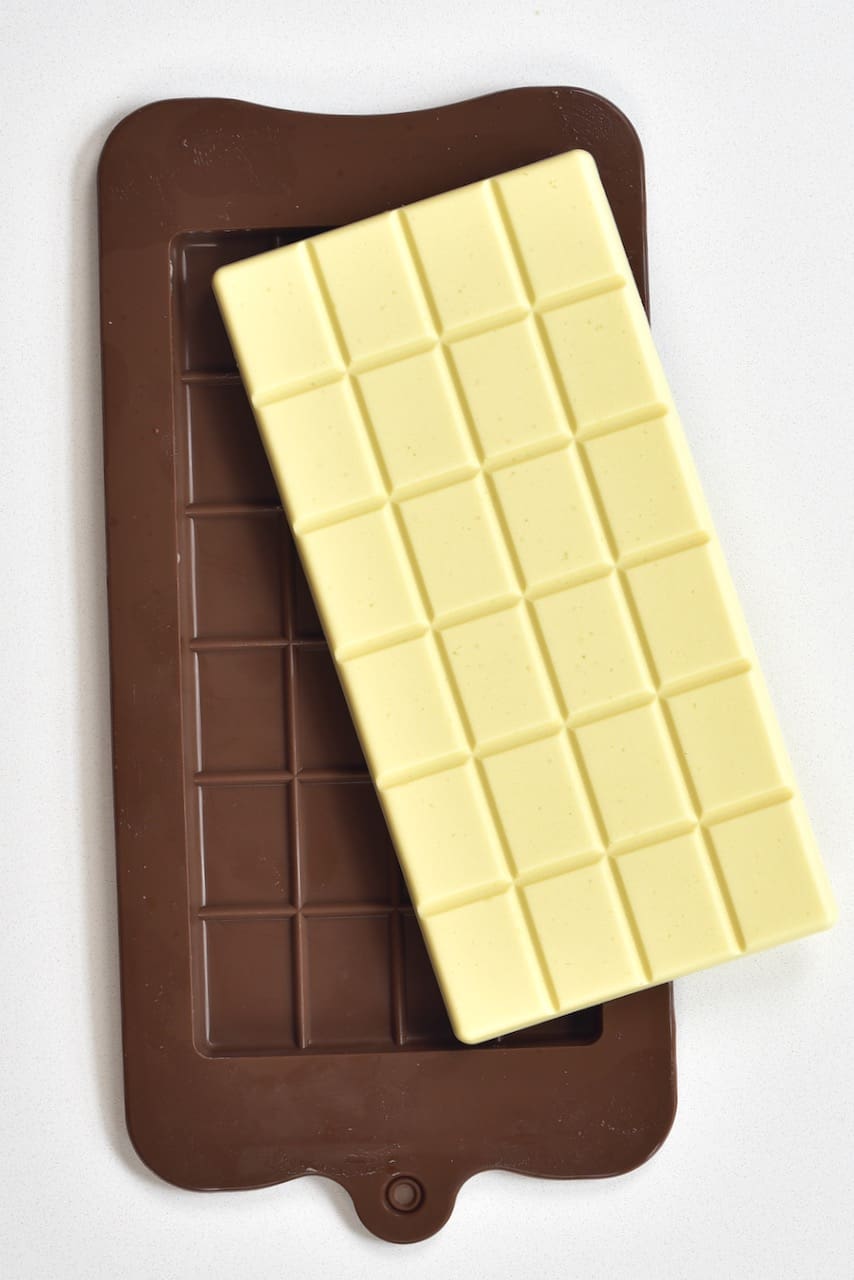
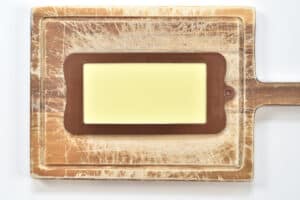
You’ll also need the equipment to use a double boiler method for melting the cacao butter and chocolate mold. This recipe is enough for 1 bar using the silicone mold photographed below. Feel free to adapt the mold to your liking – however, avoid hard (non-flexible) chocolate molds unless you plan to temper the chocolate.
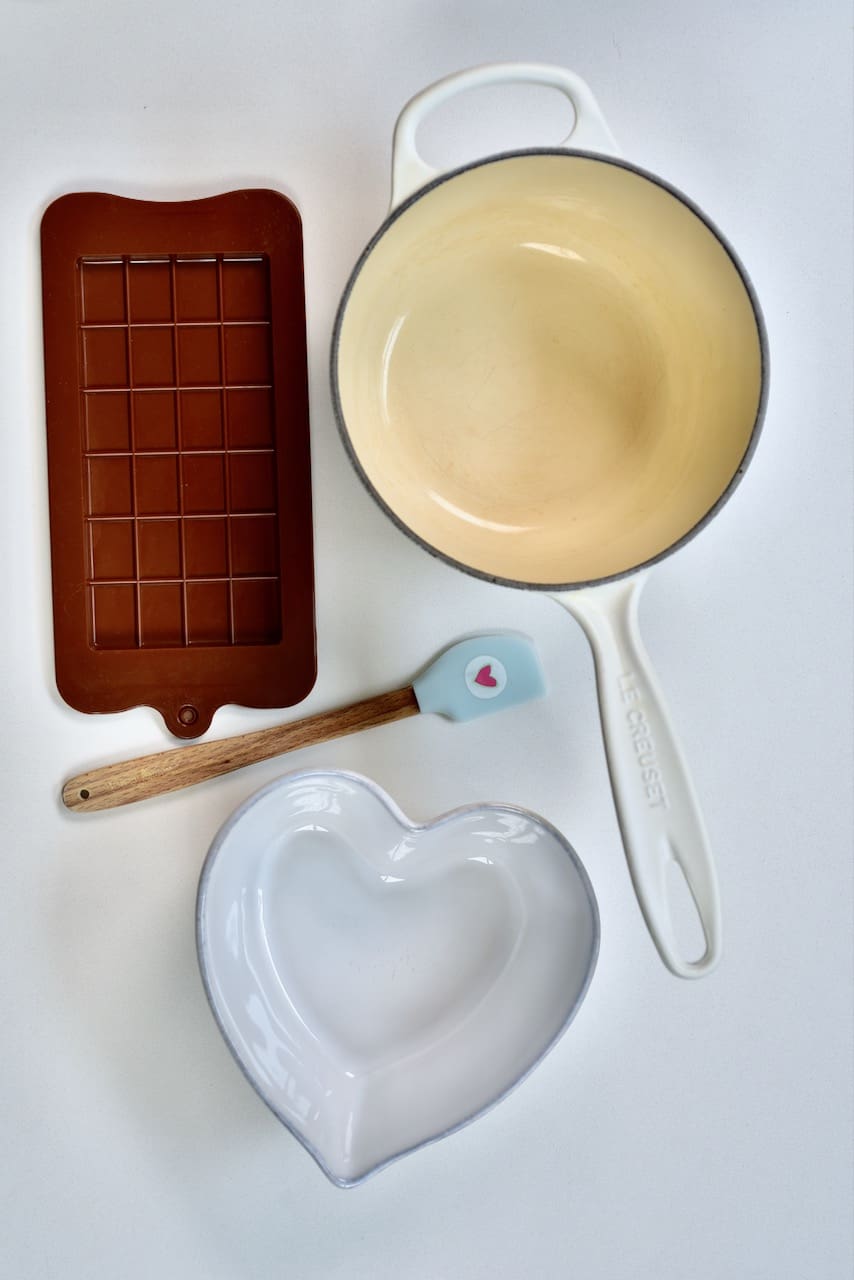
Use a silicone spatula, too, or another non-wooden spoon (to avoid the porous material leeching water into the white chocolate and causing it to seize).
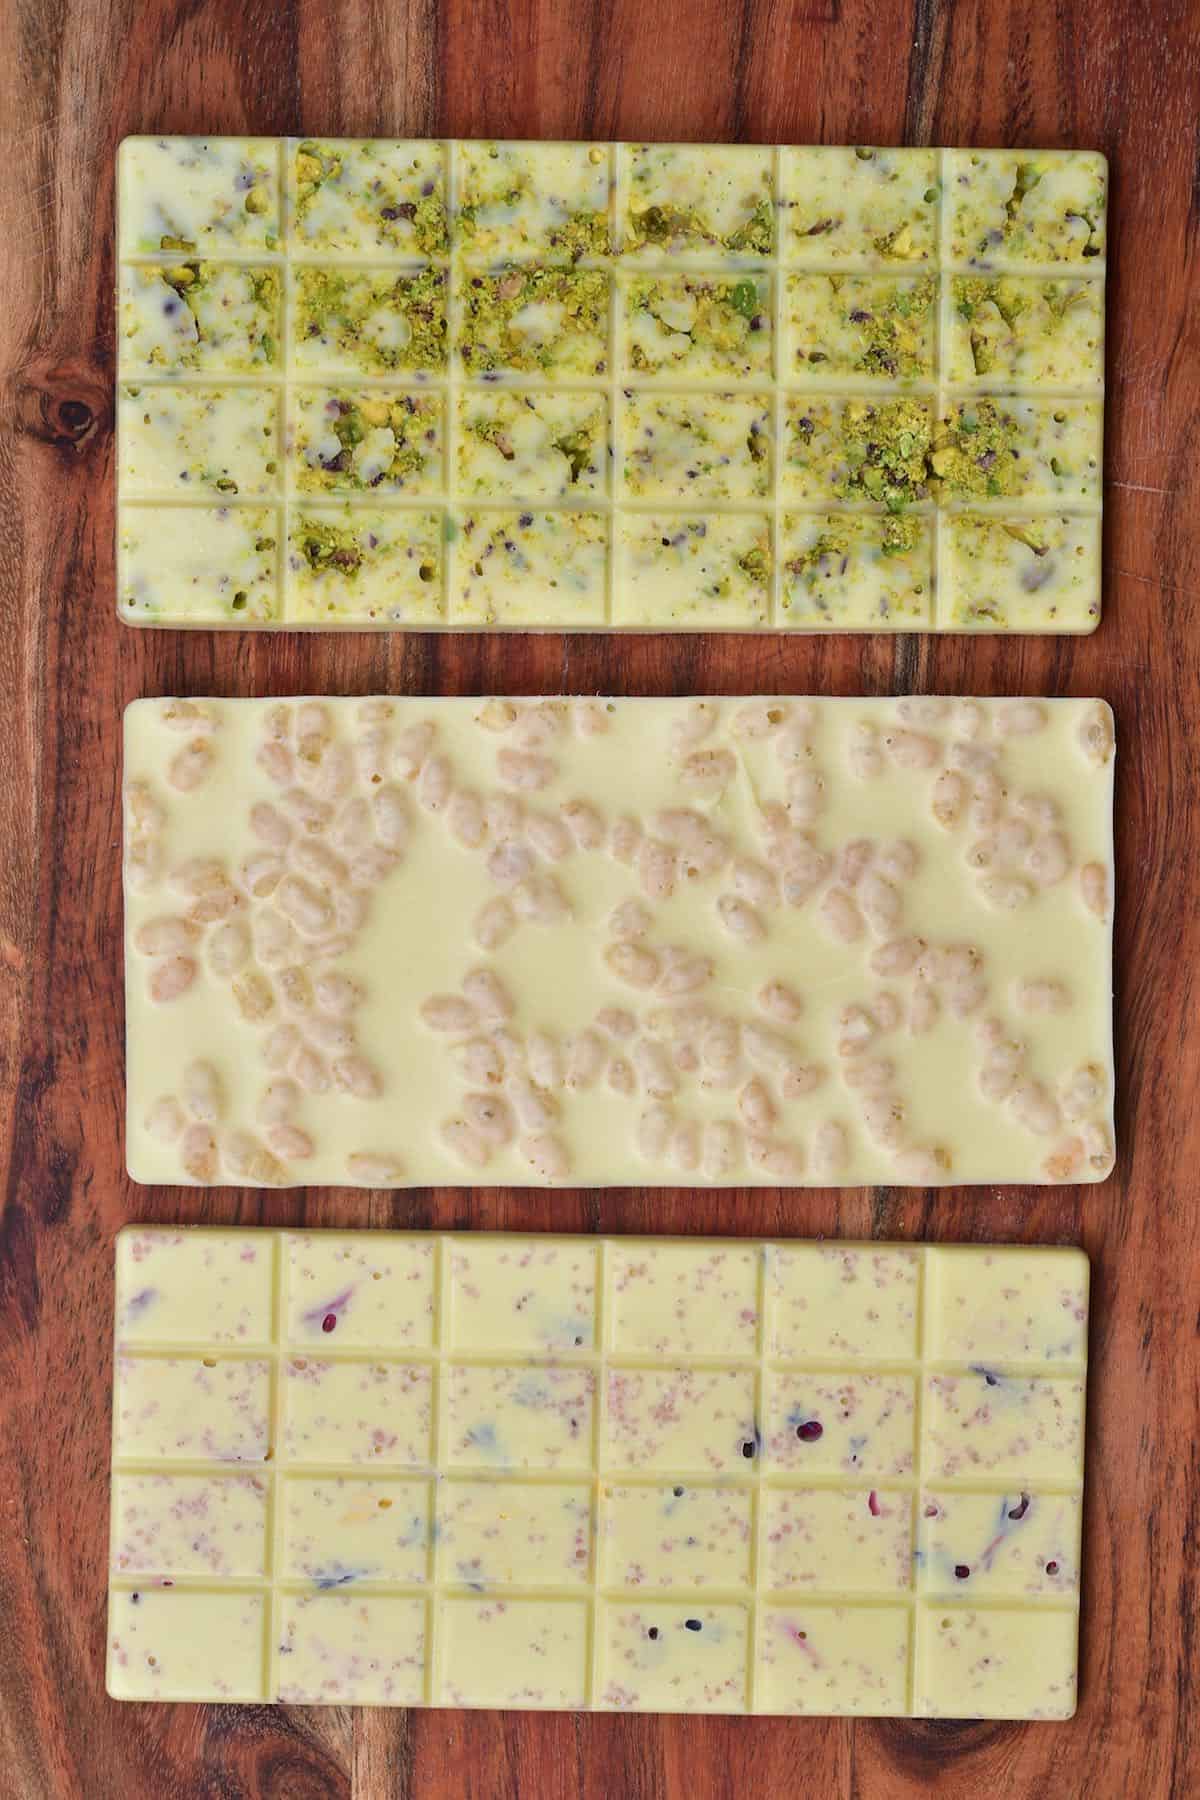
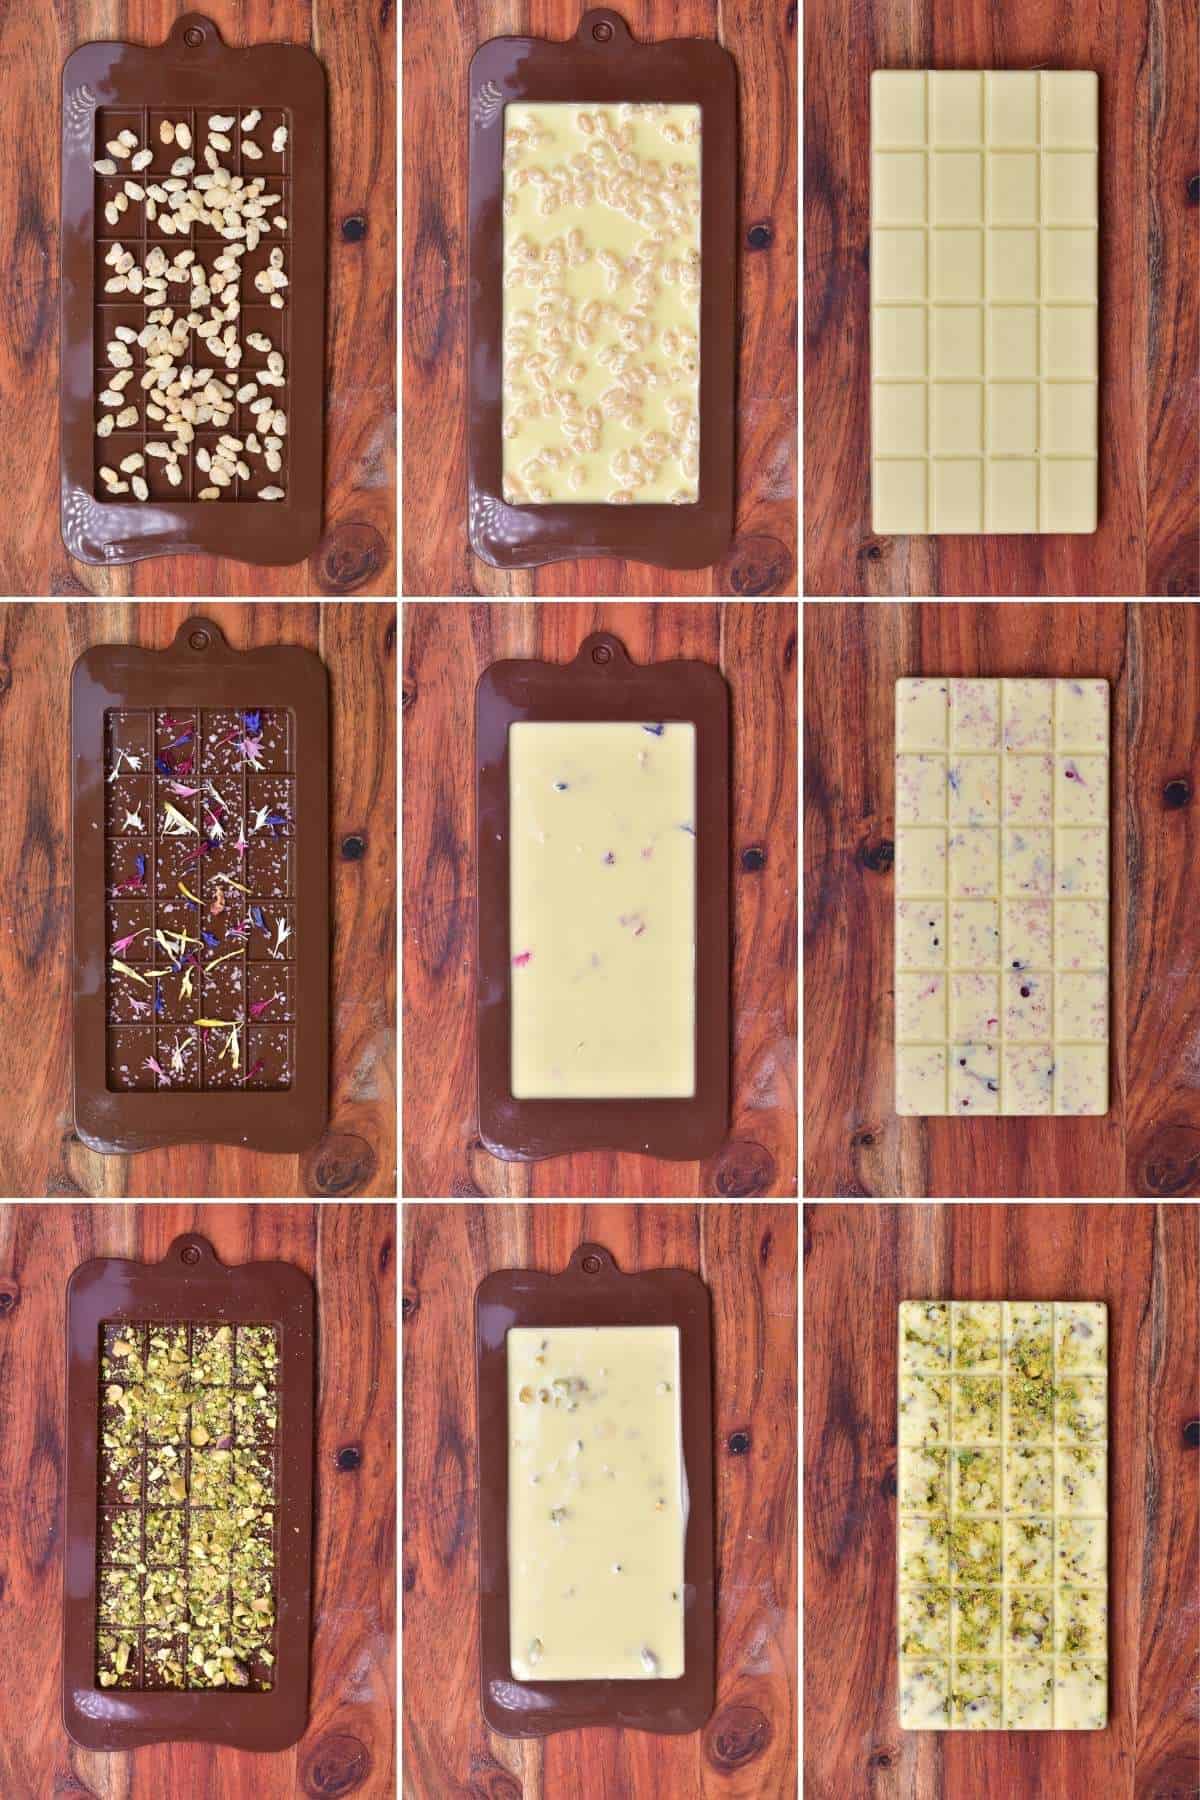
Topping Ideas
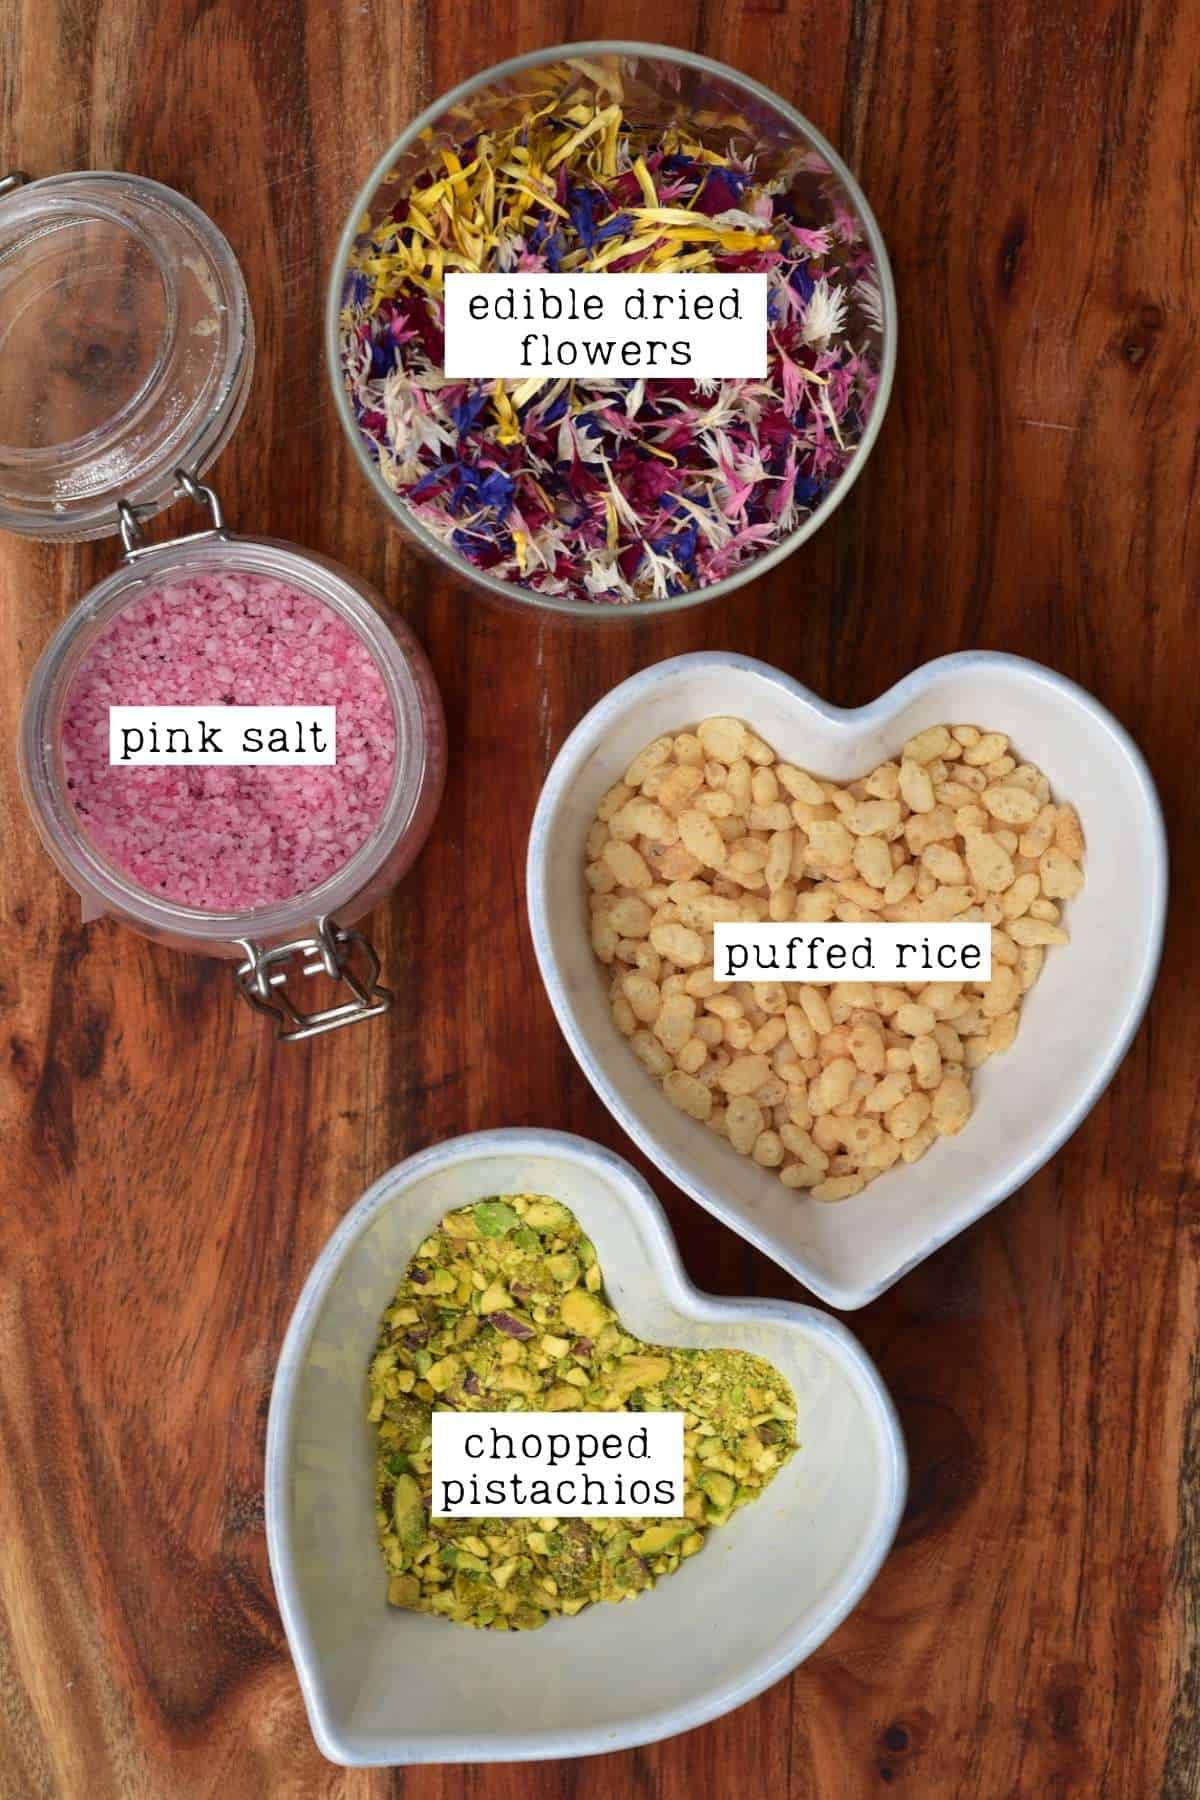
There are hundreds of ways to flavor and top homemade white chocolate. Here are just a few of my most recent experiments.
- Salt – I like using pink salt
- Puffed rice or puffed quinoa
- Chopped nuts – I love adding pistachios but you can add your favorite nut or combination of nuts
- Dried edible flowers
The Method
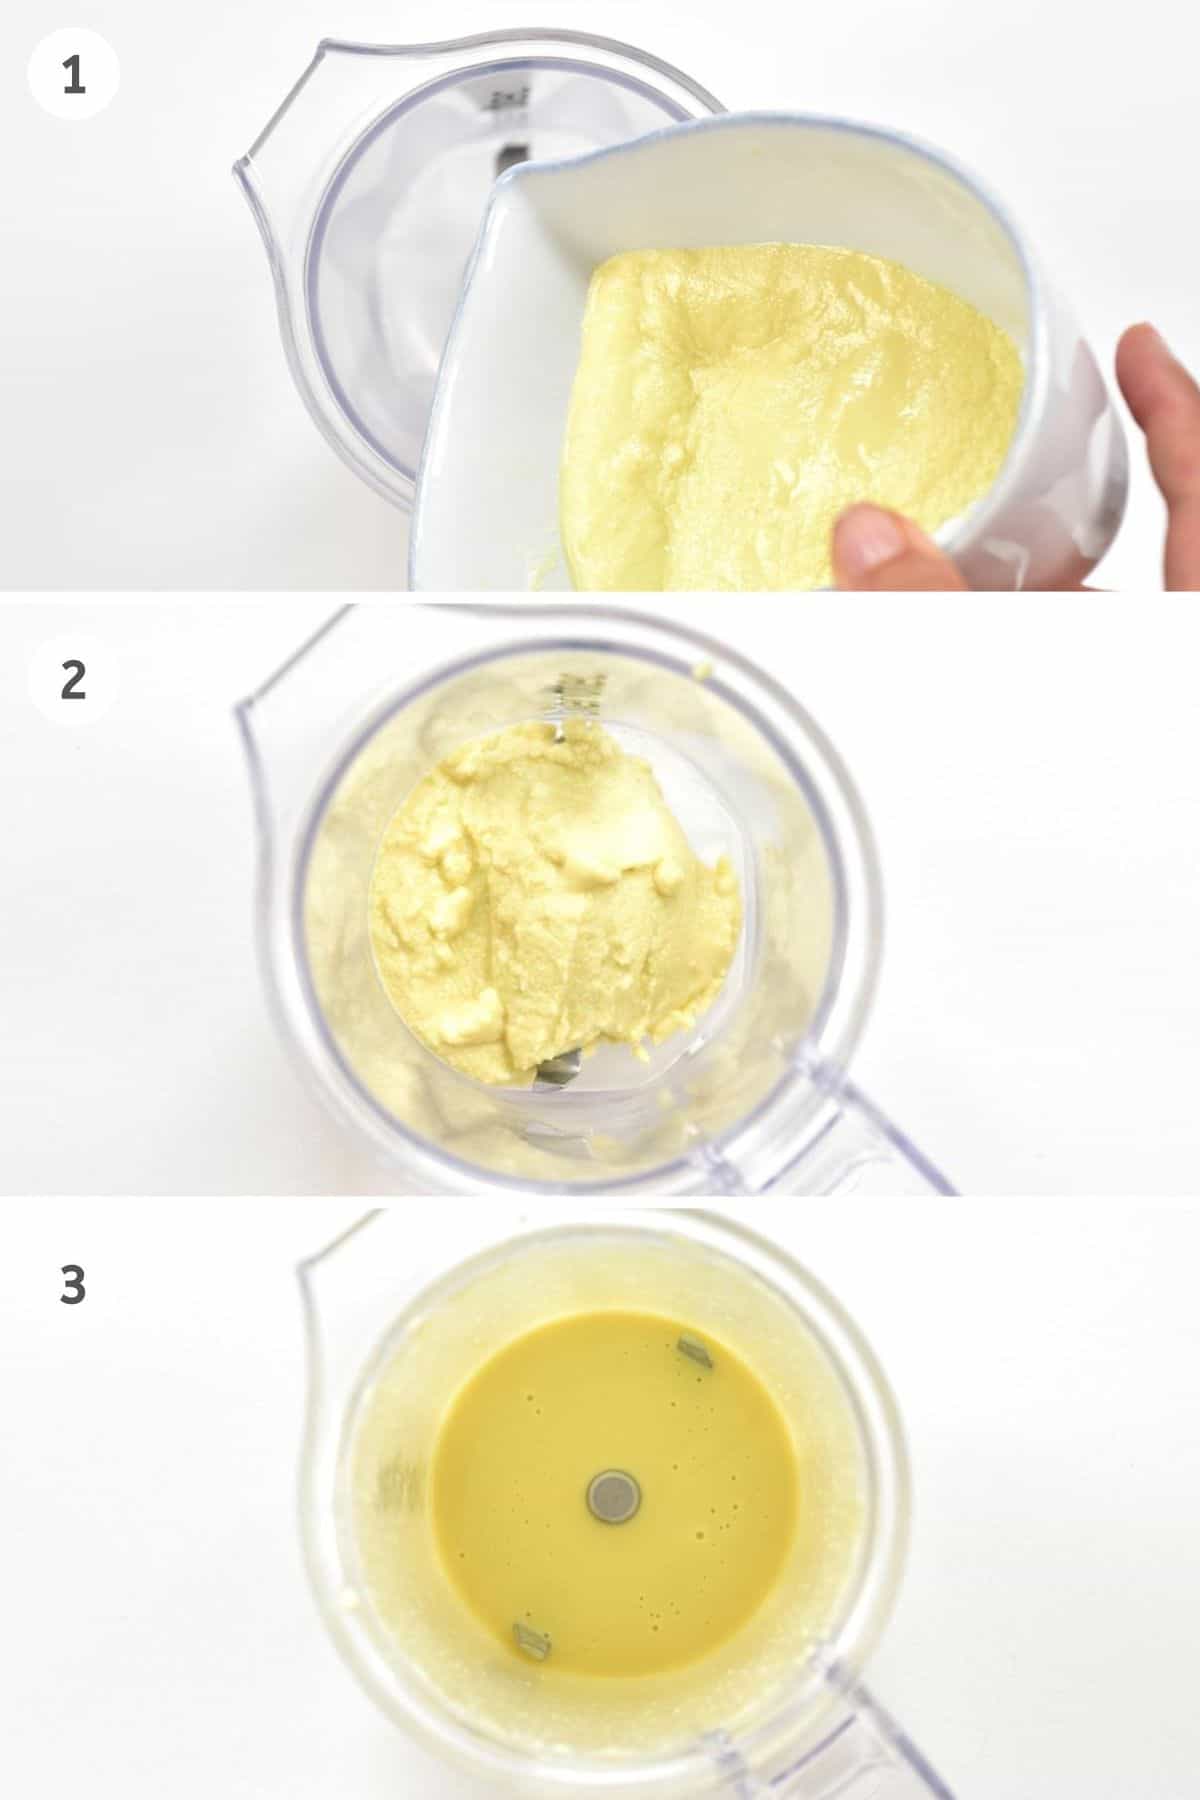
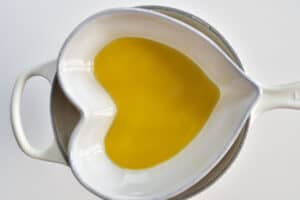
Step 1: Melt the cacao butter
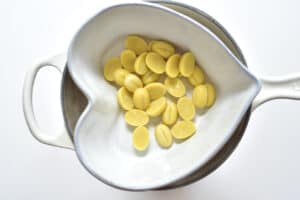
If you have a large piece of cocoa butter, begin by chopping it down to smaller chunks. You can have uneven chunks but the smaller, more even pieces will melt faster and more evenly.
Set up a double boiler by placing a heatproof bowl over a pan of water. Make sure that the water isn’t touching the bottom of the bowl and set over medium-low heat. Bring to a gentle simmer – don’t boil as this increases the risk of scorching and water getting into your chocolate, which may cause it to seize.
Add the cacao/cocoa butter to the bowl, and it will melt without scorching or reaching temperatures that are too high. Stir or whisk* the butter often during this process to ensure even melting.
*It’s best to use silicone spatula or whisks for this, rather than wooden spoons. Wood may hold moisture and affect the chocolate.
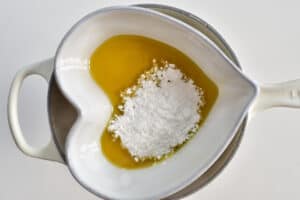
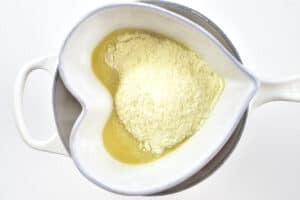
Step 2: Add the remaining Ingredients
Once melted, add the powdered sugar to the bowl. It’s best to sift this into the bowl if you think it may have some lumps, as this can affect the final texture of the chocolate. Stir well to dissolve the sugar dissolves.
Then add the milk powder. Again, you can sift it into the bowl to avoid any lumps.
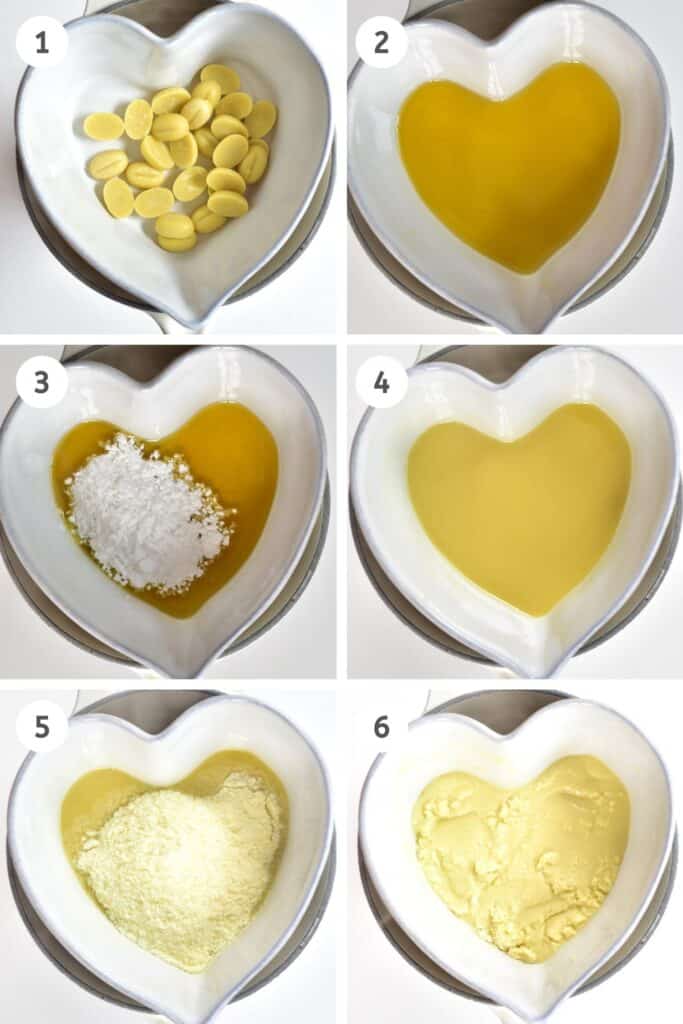
Turn off the heat before removing the bowl from the pan.
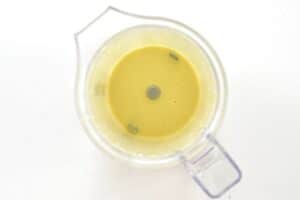
Step 3: Grind the chocolate
Next, to make extra smooth white chocolate and avoid grainy texture, I recommend pouring the mix into a food processor/blender and blending for 2-3 minutes. Now you are ready to move to the next step.
Alternatively, if you have a chocolate grinder (chocolate melanger), you can let it run for several hours (or overnight) to grind the chocolate. This will grind the particles within the chocolate into tiny tiny microparticles until they are no longer discernible by the human tongue – like commercial chocolate.


If you want to add any additional flavorings, then it’s usually best to do this once the heat is off. You can also sprinkle ‘toppings’ directly into your chocolate molds.
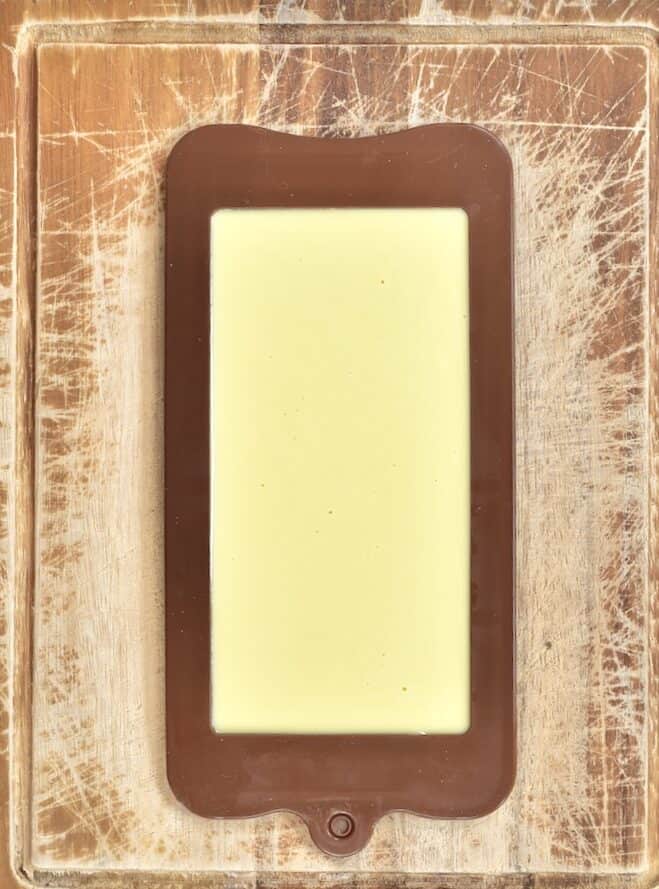
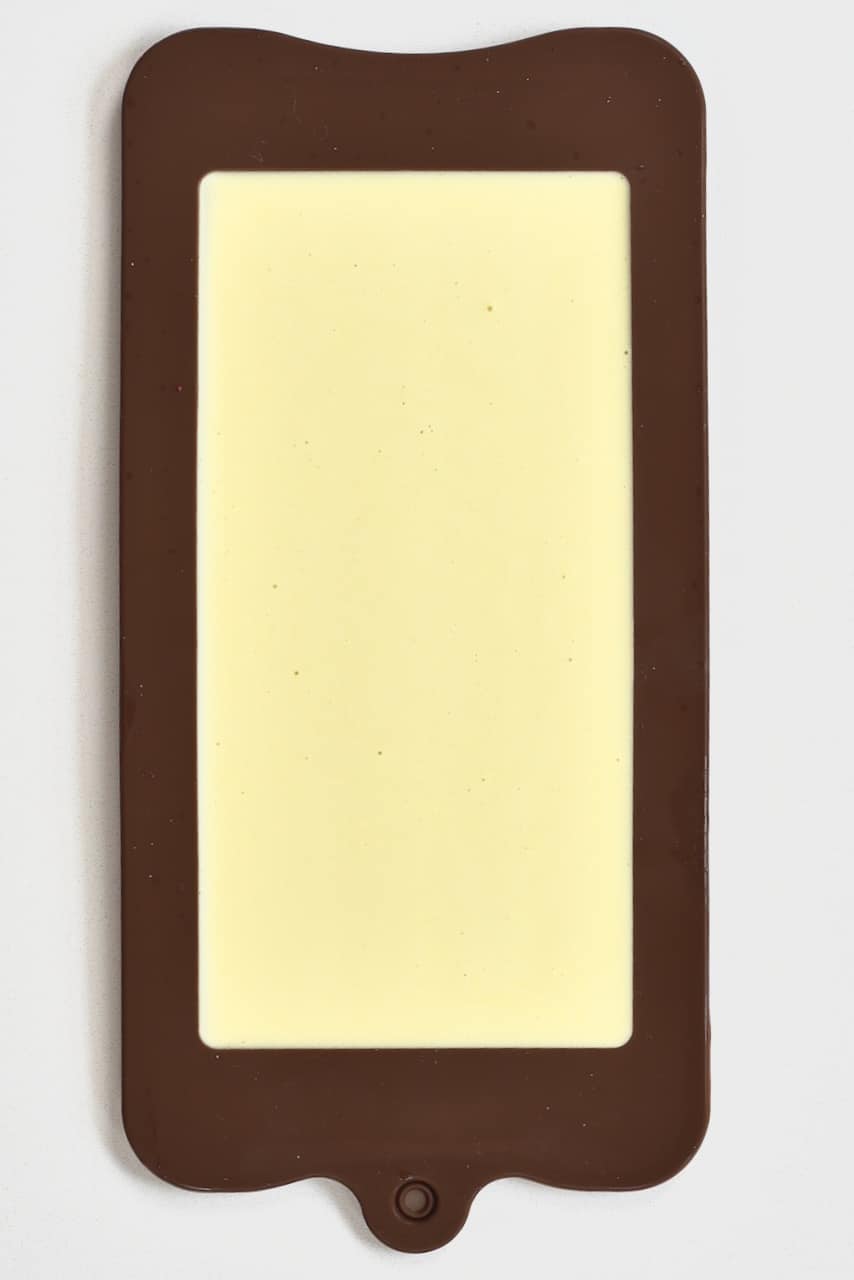
Step 4: Mold the white chocolate
Pour the white chocolate into your mold(s) of choice and place it in the freezer to set. This should only take 20-30 minutes, and then they can be transferred to the fridge (or kept in the freezer).
I prefer setting it in the fridge for about 2 hours.
How To Store
Because this homemade white chocolate is untempered, I keep mine stored in the fridge. It will last for two weeks in the fridge. Alternatively, keep them stored in the freezer for 2-3 months (if they last that long!).
How to flavor white chocolate
Once you have the base white chocolate recipe sorted then you’re finally able to start experimenting. There are just a few rules when it comes to flavoring white chocolate, otherwise, you have tons of options!
First, avoid all water-based ingredients – this includes water-based coloring and flavorings. These can cause the chocolate to seize. This can be the case with alcohol-based flavorings too (like vanilla extract), though I’ve had some luck with the extract before.
I recommend using oil-based flavorings – also referred to as ‘chocolate flavoring’ or ‘candy flavoring’. Alternatively, you can also use powdered ingredients including spices (cinnamon, ginger, etc.) as well as freeze-dried fruit powder, etc.
As is the case with all chocolate, you can also mix in or top the homemade white chocolate with tons of different ingredients including crushed biscuits and sweets, freeze-dried fruits, coffee beans, etc.
White Chocolate Flavor Variations
Here are just a few flavor variations to get you started with your experimentation. Whether you want to make vegan white chocolate, sugar-free white chocolate, etc. There are ways to adapt this recipe to your liking.
- Raspberry rose: sprinkle freeze-dried raspberry into the mold, optionally with some edible rose petals, then flavor the white chocolate with rose and raspberry flavorings (optionally with some freeze-dried raspberry powder in the chocolate for a pink bar)
- Eton Mess: add pavlova, freeze-dried strawberry, and optionally some pink sprinkles or pink pearls to the bottom or top of the chocolate mold. Optionally swirl some strawberry-flavored chocolate into the plain white chocolate (more a marbled effect).
- Oreo Slab: add ground Oreo biscuits (filling not included) to the melted chocolate mixture and top with some crushed whole Oreos and, optionally, some chocolate balls/pearls.
- Peppermint: add a few drops of peppermint oil flavoring to the chocolate and top with some crushed peppermint candies.
- Orange raspberry: Add some finely diced candied orange slices (dried- not in liquid) to the white chocolate bar along with freeze-dried raspberry pieces.
You can also easily top the white chocolate bars with all sorts of crushed/ chopped candy bars and commercial candy/chocolate/biscuits, etc.
Further Notes & Variations
- Some cocoa butter is sold with cosmetic uses in mind and may not be food-safe. Be sure to buy food-safe cocoa butter for this recipe
- This white chocolate recipe sets very solid. However, as it is untempered chocolate, it is best stored in the fridge.
- If you don’t want to blend the chocolate mixture, then it’s VERY important to sift the dry powders into the melted cacao butter.
- To temper the white chocolate, use one of these chocolate tempering methods. Once tempered you can use the chocolate for truffles and bonbons and even store it at room temperature.
- Reduce the amount of milk powder used for a less ‘rich’ white chocolate.
- If, at any point, your chocolate seizes then slowly add a little additional cacao butter or vegetable shortening (1tsp at a time) and it should help bring it back together.
More chocolate tutorials
- How To Make Milk Chocolate
- How To Make Healthy Dark Chocolate
- Homemade Filled Chocolates (Vegan Chocolate Candy)
- How To Temper Chocolate (Multiple Methods)
- Simple Hot Cocoa Recipe (+ Hot Chocolate Bar Ideas)
- How to make chocolate – From bean to bar!
If you use this method for how to make white chocolate, let me know your thoughts and questions in the comments. I’d also really appreciate a recipe rating and would love to see your recreations – just tag @AlphaFoodie.
How To Make White Chocolate
Equipment
- Stone Wet Grinder optional
Ingredients
- 1.4 ounces cacao butter
- 1.4 ounces milk powder (for vegan white chocolate use powdered coconut milk or soy milk)
- 0.7 ounces white powdered sugar
Instructions
- If you have a large piece of cocoa butter, chop it into smaller pieces. You can have it in uneven chunks, and I'll often do it this way, but the smaller, more even pieces will melt faster and more evenly.

- Set up a double boiler by placing a heat-proof bowl over a pan of water. Make sure that the water isn't touching the bottom of the bowl and set over medium-low heat. Bring to a gentle simmer – don't boil as this increases the risk of scorching and water getting into your chocolate which may cause it to seize.
- Add the cocoa butter to the bowl to melt without scorching or reaching temperatures that are too high. Stir or whisk* the cocoa butter often during this process to ensure even melting.
- Once melted, add the powdered sugar and stir well to dissolve it.
- Then add the milk powder and stir to incorporate.
- Transfer the melted whited chocolate to a blender/food processor and blend to make the mixture smooth.**Alternatively, if you have a chocolate grinder ( chocolate melanger), you can let it run for several hours to grind the chocolate. This will grind the particles within the chocolate into tiny tiny microparticles until they are no longer discernible by the human tongue – like commercial chocolate.
- Pour the mixture into the mould/s of your choice and leave in the fridge or freezer to set. You can then transfer the chocolate to an airtight container in the fridge (or keep it in the freezer).
Video
Notes
- Some cocoa butter is sold with cosmetic uses in mind and may not be food-safe. Be sure to buy food-safe cocoa butter for this recipe
- This white chocolate recipe sets very solid. However, as it is untempered chocolate, it is best stored within the fridge.
- If you don’t want to blend the chocolate mixture then it’s VERY important to sift the dry powders into the melted cacao butter.
- To temper the white chocolate, use one of these tempering chocolate methods. Once tempered you can use the chocolate for truffles and bonbons and even store it at room temperature.
- Reduce the amount of milk powder used for less “rich” white chocolate.
- If, at any point, your chocolate seizes then slowly add a little additional cacao butter or vegetable shortening (1tsp at a time) and it should help bring it back together.
Nutrition
Nutrition information is automatically calculated, so should only be used as an approximation.


Thanks for the instructions. If you break the bar into chunks for cookies would the chunks hold their shape for the most part or will they dissolve into the cookie while baking if not tempered?
Hi Shana,
They will melt while baking. I hope this helps.
Hi,
I need white chocolate cocoa butter (at least 30% cocoa) and I have cocoa butter at home. Can you help? I need 26 oz for a cake recipe
Hi Jessica,
This white chocolate recipe yields a 3.5 oz chocolate bar. If you need 26 oz white chocolate to make a cake, you’d have to multiply this recipe by 7 or 8. I.e you’d need about 10 oz cacao butter, 10 oz milk powder, 5 oz white powdered sugar.
I hope this helps.
Hello! I made this for the first time and it came out extremely gritty. Its as if it is filled with sand. Any idea why this would happen?
Thanks!
Hi Nikki,
For a smooth result, you have to grind the white chocolate for some time before you pour it into the molds. It’s also best to use powdered sugar. Stay tuned, there’s an update coming with lots of tips for how to achieve super-smooth chocolate.
Are these good for cakes pops?
Hi there,
You can certainly use it to make cake pops 🙂
can you use cocoa butter wafers or does if have to be cocoa butter only
Hi, Kadelyn. Yes, you can use cacao butter wafers.
definitely kind of grainy after adding the powder milk. did not get smooth after powder milk. not sure why. was linguist and smooth before that. hard to food process such a small amount.
Hi Bonnie,
For a smooth result, you have to grind the white chocolate for some time before you pour it into the molds. This can also be done with a pestle and mortar. Stay tuned, there’s an update coming with lots of tips for how to achieve super-smooth chocolate and a new post about tempering as well.
Hi there! I tried your ratio using a scale and it seemed way off. Everything become clumpy powder in the double boiler. I’m using nonfat milk powder and cacao butter since those were all I could acquire.
Could one of those be the issue? I mixed more cacao into it and it became more like the photo.
Also, I then blended and froze it, but the resulting bar had quite a grainy texture. I used a vitamix blender- do I need a food processor or is this just simply the way untempered chocolate tastes? Perhaps I need to temper it….
Hi Roby, I’m so sorry you struggled. Did you use a liquid sweetener or did it get in contact with any liquid? That could have caused your chocolate to seize.
How would I temper this?
I don’t usually temper this and it still turns out great. To temper the ready chocolate, it’s very convenient to have a thermometer. The process involves heating up ⅔ of the chocolate to about 110ºF, then adding the rest to melt and letting everything cool down to about 85ºF, then heating it again to about 85ºF. I am working on a blog post describing the process in detail as well as adding a lot of tips and best practices.
How would you temper this, at what stage? the cocoa butter by itself, or is it something to be done to the whole chocolate once it’s made and/or set? Thanks! 🙂
I don’t usually temper this and it still turns out great. To temper the ready chocolate, it’s very convenient to have a thermometer. The process involves heating up ⅔ of the chocolate to about 110ºF, then adding the rest to melt and letting everything cool down to about 85ºF, then heating it again to about 85ºF. I am working on a blog post describing the process in detail as well as adding a lot of tips and best practices.
Can I replace the coconut powder milk by coconut milk ?
Thank You
You can replace it with coconut milk “Powder” or almond milk powder. It’s best not to add watery ingredients when making white chocolate that’s why milk powder is normally used! hope that helps
So easy! So good! And such a good idea to use already-smooth powdered sugar instead of fiddling around with caster or granulated. I only had powdered buttermilk on hand, which is a bit of a different flavor, but not hugely so, and also less grainy than any of the regular powered milk I’ve seen so I used that and I thought it came out great! I went with the added vanilla extract option and also sprinkled on some dried mulberries, which isn’t nearly as esthetic as your suggestions, but a favorite flavor of mine 🙂 And! I love the encouragement to skip the (tedious!) tampering process, which I don’t think would have added much here anyway. I have a high power blender, so next time, I might try that on the powered milk to see if that helps the texture, in the absence of a chocolate grinder. This is an important thing to sort out, so I guess I’ll just have to make your recipe again soon. (Yay!)
Thank you for your feedback, Elizabeth. So glad you liked it and played around with the recipe. 🙂
How to infuse with coffee? Also, store bought dried milk is OK? Thanks, G
Hi, store bought milk powder works perfectly. Yes you can but I would recommend adding dried ground coffee (don’t add wet coffee inside).
how much chocolate does it make?
Hi Clara,
It yields about 100 grams of chocolate (3.5 ounces). For me, because of the size of the mold I used, it was 1 chocolate bar. I hope this helps.
I’m allergic to dairy, what can I use instead of milk powder,
Hi Judy, you can use coconut milk powder (I have a recipe for that coming soon to the blog), stay tuned 🙂
Can I use vanilla silk almond milk instead of regular milk?
Hi Shira,
The recipe calls for powdered milk. You can replace the powdered milk with coconut milk powder or almond milk powder. It’s best not to add watery ingredients (like regular milk) when making white chocolate that’s why milk powder is normally used! I hope this helps.
Do you think this would work to fully coat strawberries?
Hi Daniela,
Yes, it should work! Before the chocolate has set, dip the strawberries in it. If the strawberries were chilled in the fridge for a bit, it would help with setting the chocolate on them faster. Please note that this recipe yields about 100 gr/3.5 oz chocolate, so you might need to make more if you are coating lots of strawberries. I hope this helps.
I was wondering you said to avoid graininess to run it in the food processor for 2-3 min. Do you mean while its melted or before it melts?
Sorry LOL i found the answer to my question when i re-read your recipe
Glad you are enjoying the recipe!
Hi Kelly,
It’s once it’s melted 🙂
Hello, thanks for the recipe! I tried adding non alcoholic vanilla flavoring after leaving it in the food processor for a few minutes and it seized immediately. How much should I use? I guessed and used 1/2 teaspoon, but have no idea if that was an appropriate amount. Also, is that the best time to add it?
Thanks!
Hi Mitchell,
Whenever it seizes you can try to slowly add a bit more cacao butter or vegetable shortening (1 tsp at a time) and it should help bring it back together. It’s best to add any flavorings once the heat is off. You can also try using vanilla powder or oil-based flavoring instead.
I hope this helps!