
This post may contain affiliate links. Please read our disclosure policy.
If you love sushi and sweet treats, then you’ll absolutely love this fruit sushi. Combining coconut sticky rice and fresh fruits gives you a treat that is gluten-free, dairy-free, vegan, but also packed with flavor!
If you’ve ever tried sweet rice paper rolls with fruit, then you’ll know that the combination of the sweet, mango, sticky rice and fresh fruits is one to die for. However, this fresh fruit sushi can be prepared in a few different ways and are a wonderful option for impressing friends and family. In fact, this is easily one of my favorite healthy fruit dessert recipes.
This sweet sushi can be made into sushi rolls, balls, and rectangular ‘nigiri’ style logs topped with fresh berries. I also have options for dressings and toppings below.
Plus, this is great for getting the whole family involved. Great to satisfy a sweet tooth without lots of unhealthy ingredients (no candy sushi here!). Let me know in the comments what your favorite fruit and dip combos are!
Want to save this recipe?
The Ingredients

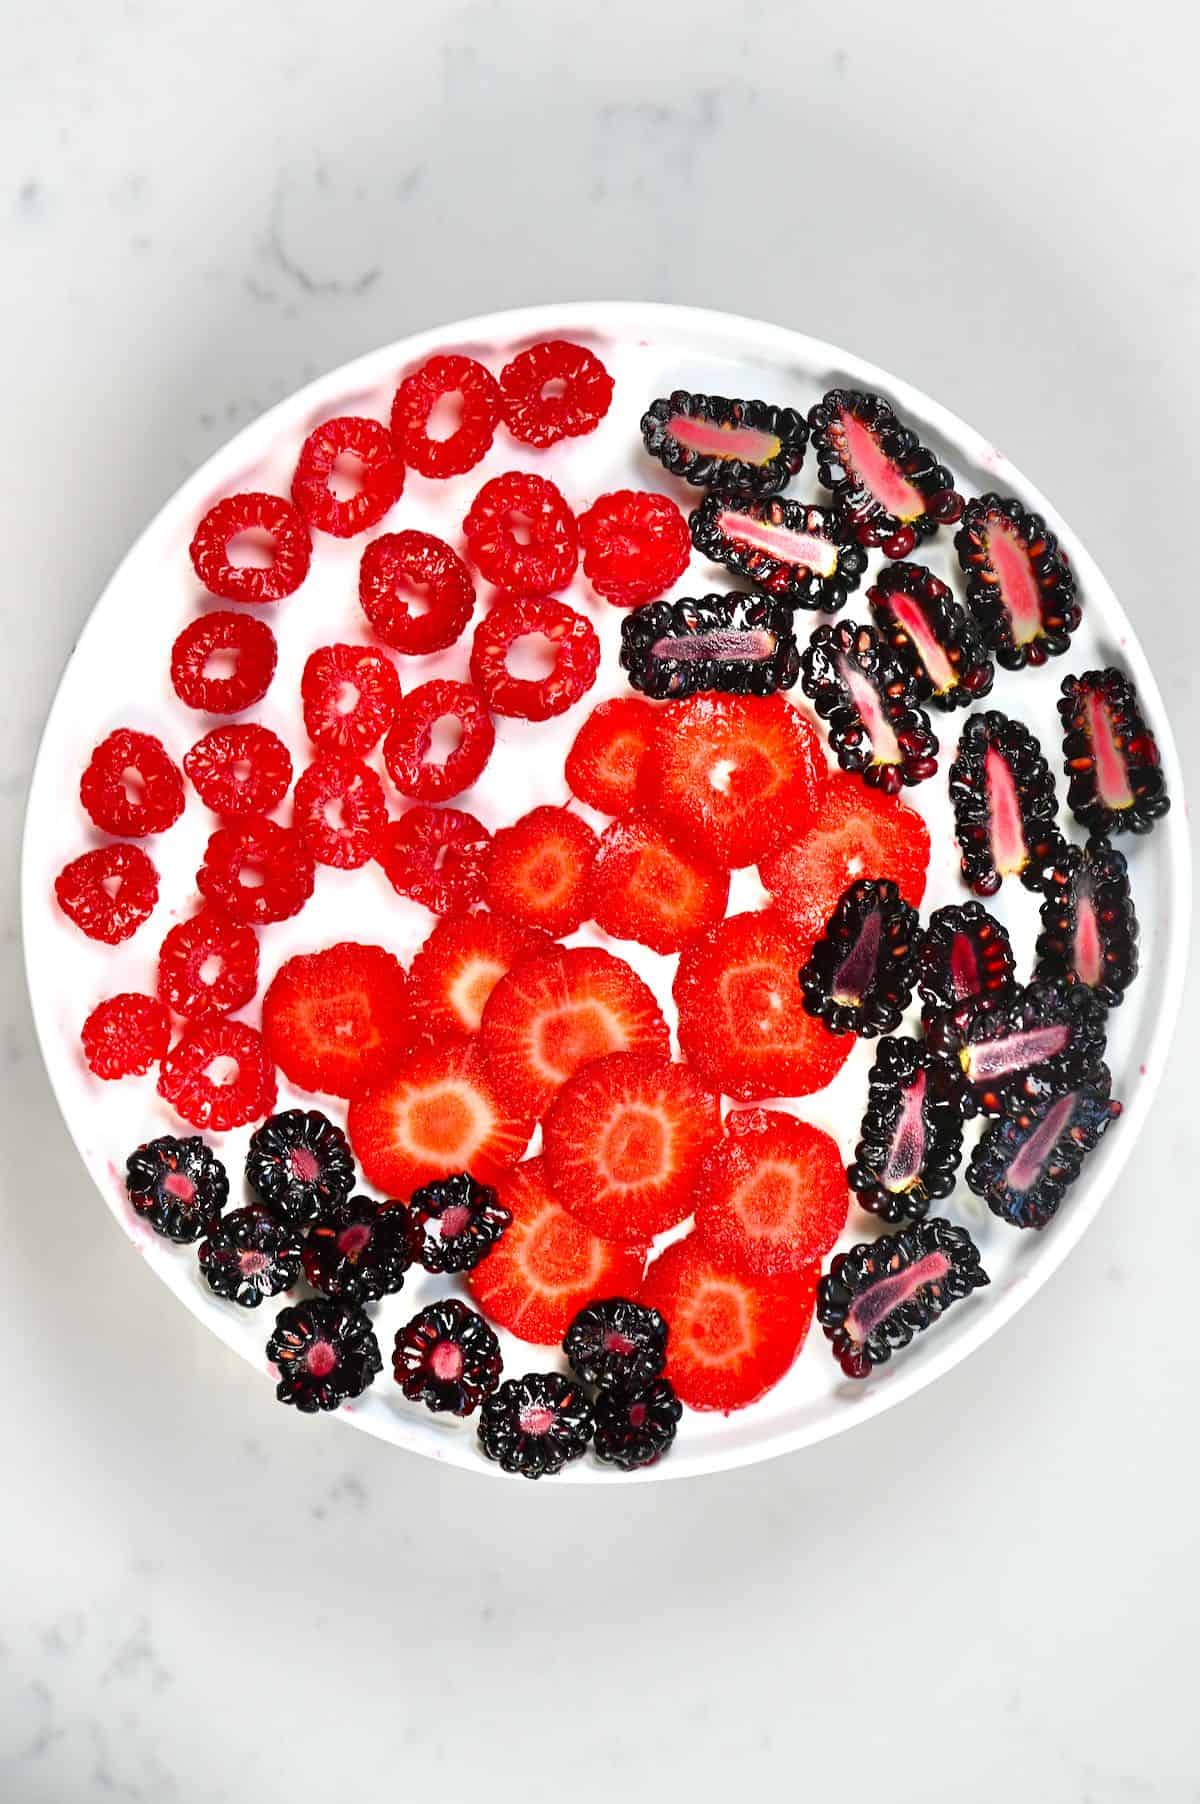
- The Fresh Fruit: My absolute favorite for this recipe is using fresh berries: raspberries, blackberries, strawberries, etc. However, you can also pair these with additional fruits such as kiwi, pineapple, peach, banana, mandarin, mango, etc.
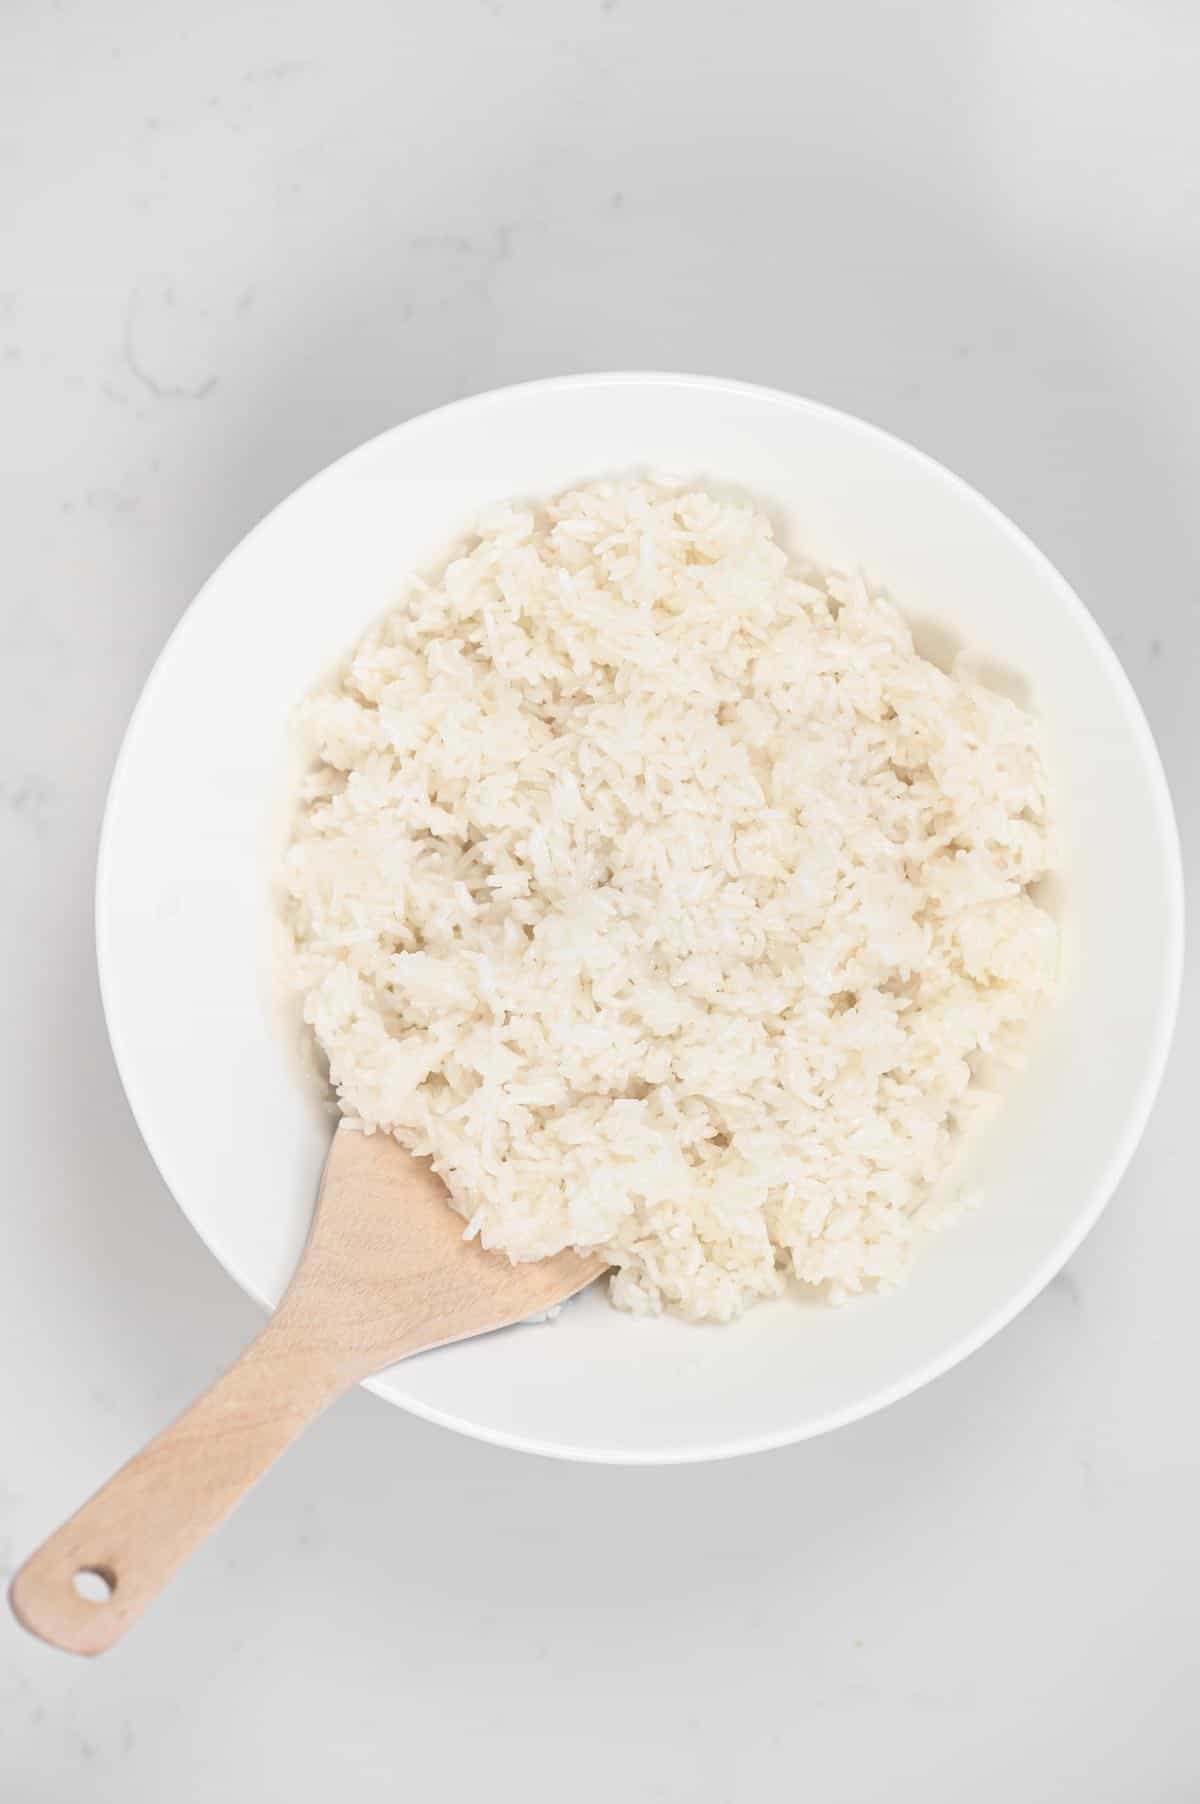
- The Coconut sticky rice: This is the recipe I always use for sweet rice recipes. It is coconut milk based and deliciously sticky and sweet – perfect for sushi making.
- The Sauces: I love to double up on the berry flavors, with a touch of acidity. Thus, these Raspberry Vinaigrette, or strawberry dressing are my favorite options.
– For a sweet sushi sauce, you can melt dark chocolate, milk chocolate, or white chocolate.
– Or even thin some raspberry jam, blackberry jam, or strawberry jam with a little water, until dipping consistency. - Optional Toppings: There are several optional toppings you can add to your sushi including shredded coconut, shaved chocolate, crushed nuts, mint leaves, etc.
Step By Step Instructions
Step 1. Prepare the sweet rice
I always use this sweet coconut rice for my fruit sushi. You’ll need to make it and allow it to cool before carrying on with the recipe. When it’s warm, it can still be fairly soft and won’t form into sushi shapes easily.
Step 2. Prepare the fruit
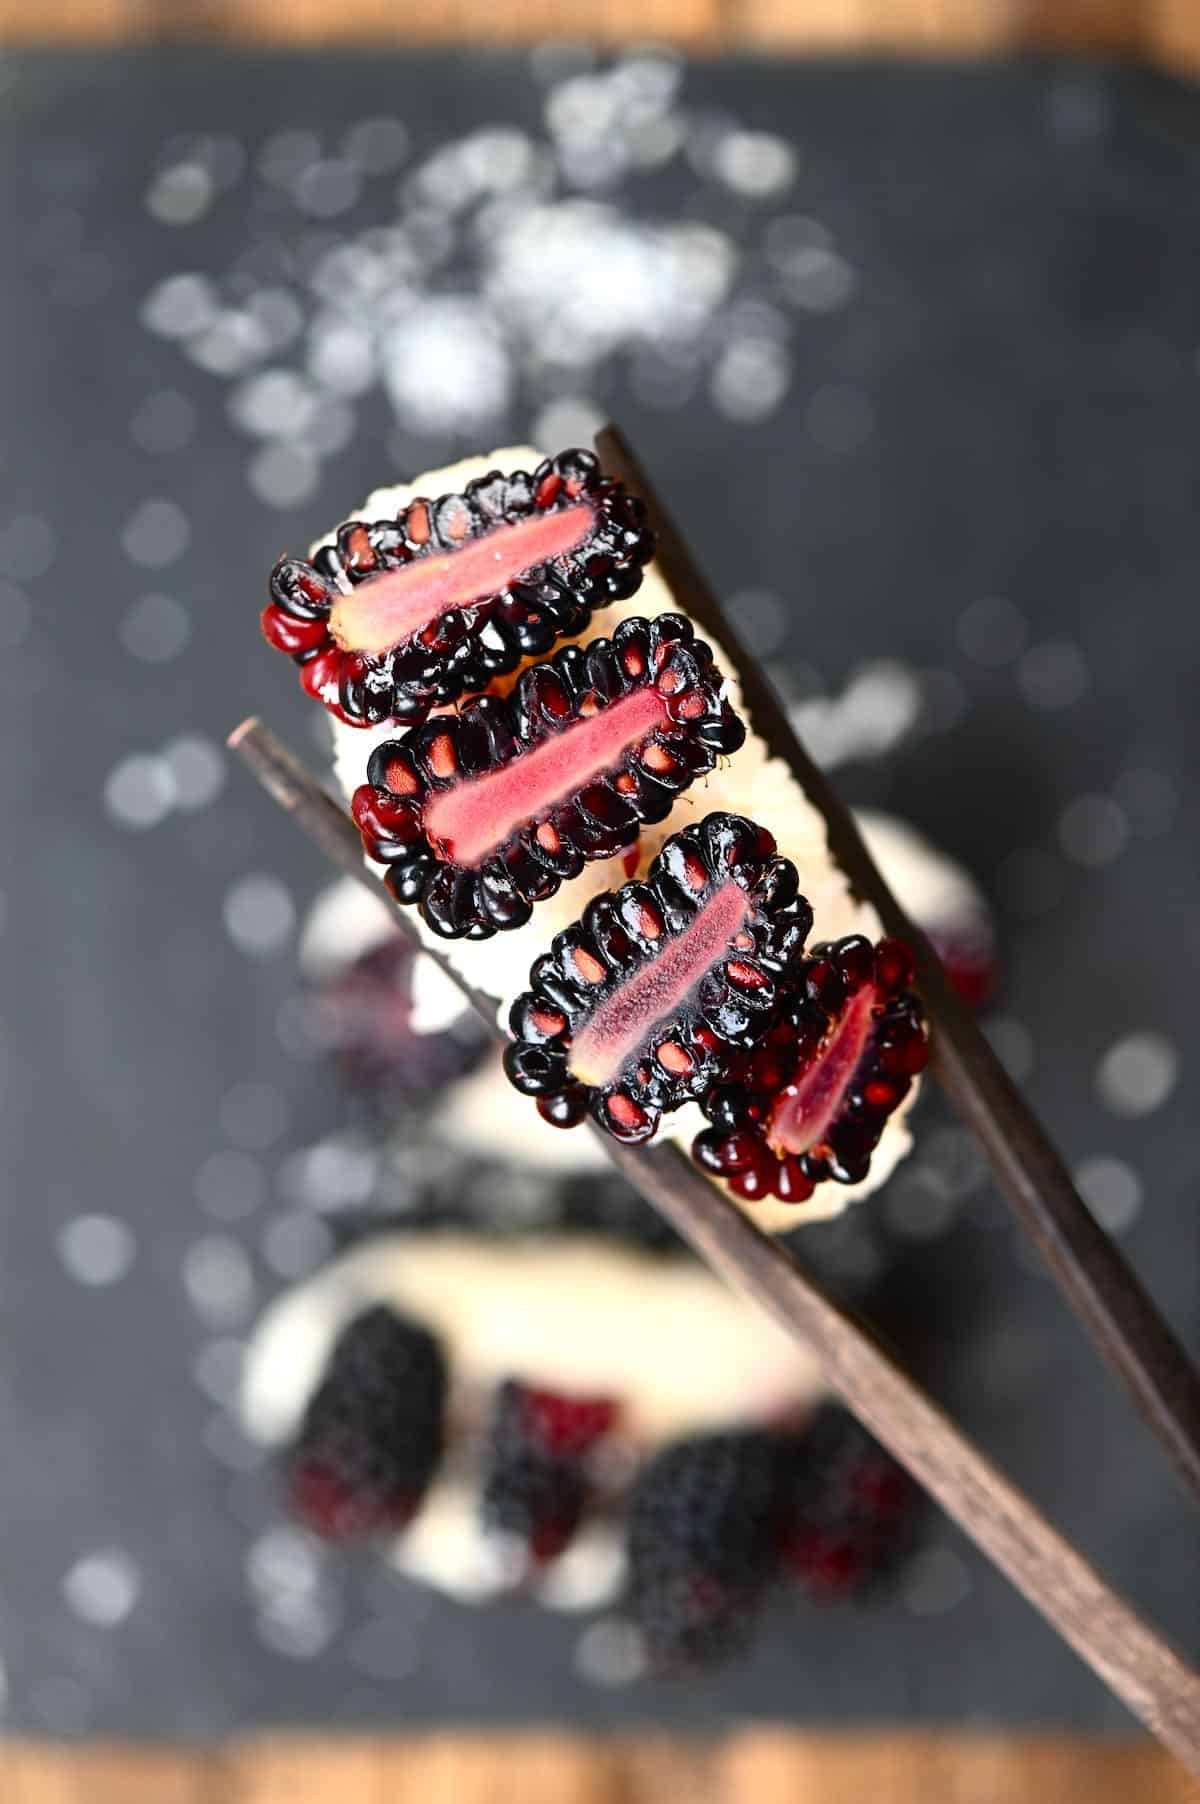
When making sushi rolls: you’ll want to slice long ‘baton’ strips of each fruit that you’re using. Slice blackberries in half, and leave raspberries whole.
For the sushi balls: you’ll need very thin slices of the fruit (using a mandolin or sharp knife); strawberry, kiwi, and mango are your best options here.
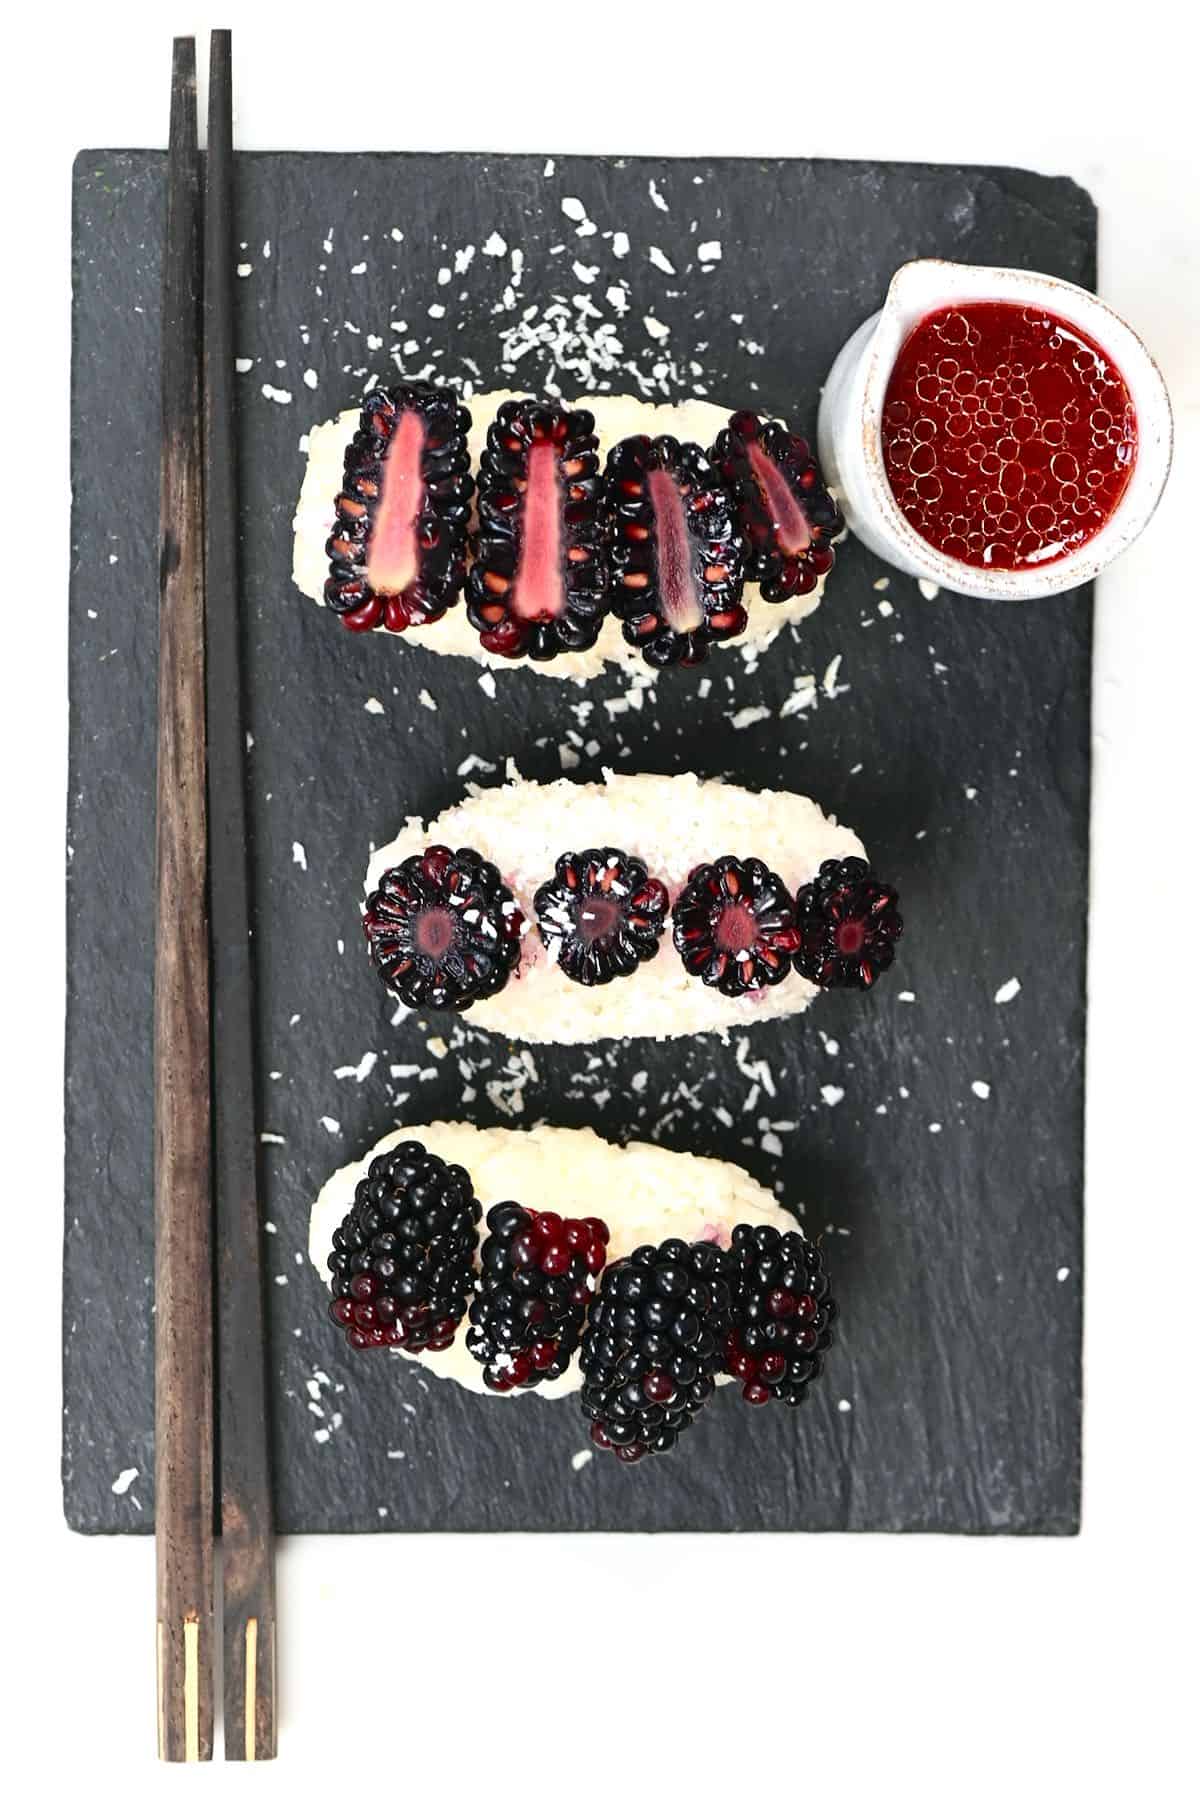
For the rectangular ‘nigiri’: you need to chop your fruit big enough to sit on top of the rice, you can leave the raspberries whole again.
Step 3. Shape the dessert Sushi
For Sushi Rolls: It’s best to use a bamboo sushi mat for this, with a piece of cling film (plastic wrap) over it. However, if you don’t have a bamboo mat then a piece of parchment paper will work (with or without cling film).
Using about 1 cup of rice per roll, spread a thin, even layer of rice over the mat/parchment paper into an ‘almost square’ (one side needs to be slightly narrower so it’s more of a rectangle).
Tip: For rolls that have thin slices of fruit on the outside, lay this on the clingfilm before spreading the rice on top. When you roll it and chill, the slices will form to the sides of the rice.
Around 1.5″ (inches) in from the rice, place a row of your fruit batons. Don’t overfill or it will be very difficult to roll the sushi.
Using the sushi mat, or just your hands, start rolling the sushi forward, into a log shape. press lightly to mesh the two rice edges together and form a complete roll.
Tighten the cling film/parchment paper around the log, twisting tightly at the ends, like a candy wrapper. Then, place in the fridge to chill for at-least an hour.
To slice the roll, release from the parchment paper/plastic wrap (or don’t- if preferred) and, using a sharp knife dipped in water, make quick, firm slices around 1-2″ apart.
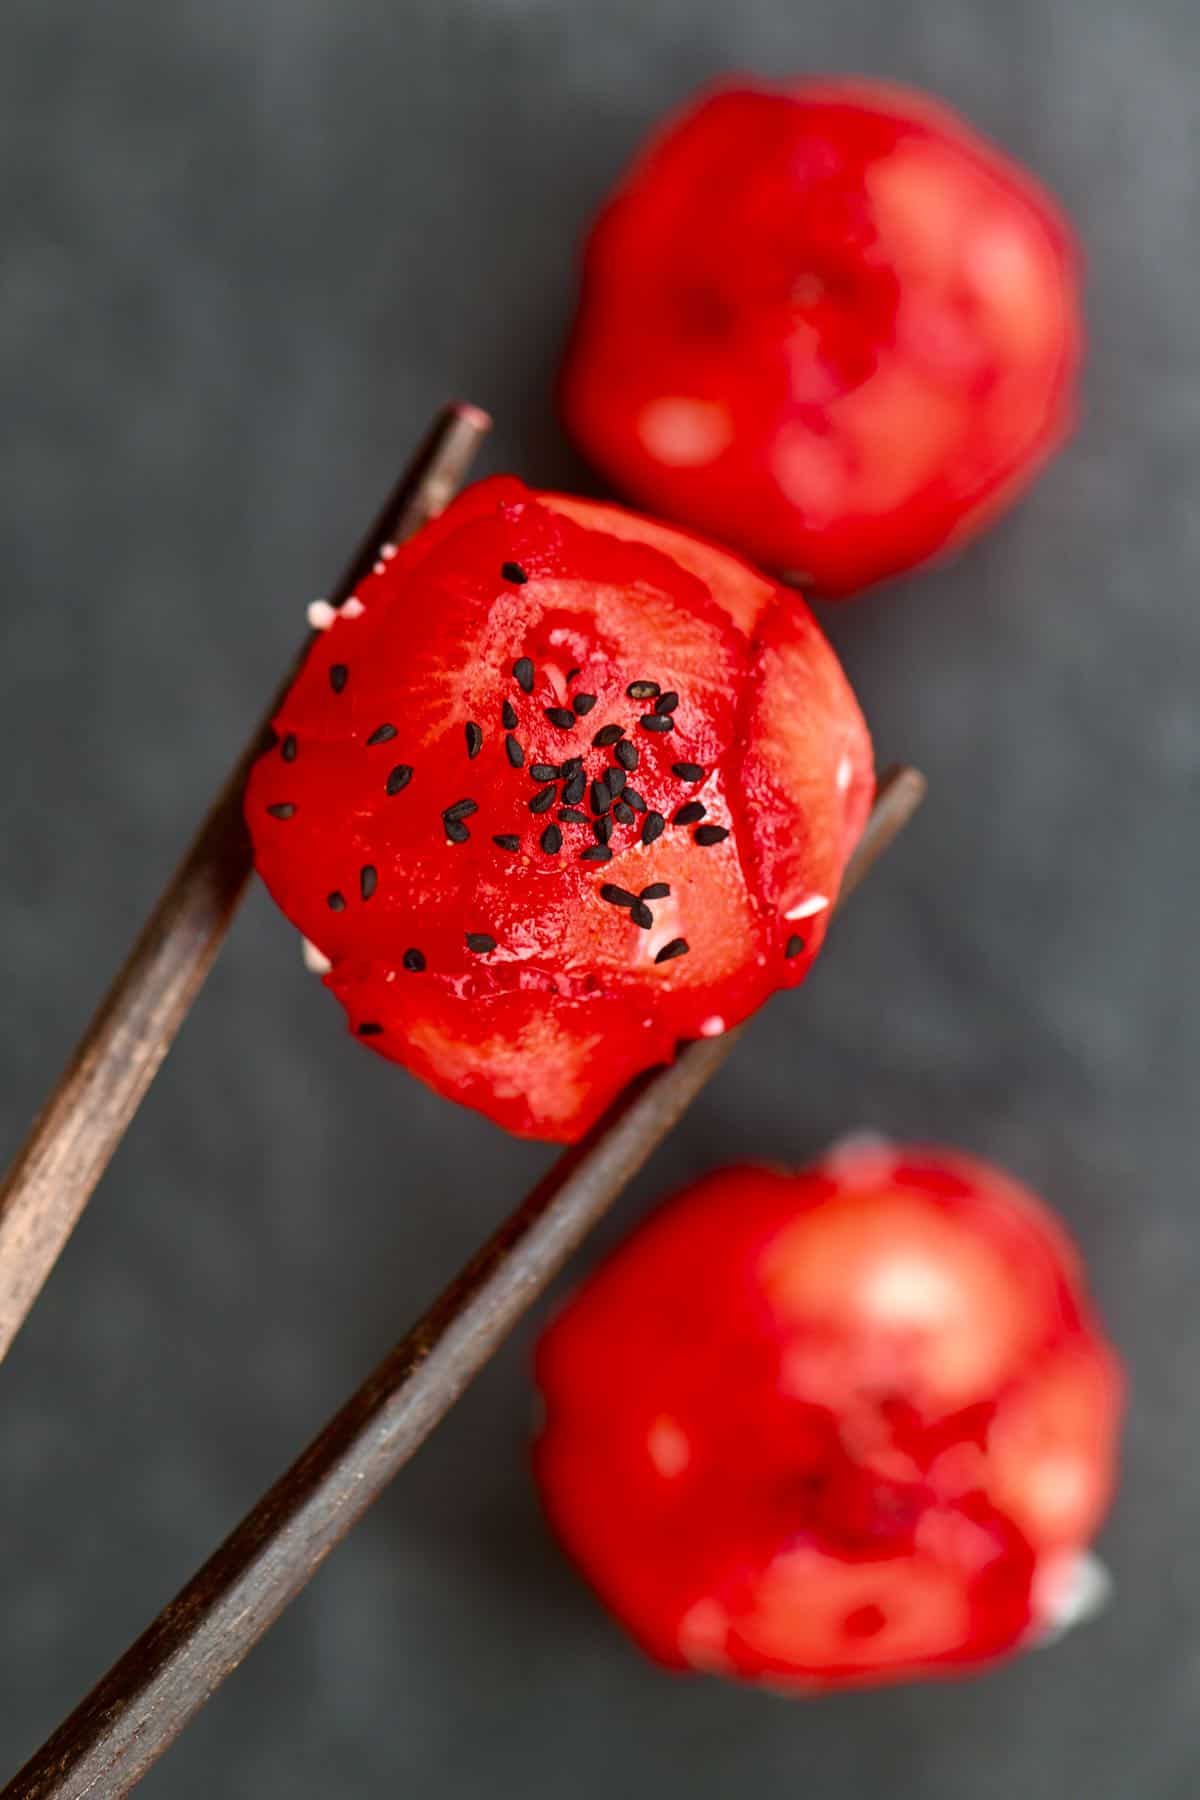
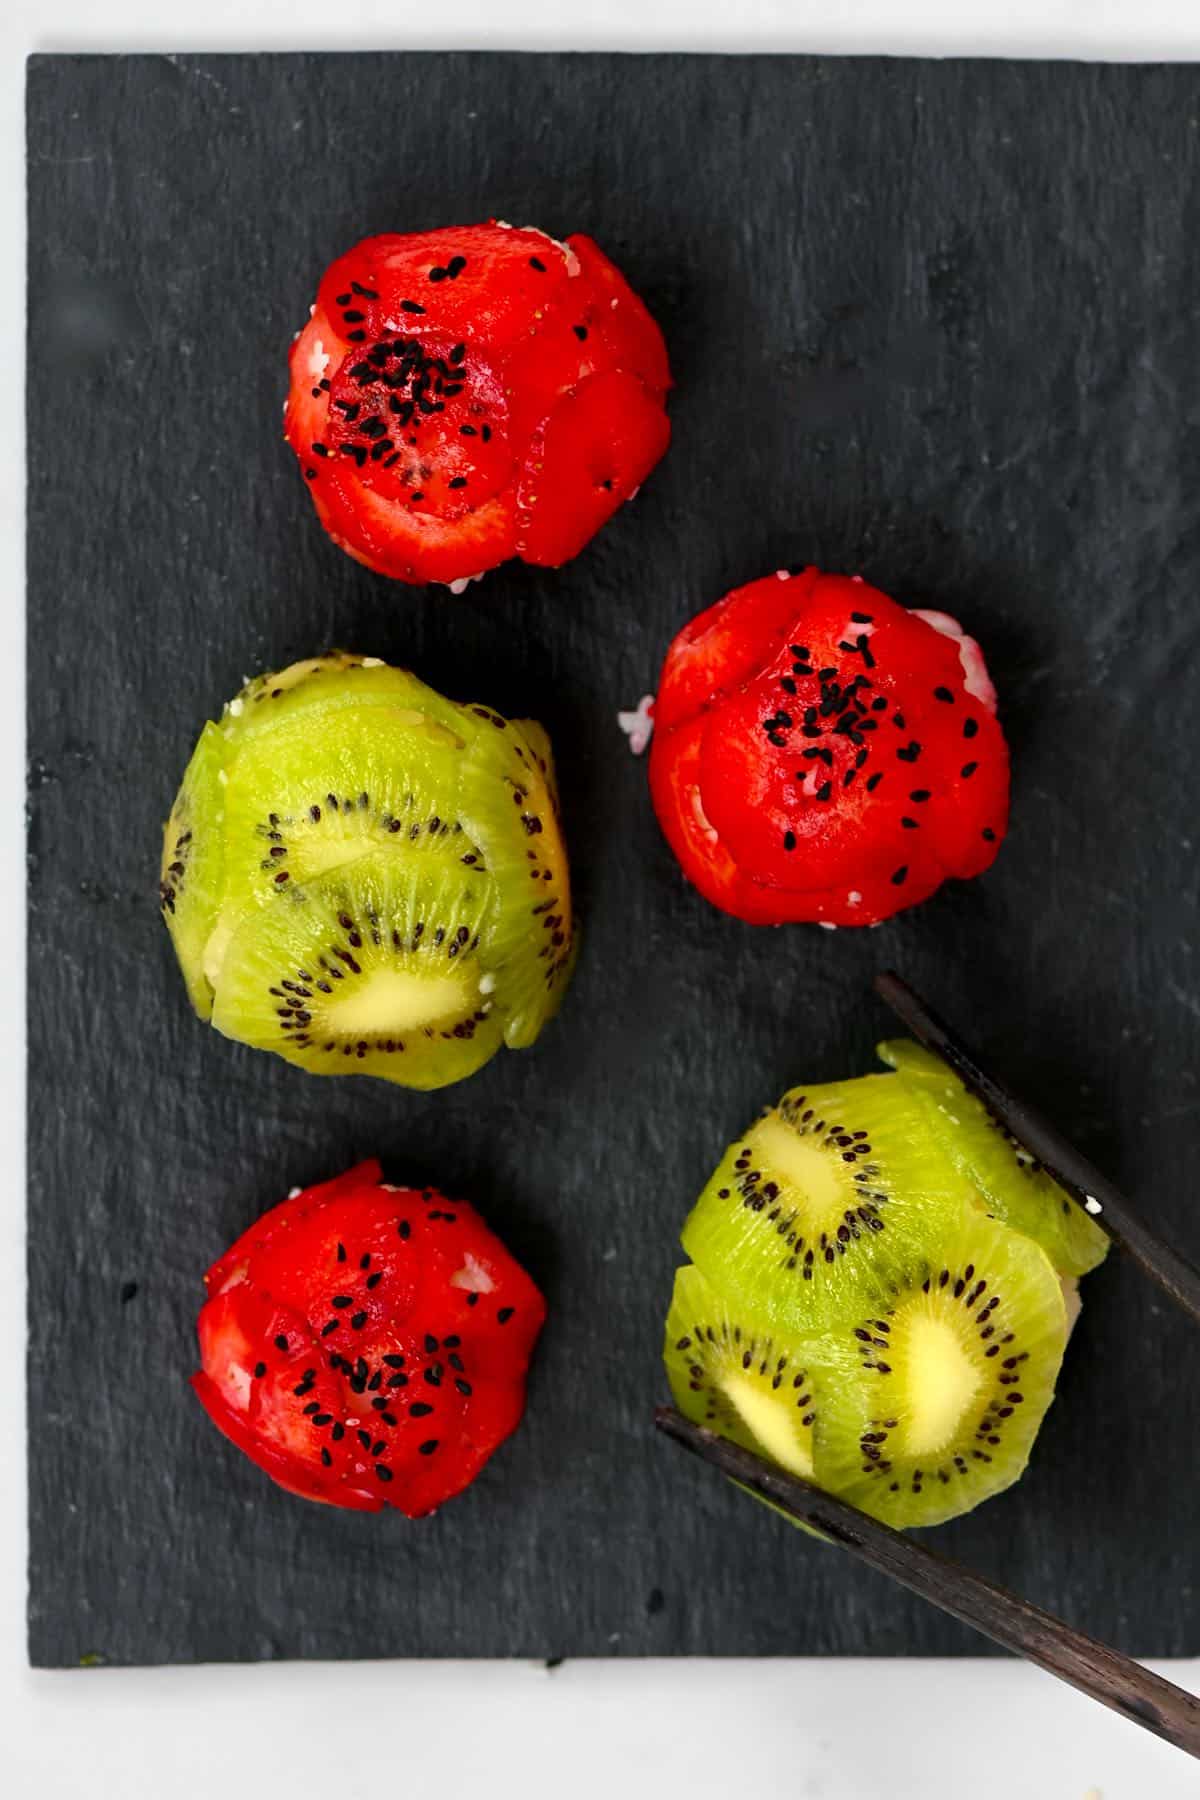
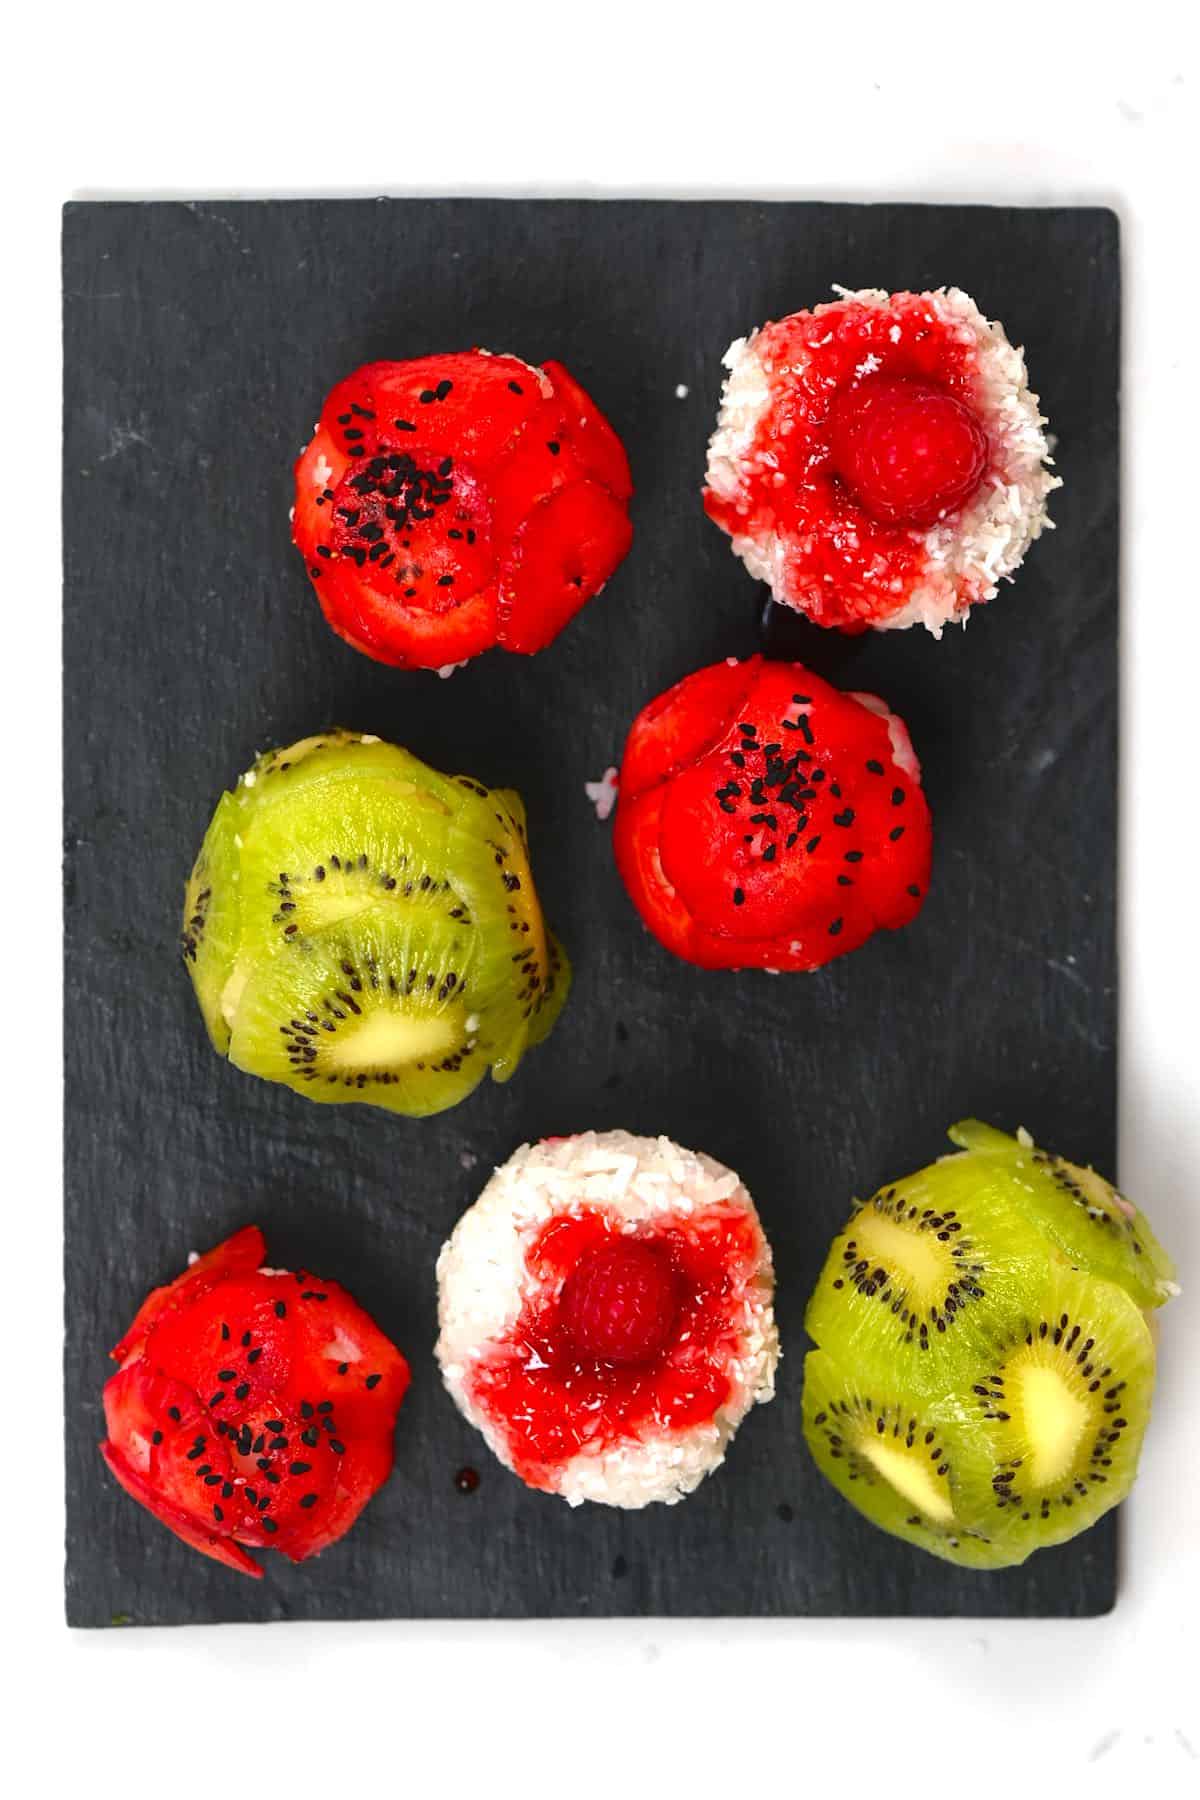
For Sushi Balls: First, you’ll need to thinly slice your fruit. These balls work best with fruits that can be sliced very thinly – such as strawberries, kiwi, mango.
Use a mandoline or very sharp knife to slice very thin slices of the fruit. Then arrange them, slightly overlapping, into the shape of a circle over a piece of clingfilm/plastic wrap (6-8″ wide).
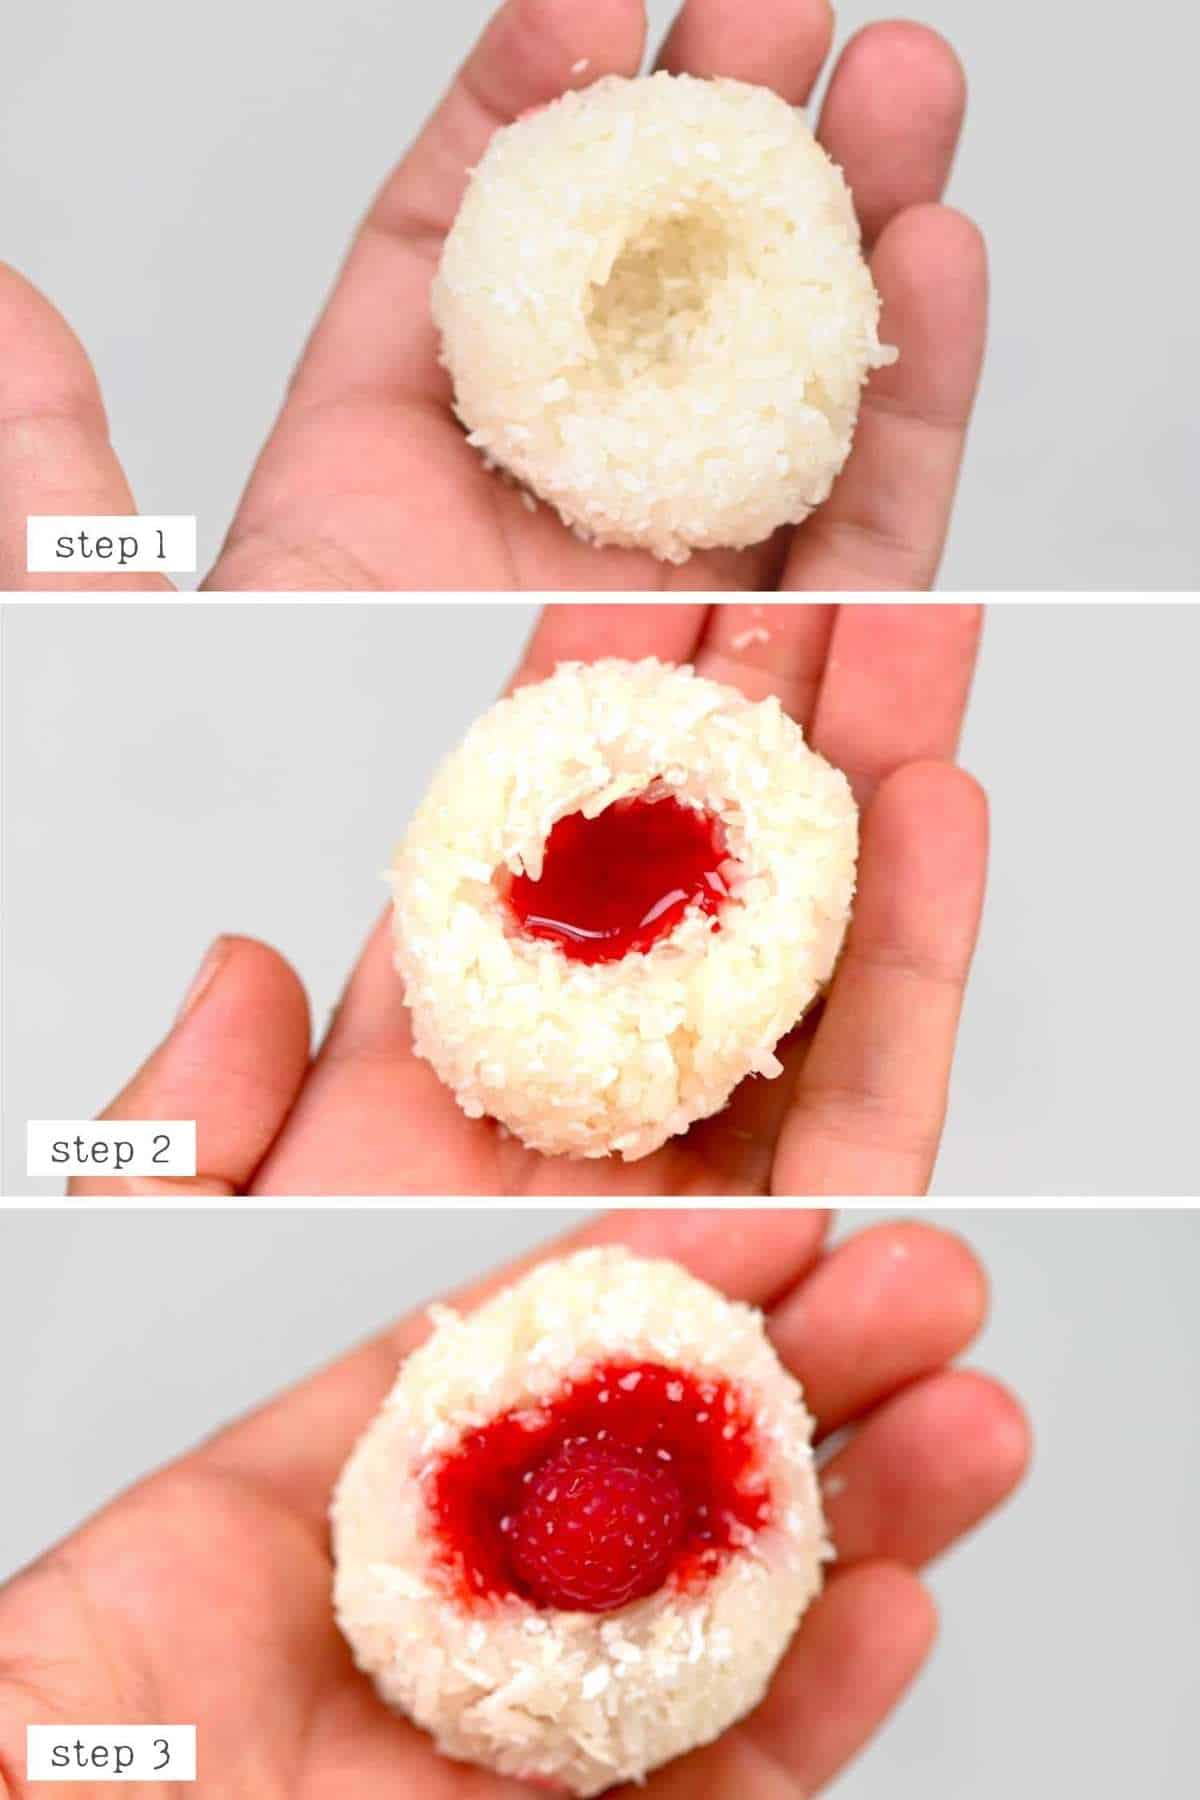
For a plain rice center, simply drop 1-1.5 tbsp of the sweet rice in the center of the fruit circle. For a ‘surprise’ berry center, press the rice into a thin layer within the circle and place a raspberry or blackberry in the center. You can even add a bit of jam with the fruit.
Then bring the wrap up and around the wall and squeeze lightly into shape then secure by twisting the plastic wrap at the top. You can attempt to de-mold it after a few minutes. Though, I prefer to place in the fridge to chill for an hour.
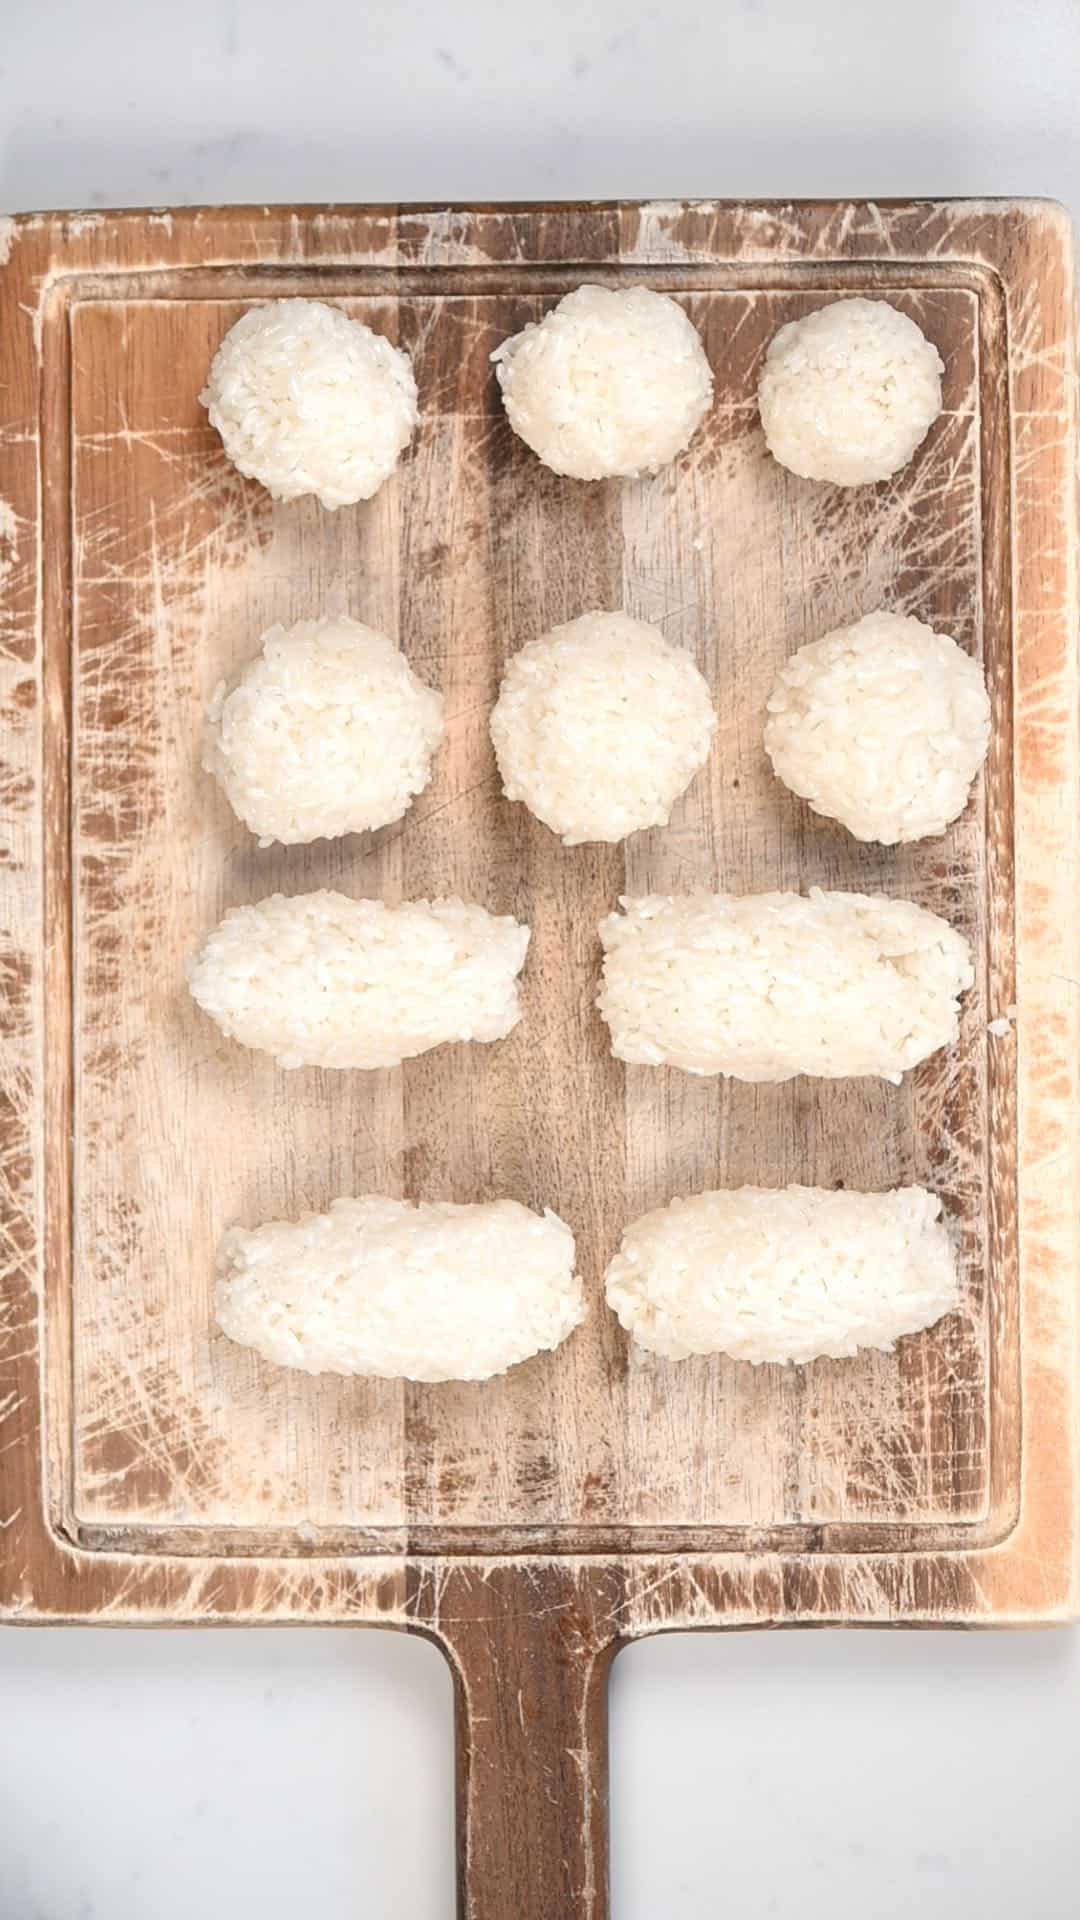
For ‘Nigiri’ (rectangular shaped): This is the easiest of all the options. All you need to do is portion out the rice into 3-4 tbsp pieces. Roll these into a rectangular shape and then top with your fruits of choice.
If you’re having issues getting the fruit to stick to the top, then you can use a little honey (non-vegan) or other sticky syrup (maple syrup isn’t sticky enough). You could also use a little berry jam.
(Optional) Step 4: Decoration and Dips
Following the above two steps, your sweet sushi is ready to eat. However, if you want to go the extra step of decorating them more then you have several options to choose from (listed above).
I like to sprinkle different sushi with different topping and top some with little mint leaves.
At the same time, prepare and ‘dip’/ ‘drizzle’ that you want to use. Melt some chocolate, water down a jam, or use one of the berry dressings for an interesting acidic flavor.
You can, optionally, serve with you favorite ice cream too or coconut whipped cream.
Recipe Top Tips
- It’s best to chill the fruit sushi for at least an hour before serving. This will help it become firmer.
- Once removed from the fridge, the fruit and rice will start breaking down the sugars in the sushi quickly, so it’s best eaten immediately.
- Wet your fingers with water when dealing with the sushi rice, to stop it sticking to your fingers.
- Also, wet the sharp knife, to make slicing the sushi easier. Dip in water between each slice.
- You can, optionally, use colorful soy wrappers for sweet sushi, for colorful rolls.
- You can slice the sushi rolls inside the plastic wrap, or after having de-molded it. Keeping it on the sushi would keep any ‘toppings’ in place (such as a mango sushi roll), however, may be trickier to slice through (depending on your knife).
- For extra sweetness, you could spread a thin layer of your favorite berry jam over the rice before rolling into a roll.
Other Japanese-Inspired Recipes
- Miso-glazed Aubergines (Nasu Dengaku)
- How to Make Sushi Rice
- Easy Avocado Sushi Rolls
- Baked Teriyaki Salmon (+ Broiled | Air Fried | Pan-Fried)
- How to Make Miso Paste (Kome Miso/Shinshu Miso)
- Simple Soy-Marinated Ramen Eggs
If you give this recipe a go, then let me know your thoughts and any questions in the comments. Also, feel free to tag me in your recreations @AlphaFoodie.
Sweet Fruit Sushi (Dessert Sushi)
Ingredients
- ½ cup raspberries
- ½ cup blackberries
- 1 cup strawberries
- 3 cups coconut sticky rice cooked
Optional
- shredded coconut to top
- kiwi or your favorite fruit
Instructions
Step 1. Prepare the sweet rice
- I always use this sweet coconut rice for my fruit sushi. You’ll need to make it and allow it to cool before carrying on with the recipe. When it’s warm, it can still be fairly soft and won’t form into sushi shapes easily.
Step 2. Prepare the fruit
- When making sushi rolls: you’ll want to slice long ‘baton’ strips of each fruit that you’re using. Slice blackberries in half, and leave raspberries whole.
- For the sushi balls: you'll need very thin slices of the fruit (using a mandolin or sharp knife); strawberry, kiwi, and mango are your best options here.
- For the rectangular ‘nigiri’: you need to chop your fruit big enough to sit on top of the rice, you can leave the raspberries whole again.
Step 3. Shape the dessert Sushi
- For Sushi Rolls: It's best to use a bamboo sushi mat for this, with a piece of cling film (plastic wrap) over it. However, if you don't have one then a piece of parchment paper will work (with or without cling film).
- Using about 1 cup of rice per roll, spread a thin, even layer of rice over the mat/parchment paper into an 'almost square' (one side needs to be slightly narrower so it's more of a rectangle).*
- Around 1.5" (inches) in from the rice, place a row of your fruit batons. Don't overfill or it will be very difficult to roll the sushi.
- Using the sushi mat, or just your hands, start rolling the sushi forward, into a log shape. press lightly to mesh the two rice edges together and form a complete roll.
- Tighten the cling film/ parchment paper around the log, twisting tightly at the ends, like a candy wrapper. Then, place in the fridge to chill for at-least an hour.
- To slice the roll, release from the parchment paper/plastic wrap (or don't, if preferred) and, using a sharp knife dipped in water, make quick, firm slices around 1-2" apart.
- For Sushi Balls: First, you'll need to thinly slice your fruit. These balls work best with fruits that can be sliced very thinly – such as strawberries, kiwi, mango.
- Use a mandoline or very sharp knife to slice very thin slices of the fruit. Then arrange them, slightly overlapping, into the shape of a circle over a piece of cling film/plastic wrap (6-8" wide).
- For a plain rice center, simply drop 1-1 1/2 tbsp of the sweet rice in the centre of the fruit circle. For a ‘surprise’ berry centre; press the rice into a thin layer within the circle and place a raspberry or blackberry in the center.
- Then bring the plastic wrap up and around the wall and squeeze lightly into shape then secure by twisting the plastic wrap at the top. You can attempt to de-mold it after a few minutes. Though, I prefer to place it in the fridge to chill for an hour.
- For 'Nigiri' (rectangular shaped): This is the easiest of all the options. All you need to do is portion out the rice into 2-4tbsp pieces (depending on your preference). Form these into a rectangular shape log and then top with your fruits of choice.
- If you're having issues getting the fruit to stick to the top, then you can use a little honey (non-vegan) or other sticky syrup (maple syrup isn't sticky enough). You could also use a little berry jam.
(Optional) Step 4: Decoration and Dips
- Following the above two steps, your sweet sushi is ready to eat. However, if you want to go the extra step of decorating them more then you have several options to choose from (listed above).I like to sprinkle different sushi with different toppings and top some with little mint leaves.At the same time, prepare and 'dip'/ 'drizzle' that you want to use. Melt some chocolate, water down a jam, or use one of the berry dressings for an interesting acidic flavor.You can, optionally, serve with your favorite ice cream too or coconut whipped cream.
Video
Notes
- It’s best to chill the fruit sushi for at least an hour before serving. This will help it become firmer.
- Once removed from the fridge, the fruit and rice will start breaking down the sugars in the sushi quickly, so it’s best eaten immediately.
- Wet your fingers with water when dealing with the sushi rice, to stop it sticking to your fingers.
- Also, wet the sharp knife, to make slicing the sushi easier. Dip in water between each slice.
- You can, optionally, use colorful soy wrappers for sweet sushi, for colorful rolls.
- You can slice the sushi rolls inside the plastic wrap, or after having de-molded it. Keeping it on the sushi would keep any ‘toppings’ in place ( such as a mango sushi roll), however, may be trickier to slice through ( depending on your knife).
- For extra sweetness, you could spread a thin layer of your favorite berry jam over the rice before rolling into a roll.
Nutrition
Nutrition information is automatically calculated, so should only be used as an approximation.


