
This post may contain affiliate links. Please read our disclosure policy.

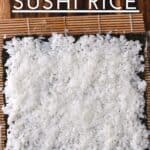
How to make sushi rice perfectly every time with just 4 ingredients (plus water). Including methods for stovetop and rice cooker sushi rice, plus top tips and FAQs to become a homemade sushi rice master!
What’s In This Post?
Learning how to make perfectly cooked rice is a fundamental kitchen skill for all. I’ve already shared methods for brown rice, coconut rice, jasmine rice, and even Lebanese rice with vermicelli. Now, it’s time to share how to make sushi rice (on the stove and in a rice cooker). With just a handful of ingredients, a simple step-by-step recipe, and several top tips and FAQs, this post teaches you everything needed for perfect (and easy) homemade sushi rice!
What is Sushi Rice?
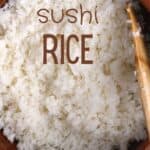
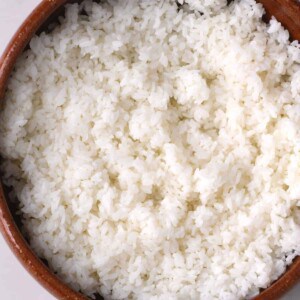
Sushi rice refers to fluffy, sticky, short-grained white rice cooked and seasoned with vinegar, sugar, and salt seasoning. In fact, “sushi” means “sour-tasting” in Japan and refers to the rice (rather than the fish, as many believe).
While there are a few handy tips to stick to for the absolute best sticky rice for sushi, the method is surprisingly easy once you know it! Once cooked, it should be fluffy and sticky without being mushy, with a slight firm bite, and perfect for making sushi, sushi bowls, and more!
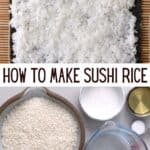
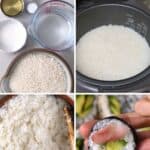
The Ingredients
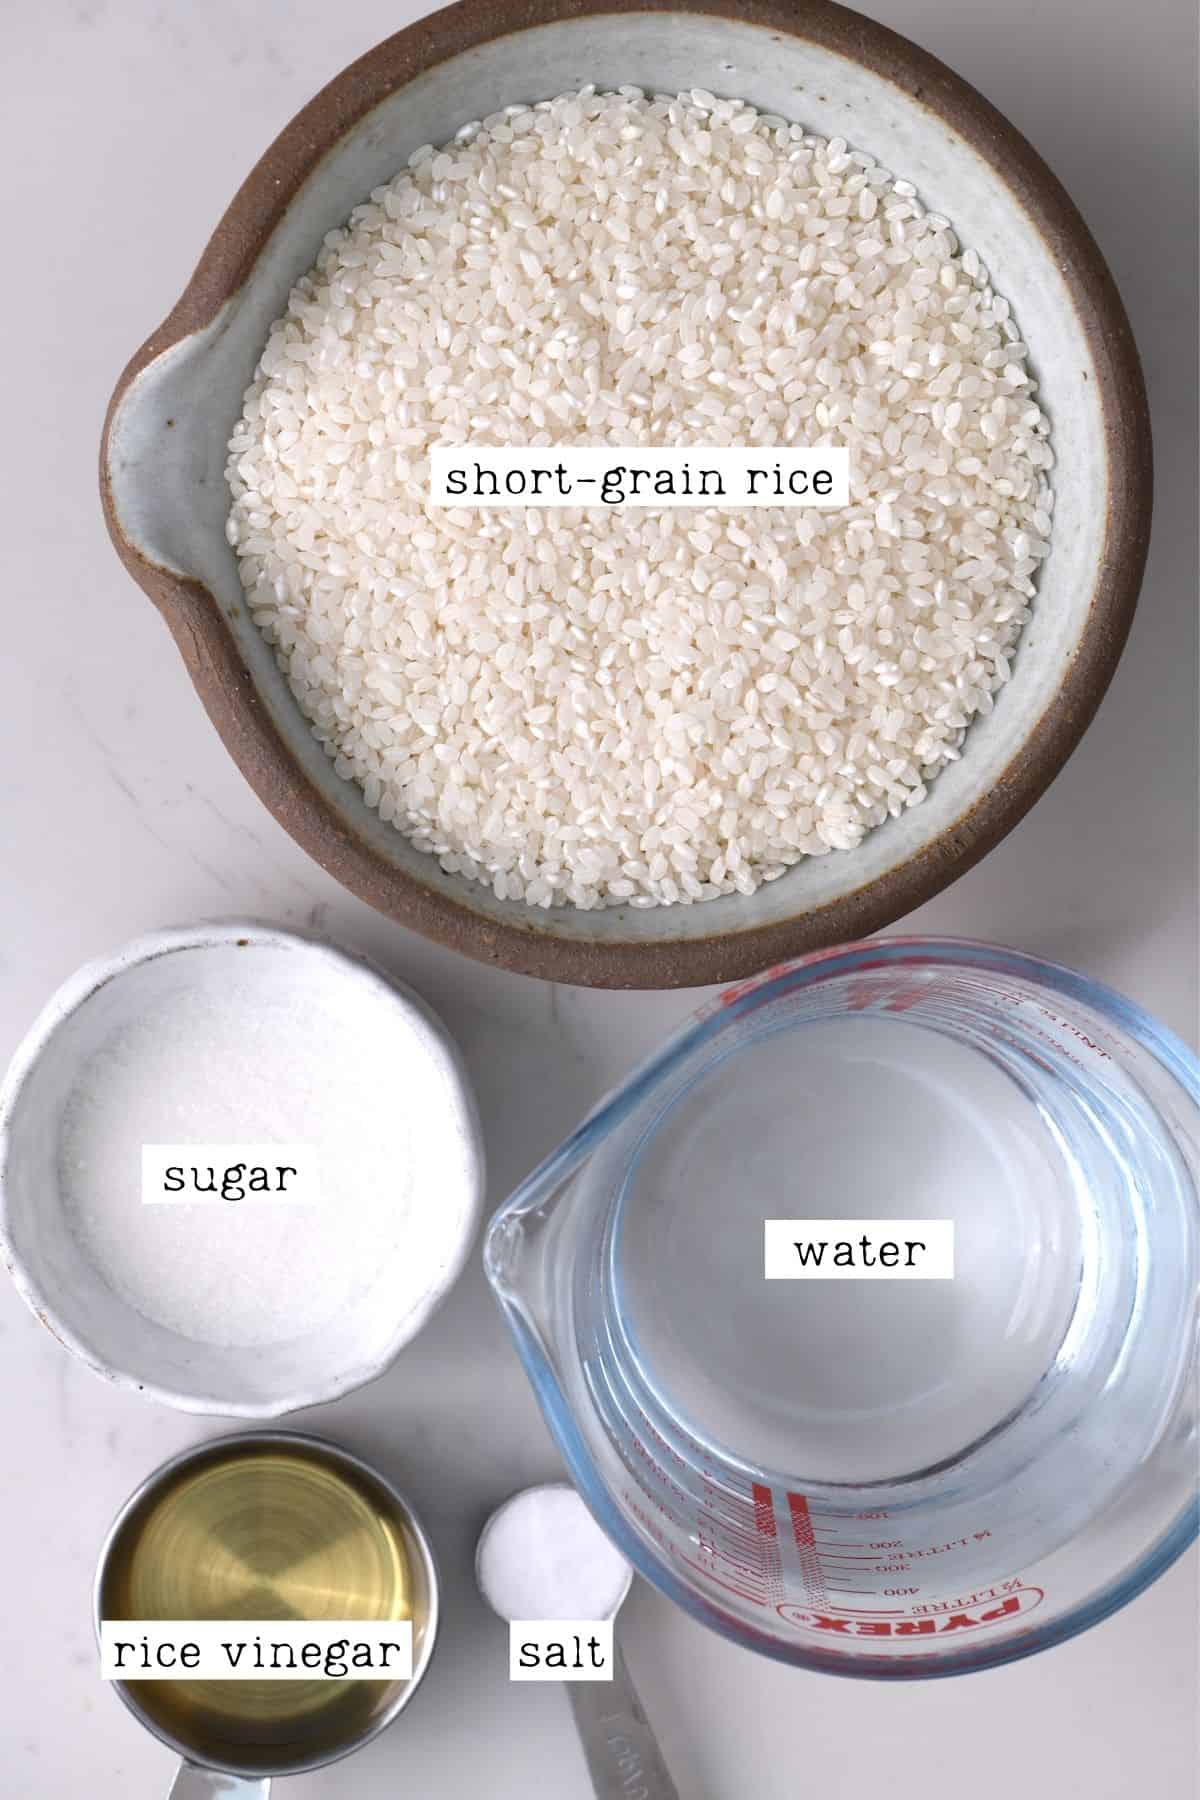
This easy sushi rice recipe requires just 5 ingredients (water and salt included!):
- Sushi Rice: short grain Japanese rice (labeled “sushi rice” or “uruchimai” most of the time) is the best option for the perfect sticky texture of homemade sushi rice. If you want to use any other type, then the method and sushi rice to water ratios will vary.
- Water: to cook the rice. You’ll need a 1:1 ratio of rice to water (i.e., 1 cup rice to 1 cup water).
- Rice vinegar: you can find this in the Asian section of most grocery stores. I don’t recommend using any other vinegar, as it won’t taste “right.”
- Sugar: traditionally, regular white granulated sugar is used. However, feel free to experiment with unrefined sugars like coconut sugar, honey, etc. Adjust the amount to taste.
- Salt: I used regular sea salt for this.
You can also save on prep time by using a bottle of pre-seasoned vinegar (called sushizu/sushi vinegar)! However, you won’t be able to easily control the amount of sugar/sodium in the rice.
Optional Add-ins and Variations
- Kombu: for extra flavor, add a small 2-inch piece of kombu to the saucepan while cooking the rice. Remove it once cooked.
- Toppings: if you plan to serve this easy sushi rice as a side dish, you may like to top it with furikake seasoning, toasted sesame seeds, shredded nori, or Japanese pickles (tsukemono).
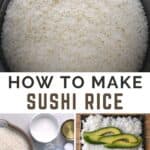
How to Make Sushi Rice?
You can prepare this sushi rice recipe in one of two ways: using the stovetop or a rice cooker.
Cook Rice in a Pot (Stovetop)
Step 1: Rinse the Rice
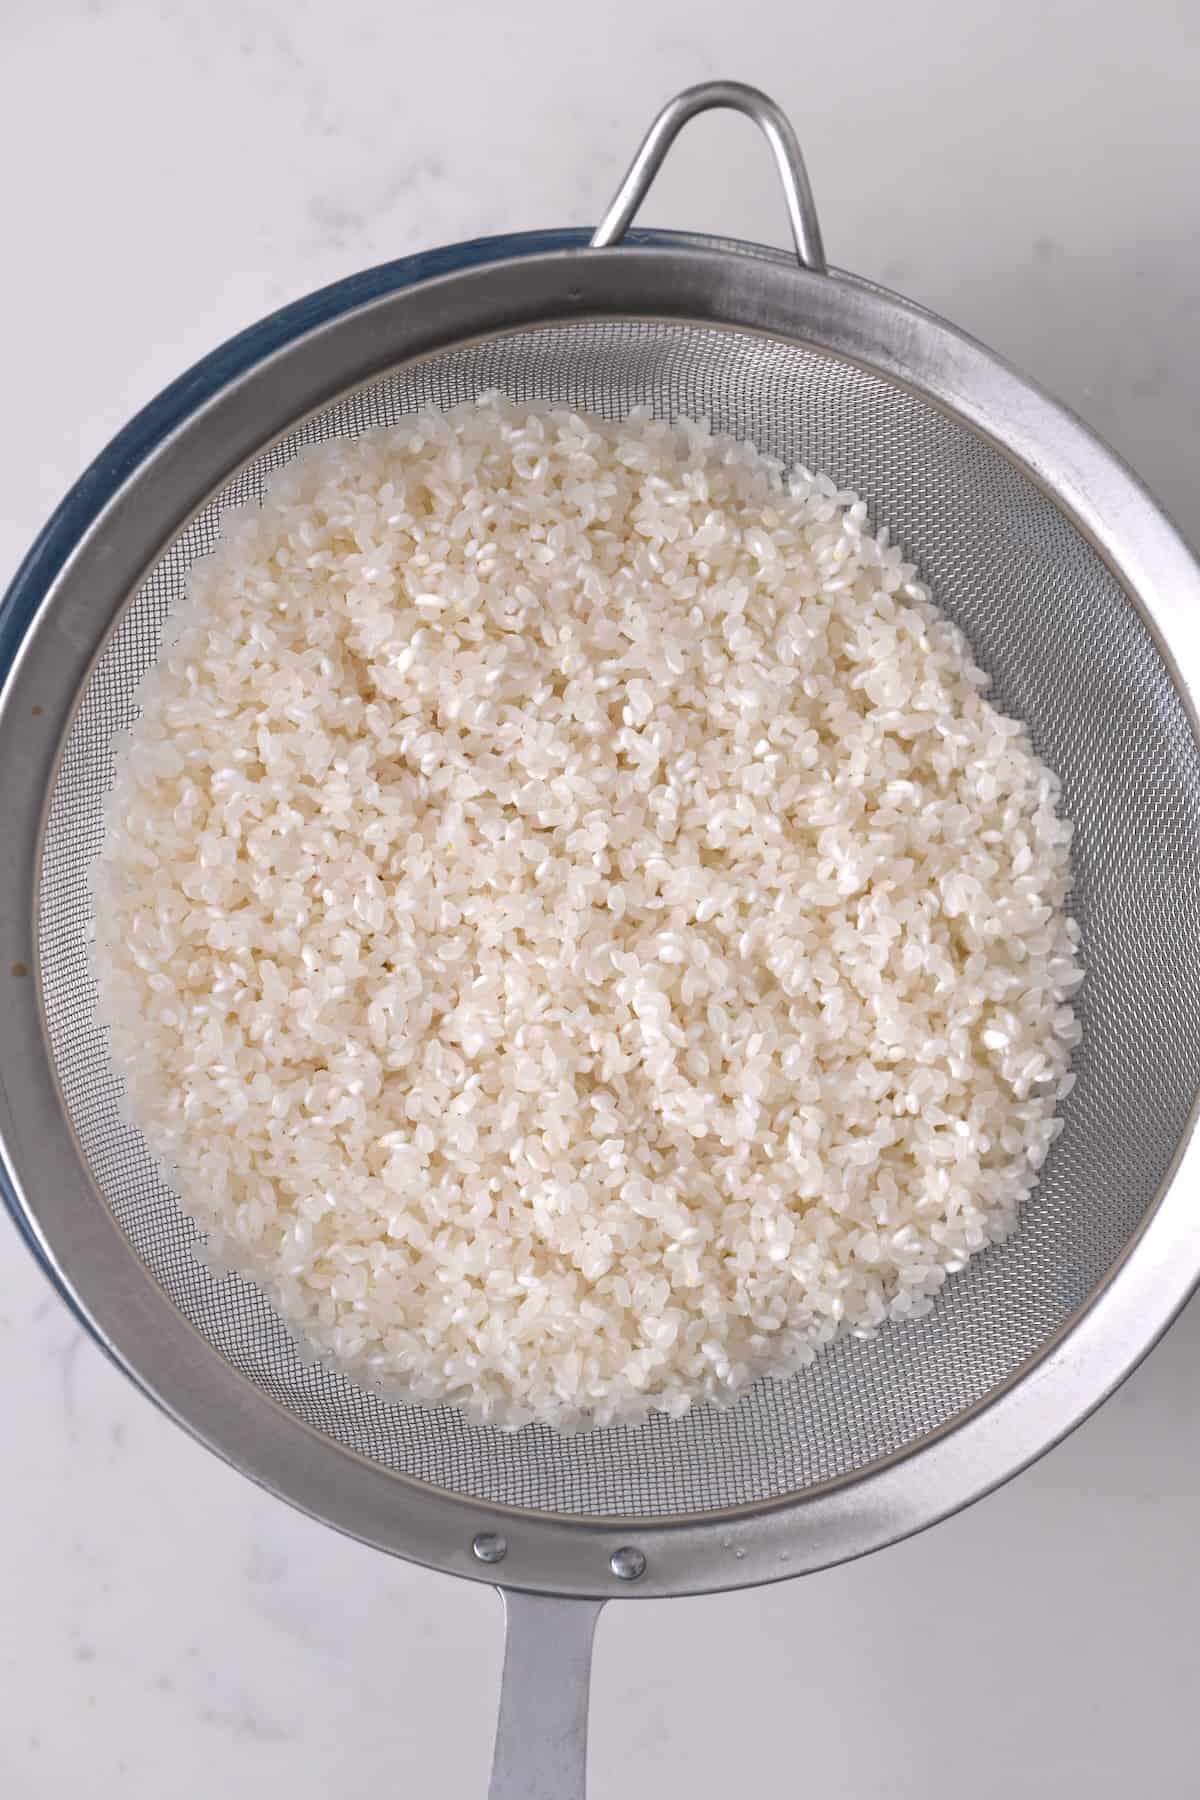
First, place the rice in a fine-mesh strainer and rinse it under water while swishing it in a circular motion until it runs almost clear. Then leave the rice to naturally drain for 30 minutes.
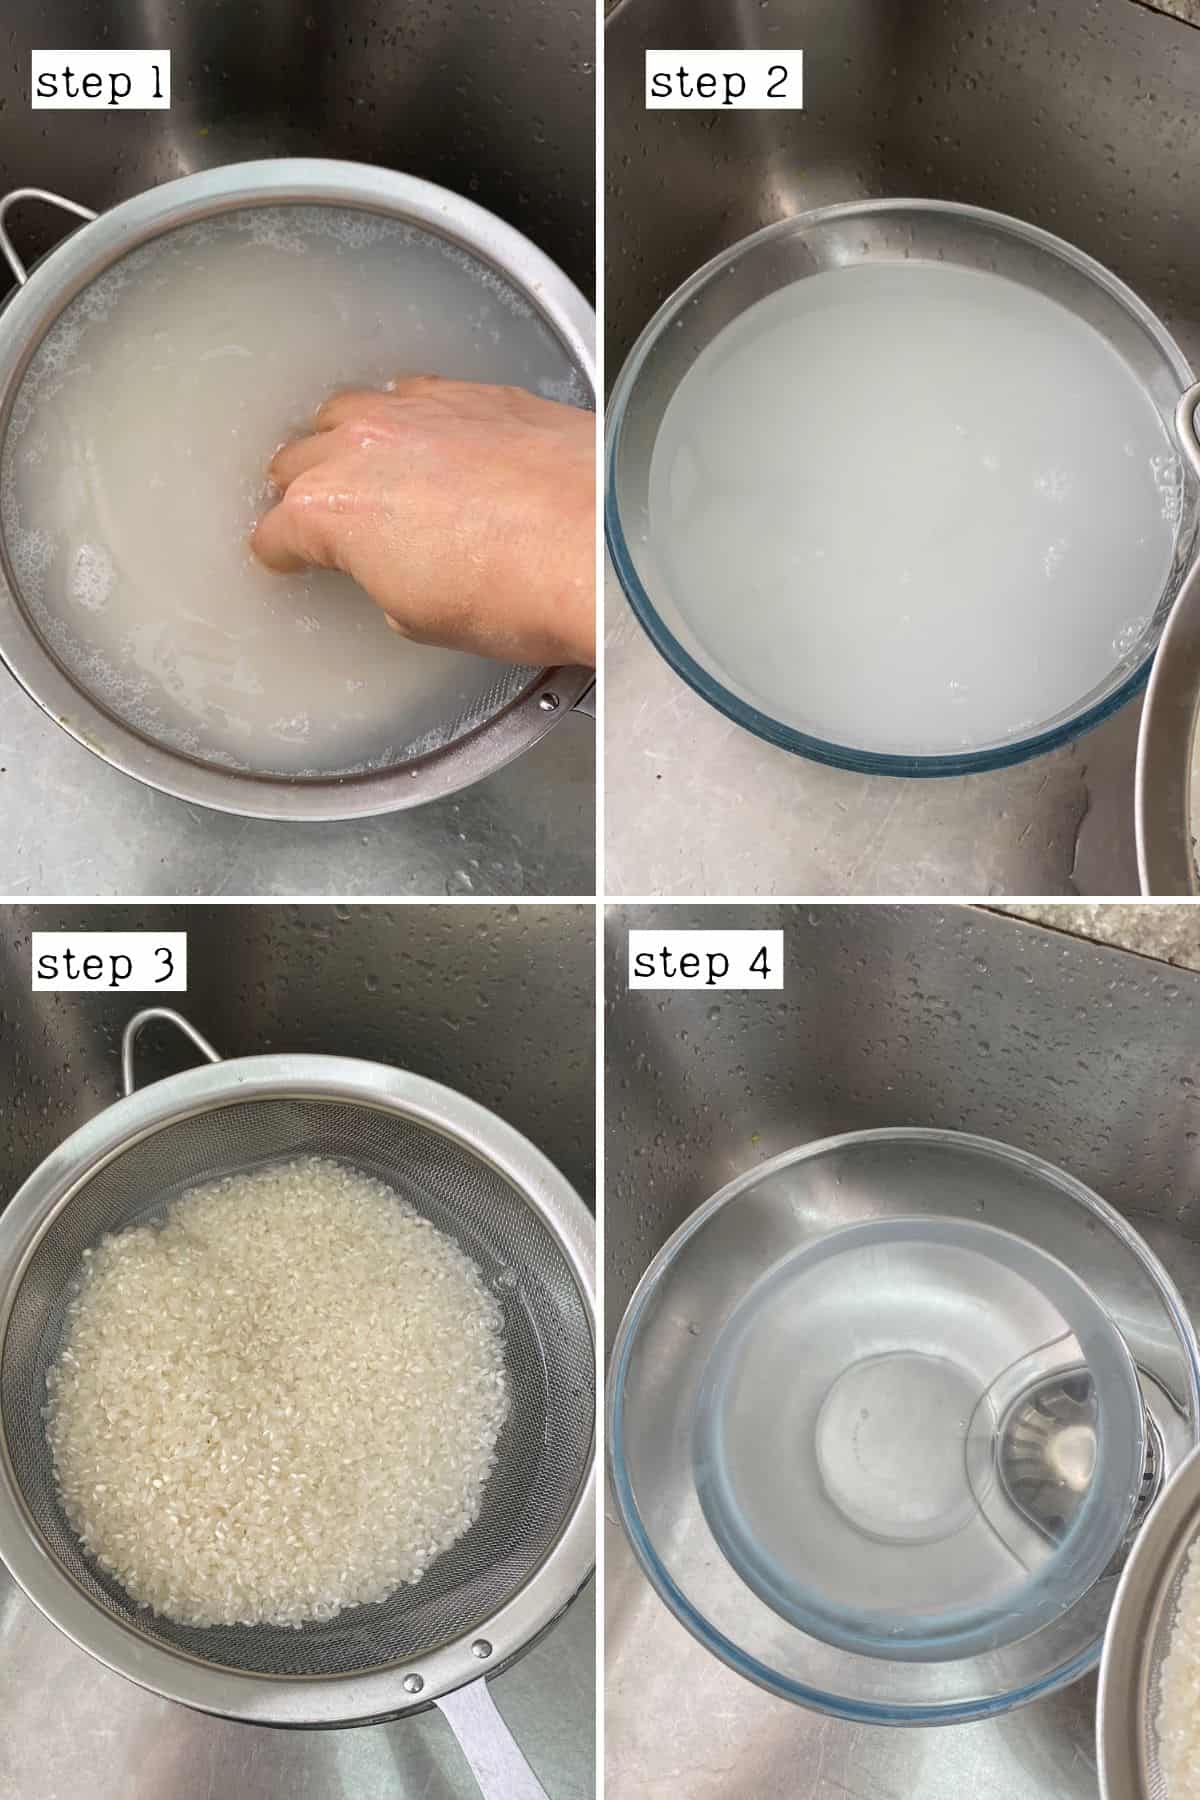
Alternatively, you can place the rice within a large bowl filled with water and use your hands to swish the rice in a circular motion for 20-25 seconds. Then drain and re-fill the bowl several times until the water is almost clear (3-5 times).
Step 2: Cook Sushi Rice
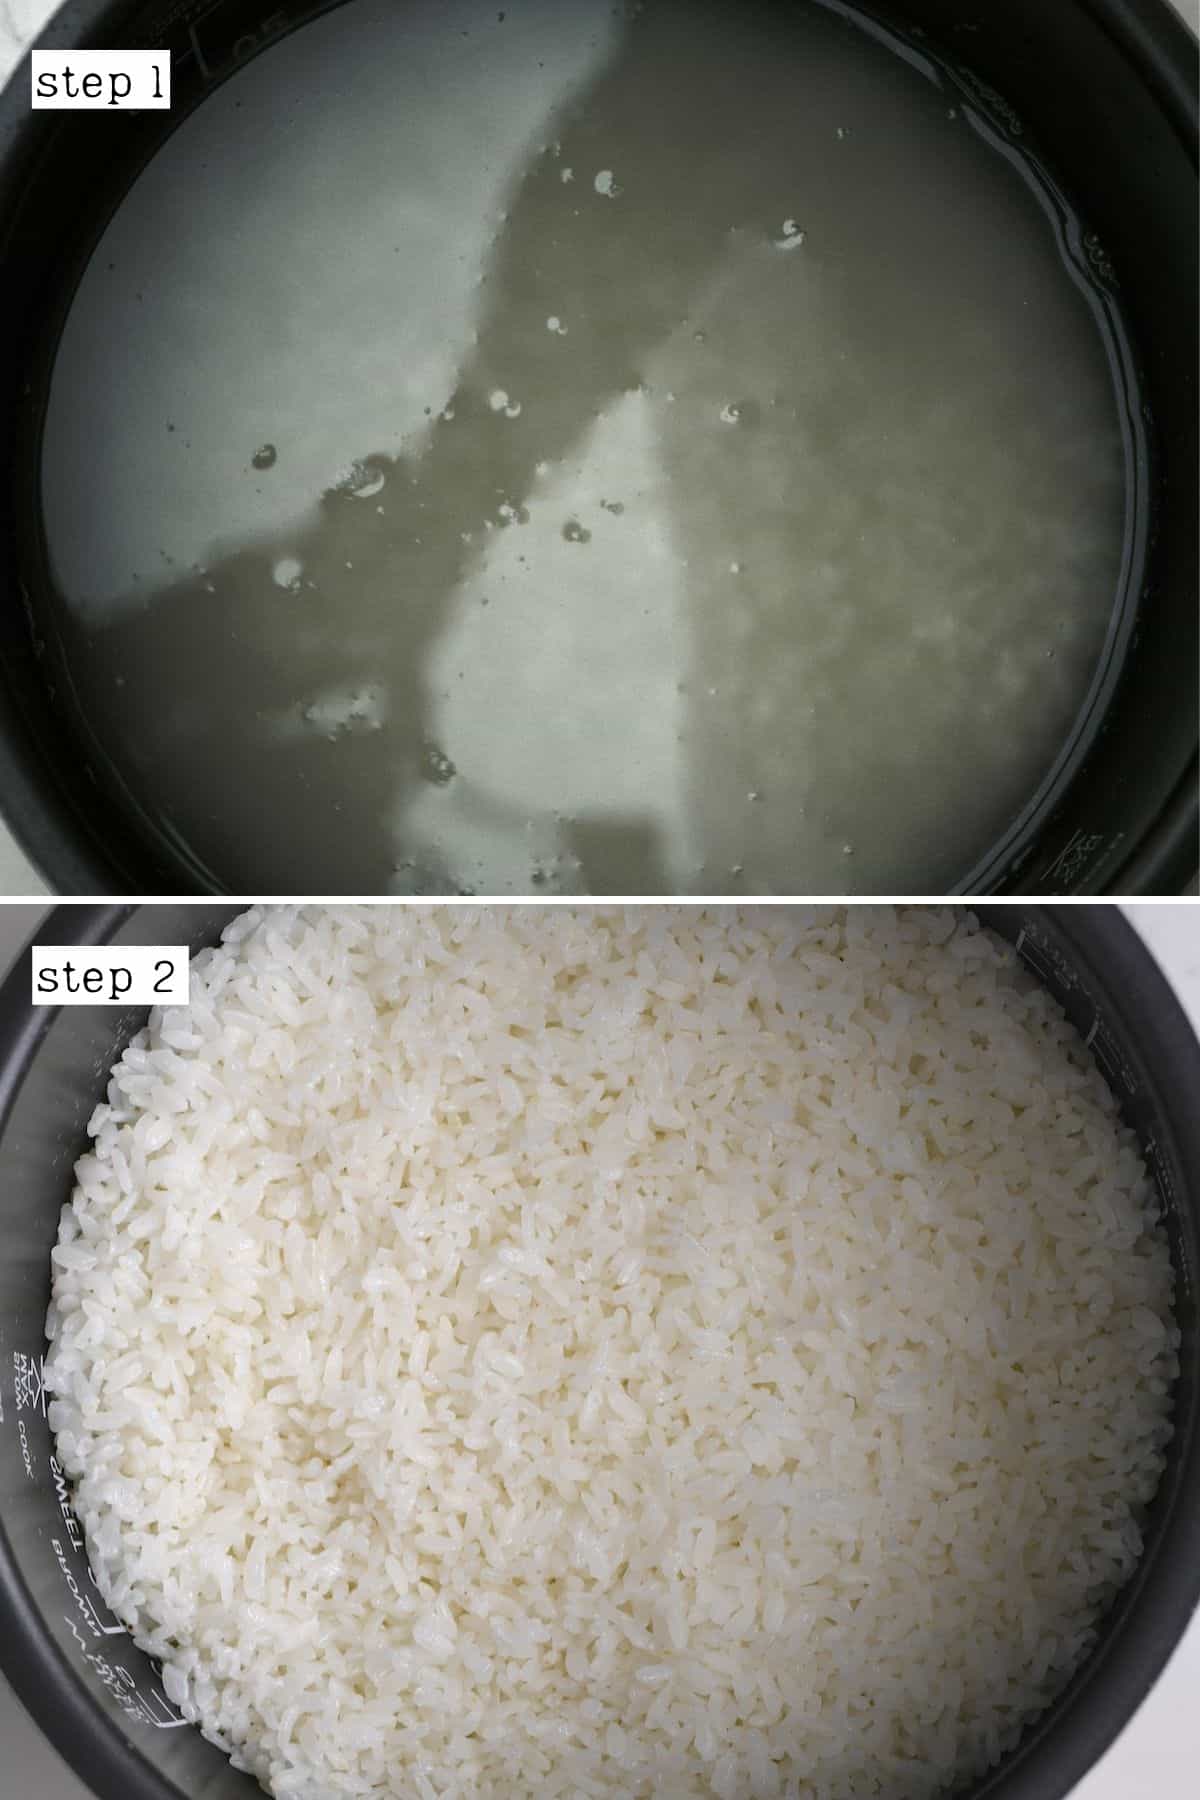
Transfer the rice and water to a heavy-based saucepan and cover with a lid.
You can optionally leave it to soak for 20 minutes, which is meant to make it cook more evenly. However, if you’re running low on time, skip it!
Bring to a boil over high heat, then reduce to a gentle simmer (low heat) for 13 minutes.
Note, this time is calculated specifically for cooking 2 cups of sushi rice. If you use more/less, then the time will vary.
Then, remove the pan from the heat and leave it to steam for a further 10 minutes. DON’T remove the lid during the cooking process at all.
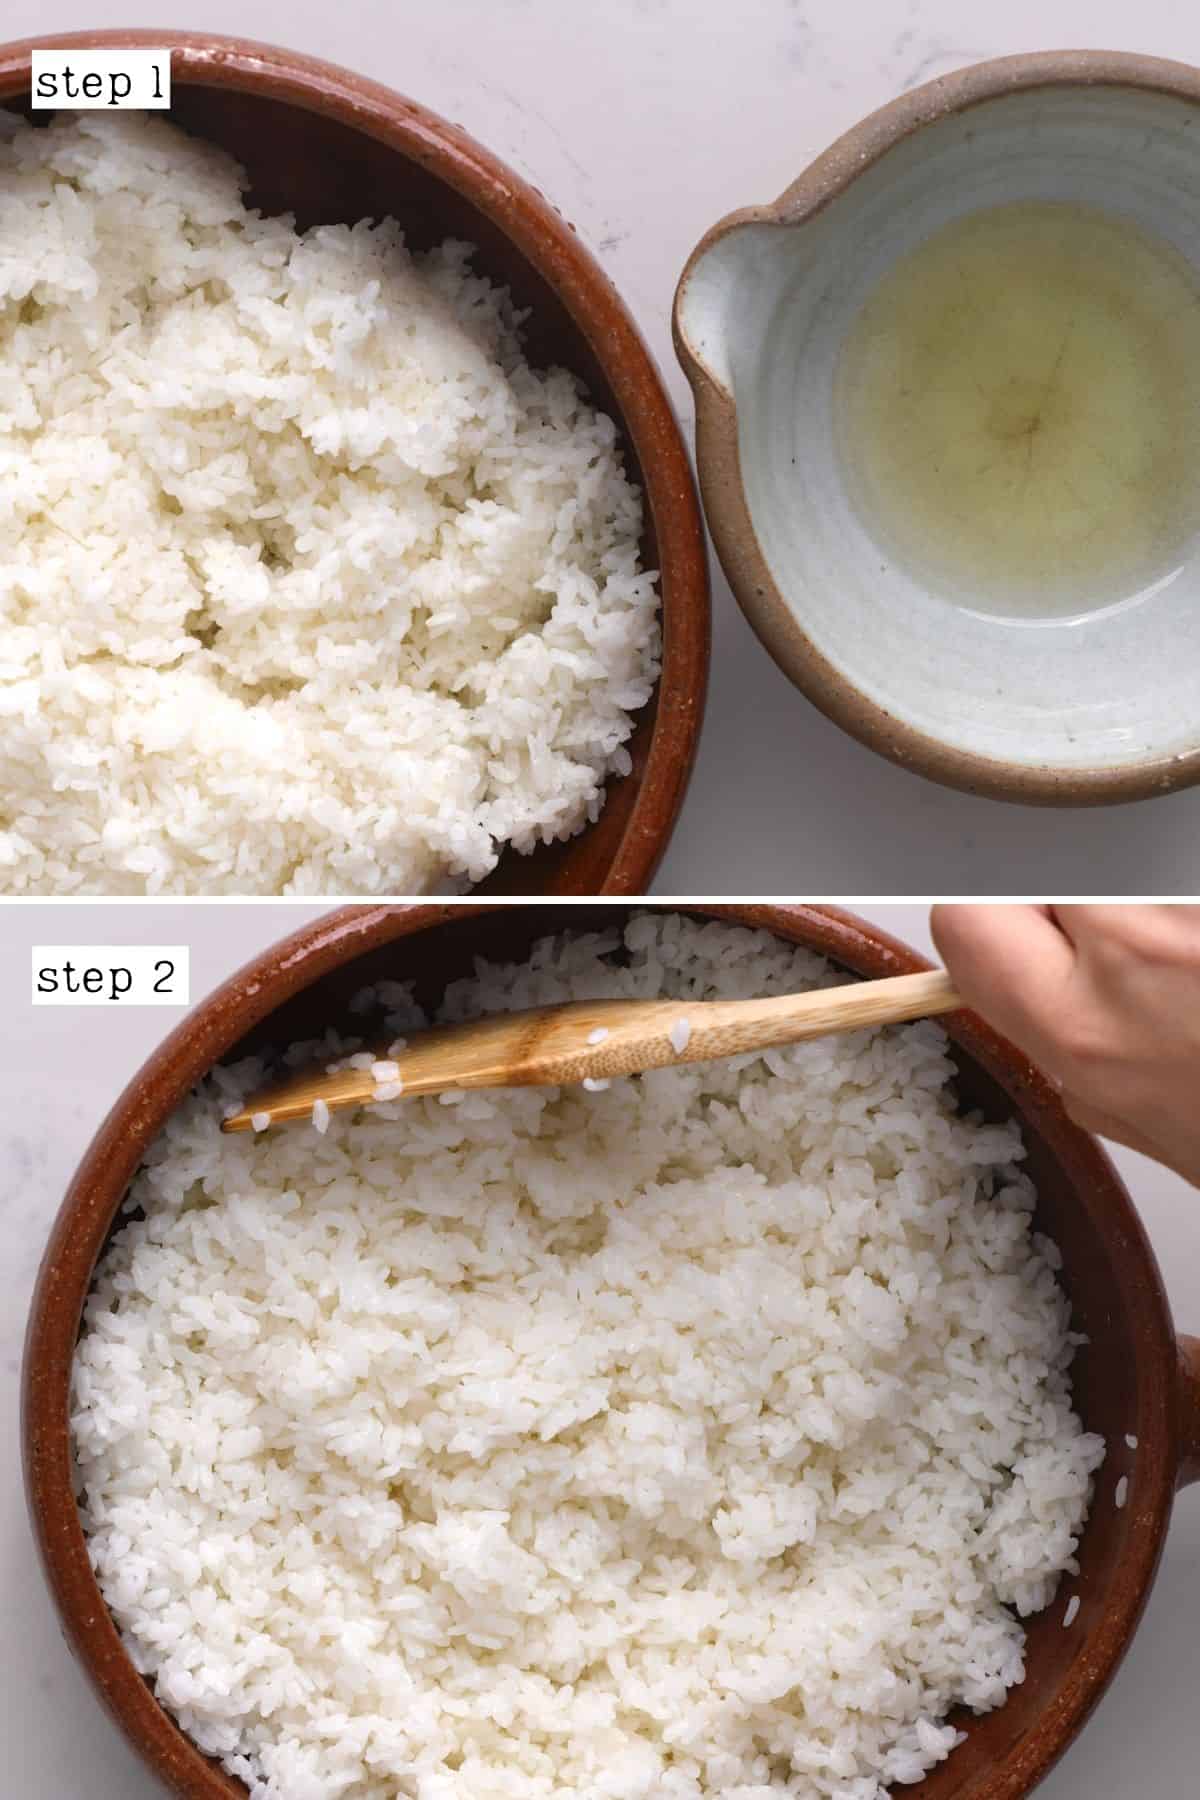
Step 3: Season the Homemade Sushi Rice
While the rice steams, prepare the sushi rice seasoning. To do so, combine the rice vinegar, salt, and sugar in a small bowl and stir well until the sugar and salt dissolve.
If it doesn’t dissolve easily, you can microwave the mixture for one minute, with additional 5-second increments if needed, until the sugar has dissolved.
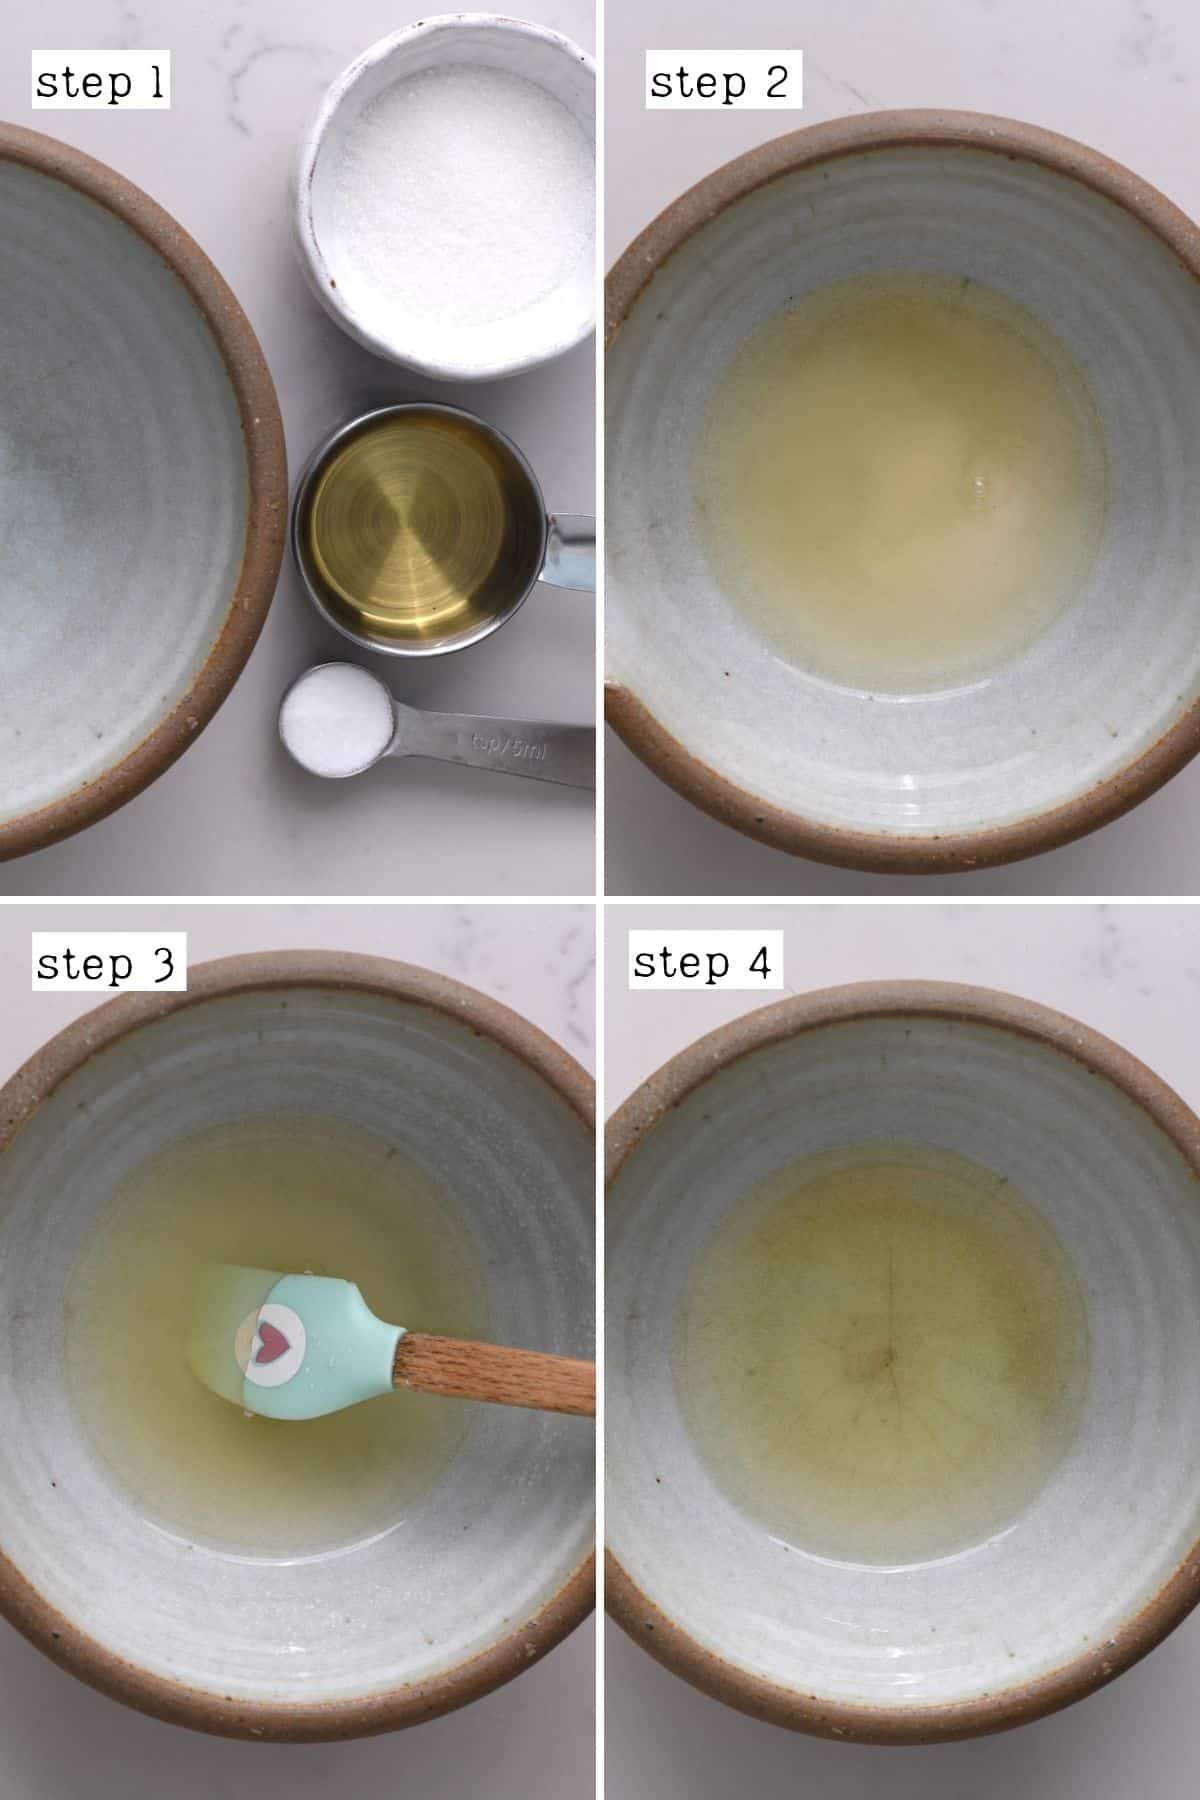
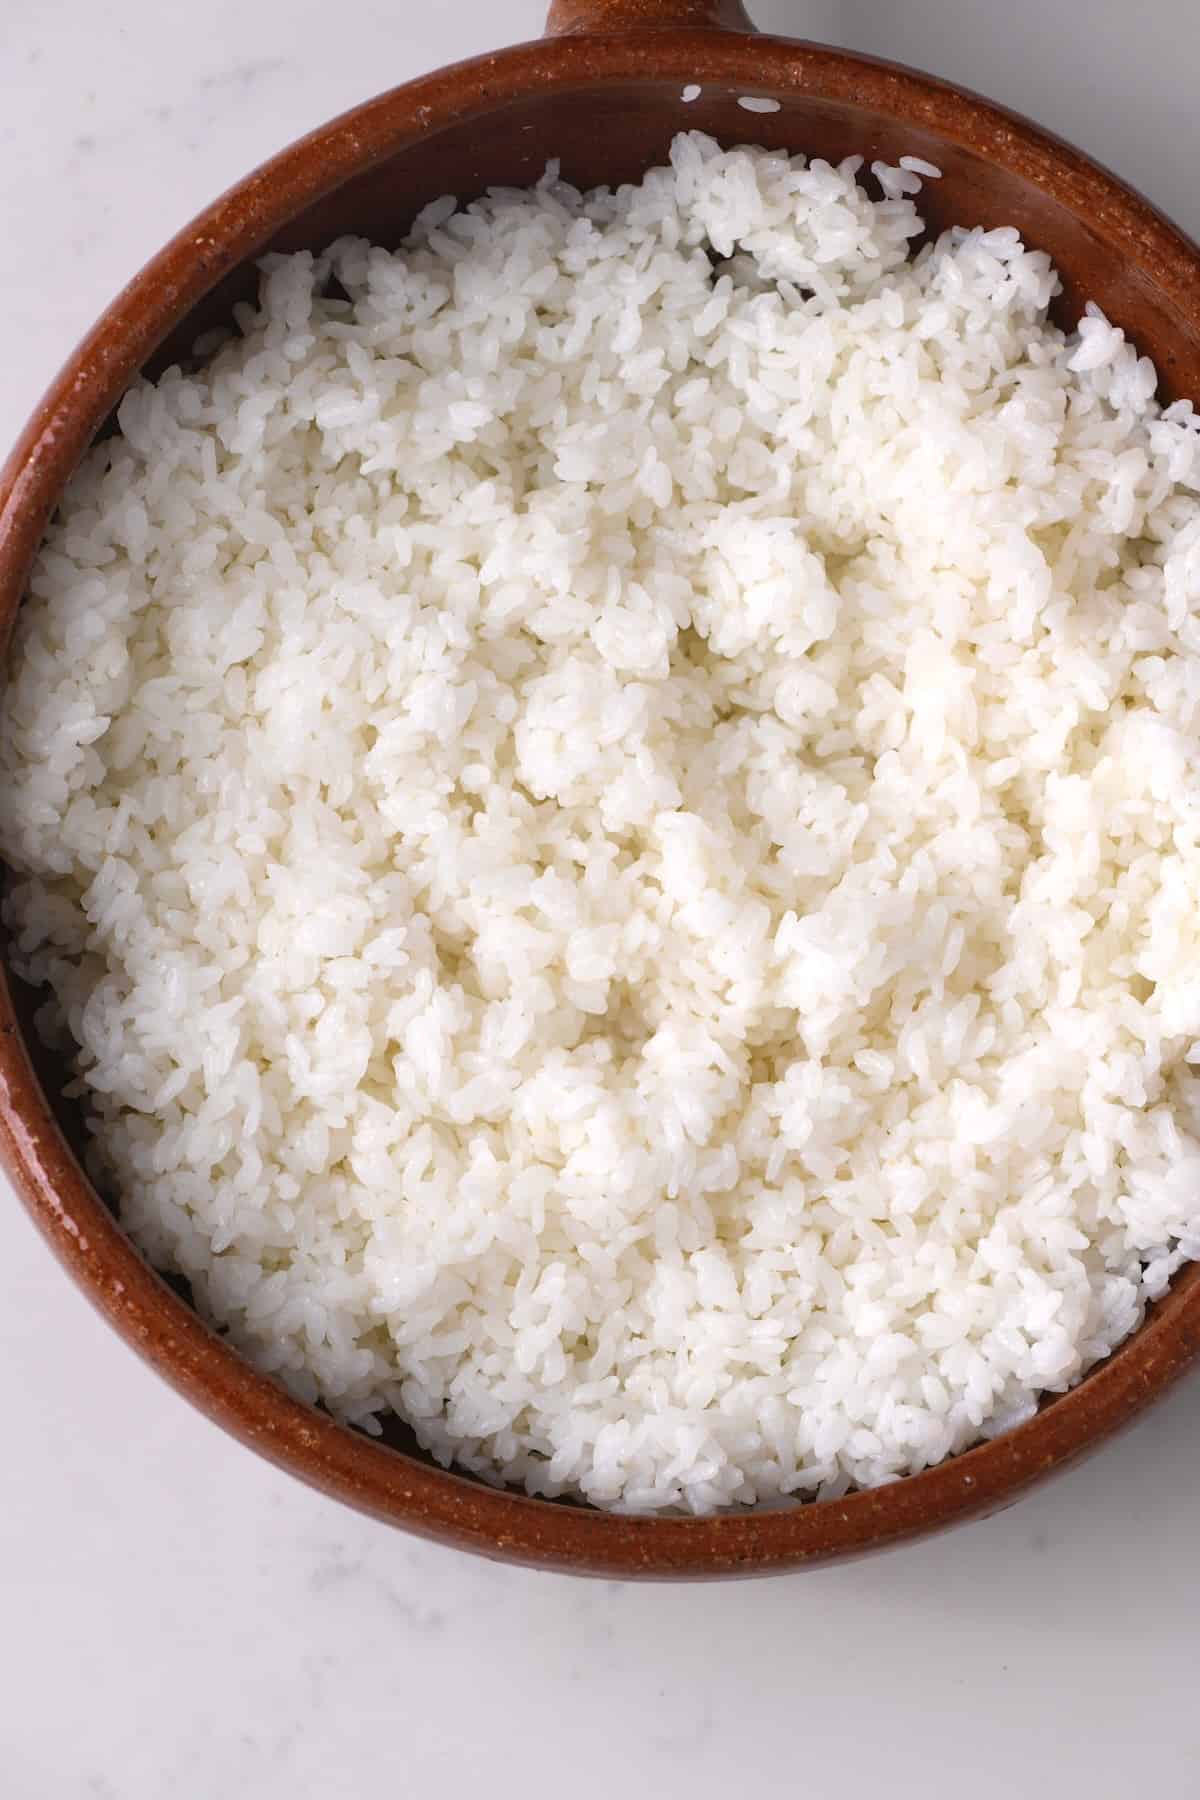
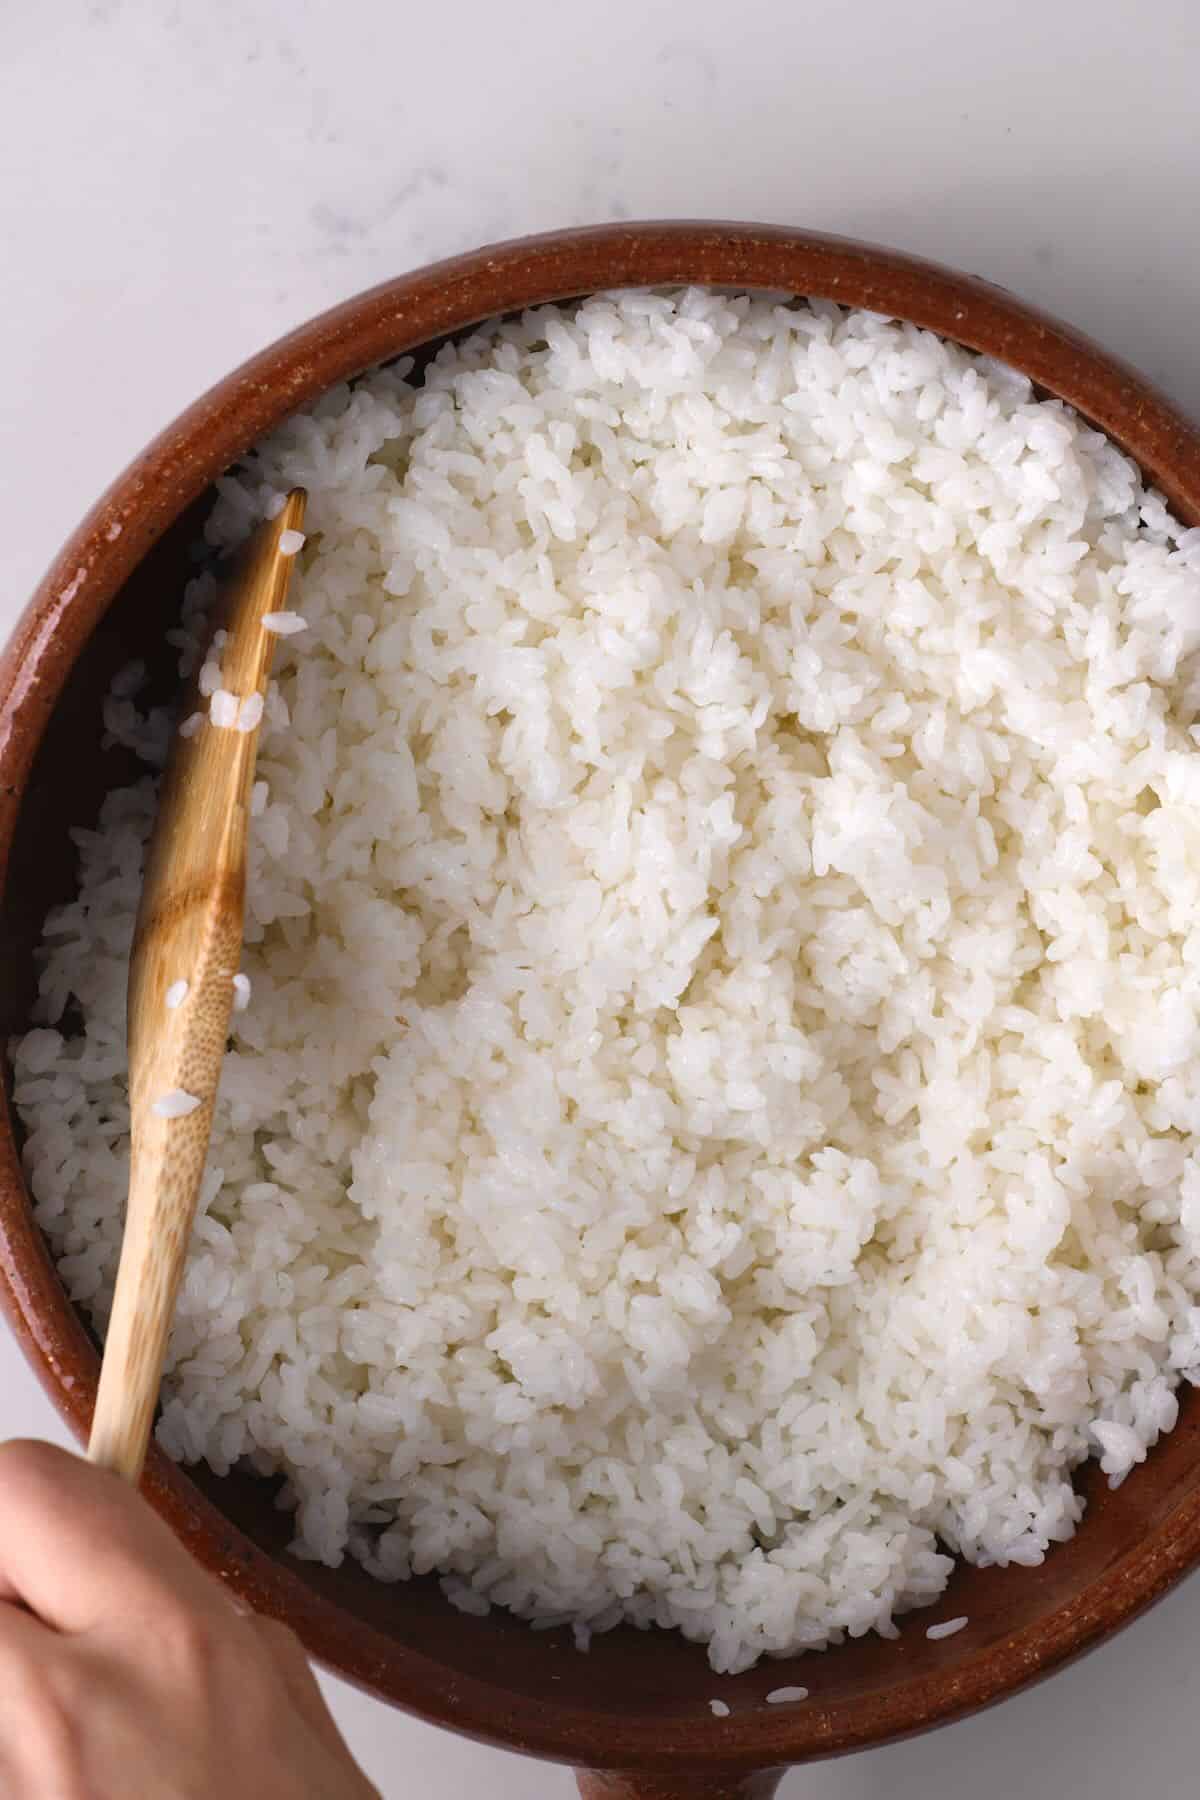
After the steaming, transfer the rice to a lightly wetted mixing bowl (plastic, wooden, or glass-not metal) and combine it with the vinegar seasoning. Use a spatula (or rice paddle) to carefully fold it into the rice (in a slicing motion at a 45º angle, like a shovel, lifting and turning sections of the rice over) without breaking the grains.
Then, allow the rice to cool down to room temperature. Make sure to cover it with a damp towel as soon as you’re done mixing it to keep it from drying out.
If you plan to use it immediately, you can allow it to cool on the counter. If you don’t, it’s best to transfer it to the refrigerator within 2 hours for food safety reasons.
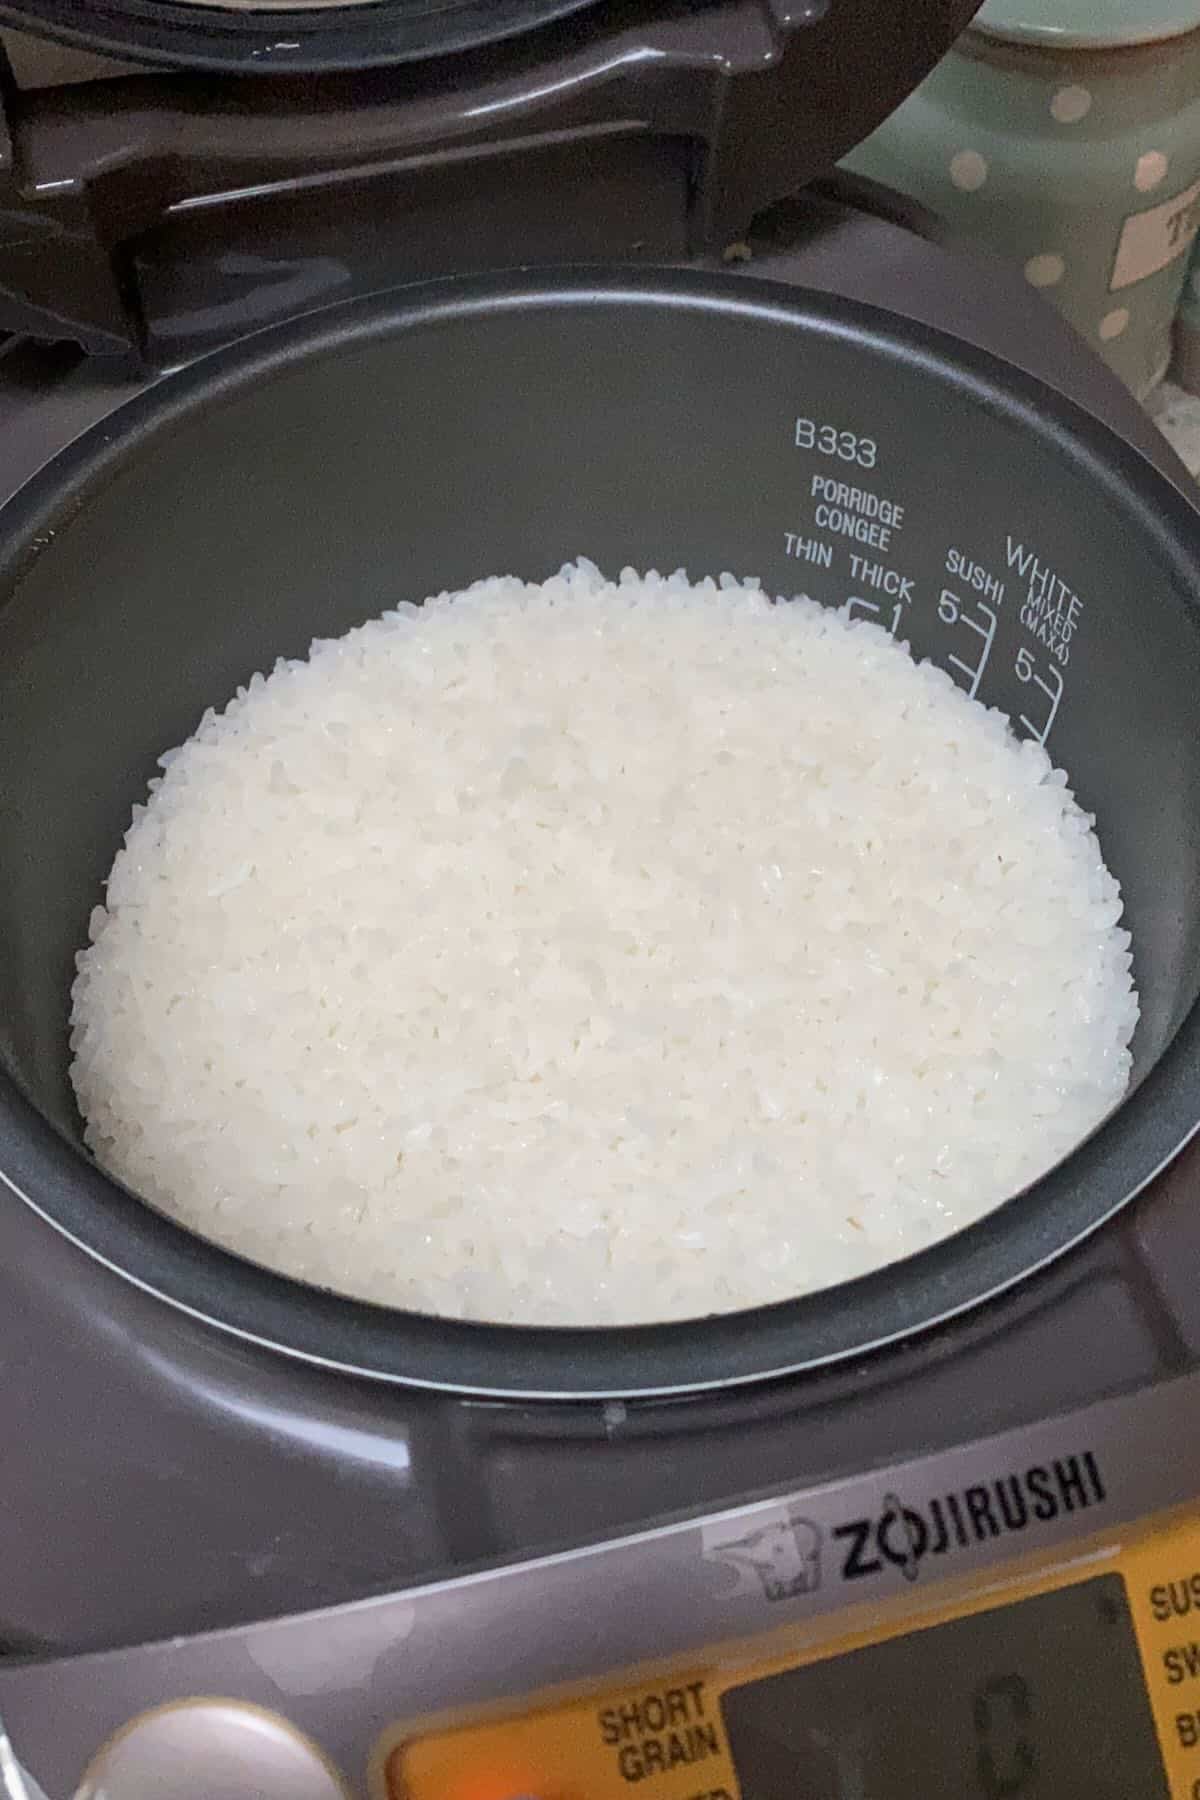
Cook Rice in a Rice Cooker
Many rice cookers will have a “sushi rice” setting, making things extremely easy. The main note is that the ratios of ingredients will need to be tweaked.
After adding the rice and water to your rice cooker, I recommend leaving it to soak for 30 minutes before cooking.
For example, 1 rice cooker cup is around 180ml (140-150g) rather than 240ml. This is 3/4, or 75%, the size of a regular cup, so reduce the water accordingly to 3/4 cup (or fill it to the “sushi rice” line in your rice cooker). It will yield around 1 ¾ cups of cooked sushi rice.
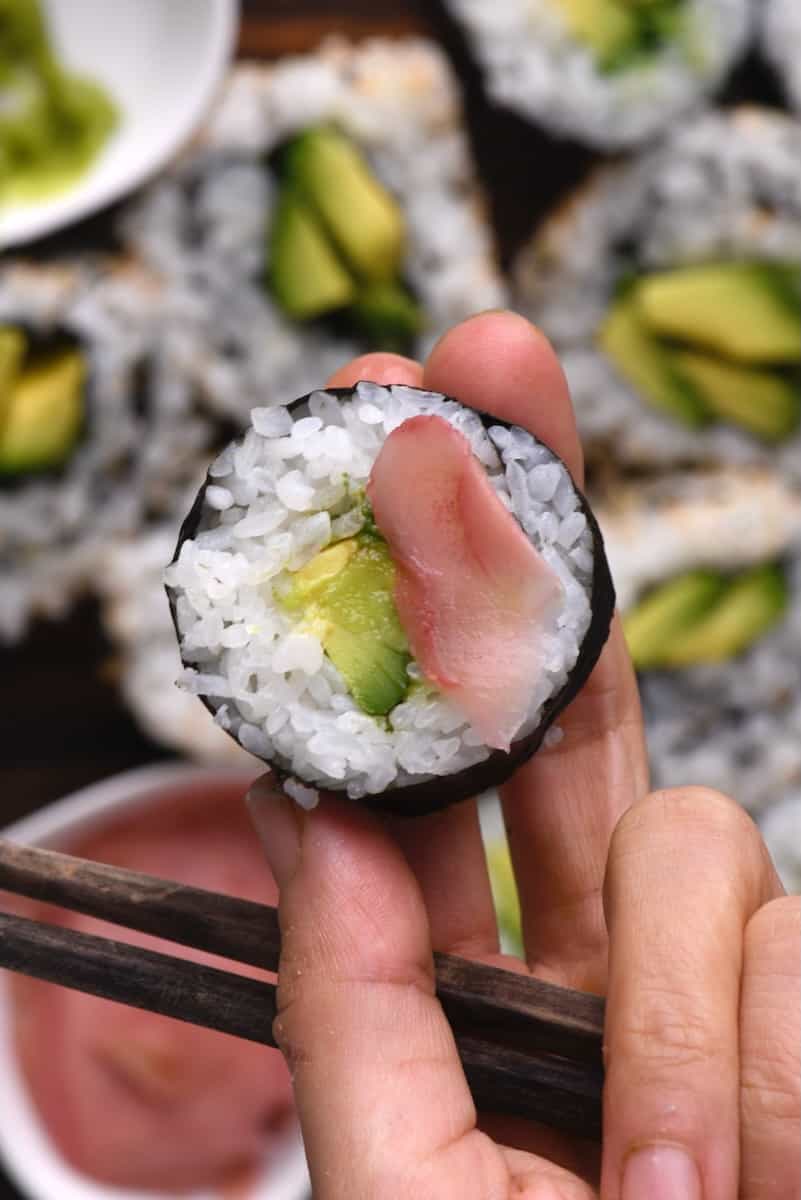
How to Use Cooked Sushi Rice?
Unsurprisingly, this homemade sushi rice is perfect for making sushi of all kinds (nigiri, onigiri, avocado sushi rolls, uramaki, temaki, fruit sushi, etc.) However, there are several other ways to use it, too, including:
- Sushi bowls,
- Poke bowls,
- Serve it with Japanese curry,
- Use in lettuce wraps,
- Make crispy rice cakes.
Some recipes work particularly well with day-old, leftover sushi rice, too. For example:
- Fried rice (like egg-fried rice or kimchi fried rice),
- Stir-fries,
- Risotto.
If you have unseasoned leftover sushi rice, you could use it to make a sweet rice pudding or mochi too.

How to Make Ahead and Store?
Make ahead: if you want to use the sushi rice over several days, then it’s best to leave it unseasoned apart from the portion you’re using each time. That way, the rice can be stored in an airtight container for 3-4 days. Or in the freezer for 4-5 months.
Store: sushi rice is best enjoyed within a few hours of making it (both for flavor and texture). However, if needed, you can store leftover sushi rice in an airtight container with layers of damp kitchen towel beneath and above it. Store it in the refrigerator for up to a day, removing it from the refrigerator 30 minutes before you intend to use it.
Reheat: while storing, the rice can dry out slightly and may need “reviving.” I’ve found the easiest way to do this is to gently steam the rice to infuse moisture back into it. Alternatively, heat the rice in a microwave-safe bowl with a spoonful of water and cover it with a damp paper towel. Microwave until warmed through and rehydrated.
I don’t recommend attempting to freeze the seasoned rice!
FAQs
If there is an odd, sour odor, the color has changed, or it seems mushy or otherwise spoiled.
Whatever you do, don’t place it in the fridge/freezer as it can cause damage and textural issues. Instead, you can place the rice by a window or fan. Alternatively, you can use a traditional Japanese rice fan (uchiwa) to fan the rice, using a spatula to flip it every couple of minutes, so it’s evenly cooled. The manual fanning method will take around 10 minutes.
Spreading the rice in a large bowl, traditional hangiri, or across a parchment-lined baking sheet (so it’s in a thinner layer with more surface area) will also help it cool faster.
The general rule is to use around 8-10% sushi vinegar seasoning to the weight of the cooked rice.
I don’t recommend it unless “needed.” In which case, you can substitute the rice vinegar for apple cider vinegar or white wine vinegar, but you may need extra sugar, and the flavor will differ.
You need to use a 1:1 ratio for the ingredients (i.e., 1 cup rice to 1 cup water).
Advice differs on this and will vary to personal taste. Some suggest you’ll need between 1/2-3/4 cup of sushi rice per sushi roll. Though others recommend between 80-90g cooked sushi rice (1/2 cup will weigh around 112g).
Top Tips for Perfect Sushi Rice
- Don’t skip the rinsing step: this will remove the excess starch from the rice providing the best texture without it being clumpy/stodgy.
- Don’t refrigerate cooling rice too quickly: if you do, it can damage the rice. If you want to cool down the rice quickly, use the methods outlined in the FAQs above.
- When to add the vinegar mixture: mix the vinegar into the sushi rice when it’s newly cooked and warm. This will make it easiest to disperse throughout without damaging any rice grains.
- Adjust the seasoning to taste: vary the sushi vinegar seasoning used based on your personal taste.
- Avoid metal spoons: when dealing with cooked sushi rice, it’s important to use a wooden spoon and/or silicone spatula. You’re less likely to damage the rice grains, and you can avoid any mistaken ‘reactions’ between the vinegar and metal.
- Don’t remove the lid: while cooking the rice, you must leave the lid on the entire time, INCLUDING for the 10 minutes steaming time. This will provide perfect sticky rice for sushi.
- Save the rice rinsing water: if you use the bowl method, feel free to use the rinsed rice water to water plants rather than dispose of it down the sink.
More Simple Rice Recipes
- Easy Egg Fried Rice (with Vegetables | Multiple Variations)
- Easy Vegetable Rice Pilaf (Yellow Turmeric Rice | Vegan)
- Simple Maqluba (Upside-Down Layered Rice)
- Cilantro Lime Rice (Coriander Rice)
- Indonesian Coconut Milk Rice (Nasi Uduk)
- Breakfast Fried Rice with Egg
- Filipino Garlic Fried Rice (Sinangag)
If you try this easy sushi rice recipe, I’d love to hear your thoughts/questions below. Also, I’d appreciate a recipe card rating below, and tag me in your recipe recreations on Instagram @Alphafoodie!
How to Make Sushi Rice (Stovetop + Rice cooker)
Equipment
Ingredients
- 1 lb short-grain Japanese rice sushi rice/uruchimai; 2 cups
- 16 fl oz water 2 cups
- 2 fl oz rice vinegar 1/4 cup
- 2 Tbsp sugar regular granulated sugar is best; feel free to experiment with coconut sugar, honey, etc.
- 1 tsp salt
Instructions
Step 1: Rinse the Rice
- Place the rice in a fine-mesh strainer and rinse under water while swishing it in a circular motion until it runs almost clear. Then leave the rice to naturally drain for 30 minutes.Alternatively, you can place the rice within a large bowl filled with water and use your hands to swish the rice in a circular motion for 20-25 seconds. Then drain and re-fill the bowl several times until the water is almost clear (3-5 times).
Step 2: Cook the Rice
- Transfer the rice and water to a heavy-based saucepan and cover with a lid.You can optionally leave it to soak for 20 minutes, which is meant to make it cook more evenly. However, if you’re running low on time, skip it!
- Bring to a boil over high heat, then reduce to a gentle simmer (low heat) for 13 minutes.Note, this time is calculated specifically for cooking 2 cups of sushi rice. If you use more/less, then the time will vary.
- Remove the pan from the heat and leave it to steam for a further 10 minutes. DON’T remove the lid during the cooking process at all.
Step 3: Season the Rice
- While the rice steams, prepare the sushi rice seasoning. To do so, combine the rice vinegar, salt, and sugar in a small bowl and stir well until the sugar and salt dissolve.If it doesn’t dissolve easily, you can microwave the mixture for one minute, with additional 5-second increments if needed, until the sugar has dissolved.
- After the steaming, transfer the rice to a lightly wetted mixing bowl (plastic, wooden, or glass, not metal) and combine it with the sushi vinegar seasoning. Use a spatula (or rice paddle) to carefully fold it into the rice (in a slicing motion at a 45º angle, like a shovel, lifting and turning sections of the rice over) without breaking the grains.
- Allow the rice to cool down to room temperature. Make sure to cover it with a damp towel as soon as you’re done mixing it to keep it from drying out.If you plan to use it immediately, you can allow it to cool on the counter. If you don’t, it’s best to transfer it to the refrigerator within 2 hours for food safety reasons.
How to Make Sushi Rice in a Rice Cooker
- Many rice cookers will have a "sushi rice" setting, making things extremely easy. The main note is that the ratios of ingredients will need to be tweaked.For example, 1 rice cooker cup is around 180ml (140-150g) rather than 240ml. This is 3/4, or 75%, the size of a regular cup, so reduce the water accordingly to 3/4 cup per rice cup (or fill it to the "sushi rice" line in your rice cooker). It will yield around 1 ¾ cups cooked sushi rice.After adding the rice and water to your rice cooker, I recommend leaving it to soak for 30 minutes before cooking. Then click the sushi rice setting and voila!
How to Make Ahead and Store?
- Make ahead: if you want to use the sushi rice over several days, then it’s best to leave it unseasoned apart from the portion you’re using each time. That way, the rice can be stored in an airtight container for 3-4 days. Or in the freezer for 4-5 months.Store: sushi rice is best enjoyed within a few hours of making it (both for flavor and texture). However, if needed, you can store leftover sushi rice in an airtight container with layers of damp kitchen towel beneath and above it. Store it in the refrigerator for up to a day, removing it from the refrigerator 30 minutes before you intend to use it.Reheat: while storing, the rice can dry out slightly and may need "reviving." I’ve found the easiest way to do this is gently steam the rice to infuse moisture back into it. Alternatively, heat the rice in a microwave-safe bowl with a spoonful of water and cover with a damp paper towel. Microwave until warmed through and rehydrated.I don’t recommend attempting to freeze the seasoned rice!
Notes
- Don’t skip the rinsing step: this will remove the excess starch from the rice providing the best texture without it being clumpy/stodgy.
- Don’t refrigerate cooling rice too quickly: if you do, it can damage the rice. If you want to cool down the rice quickly, use the methods outlined in the FAQs section on the blog.
- When to add the vinegar mixture: mix the vinegar into the sushi rice when it’s newly cooked and warm. This will make it easiest to disperse throughout without damaging any rice grains.
- Adjust the seasoning to taste: vary the sushi vinegar seasoning used based on your personal taste.
- Avoid metal spoons: when dealing with cooked sushi rice, it’s important to use a wooden spoon and/or silicone spatula. You’re less likely to damage the rice grains, and you can avoid any “reactions” between the vinegar and metal.
- Don’t remove the lid: while cooking the rice, you must leave the lid on the entire time, INCLUDING for the 10 minutes steaming time. This will provide the perfect sticky rice for sushi.
- Save the rice rinsing water: if you use the bowl method, feel free to use the rinsed rice water to water plants rather than dispose of it down the sink.
Nutrition
Nutrition information is automatically calculated, so should only be used as an approximation.


