
This post may contain affiliate links. Please read our disclosure policy.


How to make homemade vegetable bouillon cubes and powder (frozen and dried) – the perfect all-natural replacement to your regular stock cubes. This vegetable bouillon is naturally gluten-free, vegan, and contains no thickeners, preservatives, or MSG!
I’ve previously shared my preferred method for making homemade vegetable stock. However, for those who don’t have a lot of freezer space, learning how to make vegetable bouillon cubes and bouillon powder could be even better!
Since this vegetable bouillon is super concentrated, it takes up far less space than regular stock and yet is still so much healthier than any store-bought option you’ll find. I love making and storing easy “flavorings” like garlic powder and onion powder and seasoning blends like Italian seasoning, falafel spice mix, and Lebanese zaatar blend (za’atar). I’ve even shared recipes for Thai red curry paste and green curry paste. Now, we’re going back to the basics.
All you need to prepare these homemade stock cubes is a selection of vegetables, herbs, seasonings, and salt. Next, you’ll need to chop and simmer the mixture before blending it into a puree and freezing or dehydrating based on whether you want vegetable stock cubes or bouillon powder.
Even better, this recipe is super budget-friendly. It’s made up of largely pantry basics, and low-budget vegetables and a single batch can potentially last months! Even better, it’s customizable and versatile based on what’s in season (and in your kitchen) – yet it can be made neutral enough to work as a flavor enhancer to all sorts of dishes!
Want to save this recipe?
What are bouillon cubes?
Depending on where you’re based, bouillon cubes come under several names – stock cube, broth cube, stockpot, etc. Each refers to the same product, though, which is a dehydrated broth/stock combined with vegetables, salt, fat, seasonings, and MSG (which enhances flavor but is a highly controversial ingredient).
They can also contain hydrogenated palm oil, ‘flavor enhancers’ (where the msg comes in), sugar, caramel, etc.
Luckily, once you’ve learned how to make bouillon cubes at home, you can avoid all the ‘nasties’ and create all-natural, veggie-packed, flavor-enhancing cubes ready for all your meals. They provide depths of flavor with vegetables and seasoning – not just ‘flavorings’ and salt! Even better, you can store the paste fresh or frozen or dehydrate it into homemade bouillon powder.
The bouillon cube ingredients
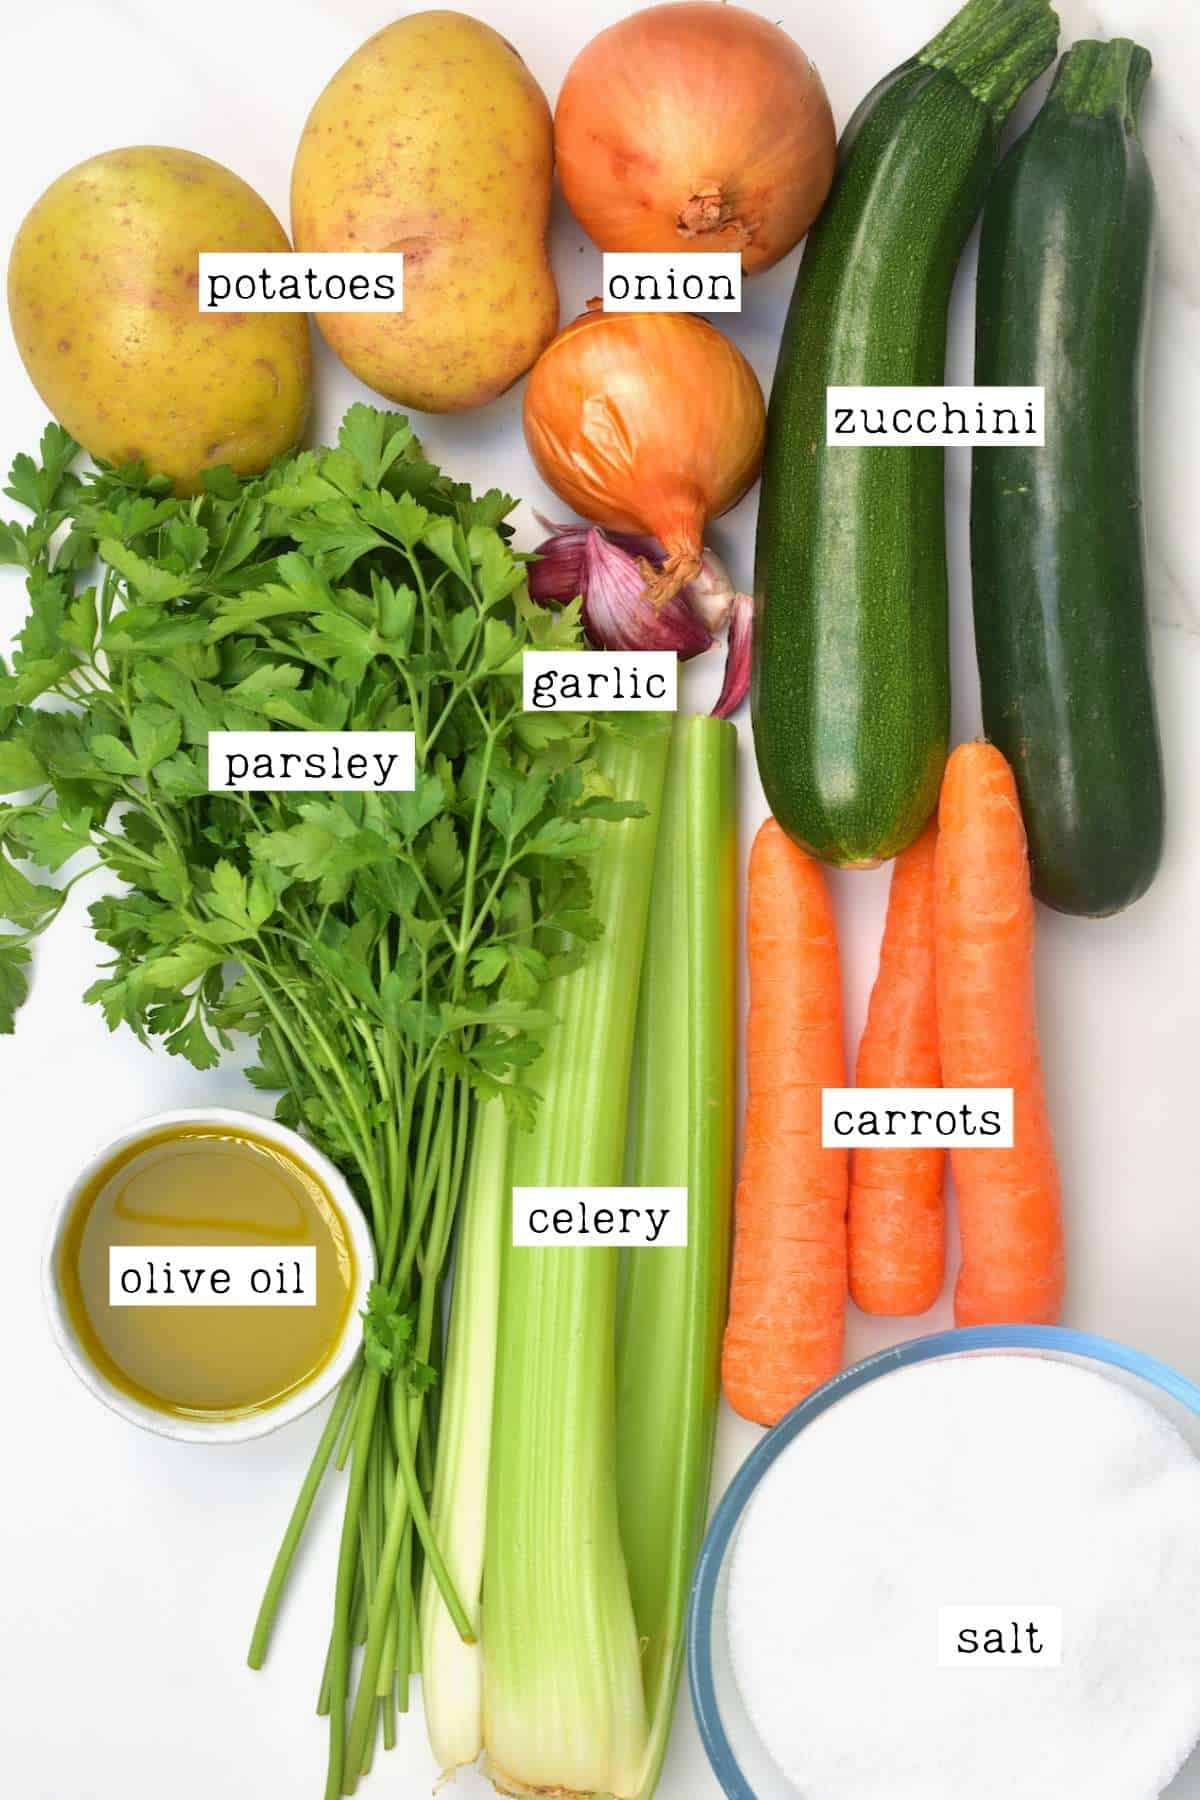
There are four main elements to homemade vegetable bouillon cubes: vegetables, aromatics (seasonings), fat, and salt.
- Vegetables: I used a combination of potatoes, zucchini, celery, carrot, and onion.
- Aromatics: I used garlic and parsley.
- Oil: I used olive oil; however, you can use any neutral oil of your choice.
- Salt: it might seem like you’re adding a lot. However, it’s important for preservation, though you can adjust the amount to personal preference.
Optional add-ins
- Other vegetables: there is some leniency in what you use for these vegetable bouillon cubes. For example, you could use parsnip, fennel, sun-dried tomatoes, peas, spinach, etc., too. However, avoid any veggies that will give more of a bitter flavor like leeks.
- For umami: you could add mushrooms or mushroom powder to add extra umami flavor in place of the MSG which is used in supermarket versions.
- Nutritional yeast: this can help to add further umami flavor and a slightly nutty, cheesy flavor.
- Other herbs: feel free to experiment with what you have available: cilantro (coriander) and basil, for example, could work.
- Other seasonings: onion powder, garlic powder, turmeric, celery seed (or celery salt), black pepper, tomato powder, etc. You could even include a bay leaf or Italian seasoning. If you want to add dried herbs or powders to the powder, you can simply add them before grinding/processing the powder.
- Tomato paste: Just 1-2 Tbsp will help to add depths of flavor.
How to make bouillon cubes and powder
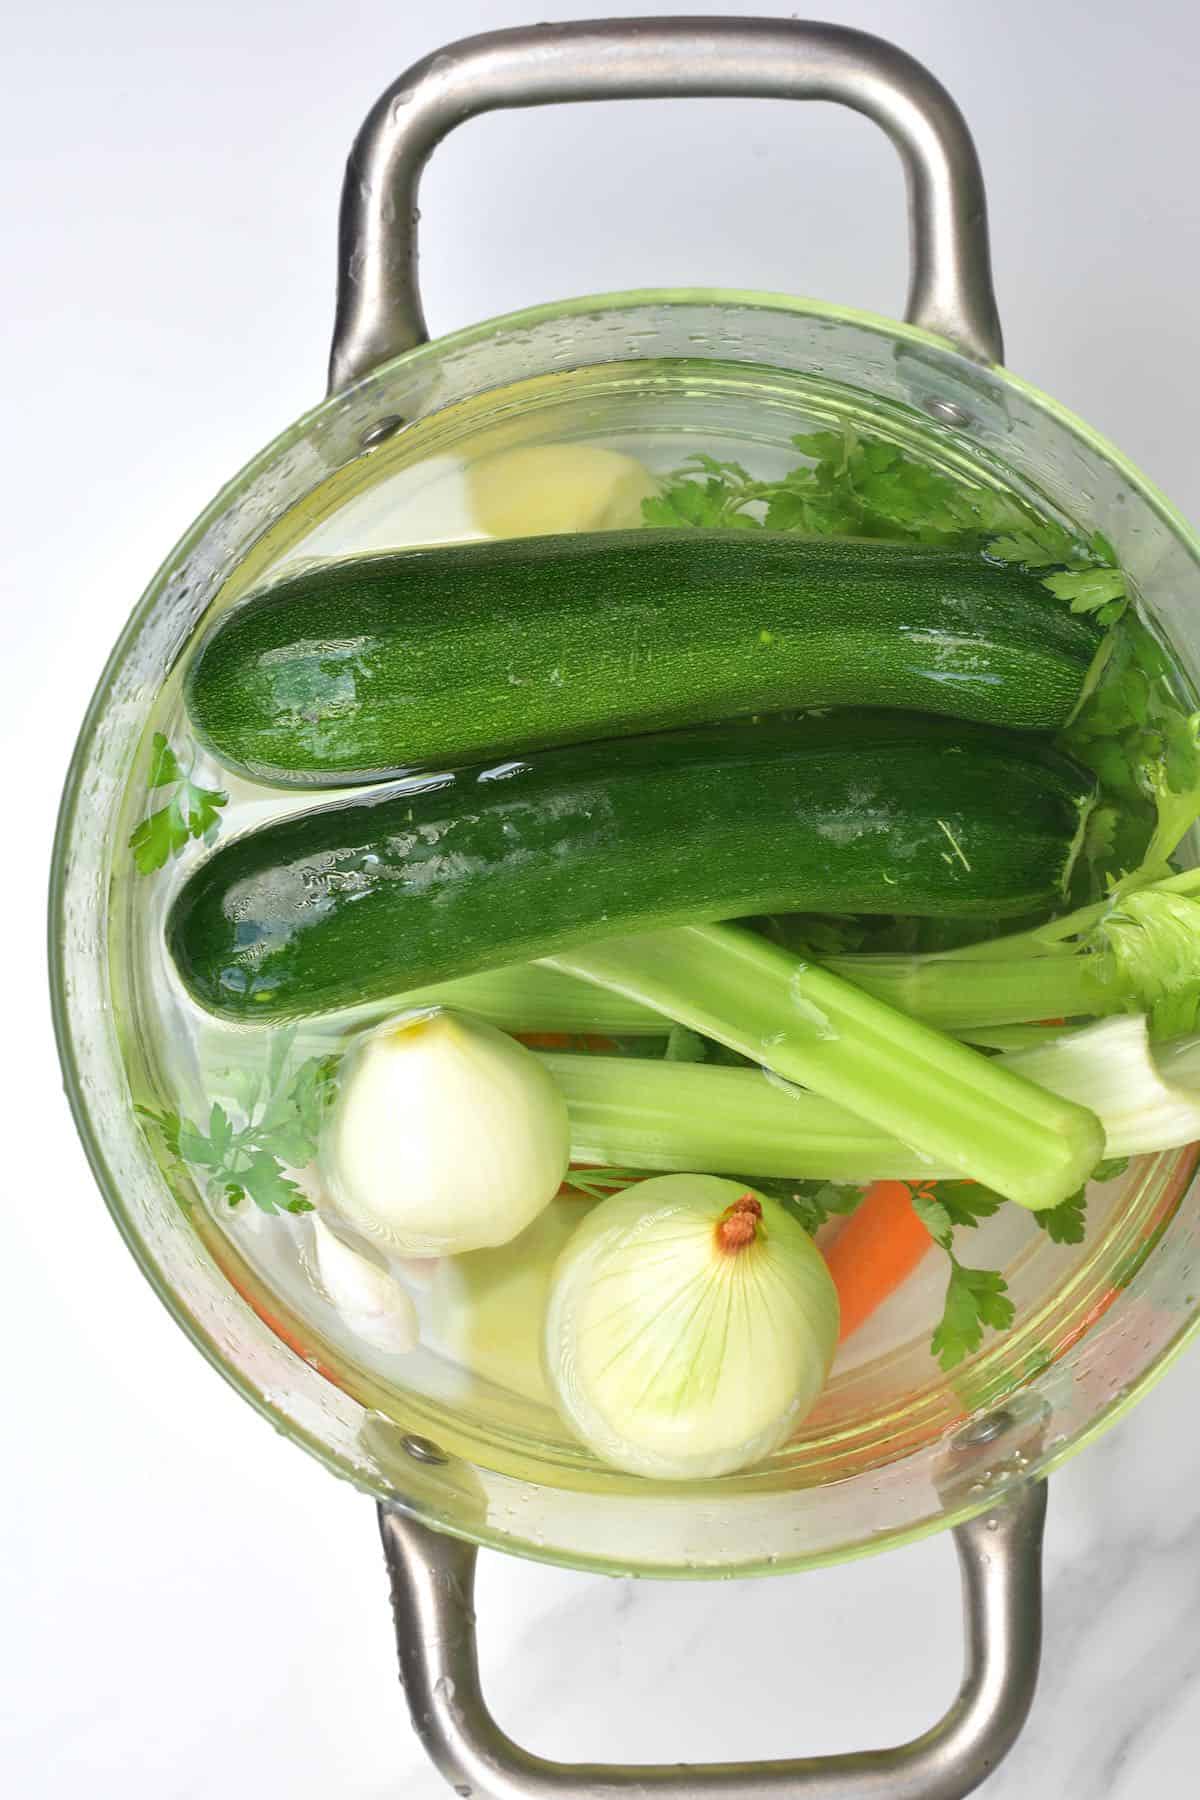
Step 1: Wash the vegetables
First, wash the veggies well. I like to soak them in a water bath for a few minutes to wash away any residue (especially when using organic produce, which can have residue soil/sand).
Scrub the veggies lightly and then dry them with a kitchen towel.
Step 2: Chop the vegetables
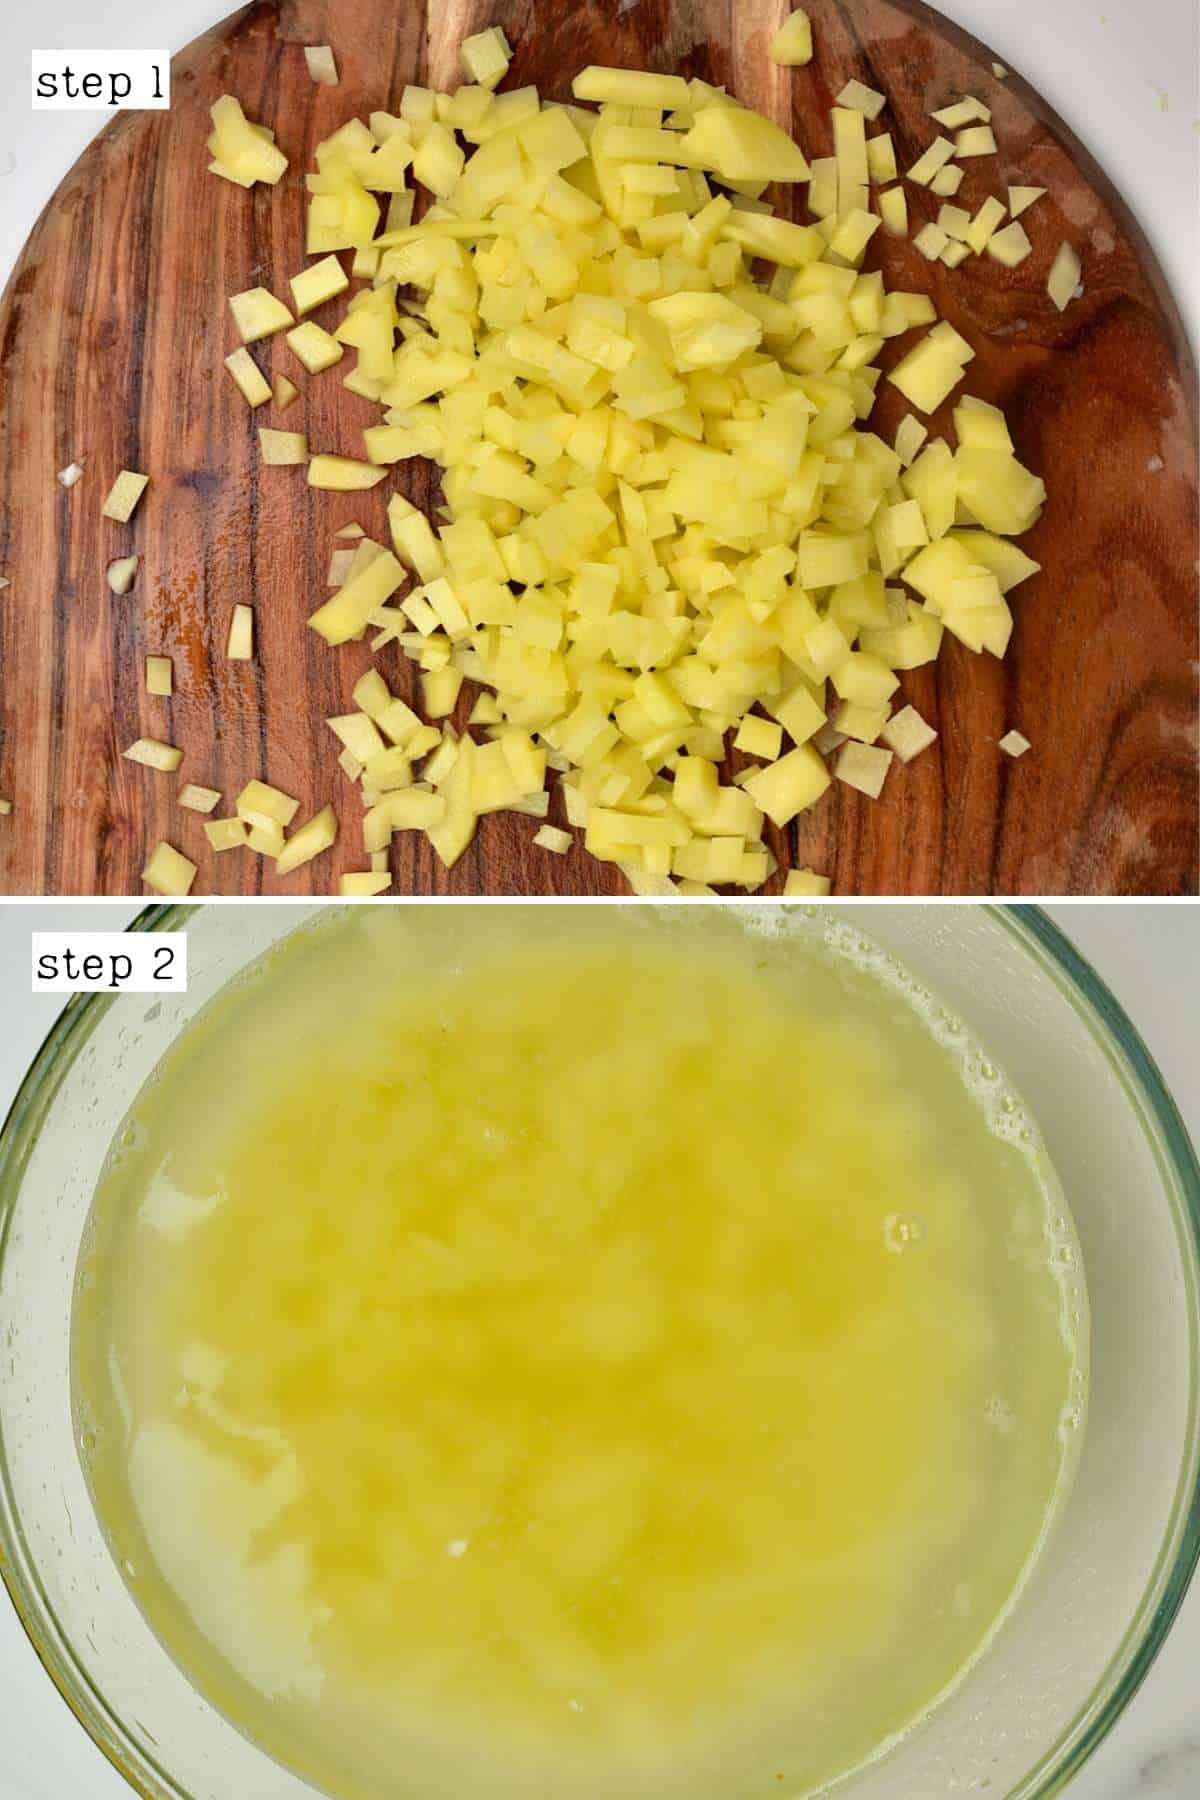
Finely chop all of the vegetables into small cubes – the smaller, the better, as they’ll cook faster and be easier to puree. You could also use a food chopper/processor to help process the vegetables into small pieces.
At the same time, finely chop the garlic and parsley.
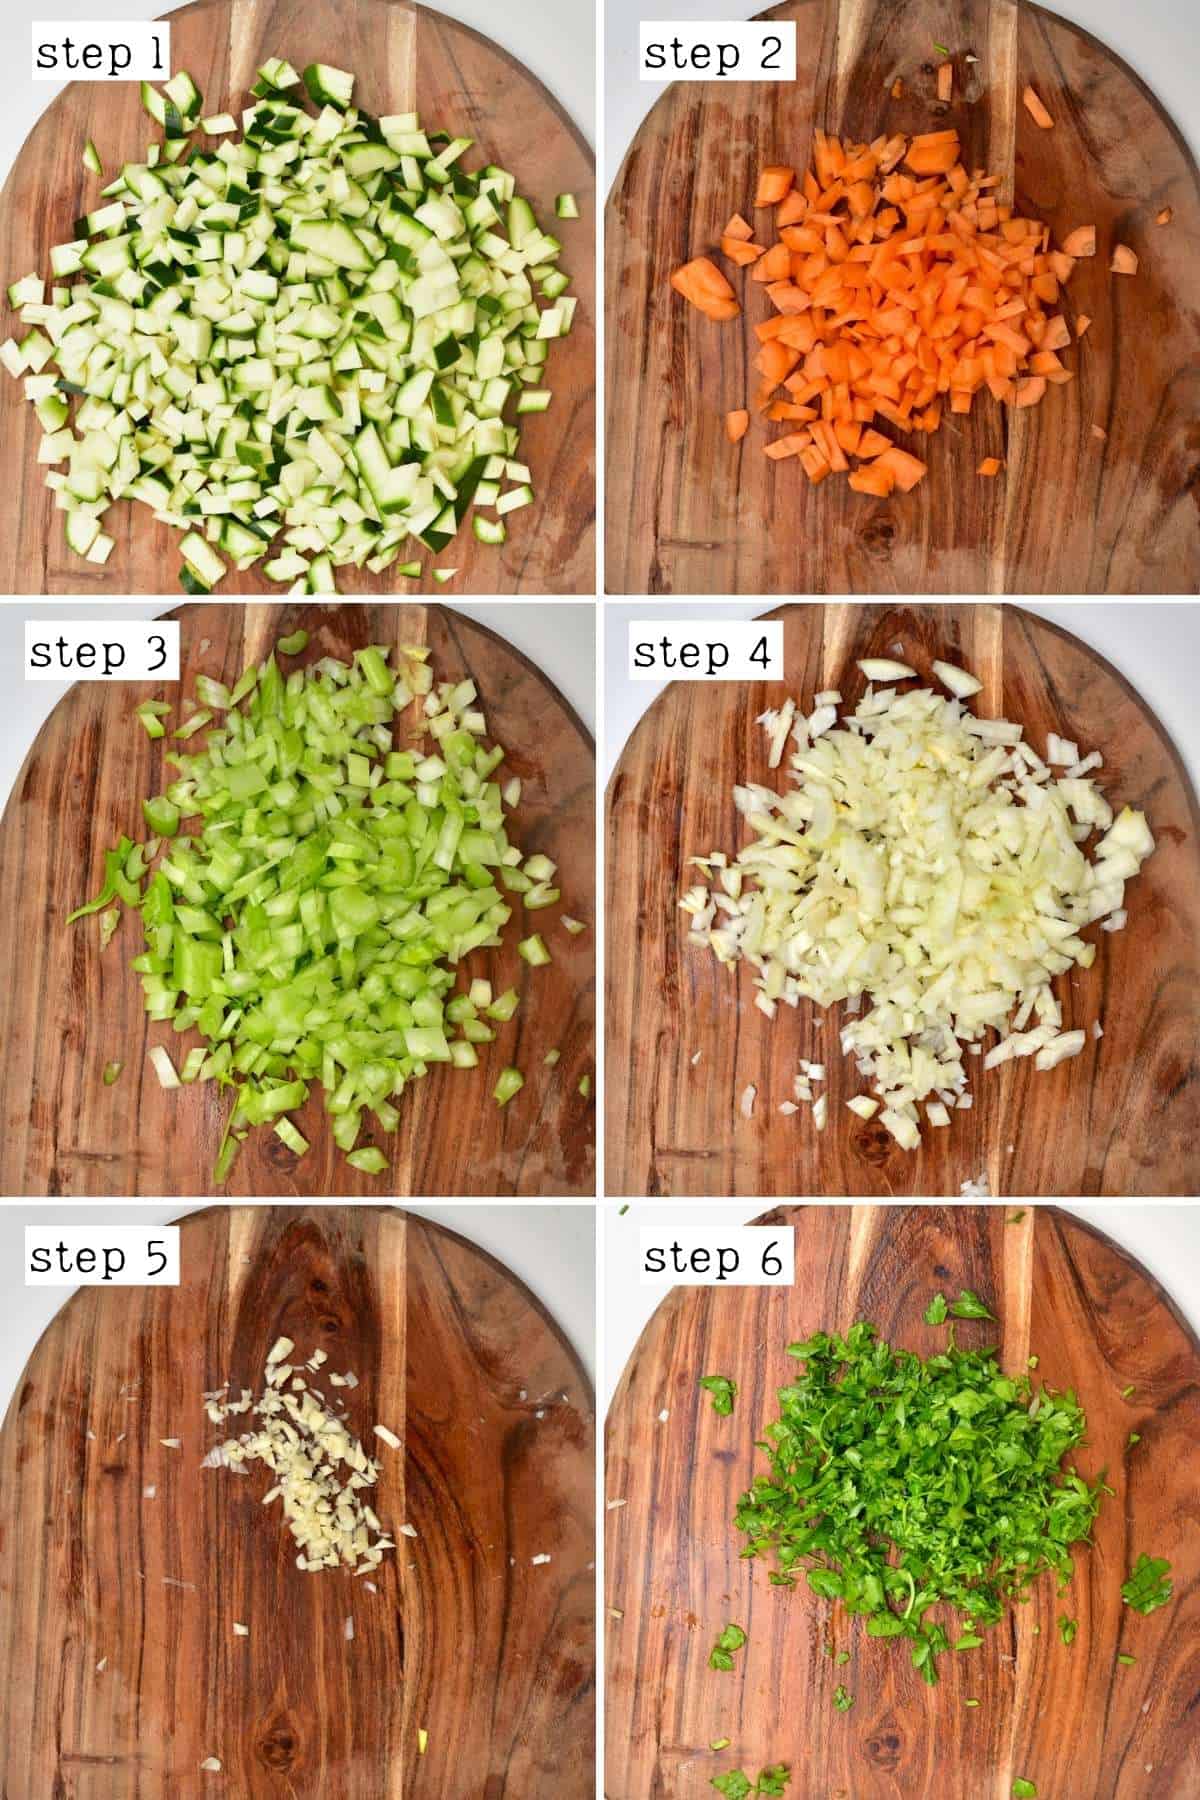
Make sure to transfer the chopped potatoes to a bowl of water while you do the rest of the ingredients. This will keep them from discoloring and get rid of excess starch.
Step 3: Cook the vegetable stock ingredients
In a large skillet, add the oil and heat it over medium heat. Once hot, add the onion and lightly saute for a couple of minutes. Then add the potatoes and cook for several minutes to begin softening (4-5 minutes).
Add the remainder of the ingredients (except the parsley), stir well, and then allow to simmer, covered, to cook until softened – this will take around 20 minutes over medium-low heat. Stir occasionally.
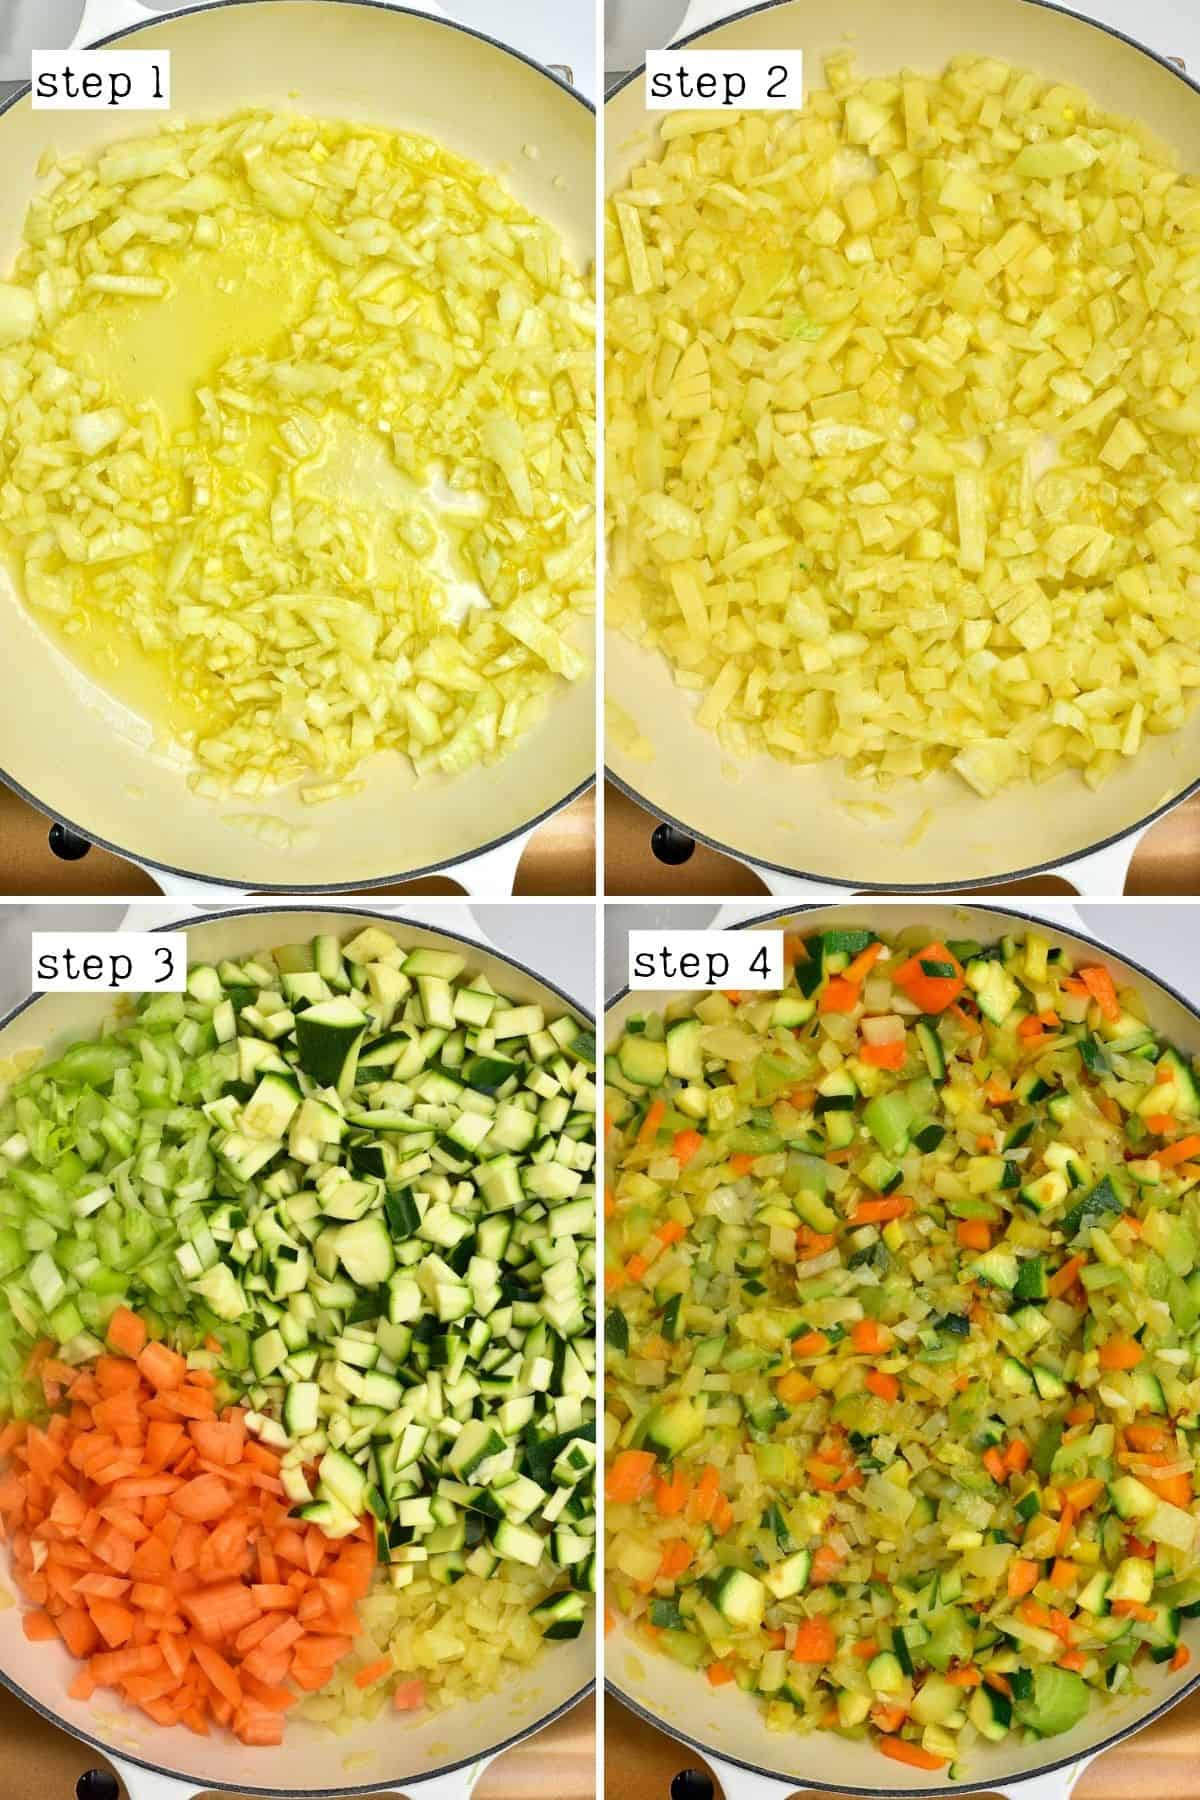
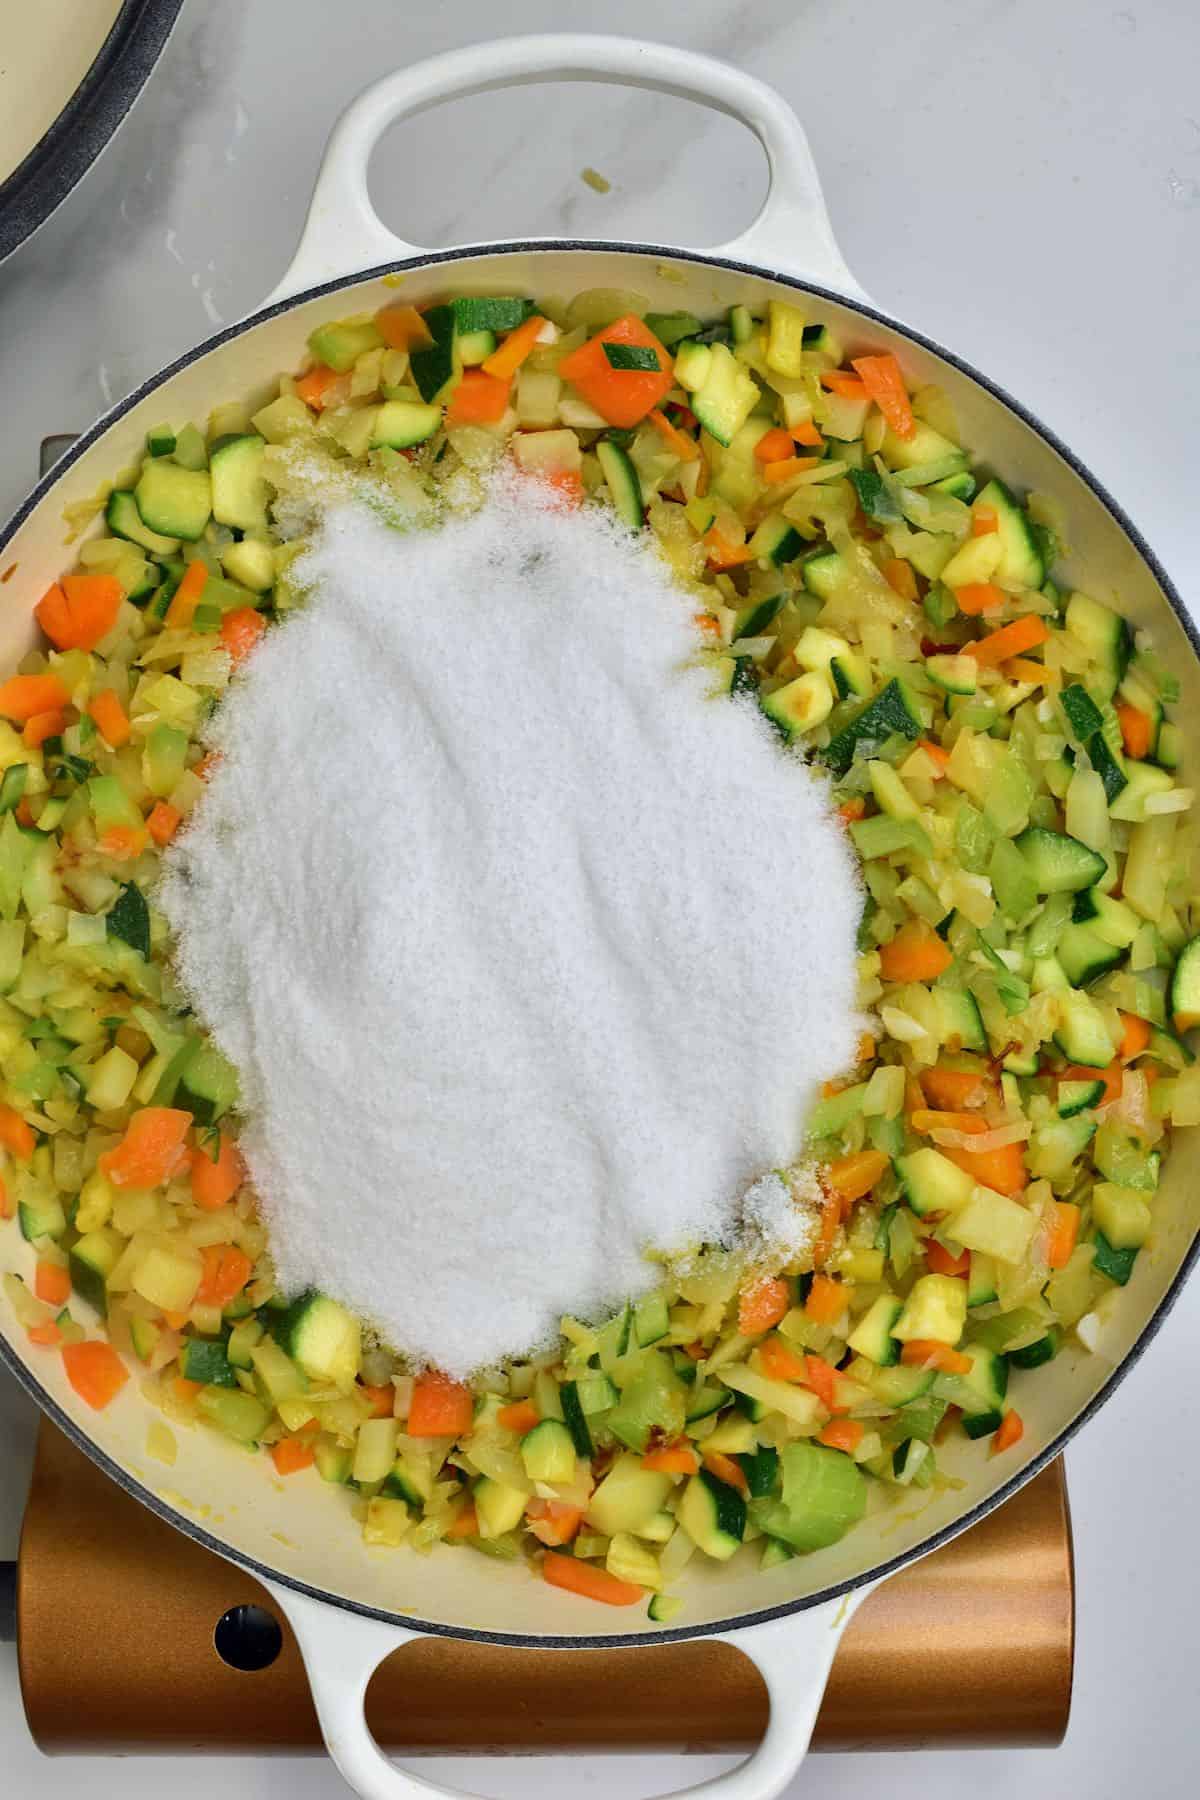
Next, add the salt and stir well. This will encourage all the excess liquid to release from the veggies. Cook for a further 15-20 minutes, uncovered, stirring occasionally.
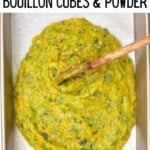
Step 4: Blend the vegetable bouillon
Using an immersion blender, you can blend the vegetable bouillon directly into the pan. Alternatively, allow it to cool slightly and use a food processor to blend it into a puree.
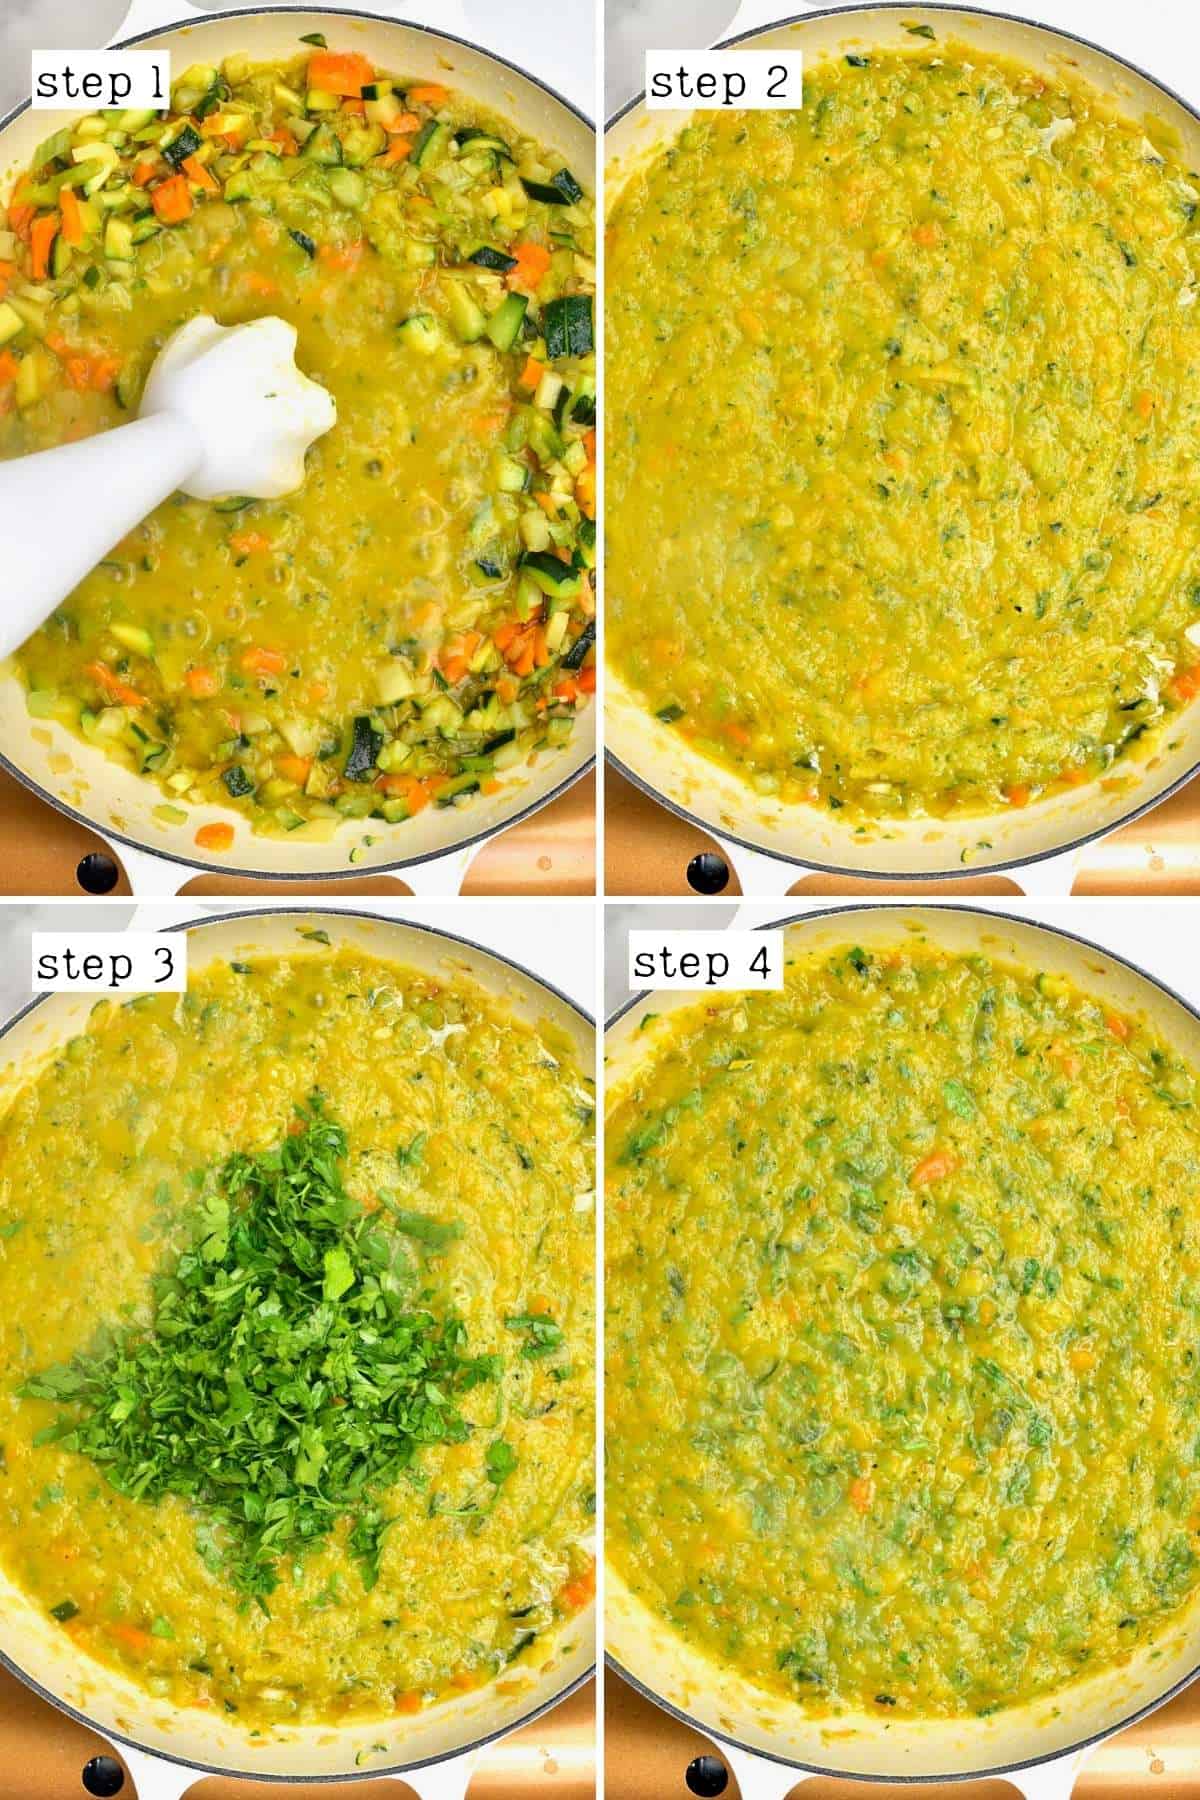
Once blended, add the parsley and stir to combine. Next, it’s time to decide how you want to store the homemade vegan bouillon cubes – make frozen cubes, dehydrate into powder, or do both with parts of the puree. You can also keep some fresh, stored in the refrigerator for a week.
Note – you can further cook it down slightly to remove more of the water content. I prefer to cook the veggies for a lower amount of time, though.
The veggie stock will have a puree-like consistency. You don’t need it to be thinner.

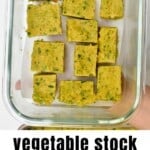
To Freeze the Vegetable Buillon
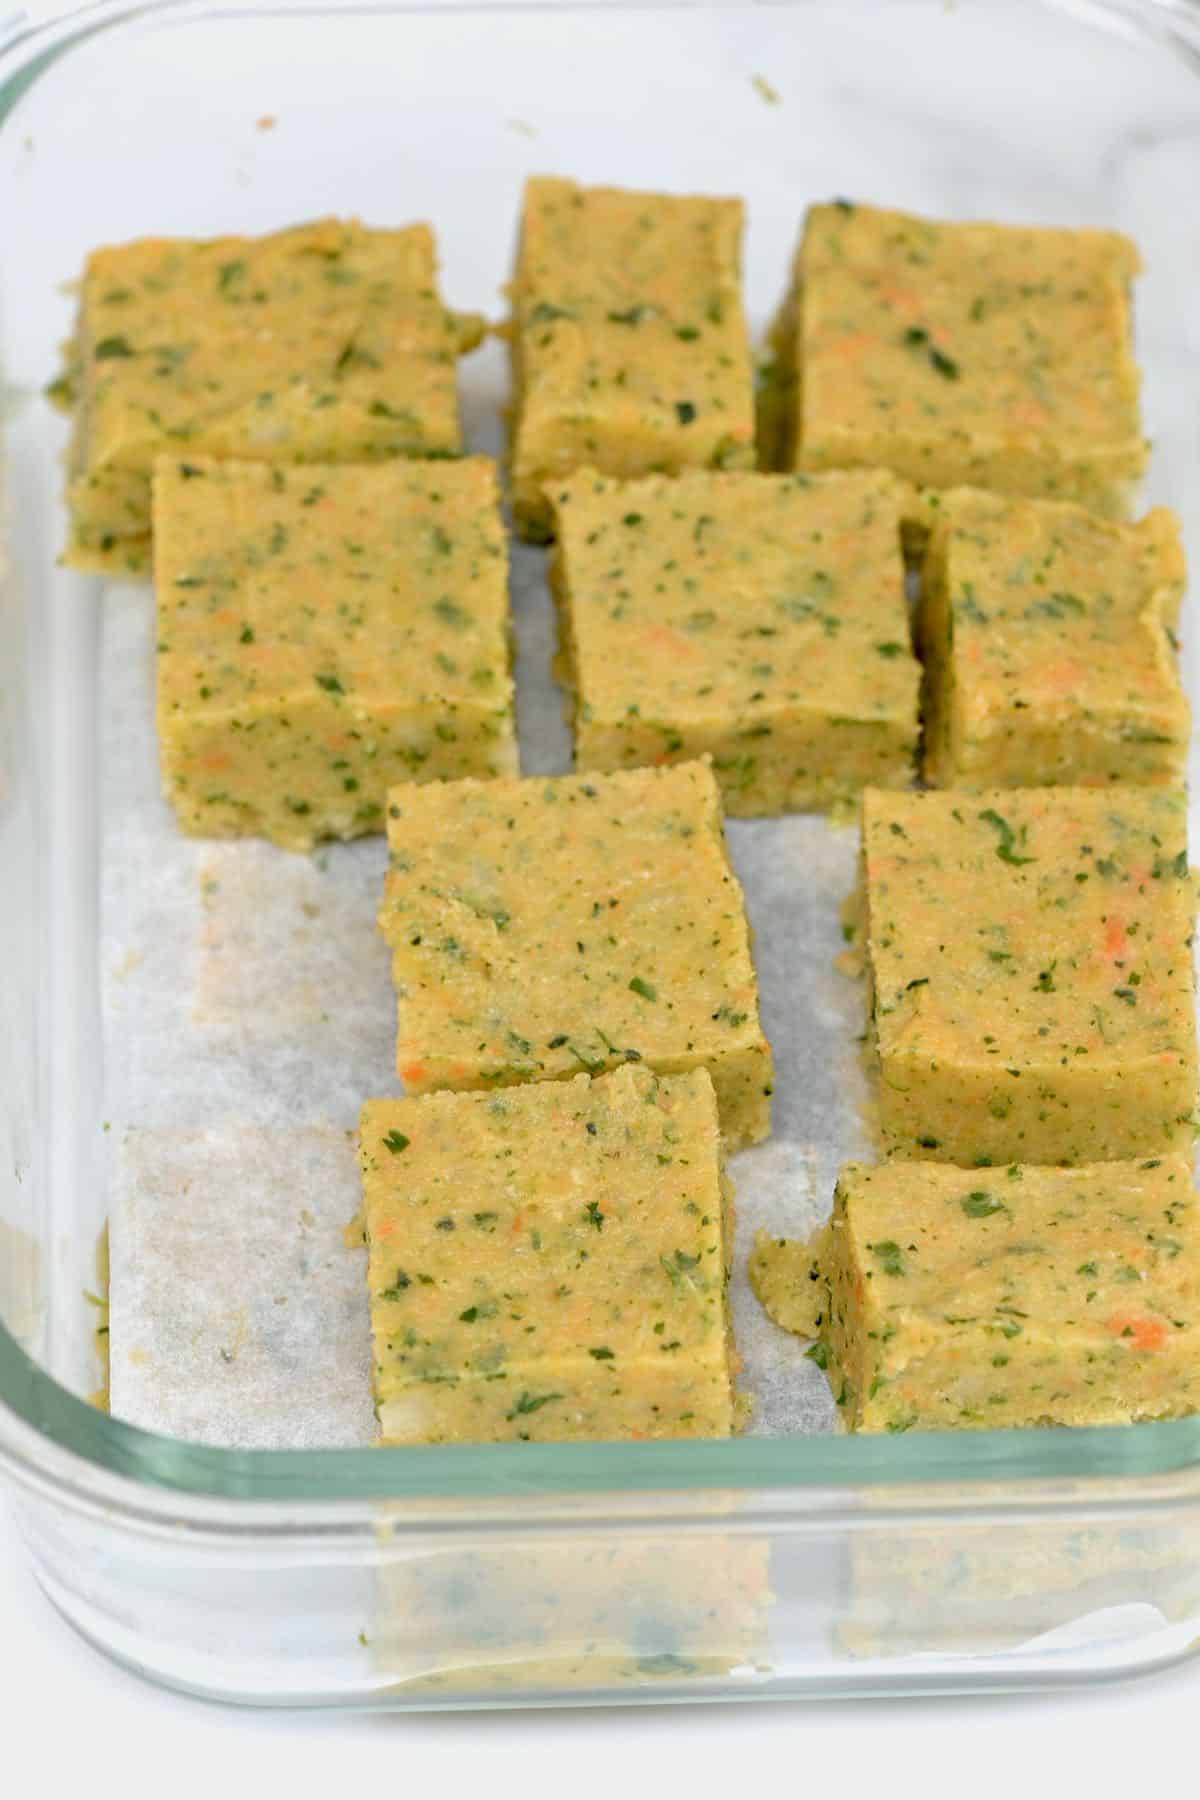
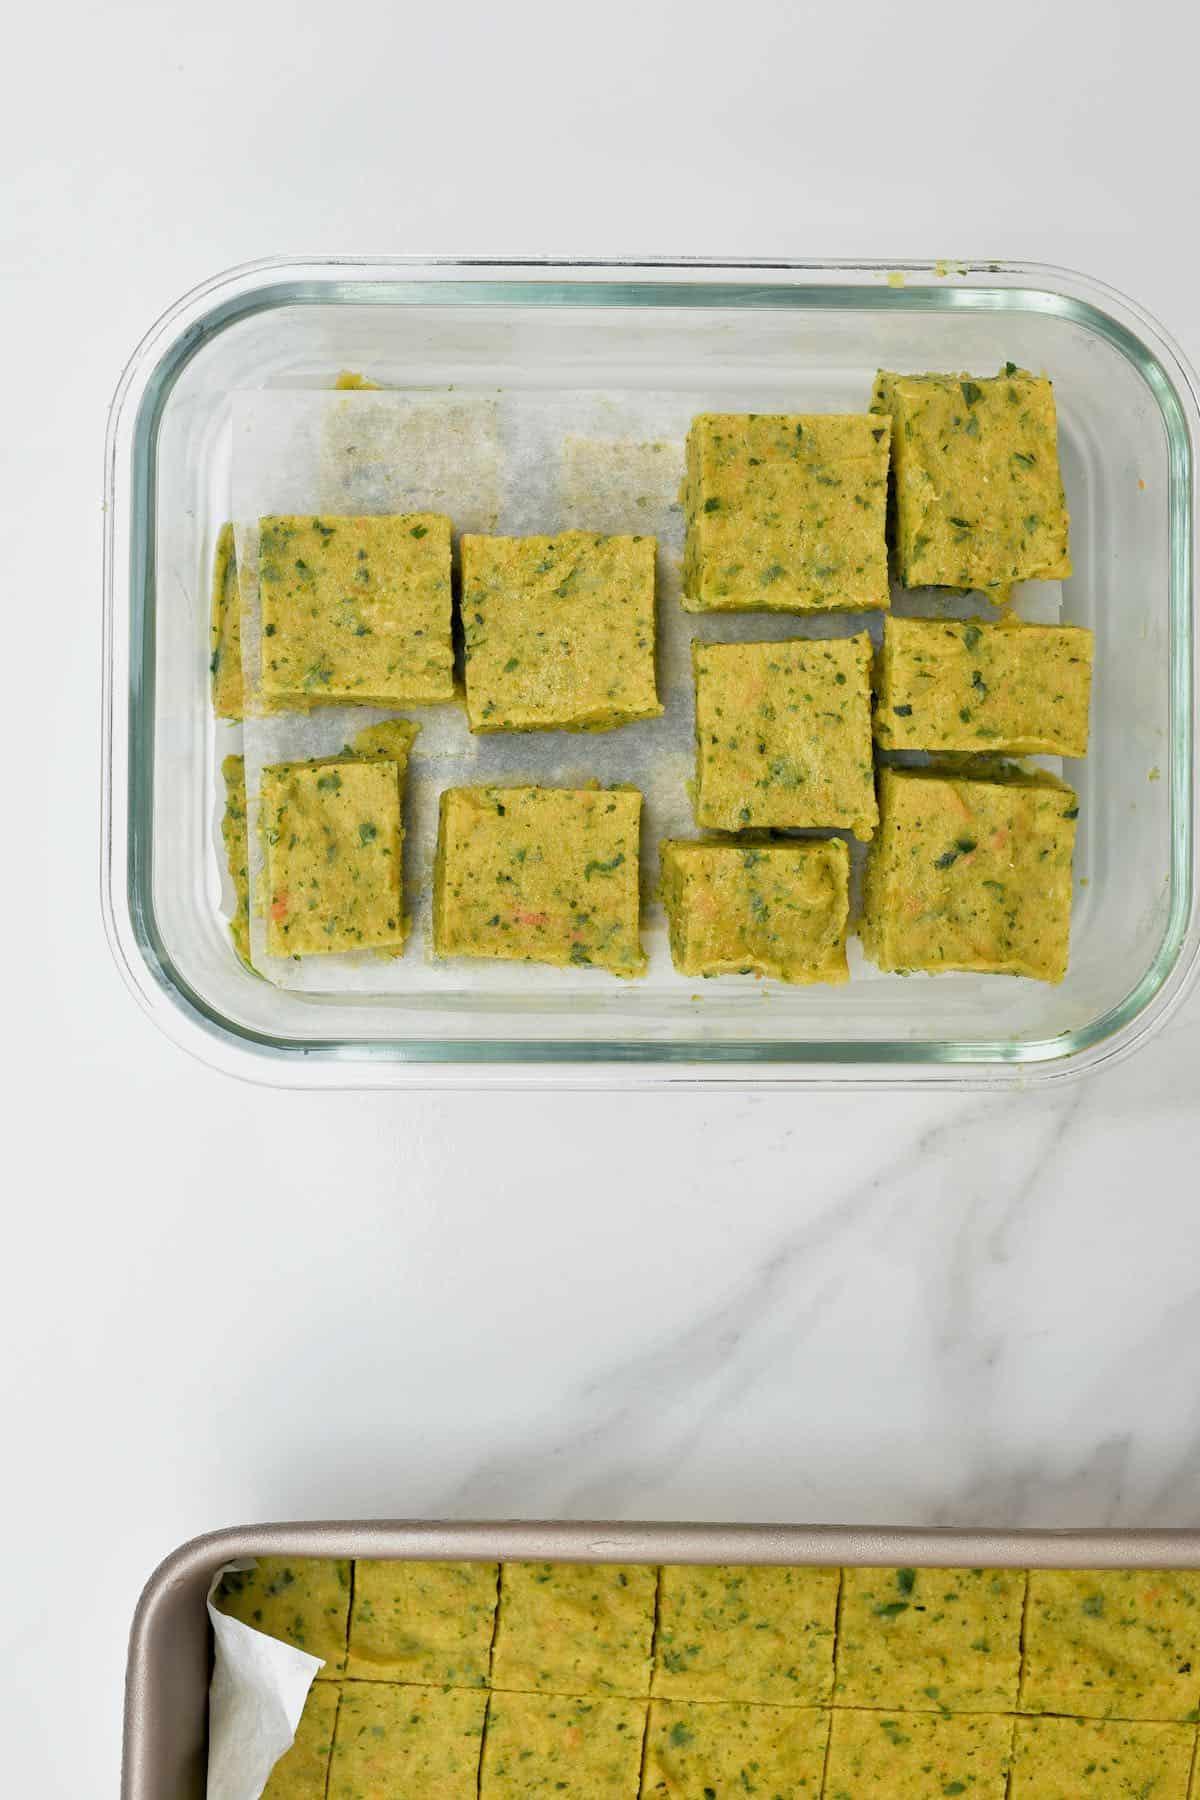
Line a baking tray with parchment paper and transfer the stock to the tray, leveling it out with a spatula. I recommended using a larger tray so you can make a thinner layer.
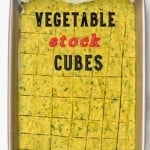
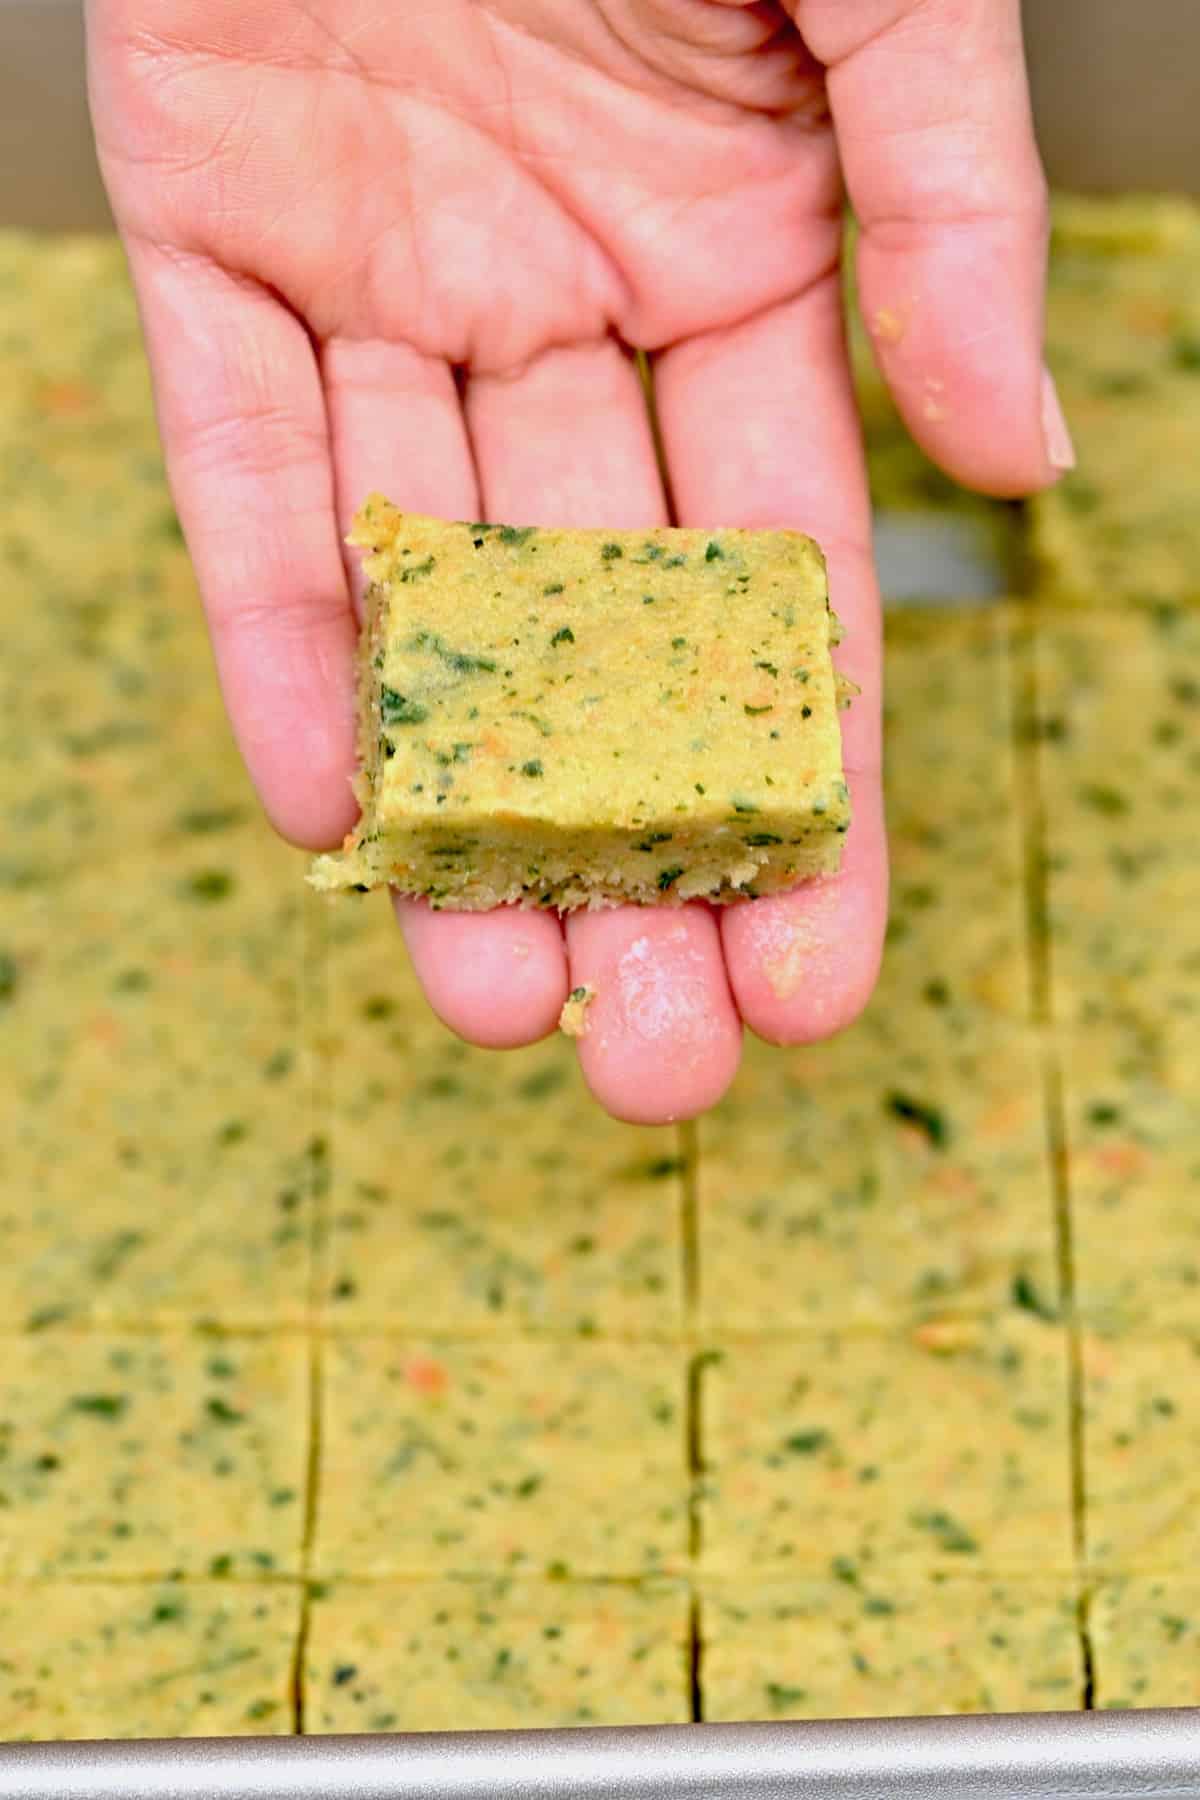
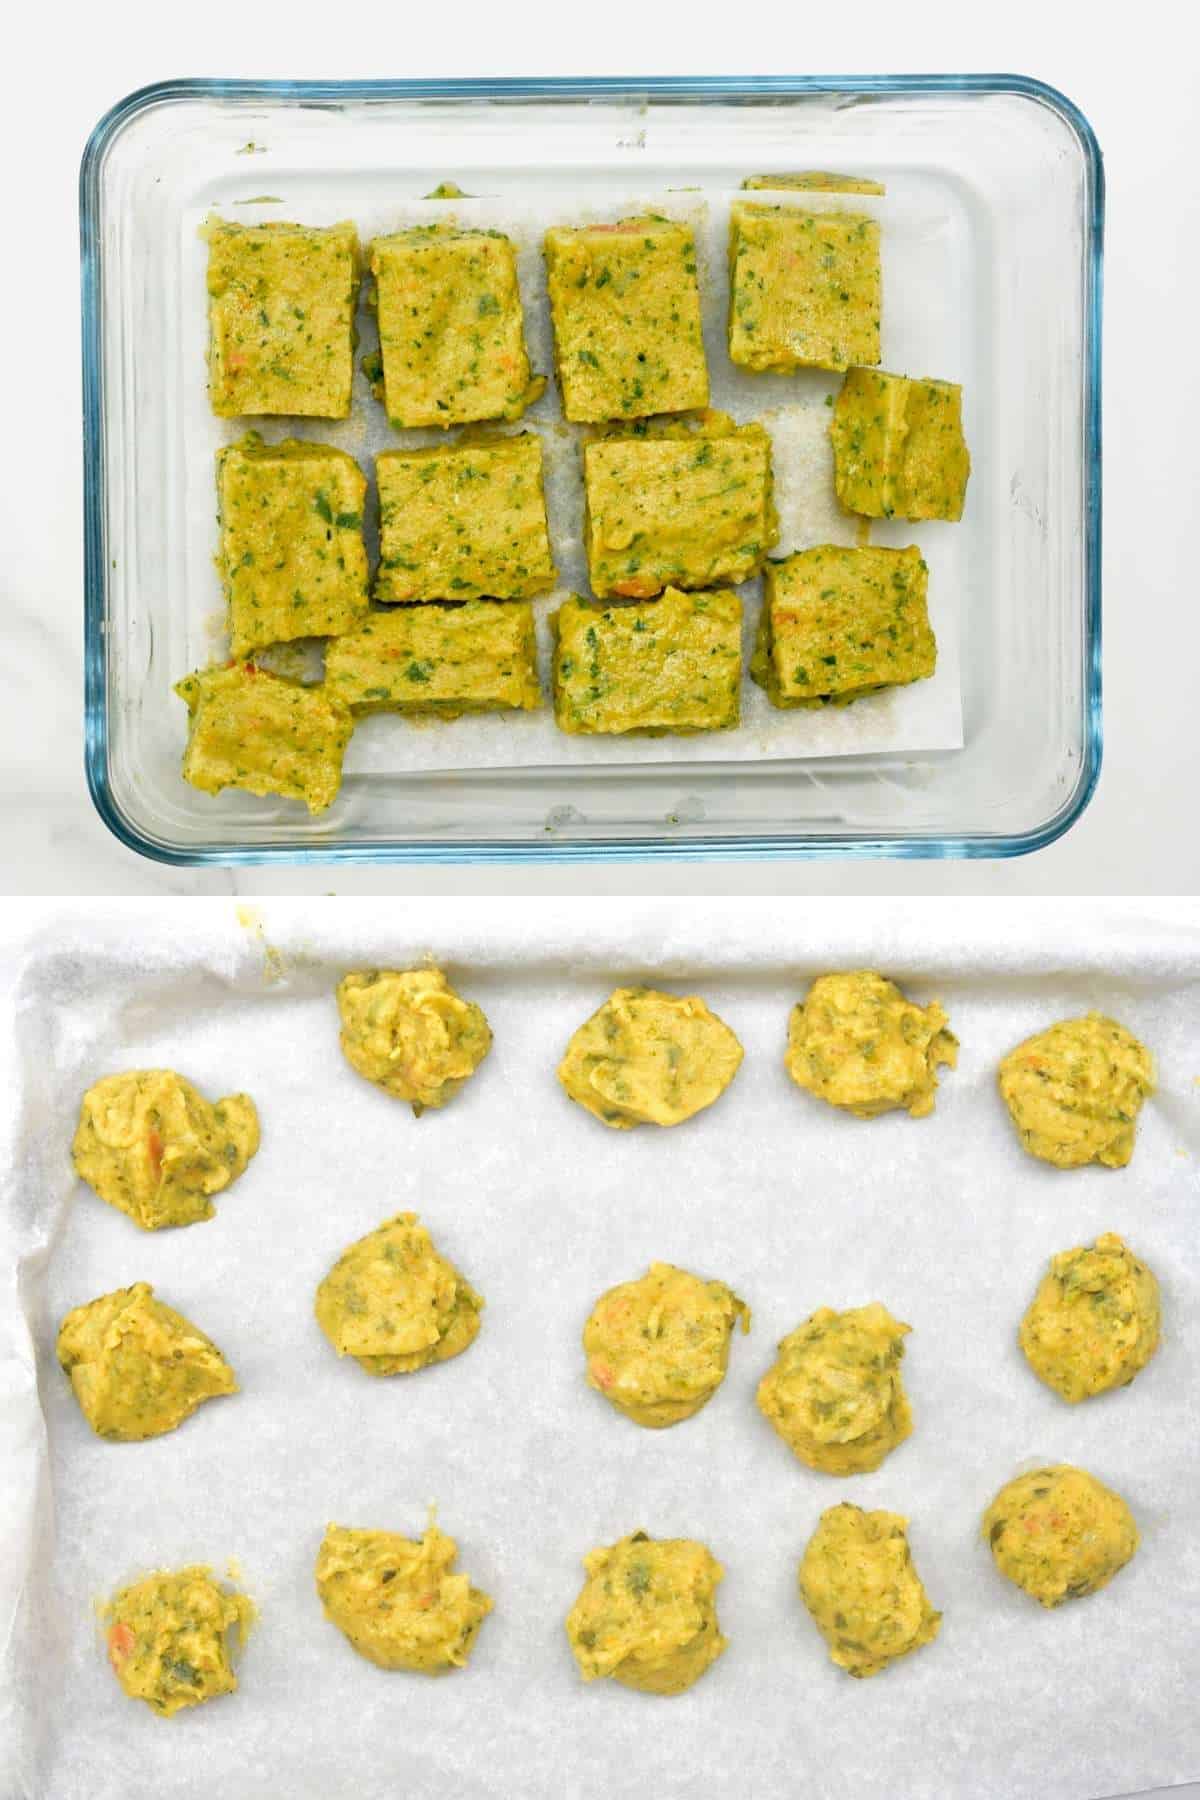
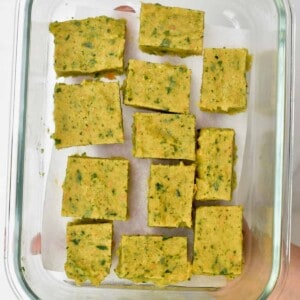
Transfer to the freezer to freeze for several hours until hardened (due to the salt content, they won’t freeze completely solid). Then use a sharp knife to cut into cubes and transfer to a freezer-safe container to store.
If you want the cubes to be the same size, I recommend using a square/rectangle baking dish and measuring when scoring the lines. I’m not too ‘perfection-y’ about this, so then I have smaller and larger pieces to choose from.
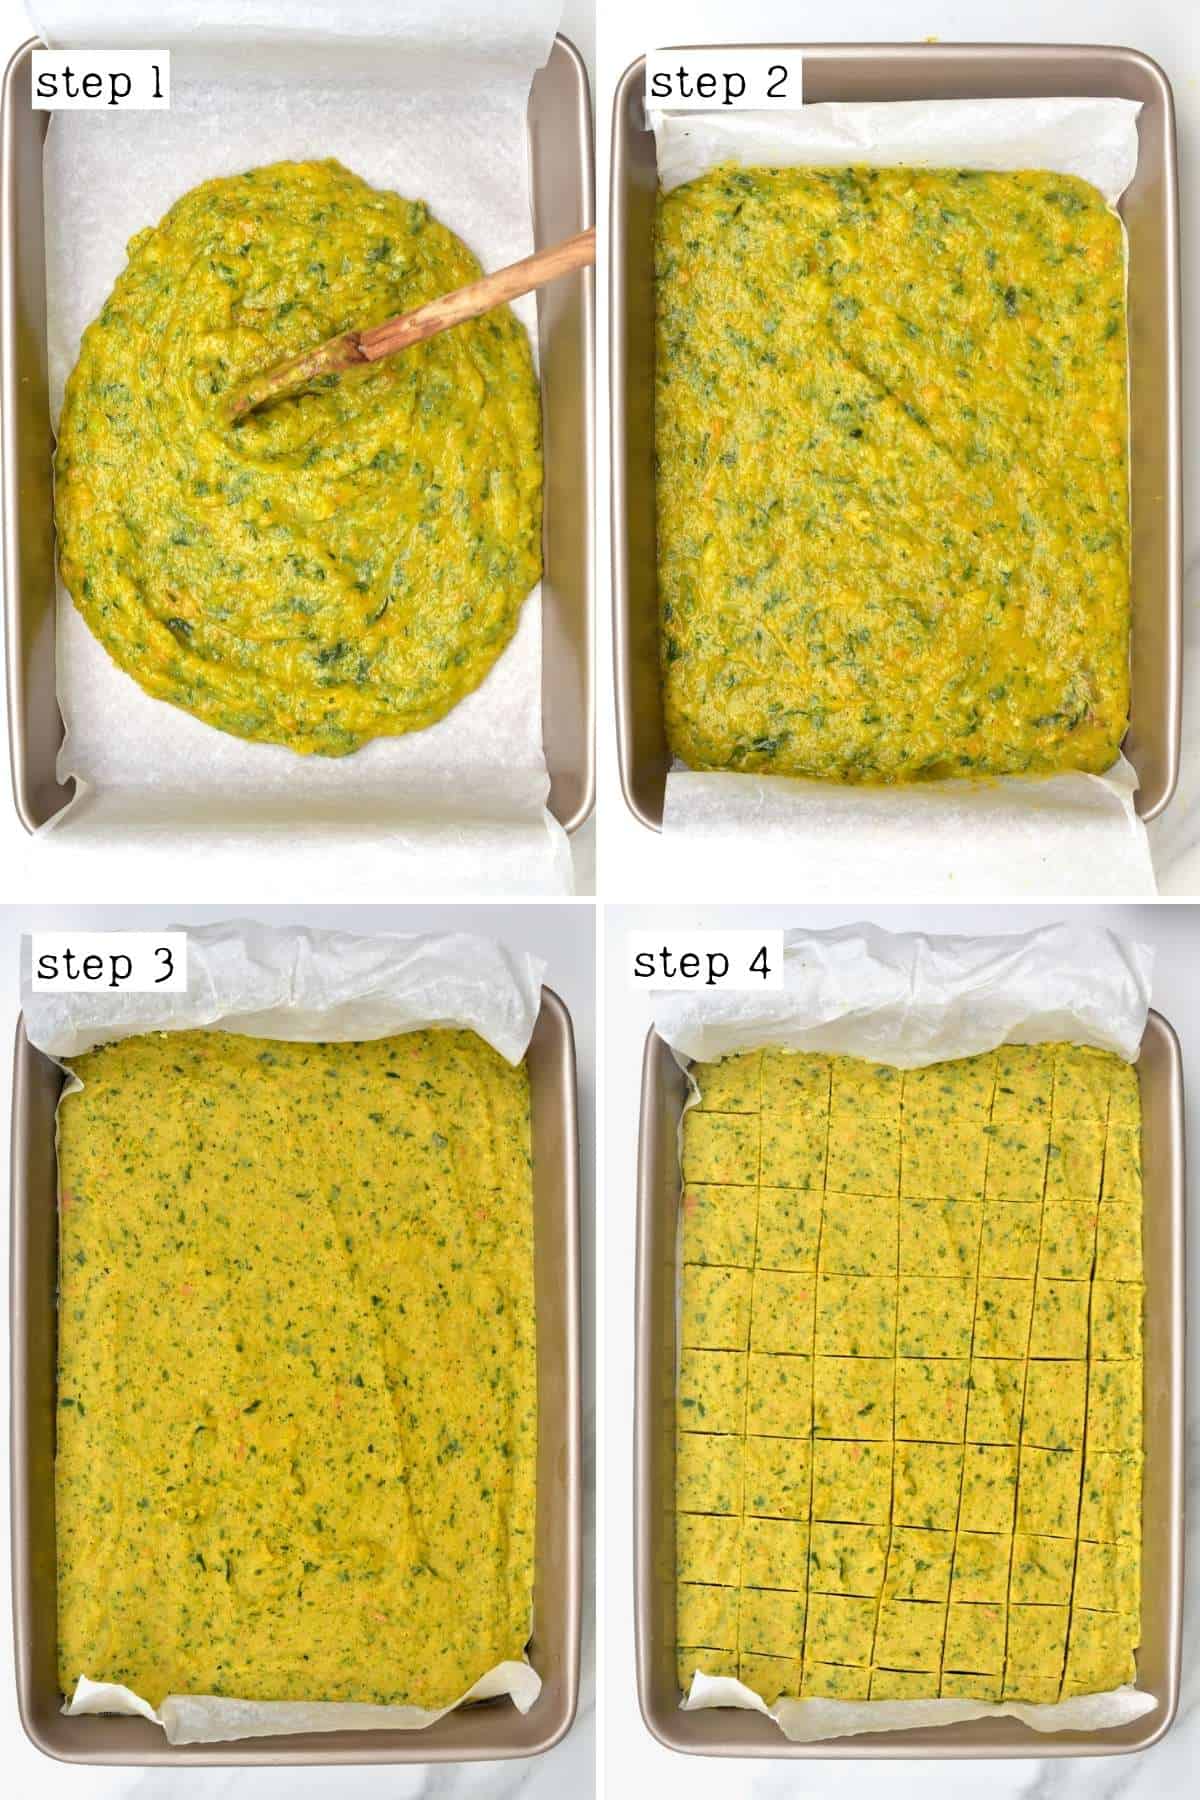
I recommend placing them in a container with space in-between each cube, layered up with pieces of parchment paper between each layer (so the cubes aren’t touching).
Alternatively, you can use a scoop/measuring spoon to freeze the puree in measured ‘chunks’ (i.e., 1 Tbsp) instead.
To store: these frozen vegetable bouillon cubes will store for at least six months, if not longer! You could also keep some of the paste in the refrigerator in a sterilized jar and aim to use it within one week.
To Dehydrate Into Vegetable Bouillon Powder/Stock Powder
Spread some vegetable bouillon puree on a large tray (or several trays) covered with parchment paper (or a dehydrator sheet) and spread out into a thin layer: the thinner, the better for quicker dehydration. Dehydrate it either in the oven or a dehydrator.
In the oven: ideally, set the temperature to 150ºF/65ºC. If it doesn’t go that low, prop the door open just a tiny bit to allow extra airflow and choose the lowest temperature. This can take up to 10 hours, depending on the thickness of the layer, humidity, etc. If the puree is layered very very thinly, it can dry up within 5 hours or so.
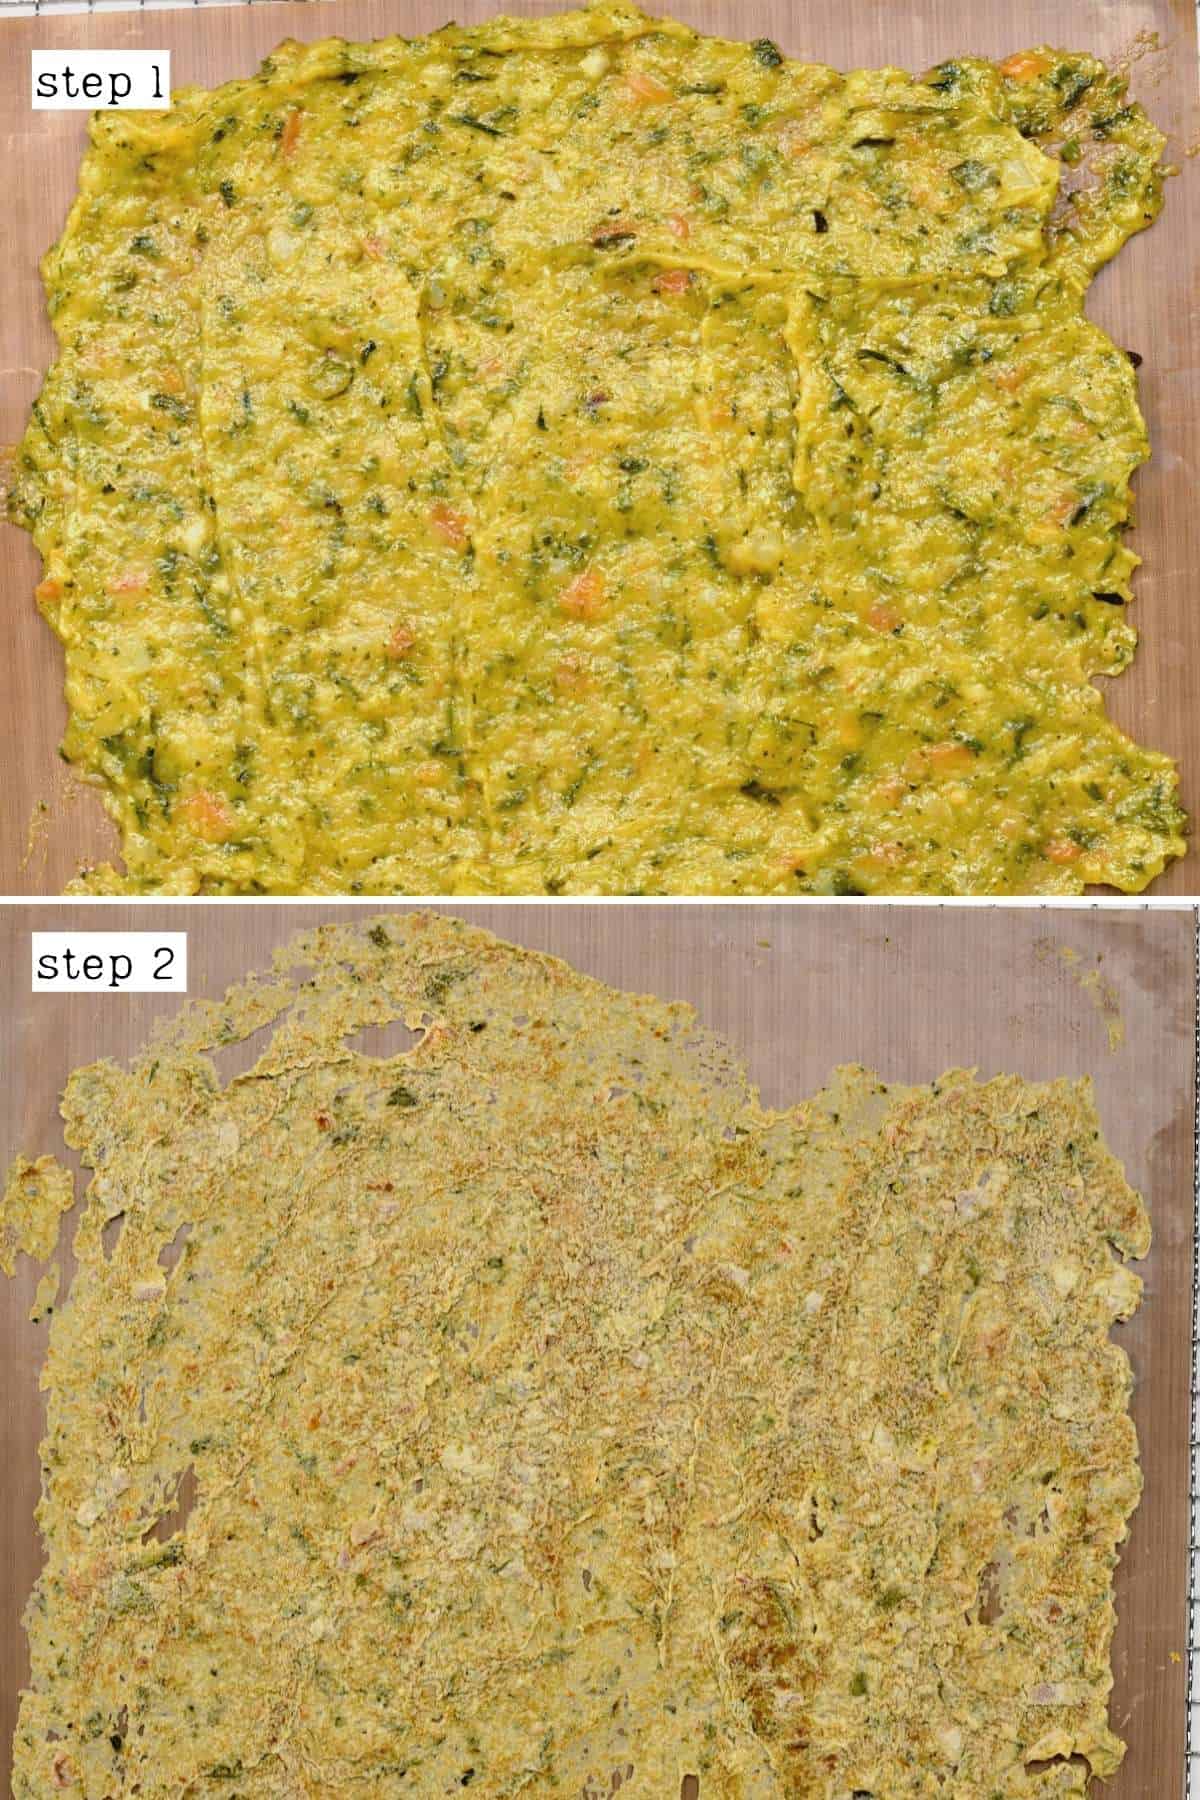
Don’t be tempted to whack the temperature up higher as it will ‘cook’ the puree rather than simply dehydrate it – which could burn the mixture.
In the dehydrator: choose 150ºF/65ºC and allow it to dry for up to 10 hours. I recommend checking on it at 5-6 hours and then increasing incrementally until ready. Also, if the layers are very very thin, the dehydration process will be faster.
It needs to be dry enough to snap into pieces.
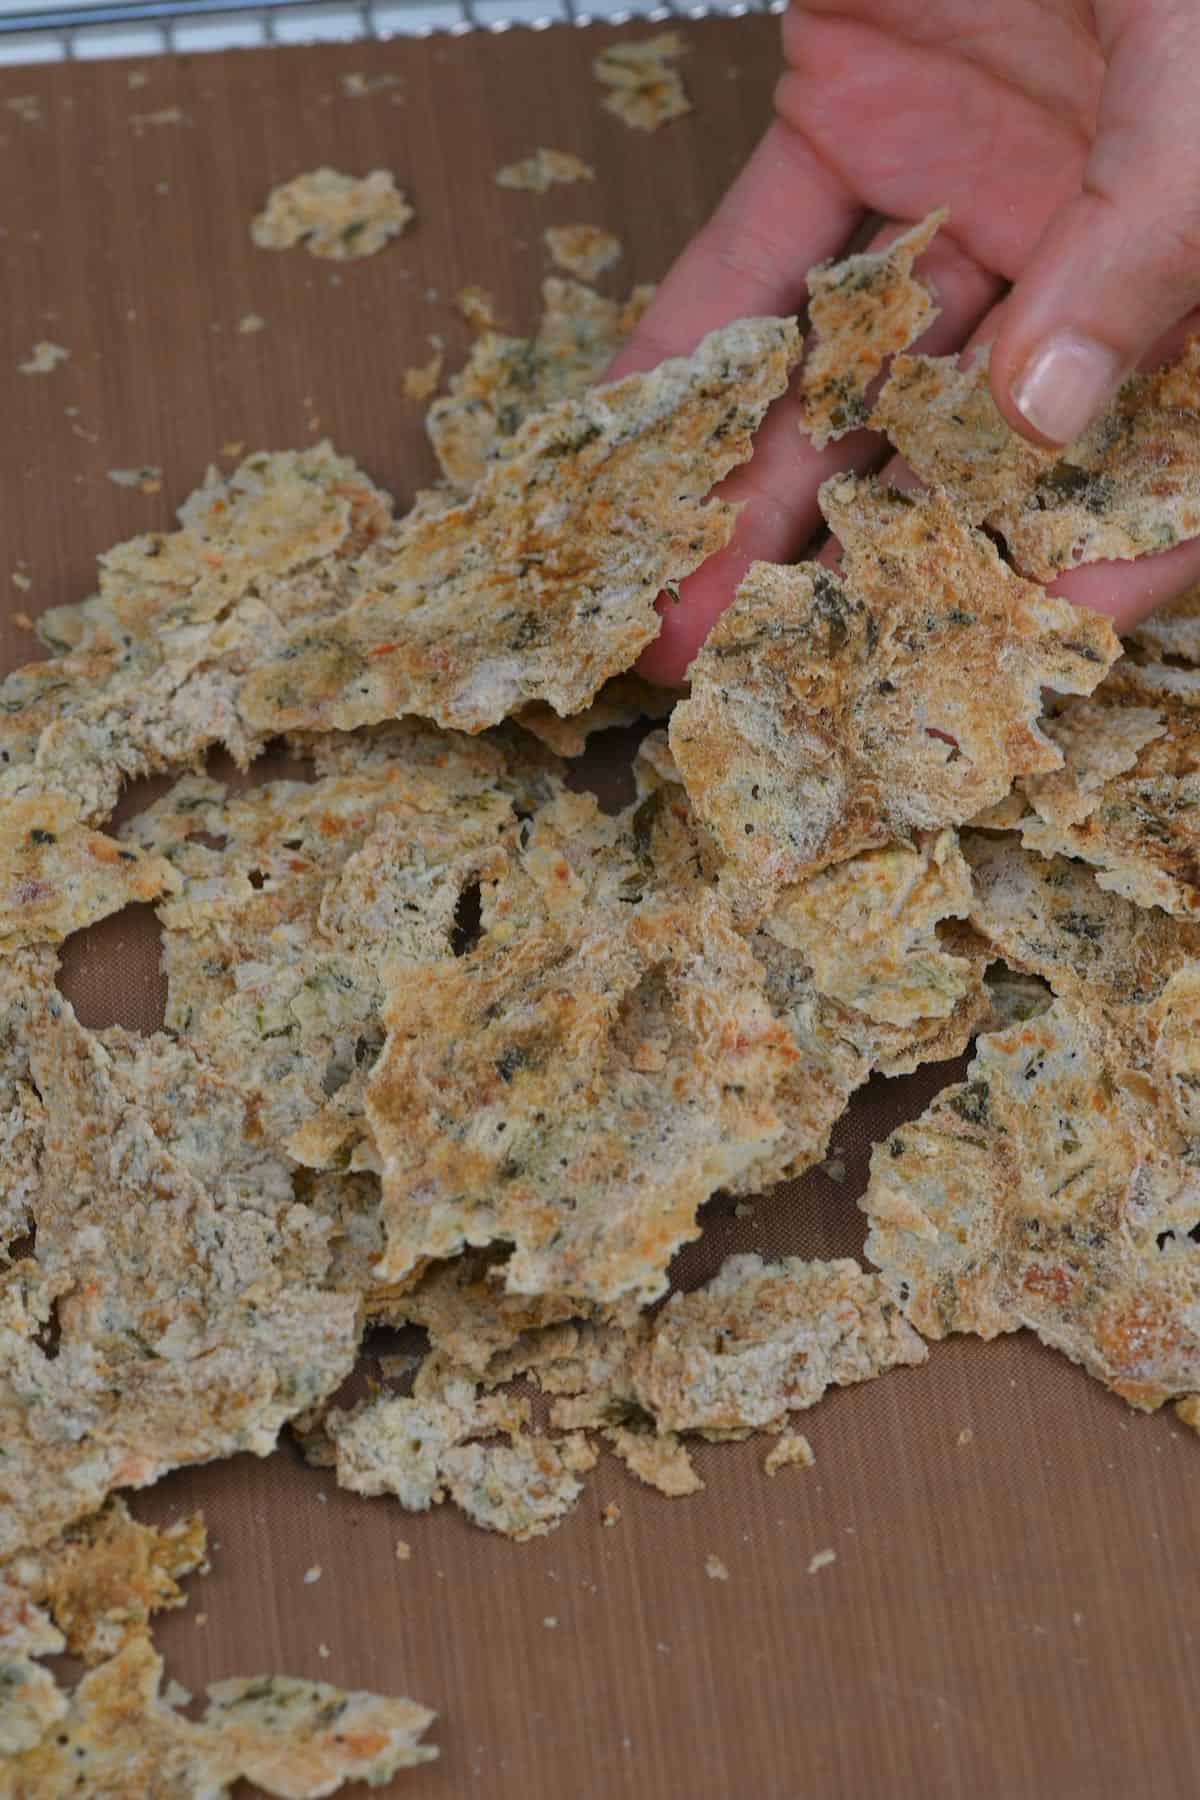
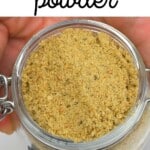
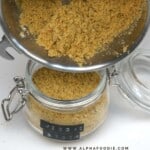
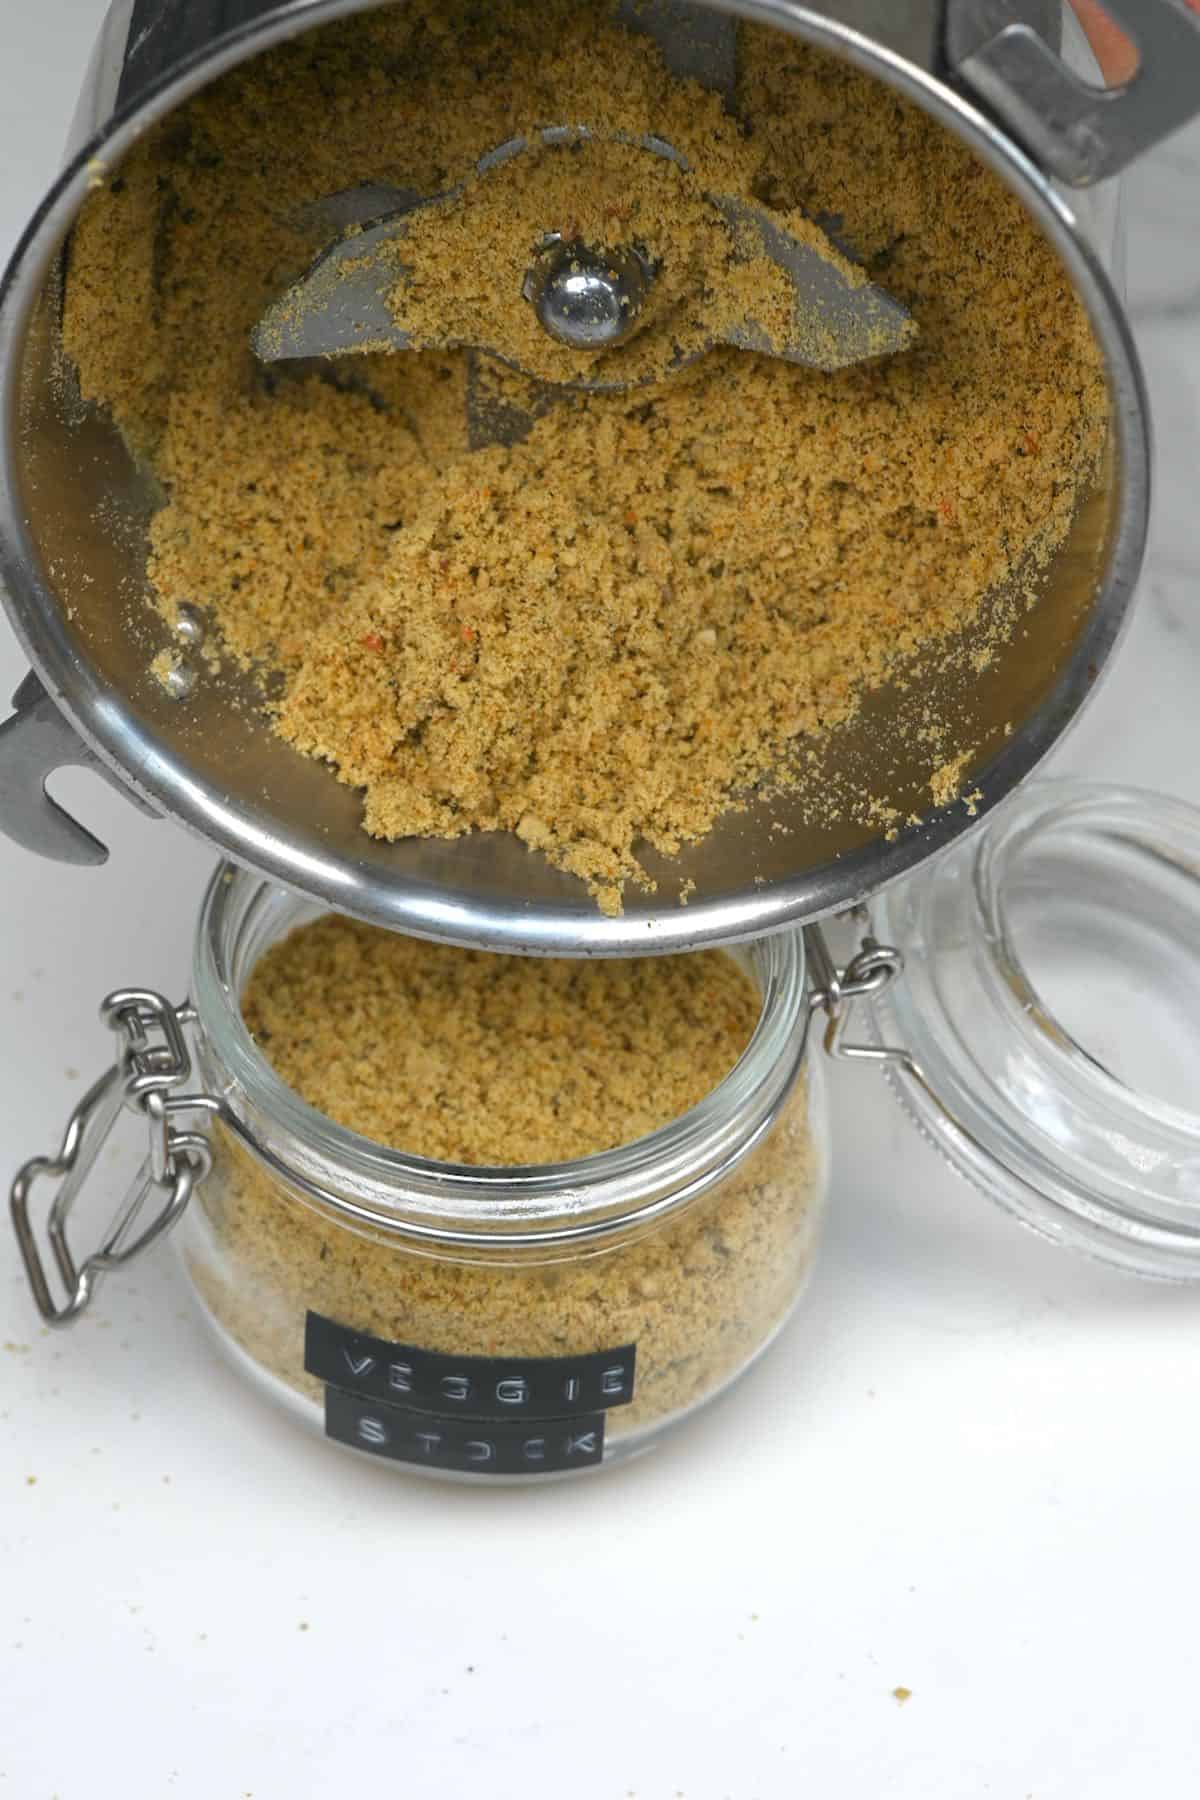
Blend the flakes into homemade bouillon powder
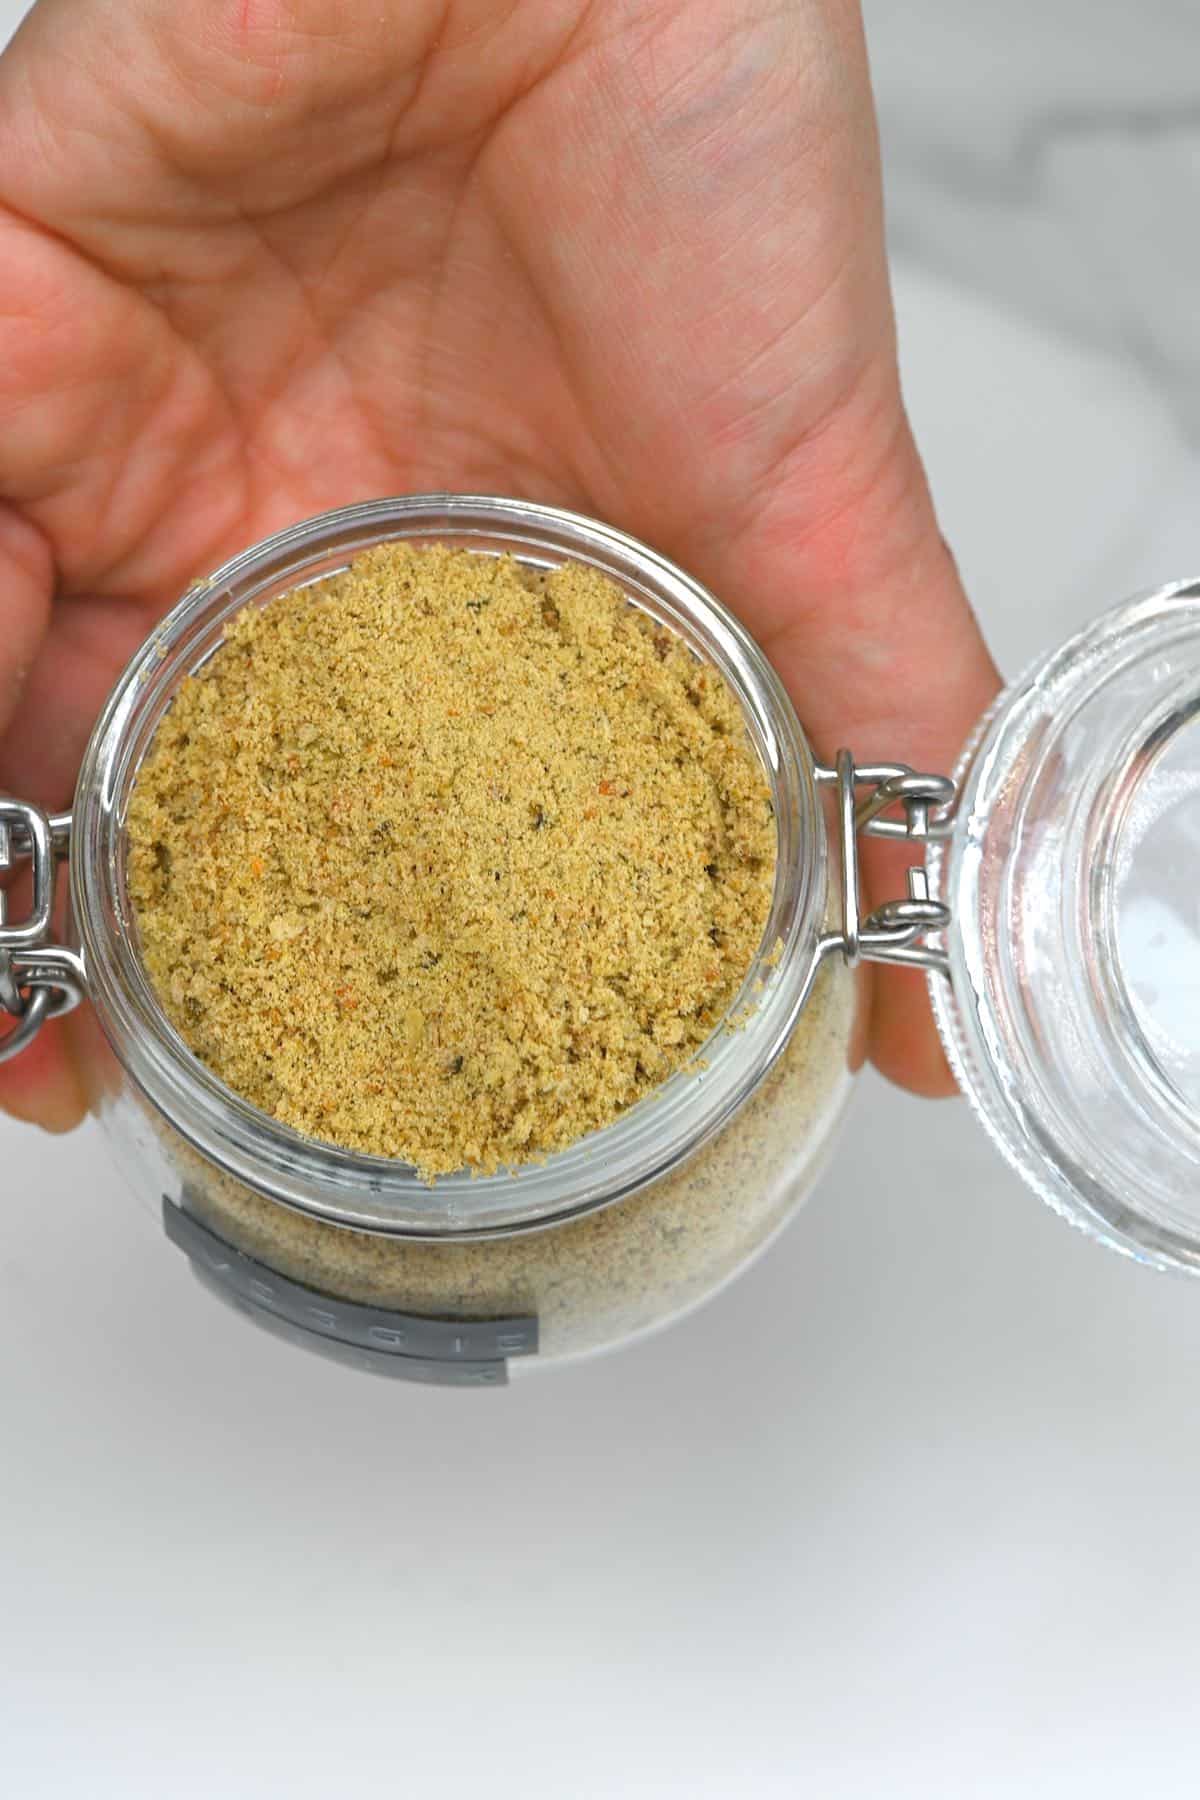
Add the flakes to a coffee/spice grinder or small food processor and process into powder. Sieve and repeat the process if there are lots of larger pieces still.
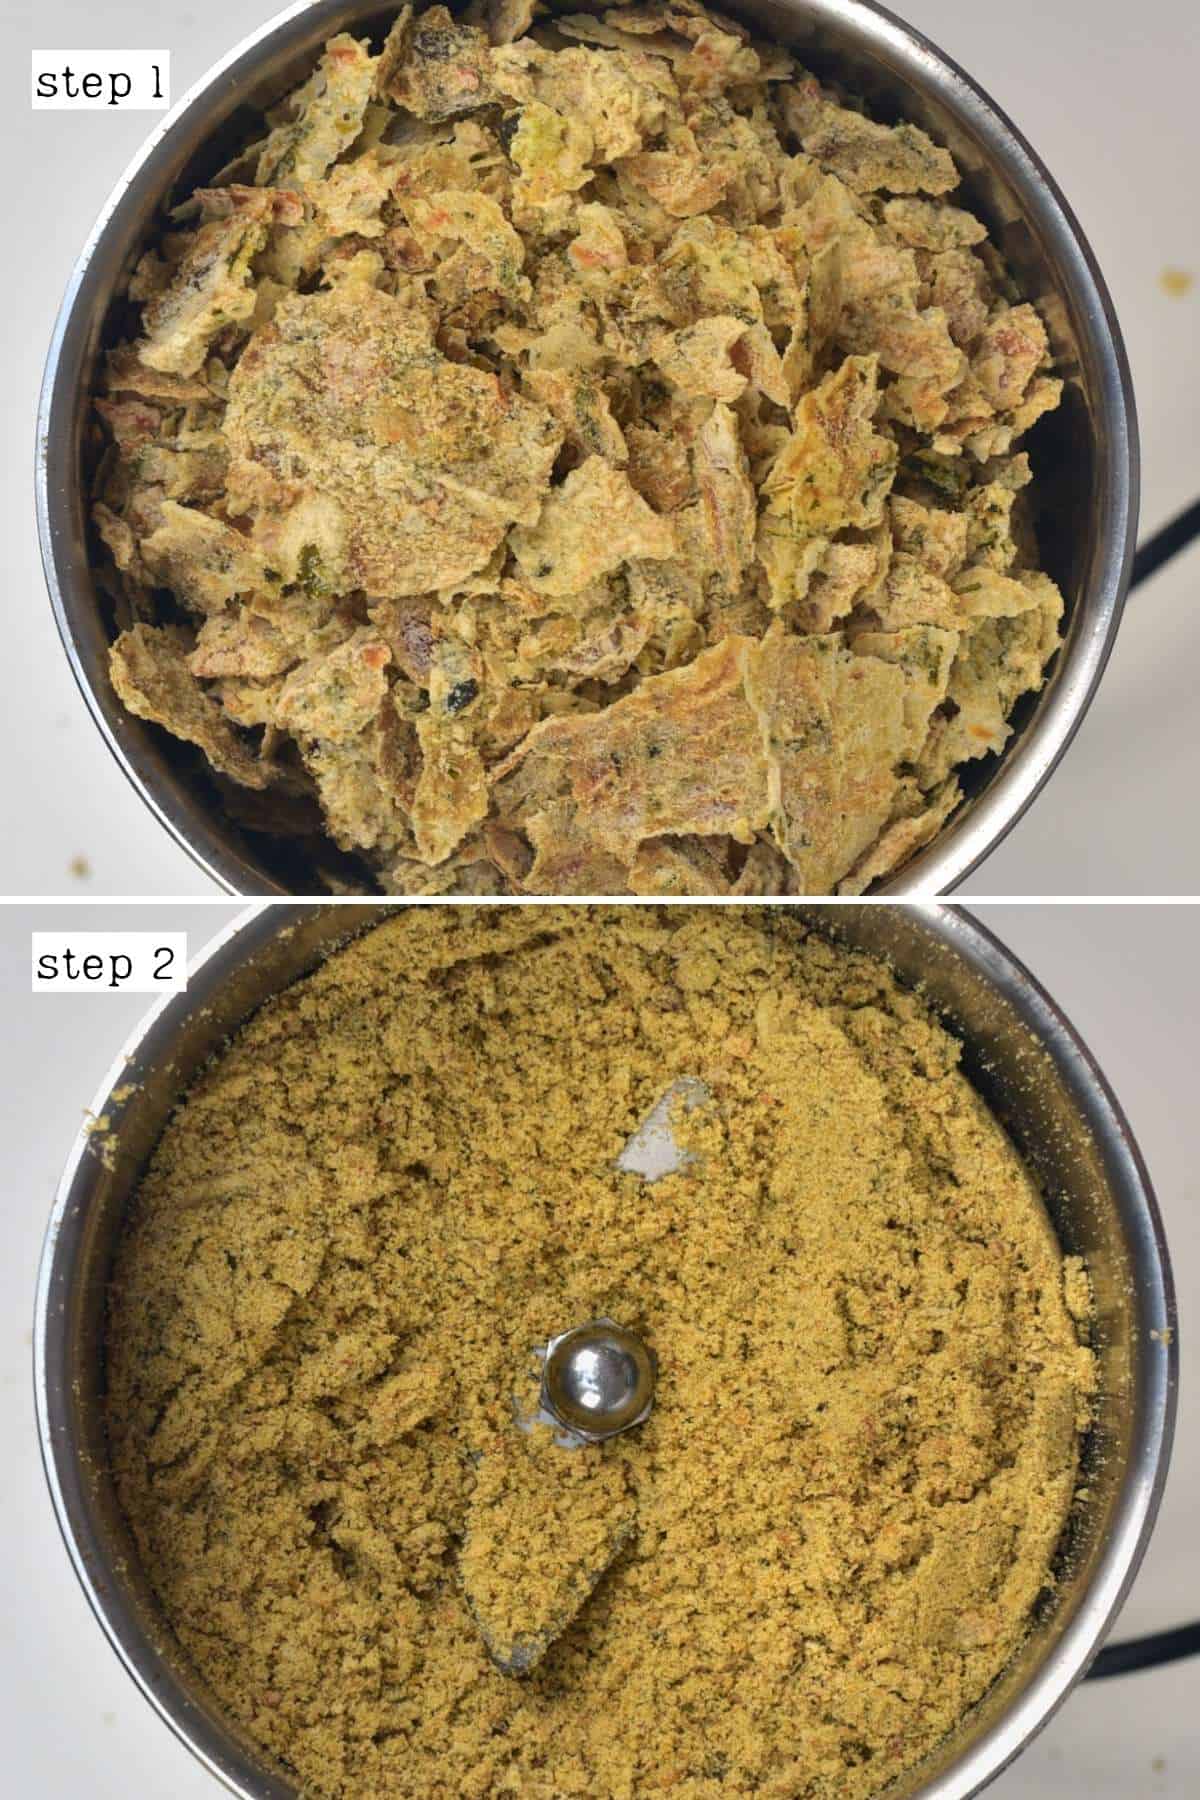
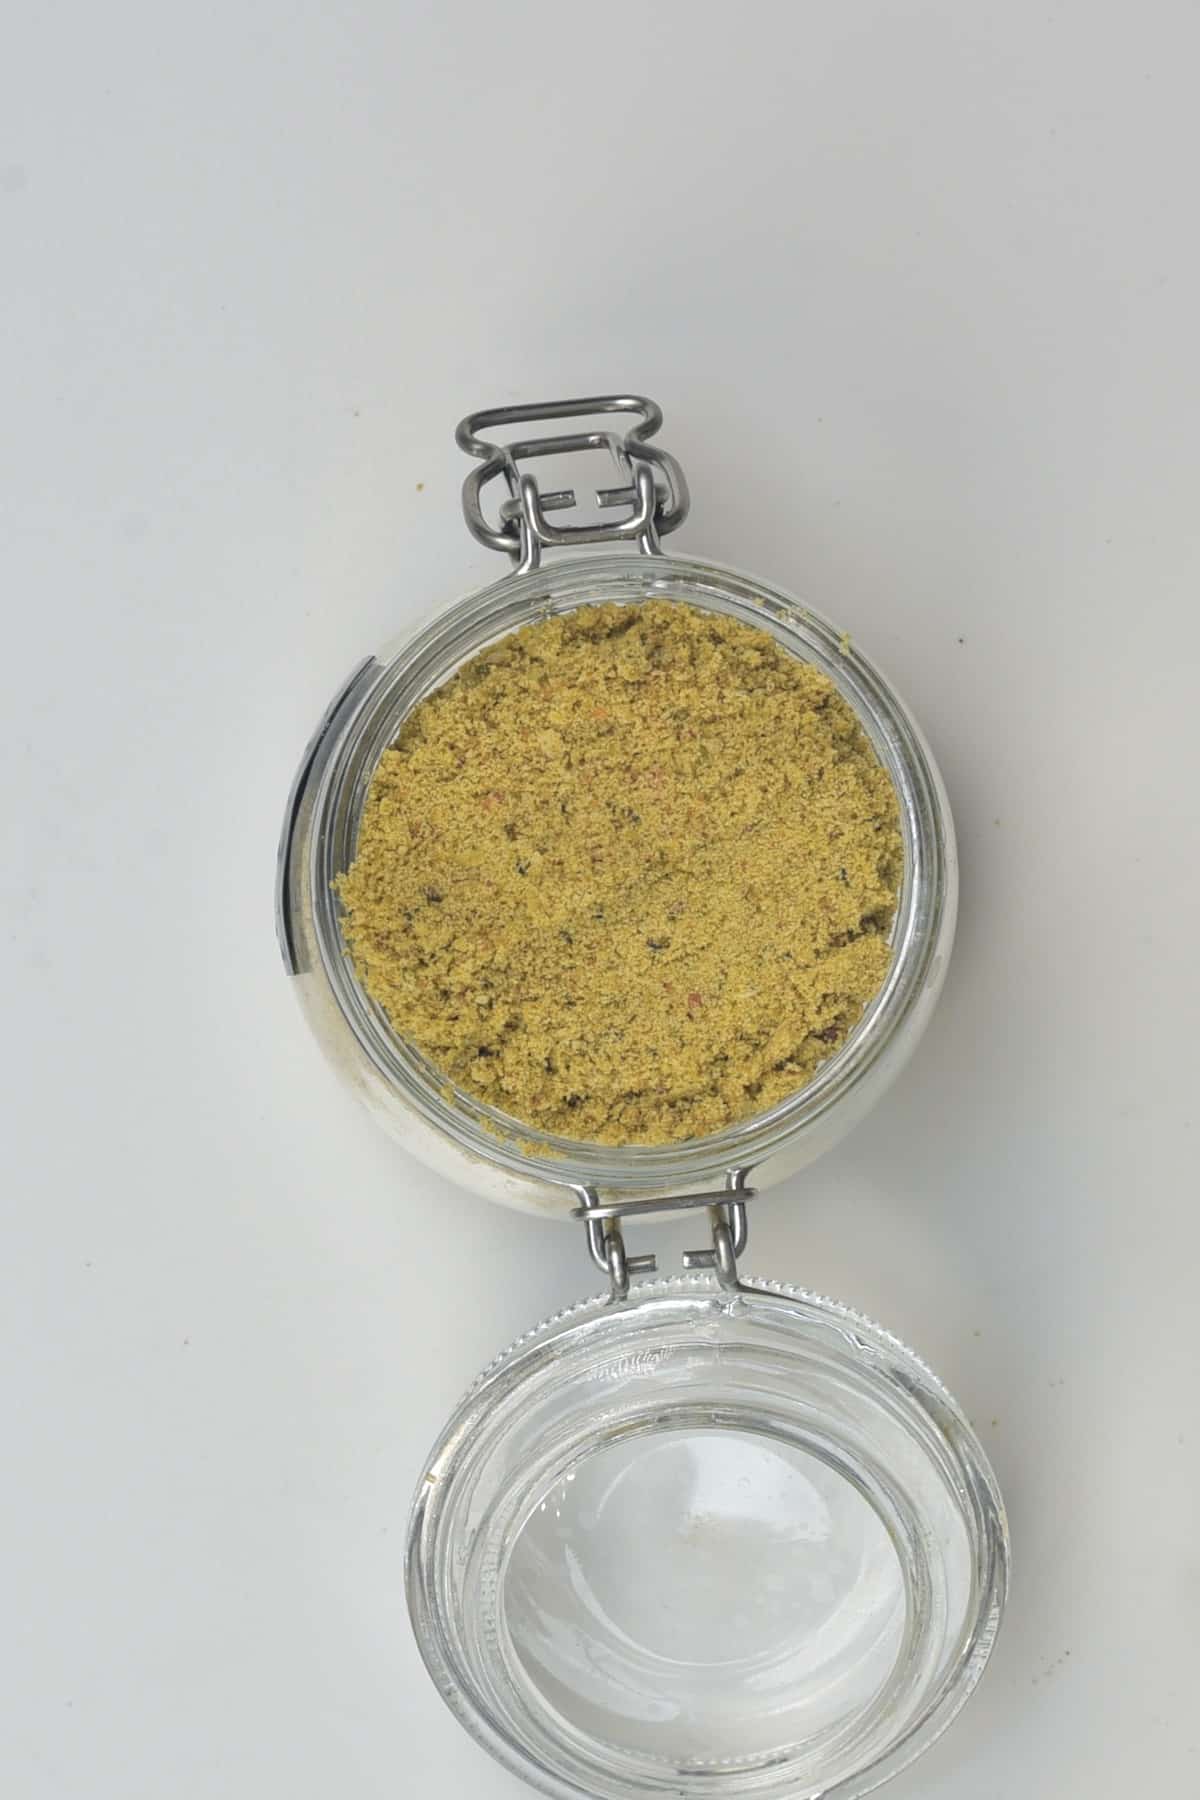
To store: store the vegetable bouillon powder in a sterilized dry jar in a cool, dark location (like a kitchen cupboard) for 6 months for optimal flavor. You can also store the powder in the refrigerator to maintain its freshness for longer.
How to use bouillon cubes and bouillon powder
You can use this homemade bouillon the same way you would a storebought powder or stock cube: combine a homemade bouillon cube with water for a flavorful broth, add to soups, stews, pasta, risotto, curry, ramen, etc. You could even add a little to creamy sauces – like this bechamel sauce.
However, you can also add a pinch of the powder to sprinkle over roasted vegetables, mix into mashed potato or rice/grain (like brown rice and quinoa), etc.
FAQs
I recommend using around 1 tsp per 1 cup of water (250ml). Feel free to taste and add more if wanted. You can also sprinkle it (to taste) into and over dishes like rice, pasta, baked potatoes, etc.
To use a frozen vegan bouillon cube, I recommend using one per 4 cups of water. Feel free to adapt this based on how flavorful you want the stock to be.
Yes, you can omit the salt entirely. However, I recommend adding salt as it enhances the flavors of the vegetable.
Recipe notes
- Tweak the ingredients based on the season: feel free to change the vegetables used based on what’s in season for the freshest flavor year-round.
- Experiment with herbs and seasonings: depending on whether you want something reasonably neutral in flavor or something with a bit more pizzaz, experiment with the herbs and seasonings.
- The salt content: bouillon is meant to be fairly salty as it’s a concentrated flavor adder to dishes. However, feel free to adapt the amount you use based on personal preference.
Related handy kitchen DIYs
- How to make ginger paste
- How to make herb salt
- Simple Mexican seasoning
- How to make garam masala spice
- Homemade shawarma seasoning
- How to make garlic paste
- How to Make Harissa Sauce (Harissa Paste)
If you try this vegetable bouillon cube recipe, I’d love to hear your thoughts/questions below. Also, I’d appreciate a recipe card rating below, and feel free to tag me in your recipe recreations on Instagram @Alphafoodie!
Homemade Vegetable Bouillon Cubes and Powder (Frozen and Dried)
Equipment
Ingredients
- 3.5 oz sea salt or as much as you'd like
- 2 Tbsp olive oil or another neutral oil
Use about 3.3 lbs/1.5kg vegetables of choice. I used:
- 2 zucchini
- 2 onions
- 4 garlic cloves
- 2 potatoes
- 3 carrots
- 3 celery sticks
- 1 oz parsley
Instructions
Step 1: Wash the vegetables
- Wash the veggies well. I like to soak them in a water bath for a few minutes to wash away any residue (especially when using organic produce, which can have residue soil/sand).
- Scrub the veggies lightly and then dry them with a kitchen towel.
Step 2: Chop the vegetables
- Finely chop all of the vegetables into small cubes; the smaller, the better, as they’ll cook faster and be easier to puree. You could also use a food chopper/processor to help process the vegetables into small pieces.Make sure to transfer the chopped potatoes to a bowl of water while you do the rest of the ingredients. This will keep them from discoloring and get rid of excess starch.At the same time, finely chop the garlic and parsley.
Step 3: Cook the vegetable stock ingredients
- In a large skillet, add the oil and heat it over medium heat. Once hot, add the onion and lightly saute for a couple of minutes. Then add the potatoes and cook for several minutes to begin softening (4-5 minutes).
- Add the remainder of the ingredients (except the parsley), stir well, and then allow to simmer, covered, to cook until softened – this will take around 20 minutes over medium-low heat. Stir occasionally.
- Next, add the salt and stir well. This will encourage all the excess liquid to release from the veggies. Cook for a further 15-20 minutes, uncovered, stirring occasionally.
Step 4: Blend the vegetable bouillon
- Using an immersion blender, you can blend the vegetable bouillon directly into the pan. Alternatively, allow it to cool slightly and use a food processor to blend it into a puree.
- Once blended, add the parsley and stir to combine. Next, it’s time to decide how you want to store the homemade bouillon – make frozen cubes, dehydrate into powder, or do both with parts of the puree. You can also keep some fresh, stored in the refrigerator for a week.
To Freeze the Vegetable Buillon
- Line a baking tray with parchment paper and transfer the stock to the tray, leveling it out with a spatula.
- Transfer to the freezer to freeze for several hours until hardened (due to the salt content, they won’t freeze completely solid). Then use a sharp knife to cut into cubes and transfer to a freezer-safe container to store.If you want the cubes to be the same size, I recommend using a square baking dish and measuring when scoring the lines. I’m not too ‘perfection-y’ about this, so then I have smaller and larger pieces to choose from.I recommend placing them in a container with space in-between each cube, layered up with pieces of parchment paper between each layer (so the cubes aren’t touching).Alternatively, you can use a scoop/measuring spoon to freeze the puree in measured ‘chunks’ (i.e., 1 Tbsp) instead.
- To Store: these frozen vegetable bouillon cubes will store for at least six months, if not longer! You could also keep some of the paste in the refrigerator in a sterilized jar and aim to use it within one week.
To Dehydrate Into Vegetable Bouillon Powder/ Stock Powder
- Spread some vegetable bouillon puree on a large tray covered with parchment paper (or a dehydrator sheet) and spread out into a thin layer; the thinner, the better for quicker dehydration. Dehydrate it either in the oven or a dehydrator.In the oven: ideally, set the temperature to 150ºF/65ºC. If it doesn't go that low, prop the door open just a tiny bit to allow extra airflow and choose the lowest temperature. This can take up to 10 hours, depending on the thickness of the layer, humidity, etc.Don’t be tempted to whack the temperature up higher as it will ‘cook’ the puree rather than simply dehydrate it – which could burn the mixture.In the dehydrator: choose 150ºF/65ºC and allow it to dry for up to 10 hours. I recommend checking on it at 5-6 hours and then increasing incrementally until ready.It needs to be dry enough to snap into pieces.
Blend the flakes into homemade bouillon powder
- Add the flakes to a coffee/spice grinder or small food processor and process into powder. Sieve and repeat the process if there are lots of larger pieces still.To store: store the vegetable bouillon powder in a sterilized dry jar in a cool, dark location (like a kitchen cupboard) for 6 months for optimal flavor. You can also store the powder in the refrigerator to maintain its’ freshness for longer.
Notes
Nutrition
Nutrition information is automatically calculated, so should only be used as an approximation.


Amazing recipe!!
Thank you!
I never considered making my own stock. Thank you for this.
I hope you give it a try 🙂
Perfect recipe!
Thank you so much!
I love how detailed you are when explaining, picturing and posting each of your recipes. Love this idea of doing my own vegetable bouillon.
Thank you so much for your comment, Rossy!
Definitely going to try that!
Thank you for your comment! I hope you give it a try.
Love your blog! So informative- thanks for sharing all
your knowledge. Love how you make recipes from available ingredients and common kitchen appliances. Makes them so much easier to copy!
Thank you so much for your comment, Anne!
Such An amazing and creative recipe love what you’re doing
Thank you so much, Victoria!
Best tips and tricks
Thanks, Mish!
I’d never even considered making my own before but now I’m not sure I could ever go back to the shop bought version!
I hope you gave it a try 🙂
Love this idea!
Thank you!