
This post may contain affiliate links. Please read our disclosure policy.


How to make preserved lemons (pickled lemons) with just salt and lemons as a base and 15 minutes of hands-on prep. Once cured, use these flavor bombs to add brightness and depth to sauces, stews, salads, and more!
In the last couple of years, I’ve really taken a shine to the art of preserving. So, along with methods for pickled garlic (plain or spicy), pickled red onion, refrigerator pickled green tomatoes, and even ferments like this honey fermented ginger and lemon, it’s the turn of super simple preserved lemons (aka pickled lemons) method!
Want to save this recipe?
What are Preserved Lemons?
Preserved lemons date back to the 12th century and go by several names, including brined lemons, cured lemons, and pickled lemons. They are lemons that are cured in salt and lemon juice brine for several weeks to preserve and transform them into something exceptional!
If you’ve never tried them before, this combination may sound odd. However, they are extremely popular in North African (particularly Moroccan and are sometimes dubbed “Moroccan lemons”), Indian, and Middle Eastern cuisine. Still, they really need to be tried to be believed.
Unlike regular lemons, these salted lemons are still bright and flavorful. However, the bitterness (from the rind) and acidity are now mellow, leaving behind this intensely lemony, sweet, slightly sour, salty ingredient. They’re perfect for adding depth and umami to all sorts of dishes!
How Does It Work?
This method requires 10-15 minutes of hands-on prep, just two main ingredients (with optional spices), and once preserved, will last up to 6 months in the refrigerator (and often even more!). This is a great way to preserve large amounts of lemons from a lemon tree, farmer’s market, or experiment with a few from the store! They are also great for gifting (perhaps for Christmas?!)
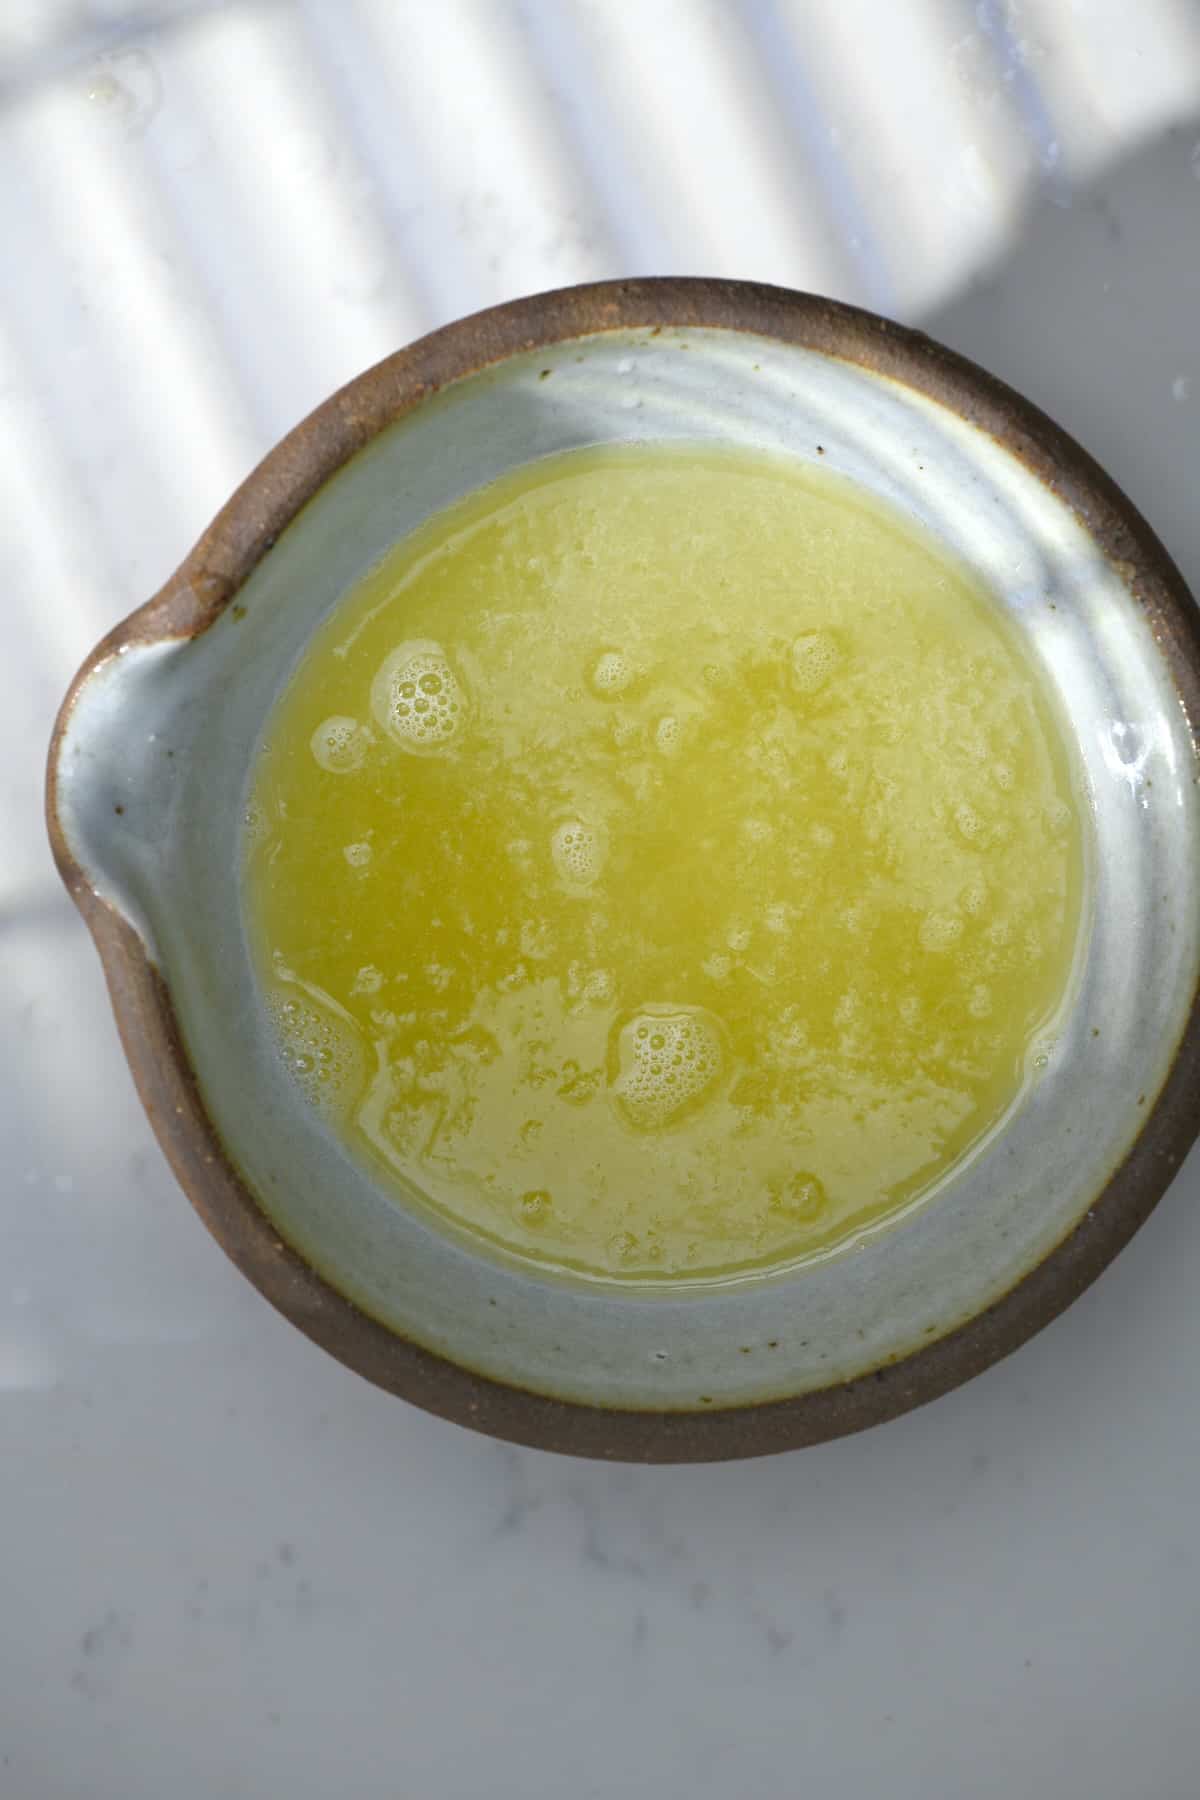
Within this post, I’ll show you how to make preserved lemons, the preserved lemons uses, and lots of top tips, tricks, and FAQs for making the most of these salted lemons! And, if you’re looking for more ways to enjoy lemons immediately, check out my recipes for this super simple lemon butter (or garlic lemon butter sauce), lemon tahini sauce, homemade fresh lemonade, or even lemon ginger shots!
What You’ll Need
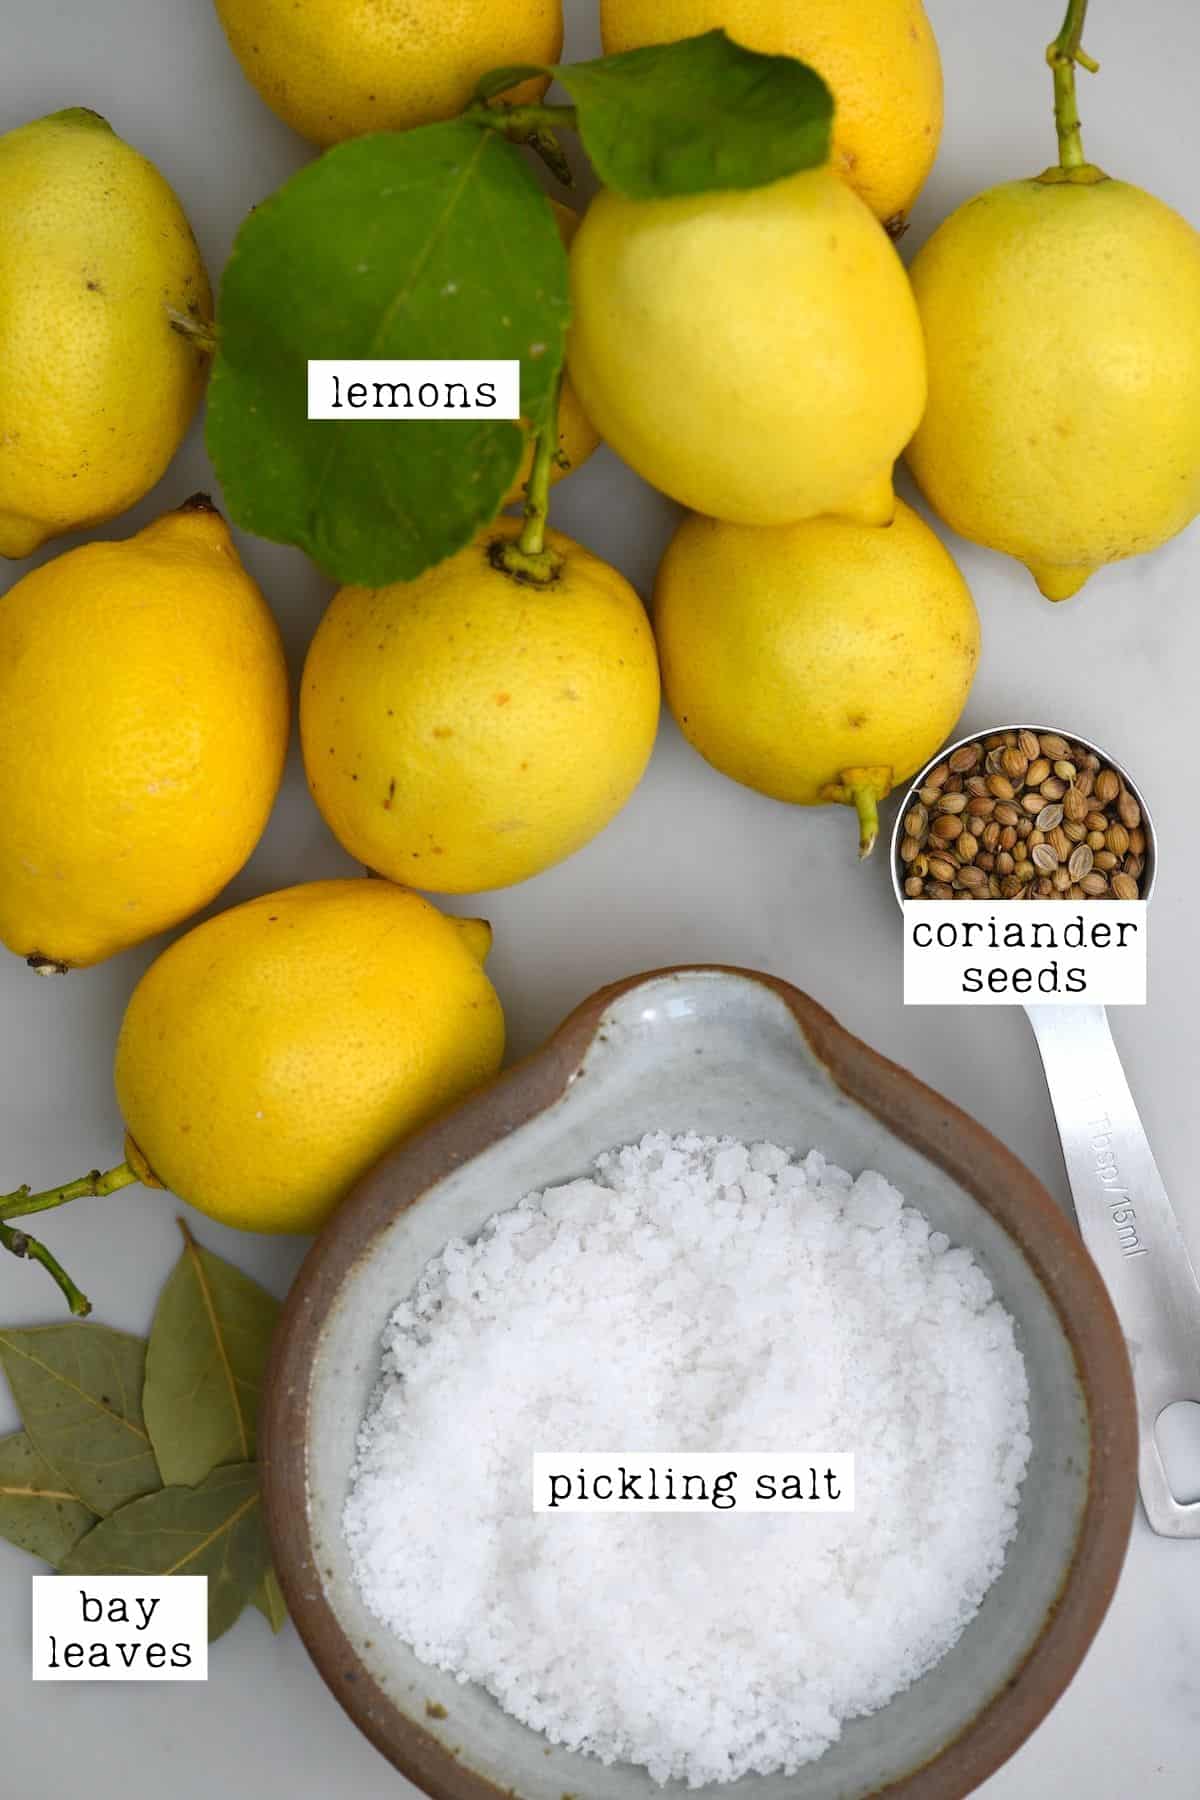
There are only a handful of things you require for this preserved lemon recipe, including:
- Lemons: in Morocco, they usually use doqq or boussera lemons. I recommend using Meyer lemons, when possible, as they’re milder, sweeter, and have a thinner skin. However, supermarket lemon will work. A part of them are for preserving, the rest are for juicing.
It’s best to use fresh lemons that are organic/not treated with harsh chemicals and pesticides (since you’ll be eating the entire rind).
- Salt: you can make salted lemons with various types of salt (as long as it’s iodine-free), though pickling salt or kosher salt is best. Using other types of salt can cause cloudiness in the jar that looks like spoilage.
- Pickling spices: (tehcnially optional) for additional flavor, I added bay leaves and coridander seeds.
- Glass jar: use a non-porous sterilized glass jar, as the lemon can be corrosive with plastic and other materials. I used a large mason jar (32 oz/1 L), but adjust the size according to how much you plan to make.
- Sharp knife: to slice the lemons. Make sure to sterilize it as well.
Optional Add-ins and Variations
Like many pickled recipes, there are several herbs and spices you could add to these pickled lemons for an extra infusion of flavor.
- Cardamom
- Vanilla
- Cloves
- Cinnamon sticks
- Mustard seed
- Mace
- Chili/red pepper flakes
- Paprika
- Dried rosemary
- Safflower
- Nigella seeds
- Whole black peppercorns.
How to Make Preserved Lemons?
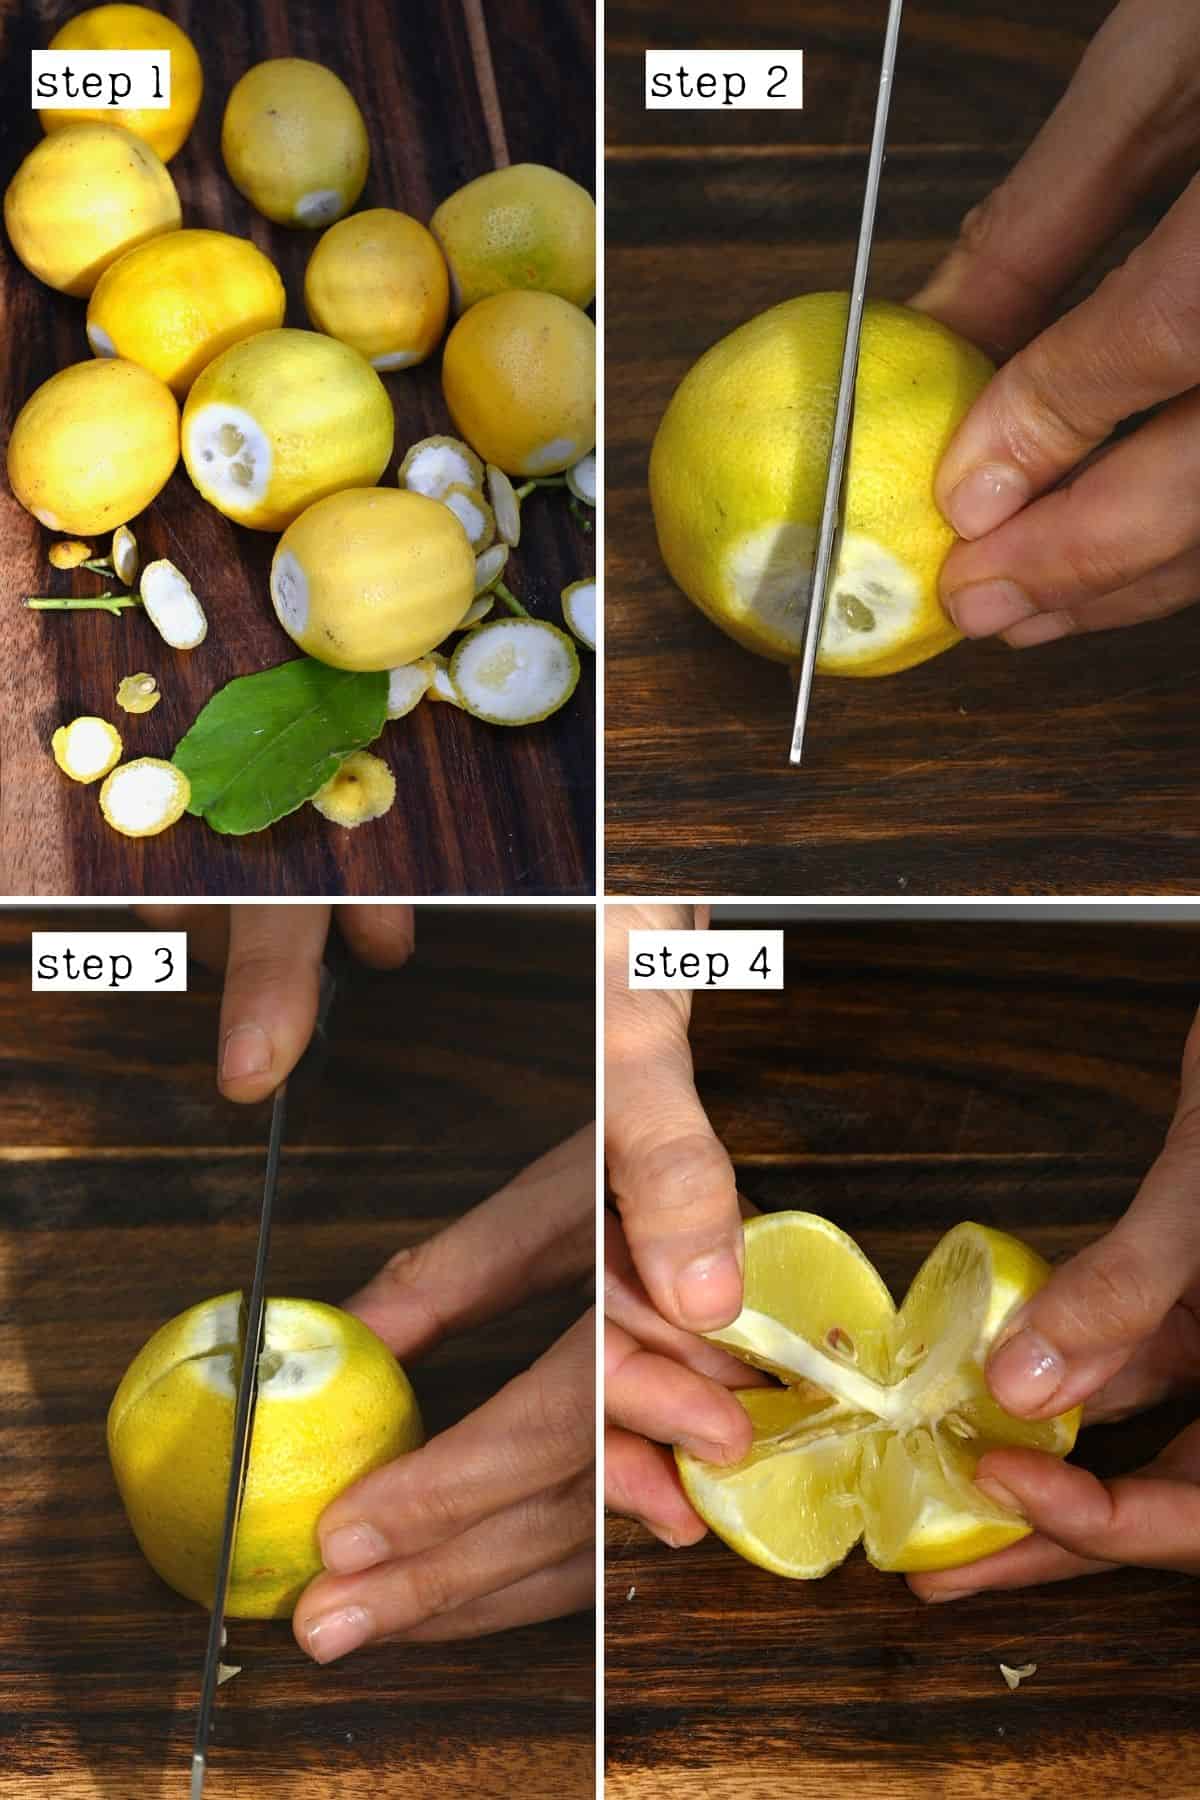
Step 1: Wash and prepare the lemons
Wash 10 lemons in warm water, scrubbing them well to remove any dirt (or wax). Then dry well with clean paper towels. I managed to fit 9 in my jar but you might be able to squeeze in an extra one. You can test in advance to see how many you can fit, though when cut, they are easier to squeeze in.
Next, cut a thin slice off the stem end of each lemon. Then, working one at a time, hold the lemon in the palm of your hand so the cut-side is upright. Use a sharp knife to carefully cut each lemon into four pieces lengthwise (once in half vertically and once horizontally), leaving an inch at the bottom of each lemon (so it opens up, like a flower, without actually being sliced into four segments – see the images below).
Alternatively, you can chop the lemons into quarters and toss them with the salt in a large bowl.
Step 2: Prepare the jars
Juice the remaining lemons. Keep in mind you need 1 ½ cups (375ml) of juice so, depending on the size of your lemons, you might need a couple more. If preferred, you can prepare 1 cup of lemon juice and then add more juice as needed when you pour it over the lemons. Keep in mind that the lemons need to be submerged in the juice.
It can help to microwave the lemons for 20-30 seconds first and roll them against your tabletop several times. This will help them release as much juice as possible.
To make sure you have enough salt – you need 1 Tbsp per lemon, as well as 2-3 extra Tbsp to sprinkle in the jar. To preserve 9 lemons, I used 12 Tbsp pickling salt (3/4 cup or 6.35oz/180 g). You can adjust the amount based on how many lemons you can fit in your jar.
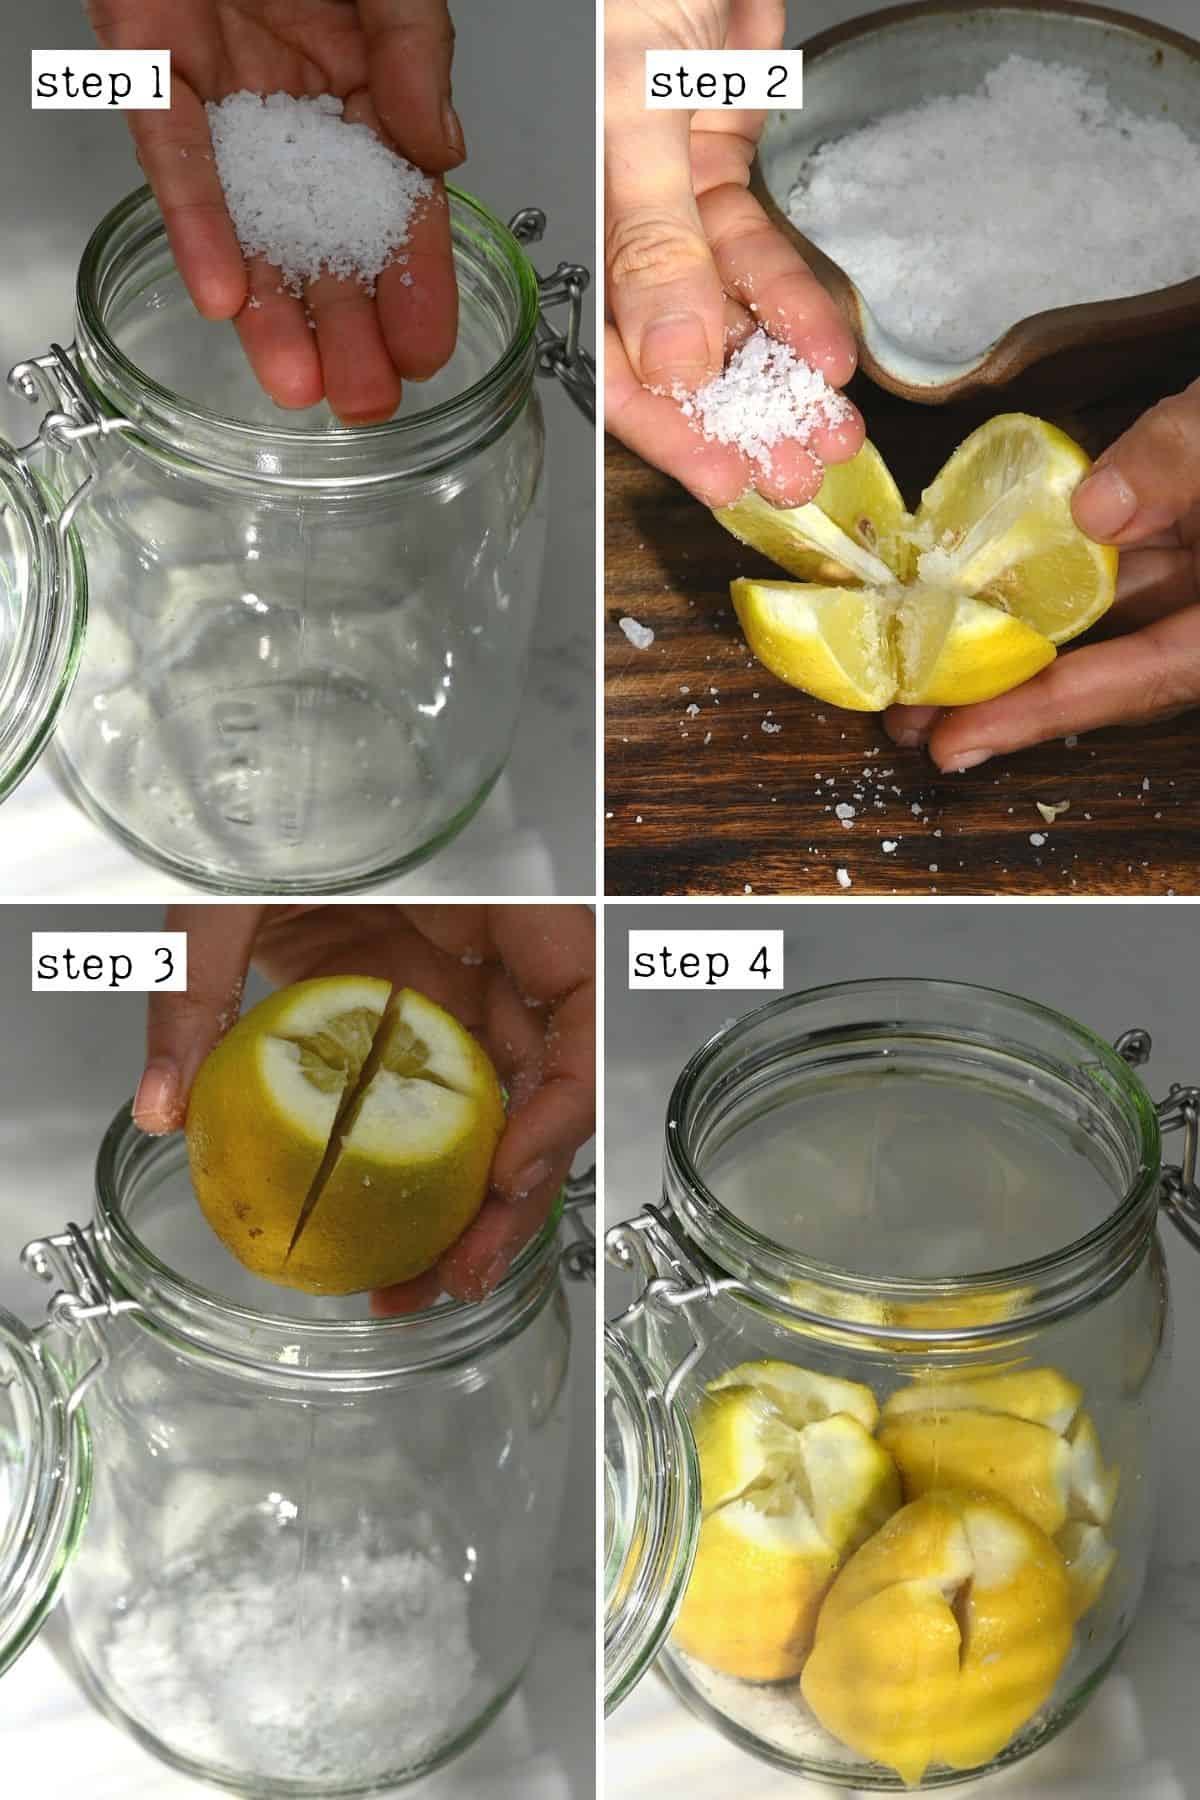
Sprinkle one tablespoon of pickling salt at the bottom of a sterilized jar (see the FAQs below on how to sterilize it). Fill each lemon with 1 Tbsp salt and push the salt into the middle. Then place the lemon in the jar, cut-side upwards (so the salt stays in). Pack the jar tightly, so they can’t move easily.
Gently smashing them once they’re in the jar will help to release more liquid and ensure they’re fully submerged. You can do this with a pestle, muddler, or even a wooden spoon.
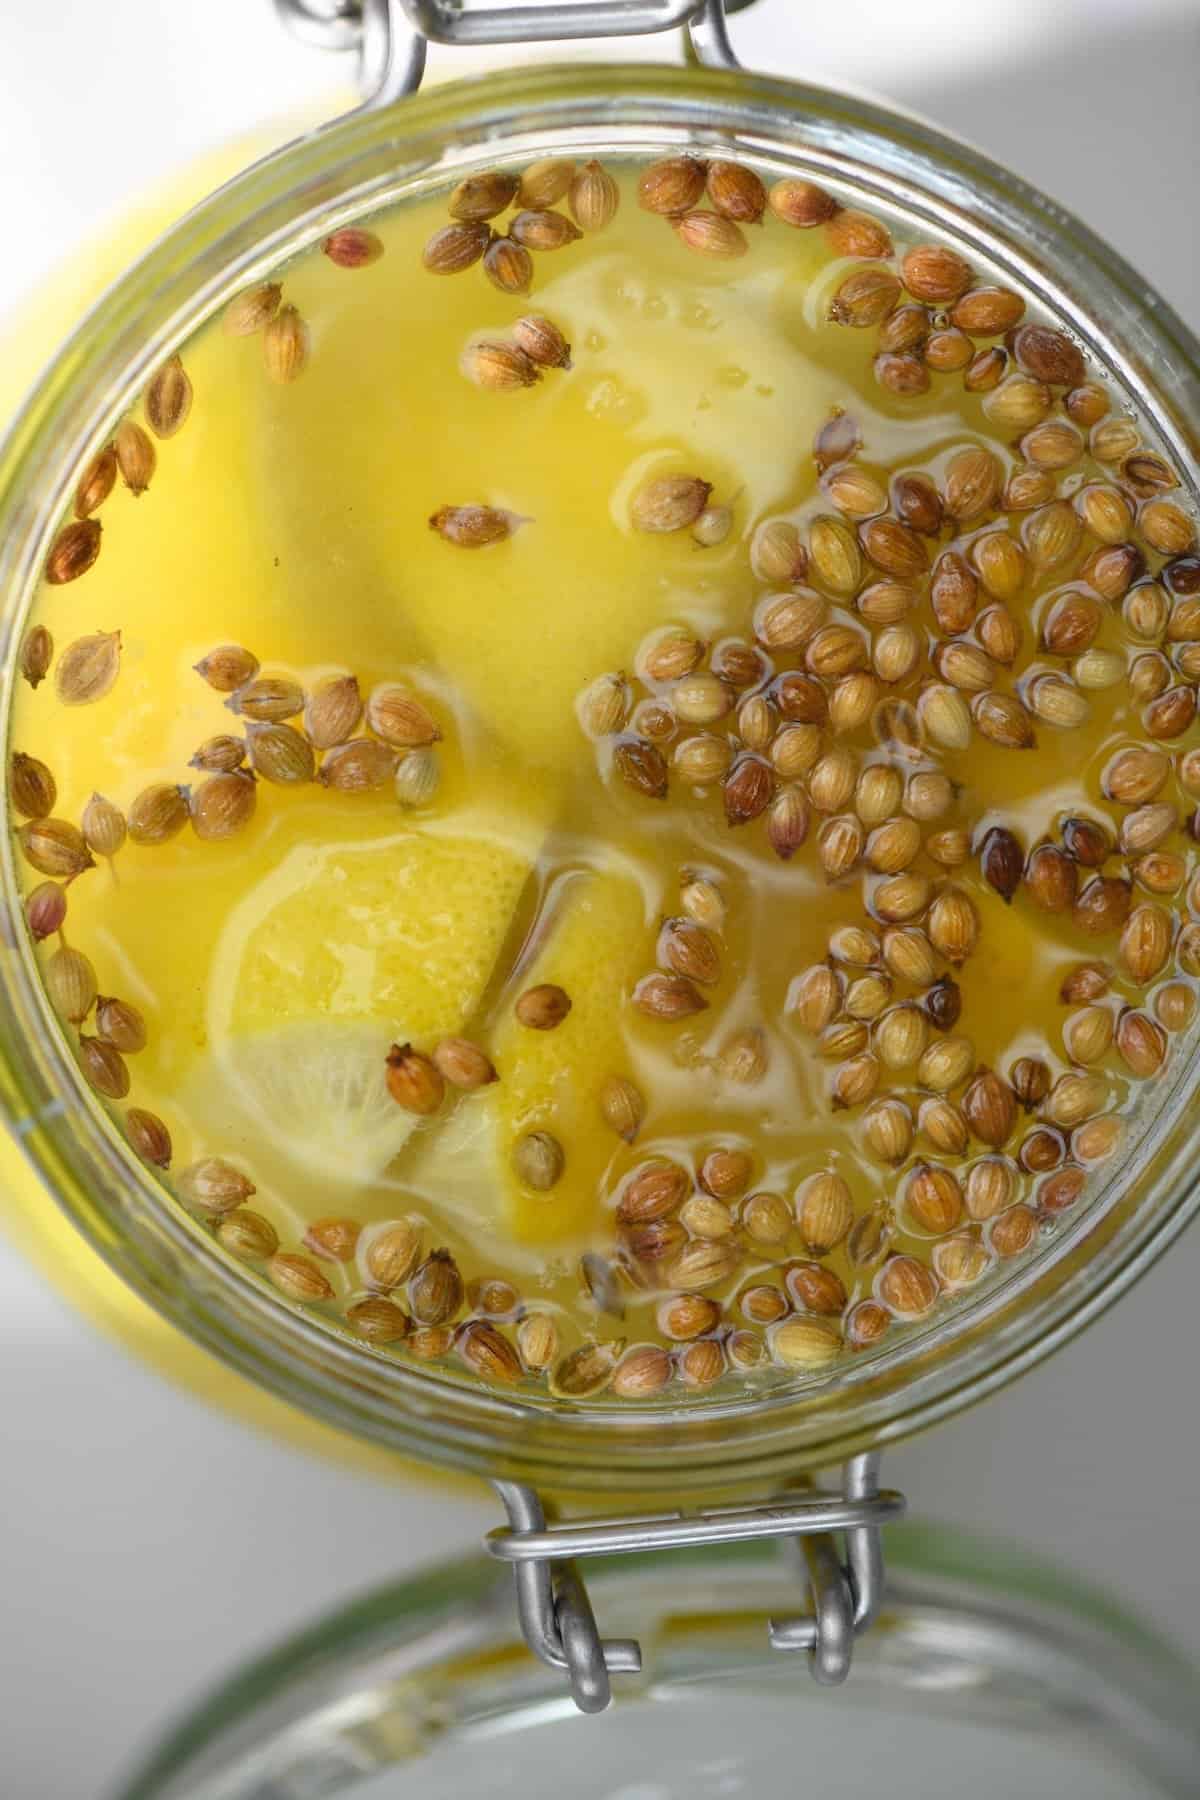
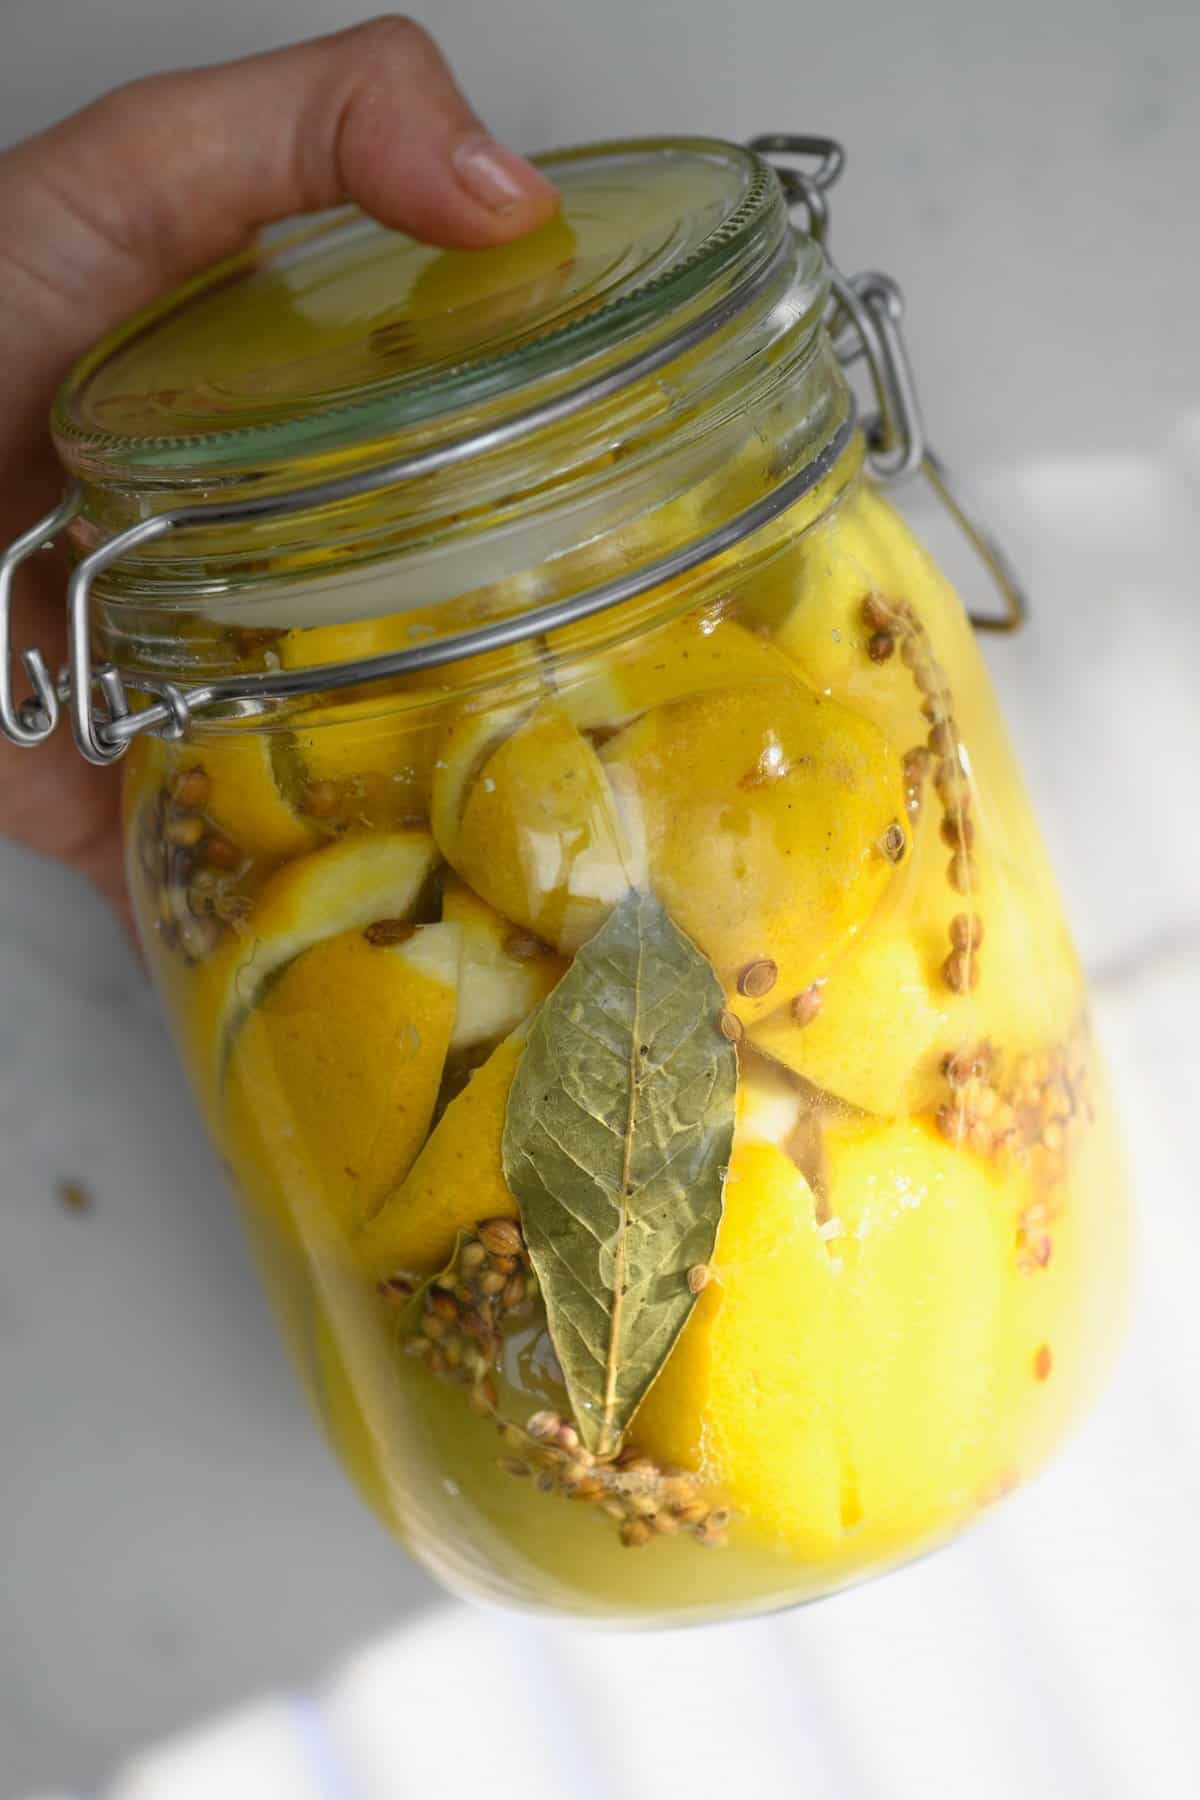
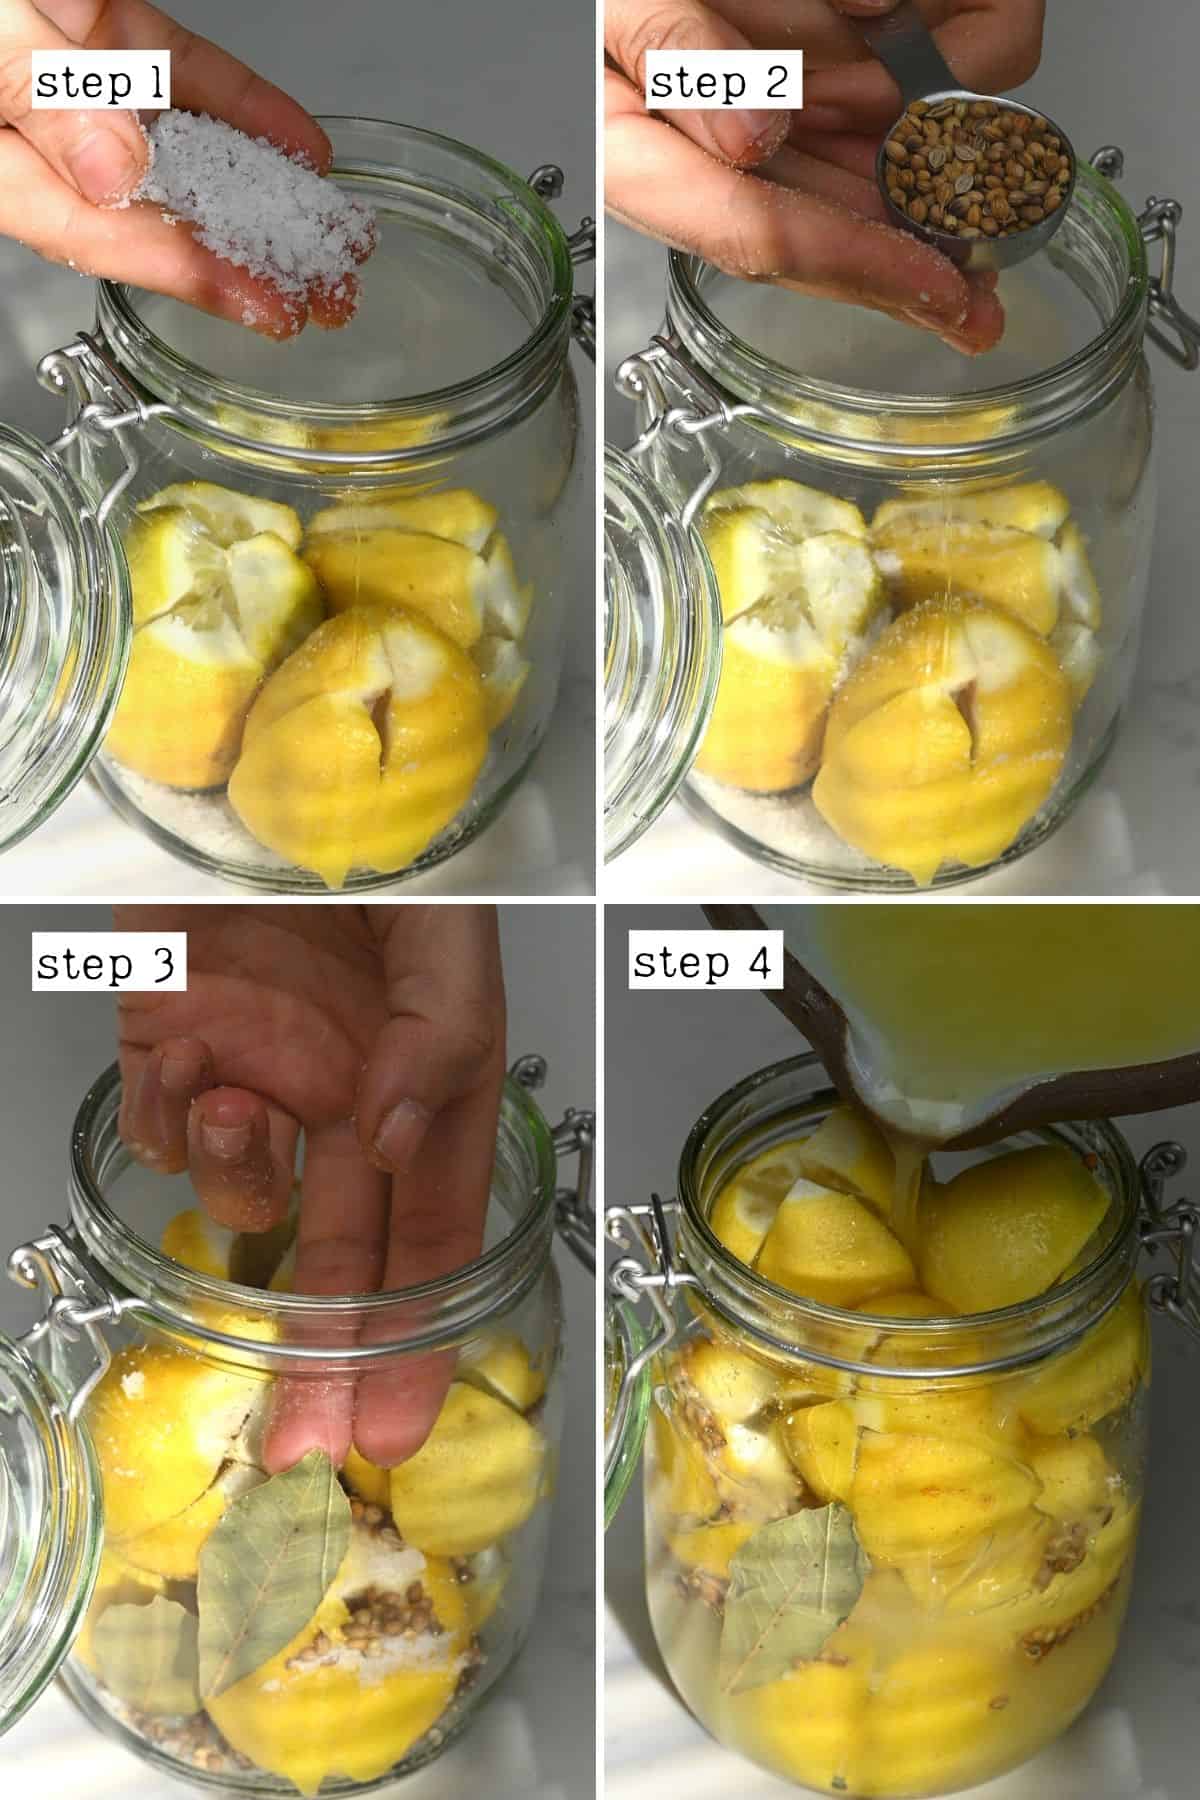
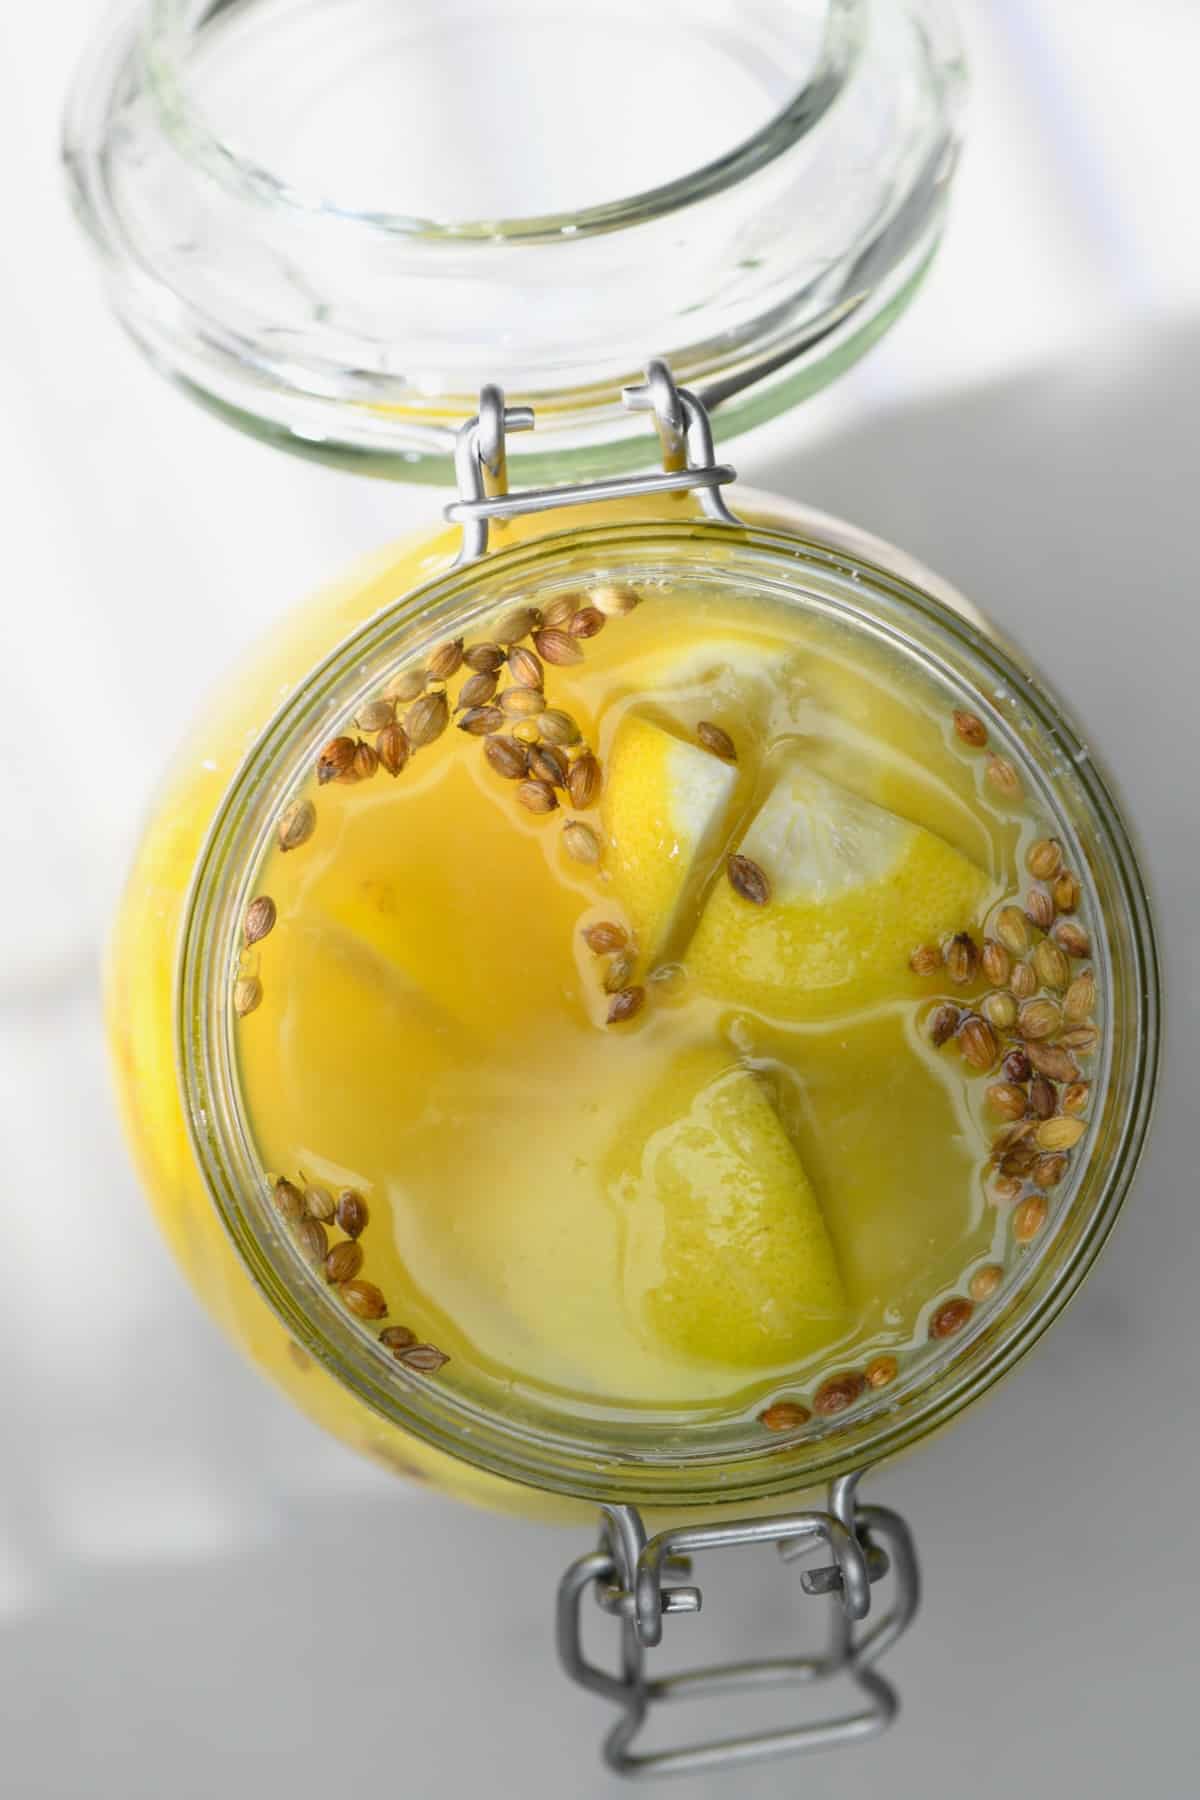
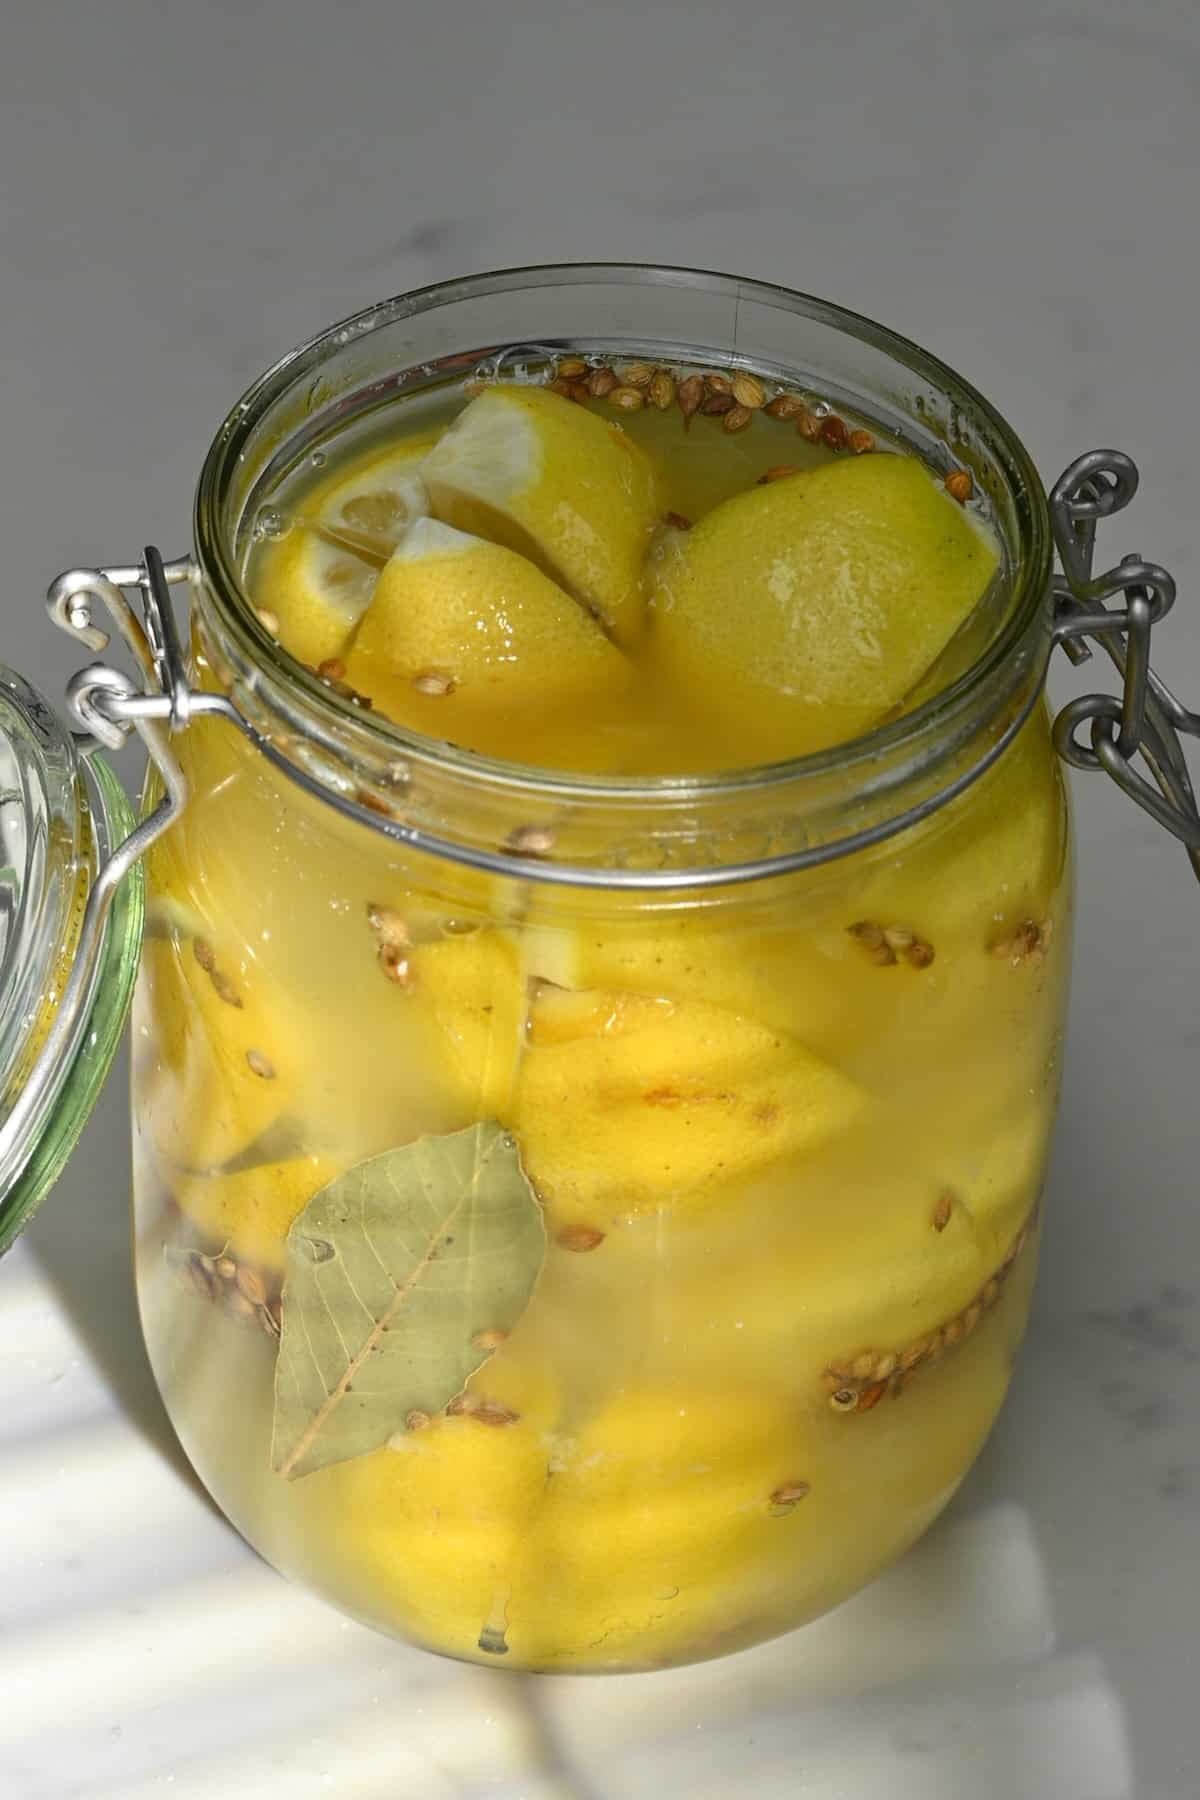
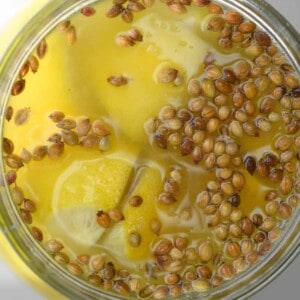
Add three of the salted lemons to the jar, then add the bay leaves and coriander seeds (or the spices of your choice) against the sides of the jar. Sprinkle some more of the pickling salt between the layers.
Then, add the remaining salted lemons and sprinkle over the remaining salt.
If you have space, you can quarter the leftover rinds from the juiced lemons and push them into the jar as well (remember, everything must be covered by the liquid, though).
Alternatively, I recommend zesting the lemons you plan to juice in advance. You can freeze the zest in small portions in an ice cube tray, then store it in a freezer-safe bag for several months.
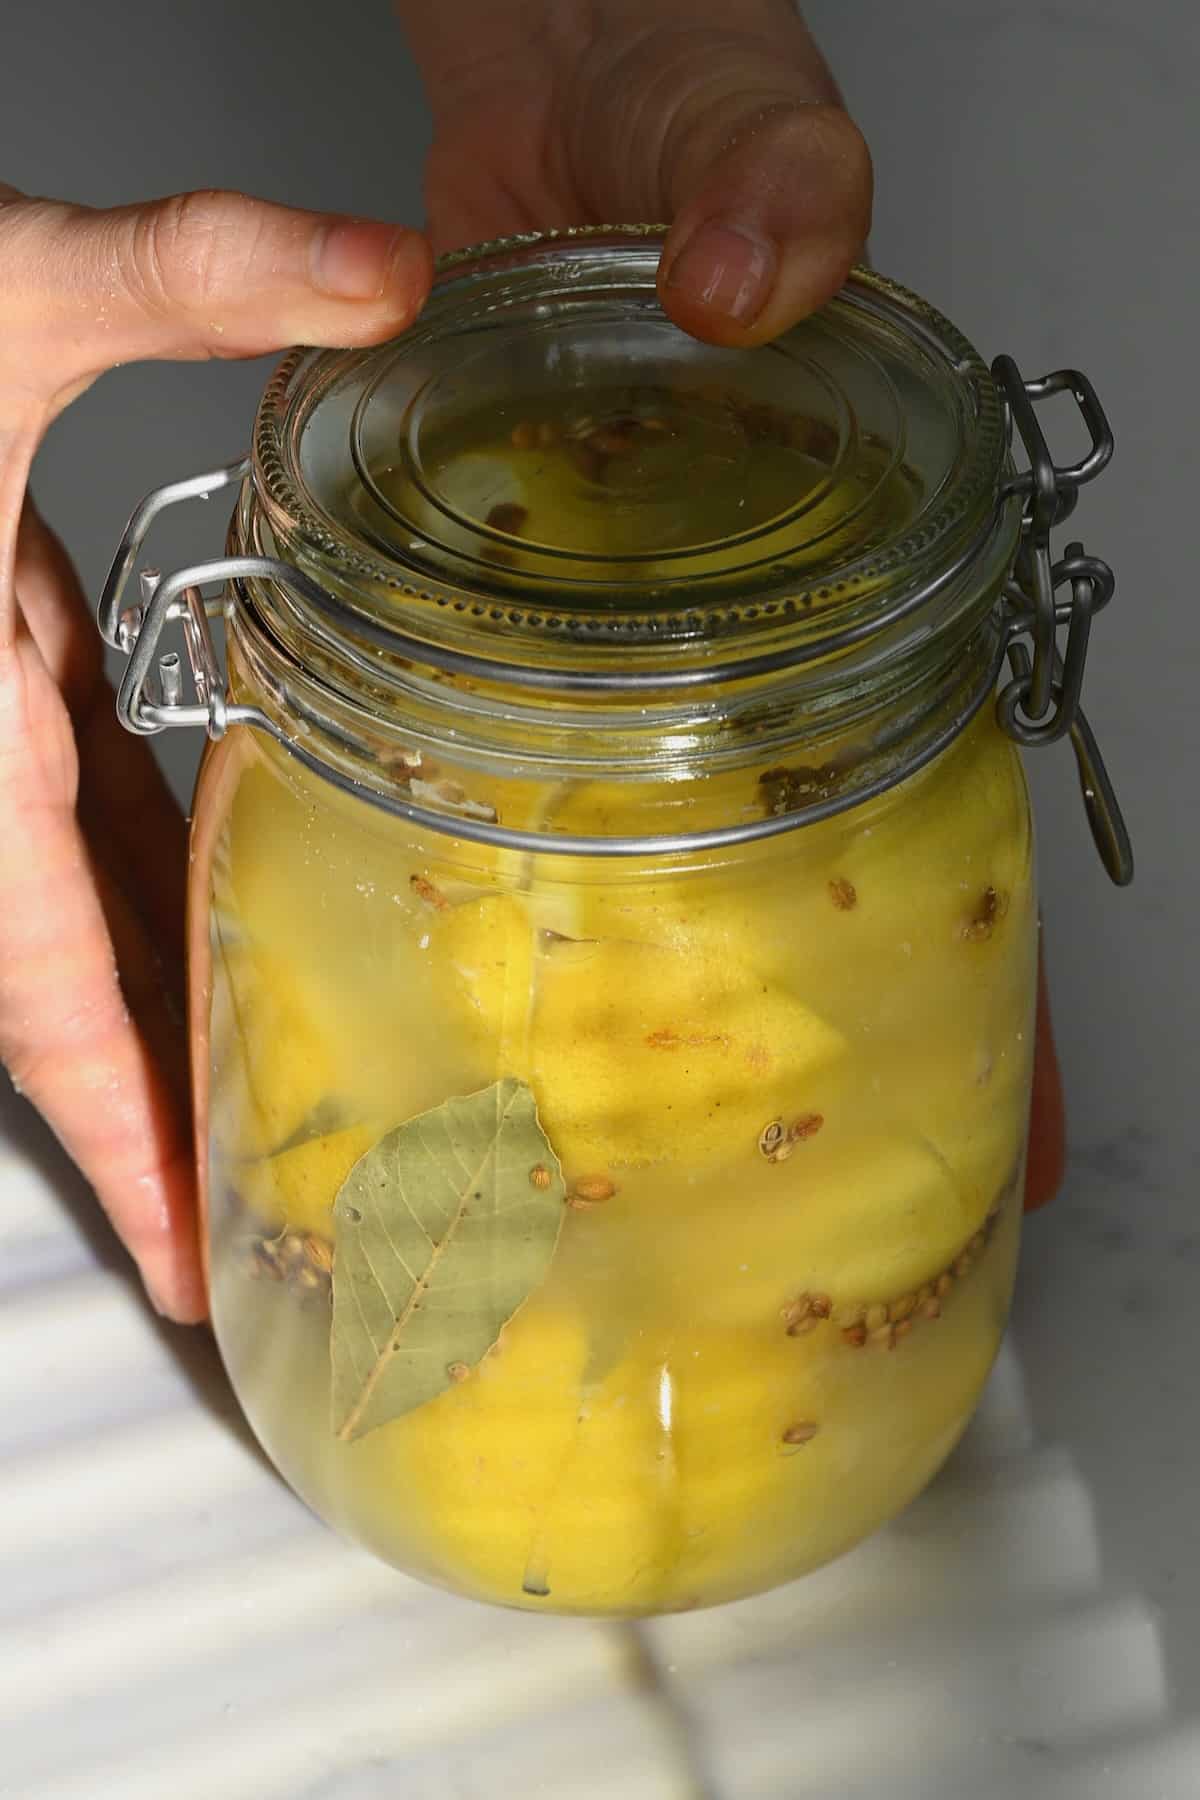
Next, fill the jar with the lemon juice, leaving around ½ inch (1 cm) of headspace at the top of the jar, and seal the jar.
Step 3: Set them aside
Place the jar in a cool, dark location (like a pantry/cupboard) for two weeks (or up to a month for even better flavor), shaking the jar every day to redistribute the salt within. Thicker-skinned lemons will take longer to cure, so adjust accordingly.
After that, the lemons should be tender with translucent flesh and are ready to transfer to the refrigerator and start enjoying!
Step 4: Using Preserved Lemons
When it comes time to use them, I first use a spoon or paring knife to separate the rinds from the flesh. Then, rinse the rinds to remove excess salt and dry them with a paper towel.
Many people don’t use the lemon flesh/juice but keep reading for potential uses for both (discard the seeds if you do plan to use the flesh). The rinsing step is also optional, but I prefer to remove the excess salt.
Then, slice, chop, or mince the preserved lemon rind into your dish of choice and enjoy!
To further remove saltiness: You can blanch the lemon rinds for several minutes before using them in your recipe of choice.
Storing Instructions
Once prepared and jarred, store the preserved lemons in the refrigerator for up to six months.
If you find one has risen above the liquid and become moldy, as long as the others look and smell fine, you can discard the moldy one only.
If prepared without any additional spices, they should last longer – up to a year or even more, when kept at the back of your fridge. Make sure to use sterilized utensils whenever you remove any from the jar.
If you note a white substance that looks ‘lacy’ clinging to the lemons, this isn’t spoilage and is actually harmless. Simply rinse it off before using them.
Freeze: to preserve the life of these salted lemons even further, you could freeze them. I don’t know exactly how long they’ll last, but it should be at least 18+ months.
How to Use Preserved Lemons?
These salt pickled lemons are absolute flavor bombs, perfect for adding depth to all kinds of recipes. You may think the uses would be fairly limited, but that couldn’t be further from the truth. Here are just a few ways of using preserved lemon rind:
- Moroccan preserved lemons are known for their use in stews and tagines
- Added to lentil soup
- Bake with proteins (like fish, roasted chicken, lamb, etc.)
- Stir (finely chopped/ minced) the preserved lemon rind into salad dressings and marinades
- Mix into pasta sauce or other simple pasta dishes (like this Easy Garlic Lemon Pasta)
- Add to mushroom risotto
- Blend into hummus
- Enjoy in a wrap/sandwich
- Add this condiment to sauces and dips (particularly ones using creamy ingredients like homemade mayonnaise, homemade labneh, homemade yogurt, homemade tahini, etc.)
- Add to grain and legume salad (i.e., couscous, bulgur wheat, rice, quinoa, etc.)
- Make a preserved lemon gremolata
- Use a little preserved lemon peel over avocado toast
- Use strips in cocktails (like Martinis, Bloody Mary, or even gin)
- Toss in with roasted vegetables
- Add a little to a potato salad
- Use with fruity granita
- To accompany raw and smoked fish
- Add to a cheese board or charcuterie board
You can also add the remaining liquid/flesh (seeds removed) to season soups and stews, mash into dressings/marinades, or sprinkle over proteins and veggies before baking them.
Honestly, you can experiment with using these pickles lemons in most recipes that call for fresh. Let me know in the comments what your favorite uses are!
FAQs
First, preheat the oven to 325ºF/160ºC. Meanwhile, wash the jars and lids in hot, soapy water and rinse well. Then, transfer them to the oven (with no rubber/plastic or other non-heat-proof elements) for about 10-12 minutes, or until the jars are completely dry. Voila, sterilized jars!
This is a point of preference. I definitely prefer to rinse the lemons as I don’t enjoy my food being overly salty. You can even reduce the salt further by blanching the lemons before adding them to your recipe of choice.
This tends to come down to personal preference. Many recipes are made with the delicious, preserved lemon rind in mind and completely discard the inner flesh. However, the inner flesh also has several uses, including smashed into salad dressings and marinades. So, I’d say, it’s up to you!
Salt preserved lemons are like lemon umami-packed flavor bombs. They’re’ bright, bold, slightly floral (thanks to the oils in the peel), and super concentrated in lemon flavor, but without overwhelming bitterness of raw lemon rind or the mouth-puckering tart acidity.
Yes, you should be able to, topping the lemons up with further lemon juice as needed. However, I’ve never reused it more than two times.
Notes and Top Tips
- Use sterilized jars: any time you;re dealing with any preservation method, it’s imperative to use completely sterilized tools and jars so the shelf life isn’t negatively affected. Check FAQs for the method.
- Make sure the lemons are submerged: this is absolutely critical to avoid spoilage. If you have issues with them rising above the liquid, it may be best to use a fermentation weight (or something similar) to keep them down.
- Don’t eat them too soon: I recommend 2 weeks as a minimum, though three or four are even better. Making preserved lemons is definitely a waiting game. This is a product that gets better with age, so don’t attempt to enjoy them after only a few days.
- Choosing lemons: it’s important to note that the lemon you use will impact how quickly they are pickled and their flavor. Thin-skinned lemons are best over regular (Eureka) lemons for these cured lemons.
- Cheat method: If you want the flavor of preserved lemons but don’t have weeks to wait, there is an option (only use in a pinch!). Chop the lemons into 4-6 pieces and add them along with a cup of salt and water to a non-corrosive oven-safe pan. Cover with foil and bake 250ºF/120ºC for 3-4 hours, occasionally stirring, until the rind is tender. This method was passed on to my by a reader, so I can’t guarentee the results.
More Preservation Recipes
- Pink Pickled Turnips
- Homemade Pickled Jalapeños
- Easy Pickled Cucumbers
- Pickled Red Onions (Pink Onions)
- Easy Pickled Green Tomatoes
- Pickled Eggs – 3 Ways
- Honey fermented garlic
- Quick Pickled Asparagus
- Easy Homemade Sauerkraut
- Canning Peaches
If you try this easy preserved lemons recipe, I’d love to hear your thoughts and questions below. Also, I’d appreciate a recipe card rating below, and tag me in your recipe recreations on Instagram @Alphafoodie!
How to Make Preserved Lemons (Pickled Lemons)
Equipment
- 1 Big glass jars (32 oz) 32 oz/1 L
Ingredients
- 15 large lemons unwaxed is best with thin skin (like Meyer lemons), 9-10 for pickling, 5-6 or more to make 1.5 cups lemon juice
- 6.35 oz pickling salt 3/4 cup
Pickling Spices (Optional)
- 4 bay leaves
- 1 Tbsp coriander seeds
Instructions
Step 1: Wash and Prepare the Lemons
- Wash 10 lemons in warm water, scrubbing them well to remove any dirt (or wax). Then dry well with clean paper towels. I managed to fit 9 in my jar but you might be able to squeeze in an extra one. You can test in advance to see how many you can fit, though when they are cut, they are easier to squeeze in.
- Cut a thin slice off the stem end of each lemon. Then, working one at a time, hold the lemon in the palm of your hand so the cut-side is upright. Use a sharp knife to carefully cut each lemon into four pieces lengthwise (once in half vertically and once horizontally), leaving an inch at the bottom of each lemon (so it opens up, like a flower, without actually being sliced into four segments – refer to the images on the blog post).Alternatively, you can chop the lemons into quarters and toss them with the salt in a large bowl.
Step 2: Prepare the Jars
- Juice the remaining lemons. Keep in mind you need 1 ½ cups (375ml) of juice so, depending on the size of your lemons, you might need a couple more. If preferred, you can prepare 1 cup of lemon juice and then add more juice as needed when you pour it over the lemons. Keep in mind that the lemons need to be submerged in the juice. It can help to microwave the lemons for 20-30 seconds first and roll them against your tabletop several times. This will help them release as much juice as possible.
- To make sure you have enough salt – you need 1 Tbsp per lemon, as well as 2-3 extra Tbsp to sprinkle in the jar. To preserve 9 lemons, I used 12 Tbsp pickling salt (3/4 cup or 6.35oz/180 g). You can adjust the amount based on how many lemons you can fit in your jar.
- Sprinkle one tablespoon of pickling salt at the bottom of a sterilized jar (see the FAQs on the blog post for how to sterilize it). Fill each lemon with 1 Tbsp salt and push the salt into the middle. Then place the lemon in the jar, cut-side upwards (so the salt stays in). Pack the jar tightly, so they can't move easily.Gently smashing them once they’re in the jar will help to release more liquid and ensure they’re fully submerged. You can do this with a pestle, muddler, or even a wooden spoon.
- Add three of the salted lemons to the jar, then add the bay leaves and coriander seeds (or the spices of your choice) against the sides of the jar. Sprinkle some more of the pickling salt between the layers.
- Add the remaining salted lemons and sprinkle over the remaining salt.If you have space, you can quarter the leftover rinds from the juiced lemons and push them into the jar as well (remember, everything must be covered by the liquid, though).Alternatively, I recommend zesting the lemons you plan to juice in advance. You can freeze the zest in small portions in an ice cube tray, then store it in a freezer-safe bag for several months.
- Finally, fill the jar with the lemon juice, leaving around ½ inch (1 cm) of headspace at the top of the jar, and seal the jar.
Step 3: Set them Aside
- Place the jar in a cool, dark location (like a pantry/cupboard) for two weeks (or up to a month for even better flavor), shaking the jar every day to redistribute the salt within. Thicker-skinned lemons will take longer to cure, so adjust accordingly.After that, the lemons should be tender with translucent flesh and are ready to transfer to the refrigerator and start enjoying!
Step 4: Using Preserved Lemons
- When it comes time to use them, I first use a spoon or paring knife to separate the rinds from the flesh. Then, rinse the rinds to remove excess salt and dry them with a paper towel.Many people don't use the lemon flesh/juice but keep reading for potential uses for both (discard the seeds if you do plan to use the flesh). The rinsing step is also optional, but I prefer to remove the excess salt.Then, slice, chop, or mince the preserved lemon rind into your dish of choice and enjoy!To further remove saltiness: you can blanch the lemon rinds for several minutes before using them in your recipe of choice.
Storing Instructions
- Once prepared and jarred, the preserved lemons can be stored in the refrigerator for up to six months.If you find one has risen above the liquid and become moldy, as long as the others look and smell fine, you can discard the moldy one only.If prepared without any additional spices, they should last longer – up to a year or even more, when kept at the back of your fridge. Make sure to use sterilized utensils whenever you remove any from the jar.If you note a white substance that looks "lacy" clinging to the lemons, this isn't spoilage and is actually harmless. Simply rinse it off before using them.Freeze: to preserve the life of these salted lemons even further, you could freeze them. I don't know exactly how long they’ll last, but it should be at least 18+ months.
Video
Notes
- Use sterilized jars: any time you’re dealing with any preservation method, it’s imperative to use completely sterilized tools and jars so the shelf life isn’t negatively affected. Check the FAQs on the blog post for the method.
- Make sure the lemons are submerged: this is absolutely critical to avoid spoilage. If you have issues with them rising above the liquid, it may be best to use a fermentation weight (or something similar) to keep them down.
- Don’t eat them too soon: I recommend 2 weeks as a minimum, though three or four are even better. Making preserved lemons is definitely a waiting game. This is a product that gets better with age, so don’t attempt to enjoy them after only a few days.
- Choosing lemons: it’s important to note that the lemon you use will impact how quickly they are pickled and their flavor. Thin-skinned lemons are best over regular (Eureka) lemons.
- Cheat method: if you want the flavor of preserved lemons but don’t have weeks to wait, there is an option (only use in a pinch!). Chop the lemons into 4-6 pieces and add them along with a cup of salt and water to a non-corrosive oven-safe pan. Cover with foil and bake 250ºF/120ºC for 3-4 hours, occasionally stirring, until the rind is tender. This method was passed on to me by a reader, so I can’t guarantee the results.
- Cardamom
- Vanilla
- Cloves
- Cinnamon stick
- Mustard seed
- Mace
- Chili/ chili flakes
- Paprika
- Dried rosemary
- Safflower
- Nigella seeds
- Whole peppercorns.
Nutrition
Nutrition information is automatically calculated, so should only be used as an approximation.


These lemons are not a fermented product. They are salt cured. There is so much salt used in the process that fermentation can not occur. I love fermented foods, but these lemons are not fermented.
Thank you for your comment. You are right 🙂