
This post may contain affiliate links. Please read our disclosure policy.

These vegetarian low-carb cauliflower pizza crusts are the perfect base for tons of toppings – whether as a party snack, healthy treat, or even use the ingredients to make larger pizzas instead. The gluten-free pizza crust combines cauliflower, cheese, and herbs for a flavorful yet low-carb keto pizza option for all. Plus, this recipe is super customizable – top with the toppings of your choice and even prepare these crusts in advance and freeze for later!

I’m no stranger to alternative pizza crusts – on my blog, I already have Butternut Squash Pizza. In fact, it was only recently that I finally posted my recipe for a traditional Homemade Neapolitan pizza (Marinara style). Instead, using alternative pizza bases is a favorite of mine for adding extra nutrition and flavor to a family favorite.
Not only does this recipe contain a gluten-free pizza crust, but it can also easily be a keto cauliflower pizza option – choose low-carb toppings, and you’re good to go! That’s why this recipe is a go-to of mine for big events: I can serve something that almost everyone enjoys (who doesn’t love pizza?) to groups with various dietary needs and not sacrifice on flavor.
Plus, best of all, the process for making these mini gluten free pizzas is ridiculously simple – so much so that you can get the entire family in on the action, helping out. Plus, give your family their pick of toppings for a great mix and match selection!
Want to save this recipe?
Ingredients
For the cauliflower gluten free pizza base
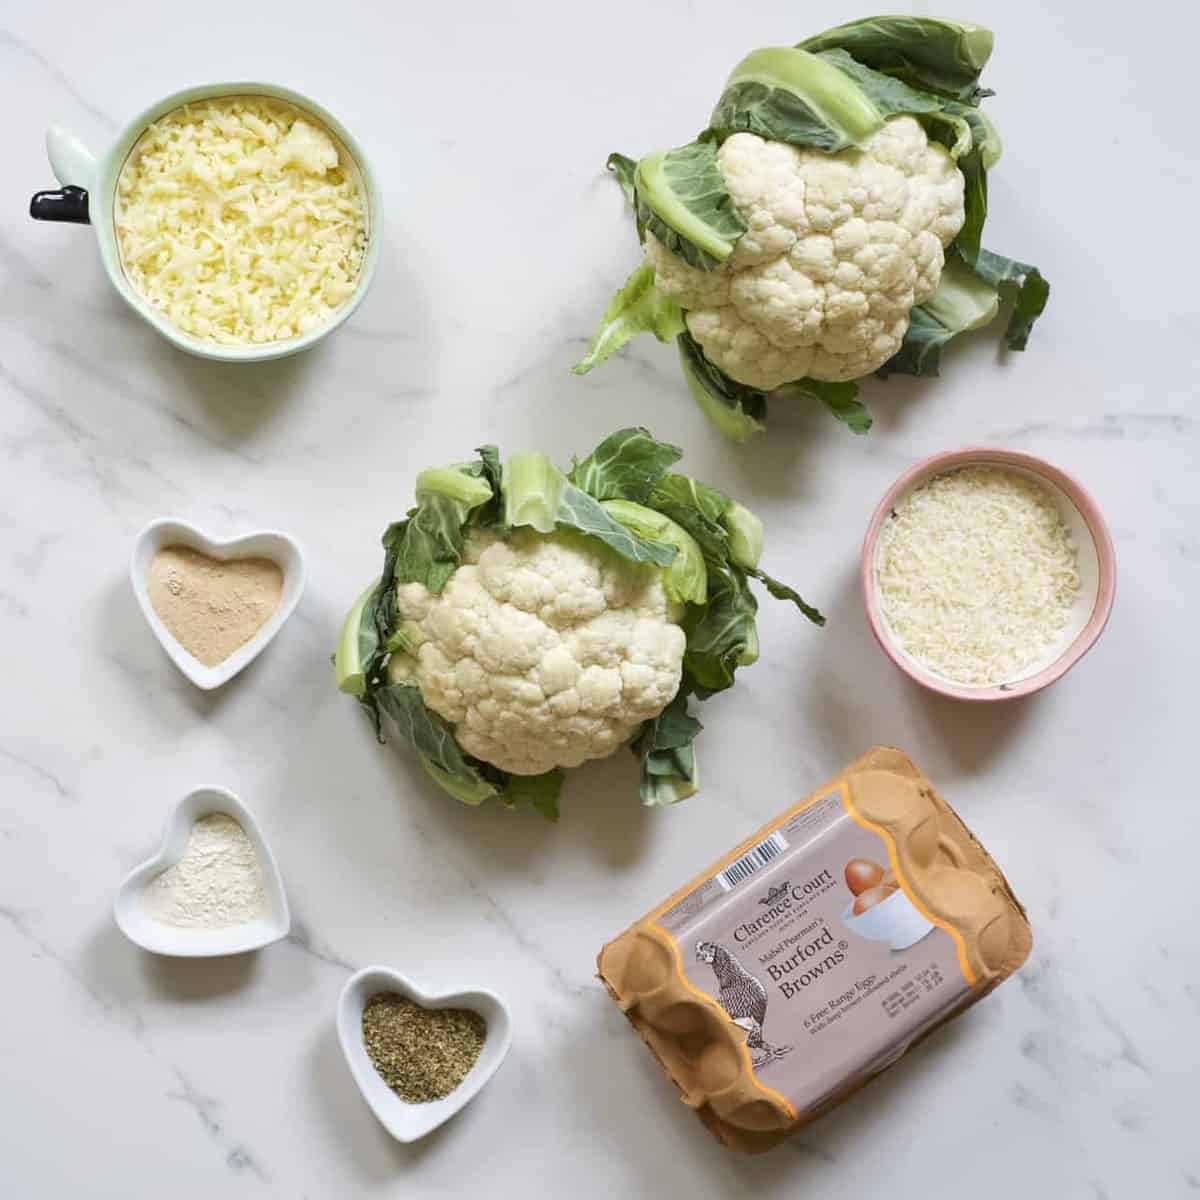
- Head of cauliflower
- Cayenne pepper (omit if you don’t want spice), Onion Powder, Garlic Powder, and Oregano
- Eggs – I used Clarence Court Burford Brown Eggs
- Shredded Mozzarella & Parmesan
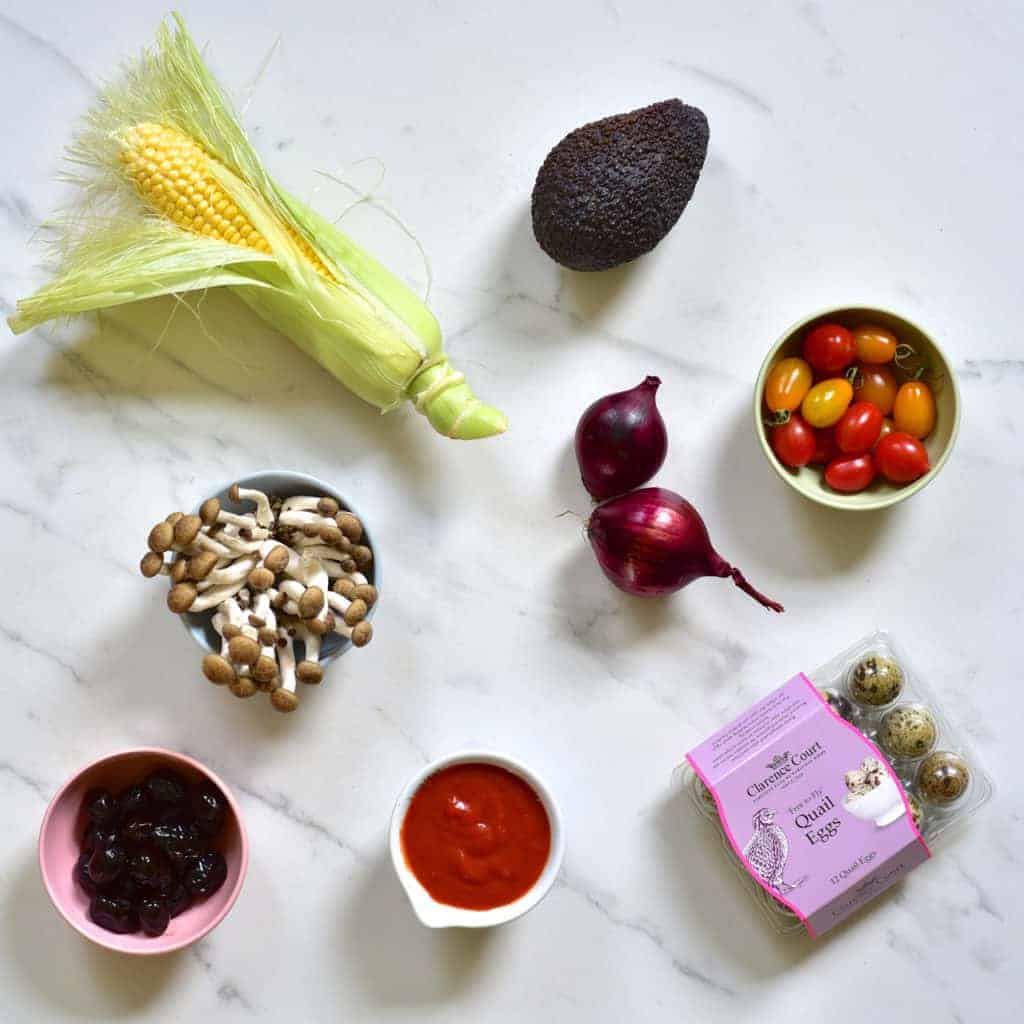
For the Toppings
The Basics:
- Marinara sauce (may need less/more depending on how thick you like your tomato base to be)
- Shredded mozzarella (I prefer only to have cheese on half my pizzas since there’s lots in the base)
The Optionals:
- Quail eggs – I used Clarence Court Quail Eggs
- Black olives
- Sweetcorn
- Red Onions, finely diced
- Mini Mushrooms
- Baby spinach
- Mixed color cherry tomatoes
- Large Avocados cut into slices (or stars)
- Chili flakes or a little Chili Oil, dill, salt, and pepper, to garnish
Note: This is 100% down to taste so that you can use your own favorite veggies!
How to make mini pizzas
Please note, because of the large number of pizzas that this recipe makes (around 40-50 depending on the size of the cauliflower heads), I’ve only included Images of a single baking tray load. For a smaller batch, feel free to half the recipe.
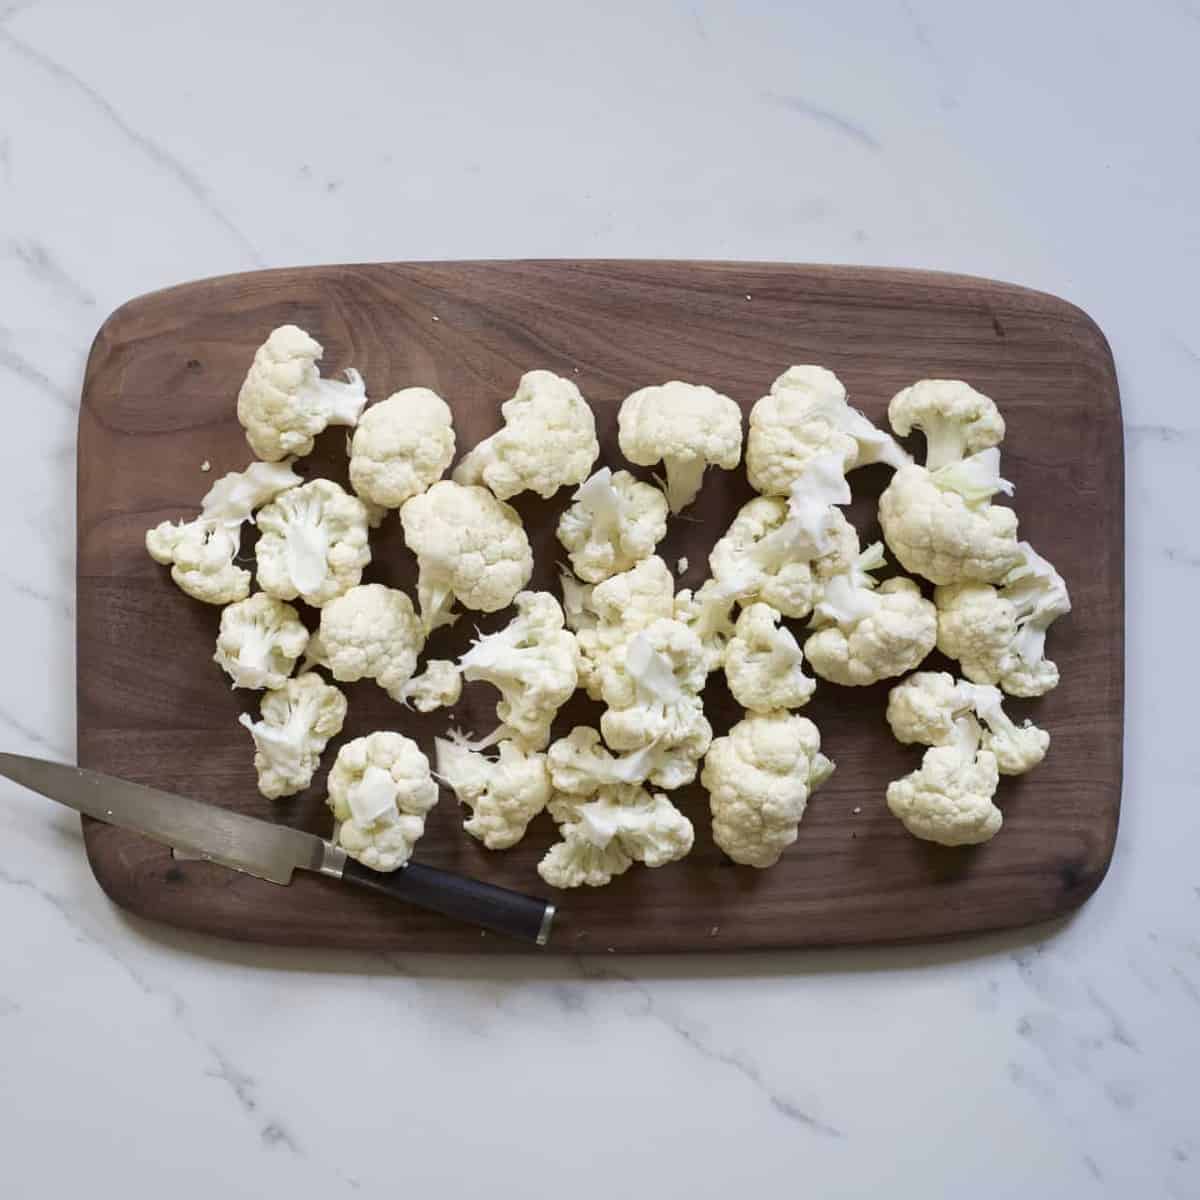
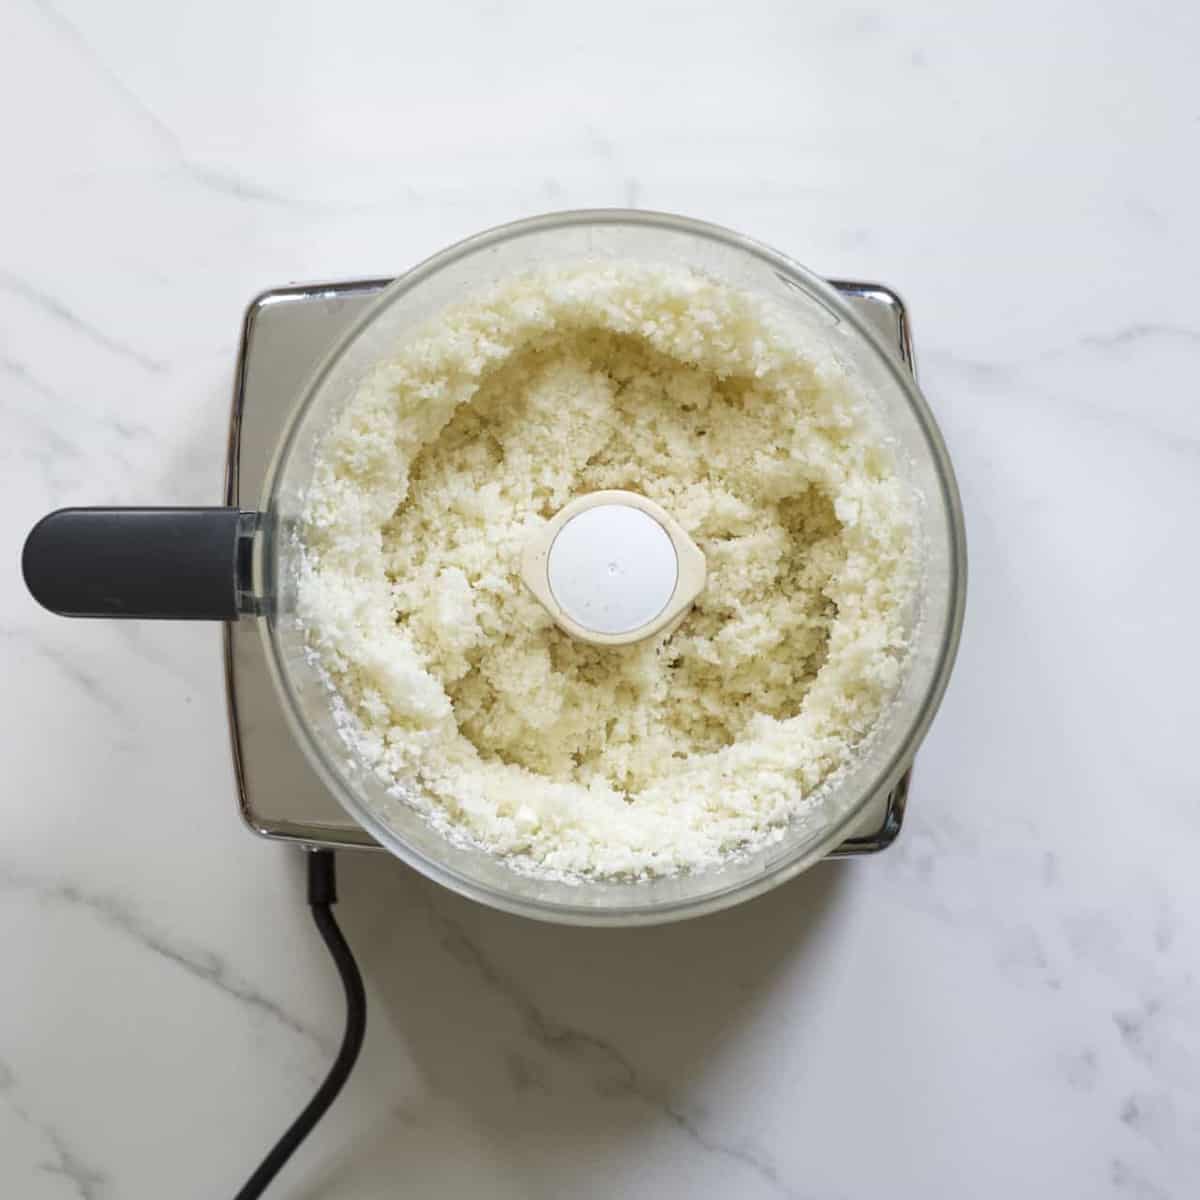
Step 1. Prepare the cauliflower. First, preheat the oven to 200°C/400ºF. Then, chop the cauliflower heads into Florets and pulse in a food processor until a ‘rice’ consistency. You may need to do this in two separate batches, one per cauliflower head.
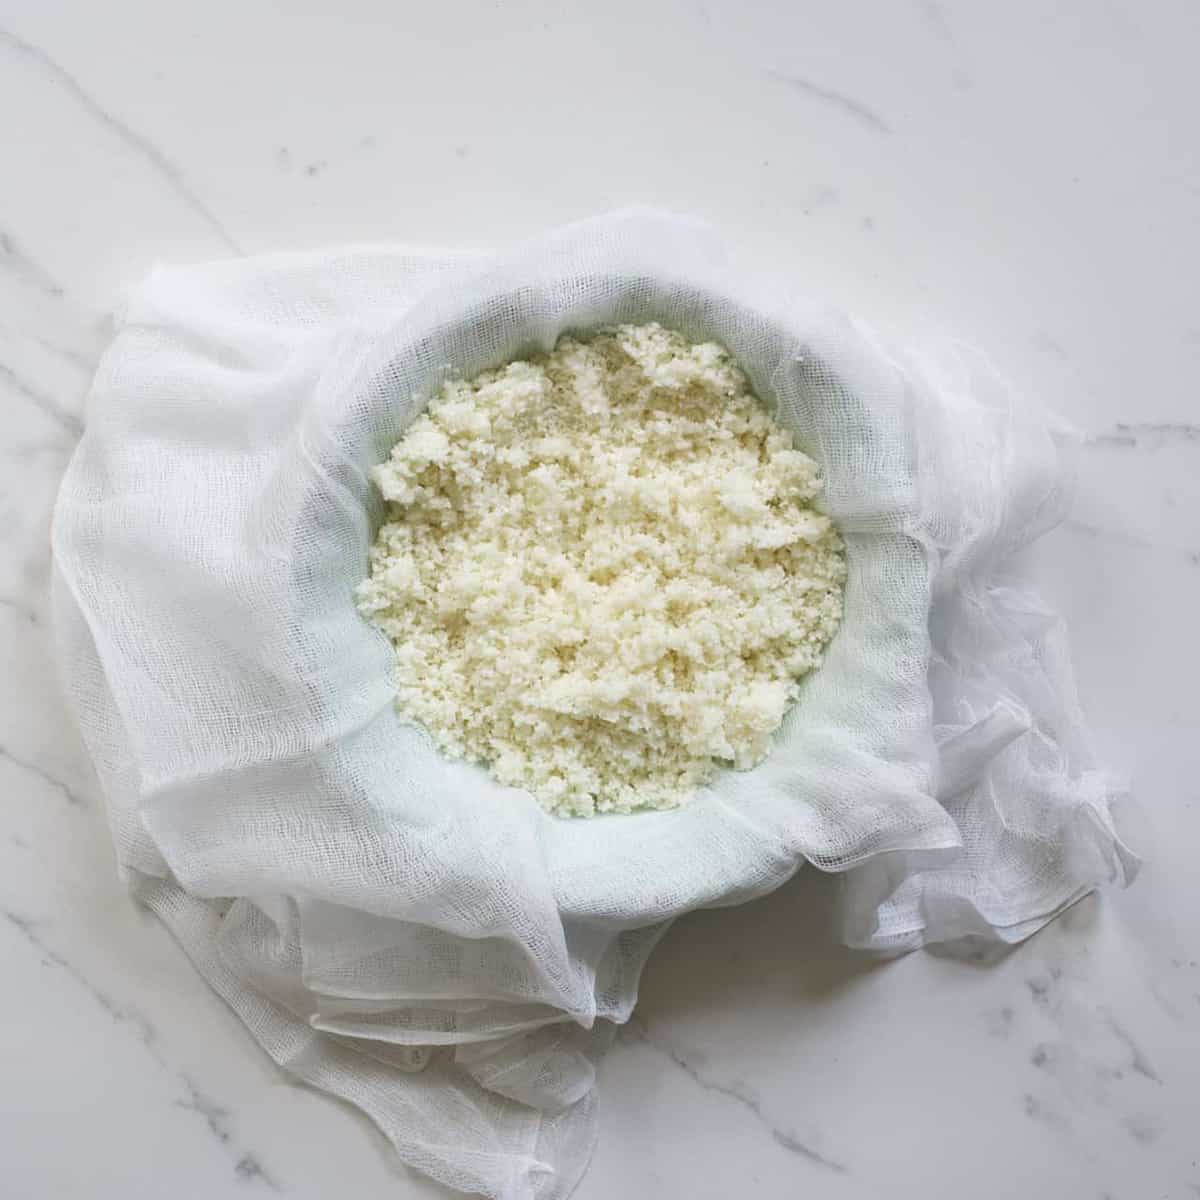
Place a cheesecloth or nut milk bag into a large bowl or over a colander then pour the cauliflower rice mixture into it. Squeeze out as much excess water/liquid from the cauliflower as you can (this is the secret to making a delicious crispy cauliflower pizza crust). Once again, you may have to do this twice for the amount of mix you have.
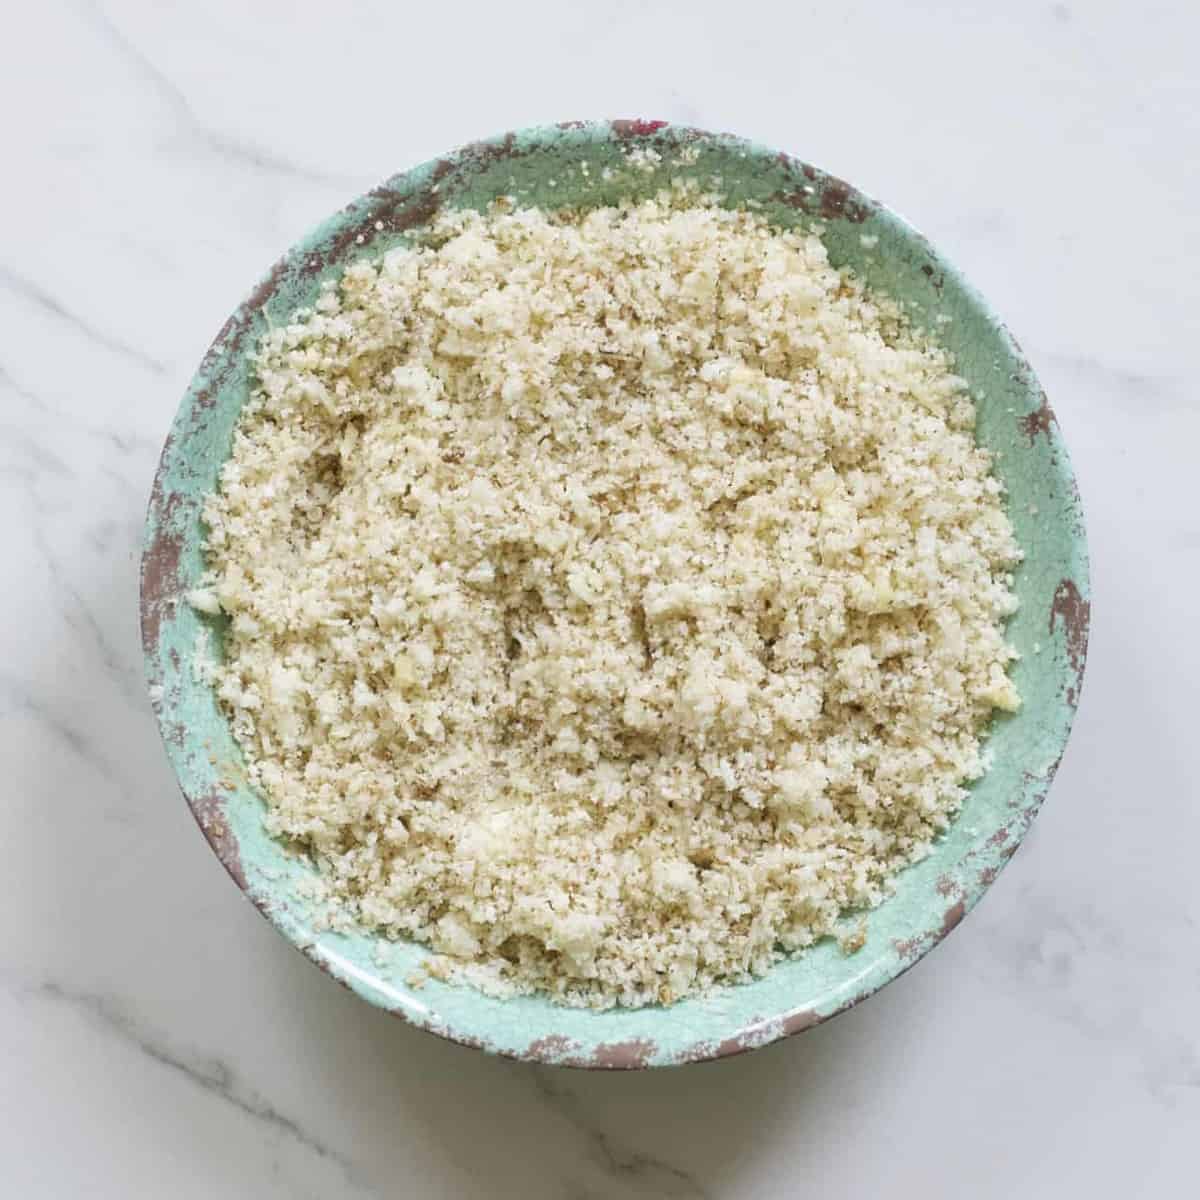
Step 2. Prepare the cauliflower gluten free pizza crust mixture. Add the onion, garlic, oregano, parmesan, and mozzarella and mix well.

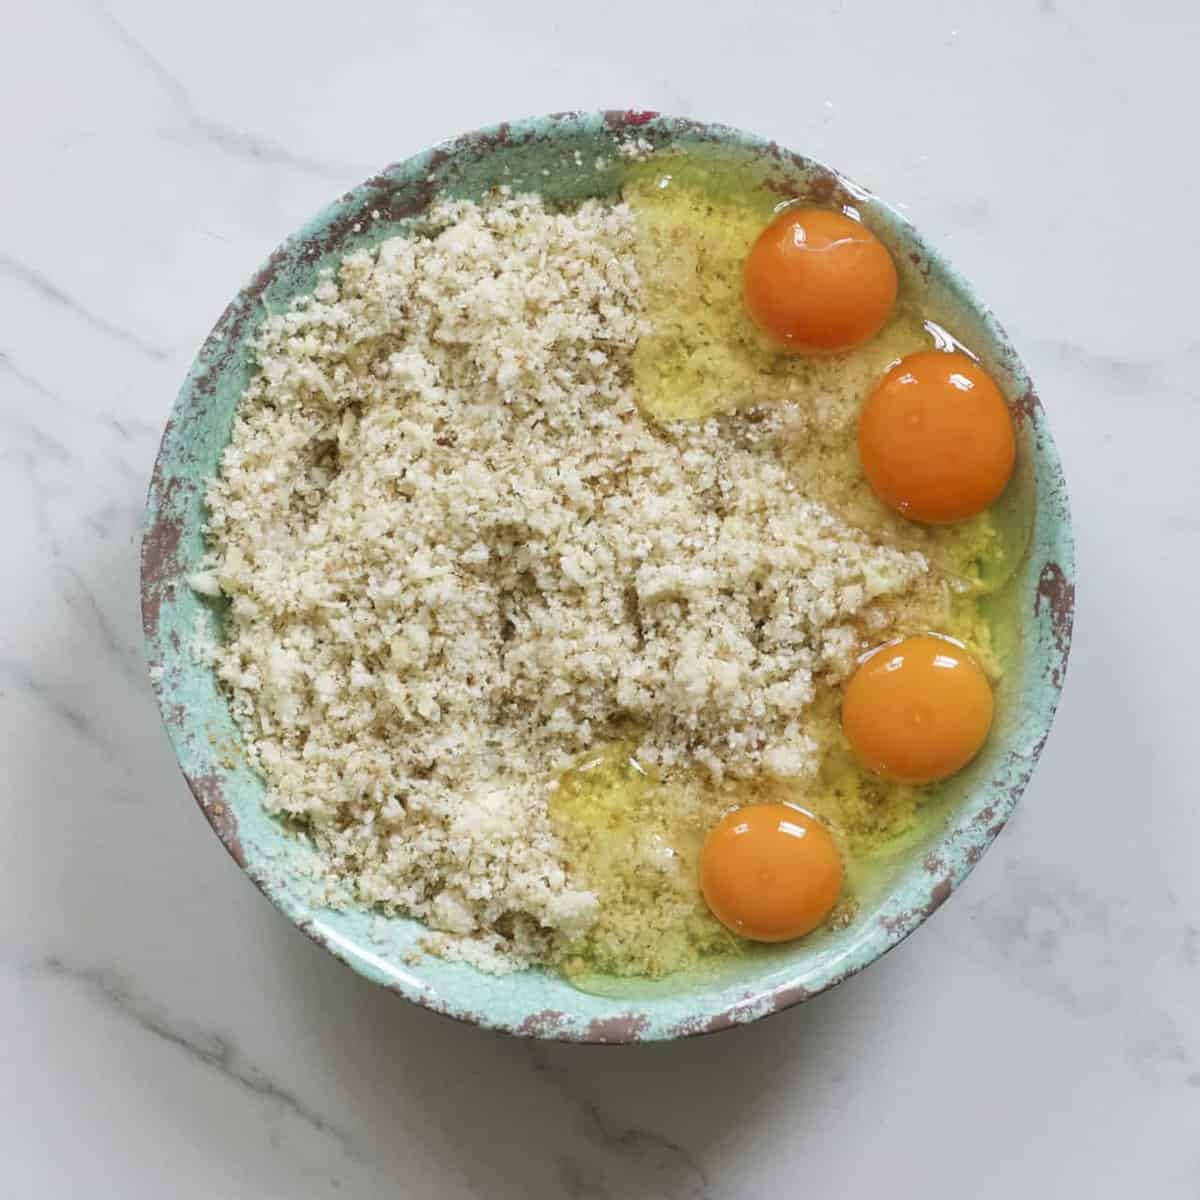
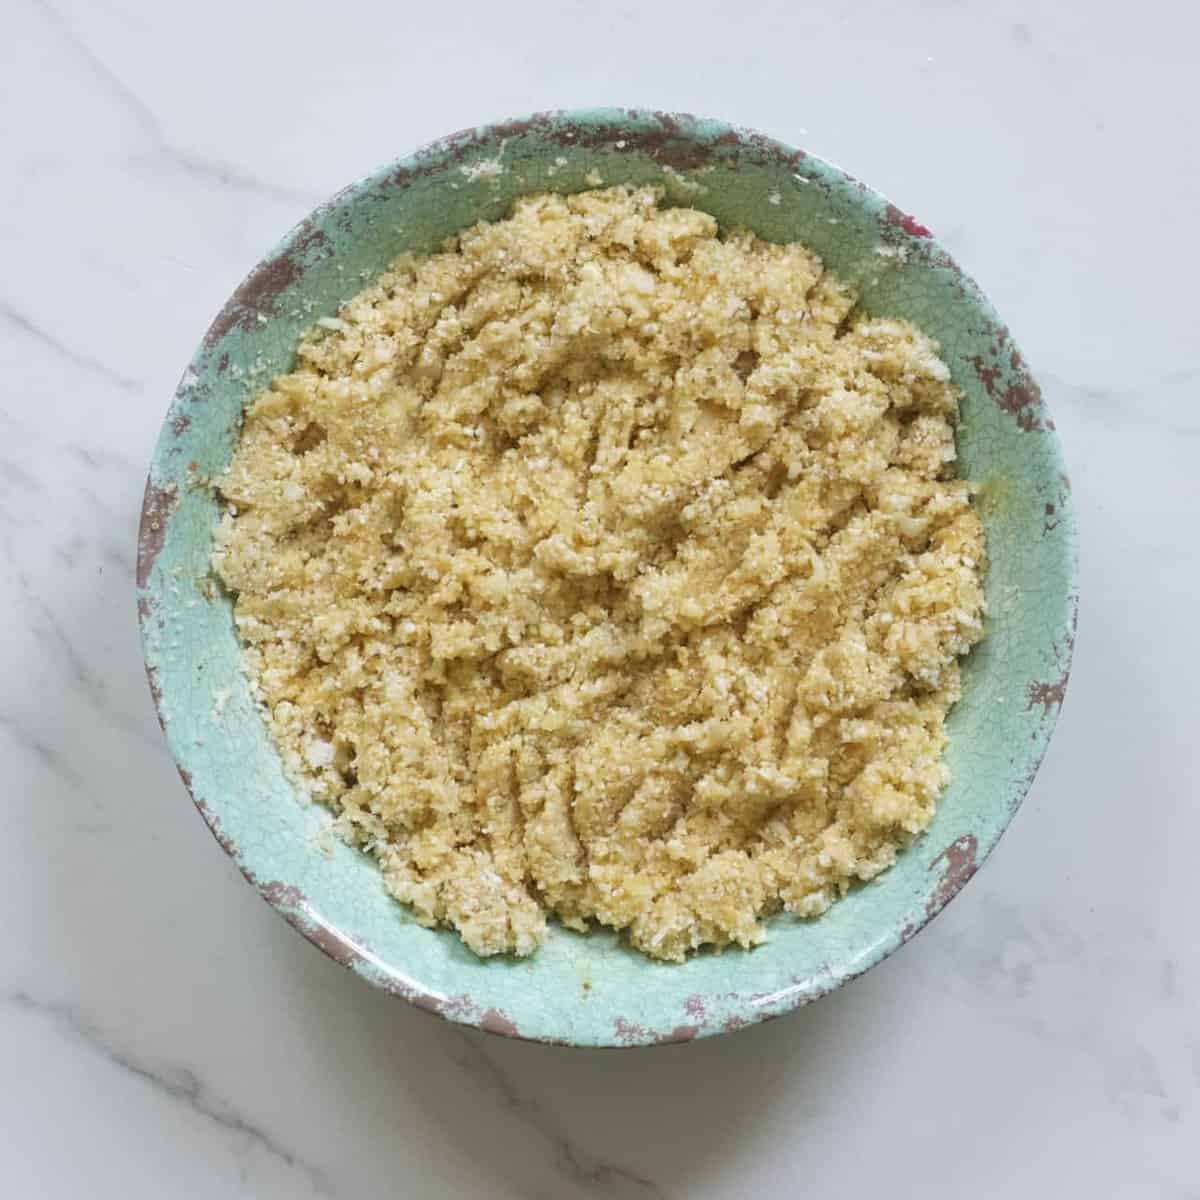
Add in eggs into the bowl and mix well to beat the eggs and combine with the cauliflower mix. You can either add them directly into the bowl or first mix them separately in a small bowl then stir through the mixture.
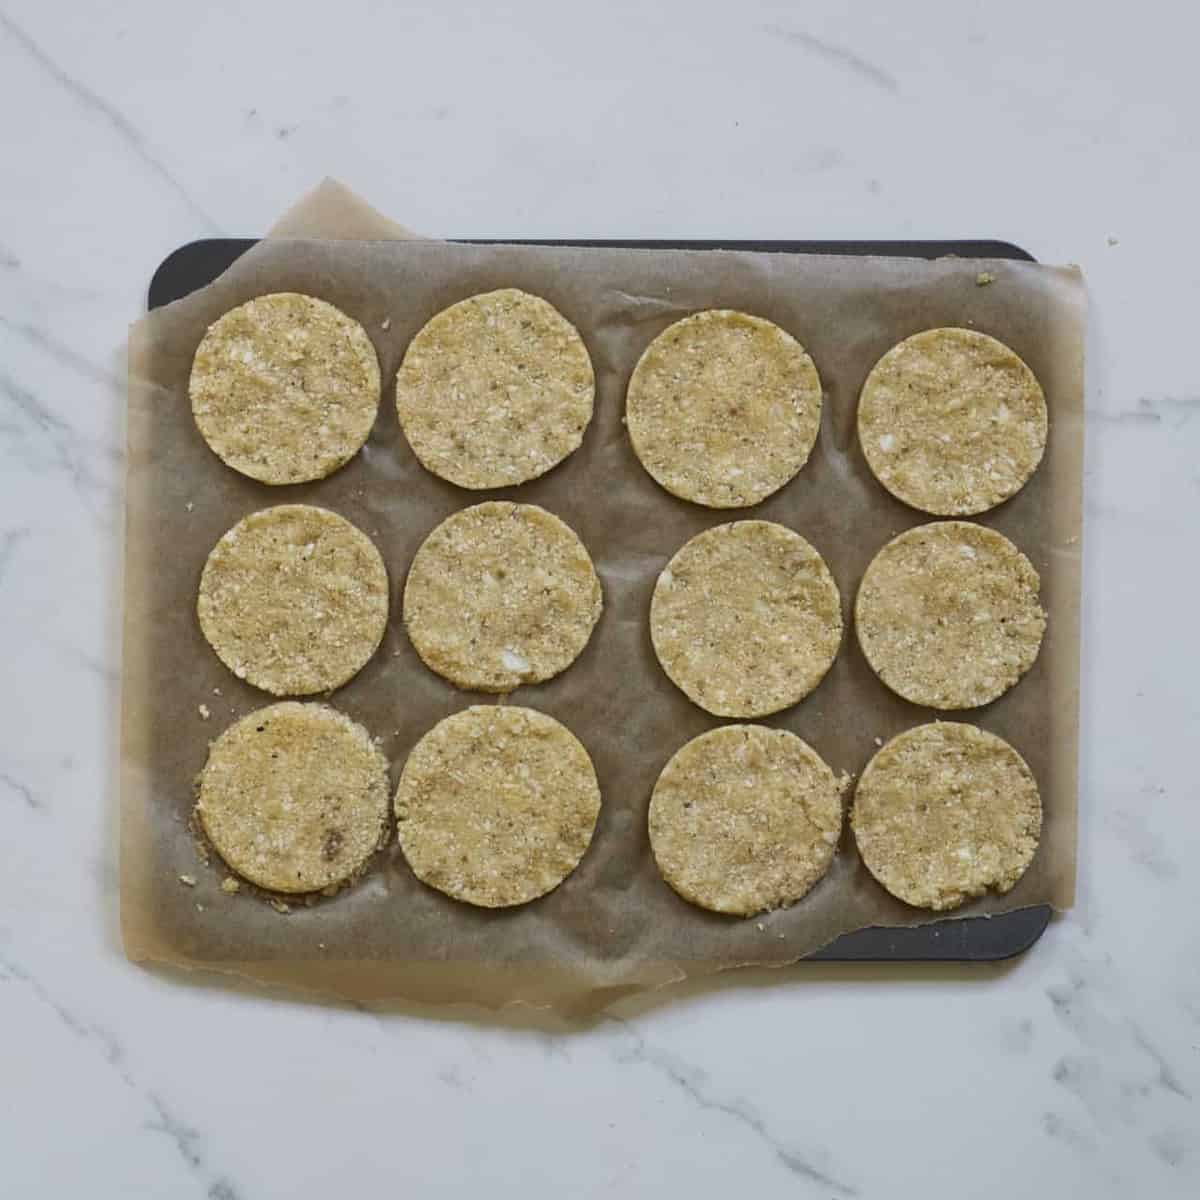
Step 3. Form The Mini Pizzas. Form into mini pizzas, either free-hand or you can use a cookie cutter/cake ring to make even shaped patties (like I did). It also helps to measure out the mixture so that they’re even in depth (1-2 Tbsp is more than enough). I fit around 12 per baking sheet and cooked two baking sheets at a time, 4 in total. I made mine quite thin as well, so probably used around 1-1 1/2 tablespoons per pizza.
It’s easiest to form the pizzas directly onto a baking sheet with parchment paper. Feel free to lightly spray the sheet with oil/cooking spray, though I had no issues with the pizzas sticking.
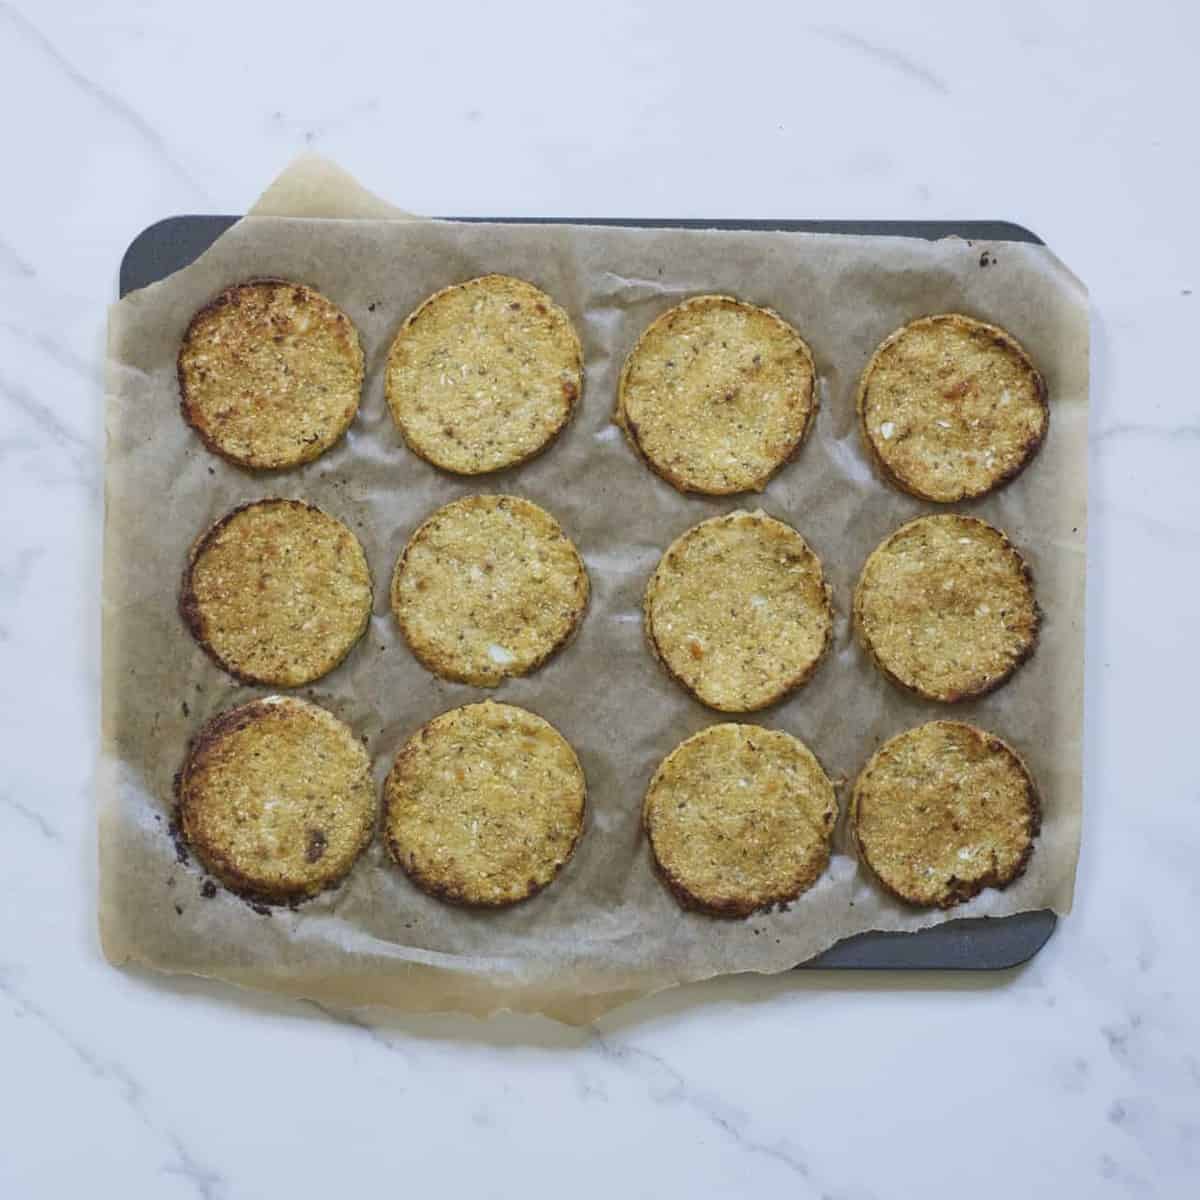
Step 4. Bake The Crusts. Bake the crusts in the oven for 15-20 minutes, until golden brown. They might brown more on the edges if they’re slightly elevated like mine were.
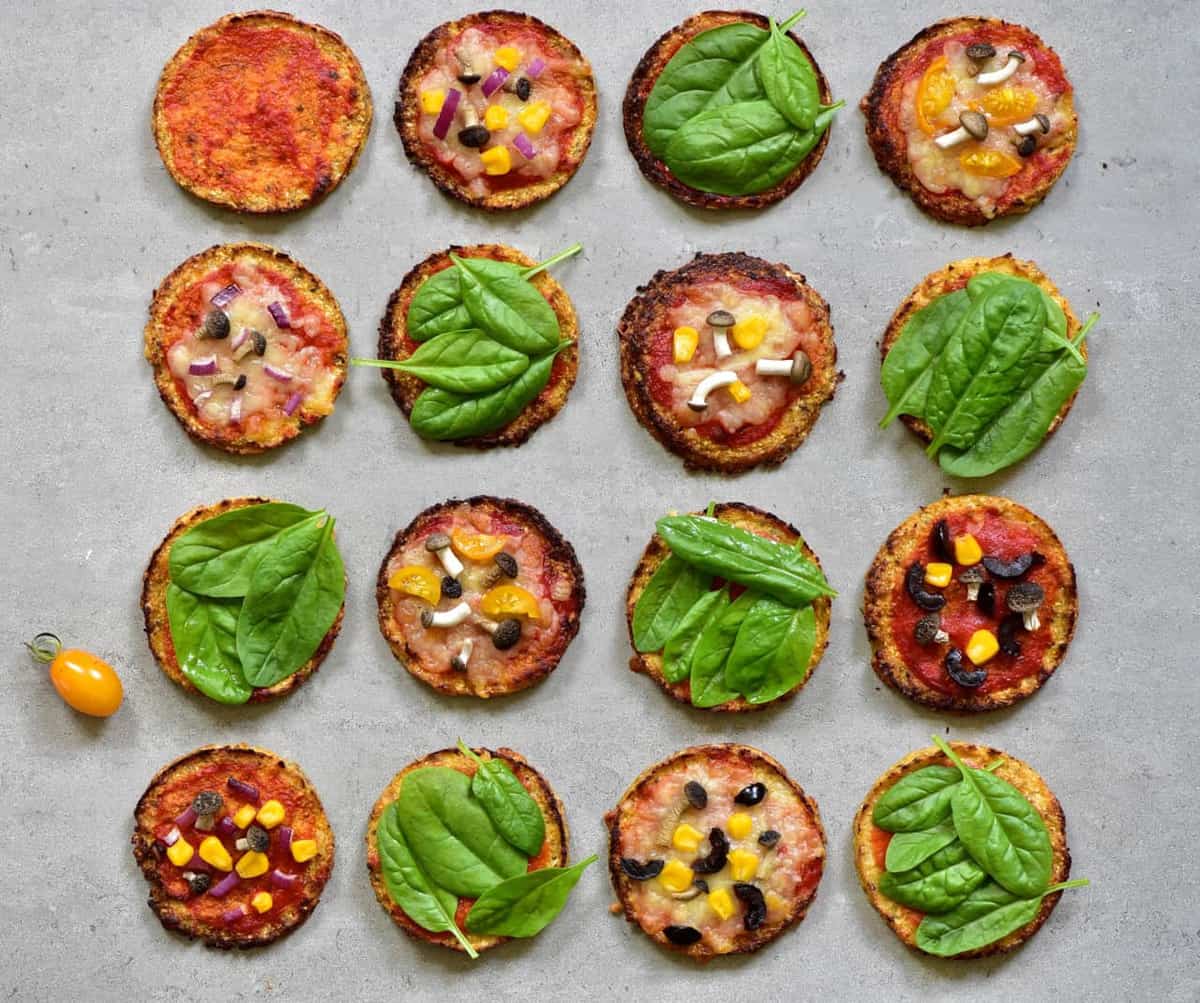
Step 5. Prepare the toppings. As the crusts bake, prepare any of the toppings that need prep. I like to use smaller veggies for these – due to the size of the base: olives, cherry tomatoes, mini mushrooms, etc. I also tend to choose veggies that only need a few minutes of baking.
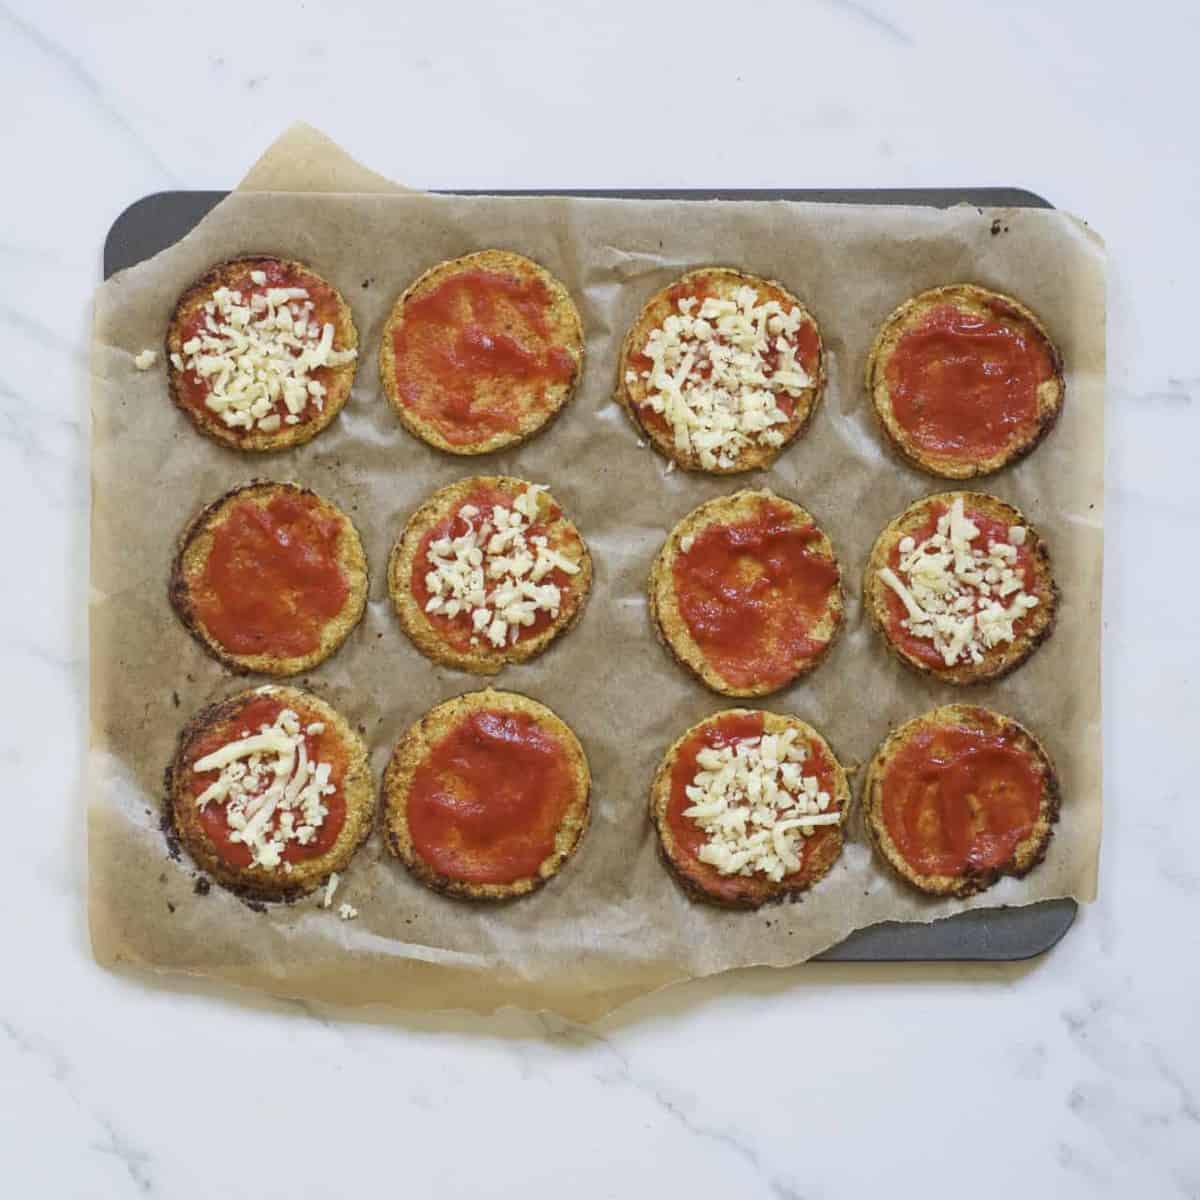
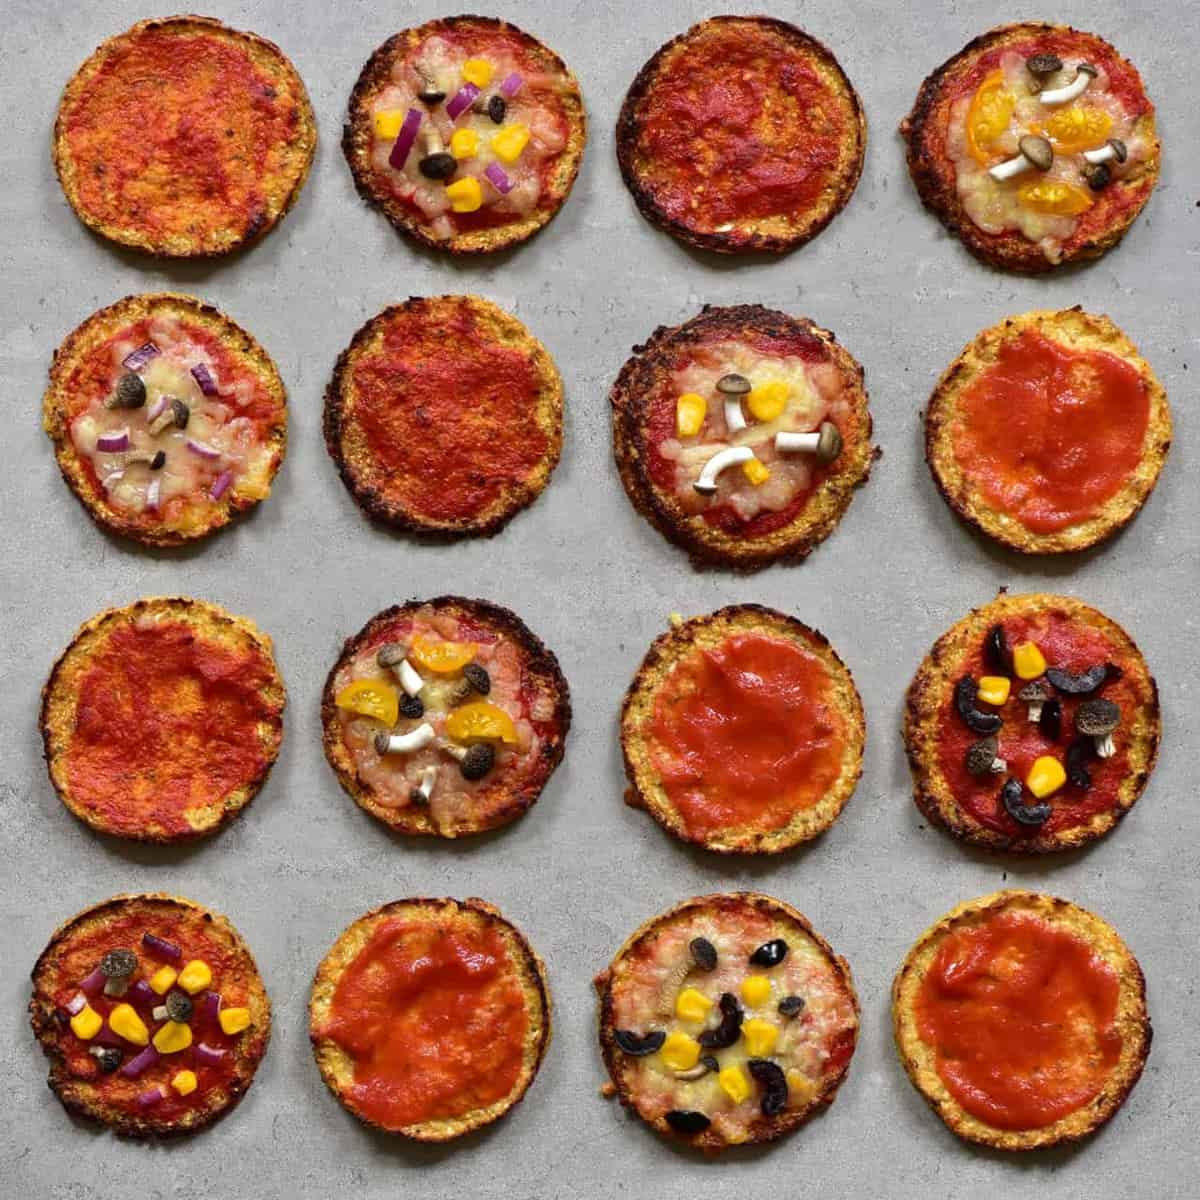
Step 6. Top The Pizzas. Remove the cooked cauliflower crusts from the oven and start to top them with around 1 tsp marinara sauce and toppings of your choice.
If you’re cooking the crusts in batches in the oven (for those of us with tiny ovens), then place a second lot of crusts in the oven to bake while you top the first batch.
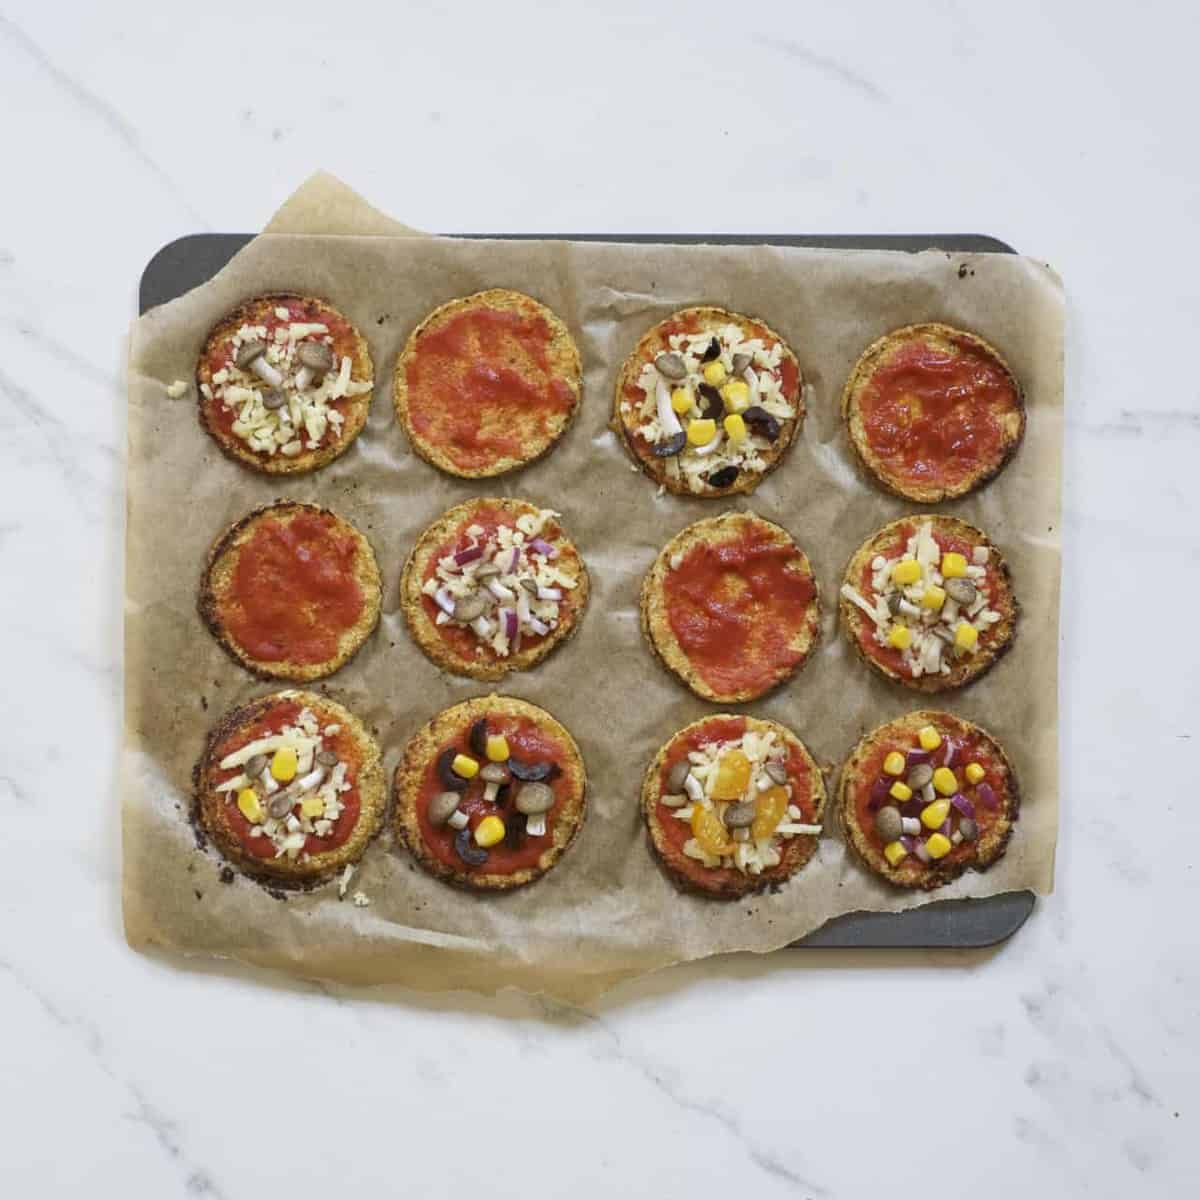
Step 7. Finish off the pizzas in the oven. Once topped, return the pizzas to the oven for a further 5-10 minutes, until the cheese has melted and the veggies are lightly baked. You could also do this step under the grill (as pictured below), but then you’re more likely to get very browned edges.
If you’re wanting to top some of the pizzas with quails eggs, then you have two options. The first is to make sure your crusts have a raised edge/lip (as mine do) so that you can crack them directly onto the pizza, and they won’t run off the edges. Though, as you can see, this can lead to darkened pizza edges. The eggs may also need a little extra time to bake until fully cooked through – although I’ve found they’re usually ready between 7-10 minutes.
The alternative method is to pan-fry the eggs in a separate pan as the pizzas complete their final bake and top them with the egg after it’s removed from the oven. Luckily, due to the egg’s small size, you can fry multiple in one go and either fry in its natural shape or use a very small heat-proof cookie cutter/mold to shape them evenly.
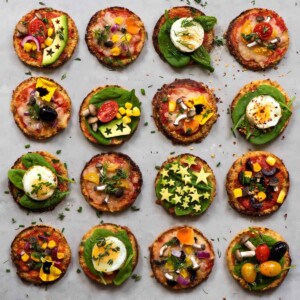
The pizzas are ready to be enjoyed immediately!
How to store
If you find that you’ve made too much crust mixture, you can freeze the pre-baked gluten free pizza crust for up to 1 month. Form into the crust shape and freeze as they are on the tray (so they won’t stick together as they bake), before transferring to a freezer-safe bag/container.
To use, allow them to thaw before baking and topping.
The baked and topped pizzas are best eaten on the same day as they are prepared. However, if you have leftovers, then you can pop them in an airtight container in the fridge for up to two days.
Recipe notes
- If you want to make a single large pizza rather than lots of tiny ones, then I’d suggest using around 1/3 of the recipe quantities.
- Feel free to substitute the oregano for other herbs or even add extra herbs of your choice into the crust mixture; Italian seasoning or basil work well.
- Make sure to really squeeze out as much excess liquid from the cauliflower as you can. This may work out your arms a little – but you’ll be happy once you take a bite of a non-floppy, crispy cauliflower crust pizza. This really is THE KEY to making a cauliflower pizza crust!
- If you don’t have a food processor, you could grate the cauliflower instead.
- You can use frozen cauliflower or even prepared cauliflower rice for this recipe in place of fresh cauliflower. In fact, they even make the process simpler as you can skip certain steps of the recipe.
- Whereas I bake the prepared crusts and then place the pizzas back in the oven once more with the toppings, you could also cook the riced cauliflower (before squeezing out the excess liquid, skip this step if using frozen cauliflower) and then do a single bake of the pizzas in the oven, with the toppings on.
- If cooking the cauliflower (as mentioned in the above point) – you can do this either in the oven for 15 minutes or microwave for 6-8 minutes (I prefer to use methods that don’t add extra liquid like boiling/steaming).
- Rather than using mozzarella in the gluten-free pizza crust, you could use soft goat cheese.
- Because of how small the pizzas are, they don’t need flipping in the oven. However, if you make a large crust, then it’s best to flip it over during cooking to make sure both sides are crispy.
Related recipes
For other fingers, foods, and party snacks, there are several options on my blog that you may enjoy.
- Vegetarian Stuffed Grape Leaves (Dolmas)
- Fatayer (Lebanese spinach pie)
- Smoky Eggplant Dip (Baba Ganoush)
- Watermelon Keg/ Dispenser
- The Best Homemade Lemonade
- Easy Baked Buffalo Cauliflower Wings
If you give this recipe a try, then let me know your thoughts in the comments. Also, feel free to tag me in your recreations @AlphaFoodie.
Best Mini Pizzas
Ingredients
The base:
- 2 cauliflower heads
- 4 eggs
- ⅓ cup mozzarella cheese shredded
- ⅓ cup parmesan cheese
- ½ tsp onion powder
- ½ tsp garlic powder
- ½ tsp oregano
- ¼ tsp cayenne pepper more or less, to taste
The Toppings: (All of the below are just suggestions – feel free to use your own favorites)
- ½ cup mozzarella cheese I prefer to only have cheese on half my pizzas since there’s lots in the base
- ¼ cup marinara sauce may need less/more depending on how thick you like your tomato base to be
- 1 cup mini Mushrooms
- 1 cup baby spinach
- 1 cup mixed colour cherry tomatoes
- ½ cup sweet corn
- ½ cup black olives pitted
- 12 quail eggs or more, depending on how many eggy topped pizzas you want
- 2 red onion finely diced
- 2 avocados
- To garnish chilli flakes, dill, salt and pepper
Instructions
- Please note, because of the large number of pizzas that this recipe makes (around 40-50 depending on the size of the cauliflower heads), I've only included Images of a single baking tray load. For a smaller batch, feel free to half the recipe.
- Step 1. Prepare the cauliflower. First, preheat the oven to 200°C/400ºF. Then, chop the Cauliflower heads into Florets and pulse in a food processor until a 'rice' consistency. You may need to do this in two separate batches, one per cauliflower head.
- Place a cheesecloth or nut milk bag into a large bowl or over a colander then pour the cauliflower rice mixture into it. Squeeze out as much excess water/liquid from the cauliflower as you can (this is the secret to making a delicious crispy cauliflower pizza crust). Once again, you may have to do this twice for the amount of mix you have.
- Step 2. Prepare the cauliflower gluten free pizza crust mixture. Add the Onion, Garlic, Oregano, parmesan, and mozzarella and mix well.
- Add in eggs into the bowl and mix well to beat the eggs and combine with the cauliflower mix. You can either add them directly into the bowl or first mix them separately in a small bowl then stir through the mixture.
- Step 3. Form The Mini Pizzas. Form into mini pizzas, either free-hand or you can use a cookie cutter/cake ring to make even shaped patties (like I did – see photos). It also helps to measure out the mixture so that they're even in depth (1-2tbsp is more than enough). I fit around 12 per baking sheet and cooked two baking sheets at a time, 4 in total. I made mine quite thin as well, so probably used around 1-1 1/2 tablespoons per pizza.It's easiest to form the pizzas directly onto a baking sheet with parchment paper. Feel free to lightly spray the sheet with oil/cooking spray, though I had no issues with the pizzas sticking.
- Step 4. Bake The Crusts. Bake the crusts in the oven for 15- 20 minutes, until golden brown. They might brown more on the edges if they're slightly elevated like mine were.
- Step 5. Prepare the toppings. As the crusts bake, prepare any of the toppings that need prep. I like to use smaller veggies for these- due to the size of the base; olives, cherry tomatoes, mini mushrooms, etc. I also tend to choose veggies that only need a few minutes of baking.
- Step 6. Top The Pizzas. Remove the cooked cauliflower crusts from the oven and start to top them with around 1 tsp marinara sauce and toppings of your choice.If you're cooking the crusts in batches in the oven (for those of us with tiny ovens), then place a second lot of crusts in the oven to bake while you top the first batch.
- Step 7. Finish off the pizzas in the oven. Once topped, return the pizzas to the oven for a further 5-10 minutes, until the cheese has melted and the veggies are lightly baked. You could also do this step under the grill (as pictured in the post), but then you're more likely to get very browned edges.
- If you're wanting to top some of the pizzas with quails eggs, then you have two options. The first is to make sure your crusts have a raised edge/lip (as mine do) so that you can crack them directly onto the pizza, and they won't run off the edges. Though, as you can see, this can lead to darkened pizza edges. The eggs may also need a little extra time to bake until fully cooked through – although I've found they're usually ready between 7-10 minutes.The alternative method is to pan-fry the eggs in a separate pan as the pizzas complete their final bake and top them with the egg after it's removed from the oven. Luckily, due to the egg's small size, you can fry multiple in one go and either fry in its natural shape or use a very small heat-proof cookie cutter/mold to shape them evenly.
How To Store
- If you find that you've made too much crust mixture, you can freeze the pre-baked gluten free pizza crust for up to 1 month. Form into the crust shape and freeze as they are on the tray (so they won't stick together as they bake), before transferring to a freezer-safe bag/container.To use, allow them to thaw before baking and topping.The baked and topped pizzas are best eaten on the sea day as they are prepared. However, if you have leftovers, then you can pop them in an airtight container in the fridge for up to two days.
Notes
- If you want to make a single large pizza rather than lots of tiny ones, then I’d suggest using around 1/3 of the recipe quantities.
- Feel free to substitute the oregano for other herbs or even add extra herbs of your choice into the crust mixture; Italian seasoning or basil work well.
- Make sure to really squeeze out as much excess liquid from the cauliflower as you can. This may work out your arms a little – but you’ll be happy once you take a bite of a non-floppy, crispy cauliflower crust pizza. This really is THE KEY to making a cauliflower pizza crust!
- If you don’t have a food processor, you could grate the cauliflower instead.
- You can use frozen cauliflower or even prepared cauliflower rice for this recipe in place of fresh cauliflower. In fact, they even make the process simpler as you can skip certain steps of the recipe.
- Whereas I bake the prepared crusts and then place the pizzas back in the oven once more with the toppings, you could also cook the riced cauliflower (before squeezing out the excess liquid- skip this step if using frozen cauliflower) and then do a single bake of the pizzas in the oven, with the toppings on.
- If cooking the cauliflower (as mentioned in the above point) – you can do this either in the oven for 15 minutes or microwave for 6-8 minutes (I prefer to use methods that don’t add extra liquid like boiling/steaming).
- Rather than using mozzarella in the gluten free pizza crust, you could use soft goat cheese.
- Because of how small the pizzas are, they don’t need flipping in the oven. However, if you make a large crust, then it’s best to flip it over during cooking to make sure both sides are crispy.
Nutrition
Nutrition information is automatically calculated, so should only be used as an approximation.


