
This post may contain affiliate links. Please read our disclosure policy.


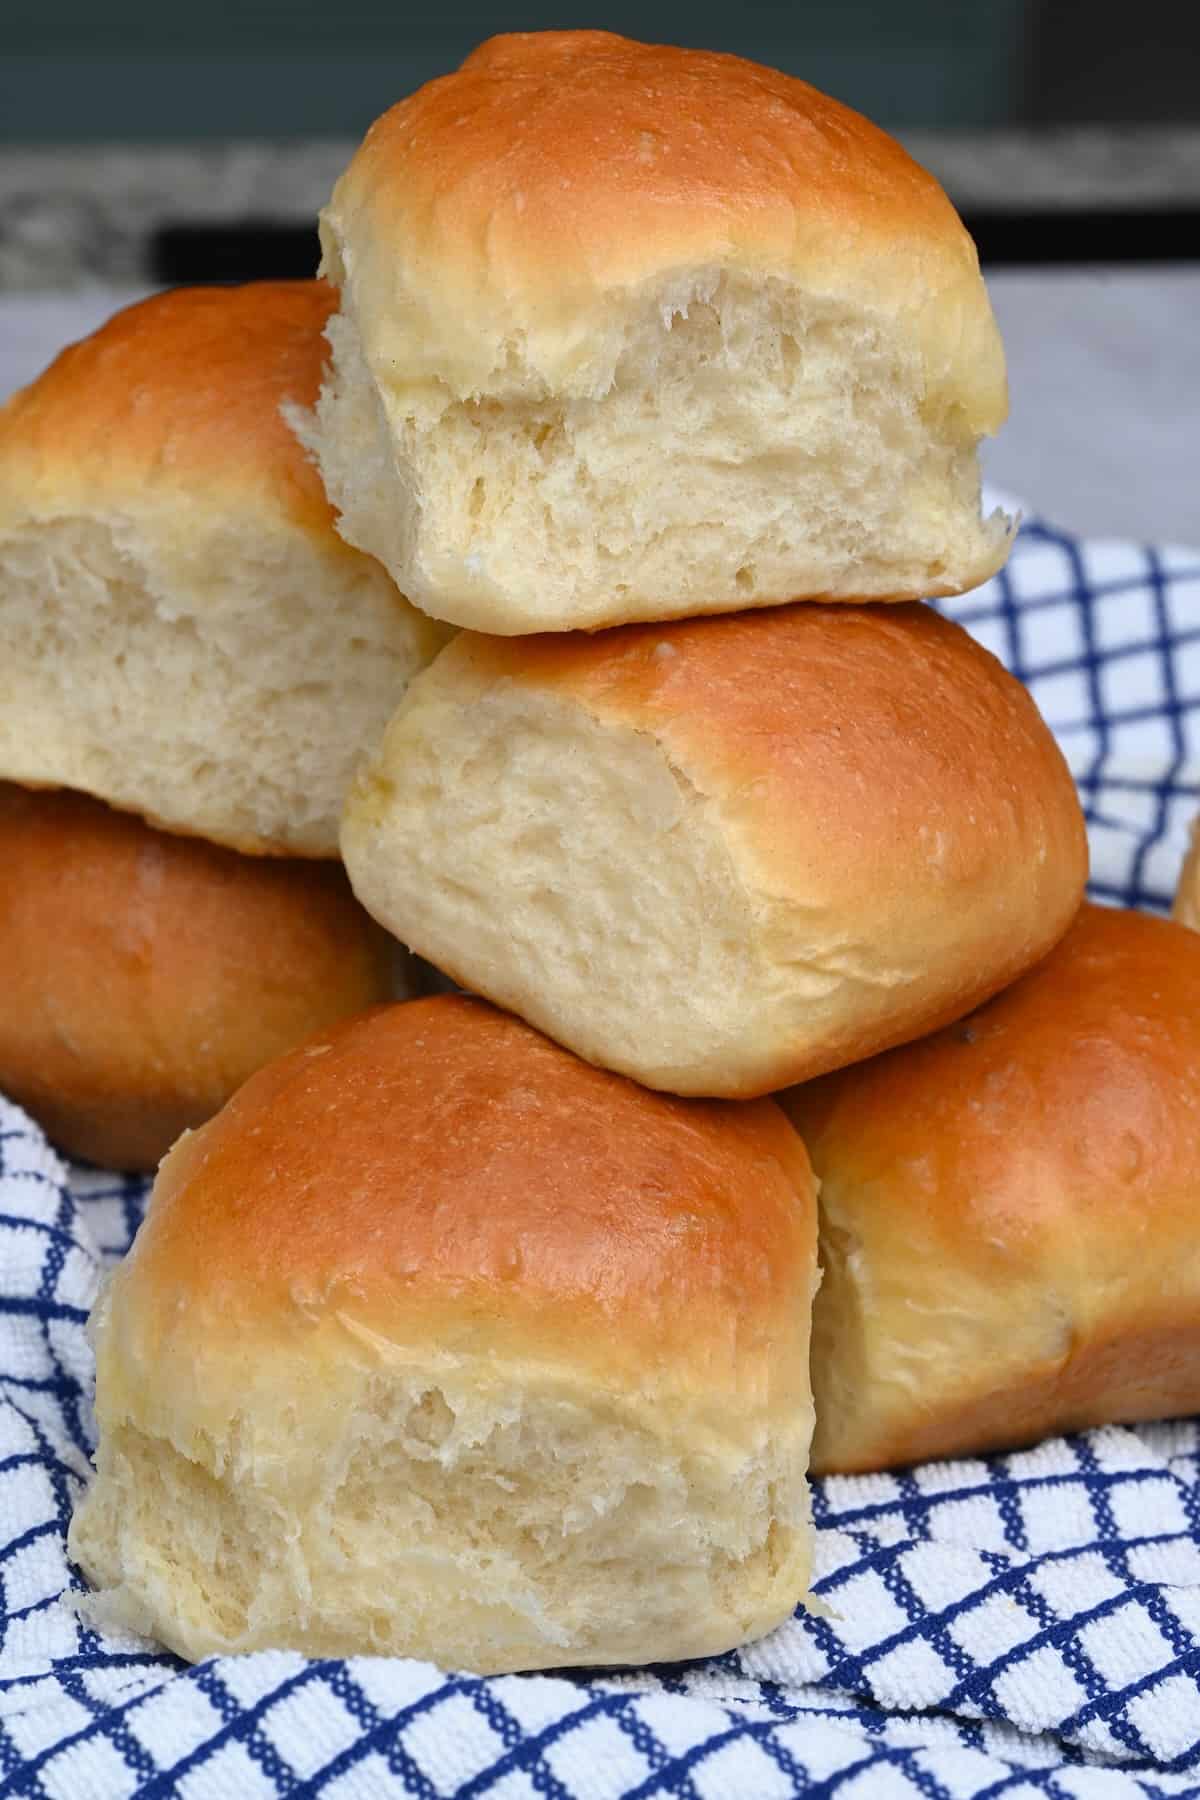
These easy homemade dinner rolls are soft, buttery, fluffy, and perfect for impressing as part of an appetizer or practically any main meal! Simple enough for beginner bakers following my step-by-step or make ahead instructions!

Bread-making felt like a daunting task for the longest time. But now I’ve spent years baking up treats like No-Knead Duch Oven Bread, rosemary focaccia, and New-York style bagels. And I can’t believe it’s taken this long to share this simple homemade dinner rolls recipe.
Thanksgiving and Christmas just around the corner. So it’s the perfect time to make a batch of these fluffy, pillowy, tender, butter, delicious, soft dinner rolls. They are perfect for enjoying fresh and warm from the oven!
If you’ve not worked with yeast before, I fully understand the concern. But you’ll be surprised at just how easy it is to wrangle this (or any) yeast recipe. Especially when following my simple step-by-step instructions below. Plus, you can make it by hand or with a mixer for even less hands-on effort.

With the base recipe out of the way, there are plenty of ways to flavor and top the homemade yeast rolls, too. Plus, you can decide whether you want regular, small, or even mini rolls. Or choose the rolls’ shape (i.e., in a baking sheet or shaped into a Christmas tree, heart, etc.). They are perfect for any occasion!
Want to save this recipe?
Dinner Rolls Ingredients
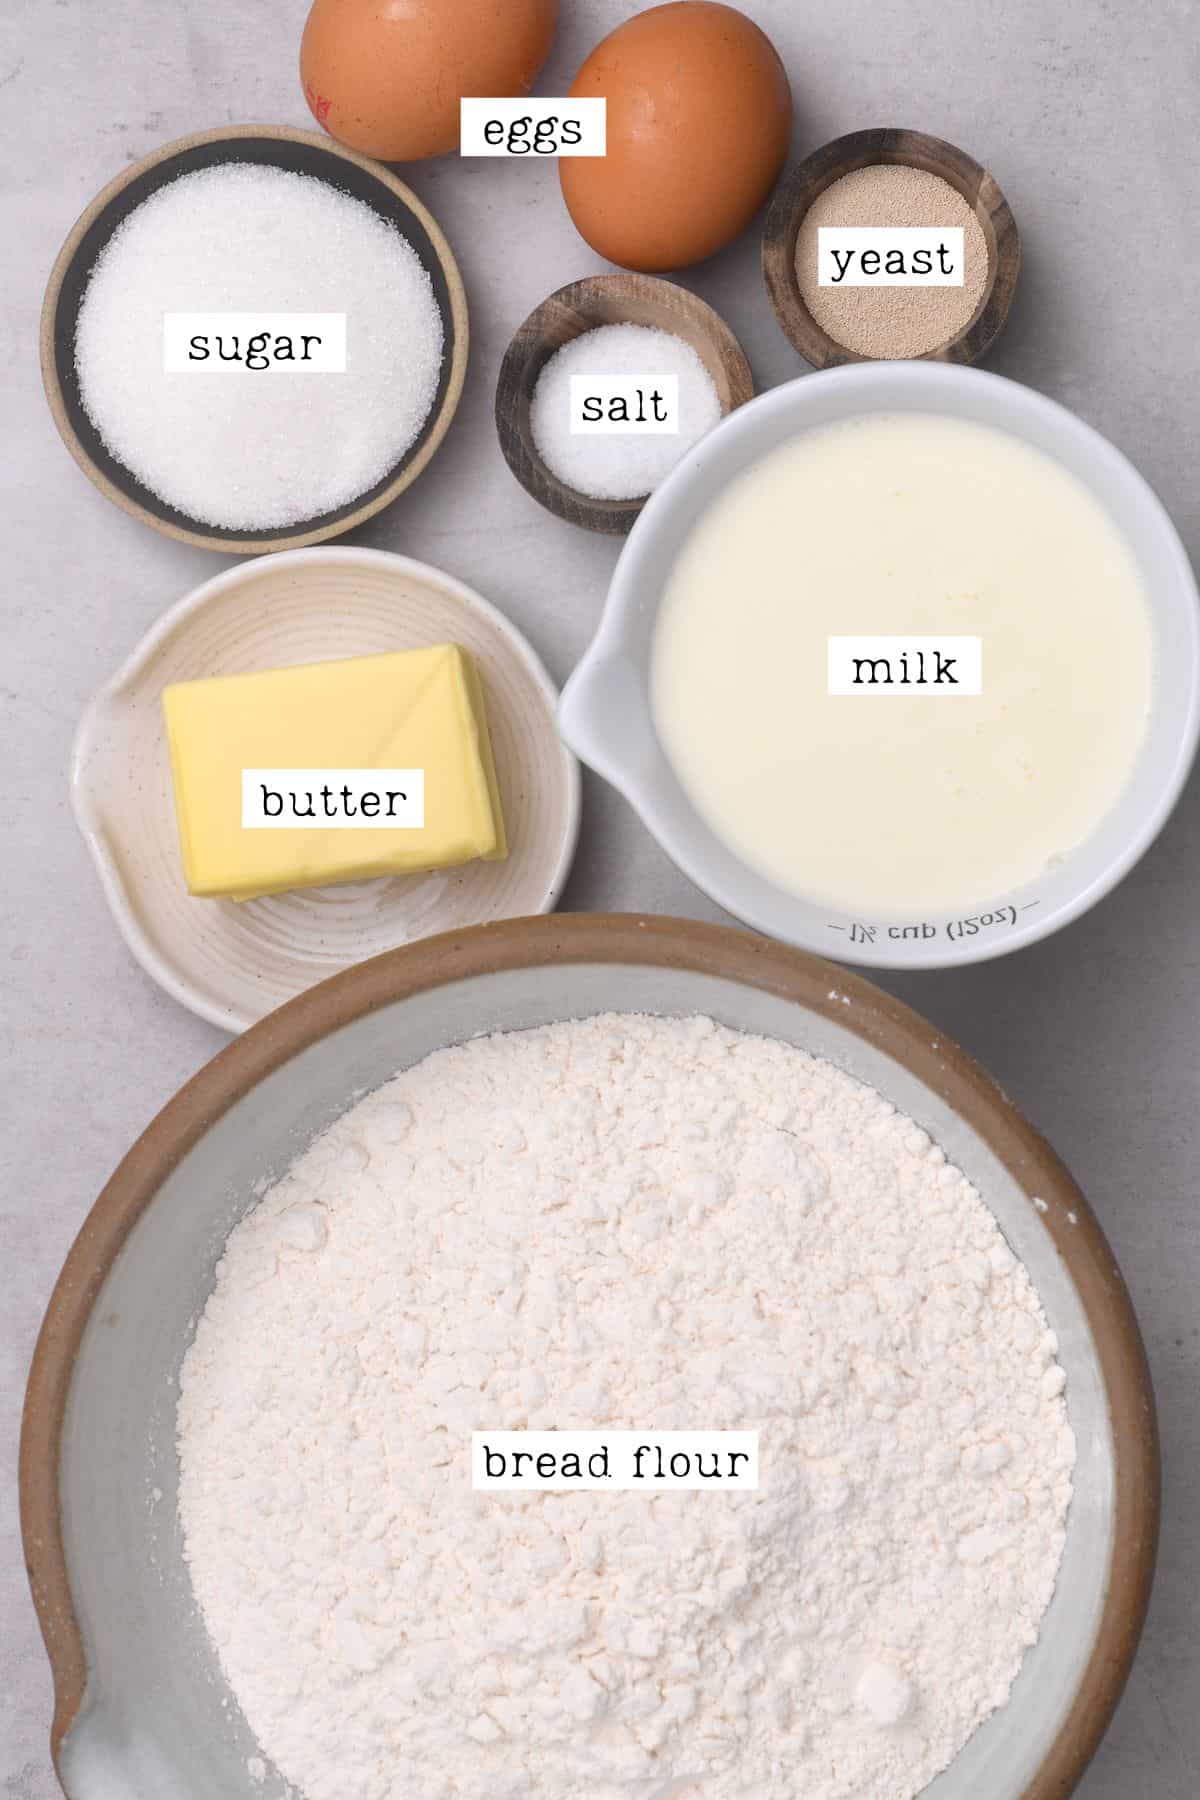
All you need for the best dinner rolls are 7 simple and inexpensive pantry staples.
- Flour: White bread flour is best for the lightest and fluffiest rolls. General all-purpose flour or a 50/50 all-purpose and whole wheat flour blend will also work (for slightly denser, chewier results).
- Salt: I recommend using sea salt/kosher salt for the best flavor.
- Eggs: It’s best to use room-temperature eggs. These provide structure to the bread.
- Butter: Use room temperature butter. Unsalted is best, but if you must use salted, then decrease/remove the added salt from the ingredients. This fat helps to create the enriched dough that makes for super soft and rich dinner rolls.
- Milk: Whole milk (full-fat milk) is best for the softest rolls. It should be lukewarm at around 100-110ºF/38-43ºC (to help activate the yeast). Buttermilk would also work.
- Dry yeast: Use either active dry yeast or instant yeast. It’s important to note that the rising time may be less with the Instant version.
- Sugar: To help feed the yeast in this bread roll recipe. Any sugar will work, including unrefined granulated sugar like coconut sugar, maple syrup, or honey.
To make vegan dinner rolls, use high-fat plant-based milk, like canned coconut milk, plus dairy-free butter.
Dinner Rolls Flavors
Learning the base dinner roll recipe is just the beginning of the fun you can have with these easy yeast rolls. Next, you can take things up a notch with toppings and fillings to suit every mood and event. Here are just a few of my favorite variations.
- Garlic, herbs, and cheese dinner rolls. Combine 1 teaspoon garlic powder with 2 Tbsp of dried herbs, like basil, rosemary, oregano, parsley, or even Italian seasoning. Also, optionally add shredded hard cheese.
- Rosemary dinner rolls: Add 1-2 Tbsp dried rosemary to the flour and salt mixture. Simple but so aromatic.
- Chili flakes: To add heat to these easy dinner rolls – best with other herbs.
- Sun-dried tomatoes & olives: Finely chopped. This also pairs well with the cheese option.
- Cheese dinner rolls: Add between 1/2-3/4 cup of shredded hard cheese, like cheddar cheese.
Optional Toppings
- Melted butter & honey (for subtle sweetness),
- Honey alone,
- Melted butter with garlic and herbs,
- Poppy seeds, or sesame seeds, etc.
- Everything bagel seasoning,
- Italian seasoning (to sprinkle over the top),
- Parmesan cheese (to sprinkle over the top in the last 5-8 minutes of baking, optionally with dried oregano).
How to Make Quick Dinner Rolls
Follow just five steps to prepare these soft, fluffy dinner rolls.
Prepare The Yeast Roll Dough
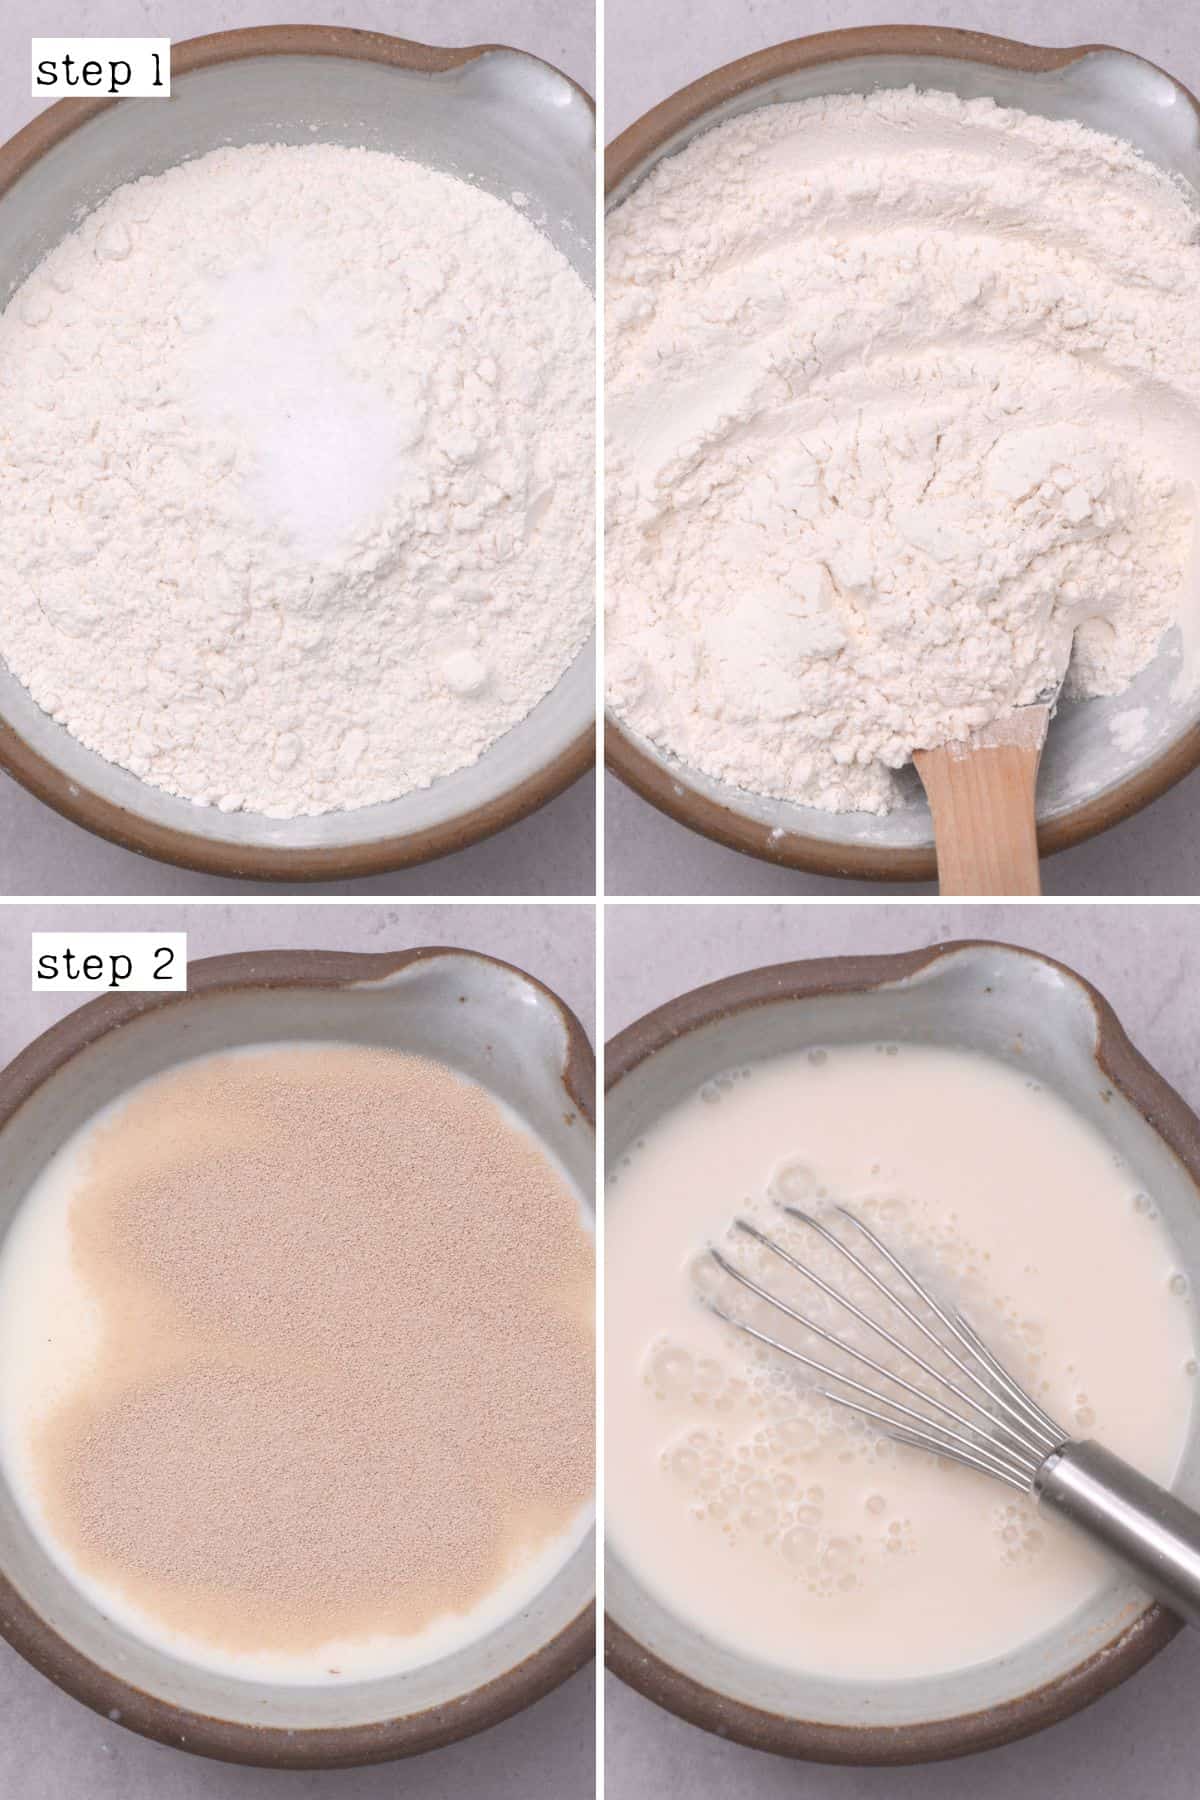
First, mix the salt and flour in a large mixing bowl. Then, in a separate bowl, combine the warm milk, yeast, and sugar. Stir well and set aside for about 5 minutes for the yeast to activate (become foamy/bubbly).
If you plan to use a stand mixer, you can prepare the yeast mixture directly into the bowl of a stand mixer.
When ready, mix the flour and yeast mixture by hand (with a wooden spoon to begin). Or use the dough hook attachment on your stand mixer to form it into a rough dough.
Then, add the eggs and mix before adding the butter incrementally, mixing all the while.
If mixing the dough by hand, it’s best to whisk the eggs in advance. Though it isn’t 100% necessary if using a stand mixer.

Knead and Allow the Dough to Rise
Knead the dough, stretching and folding it until it’s smooth and slightly tacky. About 10-13 minutes by hand on a lightly floured surface, or 7-10 with a mixer.
What should well-kneaded dough feel like?
It should be pliable, bounce back when prodded, and feel slightly tacky but not sticky. If it’s sticking to your hands or the sides of the bowl, add in more flour. Just one teaspoon at a time – too much flour will make dense rolls.
When ready, grease the large bowl/mixer bowl with a bit of oil or butter. Place the dough in it, covering it with a lid, clean kitchen towel, or plastic wrap.
Transfer the bowl to a warm, draft-free area to leave the dough to prove for between 1-2 hours until it doubles in size.
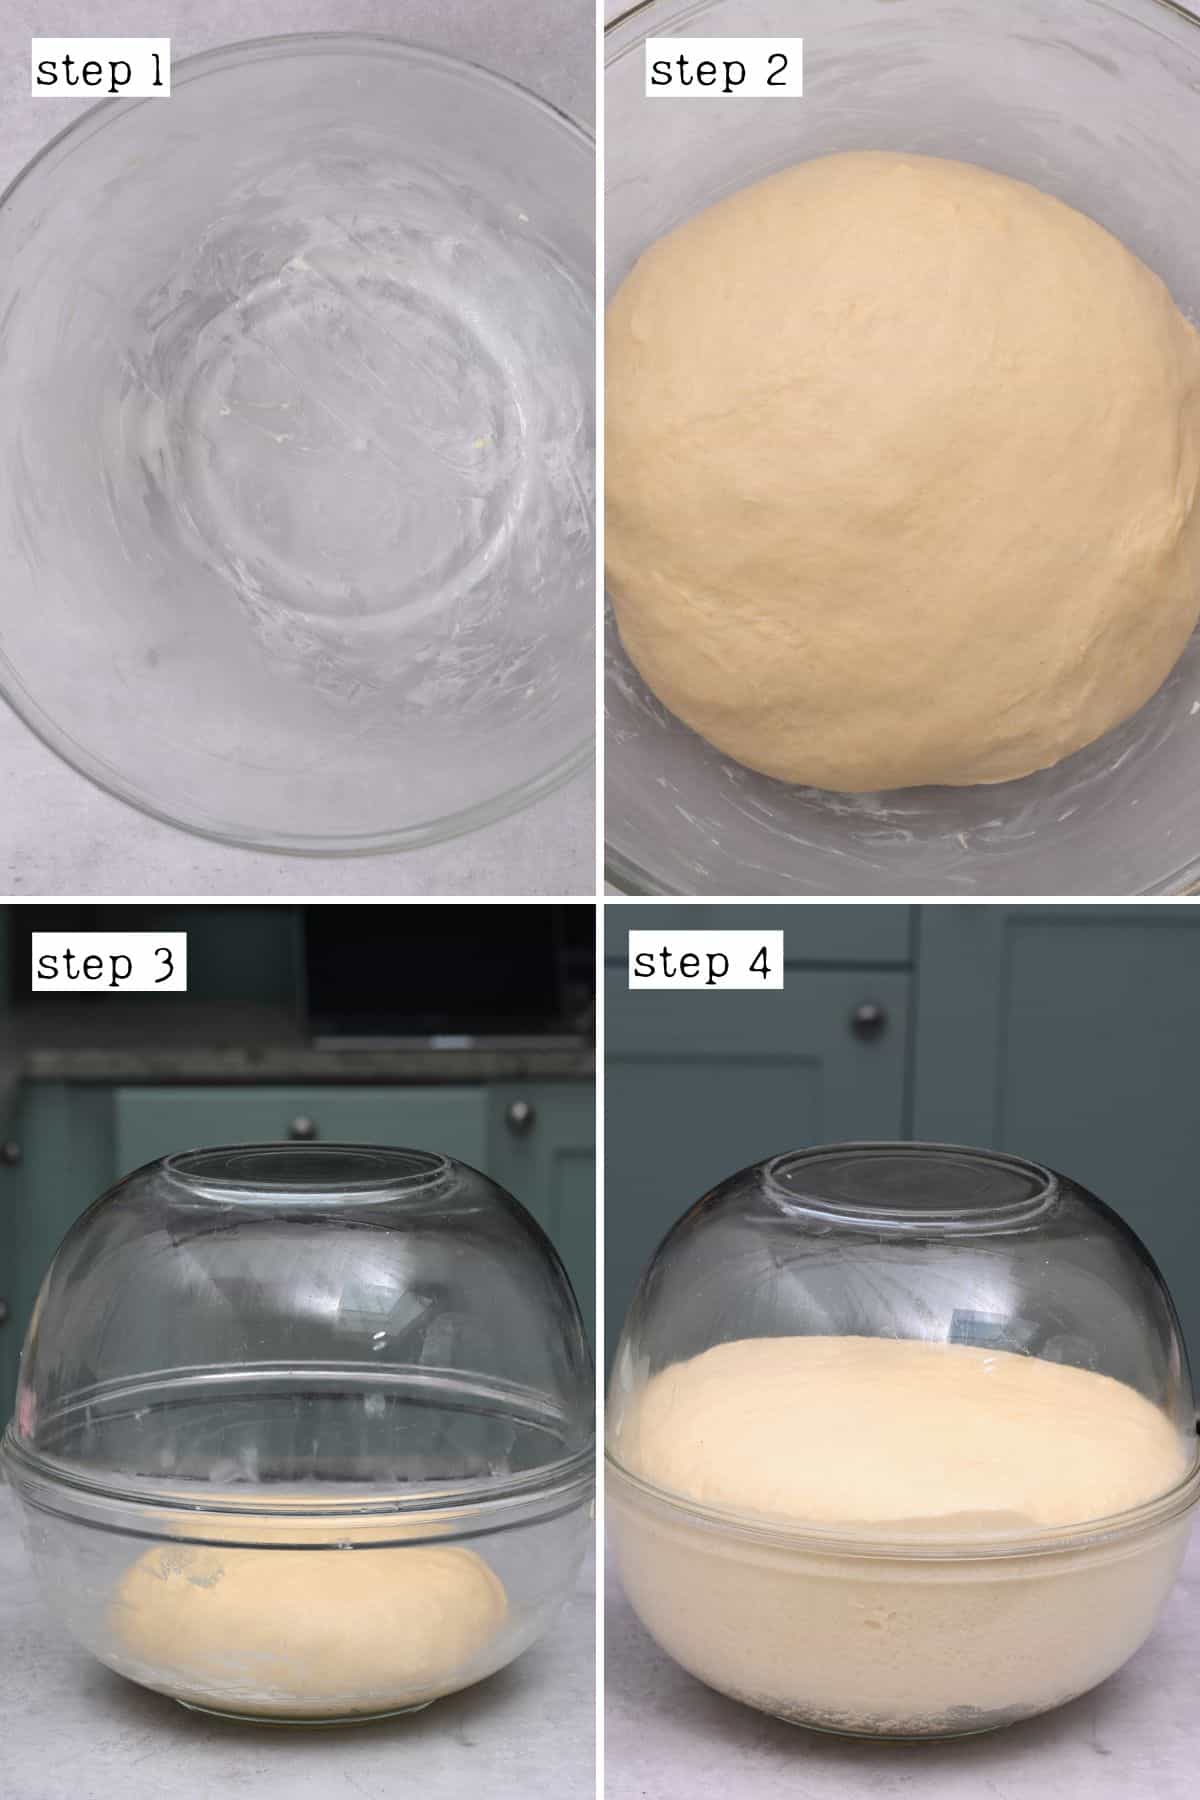
You can place it either near a heater/stove or inside an oven that just has the light on. Or use the oven’s proof mode (which keeps the temperature to 80-95ºF/26-35ºC).
Divide and Shape the Dinner Rolls
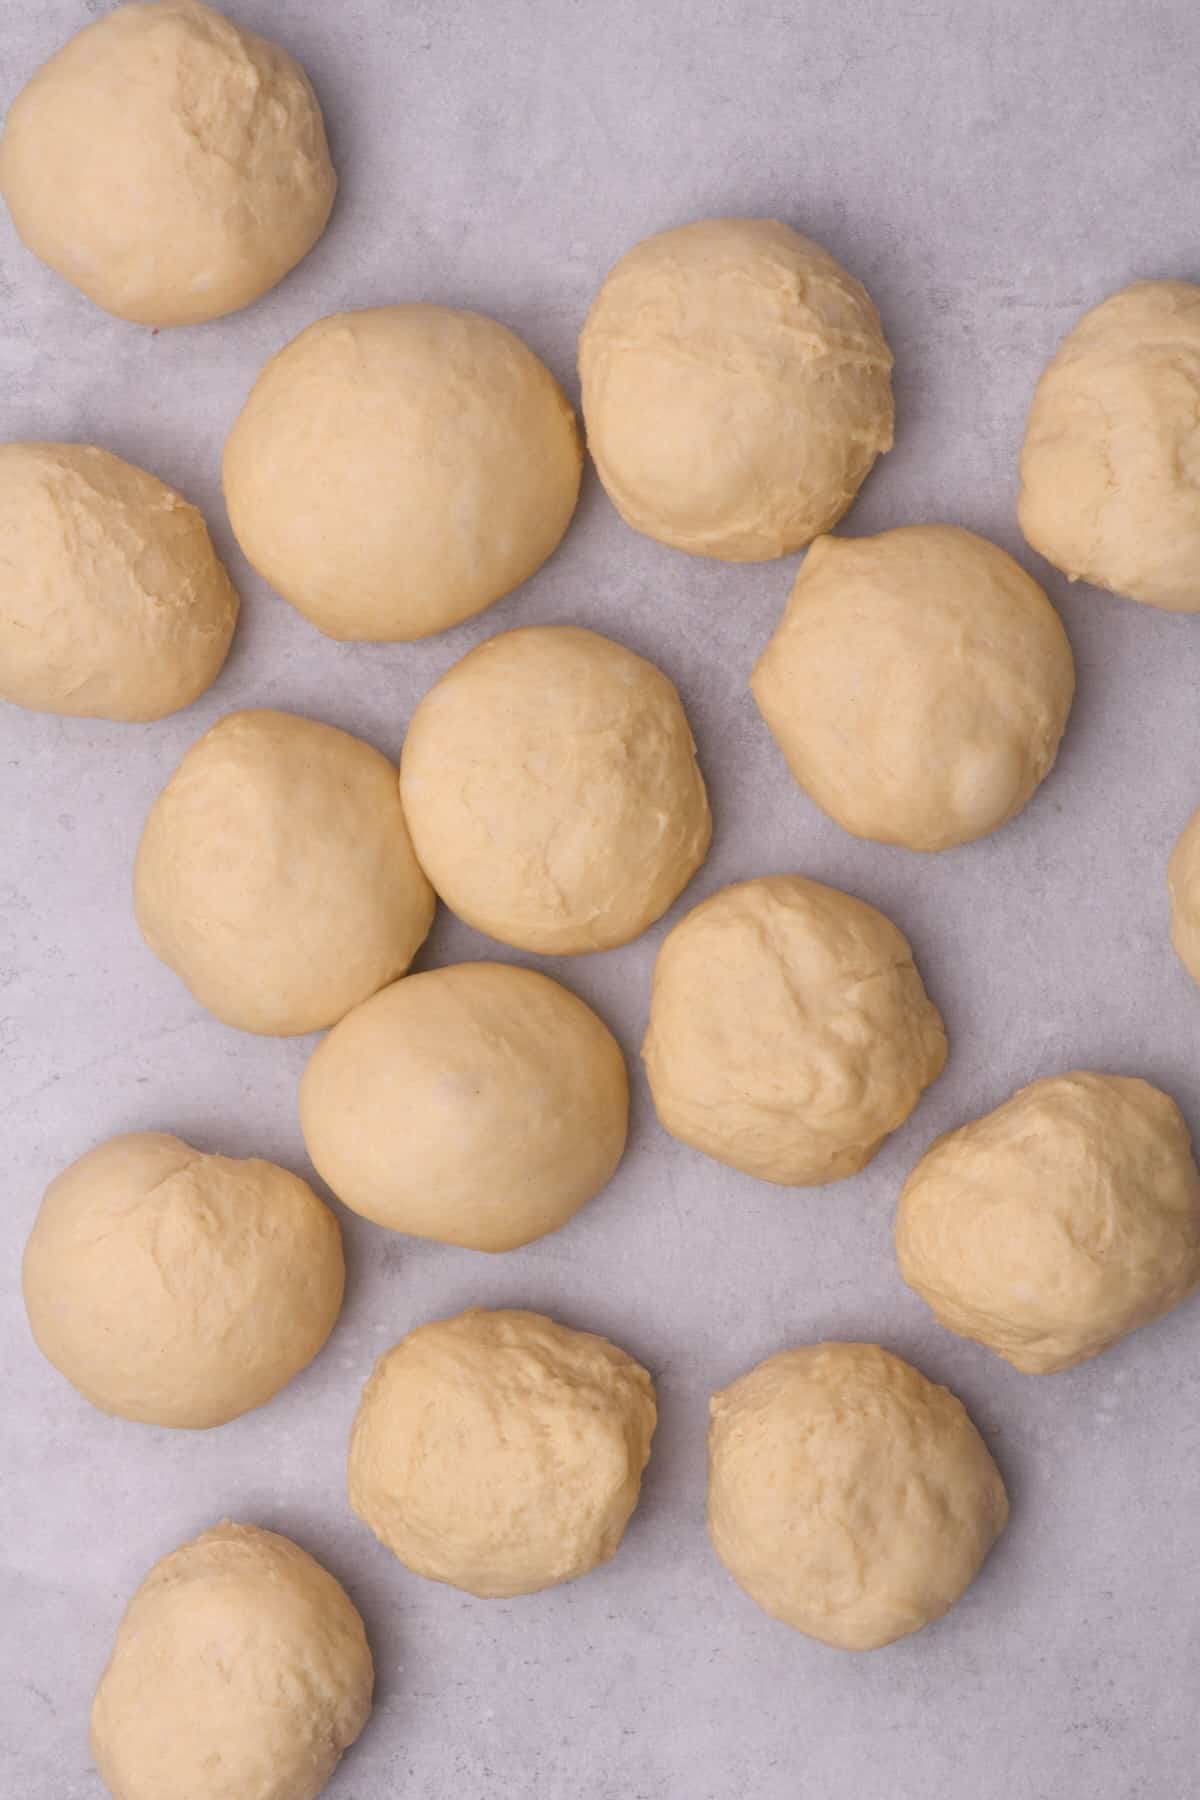
After proofing, punch the dough down to release excess air. Separate it into 16 rolls (or 24, if you want small rolls), either by hand or weighing the dough for exact rolls.
My dough weighed about 48oz (1.36kg), so I divided it into 16 large rolls of 3oz/80g each. For 24 rolls, 2oz/60g would work. If you want very small, “mini” rolls (more like dough ball size), use about 1.4oz/40g. Keep in mind that the smaller the rolls, the faster they will bake.
When making the dough balls, pinch and seal the bottom, ensuring they have a smooth top.
Prove the Dough Once More
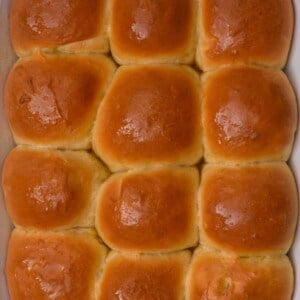
Butter or grease the baking dish you plan to bake the homemade rolls in. Then arrange them into the baking dish, placing them near one another but not touching.
How To shape dinner rolls?
I used a 9×13 baking dish. However, you could also use other shapes (like a round baking dish). Or shape them into various bread rolls shapes, like a heart, Christmas tree, or wreath (perfect for placing baked Camembert or dips in the middle). Or twist them into knots, etc.
Cover the dish with a clean kitchen towel and set it aside in a warm area for a further 40-60 minutes to rise again.

Bake the Dough
Towards the end of the second proofing, preheat your oven the 350ºF/180ºC.
How Long to Bake Dinner Rolls
When ready, bake the dinner rolls on the lower rack of the oven for 20-25 minutes (or slightly less for mini dough balls) until golden brown. Rotate the pan halfway.
If they’re browning too fast, tent the rolls with aluminum foil while baking.

Once ready, remove the rolls from the oven. Optionally brush them with a little melted butter for shine. Then leave them to cool a bit (until warm, not hot).
And this is all you need to know for how to make yeast rolls.
How to Make Dinner Rolls Ahead of Time
There are a couple of ways you can prepare these easy yeast rolls in advance, depending on what fits your needs.
The raw dough: Rather than leaving the dough to prove in a warm location (for the first or second rise), you can cover it with plastic wrap. Then transfer it to the fridge to prove overnight, up to 48 hours in advance. When you want to continue, place it on the counter. Wait until it comes to room temperature and doubles in size (between 1-3 hours), then continue with the recipe.
The rolled dough balls: Get the dough to the point of being ready to bake. Then freeze any dough rolls you don’t plan on baking immediately. First, flash freeze them on a tray, not touching, then transfer them to a Ziplock bag for 2-3 months. Next, place them on the baking dish and allow them to thaw and slightly rise for between 4-5 hours before baking.

How to Reheat Dinner Rolls
Once cooled, store any leftover yeast dinner rolls in an airtight container at room temperature for 3 days. Or store in the fridge for 5-7 days. Then, you can warm thesm in several ways.
Warm in the microwave in 15-second increments (though they’ll be softer). Slice in half and toast. Or place back in the oven at 200ºC/400ºF until warmed through (around 10 minutes).
How to Freeze Dinner Rolls
Make sure to tightly wrap the bread with plastic wrap to avoid any freezer damage. Then freeze the homemade rolls for up to 3 months, allowing them to thaw in the fridge overnight.
What to Serve with Dinner Rolls
There are plenty of ways to enjoy these dinner rolls. Especially on special occasions like Christmas or Thanksgiving (alongside mashed potatoes, green bean casserole, and brown gravy). Or even part of an Easter brunch. Enjoy them as part of an appetizer, with a cheese board/charcuterie board, or as part of a larger meal.
They are perfect to accompany your favorite soup, too—try them with beef barley soup.
I also love using them with other meals that require dunking/dipping, like stew, pasta, etc. (optionally slathered with a bit of butter). However, you can also use them as general rolls to fill with sandwich fillings and spreads, like this homemade cream cheese and homemade raspberry jam. Or make this crispy chicken sandwich, etc.
If you’re planning to serve them as an appetizer/party food option, I recommend accounting for 2 dough balls per guest.
FAQs
I haven’t tried this recipe with gluten-free flour. Though it may work if using a good gluten-free flour blend like Bob’s Red mill or King Arthur’s.
No, this enriched soft dough isn’t sturdy enough to bake a large loaf. You may, however, enjoy my homemade soft brioche bread.
Along with doubling in size, you can also use the knuckle test. Gently press two fingers into the dough up to the second knuckle, then remove them.
If the dough completely bounces back, it needs more rising. If the marks remain, the dough is ready to shape into balls.
More Bread Recipes You Might Enjoy
If you try this easy dinner rolls recipe, let me know how it goes in the comments below. I’d appreciate a recipe card rating and would love to see your recipe recreations – tag me on Instagram @Alphafoodie!
Quick Dinner Rolls Recipe
Equipment
Ingredients
- 27.5 oz white bread flour 6.5 cups; or all-purpose flour, for slightly denser, chewier rolls
- 2 tsp salt
- 2 eggs
- 2.8 oz butter and a bit extra to butter the bowl for the dough and to brush over the baked rolls
- 1.5 cups whole milk
- 0.25 oz dry yeast
- 1.6 oz sugar 3 Tbsp; or coconut sugar, maple syrup, honey.
Instructions
Prepare The Yeast Roll Dough
- Mix the salt and flour in a large mixing bowl. Then, in a separate bowl, combine the warm milk, yeast, and sugar. Stir well and set aside for about 5 minutes for the yeast to activate (become foamy/bubbly).If you plan to use a stand mixer for this recipe, you can prepare the yeast mixture directly into the bowl of a stand mixer.
- When ready, mix the flour and yeast mixture by hand (with a wooden spoon to begin) or use the dough hook attachment on your stand mixer to form it into a rough dough.
- Add the eggs and mix before adding the butter incrementally, mixing all the while.If mixing the dough by hand, it's best to whisk the eggs in advance. Though it isn't 100% necessary if using a stand mixer.
Knead and Allow the Dough to Rise
- Knead the dough on a lightly floured surface, stretching and folding it until it’s smooth and slightly tacky (about 10-13 minutes by hand, or 7-10 in a mixer).
- Transfer the bowl to a warm, draft-free area to leave the dough to prove for between 1-2 hours until it doubles in size.You can place it either near a heater/ stove or inside an oven that just has the light on or a proof mode (which keeps the temperature to 80-95ºF/26-35ºC).
Divide and Shape the Dinner Rolls
- After proofing, punch the dough down to release excess air and separate it into 16 rolls (or 24, if you want small rolls), either by hand or weighing the dough for exact rolls.My dough weighed about 48oz (1.36kg), so I divided it into 16 large rolls of 3oz/80g. For 24 rolls, 2oz/60g would work. If you want very small, "mini" rolls (more like dough ball size), use about 1.4oz/40g.
- When making the dough balls, pinch and seal the bottom, ensuring they have a smooth top.
Prove the Dough Once More
- Butter or grease the baking dish you plan to bake the homemade rolls in, then arrange them into the baking dish, placing them near one another but not touching.I used a 9×13 baking dish. However, you could also use other shaped dishes (like a round) or shape them into various bread roll shapes, like a heart, Christmas tree, wreath (perfect for placing baked Camembert or dips in the middle), twist them into knots, etc.
- Cover the dish with a clean kitchen towel and set it aside in a warm area for a further 40-60 minutes to rise again.
Bake the Rolls
- Towards the end of the second proofing, preheat your oven the 350ºF/180ºC.
- Bake the soft dinner rolls on the lower rack or the oven at 350ºF/180ºC for 20-25 minutes (or slightly less for mini dough balls) until golden brown, rotating the pan halfway. If they’re browning too fast, tent the rolls with aluminum foil while baking.
- Once ready, remove the rolls from the oven and optionally brush them with a little melted butter for shine, then leave to cool (at least until just warm).
Storage Instructions
- Store: Once cooled, store any leftover yeast dinner rolls in an airtight container at room temperature for 3 days. Or store in the fridge for 5-7 days.Reheat: Several options – warm in the microwave in 15-second increments (though they’ll be softer). Or slice in half and toast. Or place back in the oven at 200ºC/400ºF until warmed through (around 10 minutes).Freeze: Tightly wrap the bread with plastic wrap to avoid any freezer burn. Then freeze the homemade rolls for up to 3 months, allowing them to thaw in the fridge overnight.
Video
Notes
Nutrition
Nutrition information is automatically calculated, so should only be used as an approximation.


