
This post may contain affiliate links. Please read our disclosure policy.

How to make roasted garlic bread with just a handful of ingredients, including buttery, mellow roasted garlic. By combining this roasted garlic butter with the bread of your choice, you have a simple and flavorful side dish for tons of meals! Gluten-free and dairy-free methods included!
If you’re a garlic lover, garlic bread is the ultimate side dish – it’s buttery, garlicky, crunchy, and simply wonderful! However, having just posted my favorite method for roasting whole garlic heads, I had to share this roasted garlic bread “twist” on the classic. While roasted garlic butter bread may take a little extra time to prepare over the traditional version, it’s worth it!
Roasted garlic is mellow, lightly caramelized, smooth, buttery, and wonderfully aromatic. When combined with butter, and a selection of herbs/spices, it makes for the most amazing roasted garlic butter to spread over bread (or serve with proteins, over rice/quinoa, etc.!). The roasted garlic butter can also be prepared ahead and stored in the fridge or freezer – alongside Lebanese toum (garlic sauce) and pickled garlic.
When making a homemade version, you can also swap out sub-par bread for a flavorful, freshly baked Italian or French loaf for the ultimate results. Best of all, this roasted garlic bread is easy to prepare, freezes well, and is versatile. So whether you want it gluten-free, dairy-free, with a bit of spice, a cheesy version – keep reading for my top tips and suggestions for the perfect bread with roasted garlic butter every time!
Want to put your love of garlic to more use? You might also like my posts on how to peel garlic, make garlic paste, freeze it, and dry it into garlic flakes or garlic powder! Or you can try this Quick Cheesy Garlic Bread Recipe (Vegan Garlic Bread Optional).
Want to save this recipe?
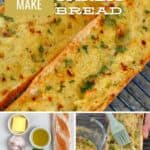
The Ingredients
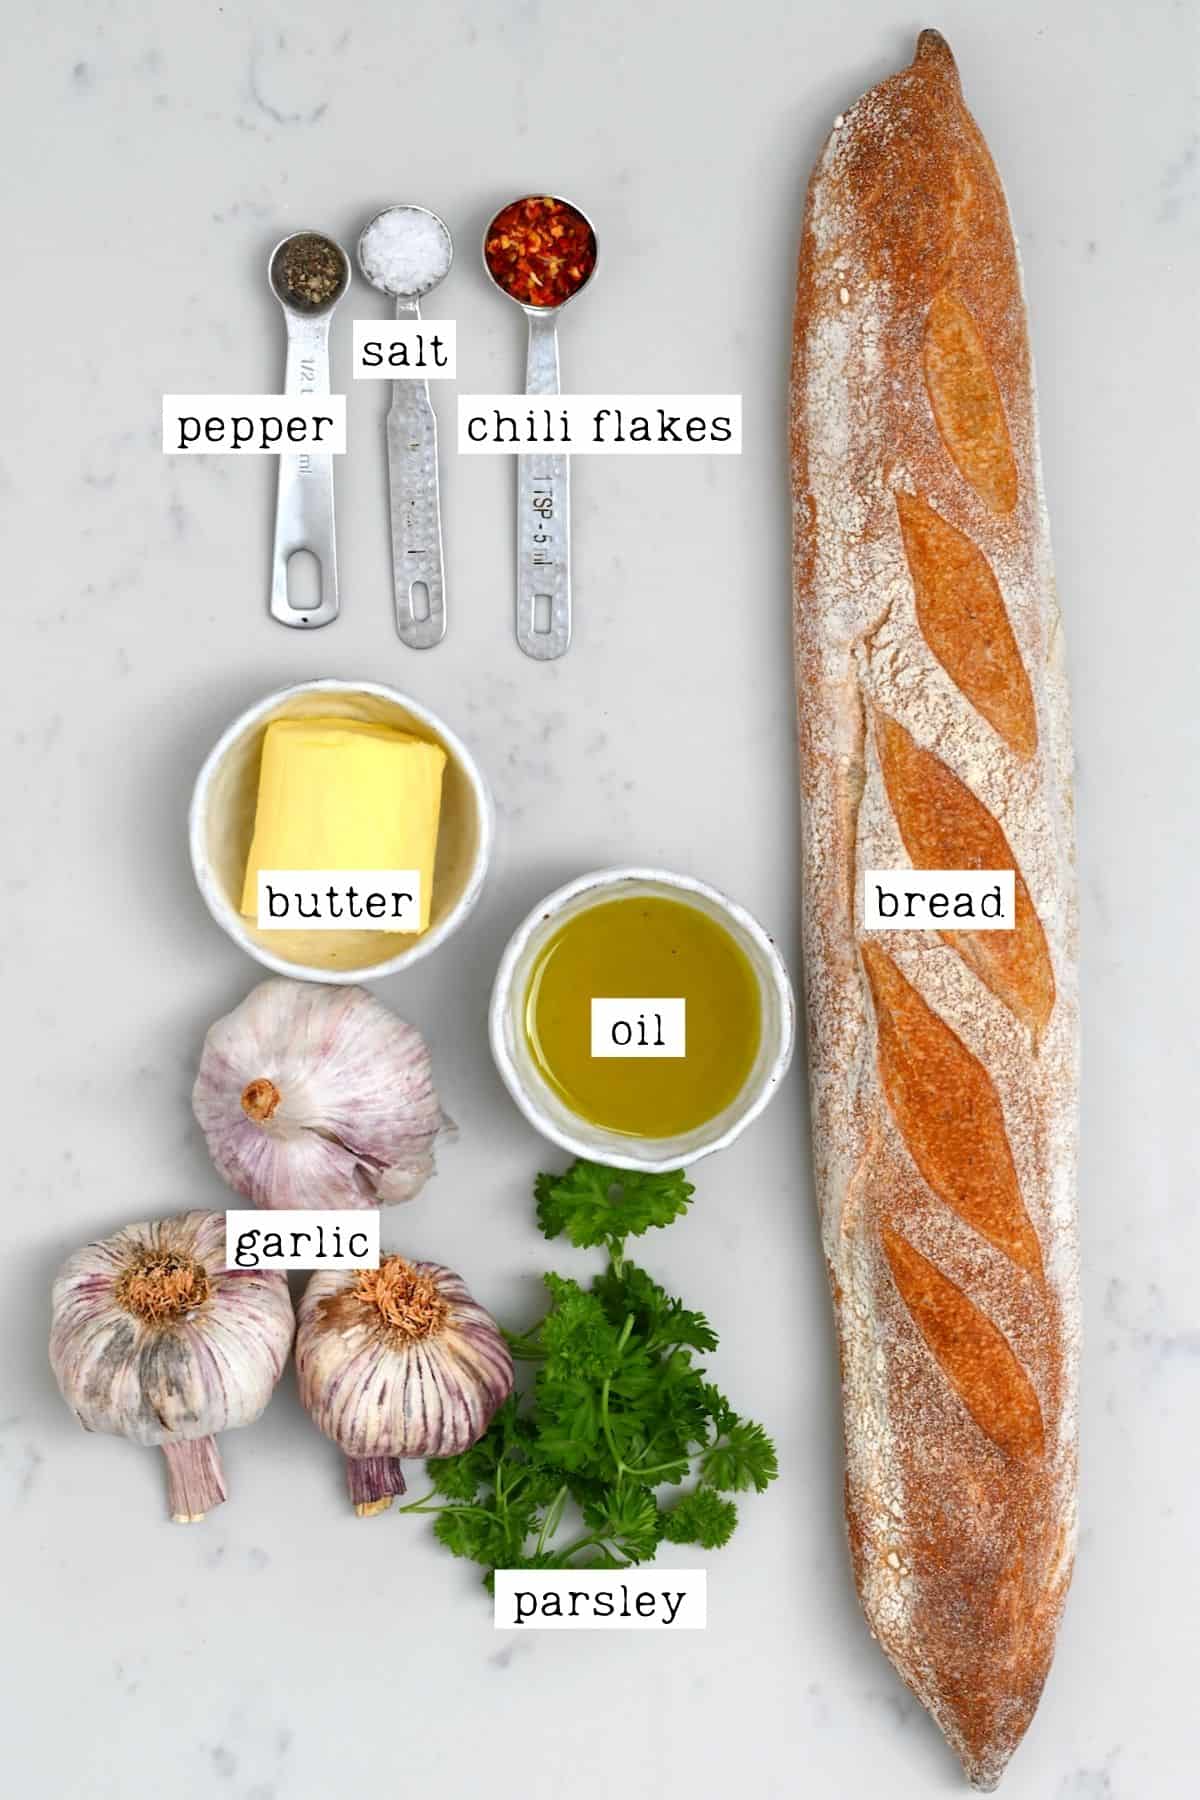
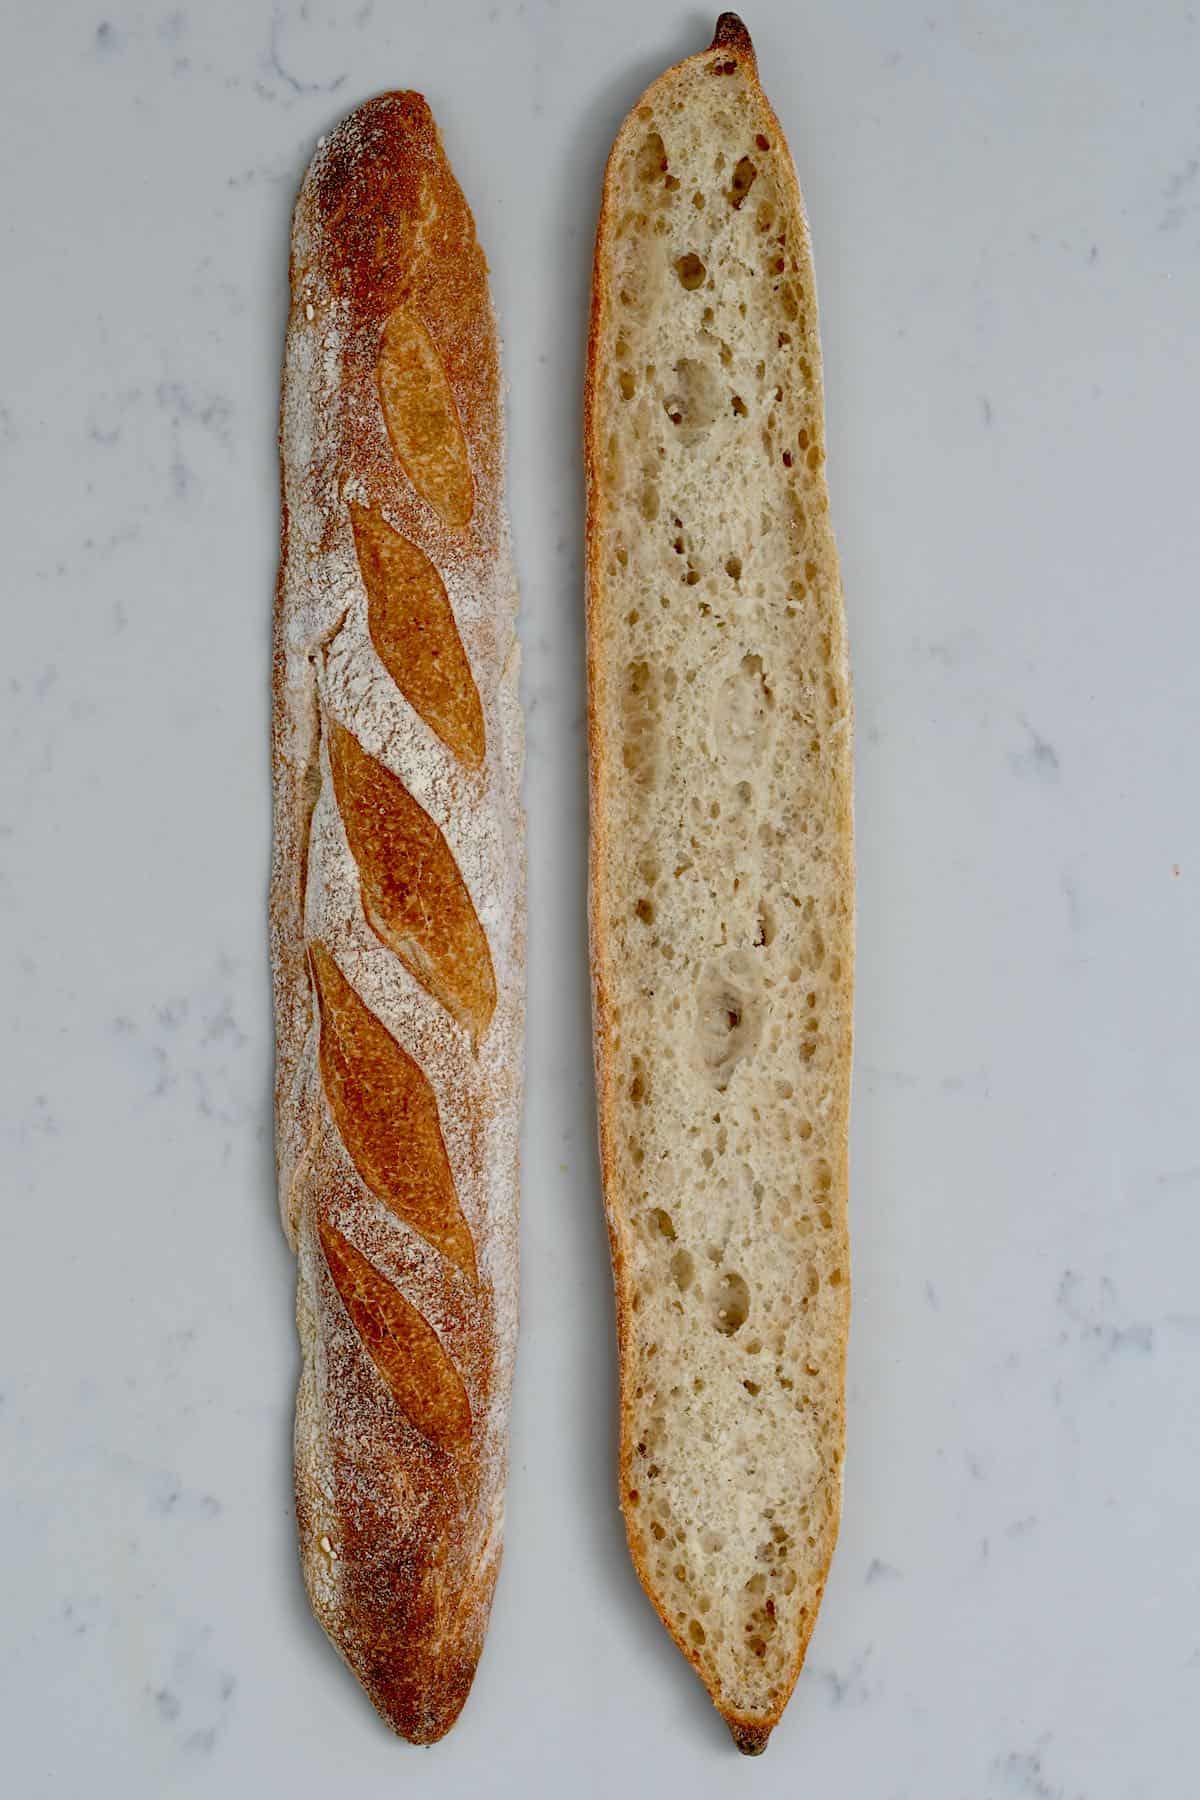
- Bread: you can use the bread of your choice (GF if needed). I like to stick to a classic French baguette or Italian bread, though roasted garlic focaccia would also work. Avoid any bread that is too “hearty” already, as it can become overly tough once baked.
- Garlic: as the garlic is being roasted, you’ll need much more than you would for regular garlic bread. Look for garlic heads that are firm with tight skin – no mushy spots or mold.
- Parsley: fresh parsley is a classic addition to garlic bread. I don’t recommend using dried parsley. However, you could omit it entirely and still enjoy delicious roasted garlic bread. Alternatively, you could use dried Italian seasoning or oregano.
- Red pepper flakes: while technically optional, I love the slight pop of heat that chili flakes add to the roasted garlic butter spread. Feel free to omit it if preferred.
- Butter: I used homemade unsalted butter at room temperature. If you must use salted, then make sure to omit the remaining salt from the recipe, though it still may throw the balance off.
- Olive oil: I recommend using high-quality extra virgin olive oil.
- Salt & pepper: I like to use sea salt flakes, which have a nicer, milder flavor than table salt. If you add it to the roasted garlic butter, then it will melt into the bread. Alternatively, you can simply sprinkle a little over the baked bread before serving.
Optional Add-Ins and Recipe Variations
- Cheese: mozzarella (or vegan mozzarella) and Parmesan are my favorite options, though cheddar will also work. Simply sprinkle the grated cheese (one or both) over the bread before roasting. Alternatively, add the grated cheese after baking and broil for a minute or two until melted.
- Spice: instead of red pepper flakes, you can add a little chili sauce into the roasted garlic butter mixture.
- Paprika: another addition that I love adding to the roasted garlic butter is a bit of sweet or smoked paprika. Usually, ½-1 tsp is more than enough.
- Dairy-free: this roasted garlic bread is incredibly easy to make dairy-free. Simply use your favorite vegan butter (and cheese, if using).
- Gluten–free: make sure to use a gluten-free baguette. Otherwise, the ingredients are all naturally gluten-free.
How to Make Roasted Garlic Bread
Step 1: Roast the garlic
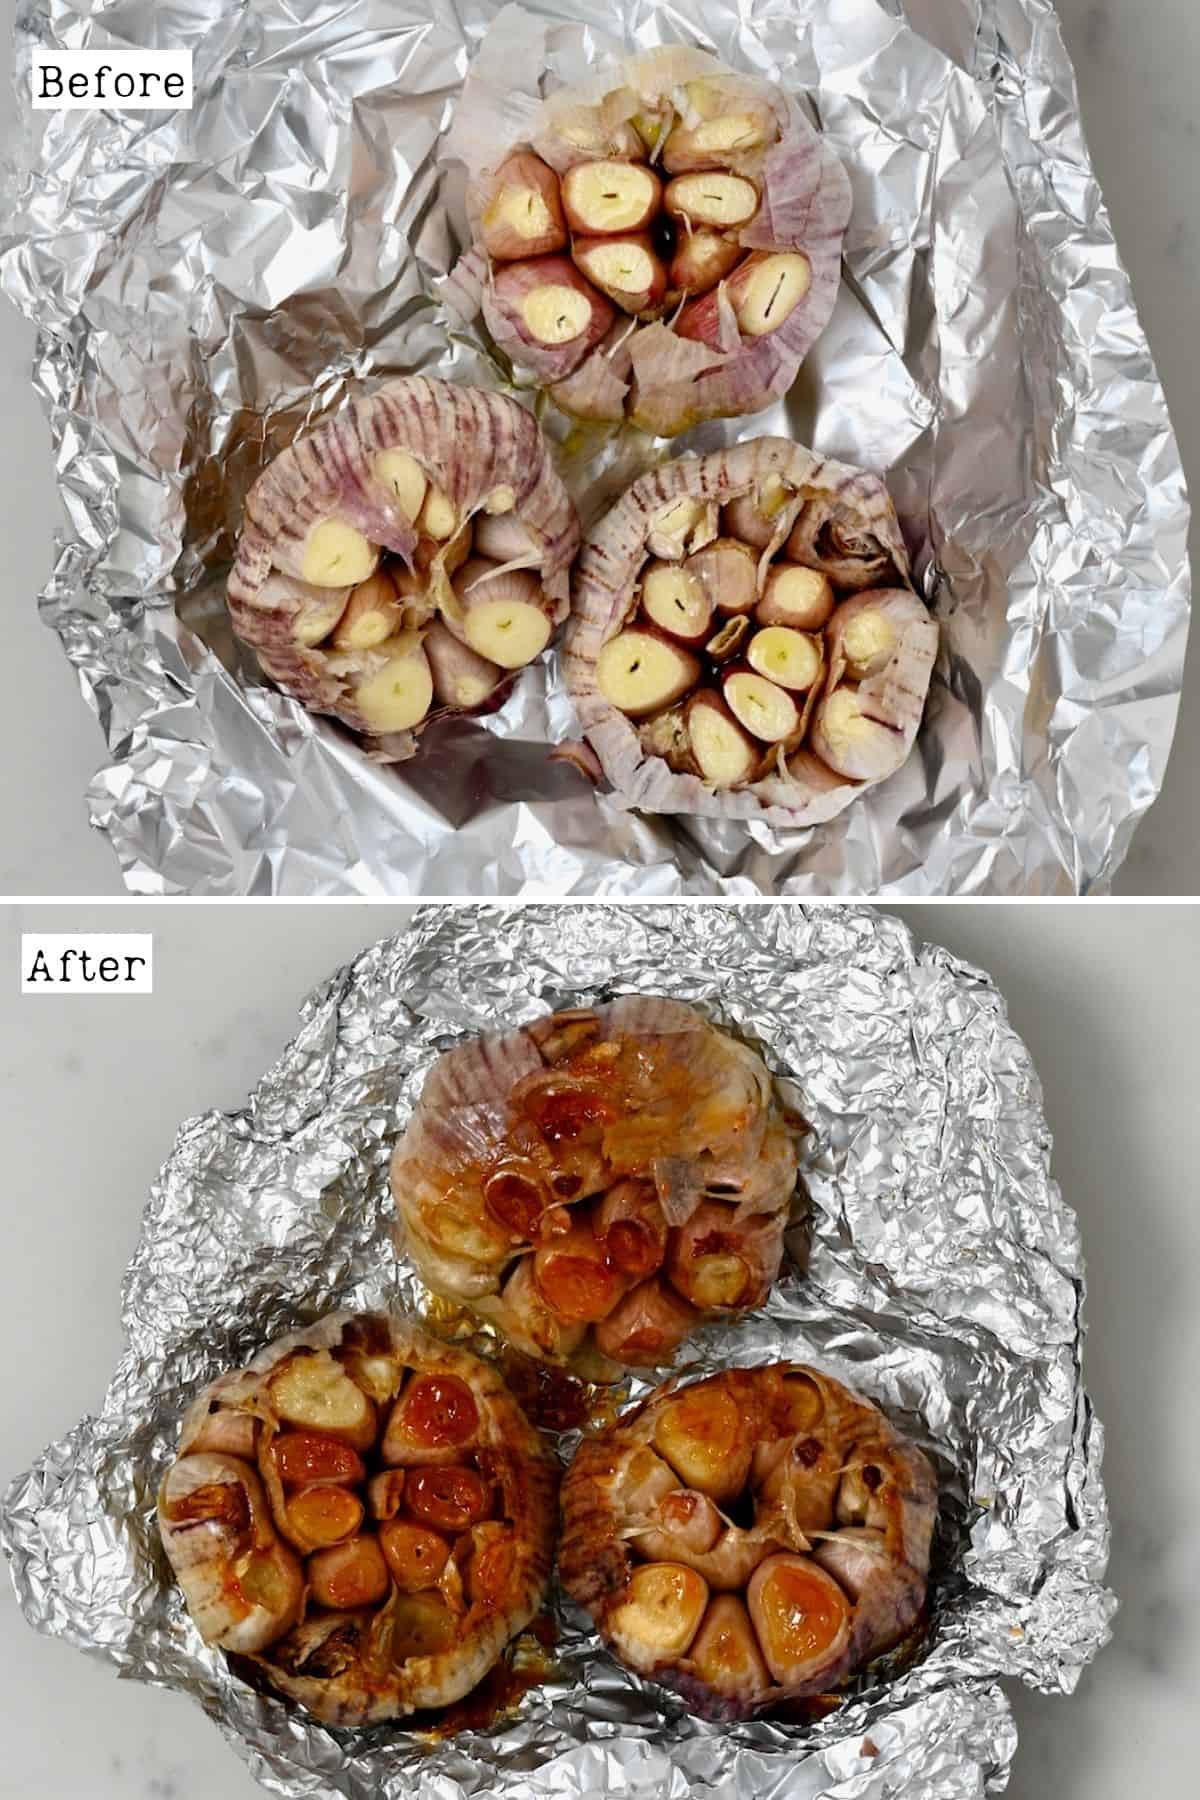
First, follow this method to roasted whole garlic heads – slice off about ½ inch from the end of the garlic roots, brush with oil, fold into a tin foil parcel, and roast at 400ºF/200ºC for 30-50 minutes, or until golden and tender.
Step 2: Prepare the bread
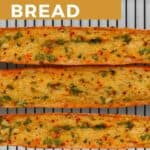
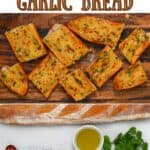
Once the garlic has been roasted, slice your bread. I sliced mine in half lengthwise. However, you could also cut individual round slices or slice the top “Hasselback” style like store-bought garlic bread (slicing every 1 inch into the bread until the bottom crust but not all the way through). Of course, if you’re using a flatbread (like naan) or focaccia, then no slicing is required.
Step 3: Prepare the roasted garlic butter
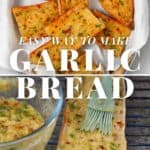
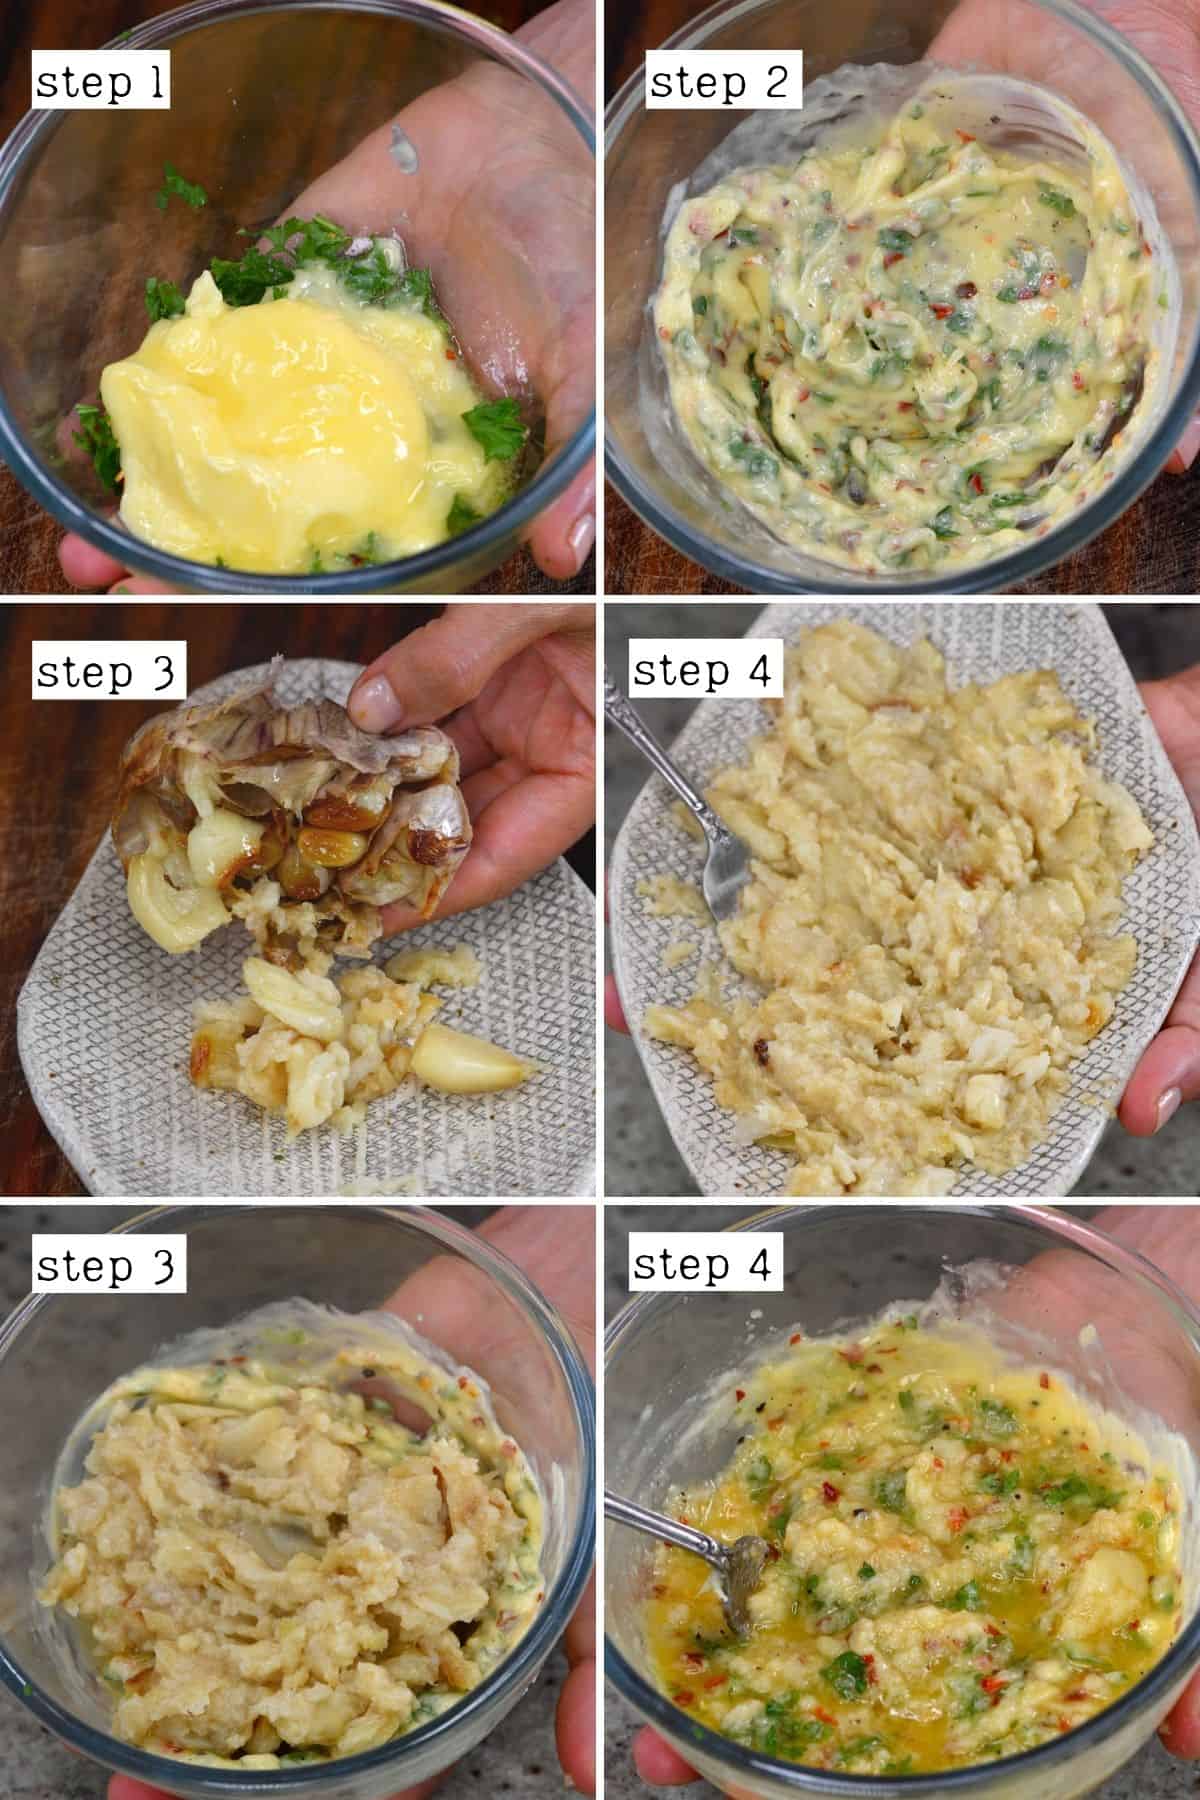
To mix the roasted garlic butter, first finely chop the parsley. Then combine the butter, parsley, chili flakes, and salt & pepper in a small bowl.
If the butter isn’t soft enough, you can microwave it for just a few seconds.
Then it’s time to mash the roasted garlic. It should be easy to remove all the garlic cloves while the heads are still warm. Simply use your hands to squeeze the garlic out onto a small dish, using a small knife or fork to help remove any stubborn pieces.
Once removed, use the fork to lightly mash the garlic into a slightly chunky puree. Then mix it into the butter mixture and combine well.
Step 4: Brush and bake the bread with roasted garlic butter
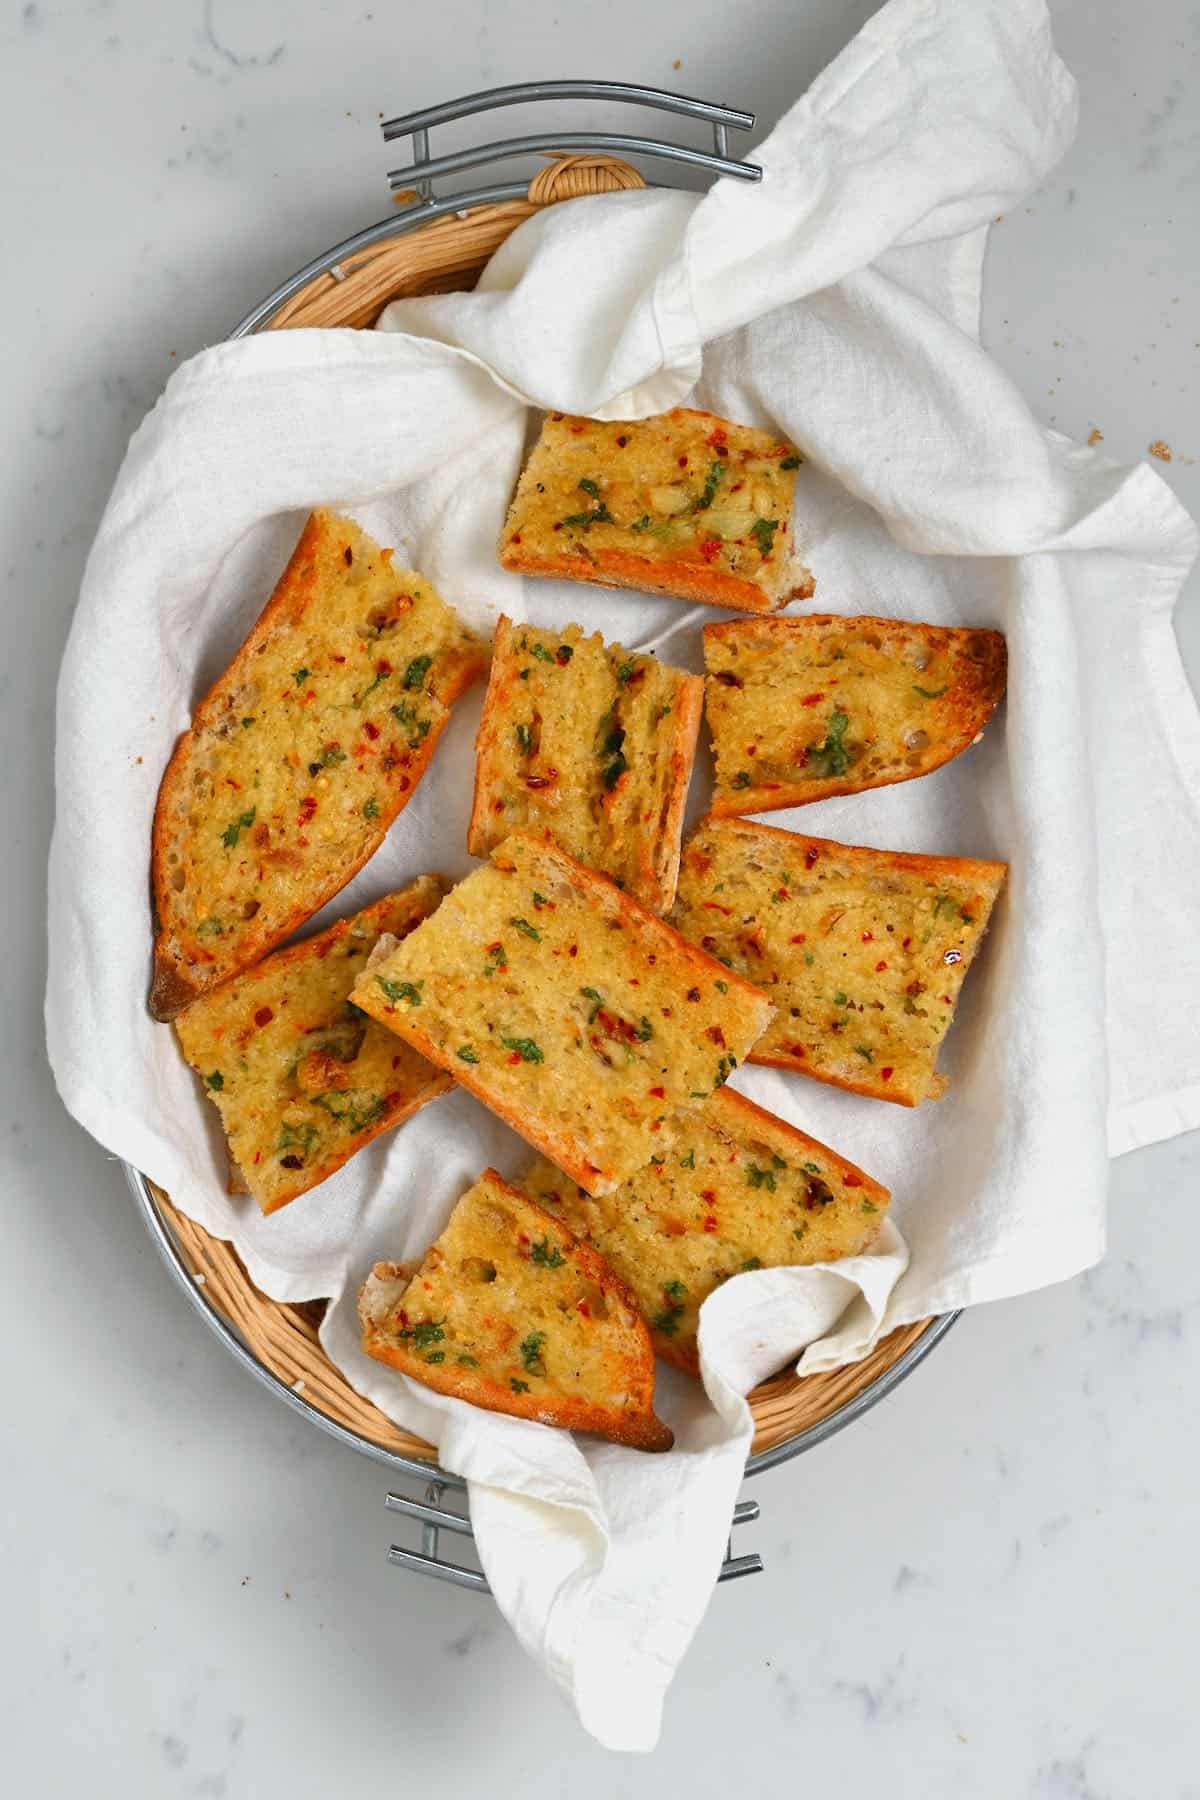
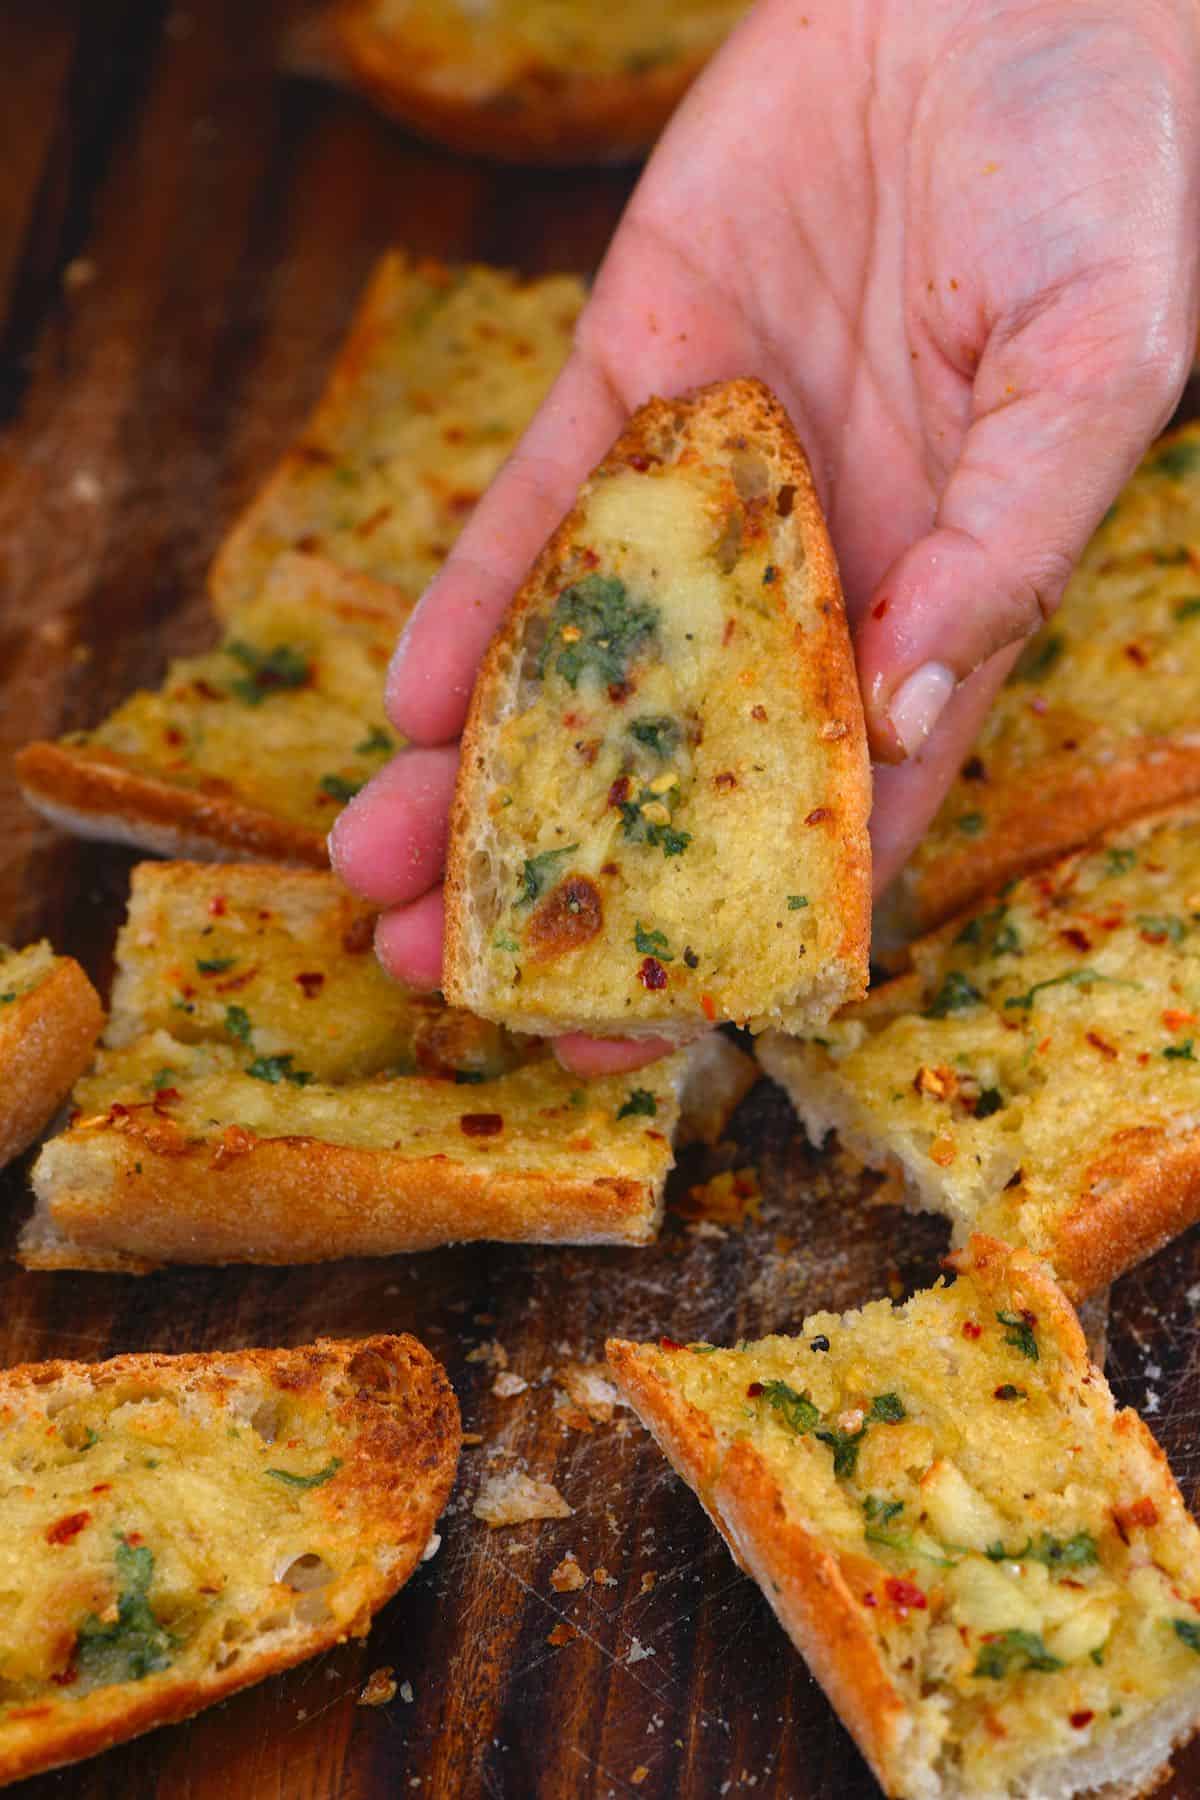
Using a pastry brush/silicone brush, brush the garlic butter mixture over your bread slices (or spread between, for the Hasselback style version). I like to do so quite liberally, for lots of flavor. Any leftover topping can be saved for another time.
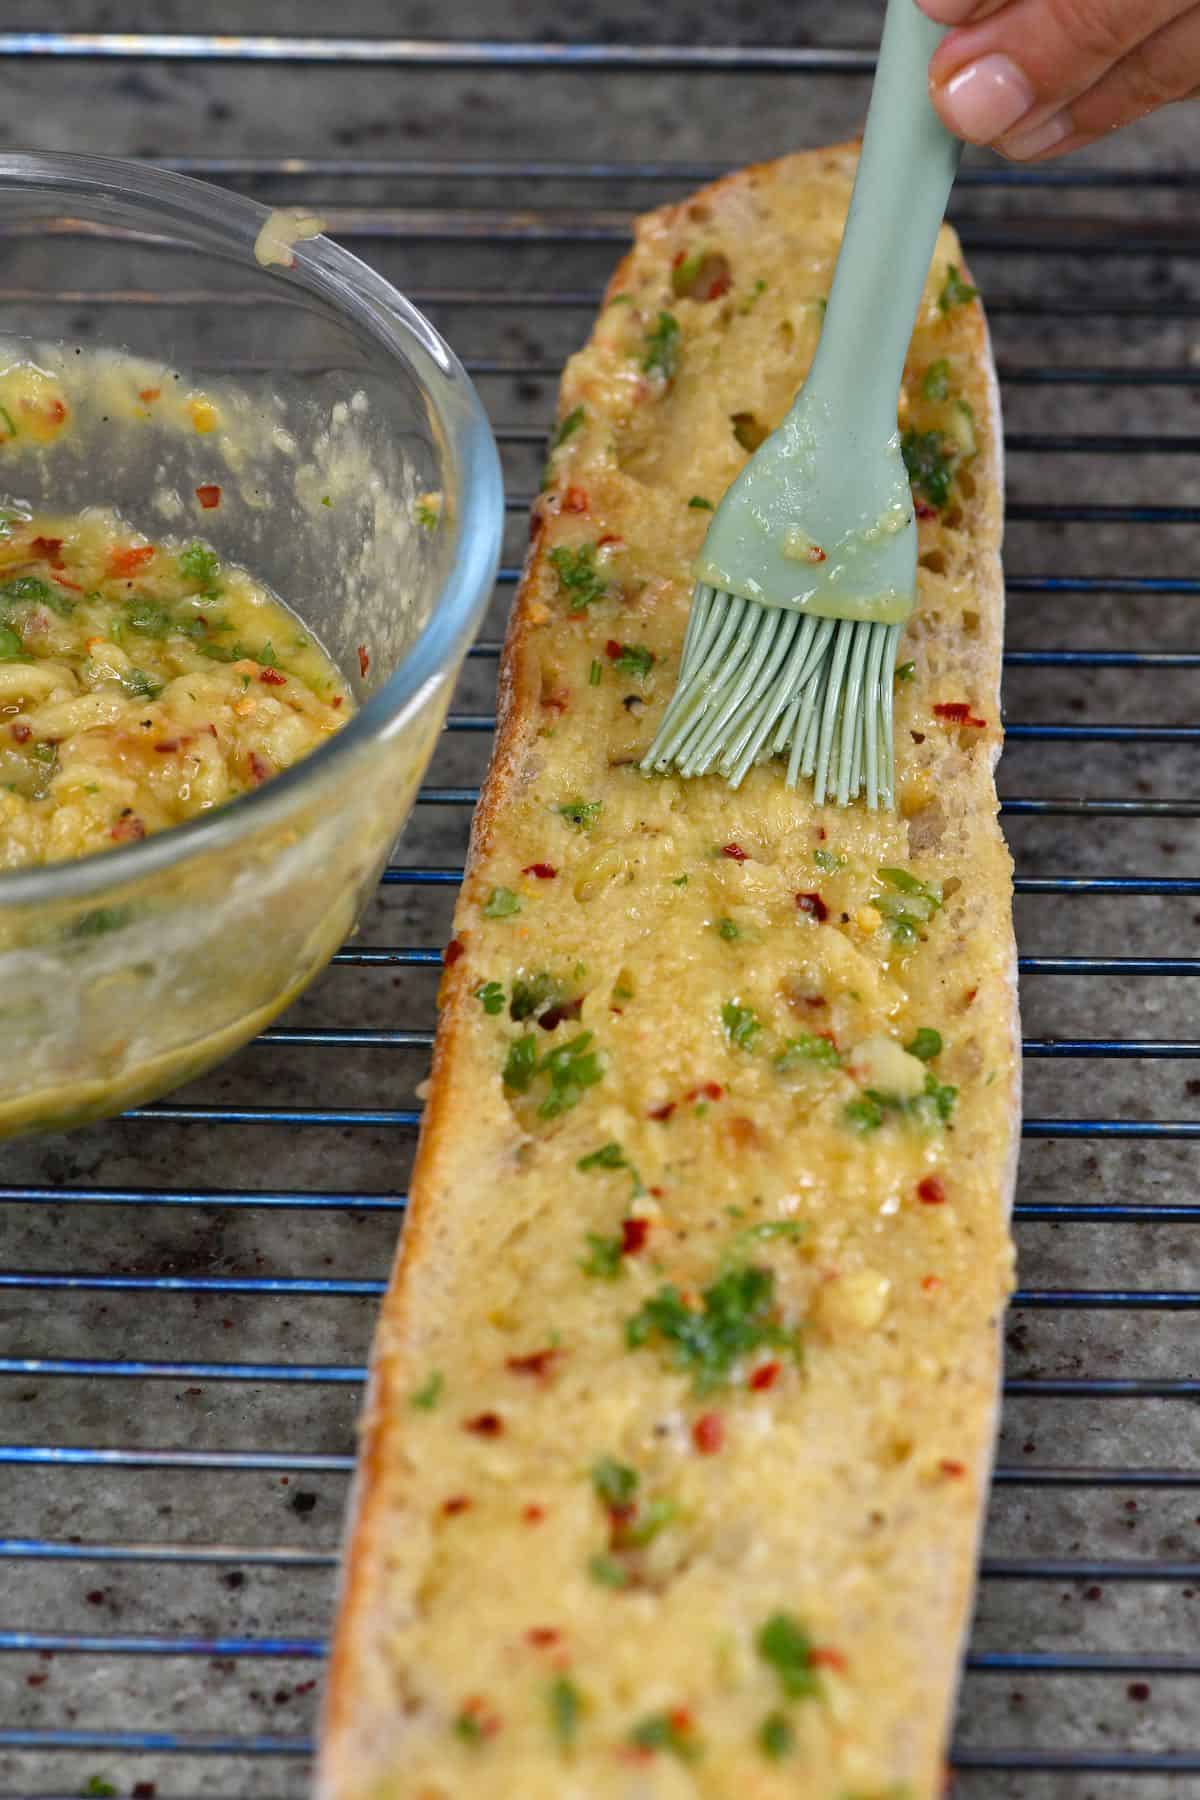
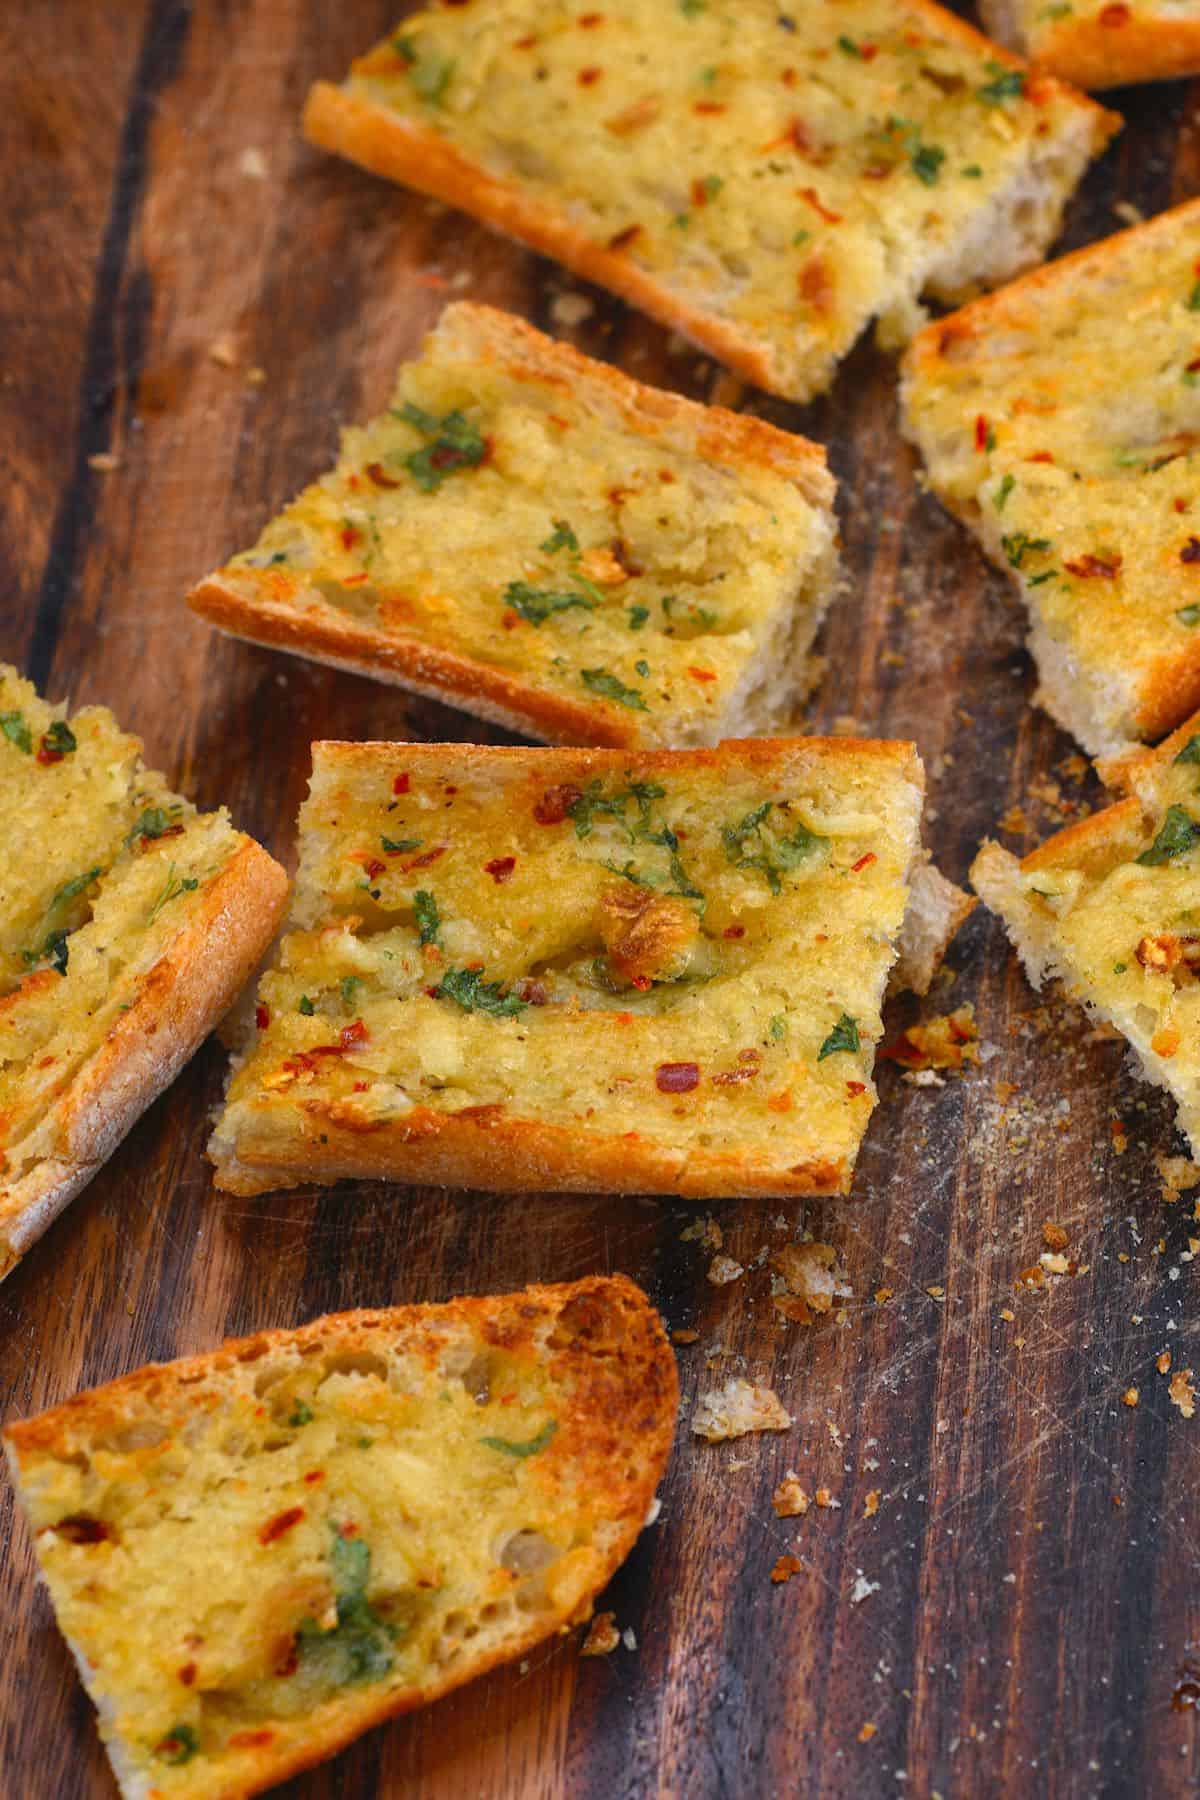
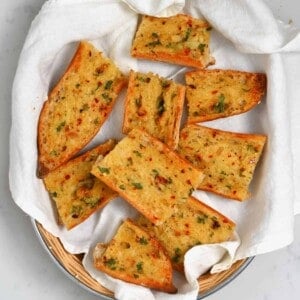
Then bake the bread slices at 350ºF/175ºC for about 10 minutes (the time will vary based on your bread choice and size), or until golden brown with slightly crispy edges. Then slice into smaller sections and enjoy!

How to Store Roasted Garlic Bread?
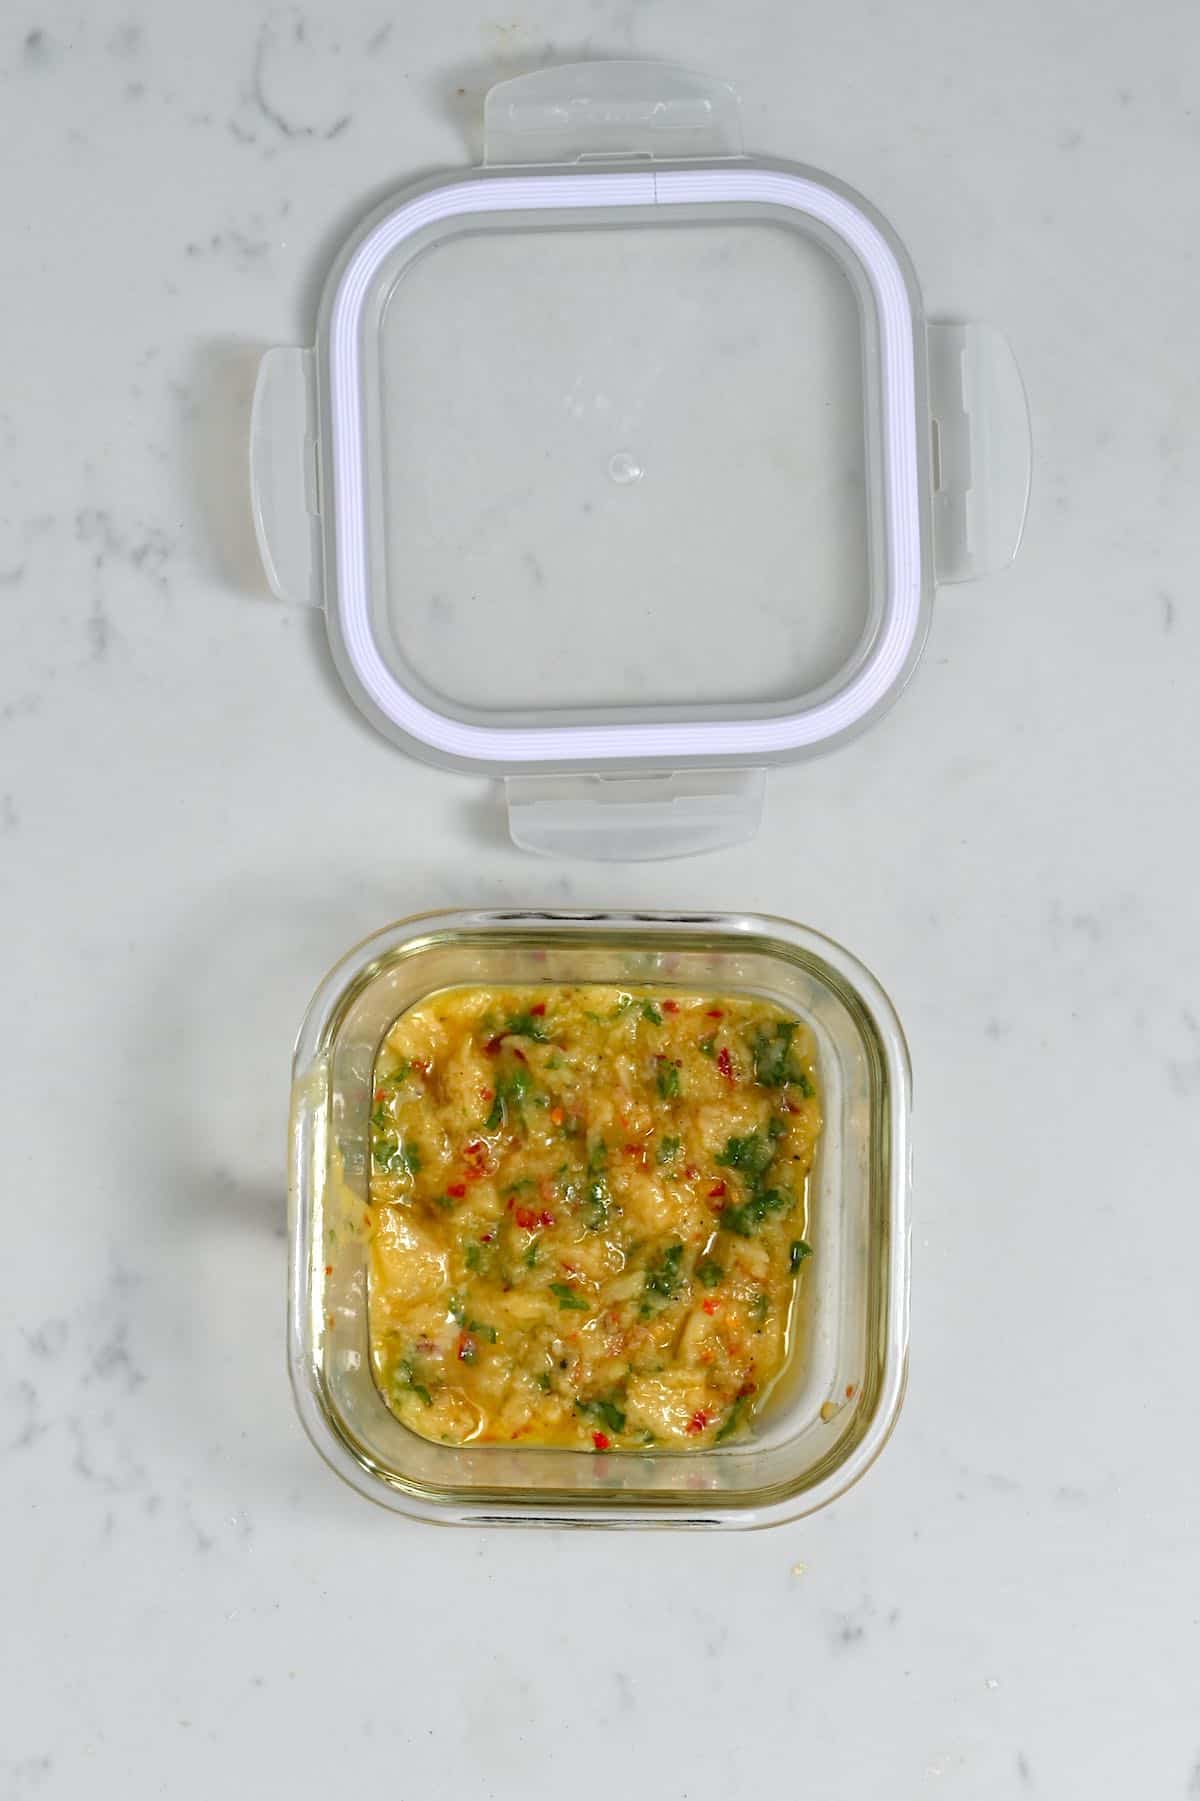
Make ahead: it’s easy to prepare the roasted garlic butter mixture in advance and store it in the fridge covered with plastic wrap for up to a week or in the freezer for up to a month. Then, when ready, heat it until lightly melted and brush over your bread of choice, then roast.
You can also freeze the basted but unbaked bread. To do so, lay the bread on a tray making sure no pieces are touching. Freeze until solid, then wrap tightly in plastic wrap and store in a Ziplock bag, if possible – for up to 3 months. You can then bake the bread from frozen. Adding a few minutes to the baking time.
Store: roasted garlic bread is best enjoyed fresh while warm. However, you can store any leftovers wrapped in foil at room temperature for 2-3 days.
Freeze: I prefer to freeze the garlic bread pre-baking, so it’s fresh when eating. However, you can also freeze the roasted garlic bread after baking. Thaw before reheating
Reheat: place the thawed bread back in the oven at 350ºF/175ºC and bake until just warmed through. Don’t leave it too long, or it will become overly crispy/burnt. You could optionally sprinkle it with a bit of water before baking for slightly softer results (or wrap in foil).
How to Serve?
- Soup/Stew: like Lebanese lentil soup, creamy tomato soup, cream of mushroom soup, turmeric ginger pumpkin soup, Lebanese Green Beans (Loubieh Bi Zeit), or eggplant stew.
- Curries: serve instead of garlic naan with dishes like chana masala (chickpea curry) and meat-free butter chicken (with tofu or paneer).
- Salad: particularly with Italian flavors like this Italian heirloom tomato salad, break up into panzanella (bread salad), or Caprese pasta salad. Or why not salad topped with roasted garlic gressing. But browse through this list of 40+ summer salads for more ideas.
- Pasta: tomato eggplant pasta (pasta alla norma), vegetarian One-Pot Pasta bake, spinach Green Pasta Salad, baked feta cherry tomato pasta, avocado pasta, or Easy Homemade Potato Gnocchi.
- Dips: use to serve alongside various dips like creamy hummus, garlic white bean dip, Persian eggplant dip (kashke bademjan), whipped labneh, or whipped ricotta!
- Eggs: while not as traditional, any garlic lover would love this garlic bread with egg dishes like shakshuka, eggs in purgatory, or French baked eggs!
You can also use this roasted garlic butter mixture for the ultimate cheesy, garlicky sourdough cheesy pull-apart bread (“crack” bread) – by brushing the mixture into the bread before adding the cheese.
Let me know in the comment what your favorite ways to serve roasted garlic bread are!
Recipe Tips and FAQs
- For softer baked bread: you can wrap the roasted garlic bread loosely in foil before baking if you’d prefer softer slices rather than crispy edges. For somewhere in-between, remove the bread from the foil in the last 5 minutes of baking.
- The baking time: this time will vary based on the type of bread you use and whether it’s whole or sliced. I recommend checking on the bread at the 10-minute mark and every couple of minutes after that.
- For a slightly more robust garlic flavor: you can add dried garlic powder into the roasted garlic butter mixture (I recommend adding 1 Tbsp then increasing to taste).
- You can also make garlic pizza: by spreading this mixture over unbaked pizza dough then baking as usual. Top with cheese, too, if preferred.
- For more aromatic roasted garlic bread: you can roast the garlic with fresh herbs like thyme or rosemary. The flavor will be infused into the garlic as it bakes.
- Enjoy a “cheat” method: if you’re in a rush, simply toast your bread of choice, brush with a little oil, and then rub with a garlic clove (or spread with some roasted garlic, if you have any). Sprinkle with any extra herbs if preferred – no baking (or dairy) required!
- What’s the best bread to use for garlic bread? I love using a fresh baguette – French or Italian are the most common. If you use a loaf that is too “soft” (like regular white bread) to begin with, it can become soggy when baked. On the other hand, if you use one that’s too sturdy, it may toughen up while baking. However, you could also use ciabatta, focaccia or even pizza dough.
More Ways to Enjoy Garlic
- Garlic and chili-infused honey
- Roasted garlic white bean dip
- Homemade croutons
- Homemade garlic naan bread
- Chinese eggplant with garlic sauce
- Vegetable Lo Mein (chili garlic noodles)
- Rosemary garlic crispy roasted potatoes
- Quick Cheesy Garlic Bread Recipe (Vegan Garlic Bread Optional)
If you try this roasted garlic bread recipe, I’d love to hear your thoughts/questions below. Also, I’d appreciate a recipe card rating below, and feel free to tag me in your recipe recreations on Instagram @Alphafoodie!
Simple Roasted Garlic Bread (with Roasted Garlic Butter)
Ingredients
- 8.5 oz garlic 3 heads
- 2 tsp olive oil only to brush the garlic with
- 1 baguette French or Italian baguettes work best
- 4 oz butter unsalted (use dairy-free if preferred), about 1/2 cup
- 0.88 oz parsley 1 handful, or 2-3 tsp dried oregano or Italian seasoning
- 1/2 tsp salt sea salt flakes – adjust to taste
- 1/4 tso black pepper
- 1 tsp chili flakes (red pepper flakes) optional, more or less to taste,1 tsp makes it quite spicy
Instructions
Step 1: Roast the garlic
- Follow this method for roasted whole garlic heads – slice off about ½ inch from the end of the garlic roots, brush with oil, fold into a tin foil parcel, and roast at 400ºF/200ºC for 30-50 minutes, or until golden and tender.
Step 2: Prepare the bread
- Once the garlic has been roasted, slice your bread. I sliced mine in half lengthwise. However, you could also cut individual round slices or slice the top "Hasselback" style like store-bought garlic bread (slicing every 1 inch into the bread until the bottom crust but not all the way through). Of course, if you're using a flatbread or focaccia, then no slicing is required.
Step 3: Prepare the roasted garlic butter
- Finely chop the parsley.
- Combine the butter, parsley, chili flakes, and salt & pepper in a small bowl.If the butter isn't soft enough, you can microwave it for just a few seconds.
- Mash the roasted garlic. It should be easy to remove all the garlic cloves while the head is still warm. Simply use your hands to squeeze the garlic out onto a small dish, using a small knife or fork to help remove any stubborn pieces.Once removed, use the fork to lightly mash the garlic into a slightly chunky puree.
- Mix the garlic into the butter mixture and combine well.
Step 4: Brush and bake the bread with roasted garlic butter
- Using a pastry brush/silicone brush, brush the garlic butter mixture over your bread slices (or spread between, for the Hasselback style version). I like to do so quite liberally, for lots of flavor. Any leftover topping can be saved for another time.
- Then bake the bread slices at 350ºF/175ºC for about 10 minutes (the time will vary based on your bread choice and size), or until golden brown with slightly crispy edges. Then slice into smaller sections and enjoy!
How to Store Roasted Garlic Bread?
- Make ahead: it's easy to prepare the roasted garlic butter mixture in advance and store it in the fridge covered with plastic wrap for up to a week or in the freezer for up to a month. Then, when ready, heat it until lightly melted and brush over your bread of choice, then roast.You can also freeze the basted but unbaked bread. To do so, lay the bread on a tray making sure no pieces are touching. Freeze until solid, then wrap tightly in plastic wrap and store in a Ziplock bag, if possible – for up to 3 months. You can then bake the bread from frozen. Adding a few minutes to the baking time.Store: roasted garlic bread is best enjoyed fresh while warm. However, you can store any leftovers wrapped in foil at room temperature for 2-3 days.Freeze: I prefer to freeze the garlic bread pre-baking, so it's fresh when eating. However, you can also freeze the roasted garlic bread after baking. Thaw before reheating.Reheat: place the thawed bread back in the oven at 350ºF/175ºC and bake until just warmed through. Don't leave it too long, or it will become overly crispy/burnt. You could optionally sprinkle it with a bit of water before baking for slightly softer results (or wrap in foil).
Notes
- For softer baked bread: you can wrap the roasted garlic bread loosely in foil before baking if you’d prefer softer slices rather than crispy edges. For somewhere in-between, remove the bread from the foil in the last 5 minutes of baking.
- The baking time: this time will vary based on the type of bread you use and whether it’s whole or sliced. I recommend checking on the bread at the 10-minute mark and every couple of minutes after that.
- For a slightly more robust garlic flavor: you can add dried garlic powder into the roasted garlic butter mixture (I recommend adding 1 Tbsp then increasing to taste).
- You can also make garlic pizza: by spreading this mixture over unbaked pizza dough then baking as usual. Top with cheese, too, if preferred.
- For more aromatic roasted garlic bread: you can roast the garlic with fresh herbs like thyme or rosemary. The flavor will be infused into the garlic as it bakes.
- Enjoy a “cheat” method: if you’re in a rush, simply toast your bread of choice, brush with a little oil, and then rub with a garlic clove (or spread with some roasted garlic, if you have any). Sprinkle with any extra herbs if preferred – no baking (or dairy) required!
- What’s the best bread to use for garlic bread? I love using a fresh baguette – French or Italian are the most common. If you use a loaf that is too “soft” (like regular white bread) to begin with, it can become soggy when baked. On the other hand, if you use one that’s too sturdy, it may toughen up while baking. However, you could also use ciabatta, focaccia, or even pizza dough.
- Cheese: mozzarella and Parmesan are my favorite options, though cheddar will also work. Simply sprinkle the grated cheese (one or both) over the bread before roasting. Alternatively, add the grated cheese after baking and broil for a minute or two until melted.
- Spice: instead of red pepper flakes, you can add a little chili sauce into the roasted garlic butter mixture.
- Paprika: another addition that I love adding to the roasted garlic butter is a bit of sweet or smoked paprika. Usually, ½-1 tsp is more than enough.
- Dairy-free: this roasted garlic bread is incredibly easy to make dairy-free. Simply use your favorite vegan butter (and cheese, if using).
- Gluten–free: make sure to use a gluten-free baguette. Otherwise, the ingredients are all naturally gluten-free.
Nutrition
Nutrition information is automatically calculated, so should only be used as an approximation.


Best recipes for using garlic I’ve ever read and the garlic bread is to die for. Thank you for sharing❤️❤️
Thank you so much for your comment, Ann! I’m so glad you loved the recipe! ❤️