
This post may contain affiliate links. Please read our disclosure policy.

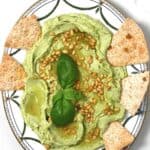

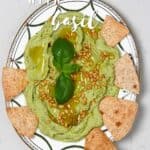

Fresh basil hummus combines creamy homemade hummus with fresh basil for a vibrant, flavorful basil dip reminiscent of pesto! All you need is 5 ingredients for this healthy gluten-free, dairy-free, vegan, and packed with plant-based protein dip – perfect for serving with pita, crackers, and spread on wraps and sandwiches!
Homemade hummus is one of my favorite low-fuss appetizers and snacks. I’ve already happily shared recipes for beet hummus, red pepper hummus, and pumpkin hummus (among others). Now it’s the turn of this herby green dip. This fresh basil hummus is a vibrant green, silky smooth, savory, creamy homemade hummus that tastes like pesto – which means that I’m obviously obsessed!
Since moving away from London, I’ve taken great pleasure in using my modest garden space to plant various herbs and veggies. One of those is, of course, basil – which I lovingly tend to in order to whip up massive batches of pesto (like traditional Italian basil pesto and vegan pistachio pesto). This time, though, this flavorful herb gives my homemade creamy hummus a vibrant and aromatic glow-up! Best of all, with the combination of garlic, lemon juice, and fresh basil – this tastes like “pesto” hummus!
Not only does it taste great, but this fresh basil pesto is also packed with plant-based protein, fiber, iron, and several other vitamins and minerals. There are also several ways to adapt this recipe, including several flavor variations, using cooked or canned chickpeas, swapping out the tahini, and more.
Either way, this lemon basil hummus recipe takes just minutes to prepare once the chickpeas are cooked and will make for the perfect addition to your next party spread, to enjoy with crackers and pita, or even add to several other dishes.
Want to save this recipe?
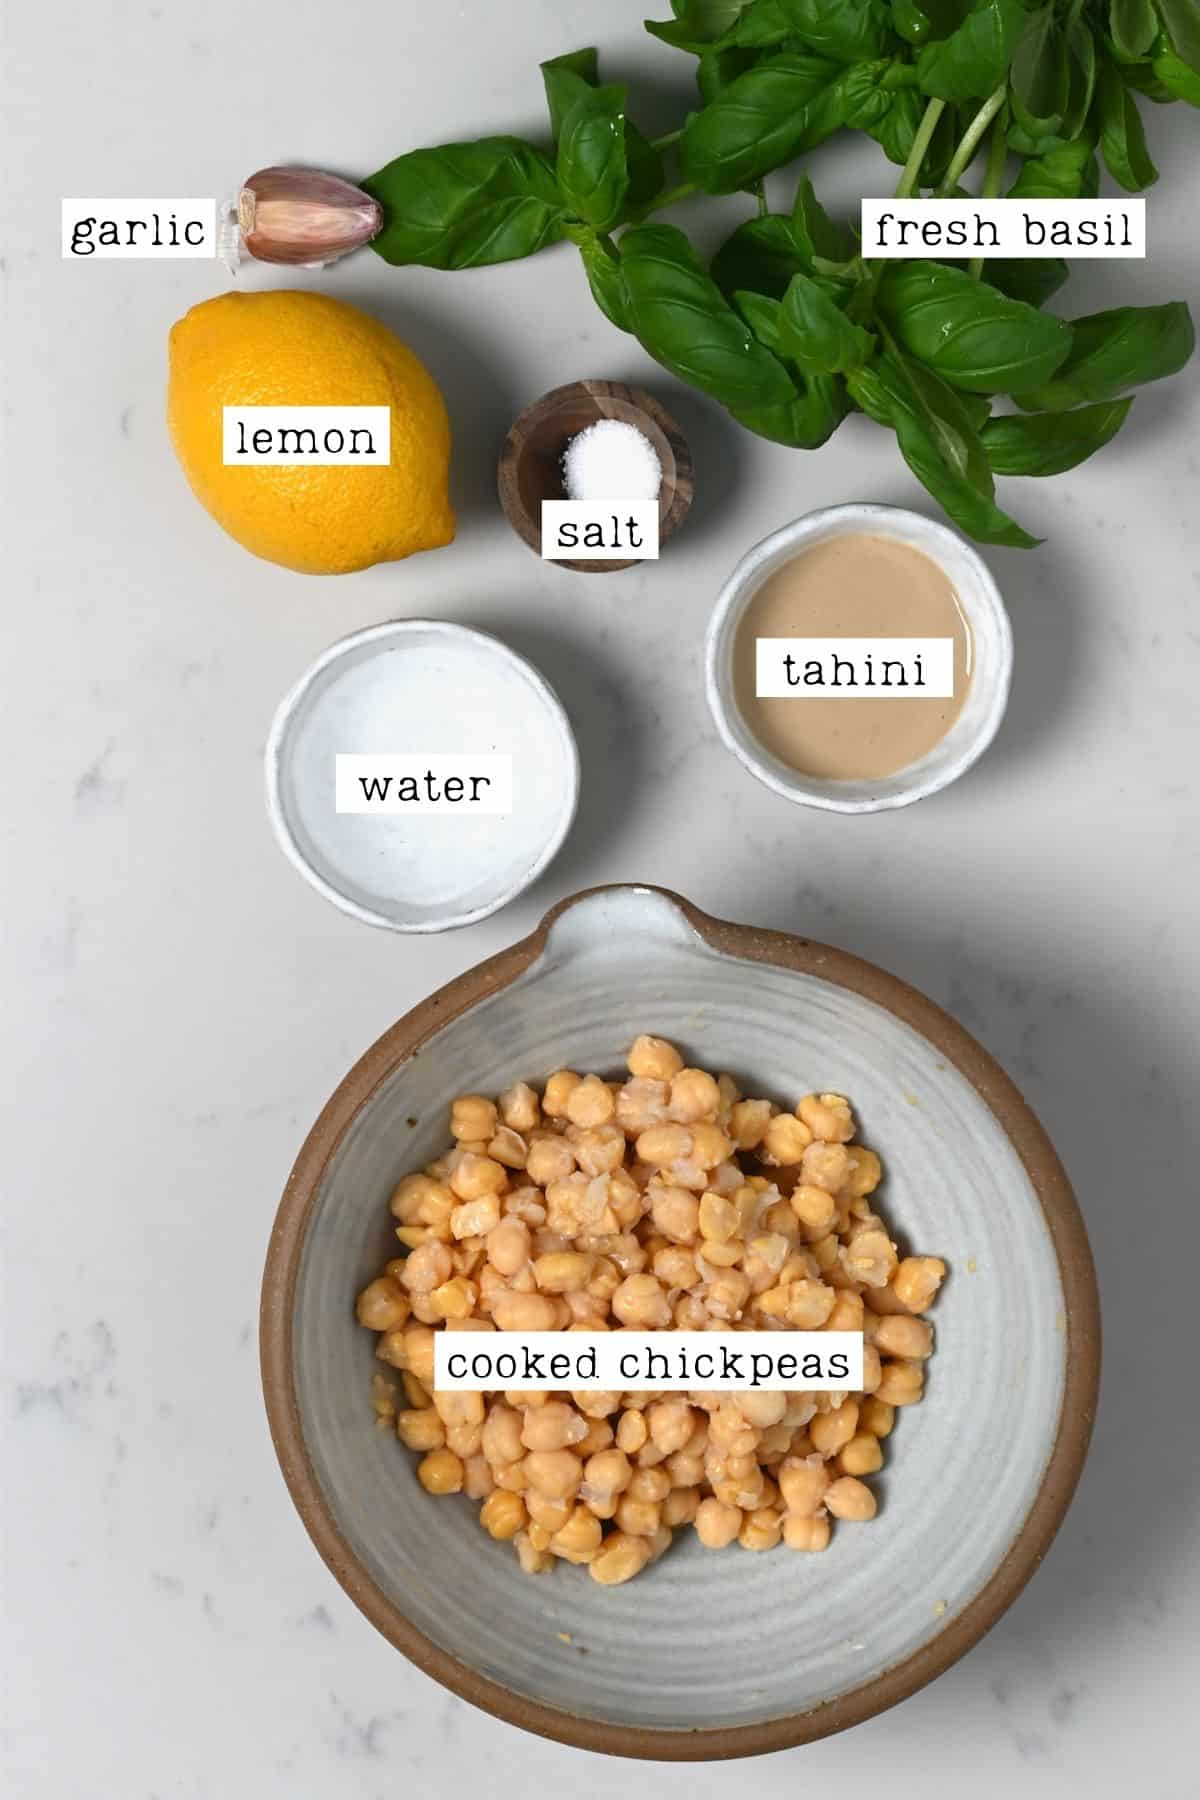
The Basil Hummus Ingredients
- Chickpeas: you’ll need canned or cooked chickpeas (1 ¼ cup dried beans or 1 15oz can). For super creamy, smooth hummus, it’s best to use slightly “mushy” (overcooked) chickpeas (refer to recipe).
- Basil: and lots of it! Fresh basil leaves is the special ingredient in this basil dip and will have it tasting like pesto hummus. You can even use frozen and thawed basil, though the color/flavor may differ slightly.
- Tahini: I use homemade tahini. If you’re using store-bought, try to use high-quality tahini, as some brands can be overly bitter.
- Salt: to season the basil hummus. Adjust the amount to personal preference.
- Lemon: use fresh lemon juice for the best flavor. Adjust the amount to personal taste (I love mine lemony!)
I recommend zesting/peeling the lemon before juicing it. That way, you can save it in a Ziplock bag in the freezer (for up to 6 months!) to add to other recipes and reduce waste.
- Garlic: once again, the amount can be adjusted to personal taste. I usually use raw garlic (for ease). However, if you have some, roasted garlic will add a wonderful flavor to the green hummus.
- Water: ice water can help create fluffier hummus and achieve incredible silky results (and without tons of oil).
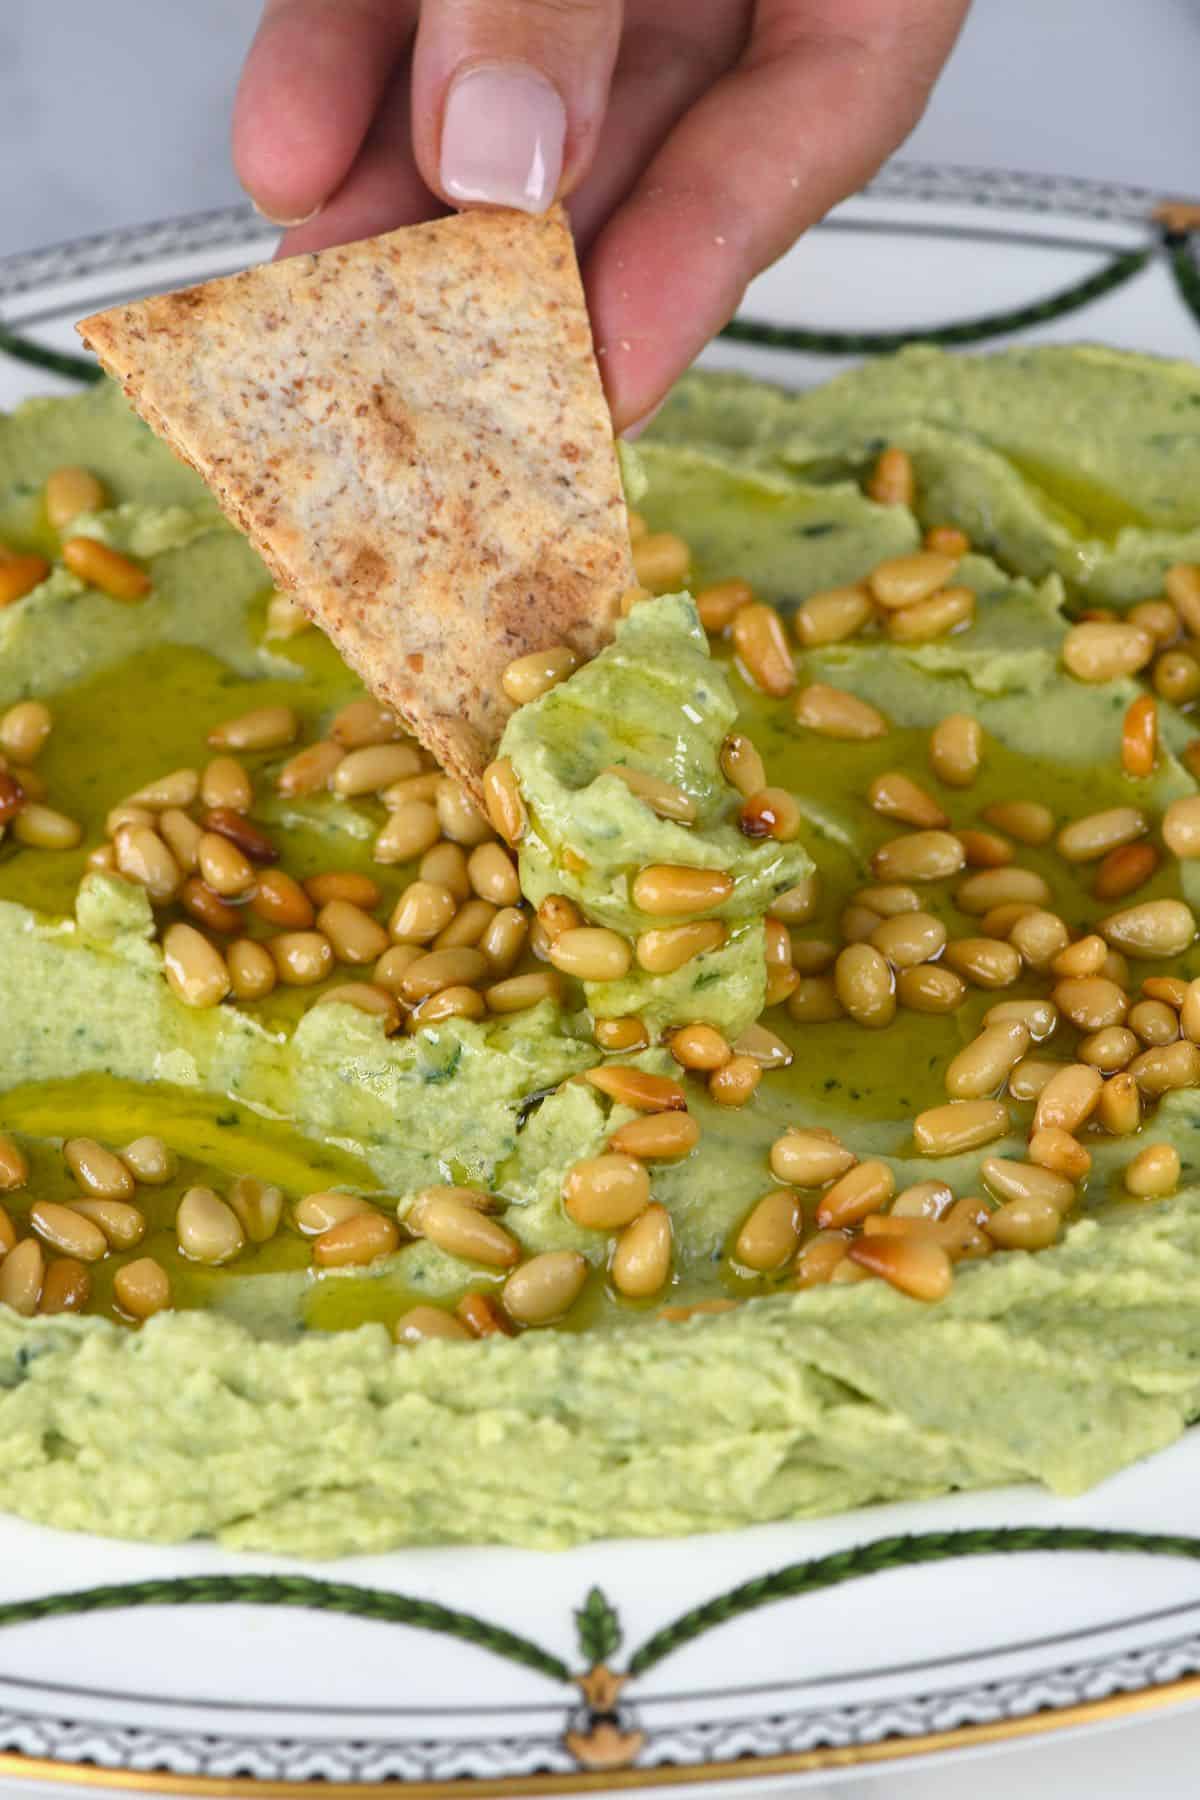
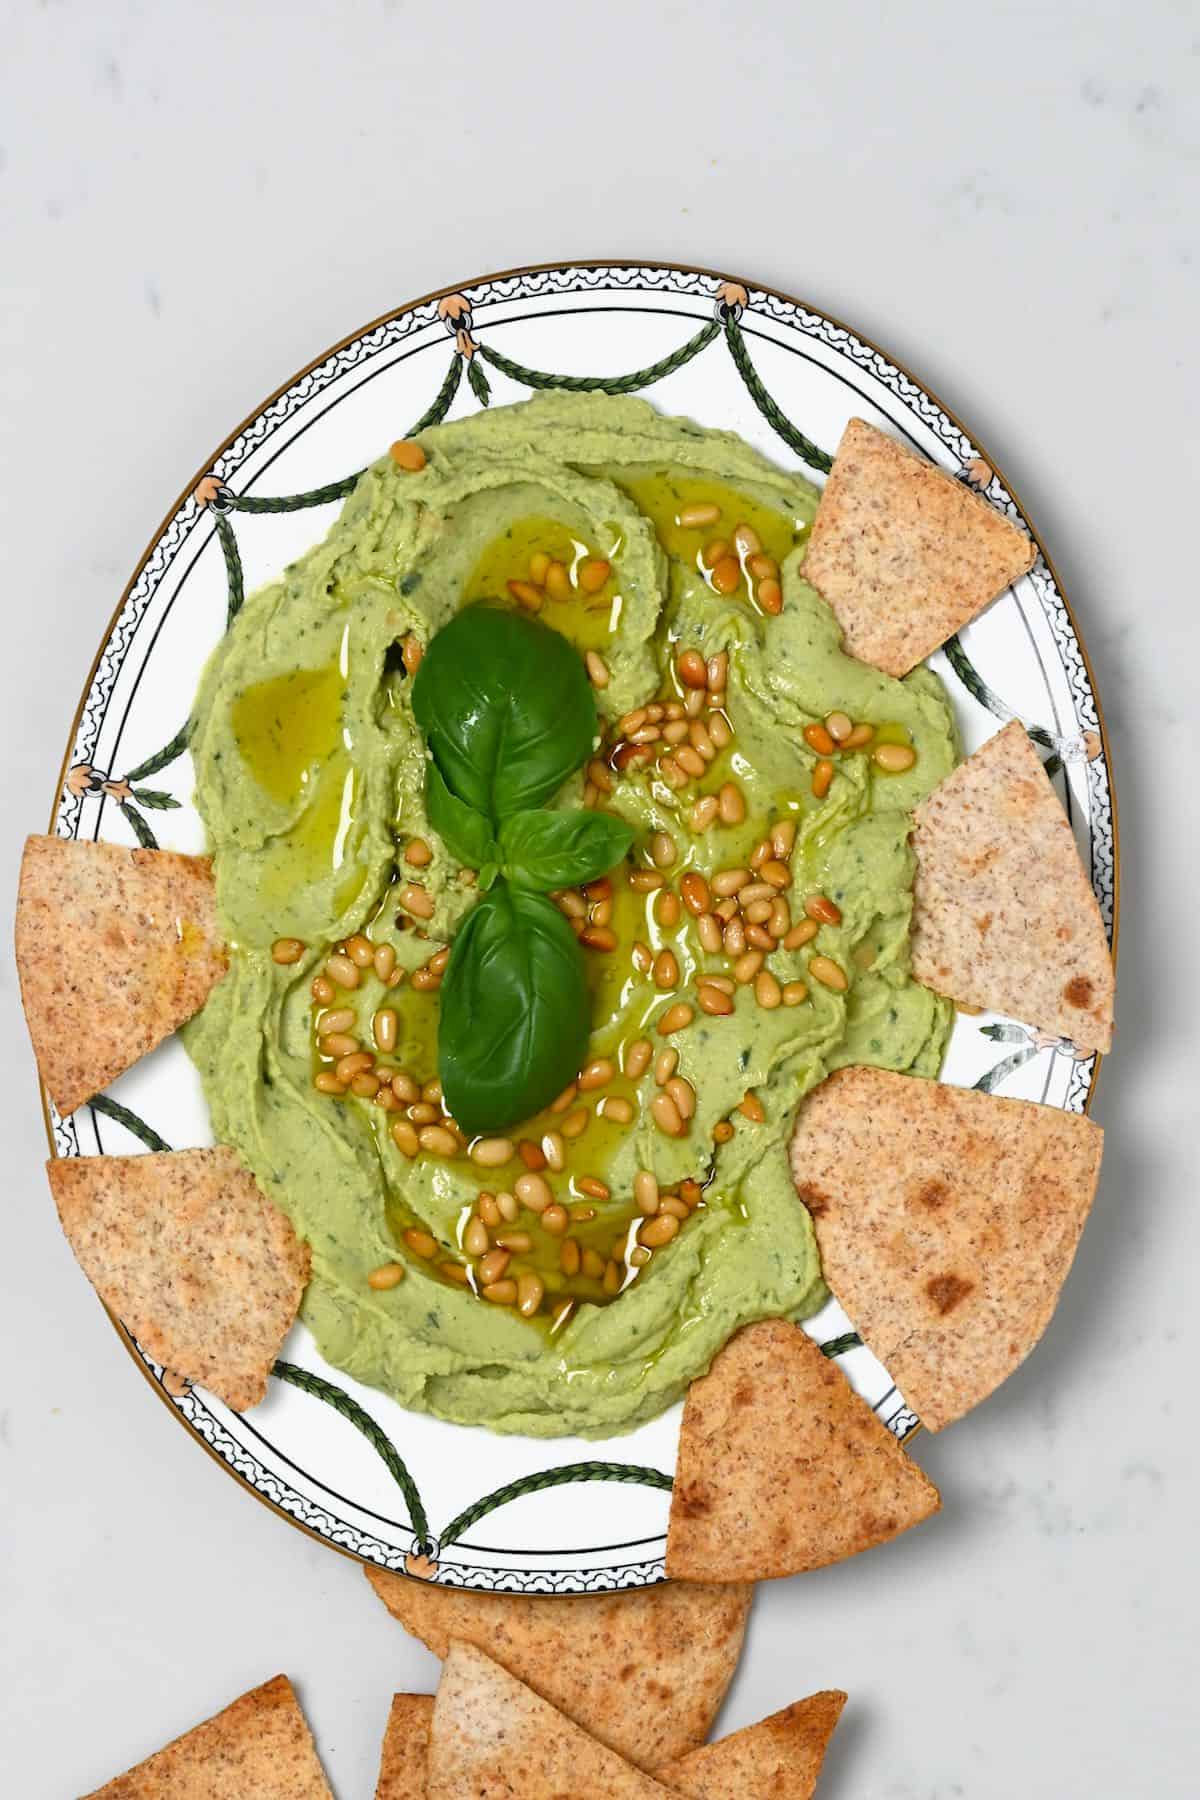
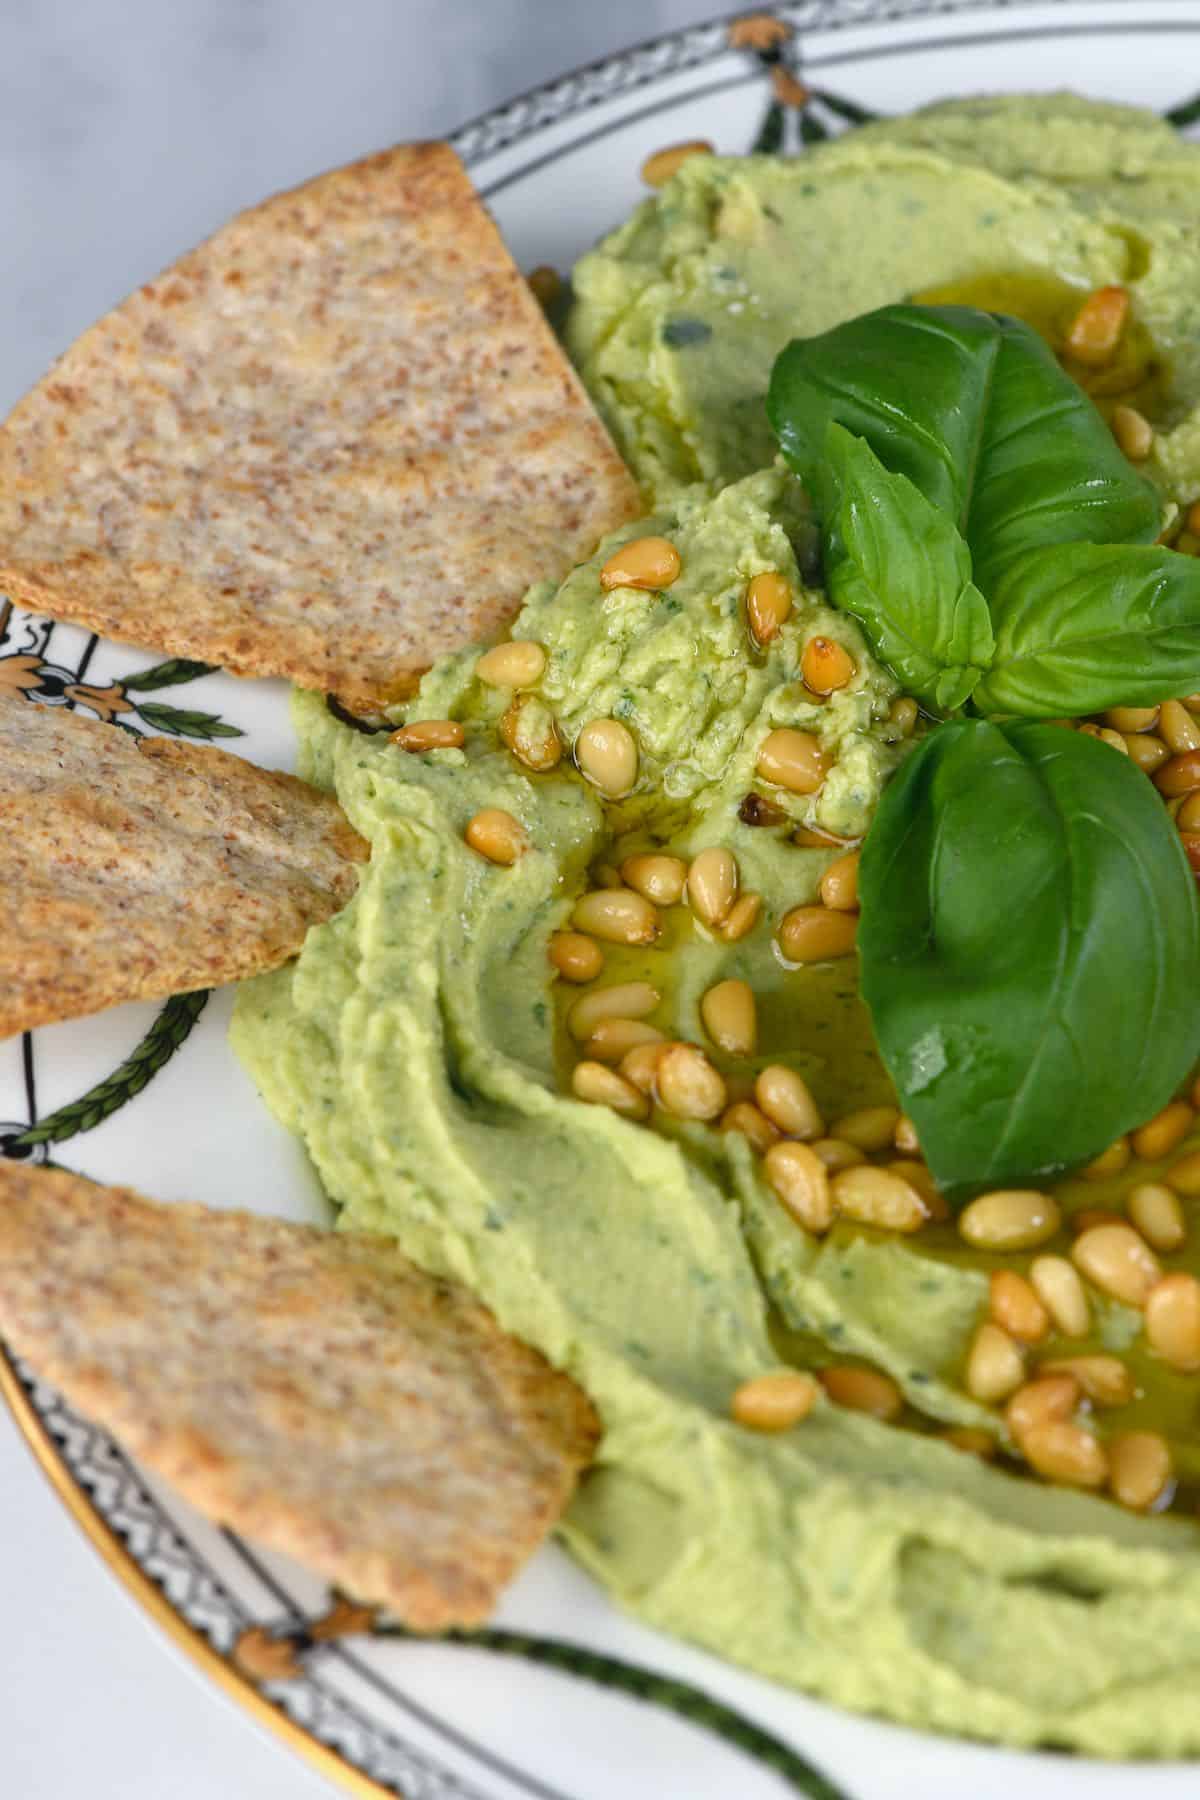
- Toppings: I like to use a drizzle of extra virgin olive oil and some lightly toasted pine nuts. You could also top it with some sun-dried or roasted cherry tomatoes and a pinch of red pepper flakes or your toppings of choice.
Optional Add-ins and Variations
- Basil pesto hummus: to enhance the “pesto” flavor, you can also add some pre-prepared homemade basil pesto (or vegan basil pesto) to the basil hummus. I recommend adding one tablespoon at a time until you enjoy the flavor (you could also reduce the fresh basil in the recipe by half). Alternatively, for a subtler flavor, you can add a tablespoon or so of pine nuts and optionally some parmesan cheese or nutritional yeast to this basil pesto recipe.
- Lemon basil pesto: this recipe already contains lemon. However, when making lemon basil pesto, I usually also add some lemon zest into the hummus and increase the lemon juice. You can also garnish the fresh hummus with lightly fried lemon peel (and drizzle it with the lemon-infused olive oil from the shallow fry).
- Basil avocado hummus: the addition of avocado makes for a super-creamy hummus. I recommend adding 1 small-medium avocado. Just be aware that this addition will cause the hummus to brown sooner.
- Sun-dried tomato basil hummus: this hummus should be red rather than green. I recommend using around 1/3 cup sun-dried tomatoes and reducing the amount of fresh basil to between 2-3 tablespoons of chopped basil.
- Chili: you could optionally add some red pepper flakes or a little chili oil to make a delicious spicy basil hummus.
- Green goddess hummus: combine ½ cup basil and ½ cup parsley with 2-3 Tbsp of either chopped green onion (scallions) or chives. You could also add a handful of spinach to enhance the color without impacting the flavor too much.
- Olive oil: for a silkier basil “pesto” hummus, you can add a little extra-virgin olive oil. I recommend doing so one tablespoon at a time.
- Spices: you can experiment with various seasonings and spices when making this lemon basil hummus recipe. I particularly like onion powder and smoked paprika.
How to Make Basil Hummus?
Step 1: Prepare the Chickpeas
If you aren’t using canned or cooked/leftover chickpeas, you’ll first need to soak and cook dried chickpeas. If doing so, plan for the time required (they need to soak for 8+ hours before cooking for 40-50 minutes). I regularly cook them for around 40 minutes. However, the aim here is for them to be mushier than regular–so usually cook for between 50-60 minutes, with ½ teaspoon baking soda added to the cooking liquid.
If you’re using canned chickpeas and don’t mind a slightly thicker hummus, then move on to step two. Otherwise, add the contents of your can and ½ teaspoon baking soda to a small saucepan. Then bring to a boil over high heat. Once boiling, reduce heat and simmer for around 20 minutes, or until the chickpeas are mushy.
Once cooked, the baking soda will help to loosen some of the skins. I personally leave these in the hummus (as they’re so soft anyway). But if you want even smoother results, you can pick out some loose skins (no need to peel each individual chickpea).
Step 2: Blend the Basil Hummus
Place all the ingredients (except the ice water) either in a blender, food processor, or large bowl (to use an immersion blender).
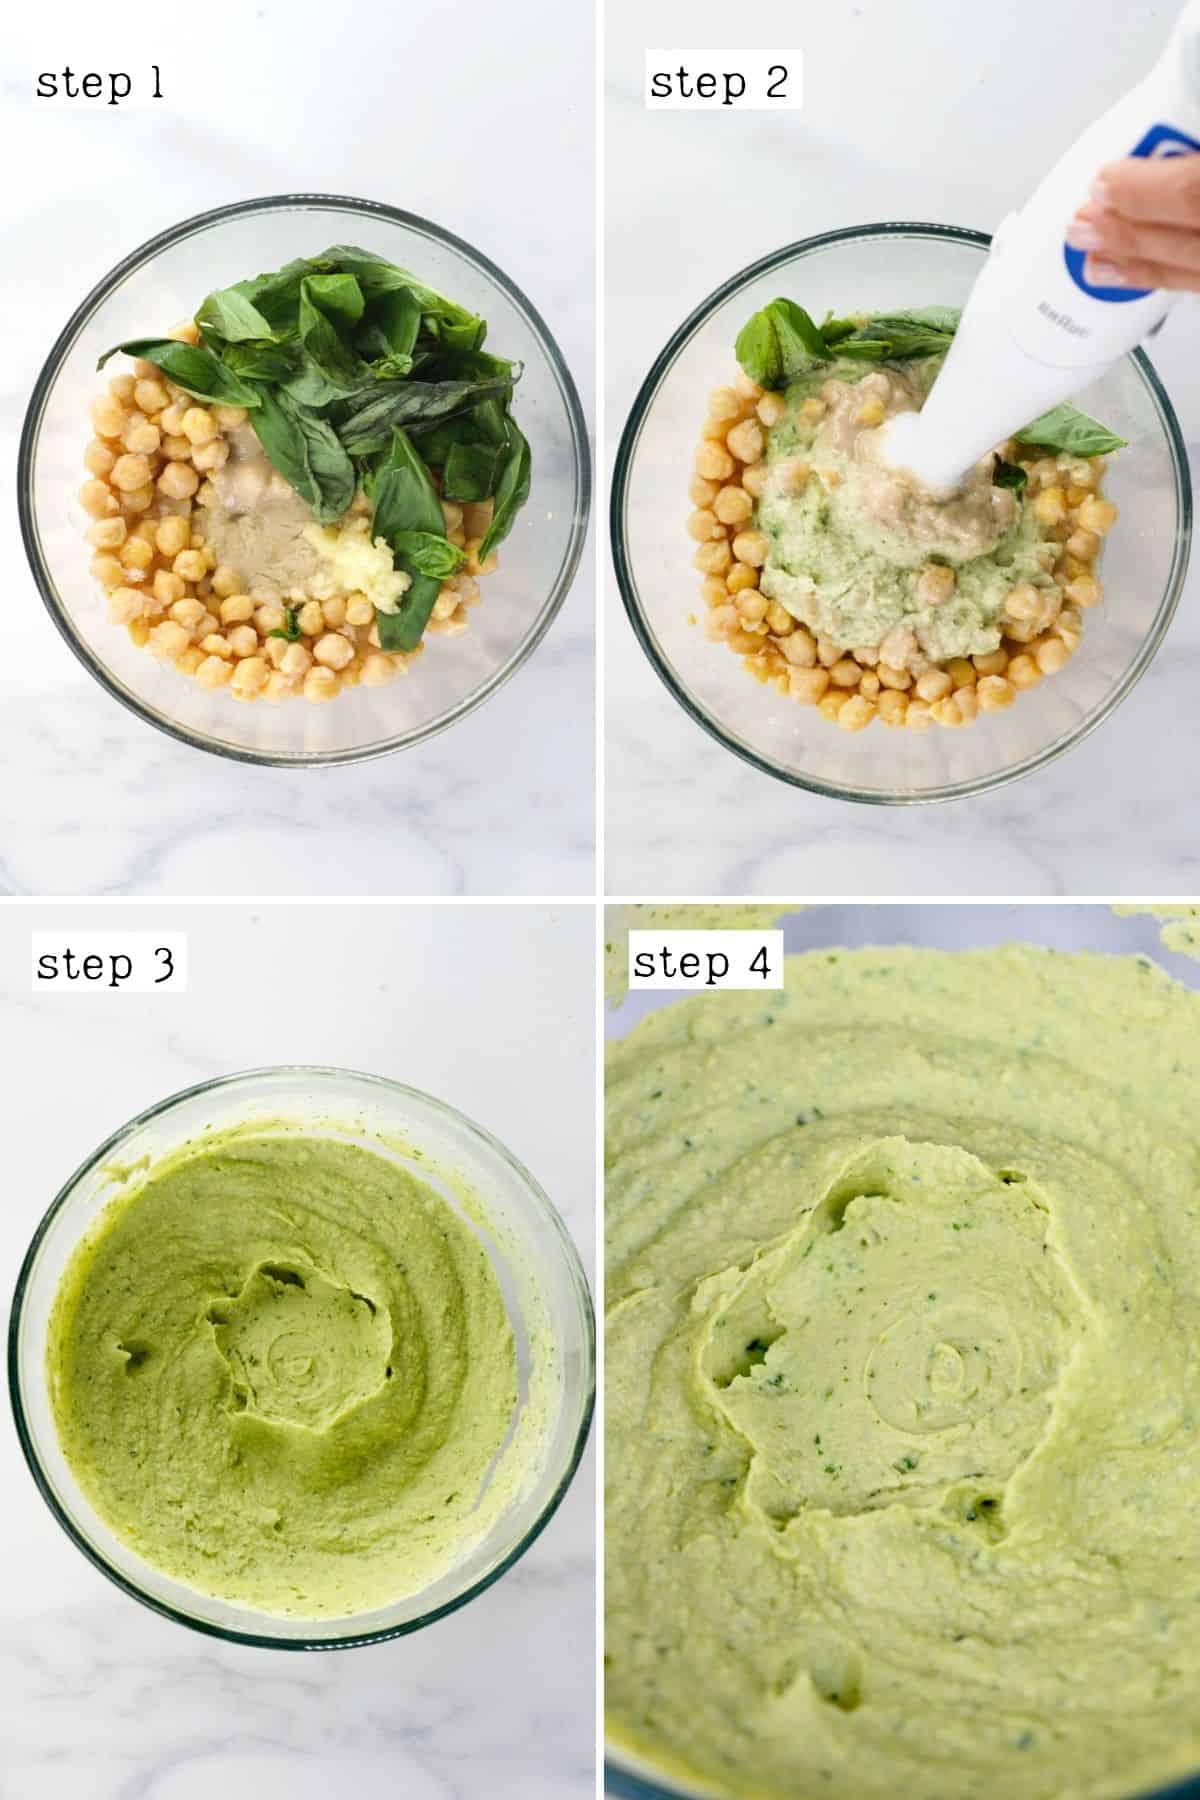
Blend until smooth, stopping to scrape down the sides of the jug/bowl a couple of times. Once a paste-like consistency, add the ice water–one tablespoon at a time- until the basil hummus is smooth and creamy.
You can add a little additional ice water if you want an even thinner hummus. But try not to add too much as it will become watery and can impact the shelf life.
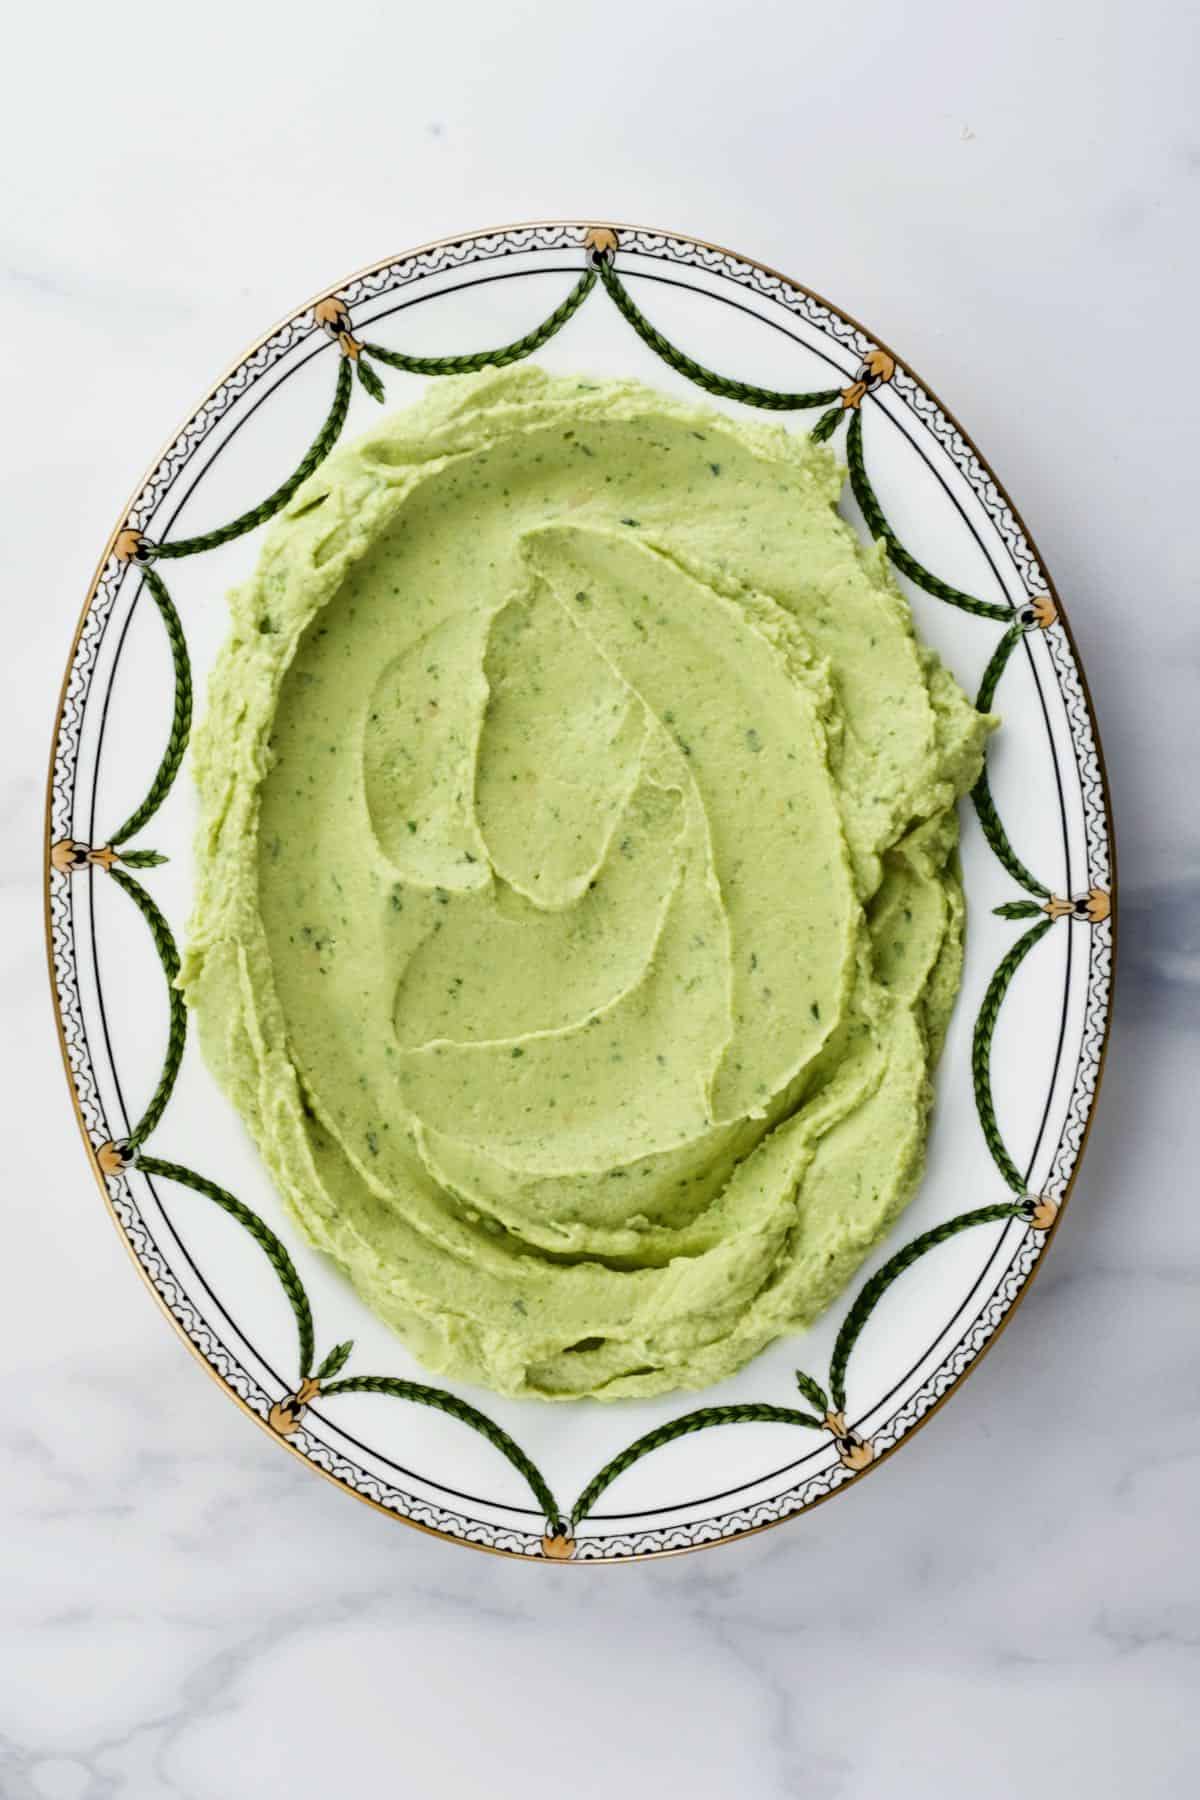
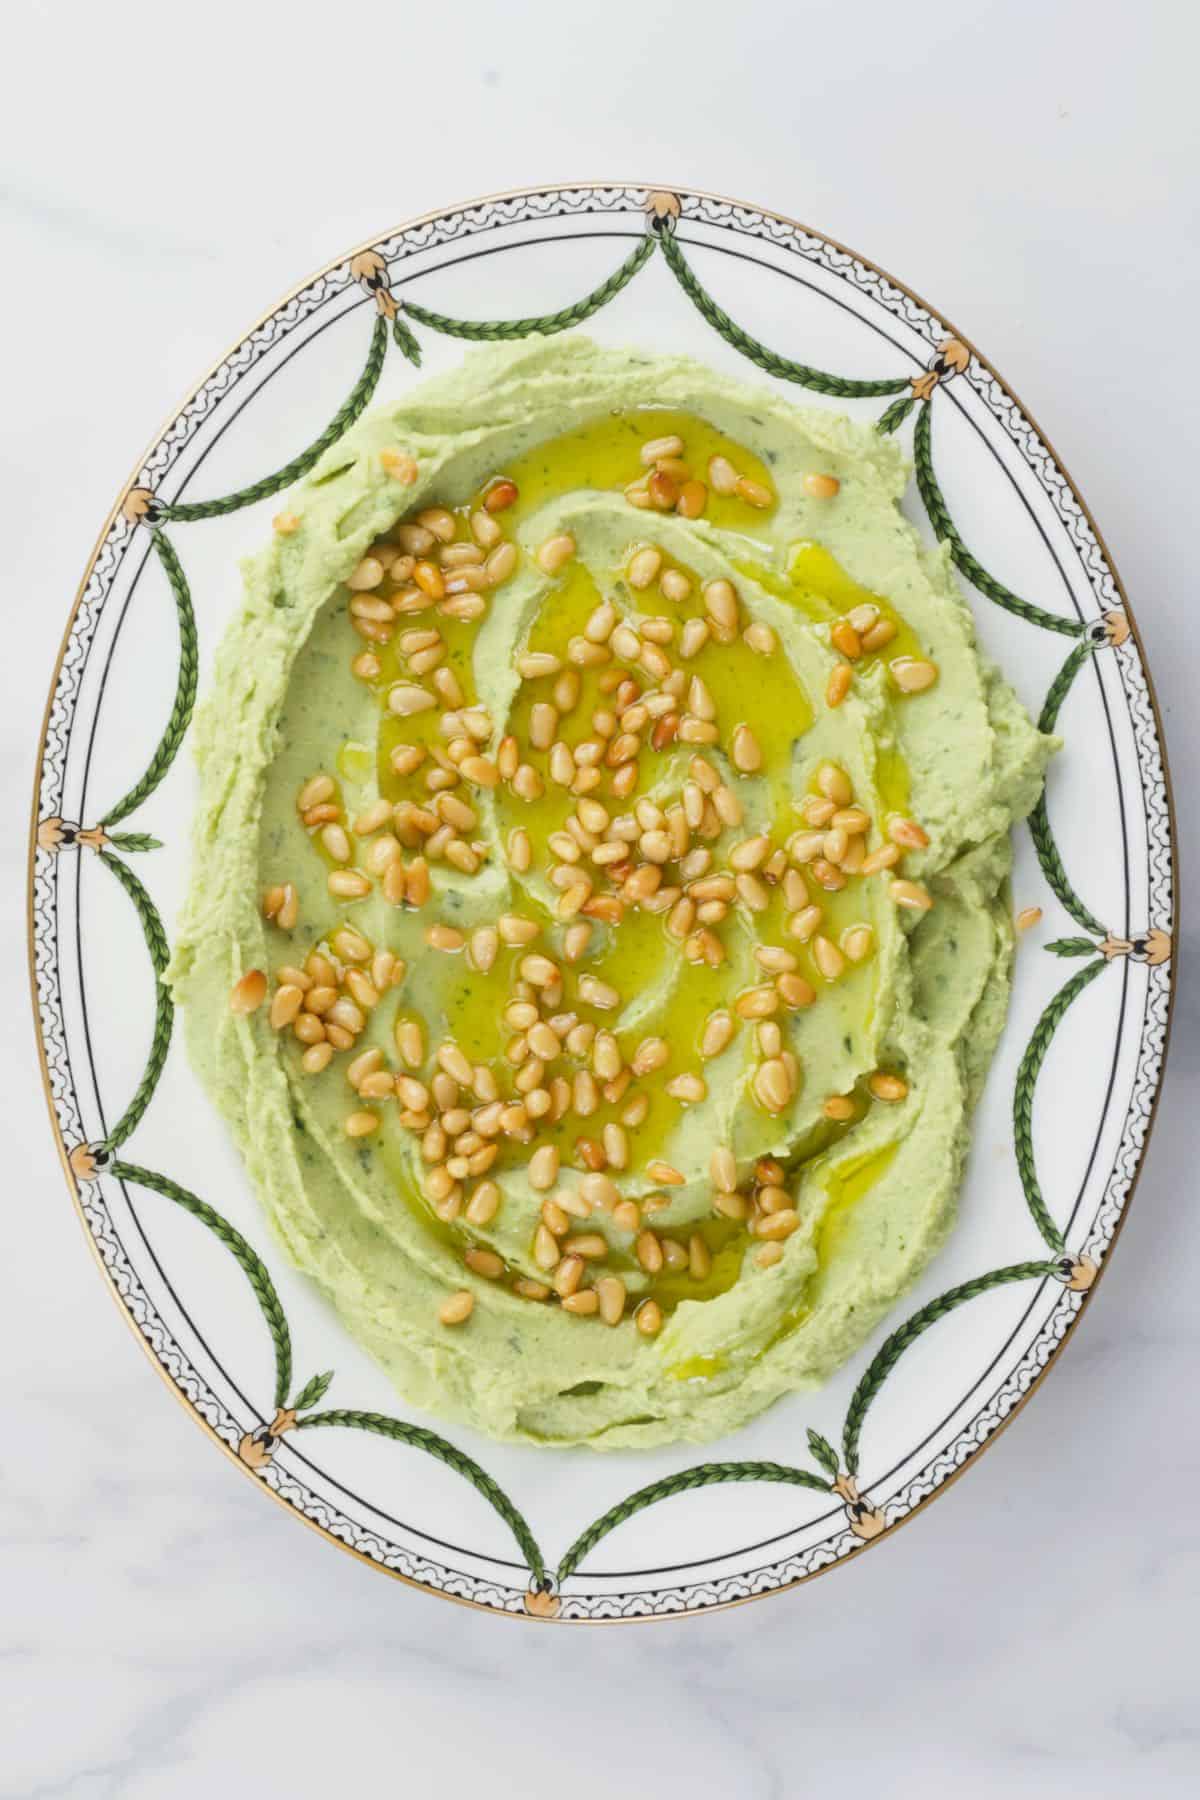
Step 3: Garnish and Serve
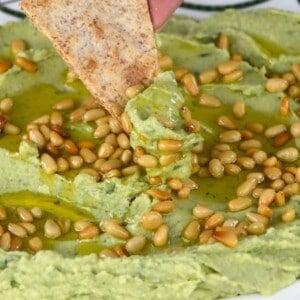
Transfer the hummus to your serving bowl/plate and top with a drizzle of olive oil and some lightly toasted pine nuts.
To toast the pine nuts, heat a skillet over medium, then add the pine nuts. Cook until golden and fragrant, stirring often to avoid burning.
Then serve the fresh pesto hummus and enjoy!
How to Serve?
While supermarkets might have you believing that chilled hummus is the way to go, it’s actually best to enjoy hummus while warm or at room temperature for the best consistency and flavor. Therefore, I recommend removing the basil pesto hummus from the fridge around 30 minutes before serving, when possible! Then you can enjoy it with:
- Crudites (aka veggie sticks) – carrots, celery, bell peppers, cucumber, etc. You could also enjoy it with a rainbow veggie platter.
- Crackers/chips – like these seed crackers.
- Pita bread – pita pocket or fluffy Greek pita.
- Pita chips – this basil hummus tastes excellent with za’atar seasoned pita chips.
- Other flatbread – like naan or manakish (tastes great with the za’atar version).
What can you do with leftover hummus?
- Use it as a spread over sandwiches, wraps, bagels, toast, etc.
- Add to burgers – like this Black Bean Burger.
- Drizzle over pizza – like this Butternut Squash Pizza with Pesto (Vegan Pizza Crust).
- Added to salad bowls and even combined with other ingredients to make a salad dressing.
- To top baked potatoes or baked sweet potatoes.
- As a pasta sauce (thin with a bit of water/stock/milk).
- With eggs – this fresh basil pesto pairs wonderfully with egg dishes. Whether it’s to drizzle/dollop over scrambled eggs, spread on toast, then top with a boiled or poached egg. Serve with French baked eggs or alongside scrambled tofu.
Let me know your favorite ways of enjoying this green hummus in the comments below!
How Make Ahead and Store?
Make ahead: when using homemade elements (tahini, cooked chickpeas), these can be prepared several days (or longer) in advance. You can also prepare the entire basil hummus the day before serving. This will give all the flavors a chance to “marinate” and develop – for even better basil hummus!
Store: store any leftover basil hummus in an airtight container in the fridge for 4-5 days. To help prevent early spoilage, you can pour a thin layer of olive oil over the top of the hummus while storing.
Freeze: transfer the pesto hummus to a freezer-safe container with some headspace. Then freeze for 3-4 months (or 5-6 when adding a layer of olive oil over the top). When you want to enjoy some hummus, allow it to thaw in the fridge before giving it a good stir or quick blitz in a blender to bring it back to the correct consistency.
During the freezing/thawing process, the flavor may be slightly affected. So feel free to “top it up” with extra seasoning, lemon, garlic, etc., if needed.
FAQs
You could try this recipe with cashew butter or sunflower seed butter instead. I have previously tried it with almond butter but found the flavor a little too strong within my hummus at the time.
Though I haven’t tried it, you could try this basil hummus recipe using white beans (similar to this creamy white bean dip) in place of the chickpeas (garbanzo beans) to make a cannellini bean hummus.
You sure can. I like to freeze it with a thin coating of olive oil over the top to lock in freshness. You can freeze most hummus for between 3-4 months (up to 6 with the olive oil topping).
Recipe Top Tips and Notes
- For more mellow raw garlic: if you aren’t a fan of the robust flavor of raw garlic, you can mellow this by soaking the garlic in ice water for 10-15 minutes before adding it to the hummus.
- Adjust the flavors to personal taste: all the main elements in hummus are adjustable. People prefer more or less garlic, lemon juice, and tahini. The recipe is my particular favorite combination. However, I recommend everyone start by only adding a portion of what is written and increasing to taste.
- Where to source basil: the most frugal way would be to grow your own. However, after that, farmer’s markets are usually more cost efficient than supermarket basil. However, if you purchase it from the supermarket, it’s best to purchase the basil in the clamshell packages (usually fresher and cheaper).
- The color of the basil hummus: not only can this vary anyway, based on your basil. However, basil can also darken when oxidized (which happens once blended). If you want it to retain the bright green flavor, you can blanch the basil leaves in boiling water for 5 seconds, then quickly transfer to an ice bath. Pat dry, then continue with the recipe.
- Adjust the amount of water: based on your preferred consistency of homemade hummus, you may want to add a little less or more ice water. Add it incrementally, so you don’t accidentally add too much.
- Allow hummus to rest: when possible, I recommend making this green hummus recipe a day in advance. The longer the basil dip has to “marinate” and for the flavor to meld, the better the flavor.
More Simple Dip Recipes
- Kashke bademjan (Persian eggplant dip)
- Garlic white bean dip
- Ajvar (red pepper eggplant dip)
- Healthy roasted carrot dip
- Zaalouk (Eggplant Tomato Dip)
- Arugula Pesto Recipe (5 Minute)
If you try this fresh basil hummus recipe, I’d love to hear your thoughts/questions below. Also, I’d appreciate a recipe card rating below, and feel free to tag me in your recipe recreations on Instagram @Alphafoodie!
Fresh Basil Hummus
Equipment
- Blender/Food processor or Hand-held blender
Ingredients
- 18 oz cooked chickpeas 2.5 cups (or canned equivalent)
- 3 Tbsp tahini
- 1/2 tsp salt
- 1 lemon juiced; adjust the amount to taste
- 1 garlic clove large; adjust the amount to taste; can use roasted
- 0.7 oz fresh basil
- 1/4 cup ice water or more if desired
Instructions
Step 1: Prepare the Chickpeas
- If you aren't using canned or cooked/leftover chickpeas, you’ll first need to soak and cook dried chickpeas. If doing so, plan for the time required (they need to soak for 8+ hours before cooking for 40-50 minutes). I regularly cook them for around 40 minutes. However, the aim here is for them to be mushier than regular–so usually cook for between 50-60 minutes, with ½ teaspoon baking soda added to the cooking liquid.
- If you’re using canned chickpeas and don’t mind a slightly thicker hummus, then move on to step two. Otherwise, add the contents of your can and ½ teaspoon baking soda to a small saucepan. Then bring to a boil over high heat. Once boiling, reduce heat and simmer for around 20 minutes, or until the chickpeas are mushy.Once cooked, the baking soda will help to loosen some of the skins. I personally leave these in the hummus (as they’re so soft anyway). But if you want even smoother results, you can pick out some loose skins (no need to peel each individual chickpea).
Step 2: Blend the Basil Hummus
- Place all the ingredients (except the ice water) either in a blender, food processor, or large bowl (to use an immersion blender).
- Blend until smooth, stopping to scrape down the sides of the jug/bowl a couple of times. Once a paste-like consistency, add the ice water–one tablespoon at a time until the basil hummus is smooth and creamy.You can add a little additional ice water if you want an even thinner hummus. But try not to add too much as it will become watery and can impact the shelf life.
Step 3: Garnish and Serve
- Transfer the hummus to your serving bowl/plate and top with a drizzle of extra virgin olive oil and some lightly toasted pine nuts.
- To toast the pine nuts, heat a skillet over medium, then add the pine nuts. Cook until golden and fragrant, stirring often to avoid burning.Then serve the fresh pesto hummus and enjoy!
How Make Ahead and Store?
- Make ahead: when using homemade elements (tahini, cooked chickpeas), these can be prepared several days (or longer) in advance. You can also prepare the entire basil hummus the day before serving. This will give all the flavors a chance to "marinate" and develop – for even better basil hummus!Store: store any leftover basil hummus in an airtight container in the fridge for 4-5 days. To help prevent early spoilage, you can pour a thin layer of olive oil over the top of the hummus while storing.Freeze: transfer the pesto hummus to a freezer-safe container with some headspace. Then freeze for 3-4 months (or 5-6 when adding a layer of olive oil over the top). When you want to enjoy some hummus, allow it to thaw in the fridge before giving it a good stir or quick blitz in a blender to bring it back to the correct consistency.During the freezing/thawing process, the flavor may be slightly affected. So feel free to "top it up" with extra seasoning, lemon, garlic, etc., if needed.
Notes
- For more mellow raw garlic: if you aren’t a fan of the robust flavor of raw garlic, you can mellow this by soaking the garlic in ice water for 10-15 minutes before adding it to the hummus.
- Adjust the flavors to personal taste: all the main elements in hummus are adjustable. People prefer more or less garlic, lemon juice, and tahini. The recipe is my particular favorite combination. However, I recommend everyone start by only adding a portion of what is written and increasing to taste.
- Where to source basil: the most frugal way would be to grow your own. However, after that, farmer’s markets are usually more cost-efficient than supermarket basil. However, if you purchase it from the supermarket, it’s best to purchase the basil in the clamshell packages (usually fresher and cheaper).
- The color of the basil hummus: not only can this vary anyway, based on your basil, but also, basil can darken when oxidized (which happens once blended). If you want it to retain the bright green flavor, you can blanch the basil leaves in boiling water for 5 seconds, then quickly transfer to an ice bath. Pat dry, then continue with the recipe.
- Adjust the amount of water: based on your preferred consistency of homemade hummus, you may want to add a little less or more ice water. Add it incrementally so you don’t accidentally add too much.
- Allow hummus to rest: when possible, I recommend making this green hummus recipe a day in advance. The longer the basil dip has to “marinate” and for the flavor to meld, the better the flavor.
Nutrition
Nutrition information is automatically calculated, so should only be used as an approximation.


I am going to make this and I’m so excited. Just cooked my chickpeas today 🙂
Hope you enjoyed the recipe, Ben! 🙂